I always stock up on blueberries when they are in season. I end up with a lot of frozen berries to enjoy throughout the year. I was cleaning out the freezer awhile ago, and decided to use some of my frozen berries to make blueberry liqueur.
After steeping for several months, I strained out the blueberries last night. I ended up making two different liqueurs. One is unsweetened- just blueberries, vodka, lemon zest and a clove. It is sometimes called an eau de vie- French for water of life- or blueberry vodka. It is one of my favorites for making all sorts of cocktails.
The other was sweetened a little with a sugar syrup- but you could use honey. That is blueberry liqueur or blueberry cordial. It will be allowed to mature for a couple of weeks.
Both are wonderful.
The color is so pretty and they can be sipped, as is, or used in cocktails. You can use other berries, if you prefer.
I look forward to enjoying these with friends and family. Soon!!
Blueberry Liqueur
4-c. fresh or frozen blueberries Sliced and scraped peel of one lemon, optional 1 clove, optional 3-c. vodka or 2 c. vodka and 1 c. brandy 1 c. sugar syrup, optional, recipe follows
Lightly crush berries with a fork. Combine with peels and clove and vodka and steep 3 months. Strain and filter and add sugar syrup. Mature 4-6 weeks.
Sugar Syrup
Simple syrup is made from 1 cup of sugar and ½ cup of water. Bring to a boil, then cool. You will have 1 cup of syrup. Some recipes call for plain sugar and others for honey. Watch when you substitute honey for sugar, as it is sweeter and stronger flavored. Better to use orange or clover honey.
This is a very nostalgic dish for me. My mom made it for us when we were kids. My Busha, her mother made it, too. The recipe is pretty simple. Cooked egg noodles are heated in butter then beaten eggs are added and cooked with the noodles. Salt and pepper finish the dish. You can add extras for fun, like diced ham, cooked, crumbled bacon or a handful of cheese. I often top with chives or green onions. My guess is the recipe came about when my grandmother was low on eggs and had breakfast to make. You can get by with an egg per person. My mom always said an egg per person and one for the pan. I just love it, no matter how many eggs I have on hand. You can use almost any kind of cooked noodle. I have used farfalle, shell pasta and spaghetti.
This is also a great meal to make when time is short. I like to make noodles and eggs on hot days, when I want something I can cook very fast without heating up the whole house.
So here is the family recipe you might want to try sometime.
Noodles and Eggs
1 T. butter or oil
8 oz. cooked noodles- any pasta you like is fine
8 eggs
Salt and pepper to taste
Heat butter in large skillet and add noodles, cooking until heated through. Beat eggs in bowl and add to hot noodle mixture, stirring until eggs are cooked and dish no longer looks wet. Season to taste and serve. Serves 6-8.
Variations: Add diced cooked ham, bacon or Canadian bacon with the noodles. Other options add 1 c. chopped tomato or chopped up cooked veggies. You can add 1-2 c. shredded cheese just after you add the eggs. Sometimes I top with fresh chives, green onions or herbs.
It is going to be very hot this week. Here are some ideas to help you stay cool while cooking and eating. Recipes for some “cool” dishes are at the end of the post.
Some tips to keep you cool.
Buy a roasted chicken at your local store. Now you have a healthy entree and can round out dinner with a salad and some bread. Also the leftovers can make great salads or sandwiches for additional meals.
Use the microwave for cooking potatoes or rice. It will not heat up the kitchen as much as conventional cooking methods and rice and potatoes make a good base for salads. I often steam veggies in my microwave. I have even been known to cook pasta in my microwave. The pasta thing is a little trickier. Ramen cooks great in the microwave, as does smaller pasta, (orzo, small shells, macaroni). Haven’t had as much success with larger pasta.
Cook once, use twice. Cook a double batch of meat, dried beans, pasta, rice, vegetables, whatever. Freeze or refrigerate the extra for another day so you don’t have to cook it twice.
Grill whenever possible. It keeps the kitchen cool, is generally a healthy way to cook and let’s be honest, food tastes better when grilled!!
Be a seasonal cook. Market prices on seasonal vegetables and fruits are generally lower and the flavor of fresh produce can’t be beat. Use them in salads, desserts and on the grill. If you or family members have a garden, plan menus around the bounty that nature provides at this time of year.
Re-invent the sandwich. Go beyond peanut butter and jelly on white bread. Use interesting breads like multigrain, pita, tortillas, and bagels. French bread etc. Then get a little creative with the fillings. Try crabmeat salad, or turkey ham with artichoke. Try grilling a whole Portobello mushroom cap and serving with grilled onions and cheese. You can just pile up vegetables and have a sort of tossed salad sandwich.
Spill the beans. Canned beans are a quick way to make a summer salad more filling, or to make any one of a number of fun dishes. Just drain and rinse for high protein, high fiber and no-cook ingredients.
Pastamania! There are so many new and exciting pastas on the market take advantage and try one of them in an old recipe to dress it up. Pasta cooks quickly and can be cooked ahead of time. Pasta come in many flavors, colors and shapes and can easily add interest to your summer menu. Fresh pasta cooks even faster than dried pasta. You can even make a batch of homemade pasta.
Drink up. With warmer weather comes the need for more fluids. Drink plenty of water, but also enjoy lemonade, iced herbal teas and sparkling fruit juices. Watch out for alcohol and caffeine laden beverages as they act as diuretics and can dry you out. These should be enjoyed in moderation in hot weather and never after times of strenuous activity when your body needs water the most.
Fresh fruit is often the nicest dessert. Fruit salads or kabobs can be served along with homemade sorbets and smoothies.
Here are a few recipes you might enjoy on a hot day!!
Bok Choy and Leftover Rice Salad
4 T. oil 2 cloves garlic, peeled and chopped 2-3 c. sliced bok choy- I used baby bok choy, but use what you like 2 c. cold cooked rice 1 carrot, peeled and shredded ½ of a sweet pepper, seeded and chopped 1 green onion, sliced
Dressing: 1/3 c. rice wine vinegar, or white wine vinegar 2 T. oil 2 T. chopped parsley or cilantro 1 T. sugar 1 t. soy sauce 1 t. sesame oil 1 t. fresh grated ginger Salt and hot sauce to taste
In skillet, sauté garlic for a couple of minutes, being careful not to burn it. Add bok choy and stir fry a few more minutes, just until bok choy wilts a little, but is still crisp. In medium bowl place the bok choy/garlic mixture, being sure to include the oil used in cooking. Add rice and veggies to boy choy mix. In small jar, with a tight fitting lid, place the dressing ingredients. Secure lid and shake until well mixed. Pour over the rice mixture and stir until well mixed. Chill a few hours or overnight before serving. Serves 4-6. Note: You can make this a main dish salad by adding a little protein. Cooked chicken or shrimp are great. For a vegetarian version- scrambled eggs or edamame work well, too.
Thai Chicken Salad
1 (3 lb.) chicken, cooked, skinned, meat shredded
8 oz. angel hair pasta, cooked and drained
2 T. coarsely shredded fresh mint leaves
1/2 c. chopped cilantro
1 tomato
1/2 c. olive oil
1 garlic clove
1/2 t. red pepper flakes, or to taste
1 T. plus 1 t. soy sauce
1 T. plus 1 t. fresh lemon juice
1 1/2 t. brown sugar
Lettuce leaves for lining the platter
Place chicken meat and pasta in bowl and combine. Mix remaining ingredients, except lettuce, in blender until smooth and toss with chicken mixture. Salad can be served immediately or chilled. Line serving platter with lettuce leaves and spoon over chicken mixture. Serves 4.
Open-Faced Pork and Apple Sandwiches
4 slices roast pork
Salt and pepper to taste
2 oz. cream cheese
2 T. mayonnaise
4 slices rye bread
4 slices Swiss cheese
1 crisp apple, sliced thin
Season pork slices and set aside. Combine cream cheese and mayonnaise and spread on bread slices. Top with cheese, then pork and finish with apple slices. Serves 4.
Italian Bread Salad
1 lb. Loaf, day old crusty bread, cut into 1-inch cubes
5-6 plum tomatoes, sliced
½ English cucumber, sliced
1 c. sliced sweet onion
2/3 c. olive oil
1/3 c. red wine vinegar
3 T. balsamic vinegar
¼ c. fresh basil leaves, cut into thin strips
2 t. Italian seasoning
In large bowl toss together bread cubes and vegetables. Combine remaining ingredients in a smaller bowl and pour over the bread mixture, tossing to coat well. Be sure that all the bread gets coated. Serves 6-8.
Greek Eggplant Salad
1 medium eggplant
1 large tomato, seeded and chopped
1 sweet pepper, seeded and chopped
1 small onion, minced
1/3 c. olive oil
¼ c. red wine vinegar
1 clove garlic
Salt and pepper to taste
Sliced ripe olives and chopped fresh parsley
Broil or grill eggplant until skin has blackened. Cool. Rub skin off the eggplant with a damp paper towel and chop the pulp. Combine eggplant with remaining vegetables in bowl. Combine dressing ingredients in blender until smooth and toss over eggplant mixture. Chill and garnish with olives and parsley. Serves 3-4.
I recently posted a recipe for blueberry pancakes and it got me to thinking- why didn’t I ever make blueberry waffles? I gave it a try and loved the way they came out. I just added some berries to one of my favorite waffle recipes. They are light and crispy, but still tender in the middle. I served them with butter and maple syrup. They would also be great with powdered sugar.
I knew the kids would love them too, so blueberry waffles are on the menu for camp this week.
The blueberries made them special. Makes for a special breakfast. They could also be used as the base for a shortcake. Topped with ice cream or whipped cream, they would make a wonderful dessert.
Blueberry Waffles
1 1/3 cups flour
4 t. baking powder
1 t. salt
2 t. sugar
2 eggs, separated
½ c. butter, melted
1¾ c. milk
2 t. vanilla
1 c. blueberries, fresh or frozen
In a large mixing bowl, whisk together all dry ingredients. Separate the eggs, adding the yolks to the dry ingredient mixture, and placing the whites in a small mixing bowl. Beat whites until moderately stiff; set aside. Add milk, melted butter and vanilla to dry ingredient mixture and blend. Fold stiff egg whites into mixture. Fold in blueberries. Ladle mixture into hot waffle iron and bake. Makes about 6 waffles.
If you need a really special dessert for your next party or cookout, consider making this cheesy cherry-blueberry coffee cake. It is one of my favorite coffee cake recipes ever. The cake is not too sweet, and the combination of cream cheese, with the fruit reminds me of a cherry-blueberry blintz.
The streusel topping adds a nice little crunch.
It is fine served all on its own. You can also serve it with ice cream or whipped cream. You can also top with more blueberries and cherries.
While I think of this cake as a wonderful dessert, it can be served as a breakfast or brunch dish.
As if this weren’t enough- this cake freezes great. Who are we kidding? There won’t be any leftovers – but you could freeze them, if you had some.
So here is the recipe. Enjoy!!
Cheesy Cherry-Blueberry Coffee Cake
1 1/4 c. sugar
1/2 c. butter
2 eggs
2 1/4 c. flour
1 T. baking powder
1 t. salt
1 c. milk
1 c. fresh or frozen blueberries
1 c. pitted and coarsely chopped cherries
8 oz. cream cheese, cubed
1 t. grated lemon peel
Topping:
1/4 c. sugar
1/4 c. flour
1 t. grated lemon peel
2 T. butter
Preheat oven to 375. Grease and flour a 13×9 inch baking dish. Cream together sugar and butter until fluffy. Beat in eggs. Combine 2 cups of the flour with baking powder and salt and beat into batter alternately with the milk. Toss fruit with the remaining flour and fold into the batter along with the cheese and lemon rind. Pour batter into prepared pan. Combine sugar, flour and lemon peel for topping and cut in butter to resemble coarse crumbs. Sprinkle over batter and bake for about 45 minutes. Use toothpick to test for doneness. Serves 12.
A galette is a cross between a pie and a tart. Rather than placing the crust in a pie pan, the crust is rolled out and the fruit is placed in the middle. The edges of the crust are folded over the fruit, leaving them exposed in the middle. Galettes have a rustic charm. They are also easy to make.
I will be serving this for dessert later. It was one of those times that what I had on hand worked together perfectly. I had an open jar of blueberry pie filling and leftover kolachy dough. Made sense to use them together.
I used homemade blueberry pie filling, but you could use store-bought, if you prefer.
The ingredients are pretty simple, pie crust and pie filling. You’ll need enough pie crust dough for one pie and one cup of blueberry pie filling per galette. After I folded over the edges, I brushed them with a little milk and sprinkled the edges with sugar, to help the crust brown nicely.
Blueberry Galette
Crust for one pie- recipe follows
1 cup blueberry pie filling
milk
2-3 T. sugar
Roll out crust like you would for a pie, about a 10 or 12 inch circle. Place crust on a baking sheet. Spoon filling into the middle of the crust. Fold edges of the crust over the fruit filling, leaving about a three inch circle exposed in the middle. Brush crust with milk and sprinkle with the sugar. Bake in a preheated 375 degree oven for 30 minutes, or until crust is golden brown. Remove to a rack to cool. Serves 4-6.
Blueberry Galette: ready to serve
Here is the recipe I used for the crust. It would make enough for about 3-4 galettes. We used most of the dough for hand pies in cooking camp and I had leftover dough. It can be frozen, too.
Eva’s Kolachy Dough
3 c. flour
1 t. baking powder
½ t. salt
1 c. butter
3 eggs
2 pkts. Yeast
½ c. warm milk
In mixing bowl, combine flour with baking powder and salt. Cut butter into flour until mixture looks like coarse crumbs. Set aside. Place eggs in a small bowl and beat until smooth. In small bowl, dissolve yeast in warm milk. Add to egg mixture and stir to combine. Add egg mixture to flour mixture and stir until combined. If mixture is sticky add a small amount of flour. Roll dough out on floured board. Thinner the better, as this dough will puff some when baked. Unlike a traditional pie crust dough, this one does not need to be chilled. It is also very easy to roll out. Use about 1/3- 1/4 of this dough per galette. Extra dough can be frozen to use later.
We made bean dip in cooking camp this week. The kids were not sure they would like it. Once they tasted it, they ate it all. we just served it with corn chips.
If you only use bean dip as an appetizer you are really missing out. Bean dip is often served with chips and veggies and it is always a hit. But, it can be used for a lot more than that.
Certainly in other Tex-Mex dishes like burritos or enchiladas. I like to spread it on fresh tortillas and top with cheese, chopped peppers, onions and olives- then bake until hot and cheese has melted. Bean dip can also be spread inside pita bread and then the bread filled with sprouts or sliced veggies for a quick sandwich. You can also add the bean dip to hot cooked veggies like corn, green beans, or carrots, in place of, or in addition to, the butter. It also can be added to stir-fries for extra flavor or to soup as a thickener. I sometimes add it to chili, too. I often make a big batch and freeze some for later use.
As an added bonus, bean dips are a good source of protein.
I have a few recipes for bean dip, so I included them all. A friend requested a version without the tomatoes (salsa).
SaucyBean Dip
2 cans kidney beans, drained and rinsed – you can use other beans 1 c. salsa, store bought or homemade ¼ c. olive oil 2 T. cider vinegar 2 t. chili powder 1 t. cumin Healthy dash of hot sauce Salt and pepper to taste
In food processor blend all ingredients until smooth. I usually start the beans first for 30 seconds or so and then add everything else. If you want it thinner you can add some extra oil. Makes 3 cups. Freezes well.
Bean Dip Recipe#2
Creamy Bean Dip
2 c. cooked beans (pinto, black or kidney preferred)
1 c. cottage cheese
2 T. sour cream
salt and pepper sauce to taste
1 t. each chili powder and cumin
1/2 t. each paprika and oregano
Combine all ingredients in a blender or processor until smooth. Adjust seasonings. Chill. Serve with taco chips or fresh veggies. Makes 3 cups.
Note: You can also spread on tortillas and top with salsa, cheese, peppers and olives for Mexican pizza. Just heat and eat.
Bean dip #3
ClassicBean Dip
2 c. cooked beans (kidney, black beans etc.) Drain if canned
½ c. chopped cilantro or parsley
3 cloves garlic
2 T. dried minced onions
2 T. oil, or a little more
juice of 1 lime
1 t. cumin
1 t. chili powder
1 t. oregano
½ t. paprika
½ t. red pepper flakes, or to taste
salt to taste
1 T. red or cider vinegar, optional
Place beans in food processor and start to run adding remaining ingredients and blending until smooth. If dip is too stiff add a little more vinegar or oil. Makes 2 ½ cups. Serve with tortillas or pita toasts.
This was a big hit at the cooking camp. The kids were excited to cook with broccoli, which made me happy. The dip is something I call “Broccomoli”. Basically similar ingredients of guacamole- except we use broccoli instead of avocados. Don’t get me wrong. I love avocados, but “timing” them to be ripe when needed for parties makes me crazy. The broccoli dip is also easy to make and tastes good. Its always nice to have more appetizer recipes.
Broccoli Dip – Broccomoli
2 c. broccoli, cooked and drained
2 T. chopped onion
1 clove garlic, minced
½ c. sour cream or Greek yogurt – we used yogurt
3 T. mayonnaise
2 t. lemon juice
½ t. each paprika and cumin
Dash of hot sauce
Salt and pepper to taste
1 tomato, seeded and chopped, optional
Combine all ingredients in blender, except tomato, and blend until smooth. Chill. Stir tomato in before serving. Serve with tortilla chips or crackers.
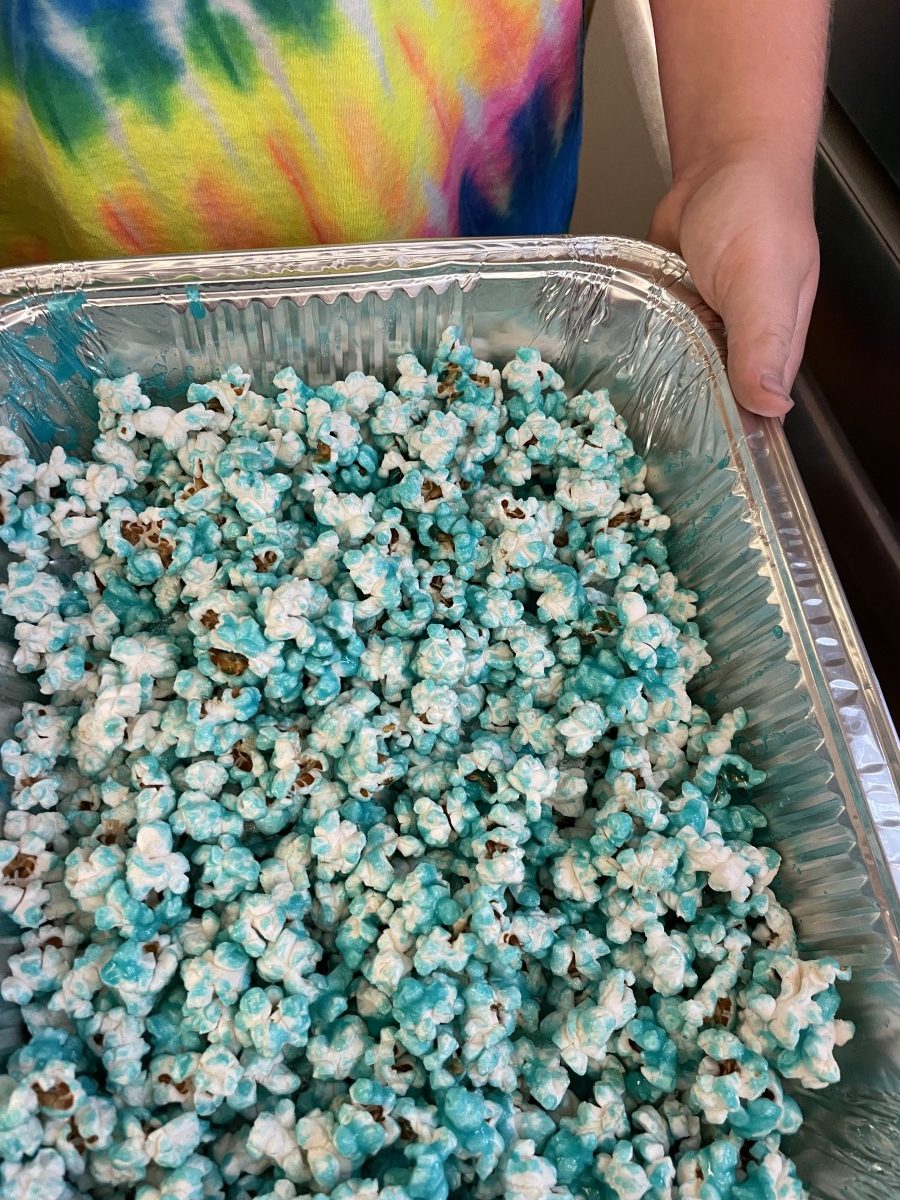
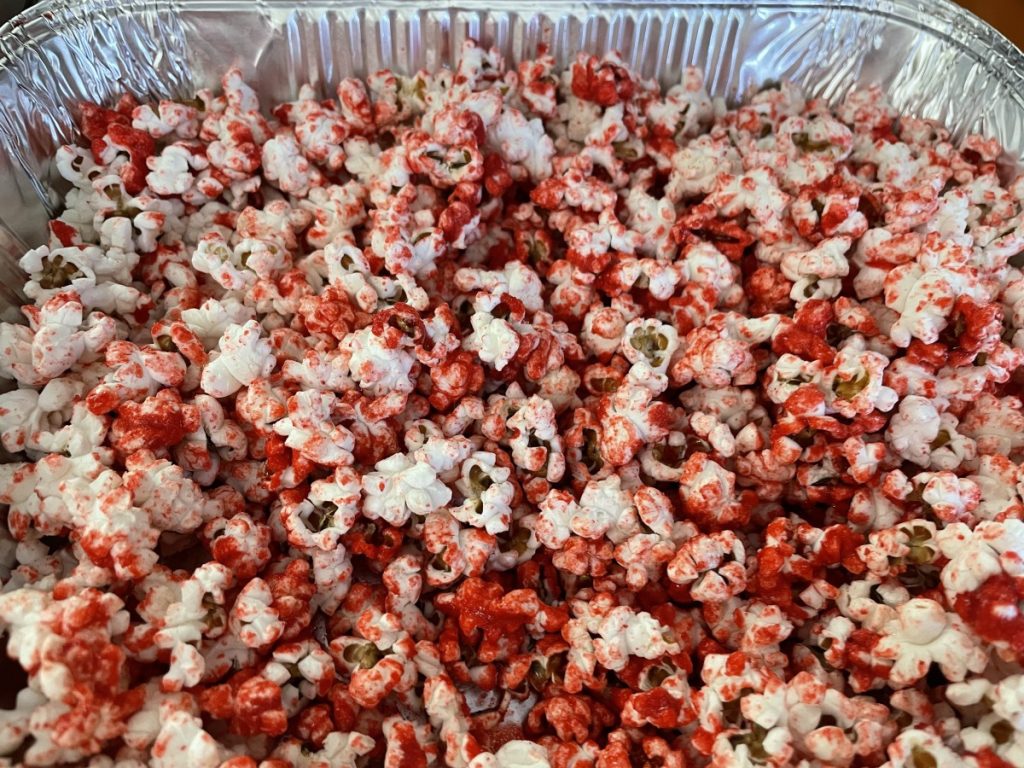
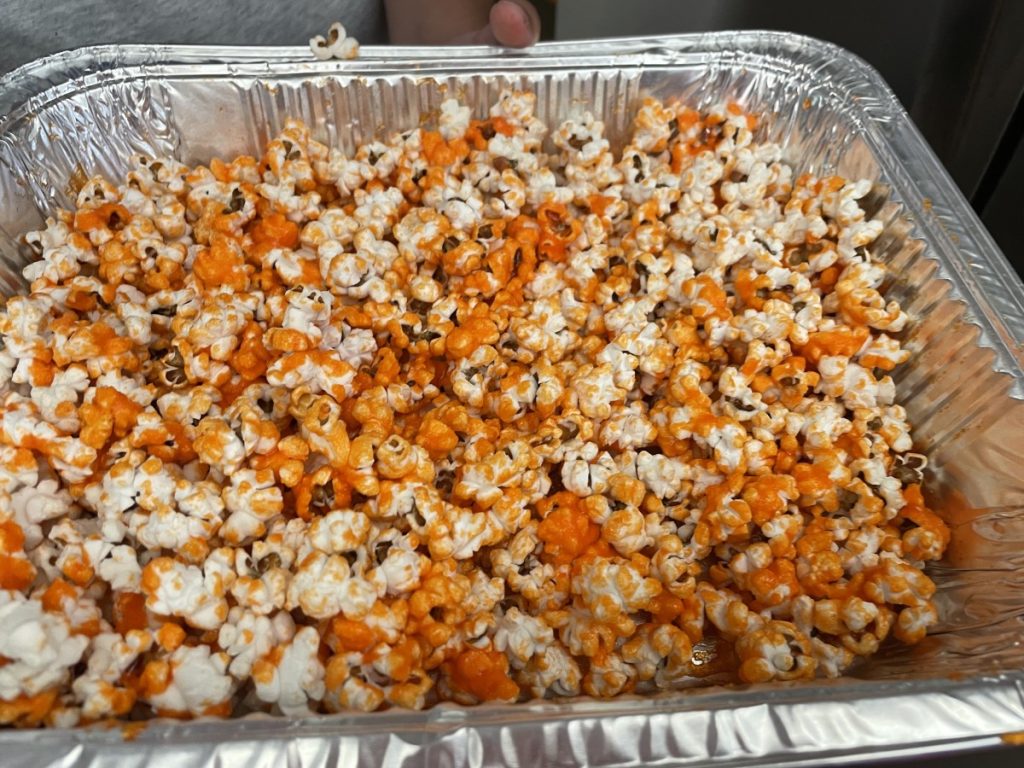
This easy to make treat is a sort of candy coated popcorn. We made some in cooking camps this week and the kids really enjoyed making it- and eating it.
The color and flavor source comes from boxes of flavored gelatin – Jell-o. Of course you can use what ever brand you like. The gelatin is melted together with a little butter and a little honey. Then popped popcorn is tossed with the mixture. Once it cools it be comes a candy coating.
Here is the recipe. Enjoy!
Pretty Pops
2 quarts popped popcorn
1/4 c. butter
2 t. honey
1 package (4 serving size) flavored gelatin, any flavor
Place popcorn in large bowl. Combine remaining ingredients in small saucepan and heat until margarine is melted. Stir until smooth and pour over popcorn, tossing to coat. Cool.
Note: you can make several batches of different flavors and then combine cooled popcorn for a colorful snack, party favor or gift.
Red Pretty PopsGreen Pretty PopsOrange Pretty Pops
8 Natural Food Colors- see note below for what they all are.
When we decorate cakes, cookies and the like, we can use any number of ingredients to tint an other wise white frosting. Lots of people use artificial colors. The little bottles found in most any grocery store. Or any number of gels, powders or tubes found in cake and candy making stores. I want to start by saying that its not my business whether you use natural or artificial colors in your cooking. I have a few bottles hanging around myself. This is just about looking at some other options out there.
People starting asking me when I used beet powder to tint frosting for a chocolate beet cake. So I began looking into what other colors I could create using more natural ingredients. My own mother had issues with a red food coloring. I know a few people that have issues with artificial colors. So what follows is what I have been doing and what I have come up with. Not all the answers and I am not a scientist. I’m just a cook and baker who likes to play around with new ingredients in the kitchen sometimes.
The Picture
Let’s start with what powders are in the picture at the top of this post. Starting with the bright blue on the lower left, then going up and around clockwise: Blue spirulina, beet, red cabbage, peas, turmeric, carrot, raspberry and green spirulina. I purchased the blue and green spirulina and the turmeric. The rest I dehydrated and then powdered in a spice (coffee) grinder.
So what colors will you get and how do you make them yourself?
Blue Spirulina: Bright blue
Algae that people consume for various reasons, including the mineral content and other health reasons.
Green Spirulina: Forest green
Like blue version, an algae that people consume for various health benefits.
Turmeric :Yellow
The dried root of a tropical plant used in foods for both flavor and color. Sometimes used to make rice yellow to mimic the use of saffron.
Beet Powder: Pink to light red
Beets are cooked, sliced and placed in a dehydrator until rock hard. Then ground in a spice mill. I have seen beet powder sold so you don’t have to make it yourself.
Red Cabbage: Purple to light violet
Leaves are steamed until just soft, then dehydrated until crisp and powdered up.
Raspberry: Pinkish violet
Raspberries and rinsed, patted dry and dehydrated until crisp.
Peas: Light to bright green
Frozen peas are thawed, drained of excess water and dried until crisp. A note about the peas. They fell right through the holes in my dehydrator. Once I retrieved most of them, I lined the trays with parchment and started over.
Carrots: Orange
The carrots were peeled and sliced and steamed until pretty tender. When I left them in thick slices the first time I made them, they were harder to grind into a powder. The thin slices worked better in my spice mill.
Final notes on colors. For green, you can also dehydrate spinach or other leafy greens. I dehydrate and powder up orange peels. Use them in recipes all the time for flavor. They too, will add orange color, but their flavor is pretty pronounced. I found the carrots were more subtle, but you can add some orange peels, if you have them.
Chocolate beet cake with beet tinted frosting
More information For any of the powders, its important that you keep them dry for long term storage. Nice airtight containers and cool conditions will help them to hold their color longer. This seems especially important with the carrot and pea powders. I store them in the fridge or freezer.
How much to use? That depends on what you are using for color and how intense you want the color to be. Blue spirulina is very blue and a little goes a long way. Carrot is a more subtle orange. Start with a very small amount on a spoon, mix it in and see where you stand. For beet powder I use maybe 1/2 teaspoon for 2 cups of frosting for a pretty pink color.
The question I got from a few people was taste. Will my frosting end up tasting of peas or cabbage? The answer is pretty much no, based on what I have used them for. Moderation is key though. If you want a super bright purple the cabbage might have a slight odor, rather than a flavor. it seems to dissipate over time.
You can also use black cocoa powder to create grey and even black in frostings and baked goods. It’s a very special Dutch process cocoa that is black rather than dark brown. It is what makes Oreos their distinct color. You should be able to find it at cake decorating stores. I buy mine online. Since chocolate is a flavor ingredient more that a coloring agent I didn’t include it in my list. In decorating red and black are the two hardest colors to achieve, even with artificial coloring. When I want black I often start with chocolate frosting and then add the black cocoa. Beet powder can give you red, if you use enough.
Well, that’s what I have so far in my use of natural foods coloring. I’m starting cooking camps and will have the kids use them this year to see what they come up with. More pics to follow soon.
Before you ask, Here is the link to the chocolate beet cake recipe. Its very popular.


