Reuben Strata

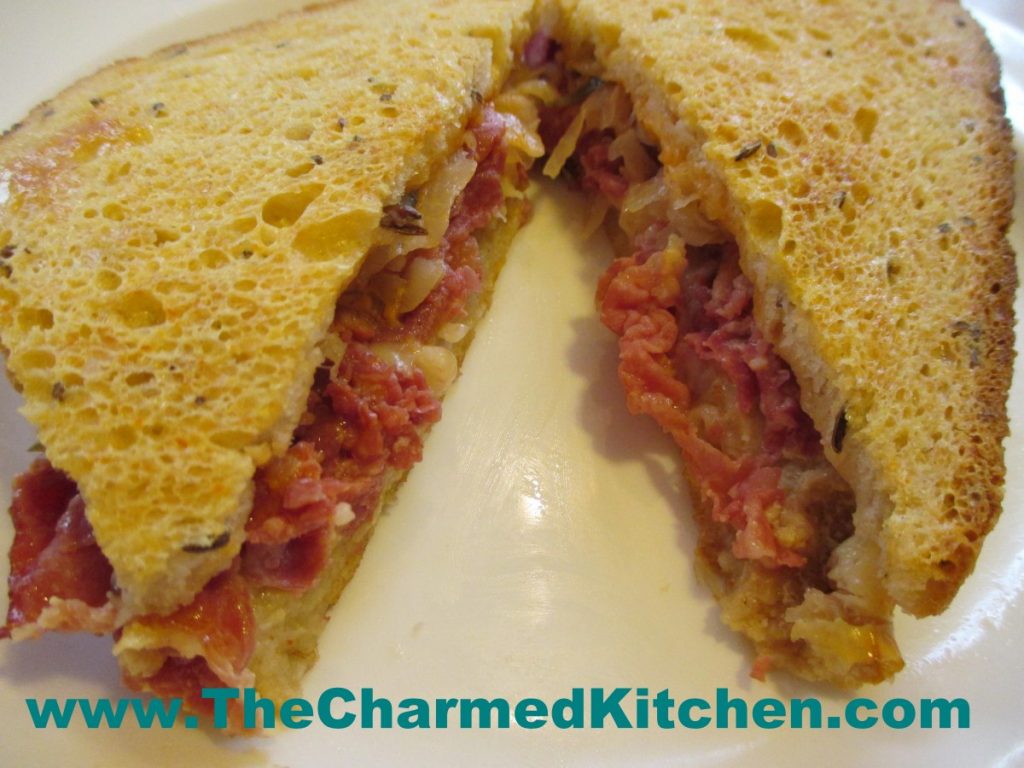
If you need a new recipe for corned beef- I would suggest making this strata. It contains all the ingredients found in a traditional Reuben sandwich, but with a twist. These “Reubens” are baked, after being soaked in an egg custard.
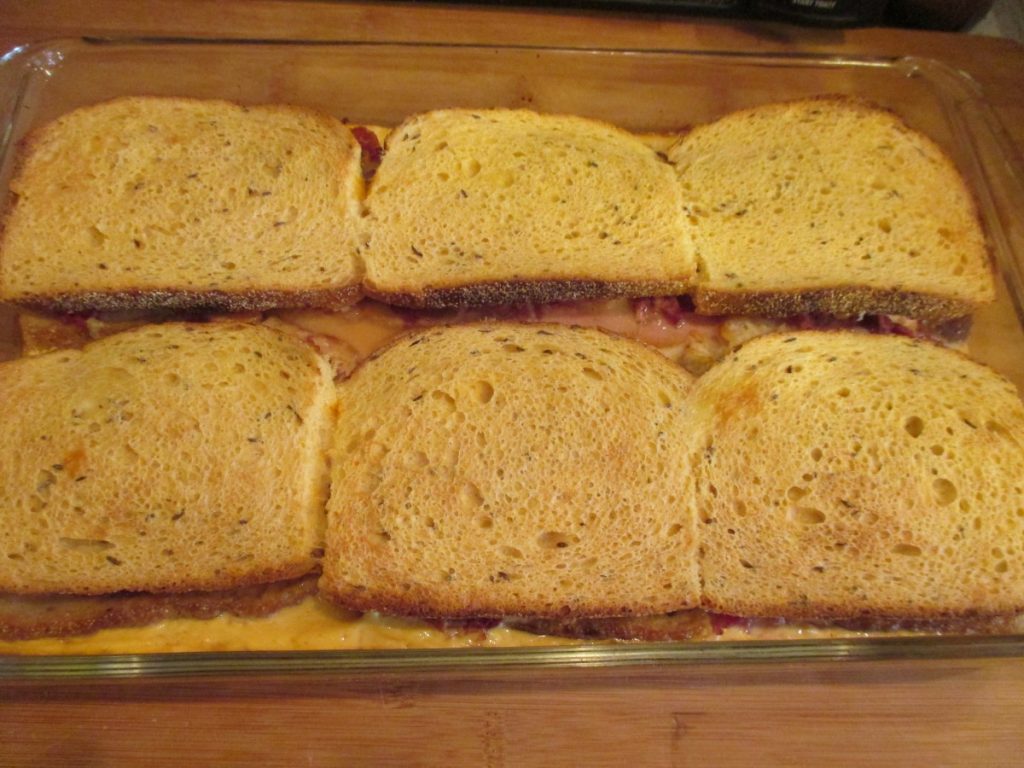
The dish is assembled at least a few hours before baking, so you can make it the day before, or in the morning. Just pop in the oven about an hour before you want to serve it.
Strata just means layers. Ingredients are layered before pouring over an egg/milk mixture. These layers add flavor to the final dish. In this strata, layers include rye bread, Swiss cheese, corned beef, sauerkraut and thousand island dressing. Of course, you can play around with the ingredients you use. If you don’t like sauerkraut, you can leave it out- or only put in on some of the sandwiches. Strata can be served for breakfast, brunch, lunch or dinner.
I used very thinly sliced corned beef from the deli. You can also use home-cooked corned beef. Just dice it or shred it up. If you have leftover corned beef from St. Patrick’s Day, this is a great recipe for using it. I also used homemade Thousand Island dressing, but use what you like. You can also serve extra dressing on the side.
Reuben Strata
12 slices rye bread
6 slices Swiss cheese
12 oz. thinned sliced corned beef- or 2 cups chopped corned beef
1 c. sauerkraut, squeezed dry
½ c. Thousand Island dressing*
3 eggs
2 c. milk
½ t. salt
½ t. hot pepper sauce, or to taste
Lightly grease a 9×13-inch baking dish. Place six slices of bread on bottom of the dish. You might have to trim the bread to fit. Top each slice of bread with a slice of cheese. Top cheese with the corned beef and sauerkraut. You can use a little more or less sauerkraut, depending on your taste. Spoon about a tablespoon of the dressing over each “sandwich”. Top with remaining six slices of bread, trimmed to fit pan, if needed. Combine remaining ingredients and pour over sandwiches. Cover dish and let stand in the fridge, several hours or overnight. Bake, uncovered, in a 350-degree oven for 40-45 minutes, or until puffed and set. Let sit a few minutes before serving. Serves 6.
*Homemade Thousand Island Dressing is just equal parts of sweet pickle relish, ketchup and mayo. You can make your own pretty easily.

Joe’s Soda Bread Ice Cream

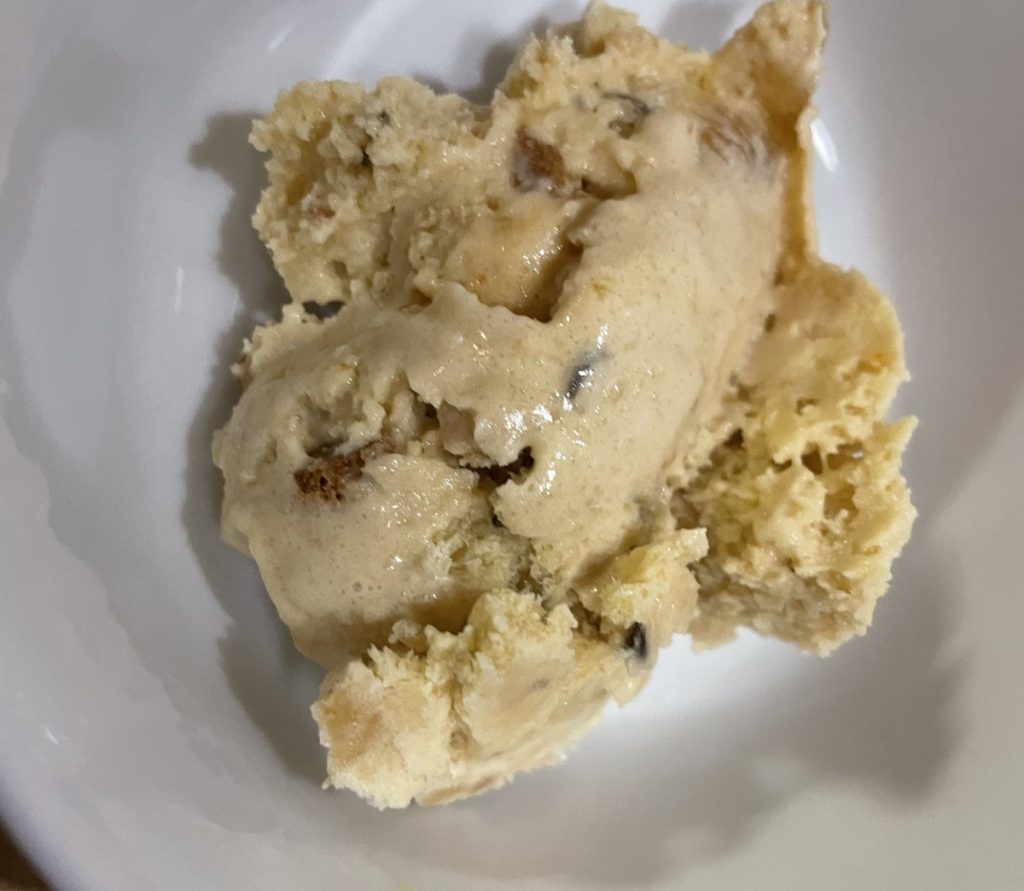
This ice cream happened because friend saw a recipe for an ice cream made with brown bread. He thought it might be fun to make it with Irish soda bread, for St. Patrick’s Day. It worked out really well. When I first added the bread to the ice cream, I tasted it and thought it was good, but needed something more. I had already made the butterscotch sauce to serve with it, so I added a little and the end result was a really fun and different ice cream. The ice cream actually tasted a lot like butter pecan. I served it to a friend the other night and she loved it.
This would be a fun dessert for St. Patrick’s day, or any day really, and it was super easy to make. Thanks, Joe, for the inspiration.
So here is the recipe. I have also included the recipes for the bread and the butterscotch sauce, although, you can buy them already made.
Joe’s Soda Bread Ice Cream
1 ½ qts. Vanilla ice cream
4 cups crumbled soda bread*
½ cup butterscotch sauce**
Soften ice cream and fold in the soda bread and butterscotch sauce. Return to freezer to firm up before serving.
* You can just buy a soda bread or use the recipe below
** I made my own butterscotch sauce, then had extra for serving. Feel free to just buy a jar if you don’t want to make your own. Serve some sauce, warmed with the ice cream to drizzle over.
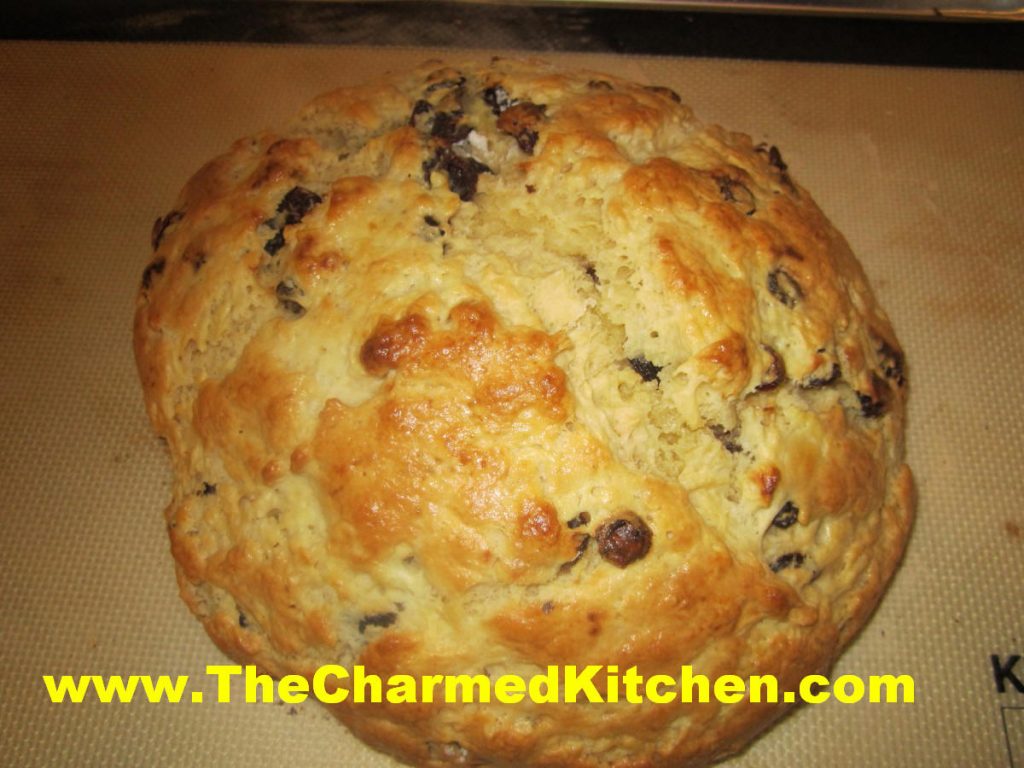
Irish Soda Bread
2 c. flour
½ t. each baking powder and baking soda
¼ t. salt
2 T. butter
¾ c. raisins, currants or golden raisins, optional, I used golden raisins
2 t. caraway seeds
1 egg, beaten
1 c. buttermilk
Preheat oven to 400 degrees. Dust a baking sheet with a little flour. Combine dry ingredients in bowl and cut in butter to resemble coarse crumbs. Add raisins and caraway seeds. Combine egg and milk and set 2 tablespoons of this mixture aside. Add remaining milk mixture to flour mixture and combine just until dough forms into a ball. Place on baking sheet, brush with reserved egg mixture and cut a crisscross on top of loaf. Bake about 25 minutes or until bread sounds hollow. Makes 1.
Butterscotch Sauce
6 T. butter
½ c. half and half
½ c. brown sugar
1 t. molasses*
½ -1 teaspoon salt
1 t. vanilla
Melt butter in a heavy bottomed pan. Add remaining ingredients, except vanilla, to the pan. Stir to mix well, then bring to a boil over medium heat. Boil 5 minutes. After 5 minutes, remove from the heat and stir in the vanilla. Sauce will thicken as it cools. Store in fridge and warm a little before using. Makes about a cup of sauce. Keeps for weeks in the fridge, but you’ll eat it long before that.
*The addition of a little molasses was because my original recipe called for dark brown sugar. I only had light brown sugar. I liked the flavor that extra molasses added to the finished sauce. Feel free to omit the extra molasses, or add a pinch more, depending on how dark you want your finished sauce.
Colcannon

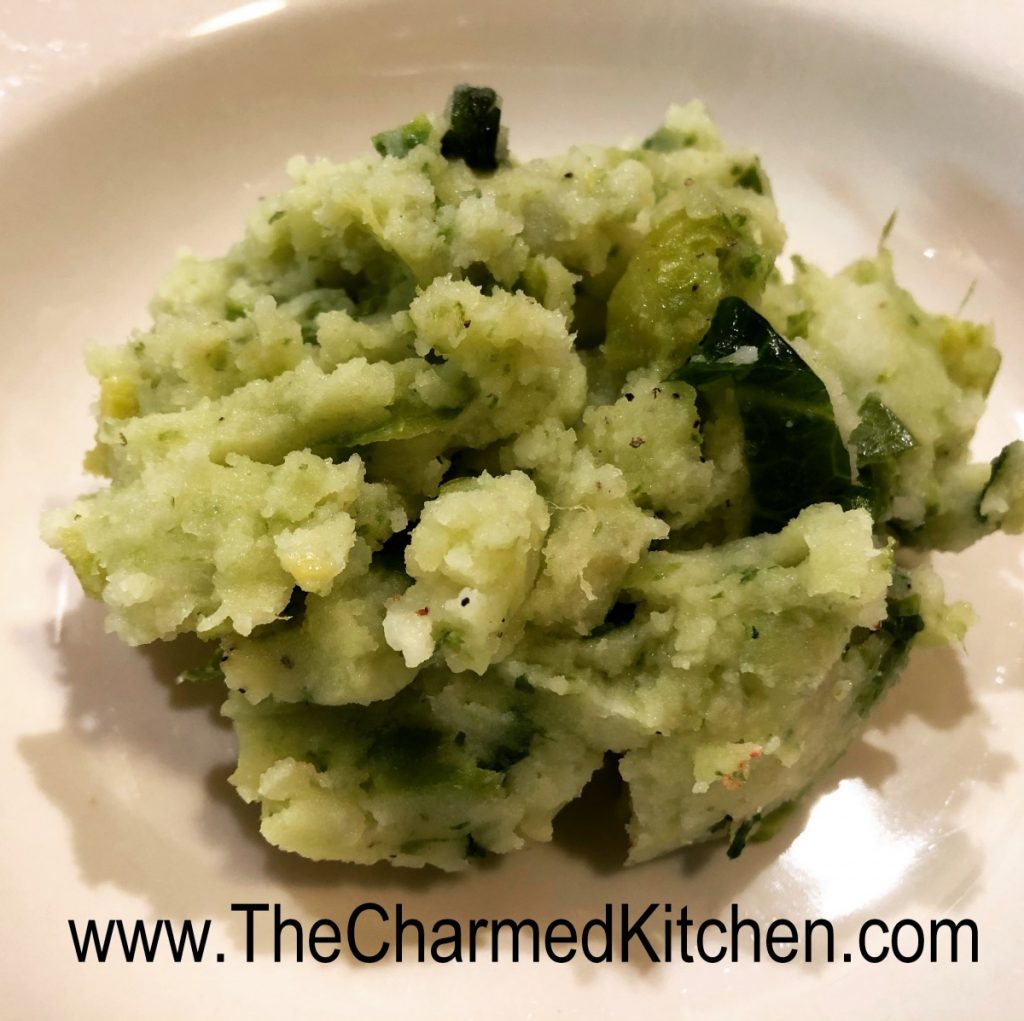
Colcannon is perhaps the ultimate comfort food. This traditional Irish dish is made with potatoes, kale, green onions, parsley and butter. There are variations made with cabbage or Brussels sprouts. All of those versions are pretty good. This is a great side dish for your St. Patrick’s Day dinner. It’s pretty, too.
I have made colcannon with Brussels sprouts, chives and even used ramps one time. For the version I made last night I used kale. I wonder why I don’t colcannon more often. It is so good- and simple to make.
Here is the version I made last night.
Colcannon
1 1/2 lbs. potatoes
1/4 lb. kale, or a bit more
3/4 c. finely chopped green onions or chives
1/2 c. chopped parsley
4 oz. butter
salt and fresh ground pepper
Peel the potatoes and cut them into chunks. Boil in salted water until very tender. Meanwhile, trim the stems out of the kale and blanch in boiling water for a few minutes. Remove kale and drain. Rinse with cold water to cool down. Squeeze out excess water and chop the kale finely. Set aside. Once the potatoes are tender, drain well and place in a mixing bowl. Add the butter and mash the potatoes until pretty smooth. A few lumps are not a problem. Stir in the kale, green onions and parsley. Mix well, adding salt and pepper to taste. Serves 4.
Pi Day Blueberry Pie


March 14th is sometimes referred to as Pi day. It’s a math nerd kind of thing, 3.14 being the value of pi and March 14 is 3/14.
I was explaining it to a friend last night. My friend’s response was that ANY day was Pie Day!!
I had some blueberries in the freezer and decided maybe today was Pie Day after all.
You could certainly use fresh berries for this pie, but frozen was what I had. Also, since it is a quiet day today, baking a pie seemed like a nice way to spend the morning. My friend is home from work today. I think she will be happy when I invite her over to have some “Pi” Day blueberry pie. It is time to put on a pot of coffee, and make a call.
Blueberry Pie
Pastry for 2 crust pie- recipe- The crust recipe I used is at the bottom of the page
2 ½ T. cornstarch
1 c. sugar
3 c. fresh or frozen blueberries
1 T. lemon juice
1 T. butter
1 T. sugar, for sprinkling
Roll out half of the crust and place in 8 or 9-inch pie pan. You can roll out the top crust ahead of time, or even cut into strips for a lattice top. Cover remaining crust to keep it from drying out. In medium bowl mix cornstarch and sugar. Toss in berries and then sprinkle in the lemon juice. Allow to stand 15 minutes. If berries were frozen be sure they are not clumped together. Spoon mixture into prepared crust and dot with the butter. Top with the second crust or place strips on in a lattice design. If using a whole crust cut in decorative slits for ventilation. I used a tiny heart-shaped cutter for my pie. Moisten then crimp edges and shape decoratively or use a fork to seal. Place pie in lower half of hot oven. Bake in a preheated 425-degree oven for 15 minutes. Reduce heat to 375 and bake an additional 40-50 minutes or until crust is brown and juices begin to bubble through the slits. Cool a little before serving.
Flaky Pie Crust
2 c. flour
1 t. salt
3/4 c. butter, chilled – you can use coconut oil, lard or shortening
1 T. cider vinegar
4-5 T. cold water
Combine flour and salt and cut in butter. Toss in vinegar and water 1 tablespoon at a time until dough holds together. Use a fork to toss the ingredients together and as soon as the mixture holds together stop adding water. Makes 2. Chill well before using.
Key Lime Pie for Pi Day

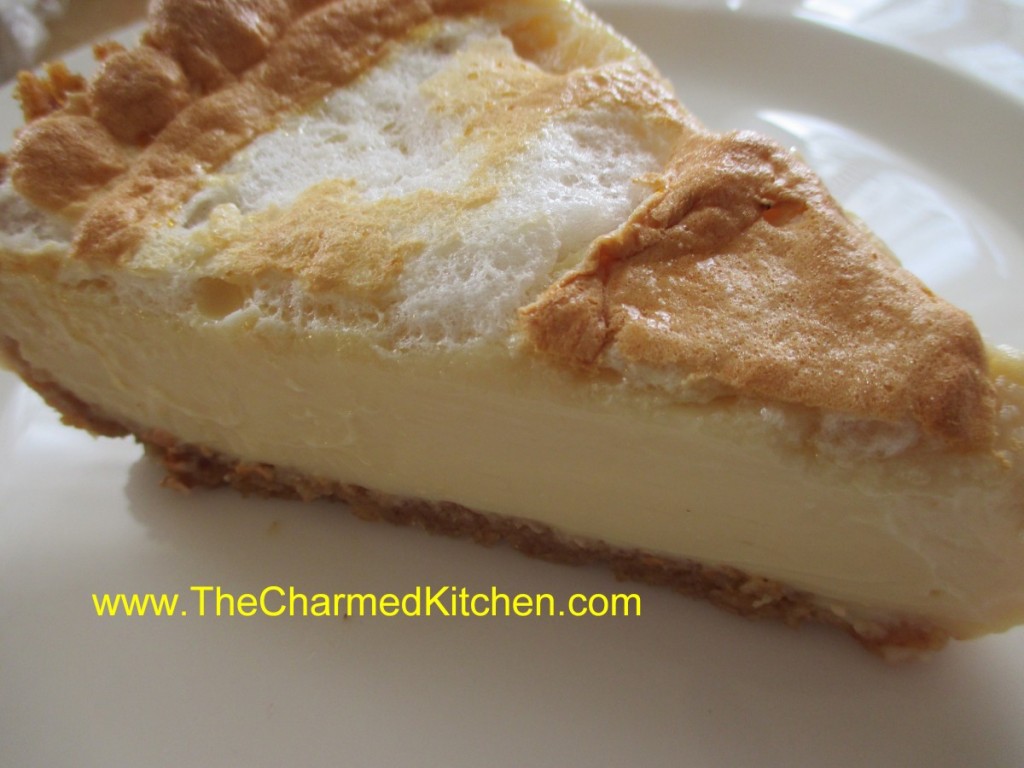
Since March 14th is celebrated by some of us math nerds as Pi Day- 3.14 , I decided to make a Key Lime Pie!! I figure any way I can get more Vitamin C is a good thing, right?
I had decided to go with a classic version: graham crust, creamy filling and a little meringue to top it off. The pie itself is simple and fast to make, although it does need time to chill. I think it took more time to juice all those tiny limes, than it did to make the actual pie.
One of the traditional ingredients in key lime pie is sweetened condensed milk. You can, if needed, make your own sweetened condensed milk, instead of using store bought. I’ve included the recipe at the bottom of this post.
Key Lime Pie
Crust:
1 ¼ c. graham cracker crumbs
⅓ c. melted butter
¼ c. brown sugar
Filling:
2 cans sweetened condensed milk*
1 c. key lime juice
Topping:
2 eggs whites
½ t. cream of tartar
2 T. sugar
In medium bowl, combine crust ingredients and toss until mixed well. Press crust into the bottom and sides of a pie pan. I use a 9-inch deep dish pan. Bake crust in a preheated 375 degree oven for 10 minutes. Cool. Reduce oven to 325 degrees. Combine filling ingredients in a medium bowl. Stir until well mixed. It will look sort of soupy, but as you stir, the filling becomes pretty thick- like pudding. Pour into crust. Prepare topping. Beat egg whites with cream of tartar until foamy. Slowly add the sugar, while still beating the eggs whites, until stiff peaks form. Spread or pipe the egg whites over the filling. Bake pie 25-28 minutes- or until meringue topping is golden brown. Chill at least 6 hours before serving. Serves 6-8.
* You can make your own sweetened condensed milk, if you prefer. Here is the recipe.
Homemade Sweetened Condensed Milk
1 c. dry non-fat milk
2/3 c. sugar
1/2 c. boiling water
3 T. butter, melted and hot
Combine all ingredients in a blender until smooth. Can be stored in the fridge and used within 3 days. This is the same as 1 (14 oz.) can.
Potatoes O’Brien

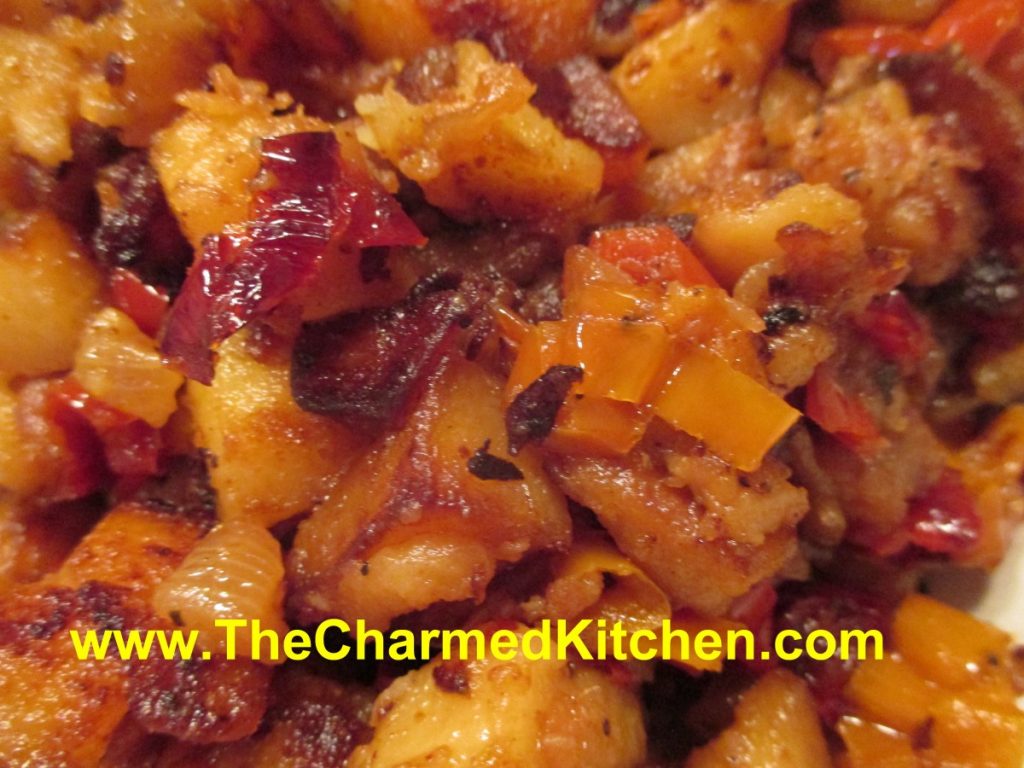
In all honesty, I love potatoes in pretty much any dish. Sometimes you just want to go with an old time classic. I always loved when my mom made potatoes O’Brien.
Potatoes O’Brien are hash browns, with onions and diced peppers. The combination is so tasty. To speed up the cooking process, I cooked the potatoes in the microwave first. You could also just use raw, diced potatoes. Either way, the end result is sure to be a hit.
Potatoes O’Brien could also be a nice side dish for your St. Patrick’s day dinner.
Potatoes O’Brien
oil
1 medium onion, chopped
1 c. chopped sweet pepper- I used baby peppers, sliced in rings
2 lbs. potatoes, diced, peeling is optional
salt and pepper
fresh parsley and thyme, optional
In skillet, heat a couple of tablespoons of oil. Saute onion until tender, add peppers and cook until the peppers are tender. Remove from skillet and set aside. Add a few more tablespoons of oil to the skillet and let it get pretty hot. Add the potatoes and cook, stirring often, until the potatoes are browned. They should be cooked, tender in the middle, crisp on the outside. I cooked the potatoes in the microwave first, then diced them once they were cool enough to handle. This made them cook up faster, but raw potatoes are fine, too. Return onion mixture to skillet with the potatoes, season with salt and pepper to taste and add the fresh herbs, if you like. Stir together until heated through. Serves 4-6.
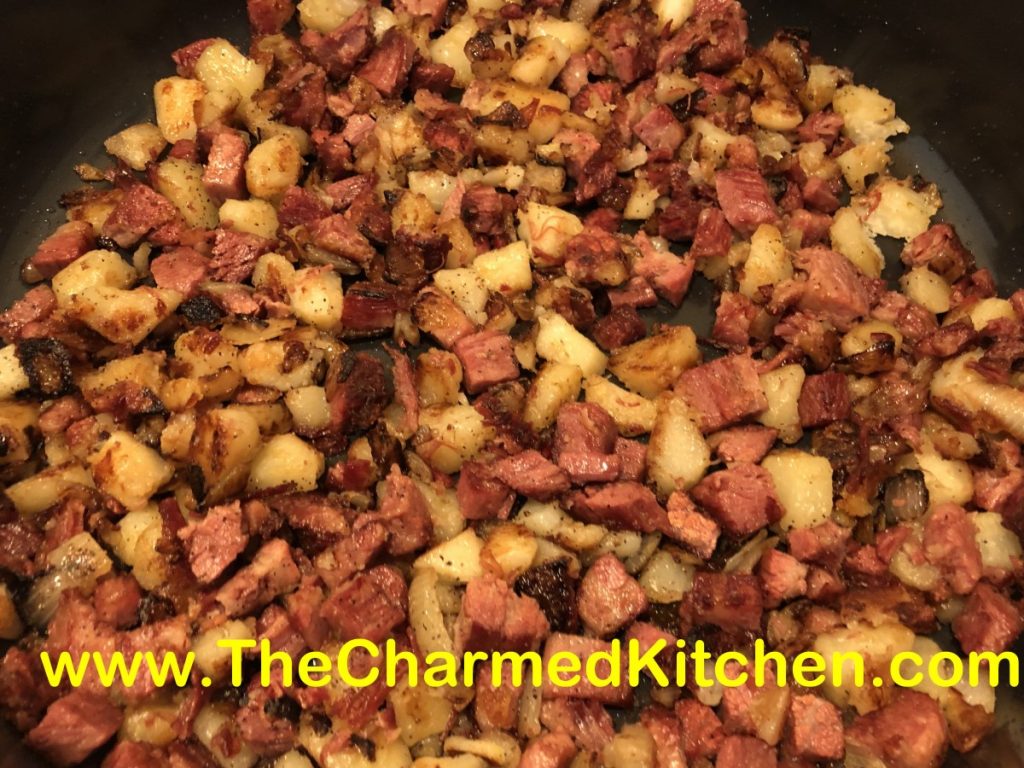
Mom’s Corned Beef Hash

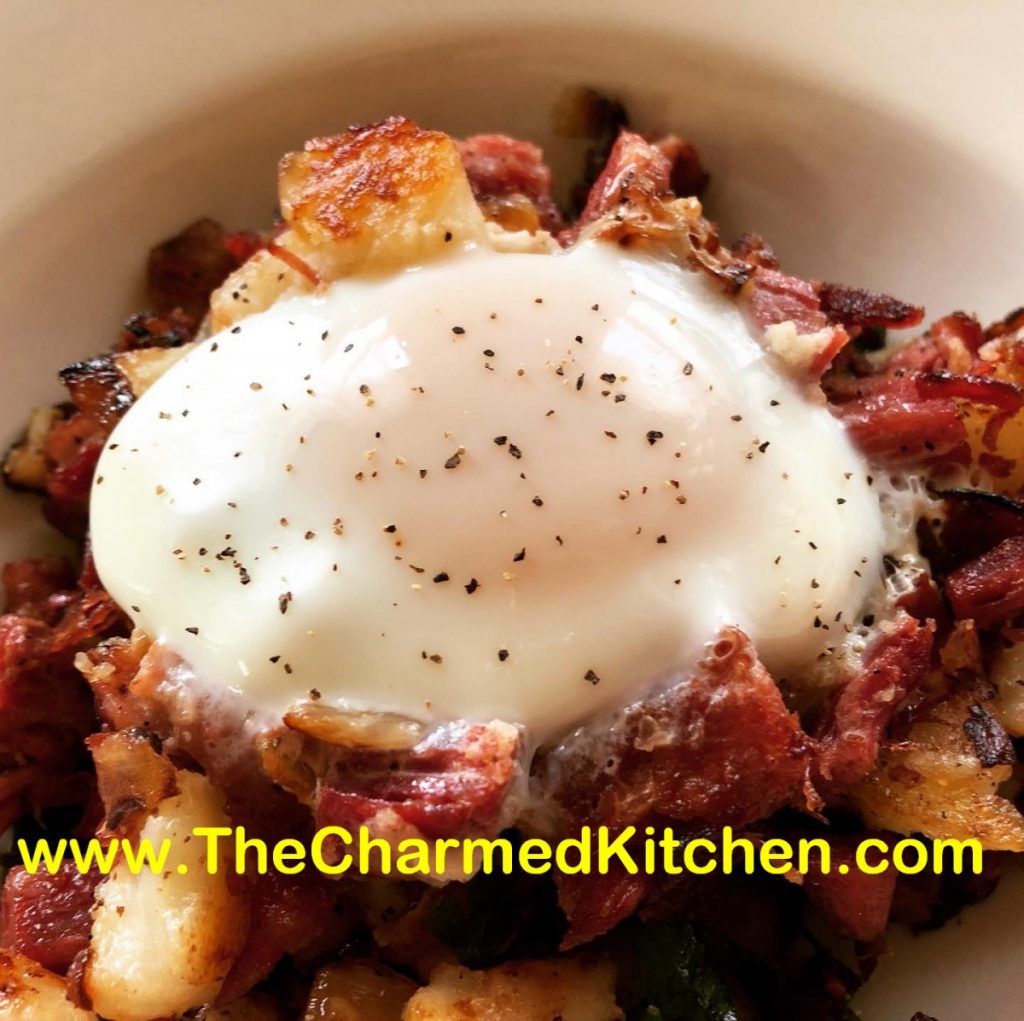
My mom used to make the best hash. I didn’t have any specific recipe for hash, so I made a point of writing down what I did, and measuring ingredients, so I could share the recipe with you. The hash tasted a lot like my mom’s. That made me smile. Here is the recipe. Hope you give it a try.
Corned Beef Hash
4 T. oil, butter or bacon fat
2-3 medium onions, peeled and chopped
1-1½ lbs. potatoes, 4-5 medium, cut in cubes, peeling optional
1 lb. corned beef, cut into ½- inch cubes
Salt and pepper
Eggs, optional
In skillet, heat up your fat of choice. Cook onions over medium heat until translucent. Add cubed potatoes and cook until potatoes and onions are starting to brown. Rather than constantly stirring, I let the potato and onion mixture cook a few minutes, then turn over sections with a spatula. It seems to get them brown faster. Check a few random potatoes to make sure they are tender. Add the corned beef and continue cooking until everything is starting to get a little crispy. Season to taste with salt and pepper. At this point you can serve it. I like to add the eggs. To add the eggs, crack and add eggs, one at a time, to the pan. Keep some space between the eggs, if you can. Turn heat down to medium low and cover the pan. It should take about 5 minutes for the eggs to cook, with the whites firm and the yolks runny. Try not to keep peeking. I know you want to, but every time you remove the lid, the heat dissipates. Wait 3 minutes to check the first time, if you can. Don’t set the heat too high, or you will burn the bottom of the hash while the eggs cook. I usually add one egg for each person I am serving. Feel free to allow more eggs per person, depending on your guests. Serves about 4.
Note: If you want to save yourself from dicing potatoes, you can use frozen hash browns. I prefer diced fresh potatoes, but the hash browns will save you time.

Corned Beef on Rye Salad

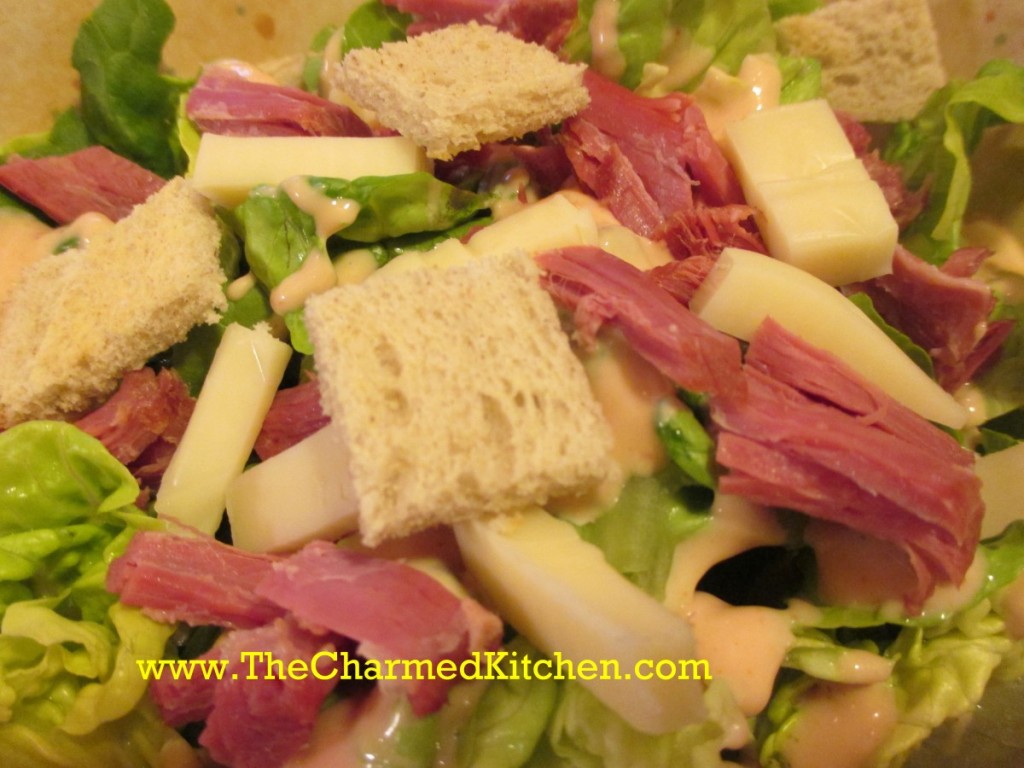
If you have leftover corned beef, you might want to try using it in a salad. This recipe came about when I had some corned beef that I was planning on using in a sandwich. I was more in the mood for a salad. Since I also had some lovely salad greens, I decided to combine them in one dish.
The end result was very tasty.
I prepped my greens, then topped them with the corned beef and Swiss cheese. I made croutons out of the rye bread and dressed the salad with homemade thousand island dressing. A nice Russian dressing would have worked, too. Perhaps, even a simple oil and vinegar dressing. The thousand island dressing made it like a Reuben sandwich, minus the sauerkraut.
Corned Beef on Rye Salad
6-8 c. mixed salad greens, washed and dried off
6 oz. corned beef, cut in bite sized pieces
4 oz. cubed Swiss cheese
2 slices rye bread, toasted and cubed
4 T. Thousand island dressing- recipe follows
Place greens in a bowl. Top with the meat, cheese, rye bread and drizzle with the dressing. Serves 2.
Homemade Thousand Island Dressing
Combine equal amounts of mayo, ketchup and sweet pickle relish. Stir to combine. I like to add capers sometimes, too. Store unused portion in the fridge.
Irish Soda Bread – Bread Pudding

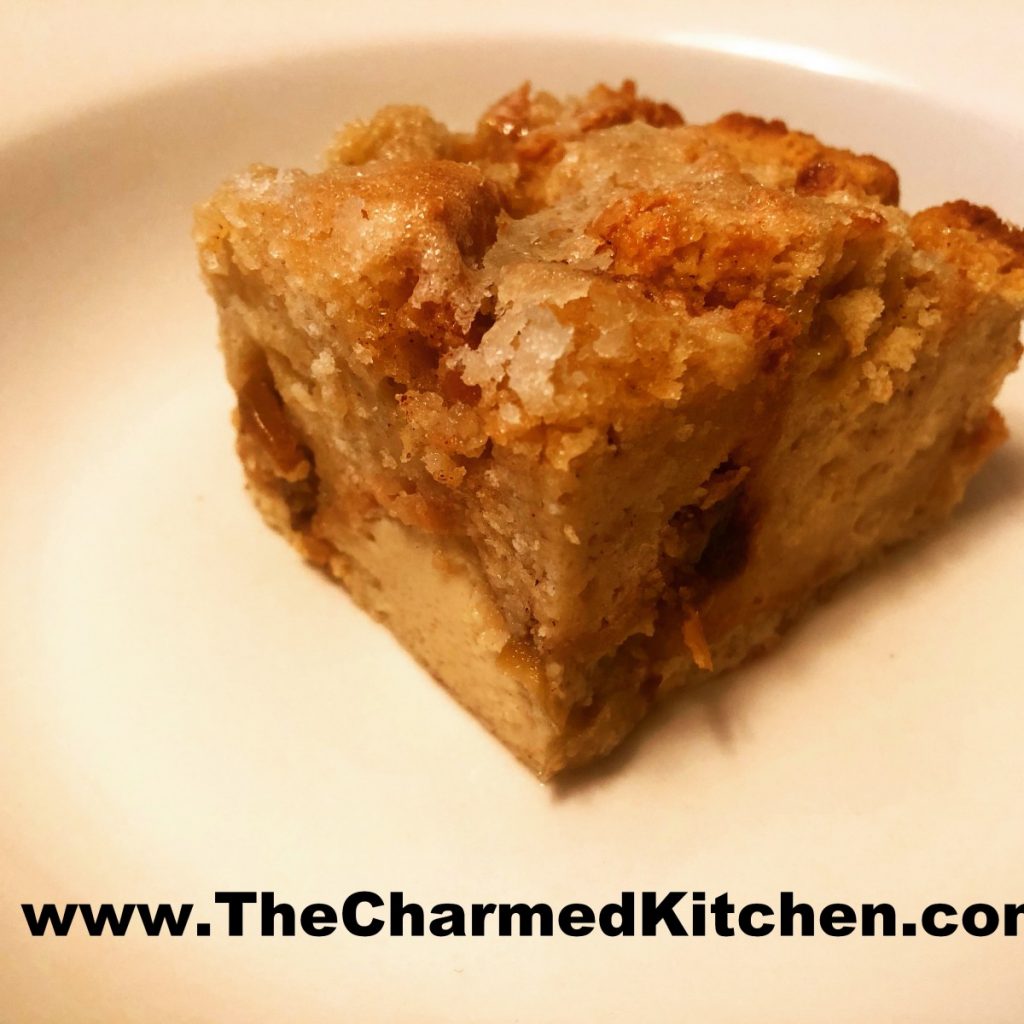
This is a great dessert for St. Patrick’s Day. Simple and not too sweet, it is a perfect way to finish your holiday meal. It is made with a traditional Irish soda bread. I used a loaf of soda bread I had baked the day before. You could buy a loaf of soda bread, if you prefer. I included the recipe for soda bread at the bottom of this post.
The bread was cubed up and allowed to sit around for a day, to dry out a little. You can also cube the bread and toast it in a low oven for 10-15 minutes. A slightly dried bread will stand up better to the custard.
For the custard I used milks, eggs, flavorings and a little whiskey. I would have added Bailey’s, if I had it. The addition of alcohol is optional.
Store cooled bread pudding in the fridge, but take out before serving- or warm a little before serving. It is great just as is, but you could dust with powdered sugar, or top with a scoop of ice cream or a spoonful of whipped cream.
Irish Soda Bread – Bread Pudding
6-8 c. cubed, day-old soda bread- recipe follows
2½ c. milk or half and half
5 eggs
½ c. sugar, plus extra for sprinkling on top
¼ c. whiskey, optional
1 T. vanilla
1 T. cinnamon
Preheat oven to 350. Grease 9×9-inch baking pan. Place cubed soda bread in prepared pan. Set aside. Beat together remaining ingredients and pour over the soda bread. Sprinkle top with a little extra sugar. Bake for 25-30 minutes or until bread pudding is set and a little golden on top. I used a glass pan- it might take a little longer in a metal pan. Bread pudding should be golden around the edges, too. Cool a bit before serving. Serve as is, or with whipped cream or ice cream. Serves 6-8.
Soda Bread
2 c. flour
½ t. each baking powder and baking soda
¼ t. salt
2 T. butter
¾ c. raisins, currants or golden raisins, optional
2 t. caraway seeds
1 egg, beaten
1 c. buttermilk
melted butter, optional
Preheat oven to 400 degrees. Dust a baking sheet with a little flour. Combine dry ingredients in bowl and cut in butter to resemble coarse crumbs. Add raisins and caraway seeds. Combine egg and milk and set 2 tablespoons of this mixture aside. Add remaining milk mixture to flour mixture and combine just until dough forms into a ball. Place on baking sheet, brush with reserved egg mixture and cut a crisscross on top of loaf. Bake about 25 minutes or until bread sounds hollow. Place on rack to cool. You can brush the loaf with a little melted butter, if you like. Makes 1.
Reuben Calzones

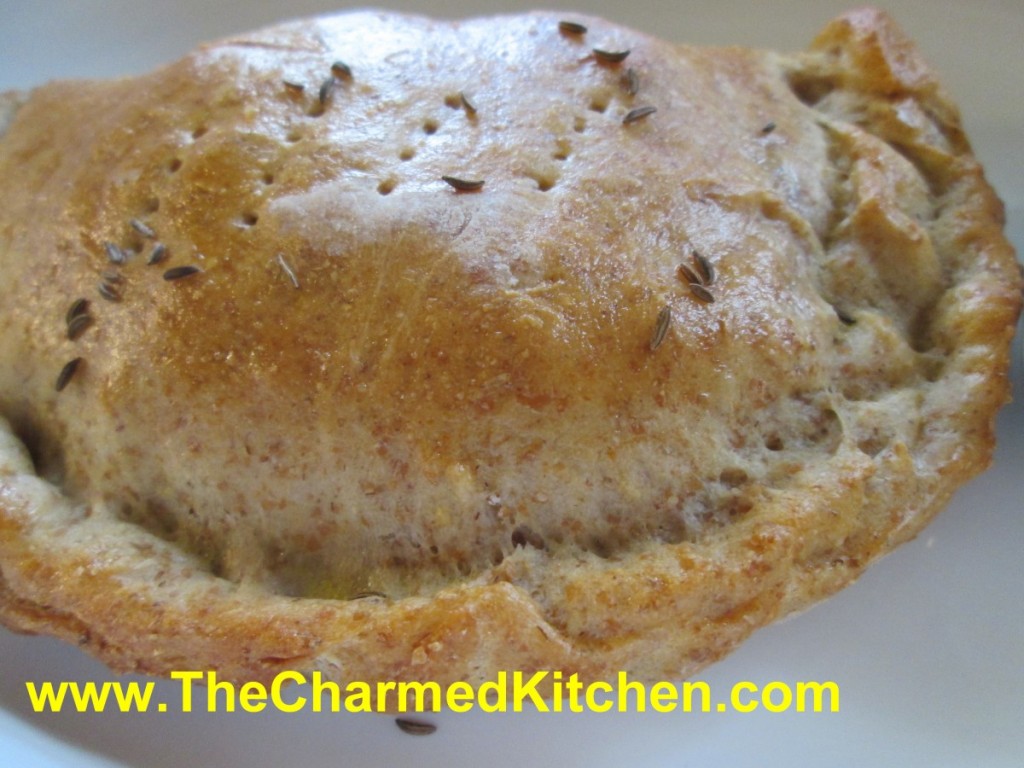
There is more than one way to enjoy corned beef. This time of year, because of the St Patrick’s Day specials, corned beef is on sale at lots of stores. These calzones are a fun way to serve corned beef.
While more often made with Italian ingredients, you can make calzones with other fillings, too. I made these for a friend a while back and we were talking about them the other day. I decided to make them again.
These are a fun way to make a Reuben, but with a twist. You can leave the sauerkraut out, if you like. I add some thousand island dressing to the calzones, but serve extra on the side. They also freeze well, so you can make a batch, enjoy some fresh, and freeze some for later. I thought I would share the recipe with you.
Reuben Calzones
3 ¼ c. flour
1 c. rye flour
1 T. sugar
1 t. salt
1 package quick-rising yeast
1⅓ c. hot water
1 T. oil
1 c. Thousand Island dressing, recipe follows
1 lb. thin sliced corned beef
8 oz. shredded Swiss cheese
1 c. sauerkraut, squeezed dry
1 egg , beaten
Caraway seeds, optional
Set aside 1 cup of the all-purpose flour. Combine remaining flour with the other dry ingredients in a medium bowl. Stir in water and oil and gradually stir in enough flour to make a soft dough. Turn onto lightly floured surface and knead until dough is smooth and elastic, about 5 minutes. Cover dough and let rest 20 minutes. Divide dough into 8 pieces and roll one piece into a 6-8 -inch circle. In the middle of the dough, add a spoonful of Thousand Island dressing, place 1 ounce of the Swiss cheese and 2 ounces of the corned beef. Add a tablespoon or two of the sauerkraut, if using. Brush the edge of the dough with water. Fold over the dough in half and press the edges to seal. Brush the edge again with water and roll the edge over again. It will give you a prettier look and seal the calzone better. Repeat with remaining dough and fillings. Place calzones on greased baking sheets- or on a baking sheet with a silicone liner or parchment paper liner. You will end up with 8 calzones in all. Only put 4 on one baking sheet. Cover and let rest 15 minutes while preheating the oven to 400 degrees. Before placing calzones in the oven brush with beaten egg and sprinkle with the caraway seeds, if you like. Also poke a few holes in the tops with a fork to help steam to escape while baking. I put both baking sheets in the oven at the same time and switch them halfway through baking. Bake in a preheated 400-degree for 20-25 minutes or until golden brown. If baking both at once switch them after 10 minutes or so. Cool slightly before eating. Serve warm and refrigerate leftovers.
If you want to use regular yeast use warm, rather than hot water. Also, allow a little more time for the dough to rise the first time, about 40 minutes. Everything else will work the same.
If you want to make your own dressing, here is the recipe
Thousand Island Dressing
1/2 c. ketchup
1/2 c. mayo
1/2 c. sweet pickle relish
Mix ingredients together and serve, or chill until needed.


