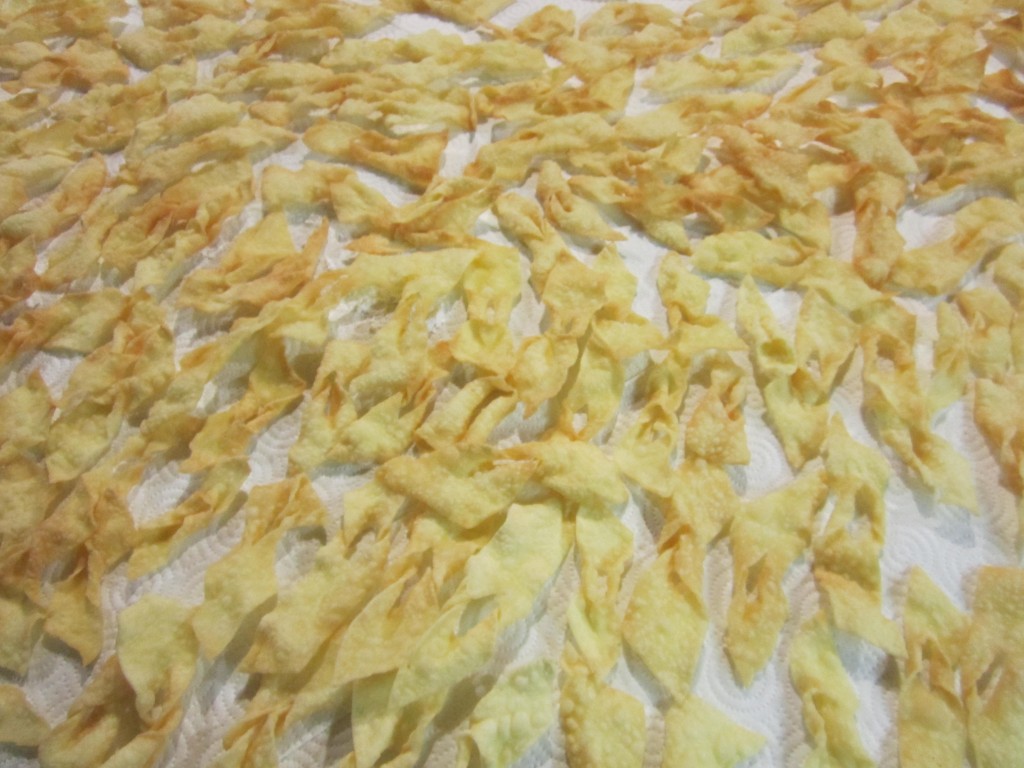
10 Easy Appetizers


The won ton appetizers pictured here are from left to right- Crab Rangoons, Sesame Spinach Triangles and Honey Ginger Chicken Won Tons.
If you are looking to serve appetizers for New Year’s Eve, or for other parties, here are some easy ones that your guests will love.
Some can be made ahead of time, saving you time the day of the party.
Sesame Spinach Triangles
oil
1 small onion, chopped fine
12 oz. fresh spinach, cooked, chopped and drained or 1 (10 oz.) box frozen spinach, thawed, cooked and drained
1/2 c. chopped water chestnuts
2 T. oyster sauce
2 t. sesame oil
1 t. hot sauce
won ton wrappers
Heat oil in skillet and cook onion until tender. Remove from the heat and stir in the remaining ingredients, except won ton wrappers. Adjust seasonings, if needed. Allow mixture to cool. Place 1 tablespoon of the filling in the center of a won ton wrapper. Moisten edges with a little water and fold over to form a triangle. Press to seal edges. Place filled triangles in 375 degree oil and fry for about 2 minutes or until golden.
Honey Ginger Chicken Won Tons
1 c. cooked diced chicken- I used thighs
1/4 c. minced celery
1/4 c. mayo
2 T. honey
2 T. dried minced onion
1 T. hoisen sauce
1 t. fresh grated ginger
salt and hot sauce to taste
won ton wrappers
Combine all ingredients, except the wrappers, and mix well. Place 2 teaspoons of filling in the center of each won ton wrapper. Moisten edges with a little water. Fold in 2 corners to meet in the middle. Starting at one of the remaining corners fold up and over and form into a roll. Press to seal edges. Fry in hot oil ( 375 degrees) for 1-2 minutes or until golden brown.
Crab Rangoons
1 clove garlic, minced
1 (8 ounce) package cream cheese
1 (6 ounce) can crab meat, drained and flaked
2 green onions with tops, thinly sliced
2 teaspoons Worcestershire sauce
1/2 teaspoon light soy sauce
won ton wrappers
Combine all filling ingredients and chill until ready to use. Place 2 teaspoons of filling onto the center of each wonton skin. Moisten the edges with water and bring 2 corners together. Bring the other 2 corners up and press all together to seal. Press all seams to seal. It should look like a little bundle. Fry in hot oil until golden brown, about 1-2 minutes.
Hot Crab Dip
8 oz. crab meat or faux crab, if you prefer
8 oz. cream cheese
1/2 c. mayo
1 T. chopped chives or green onion, optional
1 heaping teaspoon horseradish
1/2 t. Worcestershire sauce
1/4 t. hot pepper sauce, or to taste
Combine all ingredients in ovenproof bowl and mix until smooth. Bake in a 300-degree oven for 25-30 minutes or until hot and bubbly. You can also heat mixture in microwave for 90 seconds or until hot. You can mix the ingredients ahead of time and chill until ready to heat and serve. Serve with crackers, crusty breads or veggies. You can also spoon mixture into hollowed out tomatoes and broil until crab dip is hot and bubbly.
Pineapple Glazed Chicken Wings
12 chicken wings, cut into 2 pieces, save tips for another use
1 medium onion, chopped
1 can (or jar) of pineapple chunks, drained, reserving liquid- I used a pint jar- if using store bought use the 20 oz. can.
salt and pepper
Sauce:
1/2 c. apple cider vinegar
1/2 c. sugar
3 T. ketchup
3 T. sherry
2 T. soy sauce
1 t. minced garlic
1 t. red pepper flakes
reserved pineapple juice
3 T. cornstarch
Preheat oven to 400 degrees. Place wings in pan and season with salt and pepper. Bake chicken wings in roasting pan for 30 minutes. Add the onions and pineapple chunks to the pan with the chicken wings and return to the oven for 30 minutes longer. While chicken is cooking combine the first seven sauce ingredients in a small pot and bring to a boil. Check baking pan for any juices- Spoon them out and add to the sauce. Combine pineapple juice and cornstarch in small bowl, stirring until smooth and add to the sauce. Return to boil and stir until sauce is thickened and bubbly. Pour hot sauce over chicken and return to the oven to bake 20-30 minutes longer or until wings look nicely glazed and sauce has started to brown. Makes 24.
Brie Truffles
8 oz. brie, room temperature- I remove the rind from the brie for a smoother texture.
8 oz. cream cheese, softened
1 stick ( 4 0z.) butter, softened
2 c. fresh pumpernickel bread crumbs*
In food processor combine cheeses with butter until smooth. Chill mixture 30 minutes or longer. With a small cookie scoop or teaspoon form mixture into small balls. Place crumbs in a bowl and roll the balls of cheese in the crumbs to coat. Place in small paper cups and chill until ready to serve. Makes 3-4 dozen.
* To make the crumbs just place torn
Caramelized Onions “Toasts”
2 lbs. Onions, chopped
3 T. oil
1 t. salt
2 T. brown sugar
¼ c. balsamic vinegar
Dash red hot pepper sauce
Paprika
Sauté onions in oil with salt over low heat for 25-30 minutes. Onions should begin to caramelize and brown without burning. Add remaining ingredients and cook slowly another 15 minutes. Adjust seasonings, if needed and serve warm with crusty bread, crackers or smoked meats. Keeps in fridge for a couple of weeks or can be frozen. To make the toasts I placed a little of the onions on Wheat crackers and topped with squares of sliced Swiss cheese. Placed in a 400 degree oven until the cheese melted.
Brie with Pesto and Sun-Dried Tomatoes
2 c. basil leaves
3 T. Pine nuts, walnuts or pecans
2 T. olive oil
2 cloves garlic
3 T. Parmesan cheese
salt and pepper to taste
½ c. sun-dried tomatoes, soaked in water and chilled overnight
1 T. oil
1 t. oregano
small wheel of Brie 1-2#
Combine first five ingredients in a blender or processor until smooth. Add salt and pepper to taste. Drain tomatoes and chop coarsely. Combine with remaining oil and oregano and season to taste. Split Brie horizontally into 3 pieces. Spread
One layer with pesto and top with a piece of Brie. Spread with tomato mixture and top with remaining Brie. Wrap and chill overnight. Serve at room temperature or warm slightly. I warmed it wrapped in foil at 400 degrees for 10 minutes.Wanted it to brown a bit. Goes best with crusty breads.
Caponata
2 small eggplants, unpeeled and cut into 1/2-inch pieces, about 5-6 cups
1 large onion, chopped
1/2 c. olive oil, or a little more
4 celery ribs, sliced
2 sweet peppers, seeded and chopped
1 heaping tablespoon chopped garlic
3 tomatoes, chopped- or 1 (14.5) can diced tomatoes- undrained
1 c. sliced black olives
3-4 T. red wine vinegar
salt and pepper to taste*
Soak eggplant in salted water for at least 15 minutes. Rinse, drain and pat dry. Set aside. Meanwhile in skillet cook onion in 2 tablespoons of the oil until tender. Add the celery and cook until the celery is tender-crisp. Place mixture in a mixing bowl and set aside. Heat 2 tablespoons more of the oil and cook the peppers until tender. Add garlic and cook 1 minute longer. Add the tomatoes and cook 1 minute longer. Add this mixture to onion mixture and return skillet to the heat. Add remaining oil to skillet and cook eggplant until golden brown and tender. You may have to do this in 2 batches. Add remaining ingredients to bowl while eggplant is cooking. When eggplant is done add it to the bowl and mix well., Season to taste. Serve with crusty breads cold, hot or at room temperature. Serves 10-12.
* While I don’t have any herbs listed in the ingredients I often add oregano and basil or an Italian or Tuscan seasoning blend. I also like to add capers.
Mushroom Spread
½ lb. mushrooms, trimmed, washed and chopped
2 T. butter or oil
1 medium onion, chopped
½ t. salt
Fresh ground pepper
Dash of nutmeg
1 t. lemon juice
2 t. flour
½ c. sour cream or strained yogurt
½-1 t. dill weed
Sauté onions and mushrooms in butter or oil for 4 minutes. Add seasonings, lemon juice and flour and cook 3 minutes more. Remove from heat and stir in sour cream or yogurt and dill. Serve with pumpernickel bread, crackers or in mini cream puff shells.
Angel Wings – Chruschiki


Angel Wings are what a lot of people call these fried, delicate cookies. In my family, we also call them Flancate (Slovenian) or Chruschiki (Polish). After posting a picture on Facebook, I learned they have even more names. Many nationalities make versions of these cookies. These are a favorite among my family and friends.
The dough is a mixture of 8 eggs yolks, white wine, a little salt and flour. Very similar to pasta dough. They are a tradition in my family. I try to make them at least once during the holidays.
I use a pasta machine to roll out the dough. You can roll them out by hand, but a pasta maker makes the job a lot faster and easier. Also, if the cookies sit around and start to dry out before you can fry them, they tend not to grow as much. They are cut, shaped then fried. They puff up a lot when fried. More than doubling in size.
Once cooled, they are dusted with powdered sugar. Because they are rolled so thin, a single batch can make a hundred cookies or more.
Part of the fun of making them, is watching someone eat one for the first time. They are delicate and will sometimes fall apart when you go to bite into one. Then there is the powdered sugar. Let’s just say you don’t want to be wearing black.
Angel Wings/ Flancate / Chruschiki
8 egg yolks
2 ½ -3 c. flour, plus extra for rolling
½ c. white wine – I sometimes use sherry
1 t. salt
oil or shortening for deep frying
powdered sugar for sprinkling
Combine egg yolks, wine and salt mixing until smooth. Stir in 2 cups of the flour and continue adding flour until dough is very firm, but still pliable. It is better to add more flour later than to add too much too soon. Knead or mix the dough in a mixer for 5-8 minutes. Kneading dough, or mixing in a stand mixer strengthens the dough. Divide dough into thirds, cover and allow to rest 1 hour.
On lightly floured surface, roll dough out into thin strips. Cut strips diagonally into 1 ½ inch wide pieces. Cut a small slit in middle of dough and pull one end through, pulling until dough is long and somewhat twisted. Work with small amount of dough at a time to avoid drying out. Dry dough will tear and be hard to work with. You can use a pizza cutter or a pastry wheel with a zigzag edge. Cook dough, a few pieces at a time in a skillet with either oil or shortening 2 inches deep and heated to a temperature of 375 degrees. Pastry will cook in 30 seconds or so. Remove when lightly brown and drain on paper toweling. Cool and dust with powdered sugar. Makes at least 100, depending on how thin you can roll them. We have gotten as many as 200 from a single batch.
Note: If you have access to a pasta machine, the rolling time will be greatly reduced. Use the machine to roll the dough uniformly and quickly. There is no substitute for experience. After making a batch you will learn just how the dough should feel and how thick to roll the dough. If too thick, the dough is not as tender. Too thin and they fall apart to easily. Also, get a friend or two to help you. The are a lot of jobs to do and the time will fly with some assistance. Besides, you’ll have plenty to share with family and friends.
Recipes for Leftover Ham


Of course, ham makes a great sandwich, but there are a lot more things you can do with it.
If you enjoyed a ham for Christmas, you may find yourself with leftovers. Here are some recipes for all that ham.
Ham is versatile and can be used in all sorts of dishes. Added to soups, stir fry, breads, salads and omelets, it adds a wonderful smoky flavor to every dish. And of course, the ham bone can flavor a whole pot of soup.
So here are some recipes you might want to try.
Ham and Asparagus Quiche
1 (9-inch) unbaked pie crust
1½ c. shredded cheese – I used Havarti
4 t. flour
1½ c. diced cooked ham
12 oz. asparagus, trimmed, cut in ½- inch pieces and steamed 3 minutes
4 eggs
1 c. milk or half and half
2 T. fresh chopped parsley or 2 teaspoons dried
¼ t. salt
1T. Dijon mustard
1 t. hot sauce
Toss cheese with flour in a bowl and place in pie crust. Sprinkle the ham and asparagus over the cheese and set aside. Combine remaining ingredients in a small bowl beating well to combine. Pour over the ham and asparagus mixture and bake in a preheated 400-degree oven for 15 minutes. Turn down heat to 350-degrees and bake until knife inserted off-center comes out clean, about 30 minutes more. Makes 1.
Note: This quiche freezes well. After adding the fillings just wrap in heavy foil and freeze solid until ready to bake. When ready to bake unwrap and allow to sit at room temperature for 30-60 minutes. Bake as with the fresh version, but add another 10-15 minutes to the baking time. If you don’t want to freeze the pie pan, you can line the pie pan with foil before you add the crust. Once it is frozen you can remove the frozen quiche from the pie pan and wrap, returning to freezer. When ready to use unwrap and put the quiche back in the pie pan before baking. Or, if you are planning on freezing it, you can use a foil pie pan.
Ham and Swiss Calzones
4 c. flour
2 c. rye flour
2 T. sugar
2 t. salt
2 packages quick-rising yeast
2⅓ c. hot water
2 T. oil
2 lb. thin sliced ham- more or less
1 lb. sliced Swiss cheese
Thousand island dressing- recipe follows
1 egg , beaten
Set aside 2 cups of the all-purpose flour. Combine remaining flour with the other dry ingredients in a medium bowl. Stir in water and oil and gradually stir in enough flour to make a soft dough. Turn onto lightly floured surface and knead until dough is smooth and elastic, about 5 minutes. Cover dough and let rest 20 minutes. Divide dough into 12 pieces and roll one piece into a 8 -inch circle. In the middle of the dough place 1 1/2 ounces of the Swiss cheese, a spoonful of the dressing and 2-3 ounces of the ham. Brush the edge of the dough with water. Fold over the dough in half and press the edges to seal. Brush the edge again with water and roll the edge over again. It will give you a prettier look and seal the calzone better. Repeat with remaining dough and fillings. Place calzones on greased baking sheets- or on a baking sheet with a silicone liner or parchment paper liner. You will end up with 12 calzones in all. Only put 4 on one baking sheet. Cover and let rest 15 minutes while preheating the oven to 400 degrees. Before placing calzones in the oven brush with beaten egg and make a few slashes with a knife to help steam to escape while baking. I put 2 baking sheets in the oven at the same time and switch them halfway through baking. Bake in a preheated 400-degree for 20-25 minutes or until golden brown. If baking 2 at once switch them after 10 minutes or so. Cool slightly before eating. Serve warm and refrigerate leftovers. Makes 12.
If you want to use regular yeast use warm, rather than hot water. Also, allow a little more time for the dough to rise the first time, about 40 minutes. Everything else will work the same.
Thousand Island Dressing
Combine equal parts of ketchup, mayo and sweet pickle relish. You likely need at least a cup for this recipe. I made extra so the sandwiches could be dipped in extra dressing, if desired.
Tortellini and Ham Salad
¼ c. olive oil
¼ c. red wine vinegar
1 t. fresh rosemary
1 clove garlic, minced
1 t. sugar, optional
1/2 t. red pepper flakes
12 oz. mushroom or cheese tortellini, cooked
1½ c. diced ham or turkey ham
1 red pepper, seeded and diced
1 c. sauteed, sliced mushrooms, cooled
4 green onions, chopped
Parmesan cheese, optional
Combine first 6 ingredients in large bowl and whisk to blend well. Add next 5 ingredients and toss to coat. Add salt and pepper to taste. Chill at least 30 minutes before serving. Serve with Parmesan cheese on the side. Serves 4.
Corn and Ham Saute
1 T. oil
1 small onion, diced
1 c. diced ham
4 c. corn- fresh or frozen
salt and fresh ground pepper to taste
In pan cook onion in oil until tender. Add the ham and cook a few minutes longer. Add corn and continue cooking until corn is heated through. Season to taste and serve. Serves 3-4.
Ham and Swiss Bread Florentine
3 ¼ c. flour
1 T. sugar
1 t. salt
1 package quick-rising yeast
1 c. hot water
1 T. oil
¼ c. Dijon mustard
6-8 oz. sliced ham
4 oz. sliced Swiss cheese
1 large bunch fresh spinach, rinsed and steamed a few minutes to wilt, drained well.
Set aside 1 cup of the flour. Combine remaining flour with the other dry ingredients in a medium bowl. Stir in water and oil and gradually stir in enough flour to make a soft dough. Turn onto lightly floured surface and knead until dough is smooth and elastic, about 5 minutes. Roll dough into a rectangle about 16 x 8. Spread mustard down center middle of dough. Top with meat slices, cheese and spinach. Cut one-inch wide strips of dough from filling to edge on both sides. It will sort of look like fringe. Alternating sides, fold strips up and over the filling at an angle. Carefully lift loaf onto greased baking sheet and place at an angle. Cover with a towel and place sheet on top of a roasting pan half-filled with simmering water for 15 minutes. Bake in a preheated 400-degree for 20-25 minutes or until golden brown. Cool slightly before slicing. Serve warm and refrigerate leftovers.
Note: The variations for this bread are almost endless. Some favorite combinations are Corned beef and Swiss with sauerkraut and thousand island dressing., roast beef and cheddar, chicken, broccoli and cheese, Spinach with ricotta or feta and onions, pizza, assorted fillings. You get the idea. Use your imagination and have fun. Just be careful not to overfill, or the bread will be hard to move, use fillings that aren’t too runny and always use cold fillings.
If you want to use regular yeast use warm, rather than hot water. Also, don’t let dough rise over boiling water. After kneading cover dough and let rise 45 minutes. Punch down and assemble as in original recipe. Cover with a towel and let rise until dough looks puffy, about 40 minutes. Bake as directed above. These breads can also be frozen.
Ham and Corn Chowder
I was looking for a quick soup for dinner the other night. Inspiration hit when I came across some corn in the freezer. I had blanched and frozen it during the summer at the peak of corn season. I had a little ham in the fridge I was wanting to use up and the pairing was a natural. I started by sauteing an onion in a little butter. Once the onion was tender I added a peeled and diced potato, the corn, the diced ham and about 2 or 3 cups of chicken stock. I covered the soup and let it simmer until the potato was tender, about 15 minutes. I then took 4 tablespoons of flour and put it in a jar. I added a cup of milk, put on the lid and shook it until the flour was well mixed in. I poured the flour mixture into the pot and brought the mixture up to a gentle boil. I stirred it as it thickened up. I cooked it for a few minutes and adjusted the seasonings adding salt, fresh ground pepper and a dash of hot sauce. I also added some chopped parsley. The end result was a wonderful chowder that took almost no time at all. Sometimes the best dishes come from just looking at what we already have. In this case some frozen veggies and a bit of leftover ham.
Ham and Veggie Stir Fry
2 T. oil
1 medium onion, sliced
1 medium carrot, peeled and sliced thinly
1 c. sliced cabbage
1 clove garlic, peeled and chopped
1 sweet red pepper, seeded and cut into thin strips
2 c. sliced bok choy
1 1/2 c. cubed cooked ham
2 green onions, trimmed and sliced
1/2 c. whole almonds
fresh grated ginger- or powdered, to taste
soy sauce to taste
dash of hot sauce
Heat oil in wok or skillet and cook onion and carrots for 3 minutes. Add cabbage add garlic and stir fry 2-3 minutes longer. Toss in the pepper and bok choy and cook 3 more minutes. Add ham, green onions and almonds along with seasonings and soy sauce and cook until ham is heated through. Serve over hot cooked rice or pasta. Serves 3-4.
Ham with Brussels Sprouts
I started by trimming the Brussels sprouts and cutting small ones in half. I quartered the larger ones. I heated a little butter in a skillet and added 3 cups of prepared Brussels sprouts. I cooked them until they were getting a little color on them. I think their flavor is enhanced by sauteing. I then added 1 1/2 cups of diced cooked ham and 1/2 cup of water. The water helps steam the sprouts so they are tender. I like Brussels sprouts tender. You can skip the water, if you like. The water evaporates quickly and as soon as the ham starts to brown a little the dish was pretty much done. I added a little freshly ground pepper- but it didn’t need salt. I also served it with fresh grated Romano cheese. You could serve it as is or toss in some cooked pasta with the ham. Simple and really good. You might even get a Brussels sprout hater to give this one a try.
Corn, Ham and Bacon Chowder
1 lb. bacon
1 onion, chopped
2 carrots, peeled and sliced
6 c. chicken stock
2 potatoes, peeled and cubed
6 c. corn – I used frozen corn
2 c. chopped ham
2 cups half and half or milk
¼ c. flour
Salt and pepper to taste
Hot sauce to taste
Fresh chopped parsley
Cut bacon in 1-inch pieces and fry in a Dutch oven until crisp. Tip pot and spoon out most of the fat. Add the onion and sauté until translucent. Add carrots and stock. Cover and simmer 10 minutes, then add the potatoes, corn and ham. Cover and simmer 15-20 minutes, or until potatoes are tender. In jar with a tight fitting lid, combine 1 cup of the half and half or milk with the flour. Put on the lid and shake until mixture is smooth. Stir into the pot along with the remaining half and half or milk and cook, stirring often until mixture thickens up. Adjust seasoning to taste. Stir in parsley and serve. Serves 6.
Swedish Yellow Split Pea Soup
1 lb. yellow split peas, rinsed
2 qts. Boiling water or stock
1 bay leaf
2 c. chopped onion
2 c. sliced carrots
1 tsp. dried marjoram
1/4 t. ginger
dash nutmeg
1/2 t. pepper
1 T. salt, or to taste
2 cups diced ham
Note: you can use 1 teaspoon liquid smoke if omitting meat.
Combine peas, boiling water or stock and bay leaf and simmer, covered, about an hour, stirring occasionally. Remove bay leaf. Add remaining ingredients, except diced meat and salt, and cook, covered, over low heat for about 30 minutes. Add meat and cook 1 hour more, stirring occasionally. Season to taste. Serve with a pumpernickel bread. Freezes well. Serves 6-8.
Ham and Cheese Strata
12 slices bread, crusts removed if desired – I used rye
6 slices cheese – I used Swiss
1/4 c. diced green onions
1/2 c. chopped sweet pepper
2 c. diced cooked ham or turkey ham
3 eggs
2 c. milk
1 t. salt
1/8 t. pepper
Place six slices of bread on bottom of 2-quart oblong casserole. Top each slice of bread with a slice of cheese. Top cheese with the onions, peppers and ham. Top with remaining bread and cut each “sandwich” in half diagonally. Combine remaining ingredients and pour over sandwiches. Cover dish and let stand several hours or overnight in the fridge. Bake uncovered in a 350-degree oven for 40-45 minutes, or until puffed and set. Serves 6.
Ham and Swiss Quiche
1 (9-inch) unbaked pie crust
1½ c. shredded Swiss or Gruyere Cheese
4 t. flour
1 c. diced cooked ham or turkey ham
3 eggs
1 c. milk or half-half or evaporated milk
2 T. fresh chopped parsley or 2 teaspoons dried
¼ t. salt
¼ t. dry mustard
Dash of hot sauce
Toss cheese with flour in a bowl and place in pie crust. Sprinkle the ham over the cheese and set aside. Combine remaining ingredients in a small bowl beating well to combine. Pour over the ham and cheese mixture and bake in a preheated 400-degree oven for 15 minutes. Turn down heat to 350-degrees and bake until knife inserted off-center comes out clean, about 30 minutes more. Makes 1
Note: This quiche freezes well. After adding the fillings just wrap in heavy foil and freeze solid until ready to bake. When ready to bake unwrap and allow to sit at room temperature for 30-60 minutes. Bake as with the fresh version, but add another 10-15 minutes to the baking time. If you don’t want to freeze the pie pan, you can line the pie pan with foil before you add the crust. Once it is frozen you can remove the frozen quiche from the pie pan and wrap, returning to freezer. When ready to use unwrap and put the quiche back in the pie pan before baking. You can also use a foil pie pan.
Two Trees and a Roll of Duct Tape


I have some really fun childhood holiday memories. Perhaps the most fun was getting our own Christmas tree. What really made the trip fun was going with Uncle Frank.
Uncle Frank was my dad’s baby brother. He was always so much fun. He had a great sense of humor, too.
The one thing Uncle Frank never seemed to have- at least at tree cutting time- was a car with a working heater. I am not sure if he and my dad thought it was more of an adventure that way. I mean, we could have gone in my family’s car- but we never did.
One year in particular, will always stand out for me. There were 7 of us in a Volkswagen beetle. Two adults, my Dad and Uncle Frank, three of my cousins, my brother and me. Of course, no heater in the car. It was also a very snowy December, so the car was cold.
We were all bundled up as we headed out to get a couple of Christmas trees. There is a small space behind the back seat in an old Beetle. That is where my cousin Laurie and I sat. My brother and two cousins shared the back seat. Dad and Uncle Frank sat in front.
When we got to the tree farm, the dads pretty much left us kids on our own. There was a lot of snow on the ground and I remember sliding down a snowy hill, over and over. When we were called back to the car- we were all pretty cold- and our boots were full of snow.
I don’t want you to think that my Dad and Uncle Frank were not good parents or reckless. They were the best- and so much fun. They insisted we all take off our wet boots when we got in the car. Everyone tossed them in the area in back were Laurie and I had been sitting. We joined the others in the back seat. My cousin Gary sat on my Dad’s lap. Well, that was after my Dad and Uncle Frank got in the car.
See, there was this problem with the trees. For some reason they didn’t have enough rope- or any rope. I don’t really remember that part.
I just know, that at some point, with the kids shivering in the car- we were now wet and had removed our boots- My Uncle Frank and my father started taping two pine trees to a VW Bug. I remember them passing the tape over and under the car, making sure the trees were not going anywhere.
I feel the need to point out, that the rounded top of the beetle was not an easy place to secure a tree- or two. So the trees ended up more on the sides of the car, taped securely into place. I learned at a very early age, the value of duct tape. The guys had to come in through open windows, since the trees were pretty much blocking the doors.
When my Uncle started up the car- the windows were all frosted up. The heater did not work, so no defroster for the windows. He used his thumbnail to scratch off an area of ice about the size of a silver dollar. He closed one eye, put the open eye up to the little circle he had cleared on the windshield and declared – it was fine- he could see just fine.
We all laughed. He was laughing, so was my Dad. We took our cues from the adults and joined in the merriment. It was a cold, but laughter- filled ride home. When we got back, my uncle crawled out the window and un-taped the trees so we could all get out of the car.
My Mom and Aunt quickly got us into dry clothes and I am guessing they were not as amused by our condition as we were. The point is, no one got hurt and it probably toughened us up a little.
I am glad there are car seats and seat belts and air bags in cars today. I think kids and adults should be safely secured in all moving vehicles. But way back when- we didn’t have those safety features. It isn’t like they decided not to strap us in- they couldn’t.
While my Uncle Frank was laughing and joking around that day, he was also a police officer. I am sure he knew how to drive in snowy conditions. Maybe he was nervous. Maybe my dad was, too. But if they were, they didn’t show it.
I know there was a lot of love and laughter in the Beetle that day. I can only imagine the looks we got from other drivers on our way home. I couldn’t actually see other cars, however, as the view was blocked by the tree branches and frosty windows.
If there is any lesson- perhaps it is to be brave enough to be silly sometimes. While I don’t want anyone to put a child in harm’s way- don’t be so careful that your kid’s miss out on adventures, too.
Be the person that gives a kid a really good memory this holiday season. Perhaps, using duct tape and a couple of trees.
Posted in Cooking
Toasted Pecan and Orange Waffles


These orange- pecan waffles are sure to make anyone smile. They are really tasty. They aren’t hard to make, either. They would make a great breakfast for any holiday or special occasion.
You can serve them just on their own, or perhaps with a side of crispy bacon or some breakfast sausage and some fresh fruit.
I started with my basic vanilla waffle recipe and had some fun with it. I enjoyed the combination of pecans with orange juice. Since it is citrus season, I used fresh squeezed juice, but bottled juice is just fine. Serve them with warm maple syrup, powdered sugar or perhaps orange marmalade..
Here is the recipe.
Toasted Pecan and Orange Waffles
2 cups flour
4 teaspoons baking powder
2 tablespoons sugar
1 teaspoon salt
1 t. orange zest
2 eggs
1 cup orange juice
½ c. milk
½ c. melted butter
1 T. vanilla
¾ c. toasted pecans, chopped*
Whisk together dry ingredients and set aside. Beat together remaining ingredients and add to dry ingredients mixing until smooth. Cook in a waffle iron until crisp.
* To toast the pecans, place on a baking sheet and bake in a 350-degree oven for about 10 minutes. Toast them before you chop them- smaller pieces can burn easily.
Snow People Cookies


These cookies are adorable and fun to make. They also taste really good. They are a fun cookie for kids to make. The cookies are made from a rich, cream cheese dough. They stay soft in the middle, with a little crunch on the outside. They are even cuter if you use the candy-striped kisses available this time of year.
Snow People
Dough:
4 c. flour
1 t. baking powder
1 c. butter, softened
1 (8oz.) package cream cheese, softened
2 c. sugar
1 egg
1 t. vanilla
¼ t. almond extract
Decorations:
Mini chocolate chips or mini M&Ms
Kisses, whole, or mini peanut butter cups, halved
Frosting:
2 c. powdered sugar
Few drops green food coloring
Milk
Extra powdered sugar for sprinkling
Mix dry ingredients and set aside. Cream together butter and cream cheese until smooth. Beat in sugar until light and fluffy. Beat in egg and flavorings then stir in dry ingredients. Chill dough overnight. For each snow person rolls out 3 balls of dough, 1-inch, ¾-inch and ½-inch in diameter. Place balls in descending order on ungreased baking sheet. Press together lightly. Use 2 mini chocolate chips for eyes in smallest ball and use either chips or mini M&Ms for buttons (2 on largest ball and 1 in medium). You can also add a tiny dot of frosting once they are cooled for the buttons, too. Bake in a preheated 325-degree oven for about 18 minutes or until edges are firm and bottoms are lightly browned. Cool on baking sheet 1 minute then remove to rack to finish cooling. Combine powdered sugar with green food coloring and just enough milk to make a frosting that can be piped. Use a little dab of frosting to attach either a chocolate kiss (unwrapped) or half of a peanut butter cup as a hat. Pipe a small amount of frosting to form a scarf. Dust cookies with a little extra powdered sugar for snow when finished decorating. Makes about 48 cookies.
Peanut Butter Coconut Shortbread – Vegan

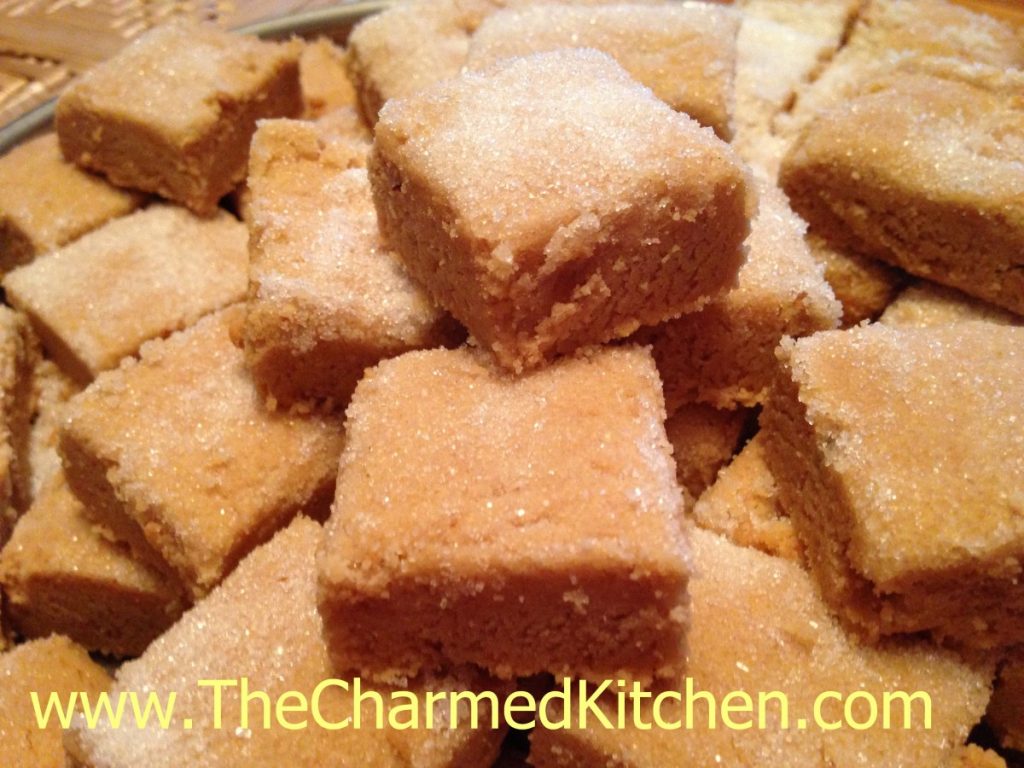
I made these for my goddaughter. She is vegan. The original recipe for the shortbread was her great grandmother’s. It is a great recipe, but not vegan. I tweaked it a little.
The original recipe called for a pound of butter. I swapped out the butter with a cup each of peanut butter and coconut oil. It worked out great.
The cookies had that same wonderful crumbly texture and rich flavor you expect in a good shortbread cookie. I used crunchy peanut butter- it was what I had. I like the bits of peanuts in the cookies. I could see adding a few more chopped peanuts the next time I make these cookies.
You could also use other nut butters, like almond or cashew, if that is what you have.
Peanut Butter-Coconut Shortbread
1 c. sugar, plus 1/4 cup extra for sprinkling
1 c. peanut butter
1 c. coconut oil
4 c. flour
2 t. vanilla
Cream together sugar, peanut butter, coconut oil and vanilla. Stir in flour until mixture forms into a dough. Press into 9×13-inch baking dish. Sprinkle extra sugar over the cookies dough, and cut into squares. Bake in a 300 degree oven for an hour or until light brown around edges. Re-cut while warm. Makes 4 dozen. They can be frozen.
Cranberry Nut Cookies

I got this recipe from a friend’s cousin. I made them for years then sort of forgot about them. Came across the recipe again and decided to make them again. Wow, they really are good. Not the prettiest cookie out there, but so soft and tender and tasty.
The original recipe calls for a cup of butter and a cup of shortening. I used straight butter, but chilled the dough Either variation works, just your preference. What can I say? I prefer butter.
The recipe also calls for dried sweetened cranberries, not fresh berries.
So here is the recipe. It makes a big pile of cookies. You can freeze the dough or even the baked cookies if it is too much for you.
Enjoy.
Craisin Nut Cookies
1 c. shortening or butter, See note:
1 c. butter
1 1/2 c. sugar
1 1/2 c. brown sugar
3 eggs
1 T. grated orange peel
5 c. flour
1 1/2 t. each baking soda and salt
2 c. chopped nuts
1 (6 oz.) package craisins (sweetened dried cranberries)
Cream together first 6 ingredients and blend until smooth. Combine flour with soda and salt and add to sugar mixture. Stir in nuts and craisins. Drop walnut sized balls on an ungreased cookie sheet about 2-inches apart. Bake in a preheated 350-degree oven for about 8-10 minutes or until golden brown. Makes about 7 dozen.
Note: If using all butter, chill the dough for at least a few hours before baking,
Sugar Cookies with Non-Royal Icing


These cut-out cookies are a classic, and always part of my holiday cookie baking. I will confess to having an enormous assortment of cookie cutters, so there is almost no end to the shapes I might use. This time of year I am making trees, stars, snowmen and more.
These cookies are crisp and sturdy enough to stand up to frosting, without being too hard. They also hold their shape well when baking.
I normally use royal icing to frost them, and an assortment of sprinkles and other candies. Royal icing is made with egg whites or powdered egg whites. The advantage over a butter cream, is that royal icing hardens, making the cookies easy to pack and stack. You don’t need much- just a thin layer. Tinting the frosting different colors is a big part of the fun. Depending on how much time you have, you can get really creative with decorating.
I tried a different frosting last year. Several friends had said they didn’t have, or couldn’t find, powdered egg whites and wondered if there was an alternative. There is. This one has just a few easy to find ingredients, and hardens up as nicely as royal icing, with a bit of a shine. The recipes for both icings follow the recipe for the cookies.
Sugar Cookies
1 c. butter
1 c. sugar
1 egg
1 t. vanilla
3 c. flour
2 t. baking powder
3 T. milk
Extra sugar for sprinkling, if desired
Beat butter and sugar until fluffy. Beat in egg and vanilla. Combine dry ingredients and add to butter mixture. Beat in milk. Heat oven to 375-degrees. Roll dough on lightly floured surface to about 1/3- inch thickness. Cut out with lightly floured cutters and sprinkle with sugar or colored sugar if you like and if you are not going to frost them. Bake on an ungreased baking sheet for 10-12 minutes. Cool on baking sheet 3 minutes before placing on wire rack to cool completely. Frost when cooled. Makes about 4 dozen.
Decorating your cookies:
You can use a buttercream frosting, if you like, however the topping I prefer is royal icing. Because royal icing contains egg whites it gets hard. Cookies have a smooth appearance and can be stacked. When making royal icing, use pasteurized egg whites or powdered egg whites. Raw egg whites pose a risk of salmonella.
You can also use colored sugar and sprinkles and mini chocolate chips for eyes.
Non-Royal Icing
4 c. powdered sugar 3 T. corn syrup 2 t. vanilla extract 1/3 c. lemon juice- about
Combine the first three ingredients then add the lemon juice, a little at a time until the icing gets to the consistency you want. You might need a little more. Stir until smooth and add food colorings, if you like. Spread or pipe out, allowing to dry before adding new layers of icing.
Royal Icing
1 lb. powdered sugar
½ t. cream of tartar
5¼ t. egg white powder
6 T. water
½ t. vanilla, optional
Assorted food coloring
In large mixing bowl combine dry ingredients and mix well. Add water and vanilla and beat until light and fluffy, about 10 minutes. Divide into small bowls and tint each batch as needed. Keep bowl covered with a damp towel while waiting to use so frosting will not dry out.
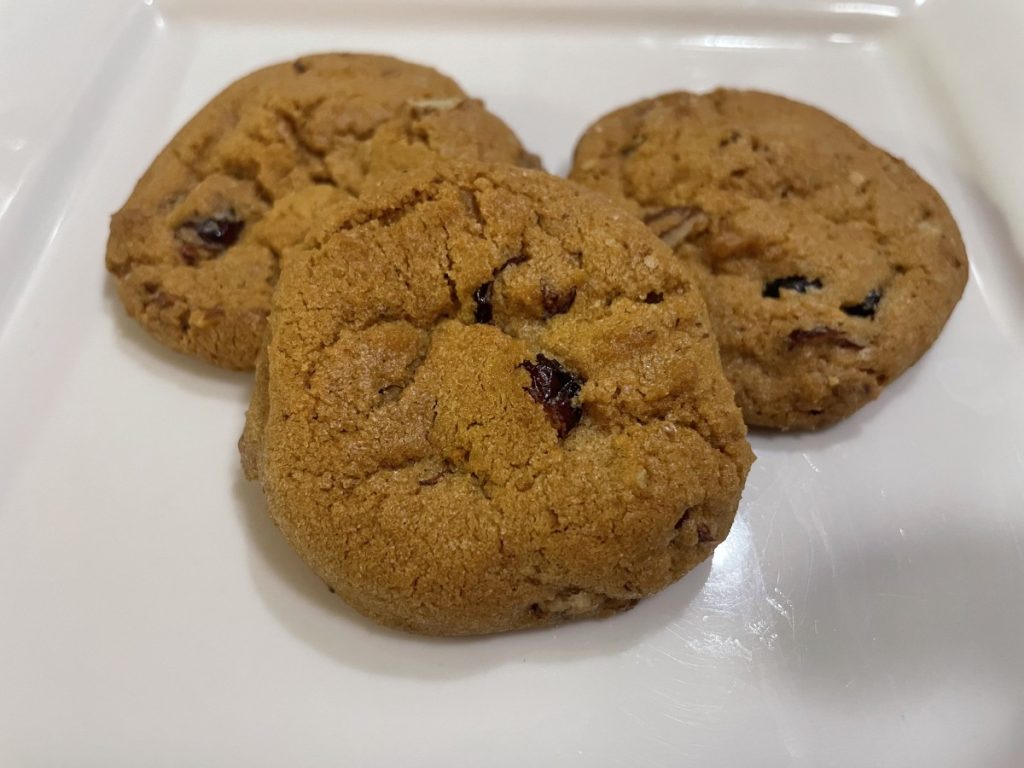
Keith’s Molasses Cookies


I really enjoy cookies made with molasses and spices. They have a unique flavor and texture that I like. A friend recently posted pictures of these molasses cookies. I wanted to try them, so I asked him for the recipe. Keith was kind enough to send me the recipe. Thanks Keith!!!
I made a batch yesterday. I can see why Keith says these are a family favorite. They are crispy on the edges, with just a touch of chewiness in the middle. The spices are a perfect balance. They remind me of the gingersnaps I make at the holidays, but with a more tender texture. I LOVE these cookies. I shared them with some friends yesterday and everyone agreed with just how good they are.
I am not sure where the recipe came from originally. Keith said the recipe came from a jar of molasses a long time ago. He has memories of making these with his grandmother.
One difference I found was that I got a lot more cookies from the recipe than I thought I would. The recipe said 5-6 dozen, based on cookies made from 1-inch balls of dough. I suspect Keith’s balls were bigger than mine. I ended up with more like 8 dozen!
With dark cookie dough, people are often worried about how to tell when their cookies are done baking. These are also a soft cookie out of the oven, so you might be worried they aren’t baked long enough. They firm up as they cool. I did 8 minutes on all but one of the batches, and they were perfect. I did a 10 minute batch, just to compare. They were also fine, if a bit darker on the bottom and crisper. If you are concerned, take one cookie off the baking sheet and flip it over. It should be a little darker than the top of the cookie. Don’t worry if they are soft when you try to take them off the baking sheet. They firm up nicely after cooling down. If it is too hard to move them right away, you can leave them on the baking sheet for a minute, before removing them.
So here is the recipe. Enjoy!!
Keith’s Molasses Cookies
1½ c. butter (3 sticks)
2 c. sugar
½ c. dark molasses
2 eggs
4 t. baking soda
4 c. sifted flour
1 t. ground cloves
1 t. powdered ginger – I used fresh grated ginger instead, adding 2 teaspoons to the dough
2 t. cinnamon
2 t. salt
Extra sugar for rolling
Melt butter. Set aside to cool. Beat sugar, eggs and molasses together until well mixed. Add cooled butter. Mix well. Sift dry ingredients together and stir into butter mixture. Dough will be on the soft side. Refrigerate dough for at least a few hours, or overnight. Preheat oven to 375. Grease baking sheets and set aside, or use silicone liners. Roll dough into approximately 1″ balls. Roll balls in granulated sugar. Place 2 inches apart on prepared baking sheets. Bake at 375 for 8-10 minutes. Re-grease sheets after each use.
Cool on flat surface covered with wax paper. I actually used a cooling rack. Cookies are very soft, but firm up a lot as they cool. Transfer carefully or allow to cool a few minutes on the baking sheet before removing. Makes approximately 5 to 6 dozen cookies.
Note: I got more like 8 or 9 dozen, but I think my balls were smaller.
If you like a softer cookie, remove at the 8 minute mark. 10 minutes will give you a crisper cookie.