Cookie “Candies”


There are so many cookies I bake this time of year, I could never pick a favorite. There are some cookies that are a MUST bake, however.
These cookie-candies are one of them. They get their name because, once decorated, they look like little pieces of candy.
Under the sprinkles are rich and tasty oatmeal shortbread cookies. Shortbread cookies are always a favorite of mine. I think I make half a dozen varieties of shortbread.
The dough is easy to handle. You just shape small amounts into shapes like circles, squares and ovals. They hold their shape. Like most shortbread, they bake at a lower temperature than other cookies. They also bake a bit longer. They should be a little golden on the bottom when done.
After they are baked and cooled, the cookies are dipped in melted chocolate and then in assorted toppings. You can dip them in sprinkles, finely chopped nuts and coconut. Pretty and tasty.
Cookie-Candies
1 c. butter
¾ c. powdered sugar
1 T. vanilla
2 c. flour
½ c. rolled oats
½ c. chocolate chips
¼ c. milk
finely chopped nuts
assorted sprinkles
shredded coconut
Cream together butter, sugar and vanilla. Stir in flour and oats. Shape teaspoonfuls of the dough into different shapes like rounds, ovals, cones cubes etc. Try to make them look like little candies. They will hold their shape very well while baking. Bake in a 325- degree oven for 20-25 minutes on an ungreased baking sheet. Cool. In microwave safe dish combine chocolate and milk and melt. Dip tops of cookies in chocolate mixture and then in one of the toppings you have. Chocolate topping will harden up after a while. Makes about 4 dozen.
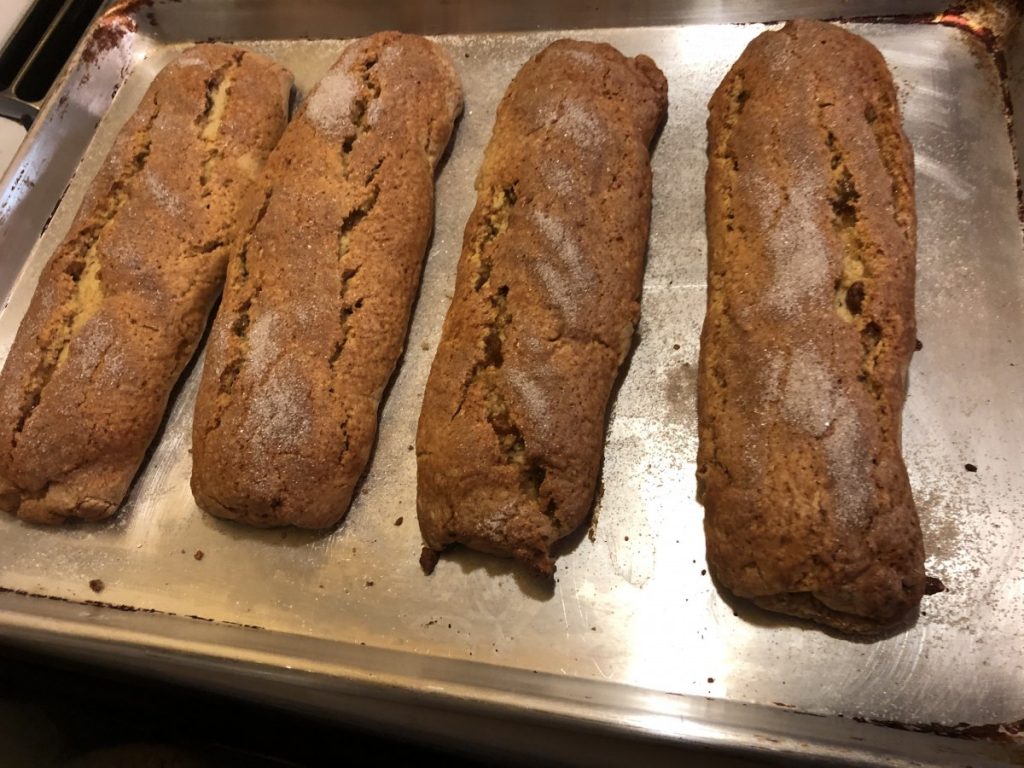
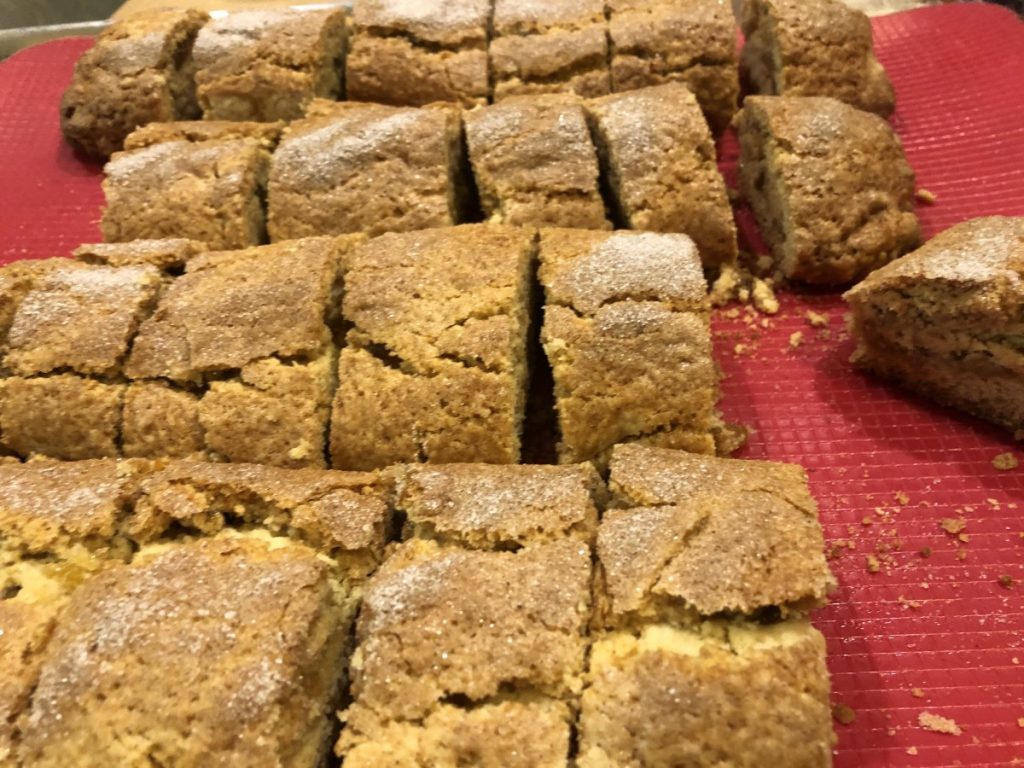
Russian Tea Biscuits

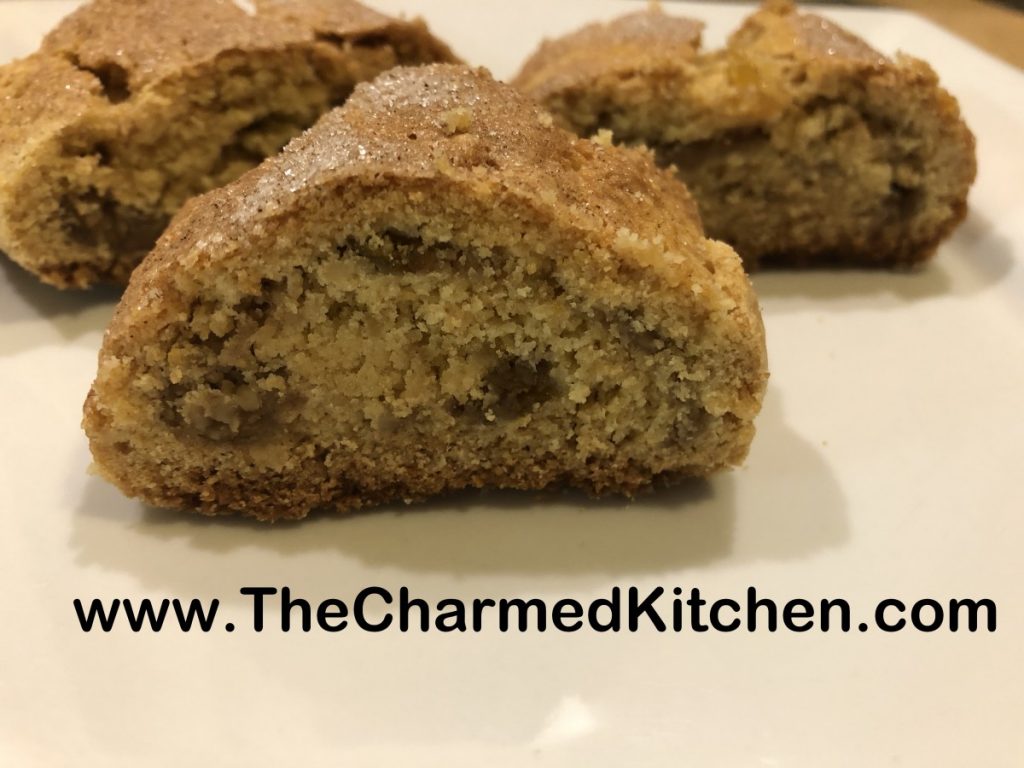
Russian tea biscuits are like a kind of cookie. A magical cookie, filled with jam and raisins and nuts. The are crispy, tender and rich. They also are not all that sweet, which appeals to me. You can serve them as a dessert, but also serve them with breakfast or brunch. And of course, with your tea or coffee.
I can remember the first time I ever had a Russian tea biscuit. It was at the Cedar-Lee theater. I guess you could say I got my love for foreign films and Russian pastry at the same place. I found a recipe in my mother’s recipe collection. I tried them and they were pretty close to the ones at the Cedar-Lee. I did tweak that recipe a bit.
My only regret was not having raspberry jam. That is my favorite. The swirl of red in the biscuits is very pretty. I used what I had- peach- and am happy with them. Not as colorful, but very tasty, all the same.
Here is the recipe. I think you might want to try these with that next cup of tea.
Russian Tea Biscuits
3½ c. flour
½ c. sugar
1 t. baking powder
1 t. baking soda
¼ t. salt
1 c. butter, softened
2 eggs, separated
½ c. orange juice
1 1/3 c. preserves, (strawberry, raspberry, plum or apricot are favorites)
1 c. chopped walnuts
1 c. raisins, dark or golden
1 t. cinnamon
3 T. sugar
Combine dry ingredients in a mixing bowl and cut in butter until mixture is the size of peas. Stir in egg yolks and orange juice. Knead until dough is well blended. Divide dough into 4 equal pieces. Roll out a piece of dough 1/4 -inch thick into an 8×10-inch rectangle. Spread with 1/3 c. of the preserves and sprinkle with 1/4 c. each of the raisins and nuts. Roll up jelly roll fashion and set, seam side down, on ungreased baking sheet. Repeat with remaining dough. Beat egg whites until foamy and brush on dough. Combine cinnamon and sugar and sprinkle on dough. Bake in a 350-degee oven for 25-35 minutes, or until golden. Use a toothpick to test for doneness. They can be golden, but a little under baked in the middle. Slice while warm into 6 pieces for each roll. Makes 24.
Chocolate Chip Shortbread Cookies


It is the time of year when a lot of people are baking cookies. I thought I would share one of my favorite cookie recipes with you. It takes the chocolate chip cookie to another level. Kind of dressed up for the holidays.
These little cookies are delicate and full of flavor. I will admit to being a big fan of shortbread cookies. I make a lot of different shortbread cookies for Christmas. This one is always on my list.
These are enhanced with mini chocolate chips and just melt in your mouth. I leave them as is, but you could add a drizzle of melted chocolate if you like. The cornstarch in the dough makes them extra tender.
Other options could include using mint chocolate chips or adding mint extract, almond extract, or even orange zest. These cookies are very versatile.
Chocolate Chip Shortbread Cookies
1 c. butter (no substitutions), softened
½ c. brown sugar
1 t. vanilla extract
2 c. flour
¼ c. cornstarch
½ c. mini chocolate chips
2-3 T. granulated sugar
With electric mixer beat butter, brown sugar and vanilla until well mixed. Stir in flour and cornstarch and then stir in chips. Form into 1-inch balls and place on an ungreased baking sheet. Pour granulated sugar on a small plate and dip bottom of drinking glass into the sugar and use this to gently flatten down the cookies. Press small indent in each cookie with a teaspoon. Bake in a preheated 300-degree oven for 15-20 minutes or until the cookies start to brown on the bottom. Cool on sheets 5 minutes before removing to a cooling rack. Makes about 3 ½ dozen.
Candied Orange Peel


During the winter months, when citrus is in season, I find myself eating a lot of oranges. I also find myself with a lot of orange peels. I dry some and powder them up for use in baking and cooking. Another fun use for orange peels is to turn them into a candy.
Candied orange peels are pretty easy to make and a nifty way of turning something that might otherwise be discarded into something tasty. You can also candy other citrus peel this way like grapefruit and lemons. The same process can be used to make candied ginger.
Once finished, the candied peels can also be dipped in dark chocolate for a special treat.
They make a nice gift, too.
Candied Orange Peel
2 large oranges ( you can also use 1 grapefruit or 3 lemons)
or 1 lb. of ginger root*
¾ c. water
¾ c. sugar, plus extra for rolling
3 T. light corn syrup, optional
Remove peel from fruit using a sharp knife. Try to get the peel off in 4 pieces. Cut the peel into ¼-inch wide strips. Place peel in a pot with cold water and bring to a boil. Boil 1 minute, drain and rinse under cold water. Repeat process 2 more times. Return to pan with fresh water and boil 15 minutes. Drain and pat dry. Bring ¾ c. water and ¾ c. sugar to boil in sauce pan with the corn syrup. Boil 2-3 minutes and then add the peel. Simmer, stirring occasionally until all but a spoonful of the syrup is left. This should take about 10 minutes. On a wax-paper lined baking sheet sprinkle 1 cup of sugar and arrange the peels on top of the sugar. Toss the peels around until cooled adding more sugar if needed. Place peels on a drying rack for 24 hours before storing. Once dried you can also dip one end of the peels in dark chocolate. Makes ½ pound.
* If making the candied ginger root, peel and cut into 1/4- inch slices. Then cut the slices into 1/4-inch thick strips
Homemade Hot Cocoa Mix

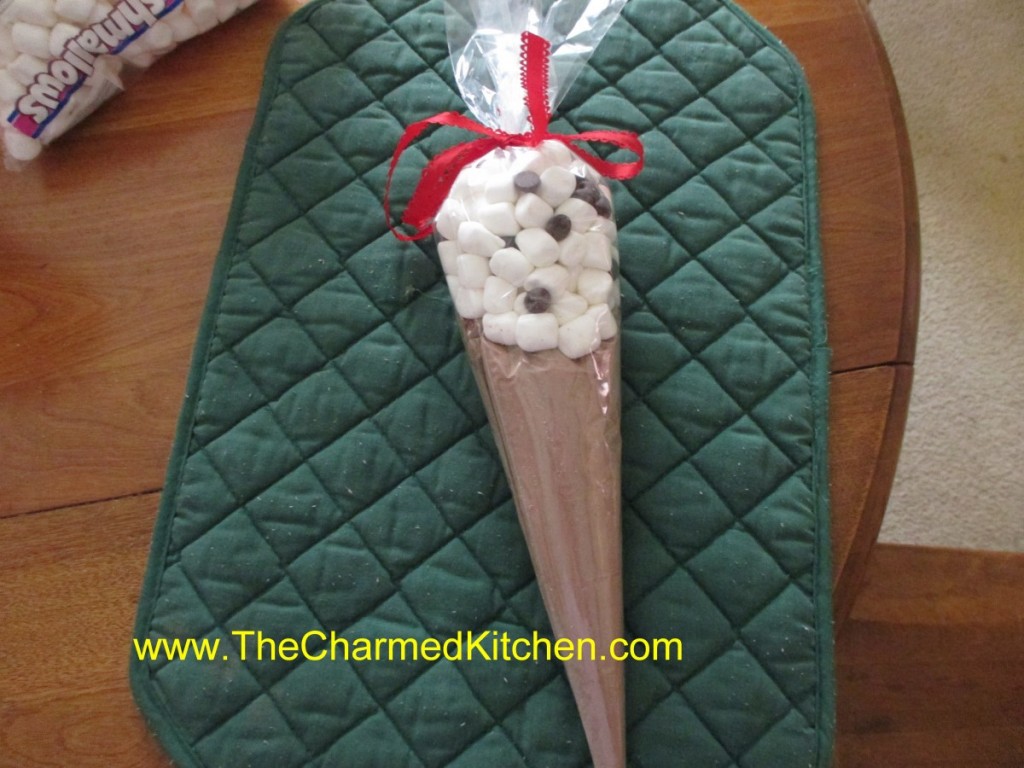
I am always looking for homemade gift ideas for the holidays. I really like gifts that both adults and kids can make. This one is just a simple way to package homemade hot cocoa mix to make it special.
You start with hot cocoa mix- recipe follows. Then you get these cone-shaped bags. I use a 12-inch size and a 17-inch size. I buy my online, but they are available in some craft and candy making stores. Put about 1 cup of the hot cocoa mix in the smaller cone-shaped bag. Fold the top down and tape it shut. Now place the smaller bag inside the larger bag. Top with about a cup of mini marshmallows mixed with some chocolate chips. The chips are optional. Tie shut with a ribbon. It ends up looking (sort of) like an ice cream cone. I add a label that says “Hot Cocoa for Two” with directions that say, “Divide hot cocoa mix between two large mugs. Fill with a cup of boiling water in each. Stir and top with the marshmallows”. You can make whatever label you like. A quick and simple gift. You could also include mugs with the gift. This is a great idea for kids to make for grandparents, teachers, etc.
Here is the recipe for the hot cocoa mix.
Hot Cocoa Mix
3 c. nonfat dry milk
1 c. cocoa
1 c. sugar
1/4 t. salt
1 c. mini marshmallows (optional)
In large bowl, mix all ingredients well. I like to sift the ingredients in because it powders the milk even finer than the way it comes. Store in an airtight jar and use within 6 months. To use add 5 tablespoonfuls to 8 ounces boiling water. Variation, flavor with cinnamon, instant coffee, cayenne pepper or even dried orange peel.
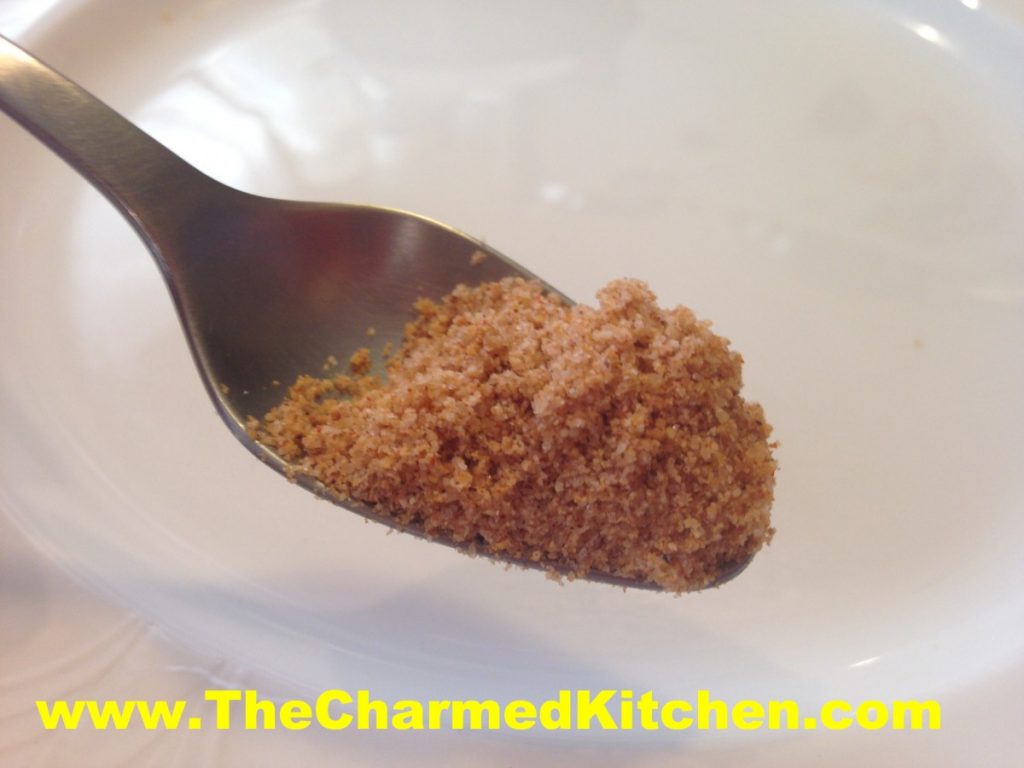
Sesame Salt

During the holidays, homemade gifts are always nice. Not every gift has to be a dessert or something sweet. This sesame salt is a lovely gift for almost anyone.
Once you taste sesame salt, I think you will love it as much as I do. I use it on all sorts of veggies, meats, pasta, potatoes and more. I love it on popcorn!!!
It is a nice alternative to regular table salt. Sesame salt adds great flavor to all sorts of foods. It is also is lower in sodium than plain salt.
You start by toasting sesame seeds. I just place the sesame seeds in a skillet and toast, on top of the stove, over medium heat, until golden brown. You can also toast them in the oven, but they burn easily. You do want to watch them carefully. As soon as they start to change color, turn down the heat or remove them from the heat. Sometimes you can also buy sesame seeds already toasted. I get them at a local Asian grocery store.
Once the seeds are toasted, you add salt and a few other ingredients (onion, garlic, paprika, pepper). Use whatever salt you like. I use sea salt. Feel free to play around with flavors you add your sesame salt. I add a little smoked paprika, which gives the sesame salt a nice, smoky flavor.
I powder the mixture in a spice mill/coffee grinder. You can also use a blender to grind it up.
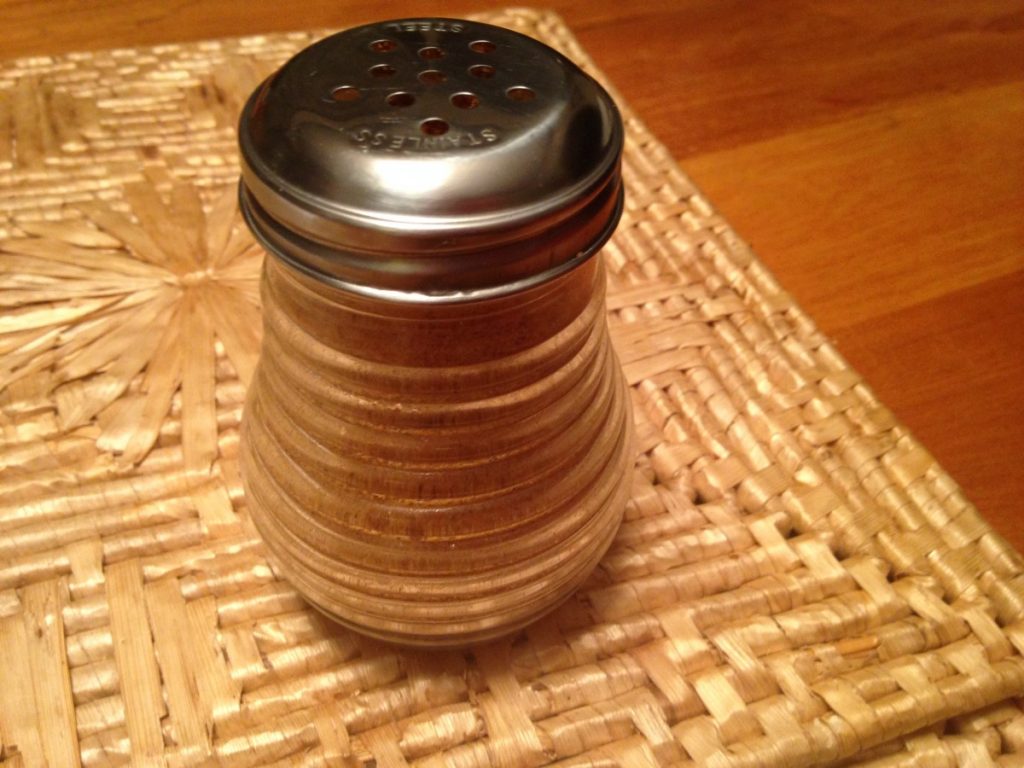
Sesame salt can be kept on the table in a shaker, just like salt. I use a shaker with slightly larger holes- I have one of those cheese shaker jars that works well. I often include a shaker when I give someone sesame salt.
Sesame Salt
1 c. sesame seeds
1/4 c. salt – I like sea salt- use the salt you like
1 t. each paprika and smoked paprika
1 t. onion powder
1/4 t. pepper
1/4 t. garlic powder
In a skillet, over medium heat, toast sesame seeds, stirring or tossing to cook evenly until seeds are light brown. Stir in salt and cook 5 minutes more. Cool mixture completely and add remaining ingredients. Process in blender or spice grinder until mixture in powdered. Makes 3/4 c. Excellent with vegetables, stir-fries, salad dressings etc.
Homemade Bath Salts

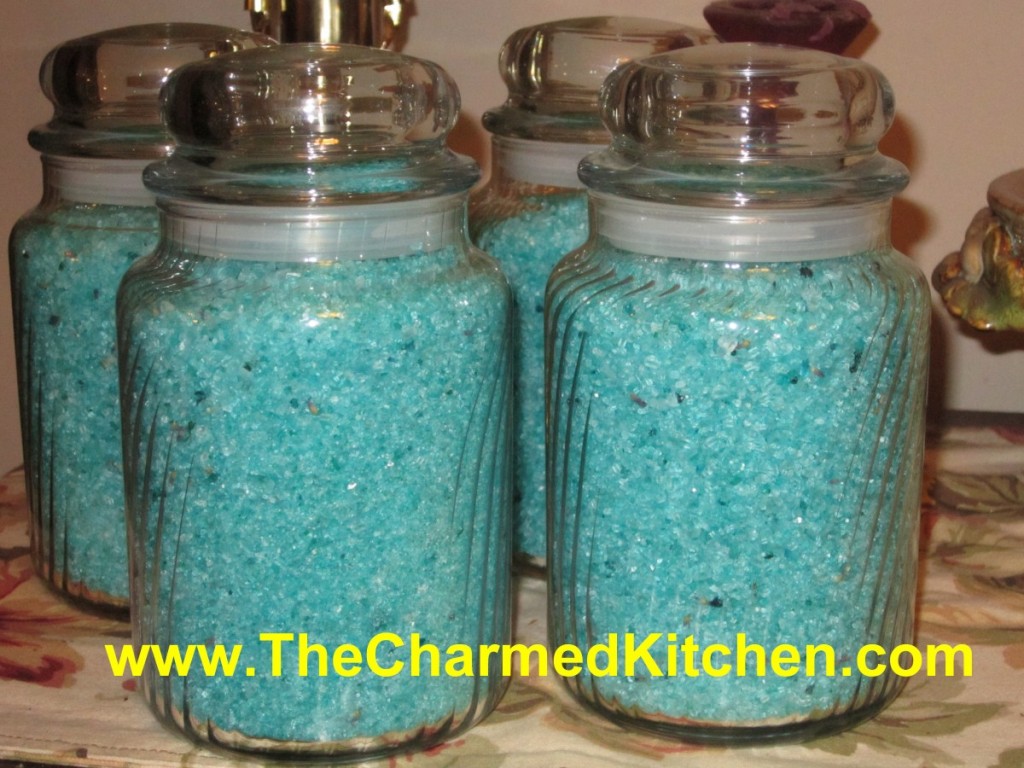
If you are looking for a simple and easy gift to make for someone, you might want to make bath salts. It is one of my favorite gifts to make. Everyone seems to like them. This is a fun craft for kids to make for Mom, teachers etc. I like using essential oils, but you can use perfume, too. You can also leave them unscented, if someone is sensitive to perfumes and fragrances.
The ingredients are fairly easy to find. Epsom salts can be found at any drug store. Essential oils can be found at most craft stores. Food coloring- grocery stores. Try to find pretty jars to put them and finish with a pretty label.
Sometimes I add small amounts of dried flower petals. If you do that- just small amounts and crumbled pretty fine, so there won’t be issues with clogging drains. Here are the directions.
Homemade Bath Salts
Epsom Salts
Fragrant oils or extracts
Food coloring, optional
Place 2 cups Epsom salts in a non-reactive bowl and add a few drops of scented oils and a few drops of food coloring, if desired. Toss to distribute, or place in a jar with a tight fitting lid or even in a plastic bag and shake mixture well. Take a whiff. If you can’t smell them, add more. You can add more coloring, too if needed. Place salts in a glass jar with a lid or in a plastic bag and let stand a day or two. Smell again and adjust fragrance as needed. Fragrances mature and you may find them too weak or strong. Add more oil or cologne to heighten aroma or add more salts to cut down on intensity. Keep in mind that the bath salts will be diluted a lot in a bath, so a little strong is good.
The oils are available at many craft stores and by mail. See the section on mail order in the back of the book. Choosing the fragrance you want to use can be a little trickier. Most of the florals are a safe bet, but you may want to get more creative. Citrus, herb, spice and woody fragrant oils can add a dimension to your bath salts that make them really outstanding. Food extracts and flavors can also be used. Vanilla is nice, but think outside the box a little and try anise or almond.
To present them as a gift salts can be put in a wide-mouth jar, with a lid. Decorate with ribbon and attach a small scoop, if you like. Discount and dollar stores are a good place to find attractive jars at a reasonable price as well as garage sales and resale shops. You can also package them for individual use in lollipop bags with a card board header, like the herb packets. I like to make different fragrances and label them (relaxing bath, earthly delights, sweet dreams, etc. I then package them in the bags and add a few to a gift basket.
Easy Cashew Brittle

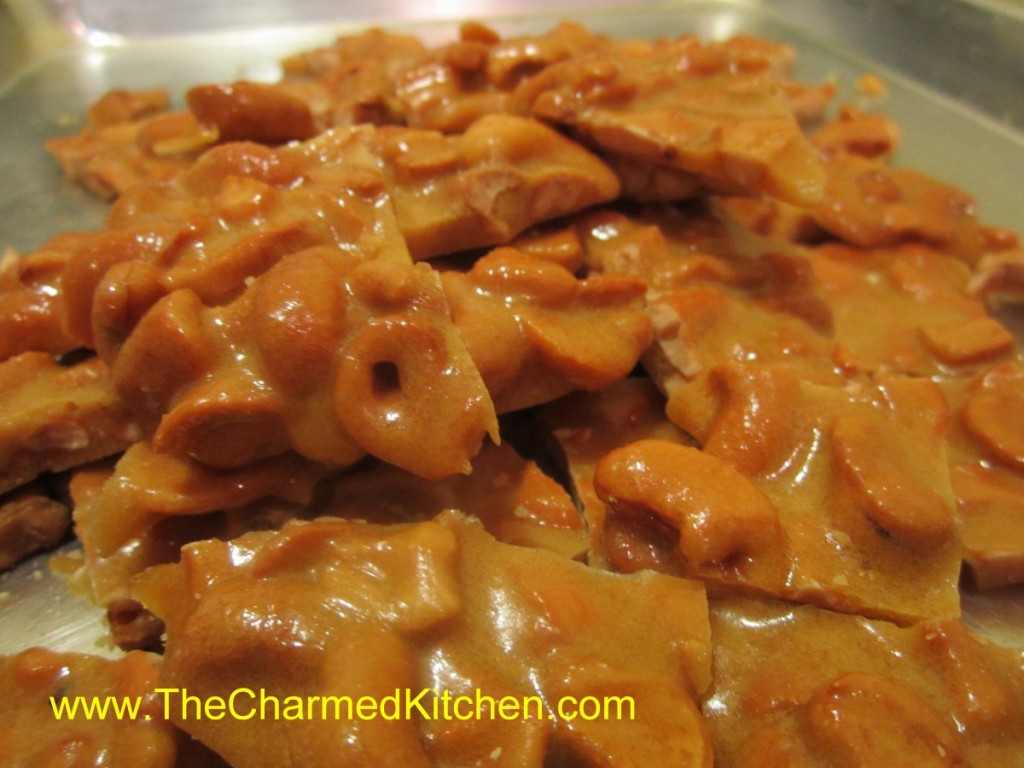
If you need a great food gift, this brittle might just be the answer. It is fast and easy to make.
I was given this recipe at a craft show a few years ago. The brittle is cooked in the microwave. No special thermometers or equipment required. Just a glass bowl and a few minutes of your time. It could not be simpler. It is really good, too.
You can use other nuts, if you prefer, or peanuts. You can add a little cayenne pepper, if you want a spicy version. You can also dress it up with a drizzle of chocolate, once cooled. So many ways to enjoy it.
Stored in a covered container, in a cool, dry place, the brittle will stay crunchy for weeks.
Homemade Cashew Brittle
2 c. cashews*
1 c. sugar
1/2 c. corn syrup
1/8 t. salt
1 t. butter
1 t. vanilla
1 t. baking soda
Butter or oil a large baking sheet and set aside. In a 3-4 quart glass bowl combine the nuts, sugar, corn syrup and salt. Microwave on high for 3 minutes. Remove from microwave, stir well and return to microwave. Cook 3 more minutes in microwave. Remove and stir in butter and vanilla, stirring until butter has melted. Return to microwave and cook for 2 more minutes. Remove from microwave and stir in baking soda. Stir until well blended and pour mixture onto prepared baking sheet. Spread out quickly, then allow to cool. Once cool, break into pieces. Store in a cool, dry place. I normally store it in a tin or plastic container with a tight-fitting lid.
* I used salted cashews but feel free to experiment with other nuts
Note: Use high power setting on microwave.
Christmas Tree Coffee Cake

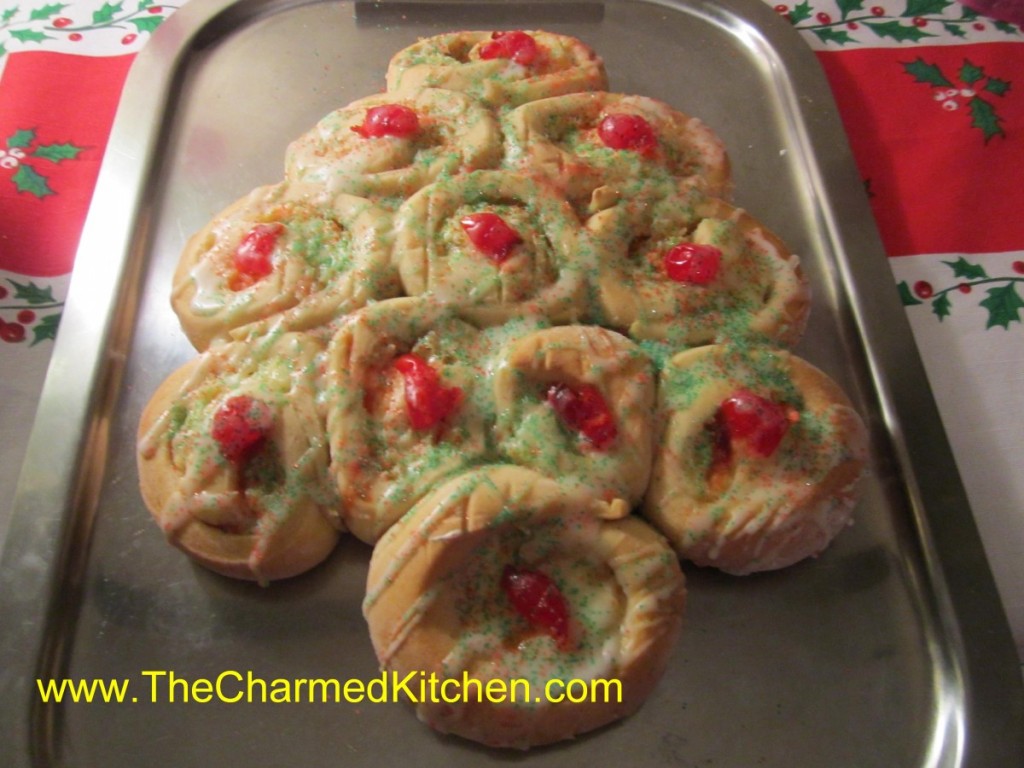
This Christmas “tree” has become a tradition around here. I make one as a gift for a dear friend every year. If you are looking for something to serve for Christmas morning, or even as a dessert option, I suggest you make this coffee cake.
The recipe actually makes 2 “trees,” so you can have one to give- and one to keep. Or perhaps, one for Christmas Eve and one for Christmas Day.
The yeast dough is prepared, then chilled before rolling. You can do that a day, or even two days, ahead of time. The rolls are filled with a pineapple and cream cheese mixture and are very tasty.
The rolls are arranged in a tree pattern before baking. Then, after baking, the “tree” is topped with a light glaze and gently sprinkled with red and green sugars. The original recipe called for candied cherries. You can use them, or Maraschino cherries or even dried cherries or cranberries. I can my own spiced cherries and sometimes use them. So pretty, and not that hard to make.
Here is the recipe.
Christmas Tree Coffee Cake
Dough:
4-4 1/2 c. bread flour
1/2 c. sugar
1 1/2 t. salt
2 packages active dry yeast
3/4 c. milk
1/2 c. water
1/2 c. butter
1 egg
Filling:
1 lb. Cream cheese, softened
1/2 c. sugar
1/4 t. nutmeg
dash salt
1/4 t. vanilla
1 (20 oz.) can pineapple in its own juice drained and squeezed dry
Topping:
11 Maraschino cherries, halved
2 c. powdered sugar
3 T. milk
red and green sugars
For dough in large mixing bowl combine 2 cups of the flour with the sugar, salt and yeast. Heat together the milk, water and butter until very warm. Add to flour mixture and beat 2 minutes. Add egg and 1 more cup of flour and beat 2 more minutes. Stir in enough of the remaining dough to make a stiff batter, about 1 cup. Cover bowl tightly with foil or plastic wrap and refrigerate for at least 2 hours or up to 3 days before using. For filling combine all ingredients for the filling except the pineapple and beat until smooth. Stir in pineapple and set aside until ready to use. Remove dough from fridge cut in half. Roll out one piece on lightly floured surface into a 10×11- inch rectangle. Spread with half the filling, leaving an inch at the end of 11-inch side. Roll up from eleven- inch side. Use thread or dental floss to cut through dough in 1-inch pieces by placing thread under roll and crossing ends. Pull outward and thread should cut through dough. If you aren’t having any luck you can always use a knife, but they tend to flatten the rolls. On a greased baking sheet arrange the slices (you should have 11) into a tree shape. Start with one on the top and then a row of 2 below then 3 and then 4. The last roll will serve as the trunk. Cover dough with plastic wrap and set in a warm place to rise. Repeat with the remaining dough and filling. When dough is risen, about 1-2 hours bake in a 375- degree oven for 15 minutes then cover edges with foil to prevent over browning and return to oven for 10 minutes more. Cool on wire rack. Place half a cherry in the middle of each roll. Make a glaze with powdered sugar and milk and drizzle over. Sprinkle with the sugars. Makes 2 trees, 11 rolls each. Can be frozen up to a month ahead . Defrost in a 350 -degree oven for 10 minutes and apply toppings.
Cookies for Sale

I will be selling boxes of cookies again this year. The boxes weigh more than 2 pounds and contain at least 10 kinds of cookies. Contact me if you are interested. They are $25 each ( $70 for 3 boxes) and will be available for pick-up starting December 21th.
Judi_strauss@att.net
216 501 2905


