Peanut Butter and Jelly Hand Pies

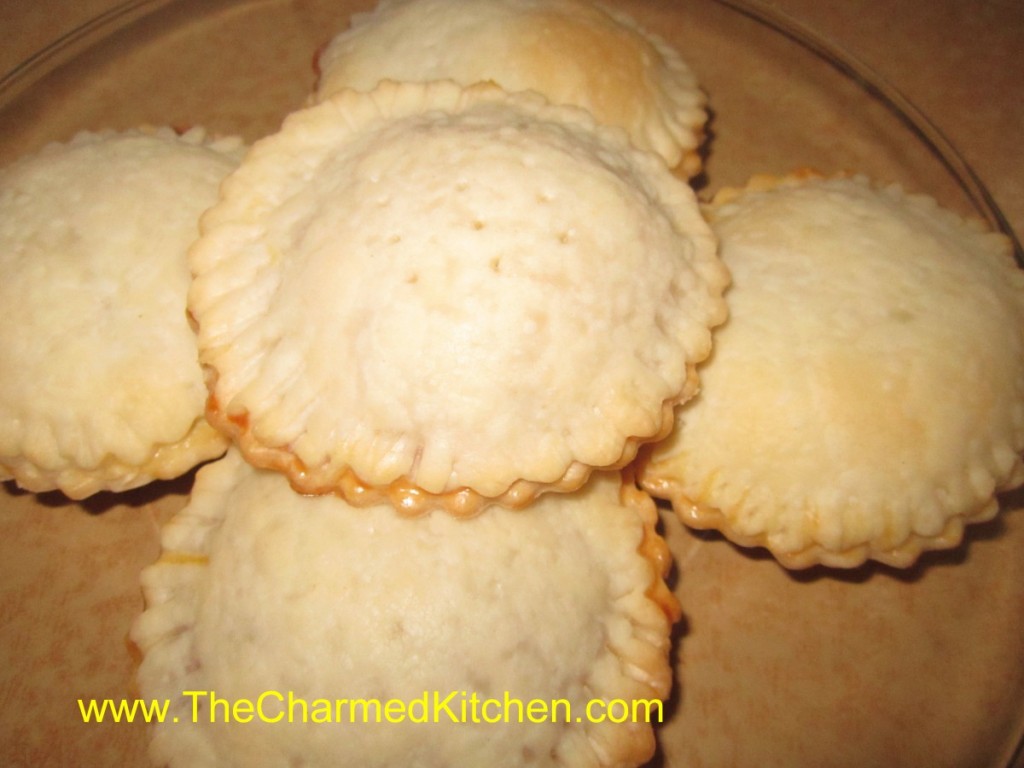
These little pies are a fun way to take peanut butter and jelly on the road. They are just cut out circles of pie crust, filled with peanut butter and jelly, sealed, then baked. Very easy to make, and a fun cooking project for kids as well as adults.
I prefer home made pie crust, but use store bought, if you like.
A nice treat, these little pies can be a snack, breakfast, lunch or even a dessert.
They are also great to take along for road trips. You can fill them with just jelly, if you like. I have filled them with peanut butter and a few chocolate chips for a fun dessert. You can use almond or cashew butter, if you prefer.
Get creative and have fun.
Peanut Butter & Jelly Mini Pies
1 (15 oz.) package pie crusts or homemade crust for 2 pies*
1 egg
1 T. water
½ c. peanut butter
½ c. preserves, any flavor
Powdered sugar, optional
Preheat oven to 400-degrees. On lightly floured surface roll out one of the crusts into a 12-inch circle. Using a 2½-inch round cookie cutter cut out about 12-14 circles, re-rolling scraps and set aside. Roll out second piece of dough so you will have about 24-28 circles altogether. Beat together water and egg and set aside. Place a circle on work surface and place 1 teaspoon each of peanut butter and preserves in the center. Brush edges of the circle with egg wash. Place second circle on top and press edges together to seal. Prick crust with a fork a few times. Repeat with remaining circles. Place “pies” on lightly greased baking sheets and bake for 12-15 minutes or until golden brown. Cool on wire rack and dust with powdered sugar, if desired.
Martha Stewart’s Pie Crust Recipe
2½ c. flour
1 t. salt
1 t. sugar
2 sticks (1 cup) butter, very cold
About 6 T. ice water
Combine dry ingredients and cut in butter to resemble coarse crumbs. Using a fork to mix the dough start to add the ice water a tablespoon or 2 at a time until mixture just holds together. Wrap and chill until ready to use. Makes 2.
Amaretto Pear Blintzes with Candied Almonds


Sometimes you can start with the simplest ingredients and end up with something special. This recipe is a perfect example. I had fresh pears and flour tortillas. I wanted to make a brunch dish for a friend so I added a few more ingredients and ended up with these pear blintzes. I make fruit blintzes with tortillas pretty often. I wanted these to be different. I added Amaretto to the pears and made candied almonds as a topper.
They look like a lot more work than they are. They were simple to make.
My friend said they reminded her of apple pie. In fact, she didn’t believe me at first, when I said they were pears. If you like the taste of homemade fruit pie, but don’t have the time to bake, these are a nice option. Because they are barely cooked, the pears retain some shape. In a pie, pears tend to fall apart.
Since we had them for brunch, I left them plain, but these would make a great dessert topped with whipped cream or ice cream. Even a dusting of powdered sugar or a drizzle of caramel. Simple and quite flavorful.
Amaretto Pear Blintzes with Candied Almonds
Blintzes:
4 (8-inch) flour tortillas, I used whole wheat
2 oz. milk
2 T. butter
Filling:
4 pears, peeled, cored and sliced
½ c. brown sugar
2 T. butter
2 T. Amaretto
1 t. cinnamon
1 t. vanilla
Pinch of salt
Candied Almonds
¾ c. sliced almonds
½ c. sugar
¼ c. water
½ t. cinnamon
Place tortillas in shallow dish and drizzle the milk over them. Try to get some milk on each of the tortillas to soften them. While the tortillas are softening, prepare the filling. In medium skillet, combine pears with the rest of the filling ingredients and bring to a simmer. Cook on low heat for 3-4 minutes. Set aside. Combine almonds with the sugar, water and cinnamon in medium skillet. Bring mixture to a boil, stirring often. Cook until liquid is evaporated, about 5 minutes. Pour almonds onto a baking sheet lined with a silicone baking sheet or foil. Spread out and allow nuts to cool.
Place butter in skillet and start to heat up the pan. While pan is heating, divide pear filling among the 4 tortillas. Place filling along center of tortilla and fold up edges over, to cover the filling. Heat the tortillas, seam side down, in the pan until golden, turning to toast evenly on both sides. Remove from pan and place on serving plate. Top with some of the candied almonds. Serves 4.
Pear and Oatmeal Muffins


It is pear season. While apples seem to get more attention, pears are a wonderful, versatile fruit.
Pears will ripen off the tree and are often picked unripe and allowed to ripen after harvest. Unlike a lot of other fruits, pears do not suffer from being picked before they are ripe. As they ripen, pears become very sweet.
I like to pick out both ripe and unripe pears at the local market. That way, I’ll have ripe pears over a longer period of time.
I had some ripe pears and wanted to do something with them. Since I had a friend coming for over breakfast, I thought muffins. It’s always nice to have an easy breakfast option on hand.
I started with a basic muffin recipe, and added some diced pears, cinnamon, orange zest, nutmeg and a cinnamon sugar topping, to make them special. And yes, you could substitute apples for the pears!!!
I was really happy with how they turned out. Not overly sweet, moist and tender. Here is the recipe.
Pear and Oatmeal Muffins
1 ½ c. flour
1 c. rolled oats
1 T. grated orange peel
2 t. baking powder
1 t. cinnamon
½ t. each nutmeg and salt
½ t. baking soda
1 egg, beaten
1/3 c. honey
1/3 c. oil
¼ c. orange juice
1½ cups of peeled, diced pears – 2 or 3 pears should do it
2 T. melted butter, optional
cinnamon sugar, optional
Combine flour with the dry ingredients. Set aside. Combine egg with the honey, oil and juice. Add egg mixture to flour mixture and stir until flour is just moistened. Fold in pears. Batter will be thick. Divide batter among 12 greased muffin cups. Bake in a preheated 375- degree oven for 20-25 minutes. While the muffins are warm, dip tops in melted butter and then dip in the cinnamon sugar, if you like. They are tasty, with or without the cinnamon sugar topping, but I like to add this last step. Makes 12.
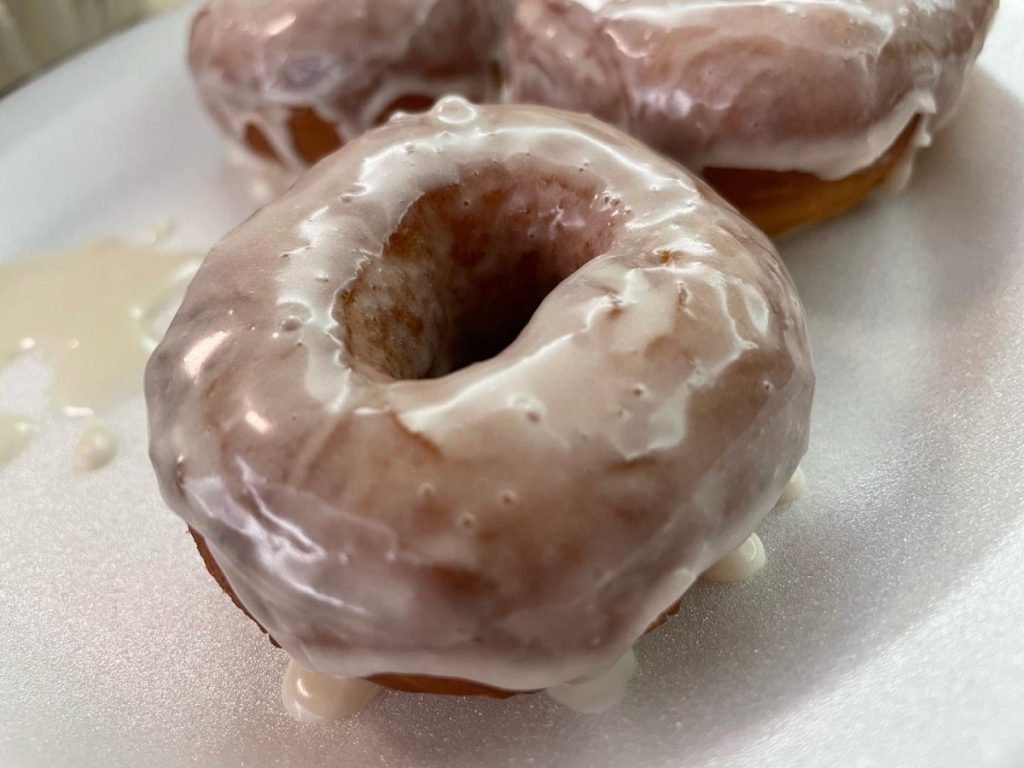
Homemade Doughnuts

I remember how fun it was to watch my parents making doughnuts. The making of the dough, then cutting the dough into circles. The dough circles would then rise on the counter, under linen towels until puffed up. Gently they would be fried, then set on paper towels to drain. Once cooled, the filling would be piped into them through a pastry bag filled with some wonderful jelly or jam.
I also remember learning to fill them. Squeezing the jelly from the pastry bag into the doughnut was tricky. You wanted to make sure there was enough filling, but not so much that they split open. After a couple of tries, I realized you could figure it out by the weight of the filled doughnut in your hand.
My parents were both excellent bakers. My father had even been a professional baker at one time. I thought it was normal to have parents who made doughnuts. It was the norm in my family.
My folks only made them for special occasions. Unless my Mom got a taste for homemade jelly doughnuts. Then, my dad would make them for her. She loved jelly doughnuts. More than pretty much anyone else I knew.
You can fill them with any number of jellies, jams and cream fillings. You can also use a doughnut cutter to create a round doughnut and a doughnut hole. These can be glazed or rolled in powdered sugar, instead of being filled.
Light and Fluffy Classic Doughnuts
1 ¼ c. milk
2 ¼ teaspoons (one package) active dry yeast
2 eggs
½ c. butter, melted and cooled (1 stick)
¼ cup granulated sugar
1 teaspoon salt
4 ¼ cups all-purpose flour, plus more for rolling out the dough
2 quarts oil, for frying, plus more for the bowl.
Heat the milk until it is warm but not hot, about 90 degrees. In a large bowl, combine it with the yeast. Stir lightly, and let sit until the mixture is foamy, about 5 minutes. Using an electric mixer or a stand mixer fitted with a dough hook, beat the eggs, butter, sugar and salt into the yeast mixture. Add half of the flour (2 cups plus 2 tablespoons), and mix until combined, then mix in the rest of the flour until the dough pulls away from the sides of the bowl. Add more flour, about 2 tablespoons at a time, if the dough is too wet. If you’re using an electric mixer, the dough will probably become too thick to beat; when it does, transfer it to a floured surface, and gently knead it until smooth. Grease a large bowl with a little oil. Transfer the dough to the bowl, and cover. Let rise at room temperature until it doubles in size, about 1 hour. Turn the dough out onto a well-floured surface, and roll it to 1/2-inch thickness. Cut out the doughnuts with a doughnut cutter, concentric cookie cutters or a drinking glass and a shot glass (the larger one should be about 3 inches in diameter), flouring the cutters as you go. Reserve the doughnut holes. If you’re making filled doughnuts, don’t cut out the middle. Knead any scraps together, being careful not to overwork, and let rest for a few minutes before repeating the process. Put the doughnuts on two floured baking sheets so that there is plenty of room between each one. Cover with a kitchen towel, and let rise in a warm place until they are slightly puffed up and delicate, about 45 minutes. If your kitchen isn’t warm, heat the oven to 200 at the beginning of this step, then turn off the heat, put the baking sheets in the oven and leave the door ajar. About 15 minutes before the doughnuts are done rising, put the oil in a heavy-bottomed pot or Dutch oven over medium heat, and heat it to 375. Meanwhile, line cooling racks, baking sheets or plates with paper towels.
Carefully add the doughnuts to the oil, a few at a time. If they’re too delicate to pick up with your fingers (they may be this way only if you rose them in the oven), use a metal spatula to pick them up and slide them into the oil. It’s O.K. if they deflate a bit; they’ll puff back up as they fry. When the bottoms are deep golden, after 45 seconds to a minute, use a slotted spoon to flip; cook until they’re deep golden all over. Doughnut holes cook faster. Transfer the doughnuts to the prepared plates or racks, and repeat with the rest of the dough, adjusting the heat as needed to keep the oil at 375. Glaze or fill as follows, and serve as soon as possible.
To fill doughnuts use a pastry bag fitted with a long tube tip for filling. I have these handy plastic syringes which are easy to use. Insert tube tip into doughnut and squeeze gently until doughnut is filled with jam. Be careful not to overfill or doughnut will split. Once filled doughnuts are topped with a powdered sugar glaze or rolled in powdered sugar.
Apricot Filling
12 oz. dried apricots, chopped up
2 c. water
2 c. sugar, or to taste
Combine apricots with water in saucepan and simmer, covered until apricots are really tender. This will take at least an hour- add more water, if needed. Add sugar to taste and cook until thickened. Puree mixture in a blender.
Strawberry Filling
1 lb. strawberries
1½ c. sugar
½ c. water
3 T. cornstarch
Crush berries and place in saucepan with the sugar. Cook until berries are tender, about 10 minutes. Combine water with cornstarch and add to strawberries. Cook until thickened and bubbly. Cool. , Puree. Makes 2 cups.
Classic Glaze
2 c. powdered sugar
¼ c. milk
1 t. vanilla
Whisk together sugar, milk and vanilla until smooth. When the doughnuts are cool enough to handle, dip into the glaze. Put on racks to let the glaze harden.

Pork with Plum Chutney

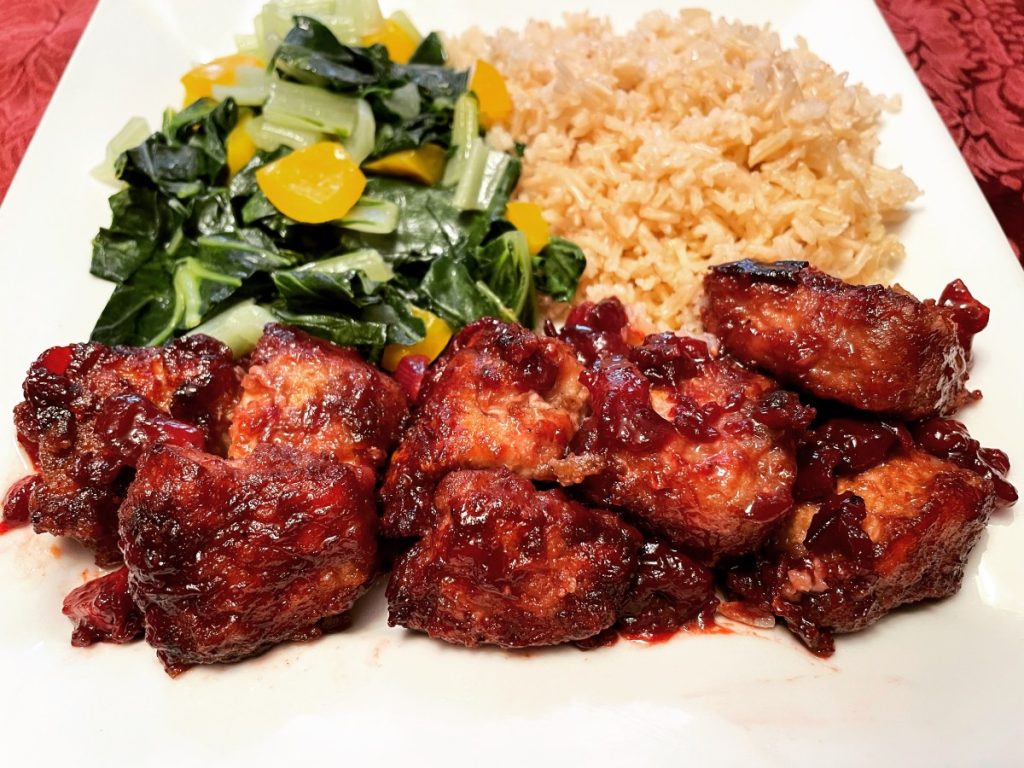
I had very ripe plums and wanted to use them in a savory dish rather than a dessert. I had made a pear chutney before, so that gave me the idea of using the plums in a chutney. I had some pork loin defrosted and I thought they would work well together. I was not disappointed.
I started by pitting and chopping up the plums. They were very ripe. I say in the recipe it was 2 cups, but let’s say a generous 2 cups. You can be off a little bit here. A few more plums aren’t going the hurt anything. I threw everything in a pot and let it cook until the mixture thickened. After it was finished I added a little honey because it seemed too tart. Trust your taste here for how much sweetening it needs.
Here is the recipe for the chutney and for the pork.
Plum Chutney
2 c. pitted chopped plums
1 small onion, minced
4 cloves garlic, sliced thin
¼ c. balsamic vinegar
¼ c. brown sugar
2 T. honey
1 t. cinnamon
Salt, pepper and cayenne to taste
Combine all ingredients, except the seasonings in a medium saucepan and s= cook over medium heat until thickened. This took about 20 minutes, maybe a bit longer. As the mixture gets thicker, stir more often to prevent sticking. I added the honey later as the chutney seemed too tart when it was finished. That is partly based on how sweet the fruit is and your personal taste. Makes about 2 cups. Will keep in fridge for weeks. Great on pork, duck and chicken or served with cheese and crackers as an appetizer.
Pork with Plum Chutney
1 lb. boneless pork, cubed
2 T. cornstarch
2 T. sherry, not cooking sherry
1 T. soy sauce
Oil
Additional cornstarch for dredging
Salt and pepper
About ¾ c. plum chutney
Place cubed pork in a small bowl and combine with the cornstarch, sherry and oil. Chill several hours, if possible. Heat oil in skillet. Dredge the pork in cornstarch and sauté until cooked through. Season with salt and pepper and spoon any excess oil out of the pan. Add the chutney and simmer until heated through. Serves 3-4.

Peanut Soup

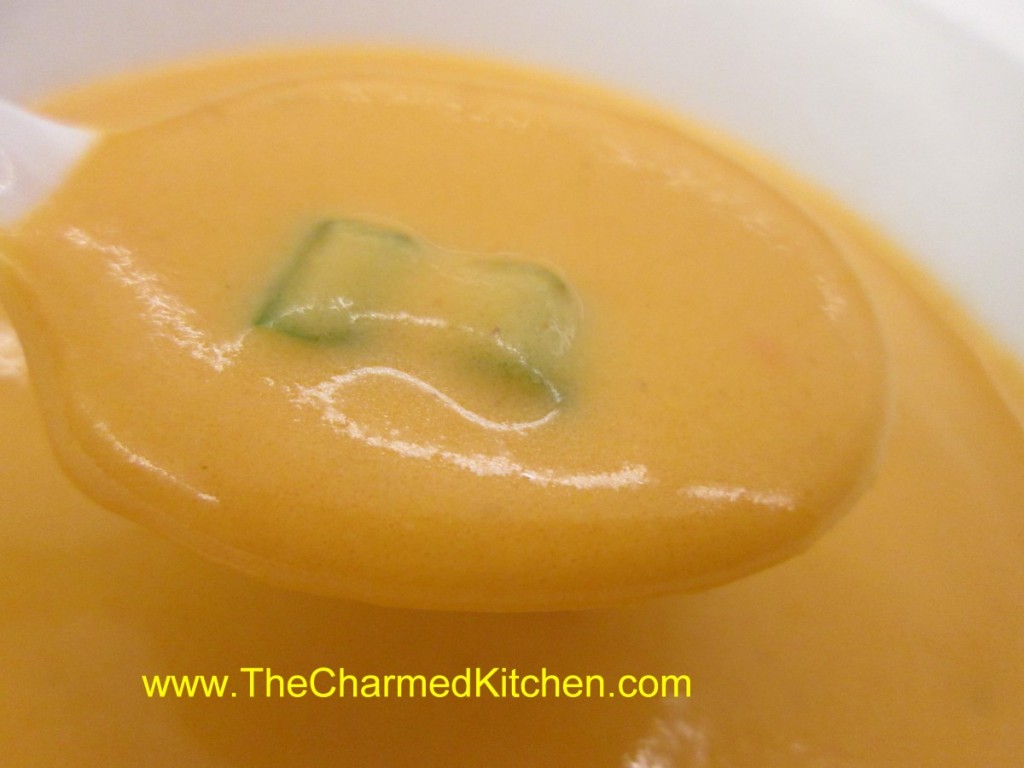
This is one of the easiest soups I make. It is also one of my favorites. It’s a rich soup with a creamy texture and just a hint of heat. You could make it spicier, of course. The recipe is very versatile. As written, the soup is vegan, but you could make it with a meat-based stock, if you prefer.
If your only experience with eating peanut butter is on a sandwich or in cookies, you might be surprised at just how good this soup tastes. I have made it with almond butter. If you don’t have peanut butter, the almond butter works fine. Other nut butters would also work. but I still prefer it made with peanut butter. It freezes well, too.
Peanut Soup
2 c. chopped onions
1 T. oil
cayenne pepper to taste
1 t. grated fresh ginger
1 c. chopped carrots
1 c. chopped sweet potatoes
1 c. chopped white potatoes
5 c. vegetable stock or water
1 c. tomato sauce
1 c. smooth peanut butter
1 T. sugar, optional
1 c. chopped green onions
Sauté onions in oil until tender. Add seasonings and carrots and sauté 3 minutes more. Add potatoes and stock and simmer until vegetables are tender. Puree soup in blender in batches until smooth. Return to pot and add tomato sauce and peanut butter. Add sugar if soup is not sweet enough. I never add the sugar, but some people do. Warm gently and serve with green onions on top. You could also top with chopped peanuts, for a little crunch. Serves 6-8.
Collard Green Omelet

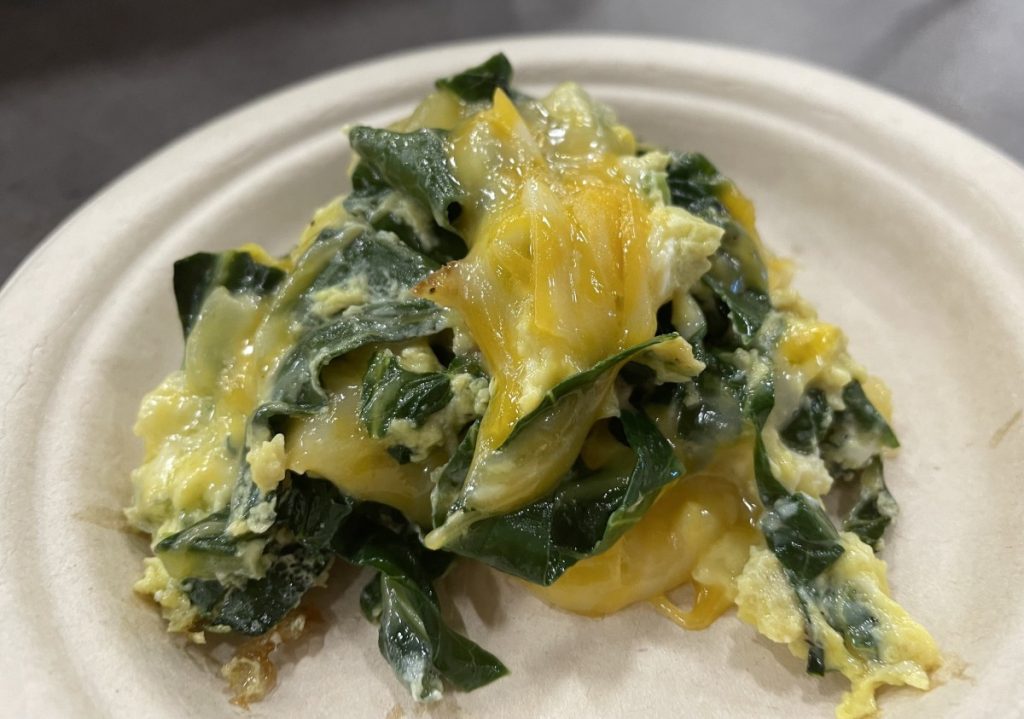
Collard Green Omelet
I love this recipe. The collards add a nice flavor to the eggs and cheese. Makes for a pretty nutritious breakfast. We made this dish in a recent cooking class. Thought I would share the recipe.
I really love collards. Collards are full of nutrition and great flavor. I think they sometimes get overlooked. Why should kale get all the attention? Collards are every bit as good- and easier to clean!!
The way I first had collard greens was traditionally cooked- long and slow. I’ll still eat greens cooked for hours with a ham hock or smoked turkey, but I prefer to cook them less.
This is how I like to prep collards.
Rinse the greens well and remove larger ribs. Slice into thin strips. Heat oil in a skillet and add the collard greens, cooking for several minutes until they have wilted. Season with some salt and add a small amount of water to the skillet. The greens will cook down a lot. As they cook down, taste after 10 minutes or so to see if they are tender enough. Sometimes they take longer, but I like them with a little bite left in them. Season with more salt and some pepper or hot sauce and enjoy, or save to use in other recipes.
Variations: you can sauté an onion or some peppers in the skillet before adding the greens. You can also add some bacon fat in place of the oil for a smoky flavor.
Once cooked, I can add them to lots of dishes, like the omelet. I will often cook up a lot of collards and then freeze them until needed.
Collard Green Omelet
Oil or butter
¼ c. chopped onion
2 c. cooked collard greens
4 eggs
Salt and pepper to taste
1 T. water
1 c. shredded cheese- any type you like
Heat oil or butter in skillet. Add onion and sauté until tender. Add collards and cook until heated through. Remove from pan and set aside. Meanwhile wipe out pan and add fresh oil or butter. Heat pan and while pan is heating up combine eggs with water in a medium bowl and beat until smooth. Add salt and pepper to taste. Pour eggs into hot pan rolling around to coat pan evenly. Using a spatula lift the eggs as they cook allowing uncooked eggs to reach bottom of pan. Once eggs are almost cooked add the vegetables and cheese to one half of the eggs. Using spatula gently fold the uncovered half of the omelet over the side with the cheese and veggies. Turn heat down and allow middle to heat through and eggs to finish cooking. You can also turn the whole omelet over to brown evenly on both sides. Slide omelet onto a serving plate. Serves 2-3.
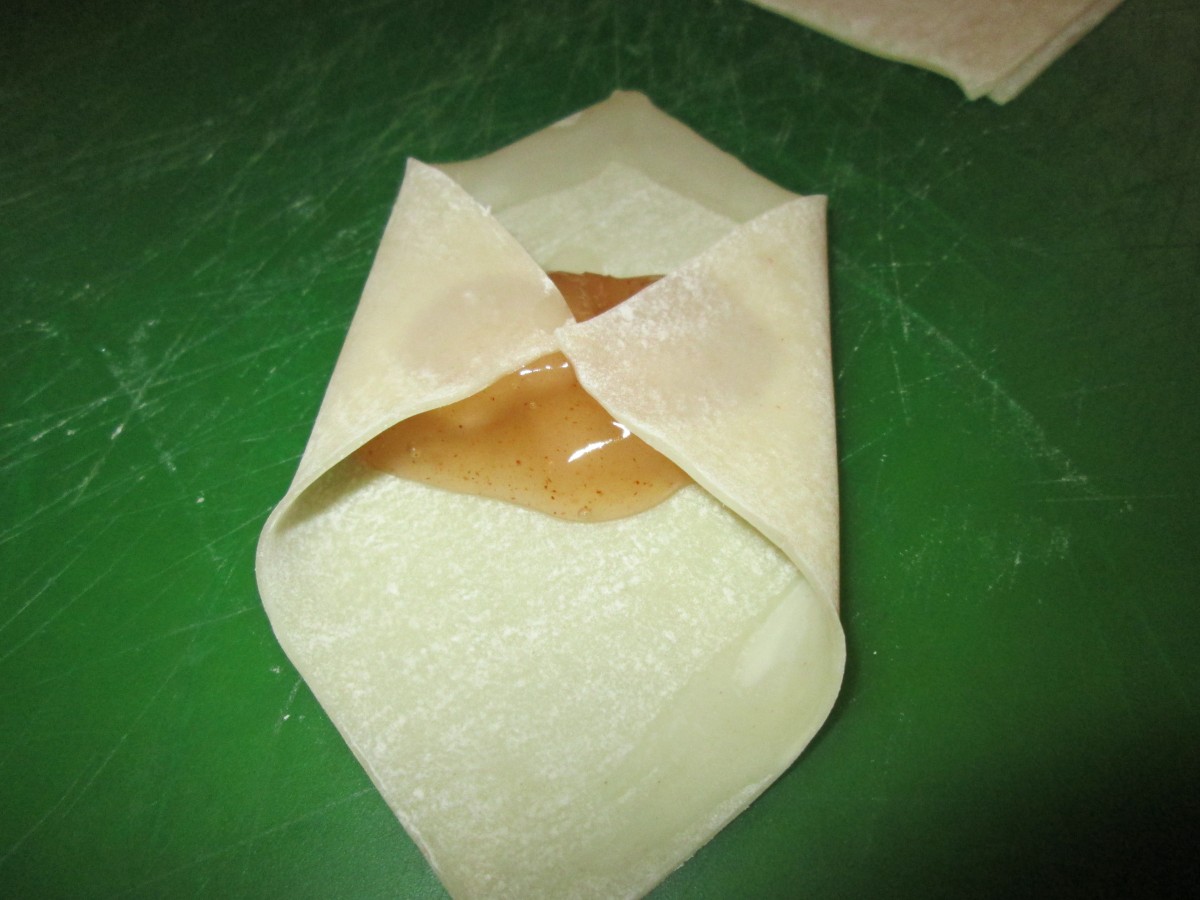
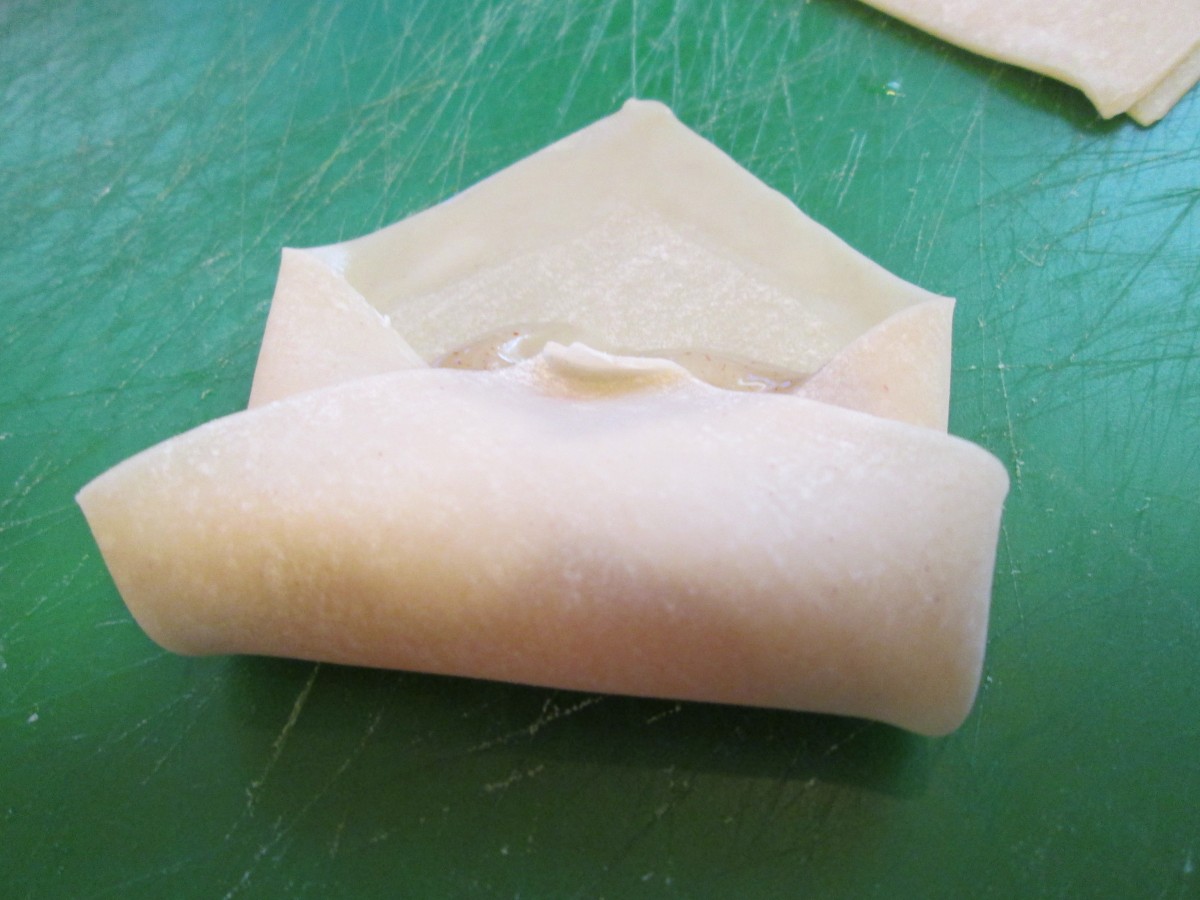
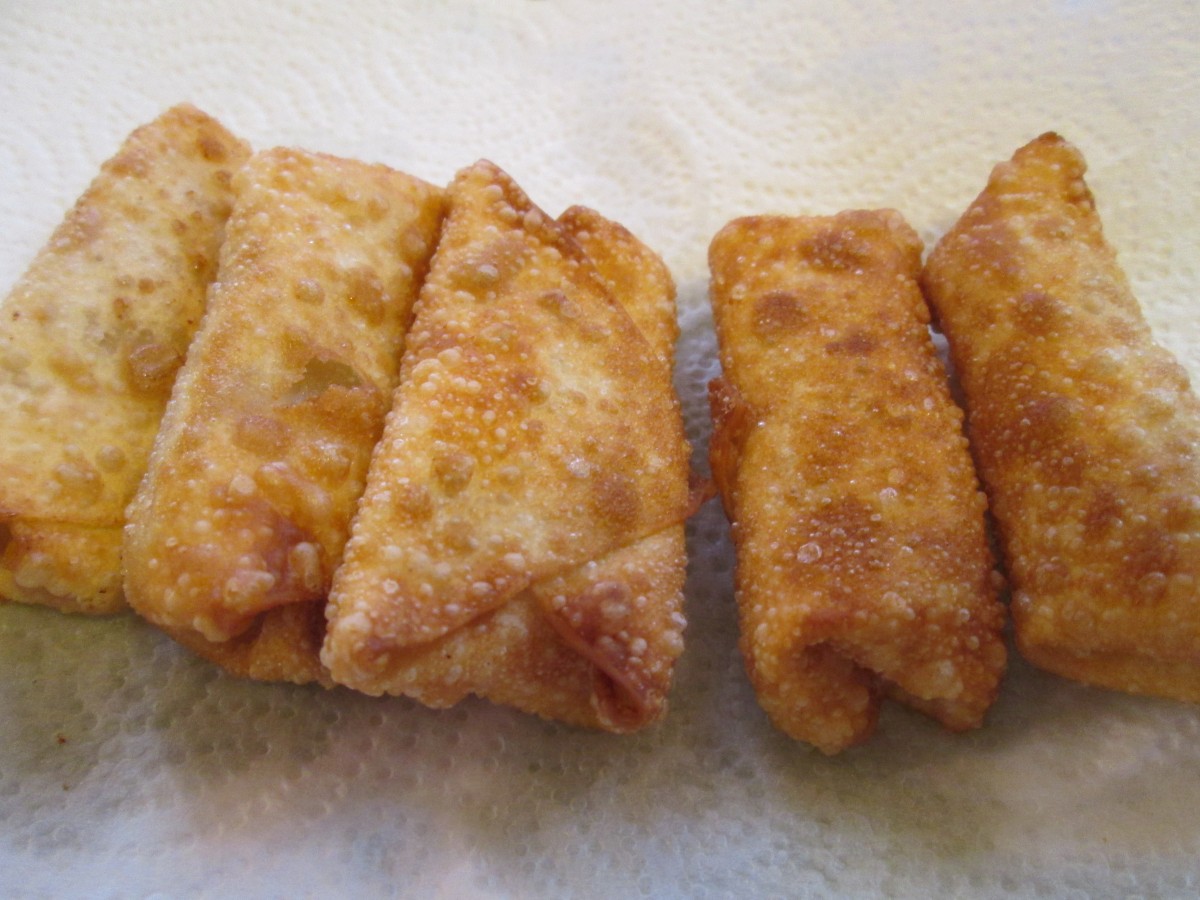
Apple Pie Wontons


I was planning an Asian inspired dinner for a friend. Since I was using won ton wrappers to make appetizers I decided to use some of them for dessert, too. I wrapped a small amount of apple pie filling in each wrapper, sealed them up and pan fried in a little oil. Before serving dusted them with powdered sugar. They taste like little crispy apple pies. This is also a great way to use up pie filling if you have some leftover from another dessert. Not a traditional Chinese dessert but a nice finish for dinner. These are tiny bites, allow 3-4 per person.
Apple Pie Wontons
24 wonton wrappers
1 c. apple pie filling about
oil for frying
powdered sugar for dusting
Place wonton wrapper on a work surface with point facing toward you. Place a rounded teaspoon of the pie filling in the middle and fold the sides in to meet in the middle. Use a little water to moisten the top point of the wrapper and roll it up. Repeat with remaining wrappers. Heat 1/2 inch of oil in skillety to 375 degrees and fry the wontons, a few at a time, until golden brown.Turn as they fry to brown evenly. Drain on paper towels or cooling rack. When all the wontons have been fried and cooled down a bit, dust with powdered sugar before serving. Makes 24, serving 6.


Homemade Apple Pie Filling

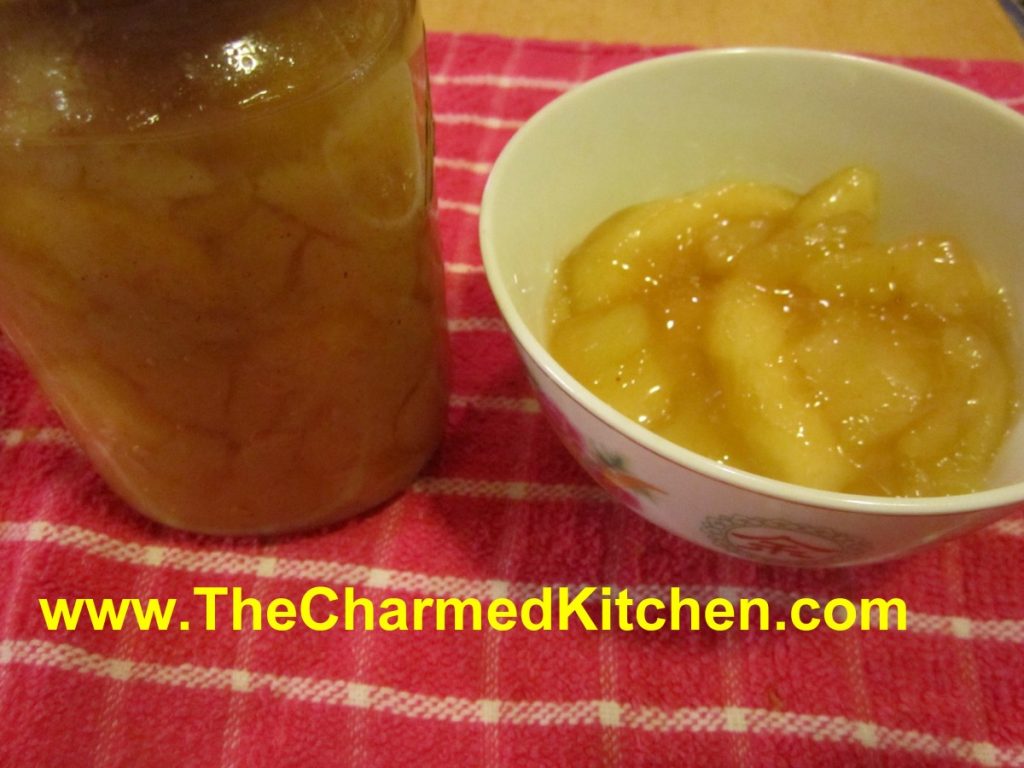
While I think the best pie is made with fresh apples, I also like making and canning my own apple pie filling. It is a handy way for me to enjoy local apples throughout the year. It is also a whole lot better than any commercial pie filling I have tried. Loaded with plenty of big chunks of apples and seasoned with cinnamon and nutmeg- I think it the next best thing to fresh apples for baking.
I use my canned pie filling to make pies, but I also use it for kolachy, blintzes, cakes and more.
The hard part, for some, is getting a hold of Clear Gel. It is a special type of modified cornstarch. I buy mine online, but you can find it in stores where the Amish shop. Clear Gel stays thick, even if it is reheated. Regular cornstarch will not. Don’t use Instant Clear Gel, either.
Here is the recipe I use. You can tweak the seasonings to suit your own taste, but keep in mind that spices sometimes get stronger when canned, so don’t go too crazy!! You can always add more spices when you use your pie filling.
Apple Pie Filling
6 qts. apples, sliced and blanched
5 1/2 c. sugar
1 1/2 c. Clear Gel- modified cornstarch available on line and in Amish stores
1 T. cinnamon
1 t. nutmeg
2 1/2 c. cold water
5 c. apple juice
3/4 c. lemon juice
If apples lack tartness, use an additional 1/4 cup of lemon juice. Wash, peel and core apples and cut into 1/2 thick slices. Place in water treated with either lemon juice, citric acid or ascorbic acid to prevent darkening. Remove from solution and drain well. Blanch in boiling water- 2 quarts at a time- for 1 minute. As you finish each batch place in a bowl and cover to keep warm. In large pot combine sugar, Clear Gel, cinnamon, nutmeg, water and apple juice. Stir over medium heat until mixture begins to bubble and thicken. Add lemon juice and boil 1 minute. Add drained apples and stir gently to combine. Ladle into hot, clean jars leaving 1 1/2 inches of headspace. Remove air bubbles. Wipe rims and adjust lids. Process in a boiling water bath- pints or quarts for 25 minutes. After the time is up, turn off canner and let jars sit in water bath for 5 minutes before removing. This will reduce the chance of siphoning. Makes 7 quarts or 14 pints.
For only 1 quart
3 1/2 c. apples
3/4 plus 2 T. sugar
1/4 c. Clear Gel
1/2 t. cinnamon
1/8 t. nutmeg
1/2 c. cold water
3/4 c. apple juice
2 T. lemon juice
Apple Pie “Blintzes”


Since I posted the recipe for making your own apple pie filling, I thought I’d share a fun way to use it- other than in a pie. In a tortilla class with kids, we made “blintzes” with the pie filling.
We used flour tortillas for the crepes. Don’t get me wrong, I love making real crepes. But, when you don’t have the time, the tortillas are a fun and tasty substitute.We soaked the tortillas in milk. By soaking the tortillas in milk, they soften up, and can be used like a crepe. Soak them for about 10 minutes, or up to 30 minutes. If you don’t want to soak them in milk, you can use a milk substitute or even juice or water.
After they are filled, the blintzes are toasted in a pan with butter, than dusted with powdered sugar. They are so tasty. Like a warm apple pie. These were a big hit with the kids.
They make a nice dessert, but they can be served for breakfast or at brunch.
Apple Pie Blintzes
10-12 flour tortillas
1/2 c. milk
2 c. apple pie filling
3-4 T. butter
Powdered sugar or cinnamon sugar, for topping the blintzes
For the filling, I used some of my homemade apple pie filling. If you have fresh apples, you can just peel and slice the apples, then cook them in a little water and sugar until softened. You can make them as sweet as you like. You made need less sugar if the apples are extra sweet. Add some cinnamon and nutmeg, too. If they are too watery- combine a little cornstarch with cold water and drizzle the mixture in until the apples thicken up. Don’t add too quickly or you might them too thick and gummy.
Place tortillas in a shallow pan, drizzling with a little milk as you go. Set aside for a few minutes, so the tortillas will soften.
To assemble the blintzes, place a softened tortilla on your work surface and spoon a little apple filling in the middle. You can do this with hot filling, but cold or room temperature filling is easier to use. Don’t over fill them or you won’t be able to fold them up. I used 8-inch tortillas and used about 1/3 cup of filling for each one. Fold the sides in until they almost meet in the middle and them roll the tortilla up to cover the filling. Place seam side down until ready to fry them.
Heat butter in a skillet, and brown the blintzes over medium heat until lightly toasted on both sides. They will be crispy on the outside, but tender in the middle. Put on a serving plate, sprinkle with powdered sugar and serve while warm. These are fine just as they are, but feel free to add ice cream or whipped cream, too.
I have made these before and use different fruit fillings. I’ve even made a cheese filled version a few times. It seems I usually have a package of tortillas, so it is a go-to dessert for me in a pinch.


