Peach Ice Cream – Custard Style


If there is a favorite summer treat for me- it is ice cream. I love to go to the local ice cream shop for a sundae or cone, and I love to make my own ice cream. When I found myself with a few extra peaches, I knew I wanted to use some of them to make ice cream. Peach ice cream is one of my absolute favorites.
I have made a peach ice cream before. This one is different because I made a custard base for my ice cream this time. A custard base just means that egg yolks, or eggs, are incorporated into the base of the ice cream. The base is heated up, so the eggs get cooked. In the other recipe, there are no eggs.
The custard base gives you a creamier end product. I wouldn’t say you have to make a custard-based ice cream for it to be good. They are just different. The custard base is a bit more work, but still not a difficult recipe at all.
This peach ice cream came out so good. Really creamy. I had perfectly ripe peaches. They were a little small, so I used 5 of them in this batch of ice cream. I used a vegetable peeler to remove the skins. I think that the skins get tough once cooked. Leave them on, if you prefer. I cut them off the pits, being sure to save all the juices, too. Then I just diced the peaches up pretty small.
If I just dumped the raw peaches into the ice cream base and froze it, they would end up as hard peachy cubes. By cooking the peaches first, they stay softer in the ice cream. This is true of any fruit ice cream. Using fruit that had been frozen, then thawed, will also work. I added a little vanilla, too. Not enough to overpower the peaches, but to add another layer of flavor.
So here is the recipe. Enjoy!!
Peach Ice Cream- Custard Style
4-5 peaches- mine were small- I used 5
1½ c. half and half
1 c. heavy whipping cream
3 egg yolks
1 c. sugar or to taste
1 t. vanilla
Peel the peaches. Cut the peaches to remove the pits. Discard pits. Dice up the peaches over a bowl to catch all the juices. In medium saucepan, place the peaches with the peach juice, half and half and cream. Over medium low heat, bring up to a simmer. Stir every few minutes, to prevent scorching. Let the mixture cook a few minutes, to soften the peaches. In a small bowl, beat together the egg yolks, sugar and vanilla. Add ½ cup of the hot cream mixture to the eggs, whisking in well. Add another ½ cup of the cream mixture, whisking again. Add one last ½ cup of the hot cream and again, whisk until smooth. Pour the egg mixture into the saucepan with the cream and while whisking, simmer until mixture starts to thicken and will coat the back of a spoon. This will take about 5 minutes. Don’t use too high a heat, or you will scramble your eggs. Mixture should reach 160 degrees to be sure eggs are cooked. Remove from heat. Pour mixture into a bowl. Allow ice cream base to cool down, then chill in fridge. Chilled mixture can be frozen in an ice cream maker once cold- in a few hours- or even the next day. Once mixture has been frozen in ice cream maker, place in a container and freeze until ready to serve. Makes about 5-6 cups of ice cream.
Corn and Black Bean Salad

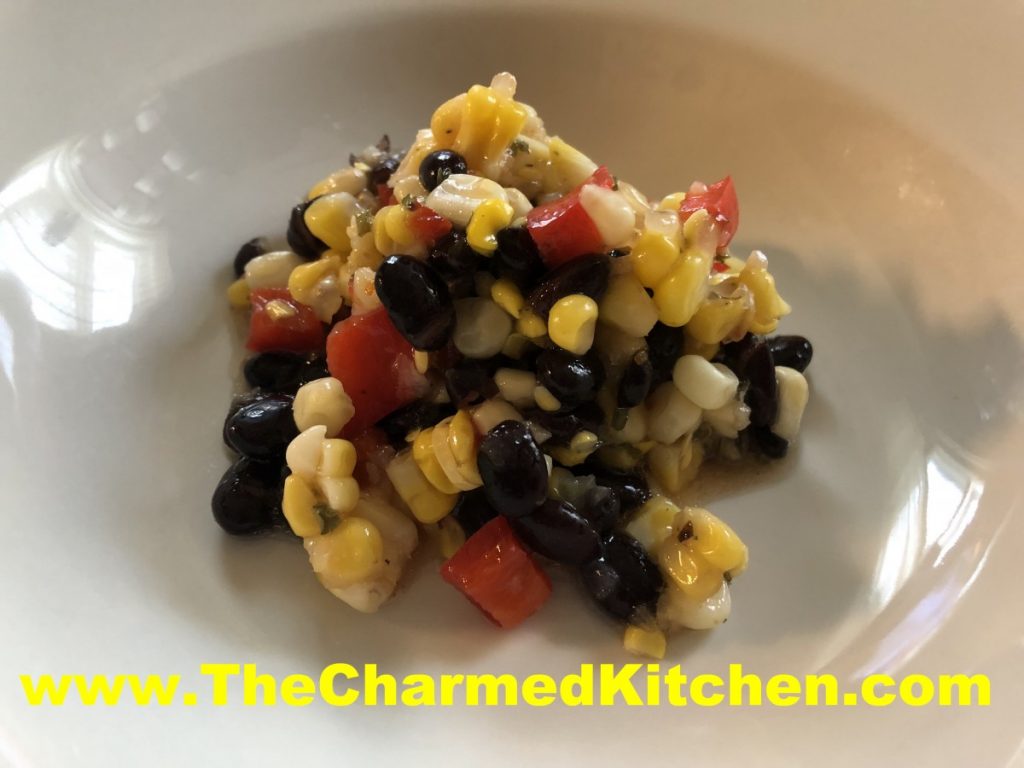
This salad was inspired by ingredients I had on hand. I had picked up some beautiful sweet corn the other day. I also had some sweet peppers and home canned black beans. I knew the trio would work well together.
I used fresh corn in this dish. You could use frozen corn, if that was all you had. Fresh corn season is too short around here. I always buy extra corn for freezing. I just blanch the shucked corn for a few minutes in boiling water, then drop into ice water. Once the corn is cool enough to handle, I cut the corn off the ears. Then I package up the corn and freeze it.
You could also grill corn and cut it off the cob to freeze.
I like to boil the cobs after the corn is cut off, for a corn stock, which I also freeze. The cobs have a lot of flavor.
If using the frozen corn in a salad, you’ll want to drain it after thawing.
So here is the recipe. Pretty simple. You could add some sweet onion, if you like, too.
Corn and Black Bean Salad
4 c. cooked corn
1 can black beans, rinsed and drained
1 sweet pepper, seeded and chopped
¼ c. olive oil
3 T. red wine vinegar
1 T. Balsamic vinegar
2 t. Italian seasoning- I used my Tuscan blend
Salt and pepper to taste
Hot sauce to taste, optional
Combine all ingredients in medium bowl. Stir to combine well. Chill before serving. Serves 6-8.
Tortellini and Ham Salad


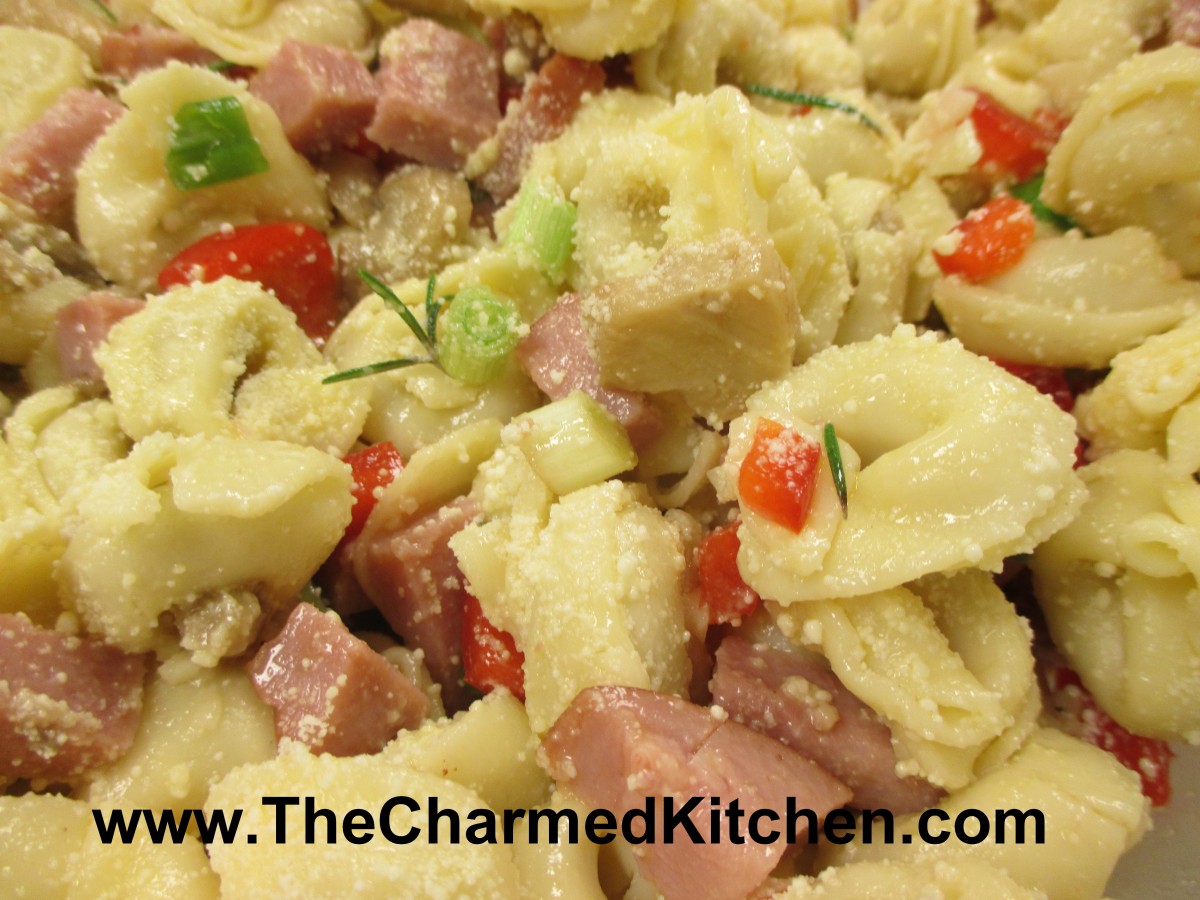
Main dish salads are always a favorite of mine when the weather gets warmer. Sometimes I just don’t feel like eating hot food. I made this salad with mushroom tortellini and some leftover ham. It might sound odd to eat tortellini cold, but we eat cold pasta salad all the time. Why not? I really liked it. The mushrooms flavor worked great with the smoky ham. I served mine on a bed of fresh spinach- which made the dish even better.
Tortellini and Ham Salad
¼ c. olive oil
¼ c. red wine vinegar
1 t. fresh rosemary
1 clove garlic, minced
1 t. sugar, optional
1/2 t. red pepper flakes
12 oz. mushroom or cheese tortellini, cooked
1½ c. diced ham
1 red pepper, seeded and diced
1 c. sautéed, sliced mushrooms, cooled, optional
4 green onions, chopped
Parmesan cheese, optional
Combine first 6 ingredients in large bowl and whisk to blend well. Add next 5 ingredients and toss to coat. Add salt and pepper to taste. Chill at least 30 minutes before serving. Serve with Parmesan cheese on the side. Serves 4.
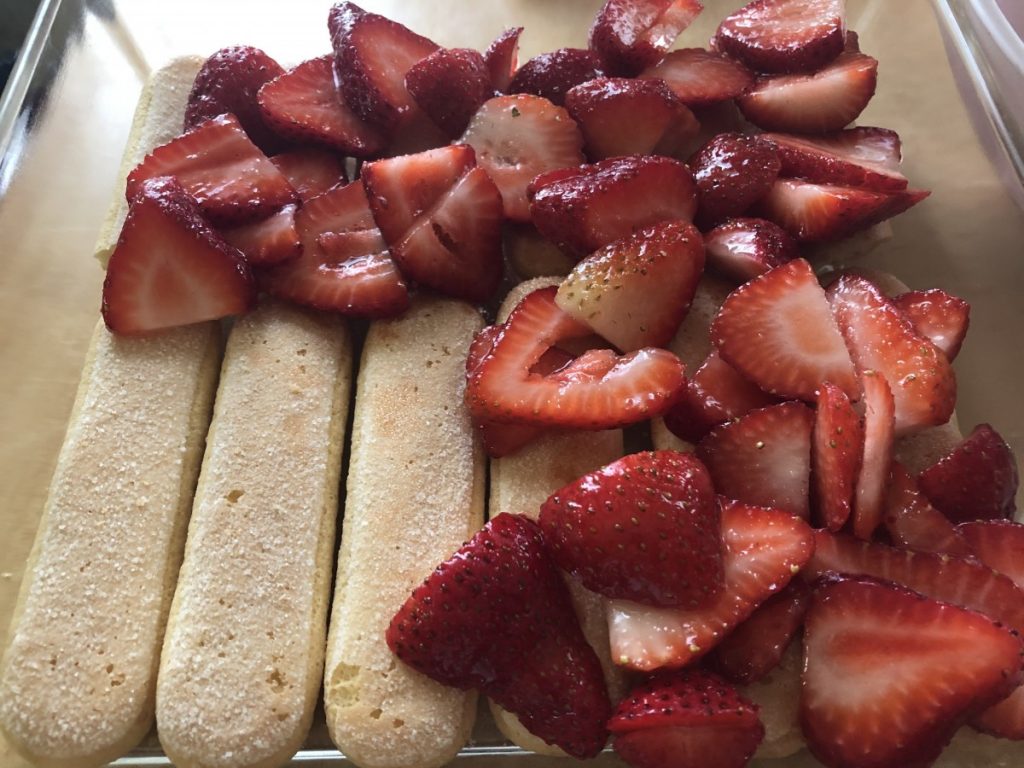
Strawberry Shortcake Trifle


I am not sure why I never combined ladyfingers with strawberries before. Using them together in this dish made a wonderful dessert- that was also very easy. It was something between a trifle and a shortcake so I called it both!
I want to just say something about ladyfingers. There are two types I see in stores around here, soft or crisp. The soft ones are smaller and cake-like and found in bakeries in grocery stores. Like sponge cake. The other ladyfingers are crisp and larger. I find the crispy type at Italian stores and sometimes at specialty grocery stores. The ladyfingers you want for this recipe are the larger, crisp ladyfingers.
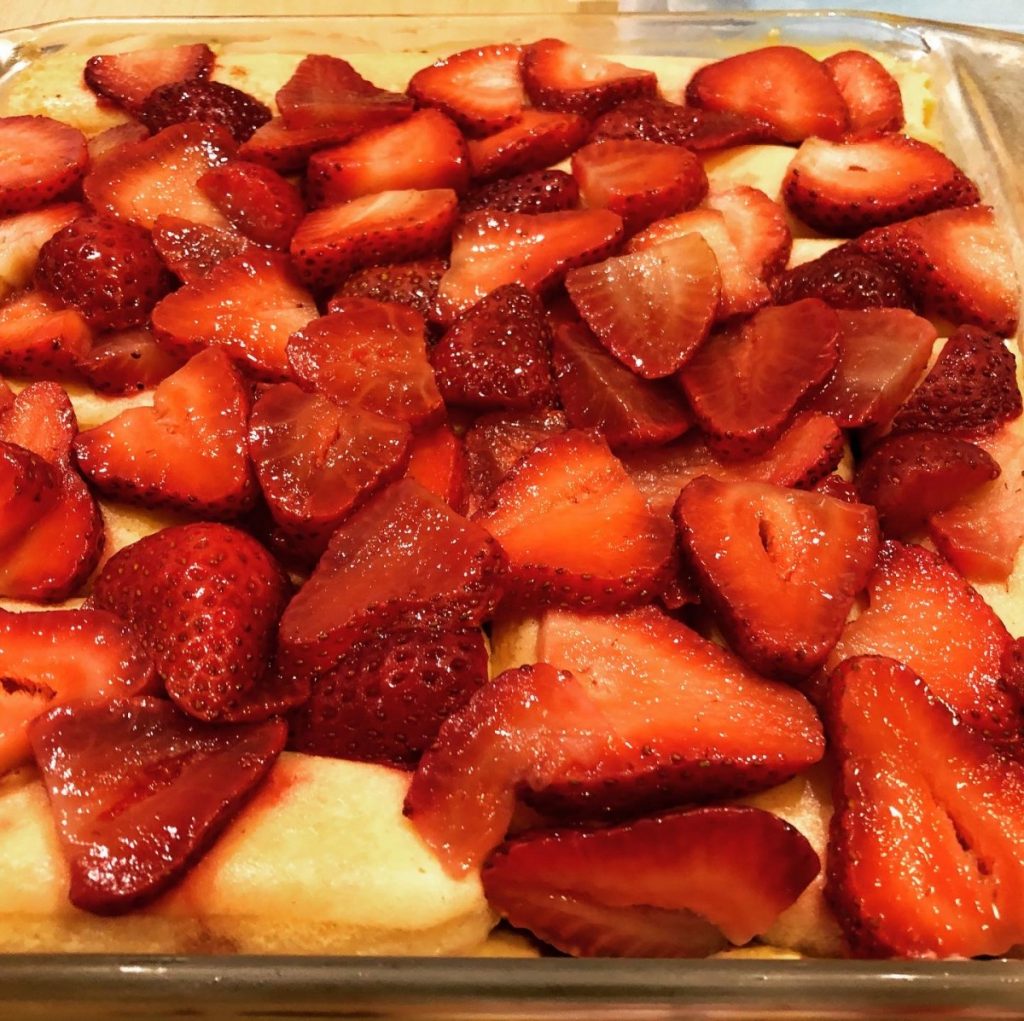
I was happy with how it came out. The ladyfingers were soft, not mushy. They actually were kind of fluffy. The flavors blended so nicely. Great summer dessert. Light and refreshing, but a little rich, too. I made vanilla pudding, but make life easier and just use store bought or instant from a box- if you prefer.
Here is the recipe. Enjoy!!
Strawberry Shortcake Trifle
1½ – 2 pounds strawberries, washed, stemmed and sliced
½ c. sugar
24 ladyfingers
1 recipe vanilla pudding- recipe follows
¾ c. Hazelnut chocolate spread
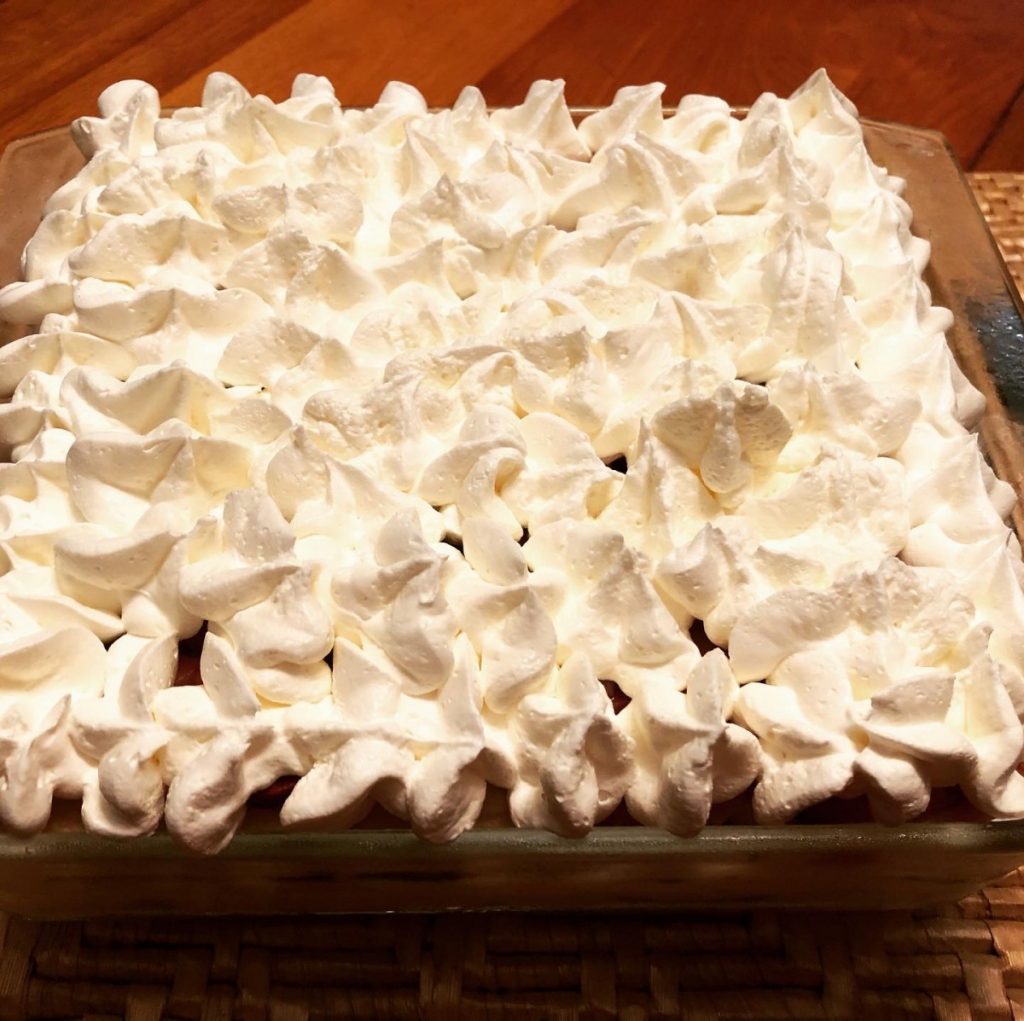
Whipped cream or whipped topping
Combine strawberries with the sugar and set aside. Make the pudding, if you haven’t already. You can use premade pudding. You’ll need 2-3 cups of pudding. I had some leftover from the recipe I made. In a 9×9-inch baking dish, place one layer of the cookies. You might have to trim them a little to fit. I had 2 rows of 6 cookies, but I had to break off a little for the second row to fit. Spoon over half of the strawberries, with some of the liquid in the bowl. Spread a layer of pudding over the berries. For the next layer, spread some of the hazelnut spread over each lady finger before putting it in the pan. When you put them in the pan, place them with the spread on the under side. Add another layer of the pudding, then top with the rest of the strawberries. Cover and place in fridge until ready to serve. You can do all this up to 2 days ahead. Before serving, remove cover and top with whipped cream or any whipped topping you like. Serves 6-8.
Vanilla Pudding
1 c. sugar
½ c. cornstarch
½ t. salt
3 ¾ c. half and half
1 T. vanilla- or a little more
2 T. butter
Combine dry ingredients in a medium saucepan. Whisk in half and half and vanilla until well mixed. Heat over medium heat, stirring constantly, until mixture starts to bubble and get thickened. Mixture will get pretty thick. Turn down heat to keep it from scorching. As soon as pudding is thickened, remove from the heat and stir in the butter until melted. Place pudding in a bowl, cover with plastic wrap and chill until ready to use. Makes about 4 cups.
Blueberry Chef Salad

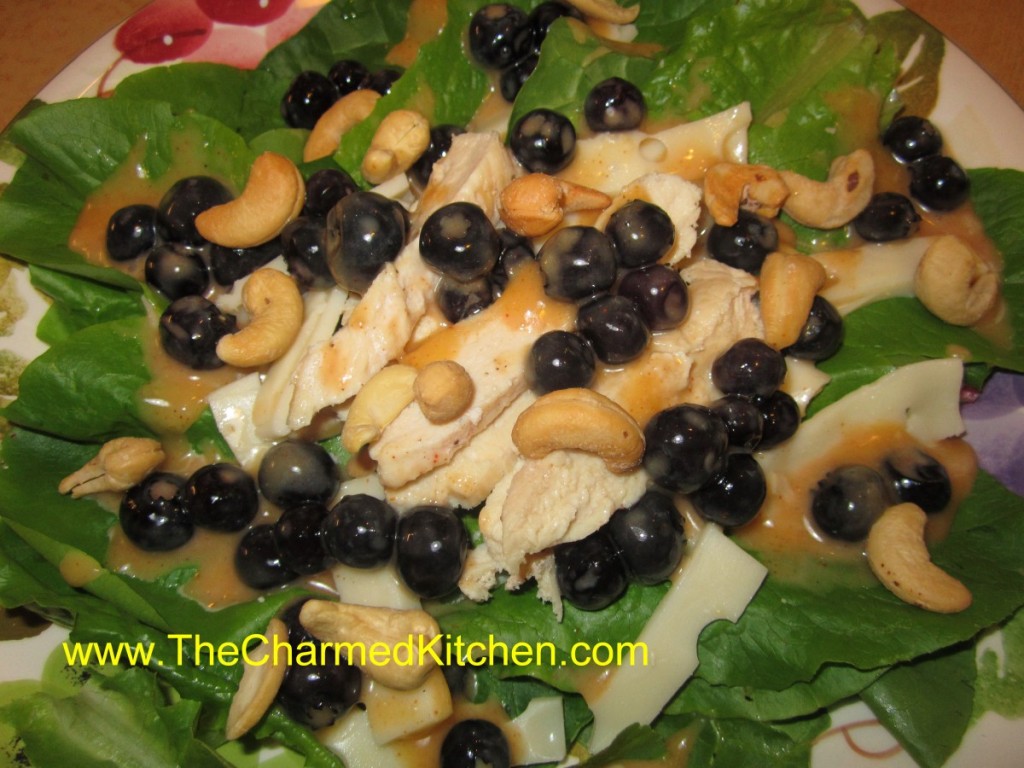
This is one of those salads that is good any time of the year. A local produce market had the most beautiful blueberries this week. I decided to enjoy some of them in this salad.
The dressing is a honey French type dressing. It really makes the whole salad work. You can add the berries to the dressing, or serve them on top of the salad. I topped it with cashews, but you could add croutons, if you prefer.
Blueberry Chef Salad
Dressing:
1/3 c. honey
1/4 c. white wine vinegar or cider vinegar
1 t. paprika
1 t. dry mustard
1/4 t. salt
1/2 c. olive oil
3 cups blueberries
Salad:
6 c. torn salad greens
12 oz. cooked chicken, turkey, ham etc, cut into strips
1 c. cubed cheese
1/2 c. cashews
In blender, combine first five ingredients and start running machine on high. Add oil in a slow stream until mixture becomes thickened. Pour into bowl and stir in berries and chill, several hours if you can. When ready to serve, arrange greens on one large platter or on smaller salad plates. Arrange meat and cheese on platter or plates. Spoon over the dressing and cashews then serve. Serves 4-6.
Cherry Bombs

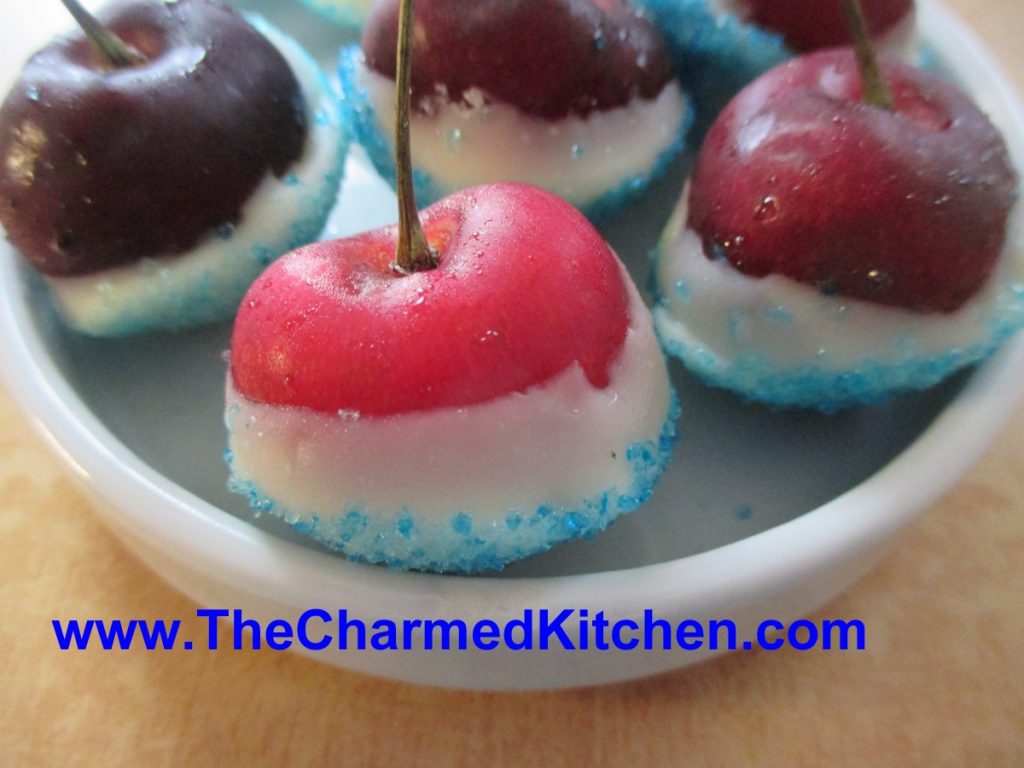
These little treats make a great addition to your 4th of July party. They are simple to make, with only three ingredients. You can make them in no time at all. It is a fun treat for kids to make, too.
Think of the cherry bombs as a type of candy. A simple, sweet treat that can be served just as they are. They can also be used to top a cake or other dessert. You can even garnish a cocktail with them. I did the same thing with strawberries, but “strawberry bombs” did not have the same ring to it.
To make the cherry bombs, you will need cherries, white chocolate and blue sugar. If you don’t have blue sugar, you can put granulated sugar in a bag, add a few drops of blue food coloring, seal the bag and shake it up. The sugar will turn blue. You could also use blue sprinkles.
Wash and dry off some large, sweet cherries. Melt white chocolate, stirring until smooth. Dip the cherries in the white chocolate, then the blue sugar. Place on wax paper to firm up. Store in fridge.
Cauliflower and Broccoli Salad


I make broccoli salad pretty often, but sometimes like to switch it up a little by adding cauliflower. The result is a salad that has a great mixed of flavors, colors and textures. The addition of bacon also adds a wonderful smoky flavor. Certainly, feel free to omit the bacon for a vegetarian salad. With or without the bacon, this is a great salad for the warmer days ahead.
Cauliflower and Broccoli Salad
1 small head cauliflower, trimmed and broken into bite- sized pieces
2 broccoli crowns, cut into bite- sized pieces
1 sweet pepper, seeded and chopped
1 c. shredded cheese- I used a sharp cheddar
8- 10 slices of bacon, cooked and chopped
1/2 cup of mayo – or more according to your taste
salt and pepper to taste
Steam the cauliflower and broccoli until just tender/crisp. About 5 minutes in a microwave steamer, 6 minutes in a conventional steamer. Place in a bowl to cool down then combine with remaining ingredients and stir to combine well. Adjust seasonings, if needed. Serves 6-8.
Cherry Lemon Ice

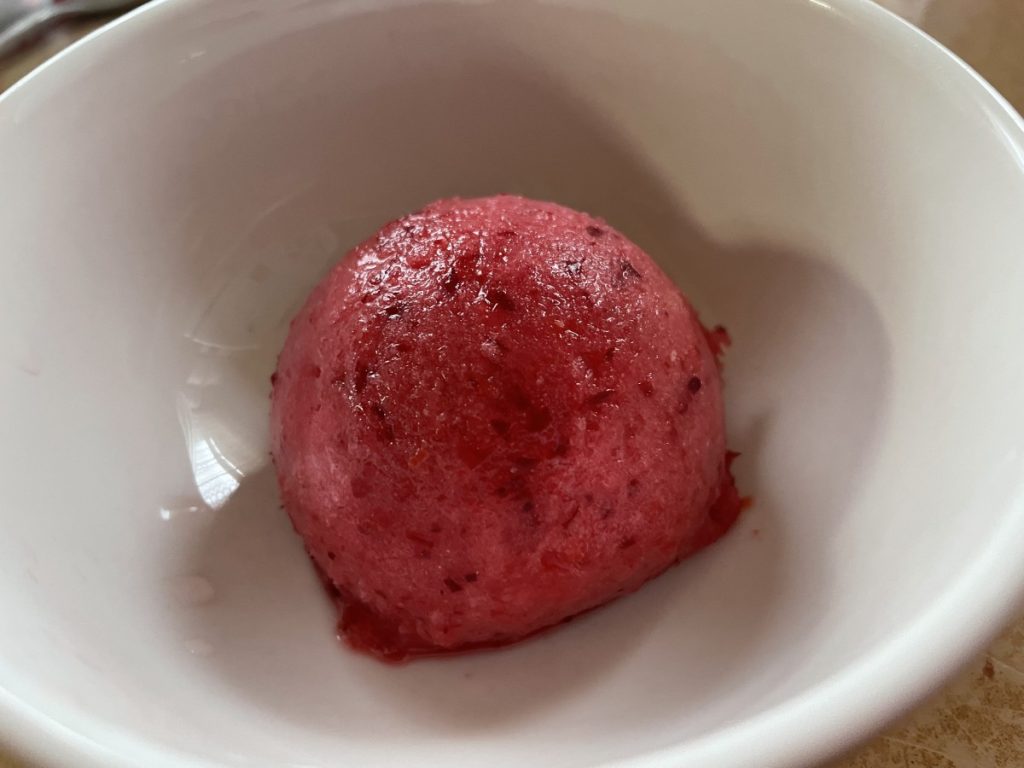
After making lemon ice recently I had thought about variations. What else could be added to the base recipe? I decided to try cherries because I love the way cherry and lemon tastes together. I was not disappointed. The cherries took my lemon ice to a whole new level. And the color!!! This may be one of my favorite frozen desserts ever.
You can use sweet or sour cherries for this recipe. I reduced the sugar from my original Lemon Ice recipe. Taste it before freezing and adjust sweetness to your preferences. Keep in mind, it will taste less sweet after freezing.
I am definitely making this recipe again. Besides just enjoying it as a dessert, you can add scoops to cocktails or non alcoholic drinks.
Cherry Lemon Italian Ice
2½ c. water
1 c. sugar
1¼ c. lemon juice*
Zest of 2 lemons, optional
2 cups pitted cherries
Combine water and sugar in bowl and stir until sugar dissolves. Add lemon juice and zest, if adding, and stir until well combined. Add the cherries. Place in a food processor or blender and process until cherries are liquefied. Since I knew I was going to be processing the ice in a food processor after freezing, I didn’t bother to blend the mixture up first. I just made the lemon ice base, tossed in the cherries and through it in the freezer. It really is about how smooth you want it to be.I knew I didn’t mind a few small flecks of cherry. Freeze.
You have options here. You can place the mixture in a shallow tray- preferably one with a tight lid- and place in the freezer. Or you can put the mixture in any shape container with a tight lid and freeze. It kind of depends on how you plan to serve your ice, once it is frozen. Some recipes call for stirring the mixture every 30 minutes as it freezes. Then to serve it, you just scrape over the surface with a heavy spoon for a grainy ice- a granita. This is one option and a tasty one. Works best in the flatter, longer container.
Another option is to just freeze it. Once frozen, allow the cherry lemon ice to soften a few minutes, then break into chunks and place in a food processor. Run the processor until the mixture is smooth- then serve or put back in the freezer until you want to serve it. You can even repeat the food processing part another time for a smoother end product. This is what I did with this batch. I wanted a sorbet – like texture.
If you didn’t have enough choices already, you can also put the mixture in an ice cream machine to freeze. This method will also give you a sorbet like final product.
No one way is best- it is just what you like. Makes about a quart and a half.
* you can use lime juice and zest instead, for lime ice- or even use them together.
Super Party Sub

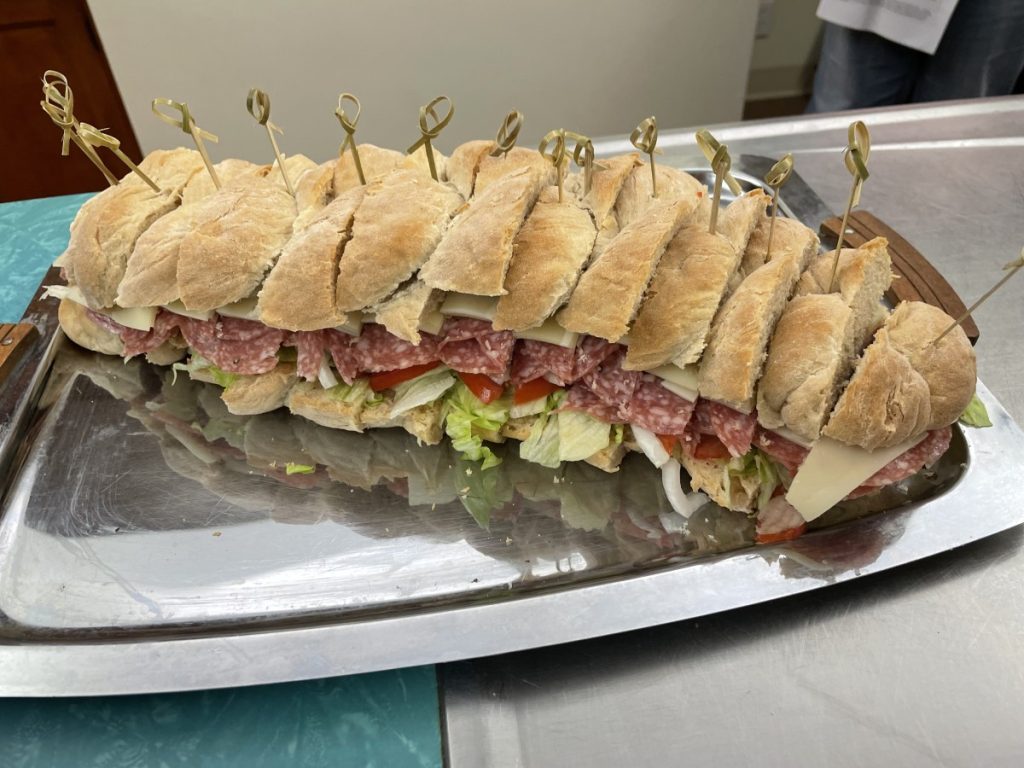
We made this sandwich in class the other night. When the weather gets warm and you don’t feel like cooking, a big sandwich is a nice option. Its a nice blend of meat, cheese and veggies. Of course, you can swap out the ingredients to suit your own taste.
I ended up baking the bread we used because I could not find the right shape loaf I wanted. I know, defeats the purpose of not cooking, but it was well worth the effort. I made my herb braids, recipe follows, but I didn’t add the herbs this time. I also subbed a couple of cups of spelt flour for the white flour.
We used a hard salami for the meat and Swiss cheese. It seemed a nice combination. So here is the recipe.
Super Party Sub
3-4 T. Italian dressing
1 loaf French bread (1 pound)
2 c. shredded lettuce
1 large tomato, sliced thin
1 sweet onion, sliced thin and separated into rings
or 2 sweet peppers, seeded and sliced thin
about 24 slices of good quality luncheon meats. I like to use smoked and regular turkey or turkey ham and turkey pastrami. Roast beef and corned beef are also favorites. Pick what you and your family like. We used a pound of the hard salami because the slices were small and why not?
8oz. sliced cheese
Slice bread lengthwise and brush with a little of the dressing on the bottom half. . Arrange the lettuce on the bread topped with the tomato, onion, or pepper slices and drizzle with the rest of the dressing. Top with the meat slices and then the cheese. Replace the top of the bread and wrap in plastic wrap or foil until ready to serve. Use long toothpicks to secure slices. You can serve with extra Italian dressing on the side. Serves 8.
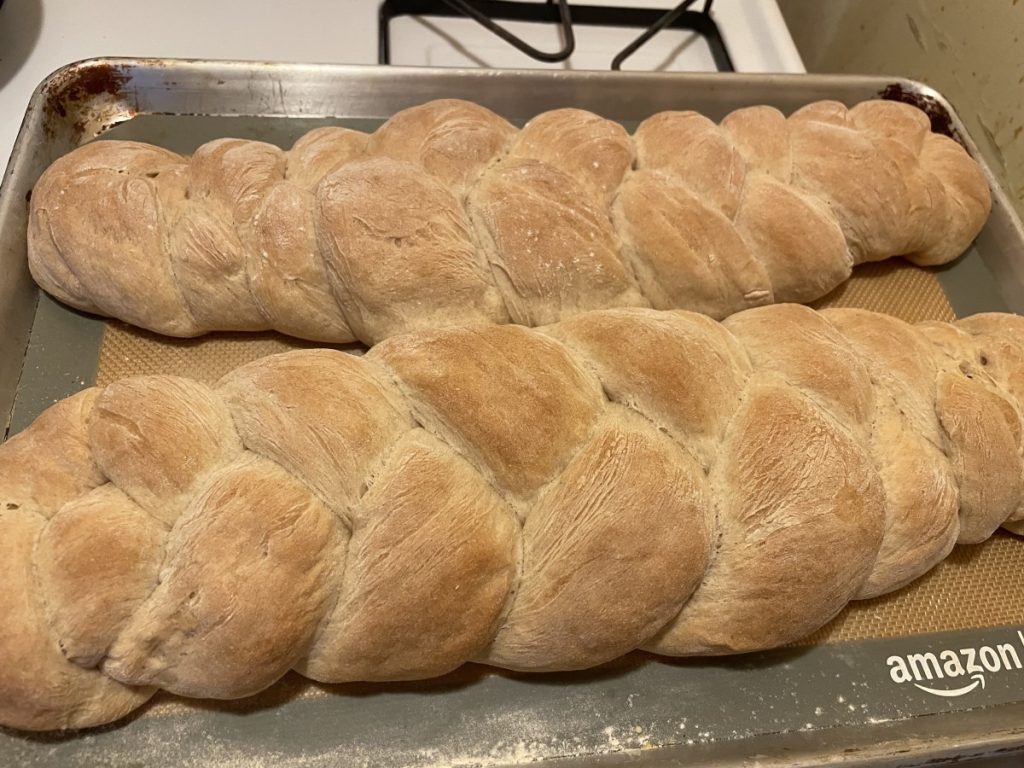
Braided Bread
5 ½ -6 ½ c. flour I used 2 cups of spelt flour to replace some of the wheat flour
2 packages quick rising yeast
1 T. honey
2 t. salt
¼ c. olive oil
2 ¼ c. hot water
In a mixing bowl combine 2 c. of flour with the rest of the ingredients and mix until smooth. Beat with electric mixer 4 minutes then add 1-cup additional flour and beat 1 minute longer. Stir in flour ½ cup at a time until soft dough forms. Turn onto surface and knead, adding flour gradually until dough is smooth and elastic. Place dough in lightly greased bowl and turn to cover. Cover with a towel and let rise until doubled, about 30 minutes. Turn dough onto surface and cut in half. Cut each half into thirds. Roll each piece of dough into an 18-inch rope. Loosely braid three ropes together and repeat with the remaining dough. Place on greased baking sheet and cover until doubled in size, about 20 minutes.
Bake in a preheated 375-degree oven for 25-30 minutes, or until bread sounds hollow when tapped lightly. Makes 2.
Variation: Whole wheat: Add 2 cups of whole-wheat flour to replace 2 cups of white flour. Also try adding ¼ c. of wheat germ, oat bran or 2 tablespoons of seeds (sesame, pumpkin, sunflower, poppy, etc.)
Regular yeast can be used, but rising times will be longer and water should be warm, not hot.
Firecracker Chicken


Sometimes the best recipes happen when you don’t have time to plan. This is one of those recipes. Even better because it only uses 4 ingredients. Fun for the 4th of July, too.
I needed an appetizer, but didn’t have extra time for prep. I also did not have time to go to the store, so I used what I had on hand. I had some boneless chicken breasts. I could also have used boneless thighs or even chicken wings. I used what I had.
I cut them into strips and poured a bunch of hot sauce over them. Put them in the fridge to marinade overnight. The next day I just tossed the chicken strips in breadcrumbs and fried them in a little oil. Served with extra hot sauce on the side, they were a big hit.
Firecracker Chicken
2 lbs. boneless chicken
3/4 c. hot sauce, plus extra when serving
2 c. bread crumbs
2 c. oil, for pan frying
Cut chicken into strips and place in a bowl. Pour over the hot sauce and stir to coat evenly. Cover and chill overnight, or even for a couple of days. Place bread crumbs in a plastic bag. Place a small handful of chicken in the bag and shake to coat. Place on a plate and continue with the rest of the chicken. Heat oil in skillet to 350- 375 degrees. Fry chicken in several batches- you don’t want to crowd them in the skillet- that will make the oil cool down too much. Fry for a minute or two per side. Remove to platter lined with paper towels and cook the rest of the chicken. Keep chicken warm until ready to serve. Serve with extra hot sauce on the side. Serves 8 or more as an appetizer, but can be served as a main dish, too.


