Zesty Tomato Soup


This is a fast and easy soup to make and full of flavor. I can tomatoes in the summer, so that is what I used. You can use store bought. If you wanted to use fresh tomatoes, you would need about 2 pounds. I just love the flavor of my home canned tomatoes so much. Next best thing to fresh.
After the soup was finished, it occurred to me that it was vegan. I hadn’t planned it that way, it was just how it worked out. I used an immersion blender to puree the soup. If you don’t have one, you can puree it in a blender. You just have to be careful when blending anything that is hot. It will splash up. To avoid getting burned, remove the center piece from the blender lid and cover with a towel before you turn it on.
I simmered the soup uncovered, because I wanted it to cook down a bit to be thick once processed. It only took about 15 minutes. You can cook it longer, if you want a thicker soup. I served it with toasted rye bread croutons, but it would be fine just as it is.
Zesty Tomato Soup
3 T. oil
1 medium onion, chopped
1 rib celery, chopped
1 sweet pepper, seeded and chopped
1 qt. canned tomatoes, or 1 (28 oz.) can whole tomatoes
Cayenne pepper to taste
2 T. fresh parsley or 2 t. dried
1 c. almond milk- or whatever milk you prefer
Salt and pepper to taste
In medium saucepan heat oil and cook onion until it starts to brown a little. Add the celery and pepper and cook about 5 more minutes. Add tomatoes and simmer, uncovered, until vegetables are soft, about 15 minutes. Use an immersion blender to puree the soup and add remaining ingredients. Adjust seasonings. Serve as is, or with croutons. Serves 3-4.
Sunny Spring Salad


Today’s recipe is a tasty vegetarian salad that is as satisfying as it is pretty. The color is bright, just perfect after several days of rainy weather. If it doesn’t feel like Spring outside, it can feel like Spring inside.
When I say split peas, what comes to mind? Split pea soup? GREEN split pea soup? Years ago my dear friend, Dale Gallis, turned me on to yellow split peas. I started making soup from them, but also use them in salads.
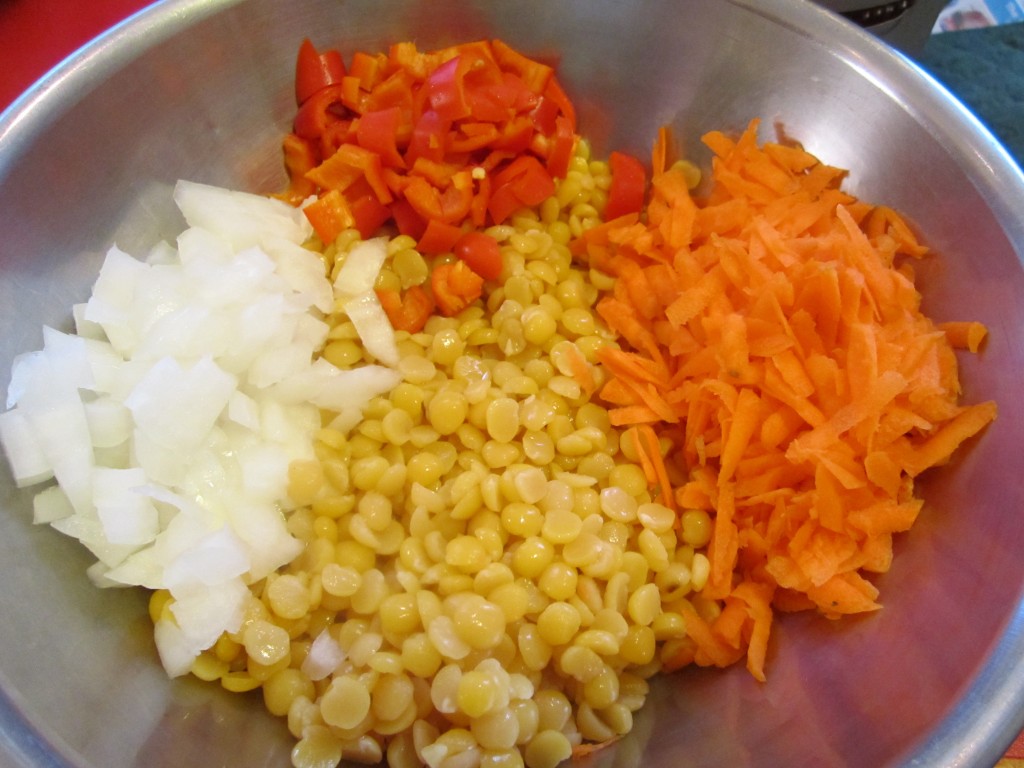
The yellow split peas are combined with carrots, sweet onion, sweet peppers and fresh herbs, then tossed with a simple combination of apple cider vinegar and olive oil. You can serve it right away, or let the flavors blend in the fridge for a bit. I served my salad over a mix of Spring greens.
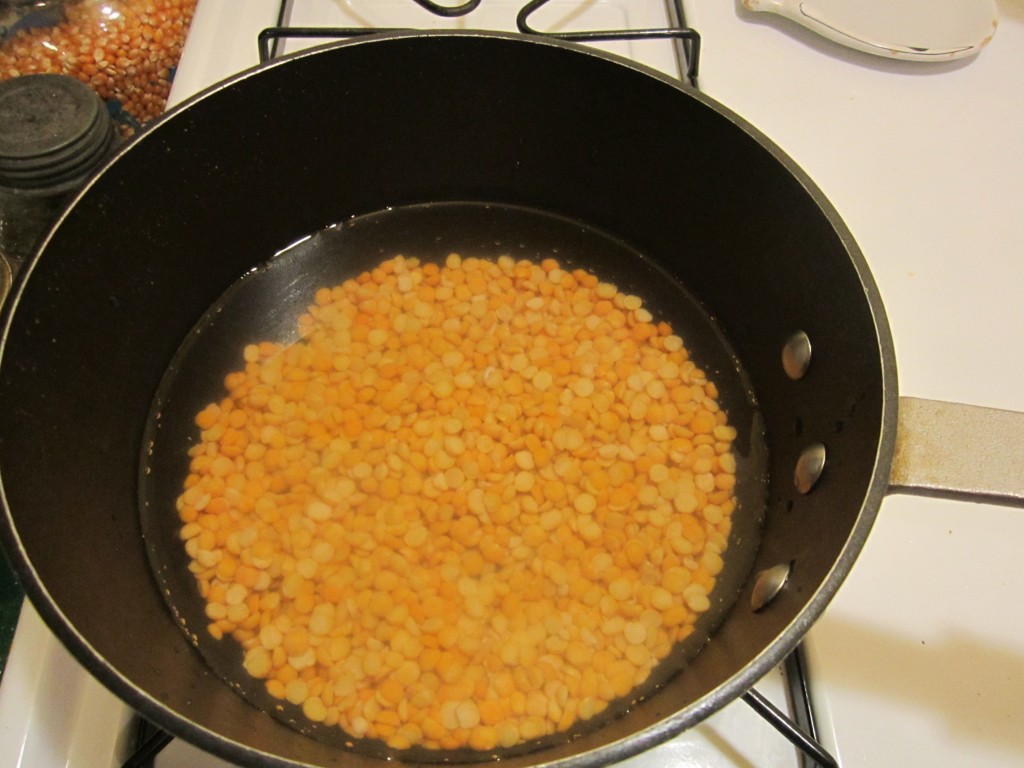
Yellow (or green) split peas cook to al dente in about 20 minutes, so they are a quick option, too. Much shorter cooking times than other legumes.
Sunny Spring Salad
1- 1 1/2 c. raw yellow split peas
salt
1 carrot, peeled and shredded
1/2 c. chopped sweet onion
1/2 c. chopped sweet pepper
1/2 c. chopped parsley
1/2 c. snipped chives
1/4 c. olive oil
1/4 c. cider vinegar
salt and pepper to taste
6 c. mixed Spring greens
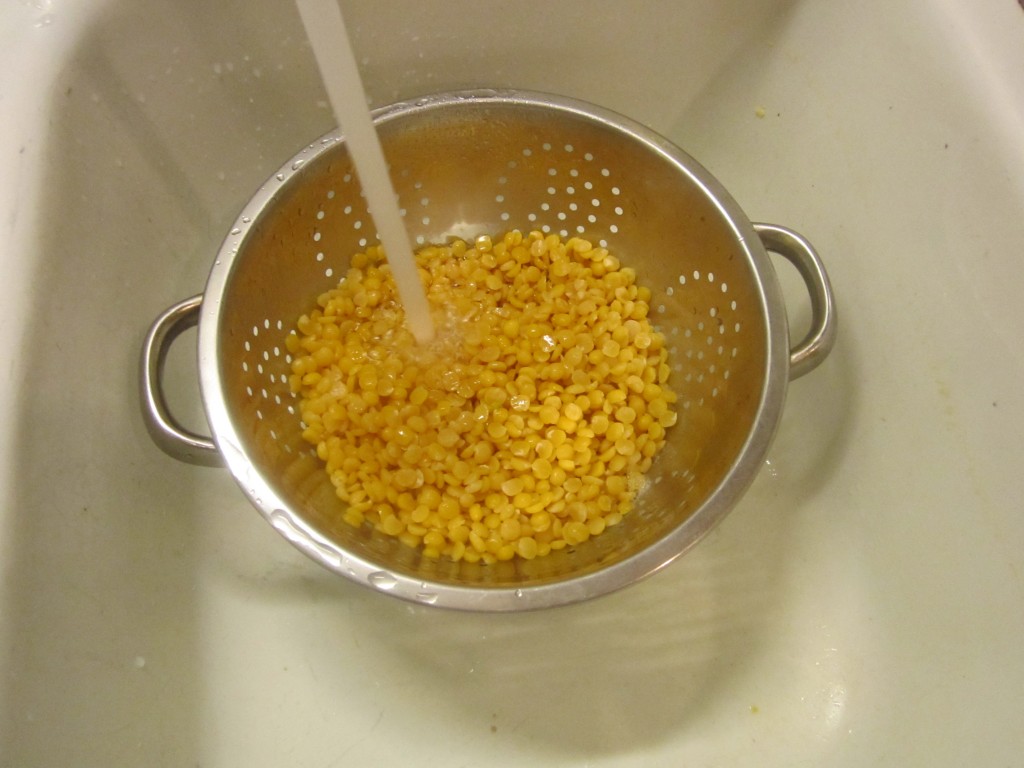
Rinse peas and place in a saucepan. Cover with water and add a little salt. Bring to a boil and simmer until peas are tender, about 20 minutes. Drain and rinse under cold water. Combine peas with carrots, peppers and onion and toss well. Add parsley, chives, oil, vinegar and salt and pepper to taste. Chill until ready to use. Serve on greens. Serves 3-4.
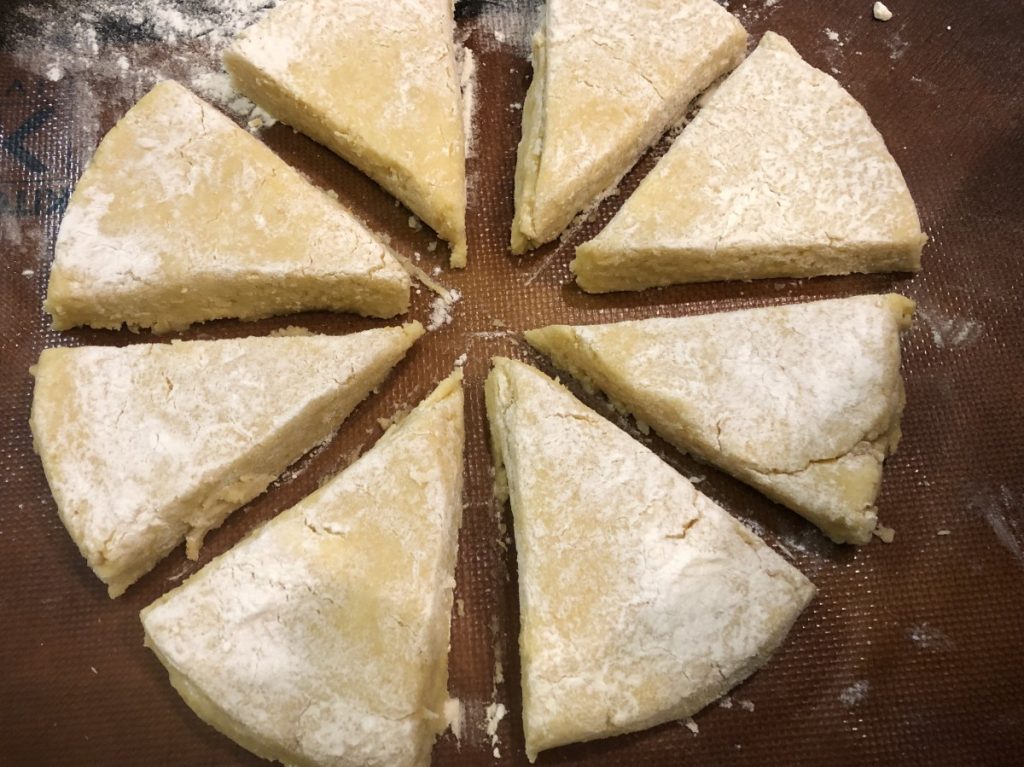
Orange and Cream Scones


These are wonderful scones. They are just what a good scone should be, tender and crumbly, without being dry. The orange flavor comes from the orange zest used in the recipe. It is subtle, but there.
I love scones because you can have them for breakfast or with a cup of coffee or tea. You can also use them as the base for a shortcake dessert by splitting them, adding sweetened fruit and whipped cream.
I was in the mood for scones, but wanted to try something new. I had come across this recipe in an old file of mine. I had ripped it out of a magazine a long time ago. They looked promising, so I decided to make them. I made few changes from the original recipe. I was very happy with how they came out. I think you will be, too. I enjoyed one this morning with some homemade clementine marmalade.
Orange and Cream Scones
2 c. flour
¼ c. sugar
1-2 T. orange zest, I used 1 tablespoon, but could have used more
2 t. baking powder
½ t. salt
10 T. unsalted cold butter, cut into ½ -inch cubes
1 egg
½ c. cold half and half
1 t. vanilla
Extra flour
2 T. half and half or orange juice to brush the scones
Extra sugar for sprinkling on top- 3-4 tablespoons
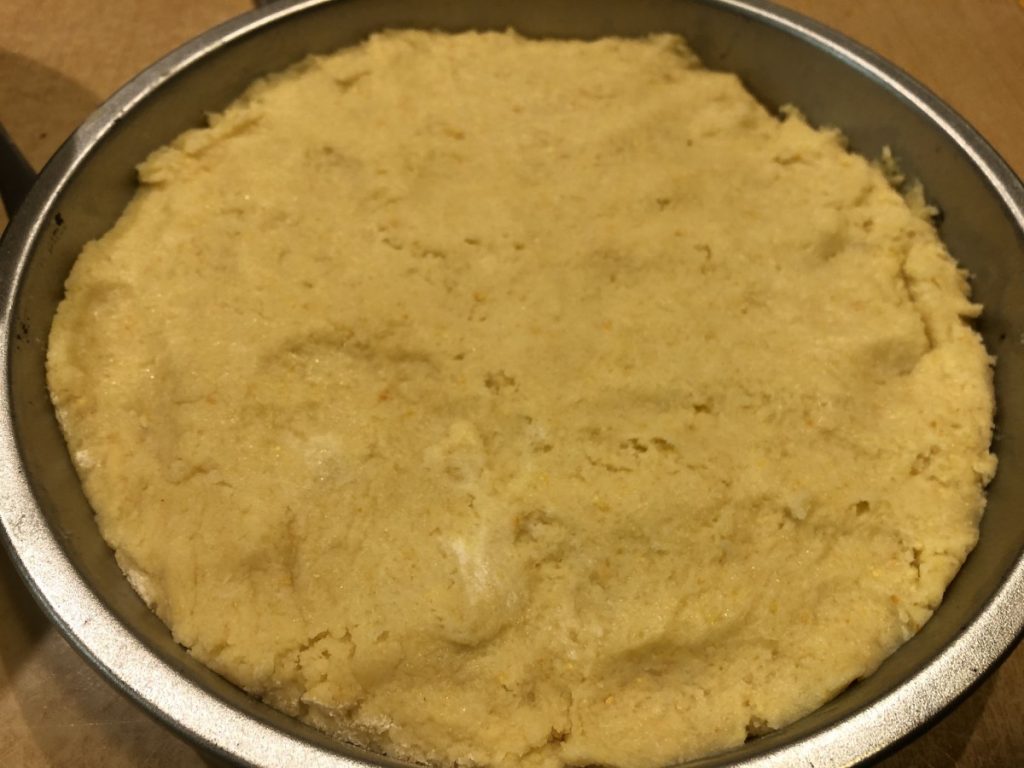
Preheat oven to 375. Line a large baking sheet with parchment paper or use a silicone liner. Set aside. In a large bowl mix together the dry ingredients. Using your fingers, rub the butter into the flour mixture until it looks like coarse crumbs. You can also use a pastry blender, but what fun is that? In a small bowl, beat together the egg, half and half and vanilla. Pour into flour mixture and stir until mixture starts to hold together. I am going to save you from messing up your counter with this next part. Get an 8-inch round cake pan and sprinkle flour in the bottom of it. Don’t be stingy, be sure there is a layer over the whole pan. One or two tablespoons should do it. Go back to your dough and sort of knead it in the bowl. That is why I said to use a large bowl. You don’t really need to knead it on your counter. Use a wooden spoon, rubber spatula or your hands to get the dough to form into a ball. Make sure you get all the dry bits from the bottom of the bowl. This isn’t a yeast dough. The idea is to get it to stick together with as little actual kneading as possible. Trust me, this is how you end up with super tender scones. As soon as the dough will hold together, and form into a ball, use a rubber scraper to get it into the floured cake pan. Press the dough evenly into the pan. Now a fun trick. You want to turn to the pan over so the dough ends up on the prepared baking sheet. You don’t want to do this slowly or the dough might plop out too soon. You also want to dough to come out. In one motion turn the cake pan over quickly onto the baking sheet. You want to actually slam it firmly on the baking sheet. Then lift up the cake pan. If all has gone according to plan, you’ll have a perfect 8-inch circle of dough on the baking sheet. I could have told you to just place the dough on the baking sheet and form it into an 8-inch circle, but I prefer the cake pan method. You get nice, even edges. There will be some flour on the dough. Leave it there for now. Using a bench scraper, or a long knife, cut the dough in half, then in half again, like cutting a pie. The dough is pretty moist, so the extra flour on top should make them easier to cut. Repeat two more times so you end up with 8 wedges. Pull them apart a little, so they can expand when they bake. I used a metal spatula to do this. If there is still extra flour on top and it is bothering you, you can brush it off. Using a pastry brush, brush a little half and half or orange juice over the scones. Then sprinkle the tops with the extra sugar. Bake for 25 minutes, or until golden brown. Makes 8. Great plain or served with jam.
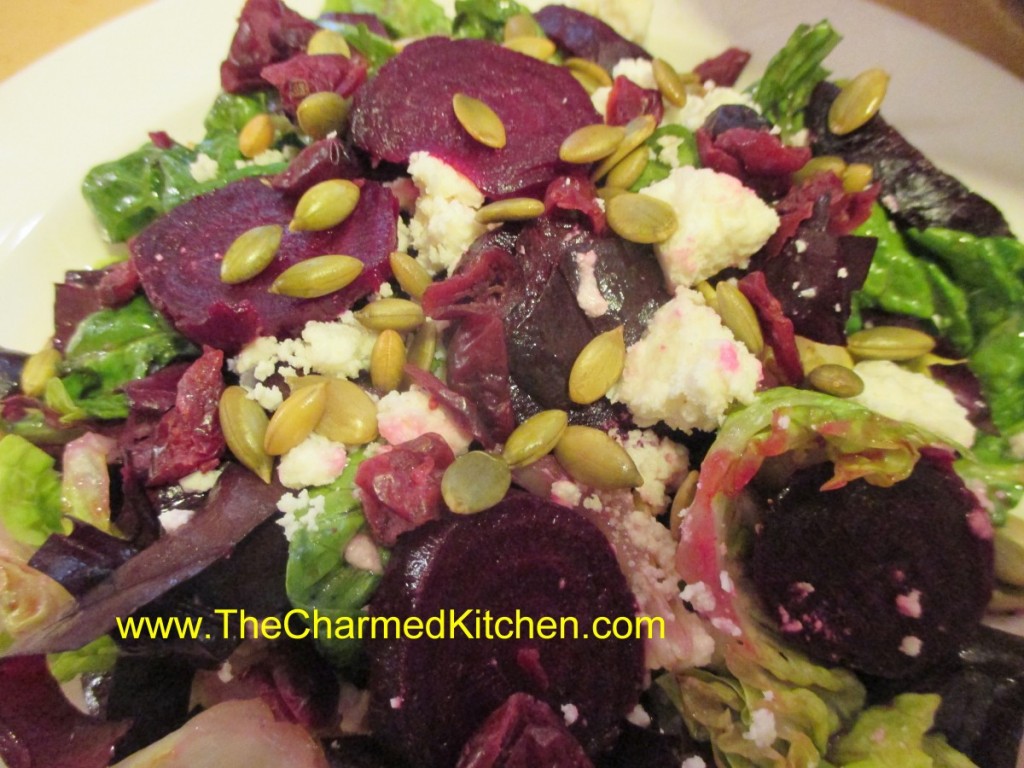
Roasted Beet Salad

I picked up a couple of bunches of beets the other day. I wasn’t sure what I wanted to do with them at the time. They just looked so fresh. I decided to roast some, and then go from there.
To roast beets: just wash them and trim off the greens- leaving about an inch of the stems to reduce bleeding. The beet greens could be added to the salad.
Place beets in a roasting pan and drizzle with a little oil. I used avocado oil. Cover pan and place in a 350 degree oven for about 45 minutes. Smaller beets will be cooked in less time- about 35 minutes. Really large beets could take up to an hour. I always check by poking one of the beets with a fork. Let the beets cool a little and then remove the peels. I use a knife to do this. They come off quite easily.
I used three small beets to make this salad for lunch. I shared it with a neighbor.
Roasted Beet Salad
1 small head Bibb lettuce, washed and sliced into thin slices
2 c. spinach, torn into bite sized pieces
1/4 c. olive oil
3 T. red wine vinegar
2 t. sugar, optional
3 small roasted beets, peeled
1/2 c. crumbled feta cheese
1/4 c. hulled pumpkin seeds, toasted
1/4 c. dried cherries
coarse sea salt- I used pink salt
Place lettuce in a mixing bowl. Combine olive oil with vinegar and sugar, if using. Add salt and pepper to taste and toss over the greens. Slice beets. Divide greens on 2 salad plates. Arrange half of the beets on each salad and top with the rest of the ingredients. Sprinkle with a few grains of the sea salt and serve. Makes 2 luncheon salads.
Homemade Rye Bread


I have been playing around with baking rye bread for awhile now. Tried a few different recipes recently. I found this recipe online, but I did change it a little. I ended up with a rye bread with lovely flavor and texture.
Rye bread can be tricky. Rye flour needs to be paired with wheat flour to have the necessary type of gluten to rise. Rye flour does contain gluten, but not the type of gluten that gets stretchy. Rye flour also rises better when some acid is added to the dough. Molasses adds some acid. In this dough, sour pickle juice is added. Vinegar also works.
Rye flour is higher in the enzymes that break down starch into sugars. Starch is needed to form the structure of the crumb, and if too much starch is split up, the texture of the bread suffers and becomes gummy. Traditionally, this is prevented by acidifying the rye dough. This is why breads with a high percentage of rye flour are made with rye sour (rye-based sourdough starter), even if commercial yeast is added, to preserve the structure of the bread.
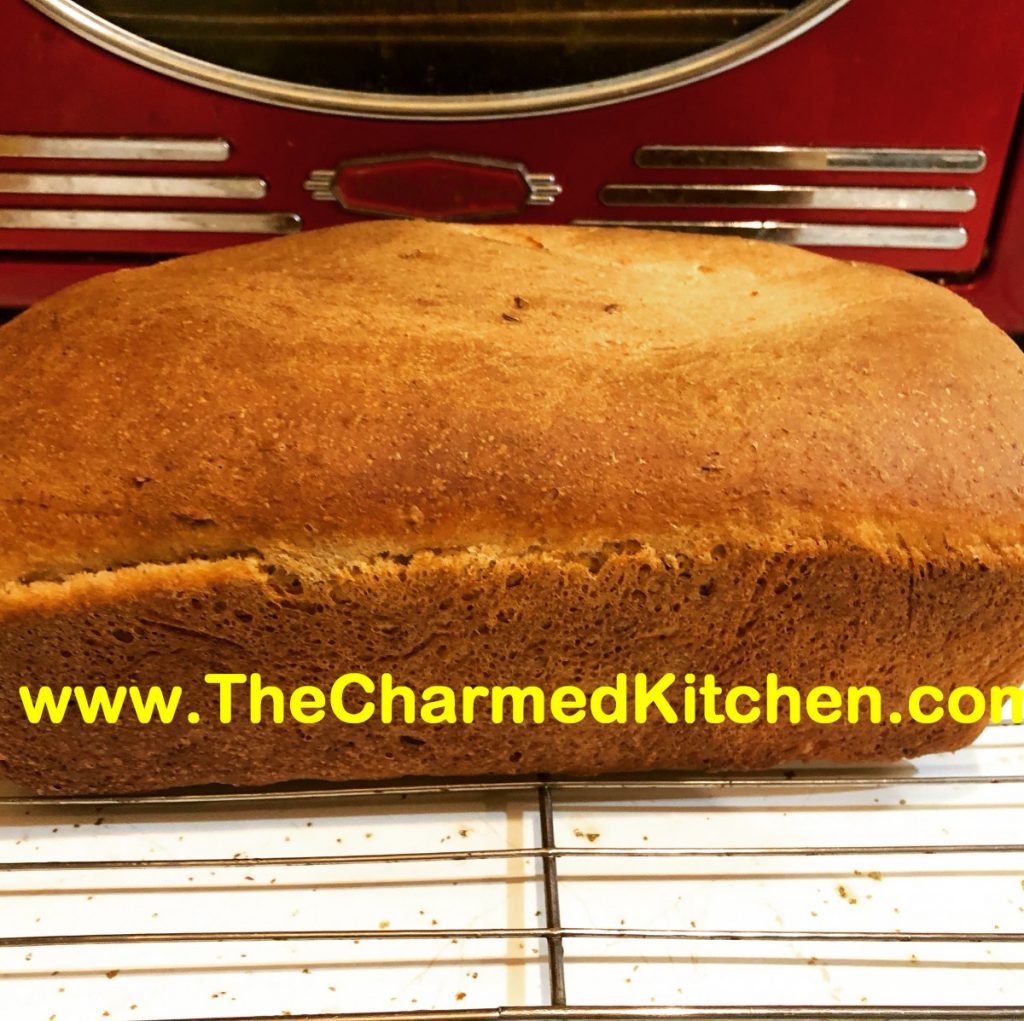
So here is the most recent rye bread I made. More variations are coming.
Deli Rye Bread
2 c. bread flour
1 c. rye flour
3 T. potato flakes
2 T. caraway seeds
2 T. brown sugar
1 packet active dry yeast- scant tablespoon
2 t. salt
1 c. warm water
¼ c. olive or avocado oil
¼ c. sour pickle juice
2 T. molasses
Place bread flour, rye flour, potato flakes, caraway seeds, brown sugar, yeast, and salt in the bowl of a large stand mixer. Stir dry ingredients to combine. Add warm water, oil, pickle juice and molasses into dry ingredients. Fit dough hook onto mixer and beat until dough is just coming together. It will look rough. Cover bowl with plastic wrap and let rest for about 30 minutes. Remove plastic wrap and knead dough in stand mixer with dough hook until smooth, firm, and only slightly sticky, 6 to 8 minutes. Turn dough onto a floured work surface and knead until smooth, 1 to 2 more minutes. Form dough into a ball, place dough into an oiled bowl, and turn dough around several times in bowl to coat with oil. Cover the bowl with plastic wrap, set into a warm place, and let rise until nearly double, about 1 hour. Grease a 9×5-inch loaf pan. Turn dough onto a lightly oiled surface, shape into a log, and place into prepared loaf pan. Cover with a linen kitchen towel and let rise until top of dough has risen slightly over top of pan, 60 to 90 minutes. Preheat oven to 350 degrees F (175 degrees C). Bake loaf until golden brown and cooked through, about 35 minutes. If loaf browns too quickly, cover loosely with a tent of aluminum foil with shiny side out. Bread should sound hollow when tapped lightly. Remove from pan and cool on wire rack. Makes 1 loaf.
Veggie and Bean “Burgers”


I have mixed feelings about calling them veggie or bean “burgers”. Maybe call them patties? They are pretty tasty, whatever you call them, but they aren’t really meant to be an imitation burger. They are just a tasty way to enjoy beans and rice!! I started with a basic bean “burger” recipe then made the veggie variation below by adding grated raw veggies to the mix and some extra bread crumbs to hold it all together. They are best when browned and crispy on the outside. The middle with be tender and moist.
Basic Bean “Burgers”
2 c. cooked beans, drained and mashed, I used pinto beans, but use what you like
1 c. cooked rice
1 medium onion, chopped
2 eggs or egg substitute
1/2 c. breadcrumbs, plus extra for coating
salt and pepper to taste
oil for frying
Combine all ingredients, except oil, in a bowl and mix well. Add more breadcrumbs, if needed, to make the mixture thick enough to shape into patties. Shape into patties and roll in extra crumbs. Heat small amount of oil in skillet and cook until browned on both sides and cooked through. Makes 6-8, depending on the size.
Variations: Just start with the recipe above
Chili Bean : Use kidney beans or black beans and season with chili powder and oregano, maybe even cilantro. You can also roll them in cornmeal, rather than the breadcrumbs. Top with salsa.
Veggie : Add 1 or 2 grated carrots, 1 chopped and seeded sweet pepper and 2 ribs of celery, minced. You’ll likely need extra breadcrumbs. Add some herbs for extra flavor or some hot sauce.
Taco Bean : Use pinto beans or kidney beans, season with taco seasoning and add a small can of diced green chilies, drained. You can also add minced black olives, if you like. Mix flour and cornmeal together for coating.
Mushroom: Add 1 c. fine chopped fresh mushrooms that have been sautéed a little and drained. Increase bread crumbs a little and season with parsley and basil.
The variations are really endless. Use your imagination and what is on hand. I like to use cooked lentils, too. Just make sure to finely dice any vegetable so that they will mix well and keep the patties from falling apart. To test seasonings either taste before you add the eggs, or cook a small amount if the eggs are already in.
Spring Lemon Tart


This would make a lovely dessert for any Spring dinner. It would be a nice dessert for Easter, too. Since the first day of Spring is tomorrow, I thought it was a perfect time to share this recipe.
I was leaning towards making a cheesecake. Then I discovered I only had one box of cream cheese. Not enough for a cheesecake. While searching my fridge for cream cheese, I found a couple of lemons. I suppose I could have made a lemon pie, but I decided to just make something up with what I had, including the cream cheese. This lemon tart was the result.
Before I get to the actual recipe, let me talk about the lemons, and including fresh lemon juice in recipe directions. Recipes will often list the “juice of a lemon” in the ingredients. There is about the same amount of lemon juice in all lemons, so that a little difference, one way or the other, is no big deal. The amount is anywhere from 2-3 tablespoons of juice in a lemon. You might get 4 tablespoons, if the lemon is really big. I have used that phrase in recipes myself.
Sometimes, however, you have to recognize when you have lemons that aren’t “average”.
The two lemons I had on hand were big, really big. When I juiced them, I ended up with 2/3 of a cup of lemon juice. So, in this recipe I used the actual measurement of the juice, rather than saying, “the juice of 2 lemons.” Three or four average sized lemons should give you 2/3 cup of juice.
So here is the recipe for my lemon tart, the happy end result of using what I had, and making it work.
Spring Lemon Tart
Crust:
1½ c. crushed vanilla cookies
4 T. melted butter
Filling:
1 (8oz.) container cream cheese, softened
½ c. sugar
2/3 c. lemon juice
Zest of two lemons
3 eggs
¼ c. cornstarch
Combine crust ingredients in medium bowl. Press crumb mixture into a 9–inch springform or tart pan. Bake in a preheated 350-degree oven for 10 minutes. While the crust is baking, make the filling. In mixing bowl combine the cream cheese with the sugar and beat until fluffy. Add the lemon juice and zest and beat well. Add the eggs and cornstarch and beat until smooth. Pour filling over the baked crust and return to oven. Bake for 35 minutes, or until golden on top. Center will be soft, but firms as the tart cools. Cool, then refrigerate until ready to serve. You can dust with powdered sugar, if you like. Serves 6.
Lemon Curd Ice Cream


This is one of the easiest ice creams to make. You don’t need an ice cream machine to make it and there are only three ingredients, if you count the lemon curd as one ingredient. I did make my own lemon curd- recipe follows, but you can just use a jar of store bought. It has the nicest flavor and texture.
This ice cream came about because I had made lemon curd for a party and had some left over. I also had whipping cream that needed to be used up. I combined the two and it was even better than I thought. Two friends have tried it so far and both really liked it.
Here is the recipe.
Lemon Curd Ice Cream
1-1 1/2 cups heavy whipping cream
2 cups lemon curd
1/2 c. powdered sugar
In a medium mixing bowl, whip the cream until soft peaks form. Beat in the lemon curd and sugar and place in a freezer container and freeze until ready to eat. Makes about a quart. I told you it was simple!!!
Lemon Curd
1/2 c. lemon juice
zest from one good sized lemon- you should have 2-3 teaspoons
1/2 c. sugar
3 eggs
6 T. unsalted butter- cut into little cubes
In medium saucepan, combine all ingredients. Whisk the mixture until the eggs are well blended. Cook over medium low heat, whisking often, until the mixture thickens. This will take 5-7 minutes. Whisk more often as mixtures warms and starts to thicken. Better to heat over lower heat and take longer than cook over too high a heat. You don’t want the eggs to scramble. Once the mixture is thickened , transfer to a bowl or jar. Cover the surface with a piece of plastic wrap to keep the surface from developing a skin- like any pudding will do. Chill until ready to use. Makes about 2 cups. Will keep in fridge a week or two.
Irish Shortbread


If you are looking for an Irish dessert for St. Patrick’s Day, you might want to make these shortbread cookies. They are everything a shortbread should be. They have the classic shortbread crumbly, tender texture that is buttery at the same time. I think the phrase is melt in your mouth.
These are a little different than other shortbread, though. For starters, you add cornstarch to the dough. The cornstarch helps the cookie to be extra tender. You also melt the butter before adding it to the rest of the ingredients.
It could not get any easier. I pressed the dough into a 9×9-inch pan to bake. Once in the pan, I score the dough before baking, then cut the shortbread again once baked and cooled.
I will say that shortbread aren’t the prettiest cookies on the plate- but they are wonderfully tasty.
So here is the recipe. They also call for self-rising flour. If you don’t have self-rising flour- the recipe for making your own follows the shortbread recipe.
Irish Shortbread
1 c. butter
2 1/4 c. self- rising flour (see note)
3/4 c. cornstarch
1/3 c. sugar, plus extra for sprinkling on top
Melt butter and allow to cool slightly. In medium bowl combine remaining ingredients. Stir in butter and mix until dry ingredients are thoroughly coated. Press into 7×11-inch glass pan (8×8 or 9×9-inch pans are OK). Sprinkle with extra sugar and score with a knife into 1×1-inch pieces. Bake in a preheated 325-degree oven for 30-40 minutes, until edges begin to brown. Cool in pan and cut on score marks. Makes about 6 dozen squares, depending in pan size used.
Note: If you don’t want to buy self-rising flour here is an easy recipe to make your own. It works in any recipe that calls for self-rising flour.
Self-Rising Flour
8 c. flour
5 T. Baking powder
2 T. sugar
1 T. salt
Combine all ingredients and store in an airtight container. Keeps for several months.
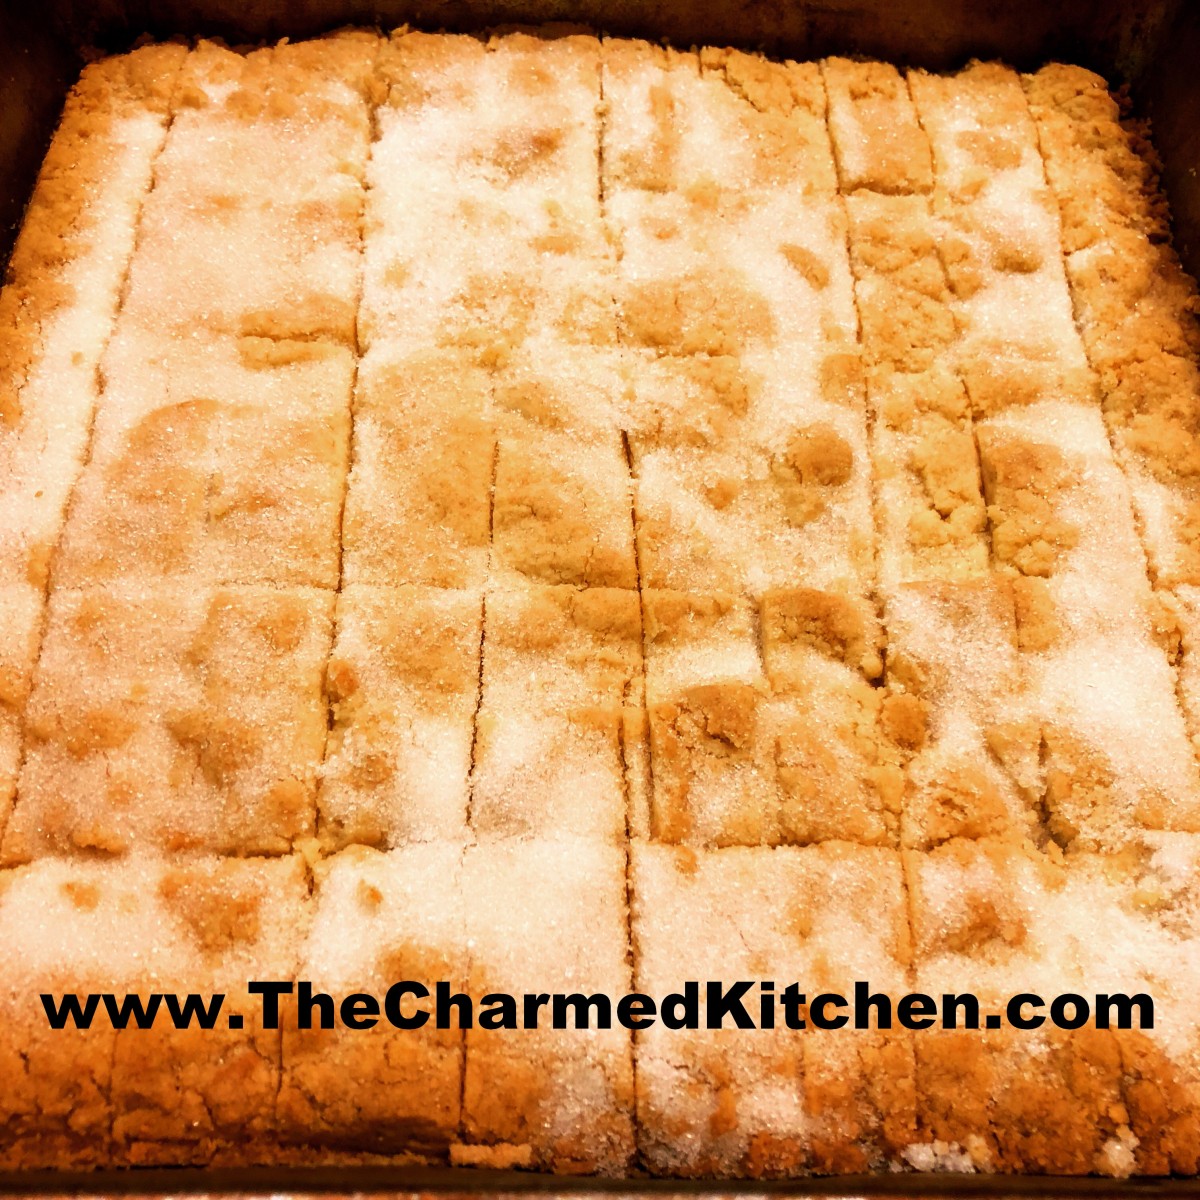
Right out of the oven
Corned Beef on Rye Salad

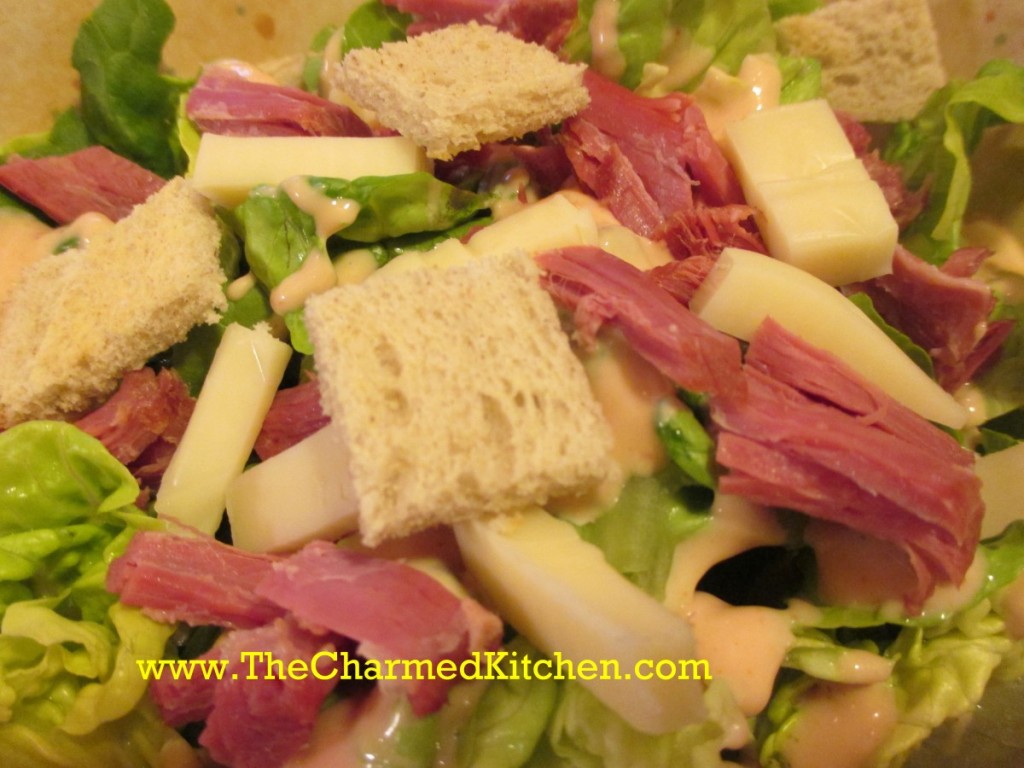
If you have leftover corned beef, you might want to try using it in a salad. This recipe came about when I had some corned beef that I was planning on using in a sandwich. I was more in the mood for a salad. Since I also had some lovely salad greens, I decided to combine them in one dish.
The end result was very tasty.
I prepped my greens, then topped them with the corned beef and Swiss cheese. I made croutons out of the rye bread and dressed the salad with homemade thousand island dressing. A nice Russian dressing would have worked, too. Perhaps, even a simple oil and vinegar dressing. The thousand island dressing made it like a Reuben sandwich, minus the sauerkraut.
Corned Beef on Rye Salad
6-8 c. mixed salad greens, washed and dried off
6 oz. corned beef, cut in bite sized pieces
4 oz. cubed Swiss cheese
2 slices rye bread, toasted and cubed
4 T. Thousand island dressing- recipe follows
Place greens in a bowl. Top with the meat, cheese, rye bread and drizzle with the dressing. Serves 2.
Homemade Thousand Island Dressing
Combine equal amounts of mayo, ketchup and sweet pickle relish. Stir to combine. I like to add capers sometimes, too. Store unused portion in the fridge.


