The Beet Cake is Back
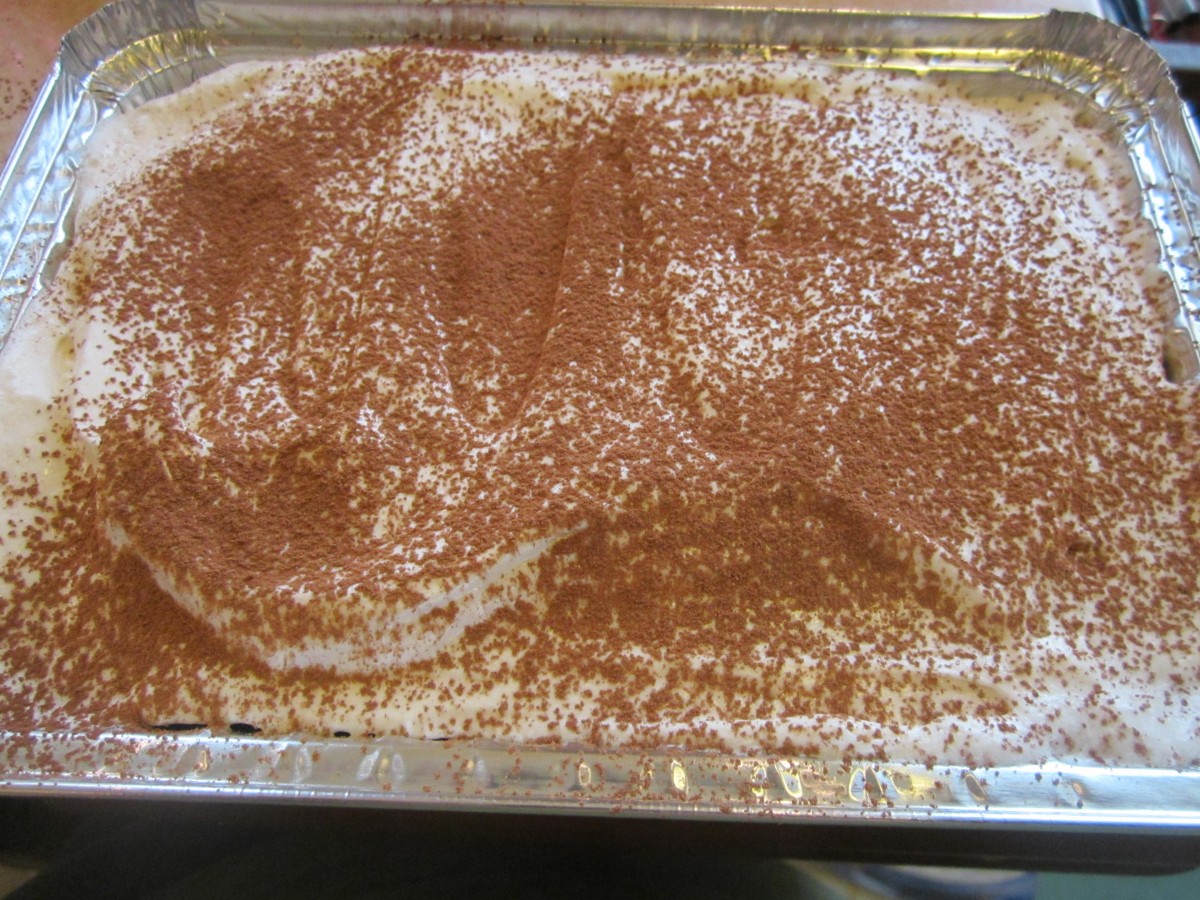
Chocolate Beet Cake with Cream cheese Frosting and a light dusting of cocoa
For those of you who have been asking for it I will have chocolate beet cake today at the Blue Pike Farm market. I will also have fresh made zucchini bread. Plus peach preserves, strawberry jam, blueberry jam, assorted pickles, dilly green beans, pickled asparagus and more!! Hope to see you there. The market at Blue Pike Farm is Thursdays from 4-7 pm. The farm is located at 900 E.72 street in Cleveland- just 1/2 mile south of the shoreway.
Beet Relish
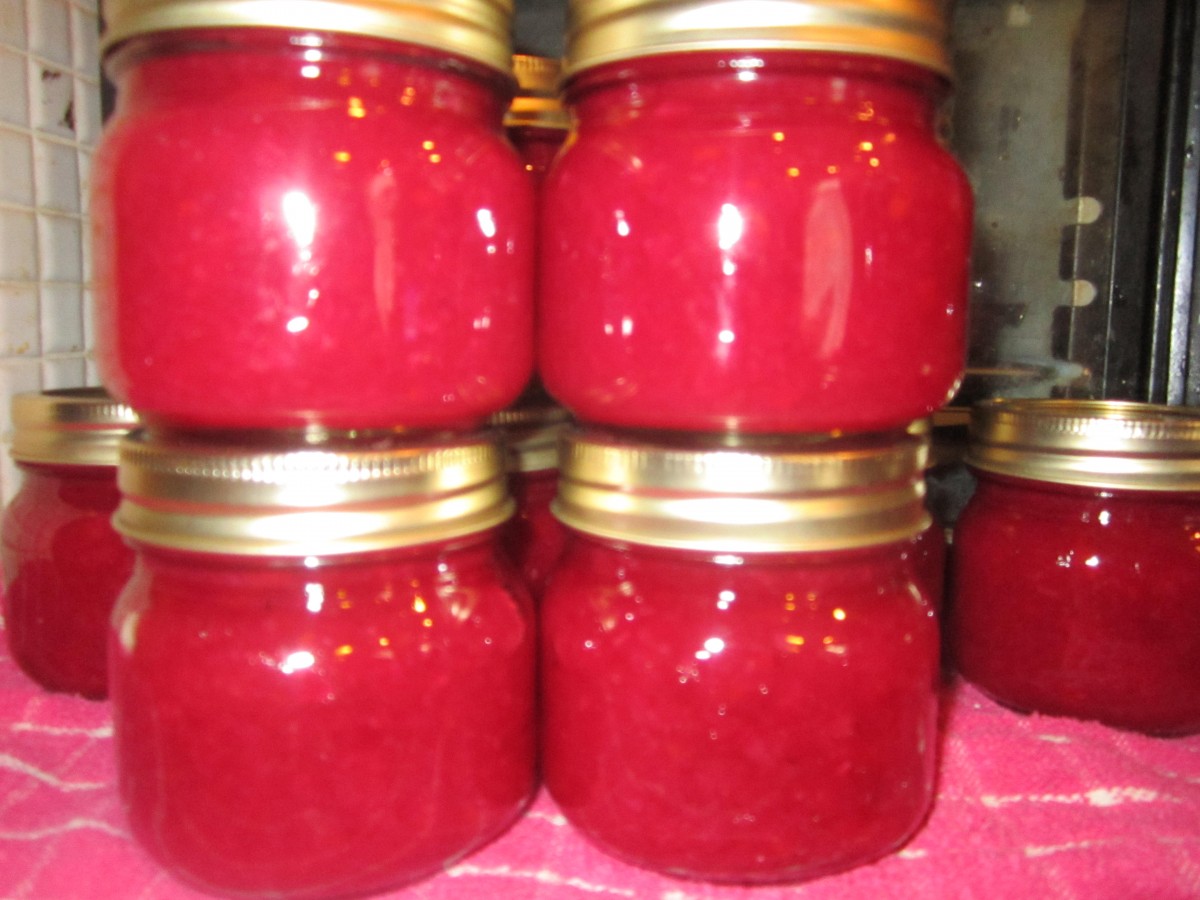
Beet Relish
I love this relish and make several batches every year. You can add it to sandwiches or salads and if you put some in your chicken salad it turns it the nicest shade of pink. If you have some extra beets laying around you might want to try it.
Beet Relish
1 qt. chopped cooked beets, about 12 medium
1 quart chopped cabbage, about 1 small head
1 c. chopped onion
1 c. chopped red sweet pepper
1 1/2 c. sugar
1 T. prepared horseradish
1 T. canning salt ( non-iodized)
3 c. vinegar, white or cider- I prefer cider vinegar
Combine all ingredients in a pot and bring to a boil. Simmer 10 minutes. Bring mixture to a boil. Pack hot relish into hot jars leaving 1/4 -inch head space. Seal jars and process in a boiling water bath 15 minutes. Yield about 10 half-pint jars.
Source: Ball Blue Book
Peach and Vanilla Preserves
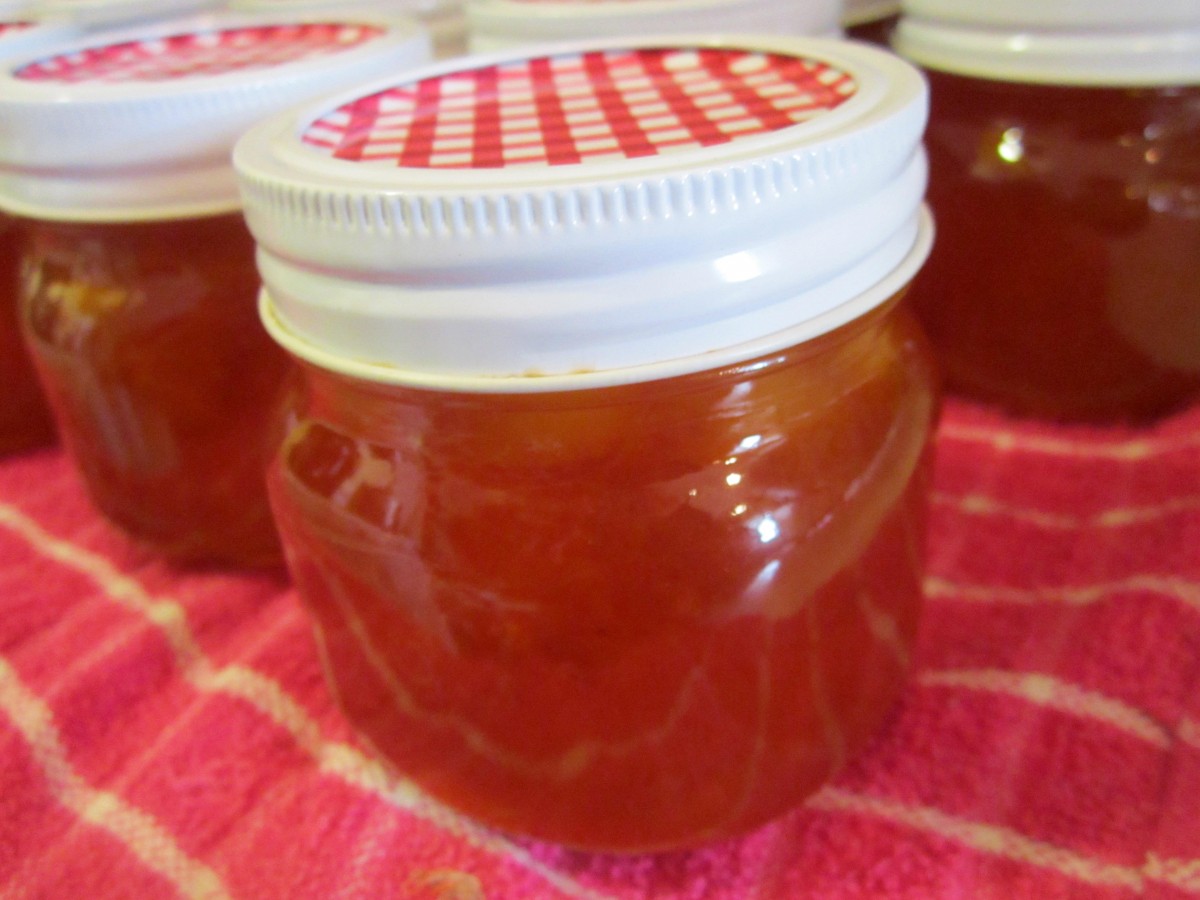
Peach and Vanilla Preserves
With local peaches at their peak I decided to make Peach Preserves. I change them up a little by adding vanilla which complements their sweetness.
Peach and Vanilla Preserves
4 c. peaches, peeled, pitted and cubed
6T. powdered pectin
1/4 c. lemon juice
1 T. pure vanilla extract
7 c. sugar
Place peaches in a pot with the pectin, lemon juice and vanilla. Bring to a boil, stirring often. Add sugar and stirring constantly, bring mixture to a boil. Boil hard for 1 minute. Pour mixture into jelly jars leaving 1/4 -inch of headspace. Wipe rims and screw on lids. Process in a boiling water bath for 10 minutes. Makes about 8 half- pint jars.
Freezing Green Beans
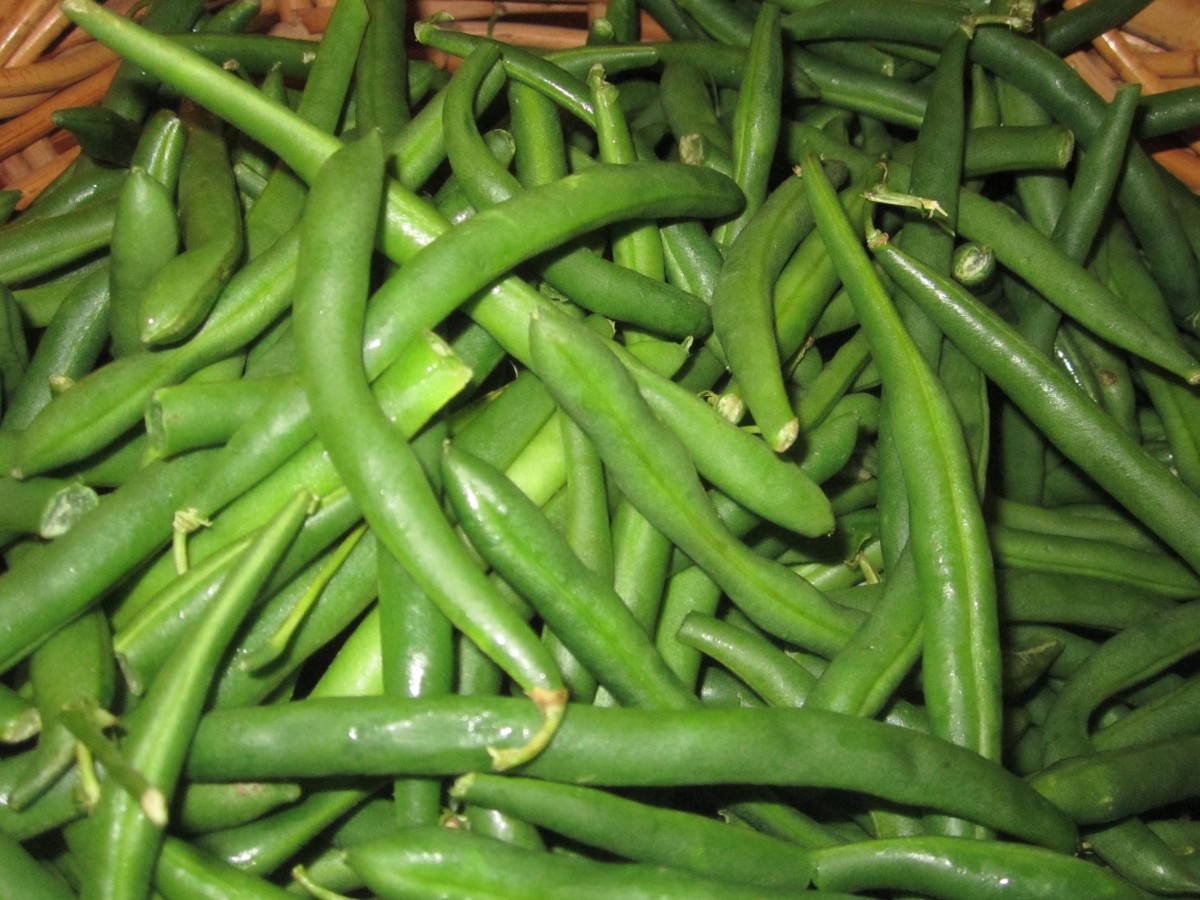 With so many vegetables and fruits in abundance now I think its important to consider putting some away for winter. I had a request from a friend to post this info. She wants to have green beans from her garden at her Thanksgiving dinner. Not a problem at all. You could can green beans, lots of people do. Canning them does require a pressure canner, which my friend doesn’t have. You could also pickle them or dehydrate them, but for the green bean dish my friend wants I think freezing them is the way to go.
Unlike canning, safety is not the primary concern when freezing. Quality is, however, and by following a few steps you can enjoy your harvest all year round.
To freeze green beans start by washing the beans and trimming off the ends. You can freeze them whole or cut. Beans are best when blanched in boiling water before freezing. Have a large pot of water boiling and a bowl of ice water ready. Place prepped beans in the boiling water for 3 minutes. Remove with a slotted spoon and place in the ice water to cool down. If you are blanching a lot of beans do them in batches. Placing too many will bring the temp of the boiling water down too much. Once beans are cooled down drain them and place in freezer bags or containers, label and date then place in freezer. When ready to use them take from the freezer and place beans in boiling water until tender- about 5 minutes.
Advantages of freezing are that you don’t need to buy a canner or worry about spoilage. You will, however, need freezer space and freezer containers to prevent freezer burn. And of course in the event of a prolonged power outage you could lose it all. I think some foods are better when frozen than canned, like green beans which must be processed for a very long time when canned.
Always label what you freeze and date it. It’s amazing how time flies. While food remains safe for ages in the freezer it is best to use most home-frozen foods within a year of freezing.
Some foods need to be blanched before freezing. Blanching is simply putting the food in boiling water steaming for a few minutes and then plunging the food into ice water to stop the cooking. Blanching kills surface bacteria and also causes the produce to wilt, thus making it easier to pack. Blanching also stops the action of ripening enzymes, thus keeping that just-picked taste. The issue with fruits and vegetables is whether to blanch before freezing or not. As a rule, fruits are not blanched and most vegetables are. Peppers and onions can be frozen without blanching.
The biggest problem with home freezing is that most home freezers aren’t cold enough. Refrigerator-freezer combinations tend to be warmer than separate freezers. To have the best results foods should be kept at -20 degrees. If you’re lucky you might have a freezer that is as cold as -10 degrees. Some are at warm as 10 above zero. Fine for making ice cubes, but too cold for long term freezing. Get a freezer thermometer and keep track. The warmer the freezer the shorter you should be keeping foods frozen.
Cream of Fresh Tomato Soup
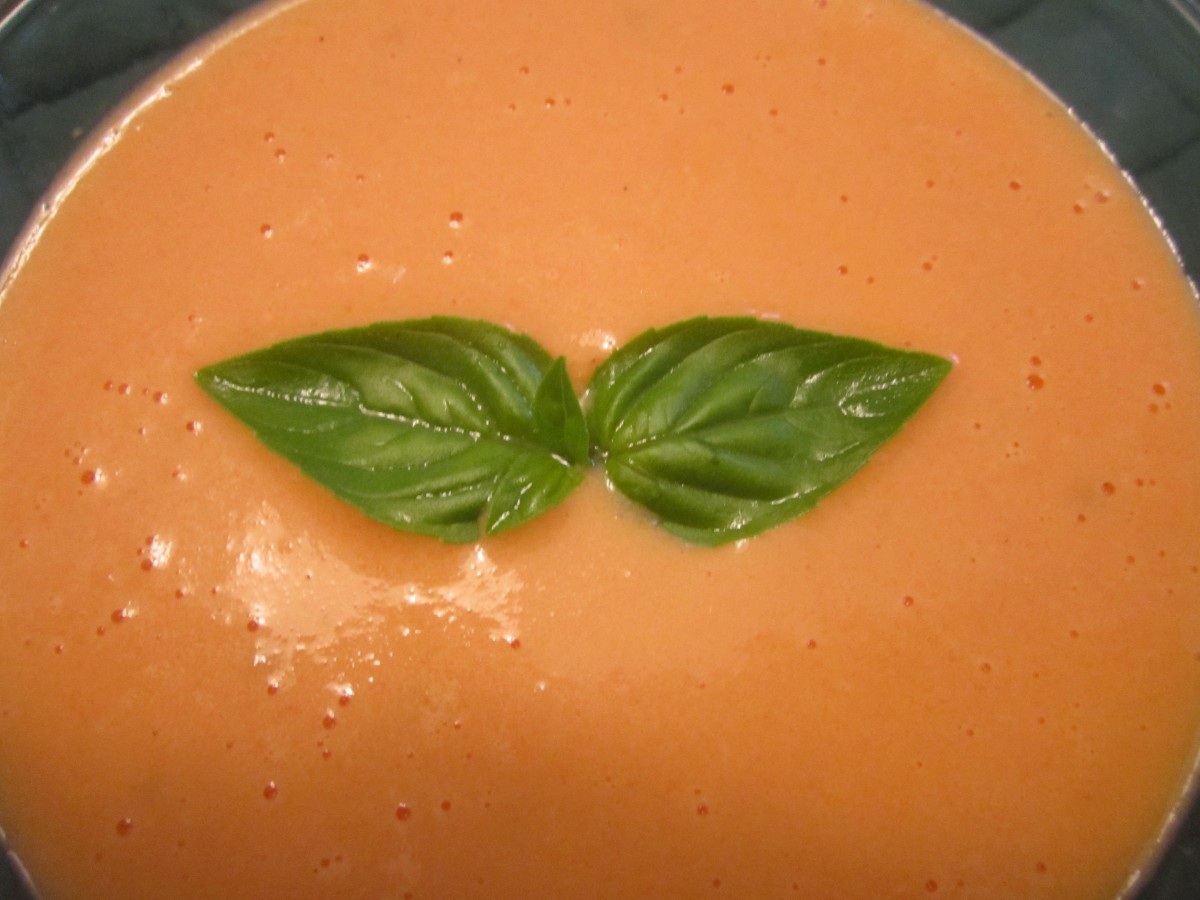
Cream of Fresh Tomato Soup
This is a great way to use some of those fresh tomatoes. A simple soup with lots of flavor it is my favorite tomato soup ever. Try it by itself or pair with a grilled cheese sandwich. Yummy!!
Cream of Fresh Tomato Soup
3 medium-sized ripe tomatoes
1 small onion, chopped fine
1 rib celery, chopped fine
Pinch of sugar, optional
3 whole cloves
1 small bay leaf
3 T. butter
3 T. flour
1 t. salt
3 c. milk
Peel and chop tomatoes. Place tomatoes in saucepan with onion, celery, sugar (if adding), cloves and bay leaf. Bring mixture to a boil; reduce heat and cover, simmering 15 minutes. Melt butter in a large saucepan then stir in flour and salt. Cook mixture until bubbly. Add milk and cook until thickened stirring constantly. Puree tomato mixture through strainer, food mill or in a blender or processor. Add to milk mixture and heat through. Serves 6.
Canning Tomatoes
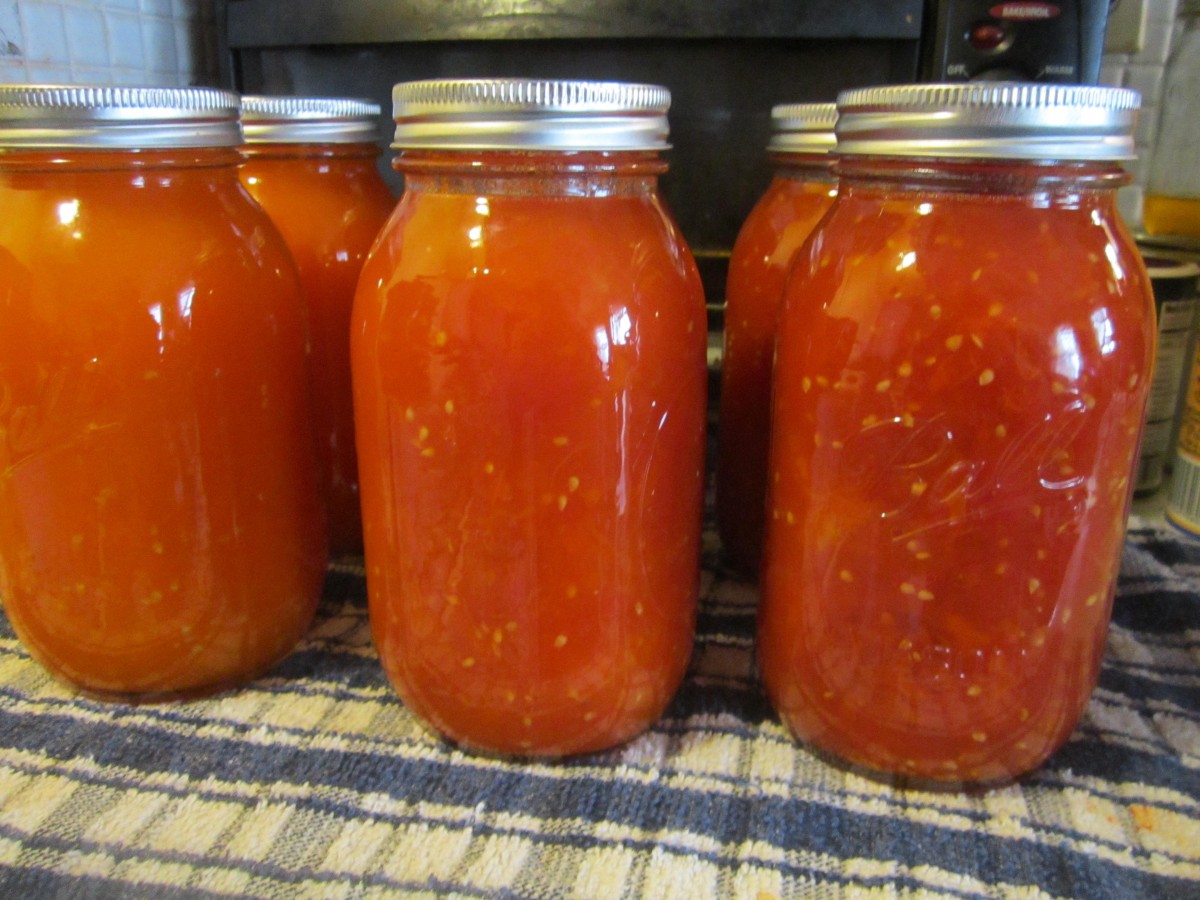
Canning Tomatoes
Certainly one of the most popular products to can each year here are a few recipes to start you off.
Crushed Tomatoes
Peel and core tomatoes , trim off any bad spots and quarter. Place about 1/4 of your prepared tomatoes in the kettle and cook, stirring constantly over high heat. Use a potato masher to crush tomatoes and extract juices. Once they are boiling add remaining tomatoes, stirring constantly. You don’t need to crush these tomatoes. Bring to a boil and boil for 5 minutes. In clean, hot jars add needed acidity listed below. You can also add 1 teaspoon of canning salt per quart if desired. Ladle in hot tomatoes, leaving 1/2-inch headspace. Wipe jar rims clean and adjust lids. Process in boiling water bath. Pints 35 minutes, quarts, 45 minutes. 1,000-3000 ft over sea level add 5 minutes. Twenty-two pounds of tomatoes will yield about 7 quarts of tomatoes.
Whole Tomatoes in Juice
Use any extra tomatoes to make juice. I use tomatoes that are too big to can whole, or those that have blemishes that need to be trimmed. Cut up clean, unpeeled tomatoes in a kettle and cook, stirring often until tomatoes are mushy. Strain mixture, pressing on solids or run through a food mill or tomato juice extractor. Set aside,. Place peeled, whole tomatoes in kettle and add enough tomato juice to cover them. Heat to a simmer and simmer gently 5 minutes. Add lemon juice or citric acid to jars, using amounts listed below. Add salt, if desired. Add tomatoes and cover with hot juice, leaving 1/2 -inch headspace. Wipe rims and adjust lids. Process both pints and quarts 85 minutes in a boiling water bath.
Tomato Juice
Wash, stem and trim bruises off tomatoes. Cut into chunks. Add about 1 pound of tomatoes to kettle and bring to a boil while crushing. Continue to add additional cut up tomatoes slowly, keeping mixture boiling. This will keep the juice from separating later. Simmer an additional 5 minutes once the tomatoes have all been added. Press mixture through a strainer , sieve or food mill to remove seeds and skins. Add lemon juice or citric acid to jars according to directions listed below. Add salt if desired. Return juice to boil and add to prepared jars leaving 1/2-inch headspace. Wipe rims and adjust lids. Process n a boiling water bath pints 35 minutes and quarts 40 minutes. Add 5 minutes processing time at elevations between 1,001 and 3,000 ft.
Tomato Sauce
Prepare as for juice. After juice is made return to pot and start cooking down to desired thickness. You’ll lose about 1/3 of the volume for thin sauce and 1/2 of the volume for thick. Add lemon juice or citric acid to prepared jars as described below. Add salt if desired. Add boiling sauce leaving 1/4 -inch headspace. Wipe rims and adjust lids. Process in a boiling water bath 35 minutes for pints and 40 minutes for quarts. Add five minutes at 1,001-3,000 ft. elevation.
Acidity and Tomatoes
Tomatoes must be acidified before canning. When canning either whole, crushed or juiced tomatoes you must add either 2 T. bottled lemon juice per quart or 1/2 t. citric acid . For pint use 1 T. lemon juice or 1/4 t. citric acid. You can also use 4 T. (5%) vinegar per quart, but it will alter the flavor and is not recommended. You can add a little sugar to offset the flavor, if you like.
Cherry Almond Clafouti

Cherry Almond Clafouti
I posted the picture of my clafouti and now, as promised, here is the recipe. Clafouti is a sort of pancake, sort of quiche. Its a wonderful dish that is the perfect dessert for fresh fruit. I used cherries in this one but you can use all sorts of fruits- peaches, plums, blueberries, raspberries….. Most people enjoy it as a dessert but it is also nice with that morning cup of coffee.
Cherry Almond Clafouti
2 c. pitted cherries
1/3 c. sliced almonds
3 eggs
1 c. sugar
1/2 c. flour
2 t. vanilla extract
1 t. almond extract
pinch of salt
1 c. half and half
powdered sugar, optional
Grease and flour a 9×9-inch baking dish. Preheat oven to 350 degrees. Place cherries and almonds in the prepared pan. In blender combine eggs, sugar, flour, flavorings and salt.* Blend until smooth. Add half and half and blend again until smooth. Pour batter over the cherries and almonds. Bake for 45-50 minutes or until clafouti is browned around edges and puffed up. Allow to cool and dust with powdered sugar, if you like. Serves 6.
* You can whisk the ingredients together by hand, if you prefer.
Green Beans in Herb Butter
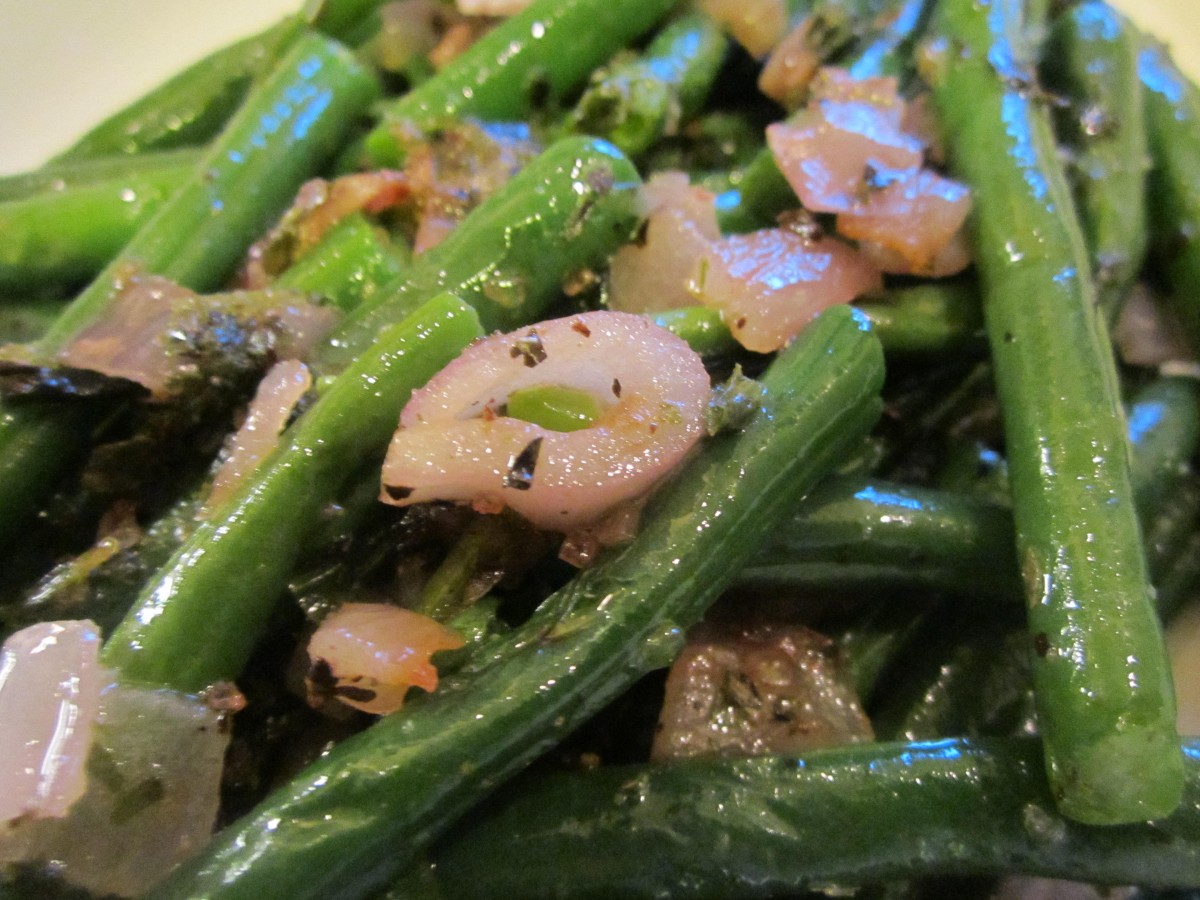
Green Beans with Herb Butter
With fresh green beans everywhere it seemed like a good time to share this recipe. I love them and can’t get enough this time of year. I like this preparation because it adds flavor and a nice twist without covering up the flavor of the beans. Fast and easy to make, too, which is always a plus.
Green Beans with Herb Butter
1 lb. Green beans, washed and trimmed
¼ c. butter
¾ c. minced onion or shallots, I used shallots
1 clove garlic, minced
2 T. chopped parsley
¾ t. salt
1/2 t. each oregano and basil
Boil or steam beans until tender, about 5 minutes. Drain and set aside. Meanwhile, start sauce. Heat butter in skillet and add shallots or onion and garlic. Cook 5 minutes then add seasonings and cook, covered, 5 minutes more. Toss beans with sauce. Serves 4.
Peach and Almond Smoothie
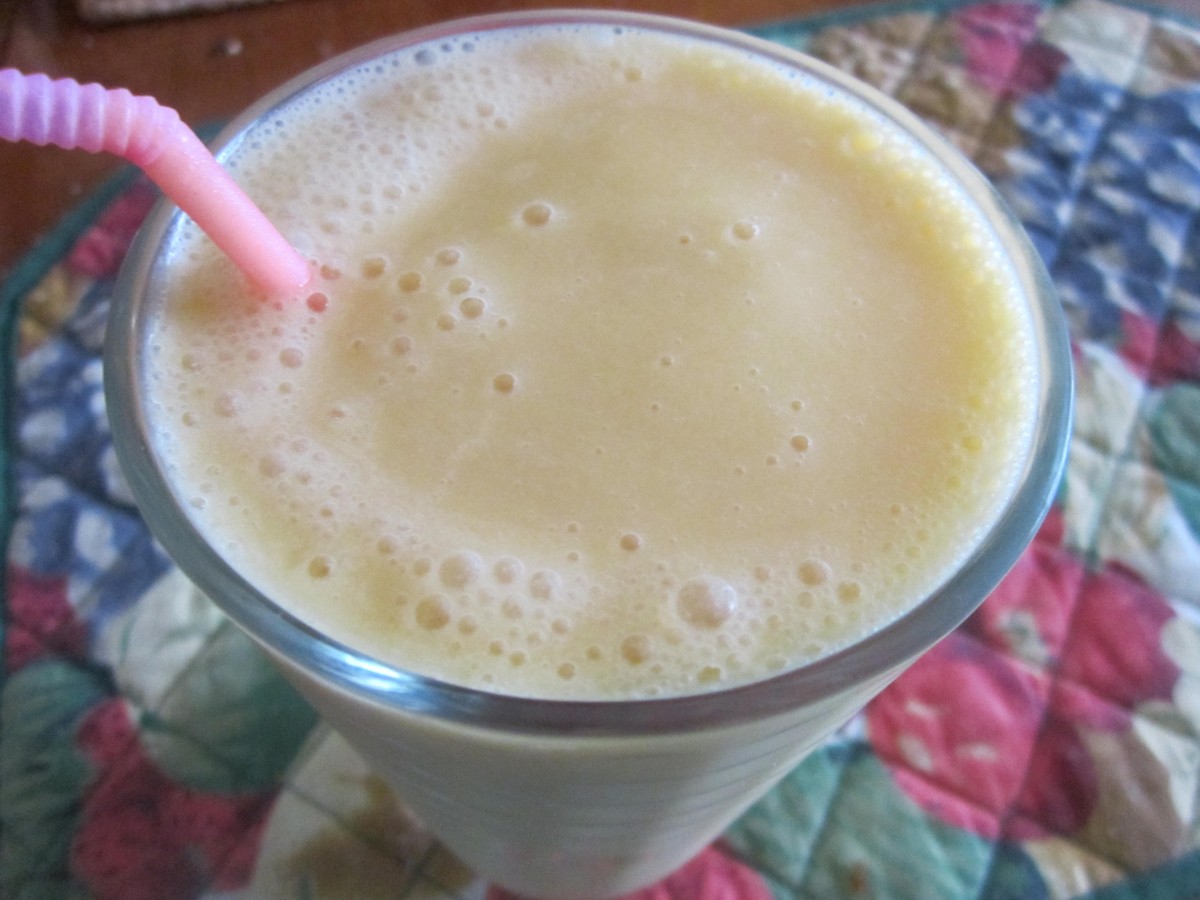
Peach and Almond Smoothie
I have been enjoying fresh peaches a lot lately. I wanted to use some of them in a smoothie. I peeled and sliced a couple of peaches and put them in the freezer. I combined the frozen peaches with almond milk, honey and a little vanilla. I will definitely make this one again!!
Peach and Almond Smoothie
2 peaches, pitted and peeled- then frozen
1 1/2 c. plain almond milk
2-3 T. honey, or to taste
1 t. vanilla
Place all ingredients in a blender and process until smooth. Makes 1 large or 2 smaller servings.
Easy Turkey Vegetable Soup
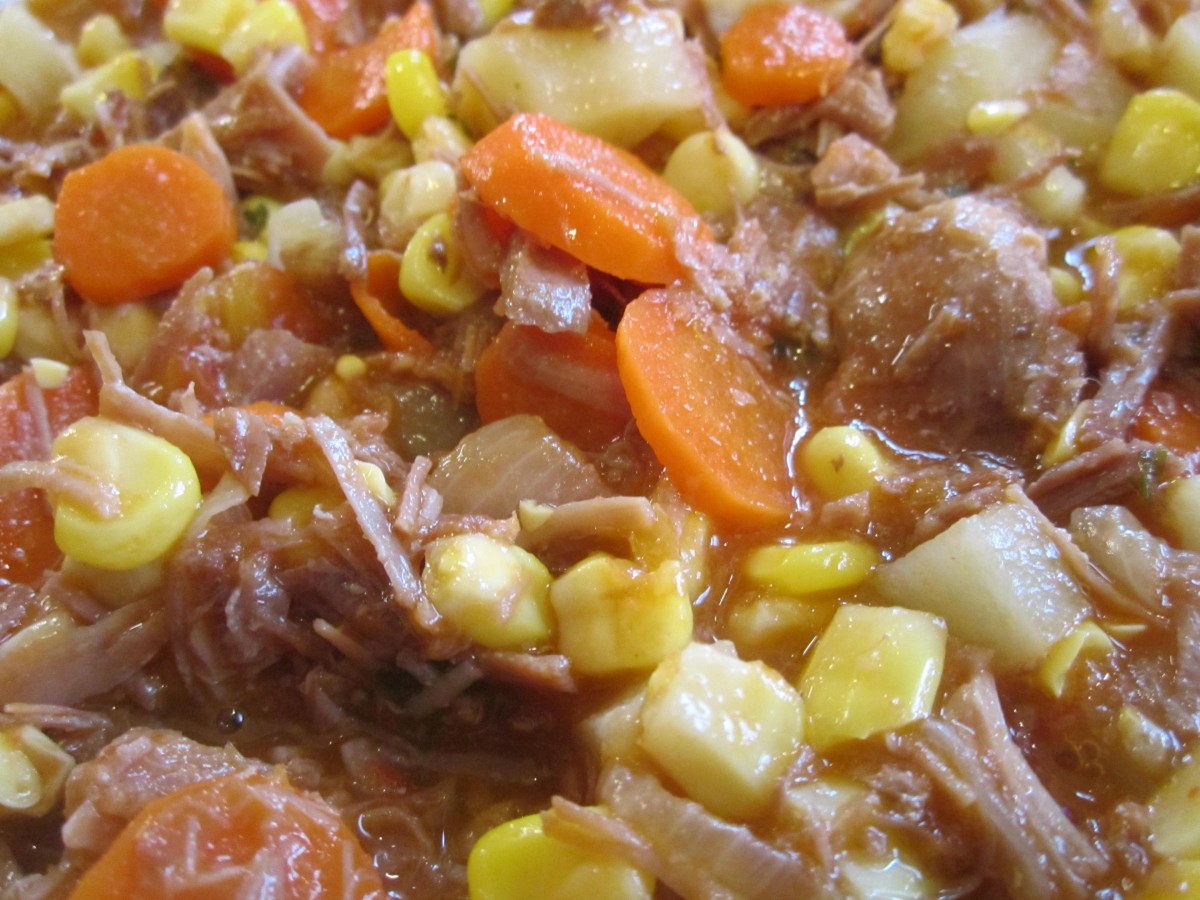
Easy Turkey Vegetable Soup
Its been a little cool lately. Made me want to have some soup. I had picked up some turkey drumsticks so I put them in the crock pot with some onions, carrots, celery, garlic and herbs. Covered the meat and veggies with water and let it cook overnight. The next morning I strained it and had lovely turkey stock. I also had some seasonal veggies so I threw it all together and ended up with an easy and tasty dinner. If you don’t have turkey stock- use what you have.
Turkey Vegetable Soup
1 onion, chopped
oil
3 carrots, peeled and sliced
3 small potatoes. peeled and cubed
1 c. corn- cut from 1-2 ears
1 medium tomato, peeled and chopped
2 c. shredded cooked turkey *
3-4 cups turkey stock- or whatever you have and like
Fresh parsley and basil
salt and pepper to taste
dash of hot sauce
Heat oil in pot and cook onion until golden. Add carrots and cook a few more minutes. Add remaining vegetables, turkey and stock and simmer, covered, for 10 minutes- or until veggies are tender. Add herbs and simmer a few more minutes. Adjust seasoning and add hot sauce. Serves 2-3 for dinner.
*If you want to turn this into a vegetarian soup add vegetable stock and add a couple of cups of cooked beans. Kidney beans would work well.


