Cookies for Sale
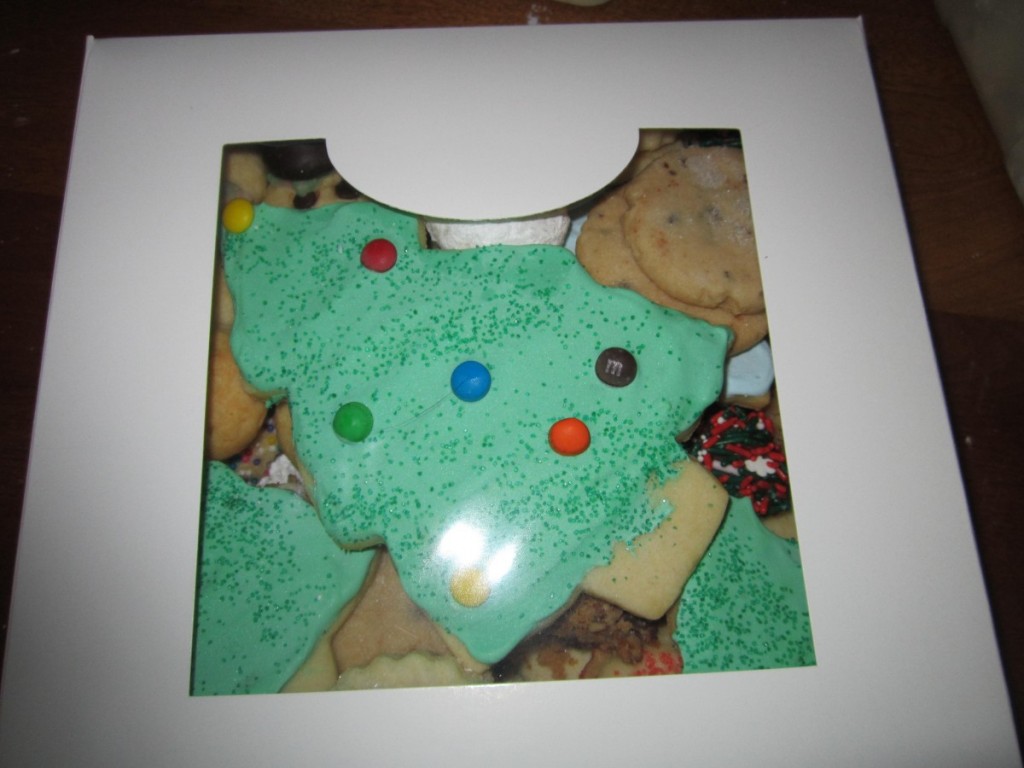
I will be selling boxes of cookies again this year. The boxes weigh more than 2 pounds and contain at least 10 kinds of cookies. Contact me if you are interested. They are $25 each ( $70 for 3 boxes) and will be available for pick-up starting December 21th.
Judi_strauss@att.net
216 501 2905
Homemade Mustard
I love making food gifts for the holidays. I often make cookies or other baked goods. But not everyone wants sweets. For those friends and family, I often make them homemade mustard. I have included recipes for 5 of my favorite mustards.
I wasn’t a big fan of mustard, when I was a kid. I am now. I enjoy using all types of mustard in all sorts of dishes, not just on hot dogs.
Mustard is great on sandwiches and sausages. It is a versatile ingredient for salads, salad dressings, marinades and all sorts of sauces. I lean towards spicy brown mustard myself.
I also enjoy making my own mustard. That way, I can tweak the seasonings.
So here are five of my favorite homemade mustard recipes. If you never made mustard before- you might want to try. It is easy, and fun. Four of them are stored in the fridge- and will keep for months. For gift-giving, look for decorative jars or crocks to put them in. The fifth recipe is canned, so 4 ounce canning jars are required, but it doesn’t have to be stored in the fridge.
Horseradish Mustard
1 c. dry mustard
3/4 c. white wine vinegar
1/3 c. dry white wine or dry sherry
1/4 c. brown sugar
1/4 c. granulated sugar
1 T. dried minced onion
2 t. caraway seeds
1 1/2 t. salt
1/4 t. coarse ground mustard
2 eggs, slightly beaten
1 T. prepared horseradish
Combine all ingredients, except eggs and horseradish in top of double boiler and let stand at room temperature for 2 hours. Whisk in eggs and cook over simmering water until mixture has thickened and eggs are cooked, about 10 minutes. Remove from heat and stir in horseradish. Pour into sterilized jar, cool and cover. Store in fridge for up to 3 months. Makes 2 cups.
Bavarian Mustard
3/4 c. beer
2/3 c. dry mustard
2 T. sugar
2 T. cider vinegar
2 t. salt
1-t. celery seeds
1/2 t. fresh grated ginger or 1/4 t. dry
1 egg, beaten
Combine all but the egg in the top of a double boiler and let stand 2 hours at room temperature. Stir in egg and cook over simmering water. stirring constantly until mixture thickens and egg is cooked, about 10 minutes. Pour into sterilized jars and cool before covering. Store in fridge for up to 2 months. Makes 2 cups.
Spicy Mustard
1 c. dry mustard
2/3 c. dry white wine
1/2 c. vinegar, flavored with herbs or garlic
1/2 c. sugar
2 t. salt
1 t. basil
1 t. chili powder
1 t. dried minced garlic
1 t. oregano
1/2 t. cracked pepper
2 eggs, slightly beaten
Mix all ingredients, except eggs, in top of double boiler and let stand 2 hours at room temperature. Add eggs and cook over simmering water, stirring constantly until mixture thickens and eggs are cooked, about 10 minutes. Pour into sterilized jars and cool down before covering and refrigerating. Keeps in fridge for up to 2-3 months. Makes 2 cups.
French Herb Mustard
1/4 c. dry mustard
1/4 c. white wine vinegar
1/4 c. white wine or dry sherry
1/4 c. brown sugar
1/2 t. salt
1/2 t. tarragon
1/4 t. dill seed
1/4 t. celery seed
1/4 t. ground cloves
3 egg yolks or 1 whole egg
Combine all ingredients, except eggs, in top of double boiler and let stand at room temperature 2 hours. Whisk in eggs and cook over simmering water, stirring constantly, until mustard thickens and eggs are cooked, about 5 minutes. Store in crock or jar in fridge for up to 1 month. Makes 1 cup, recipe can be doubled.
This recipe can be canned, so it doesn’t have to be kept in the fridge. A bit of work , but worth the effort. Makes about 6, (4 ounce) jars.
Dijon Mustard
2 cups chopped onion
2 cups Pinot Grigio or other dry white wine
1 cup white wine vinegar (5% acidity)
1 tsp. salt
6 garlic cloves, coarsely chopped
4 black peppercorns
1 rosemary sprig
1 cup yellow mustard seeds
1⁄3 cup dry mustard
2 2⁄3 cups water
Combine first 7 ingredients in a large stainless steel or enameled saucepan. Bring to a boil over high heat; reduce heat, and simmer, uncovered, 15 to 20 minutes or until onion is very soft, stirring occasionally. Remove pan from heat; pour onion mixture through a wire-mesh strainer into a glass or stainless steel bowl. Discard solids. Stir mustard seeds and dry mustard into wine mixture. Cover and let stand at room temperature at least 24 hours, but no longer than 48 hours. Process mustard mixture in a blender or food processor, adding water until consistency of cooked oatmeal. Transfer mustard to a small saucepan. Bring to a boil, stirring often; reduce heat, and simmer, uncovered 5 minutes. Ladle hot mustard into a hot jar, leaving 1⁄4-inch headspace. Remove air bubbles. Wipe jar rim. Center lid on jar. Apply band and adjust to fingertip-tight. Place jar in boiling- water canner. Repeat until all jars are filled. Process jars 10 minutes, adjusting for altitude. Turn off heat; remove lid, and let jars stand 5 minutes. Remove jars and let cool.
Source Ball Book
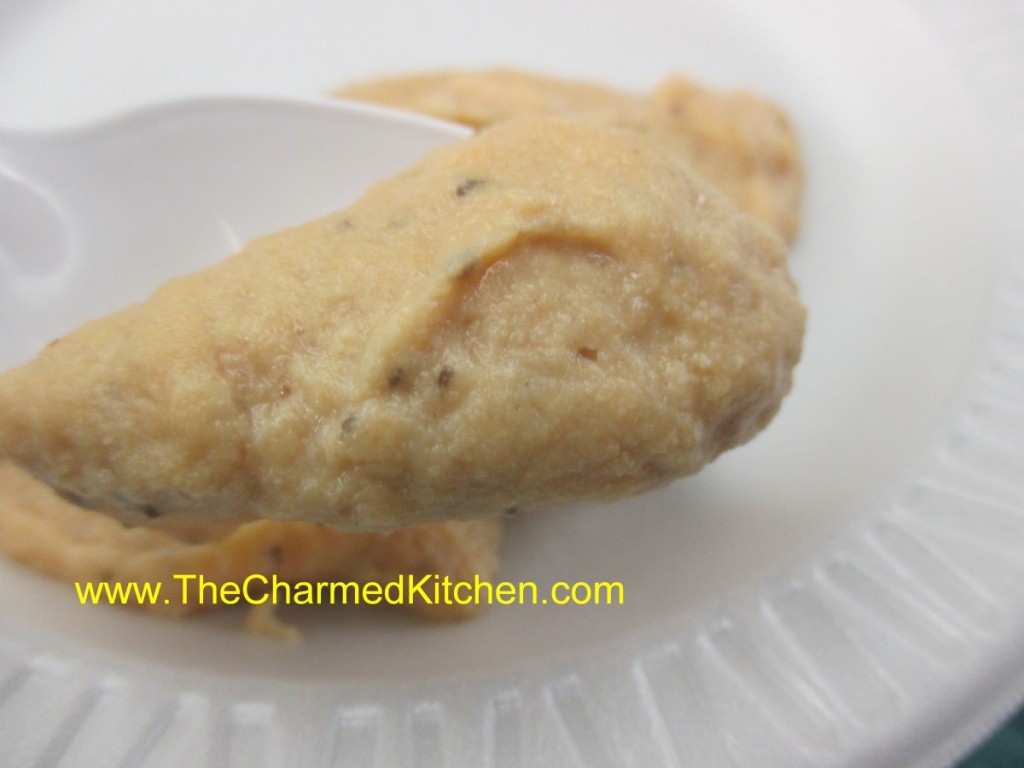
Phyllo Chocolate Fan Cookies
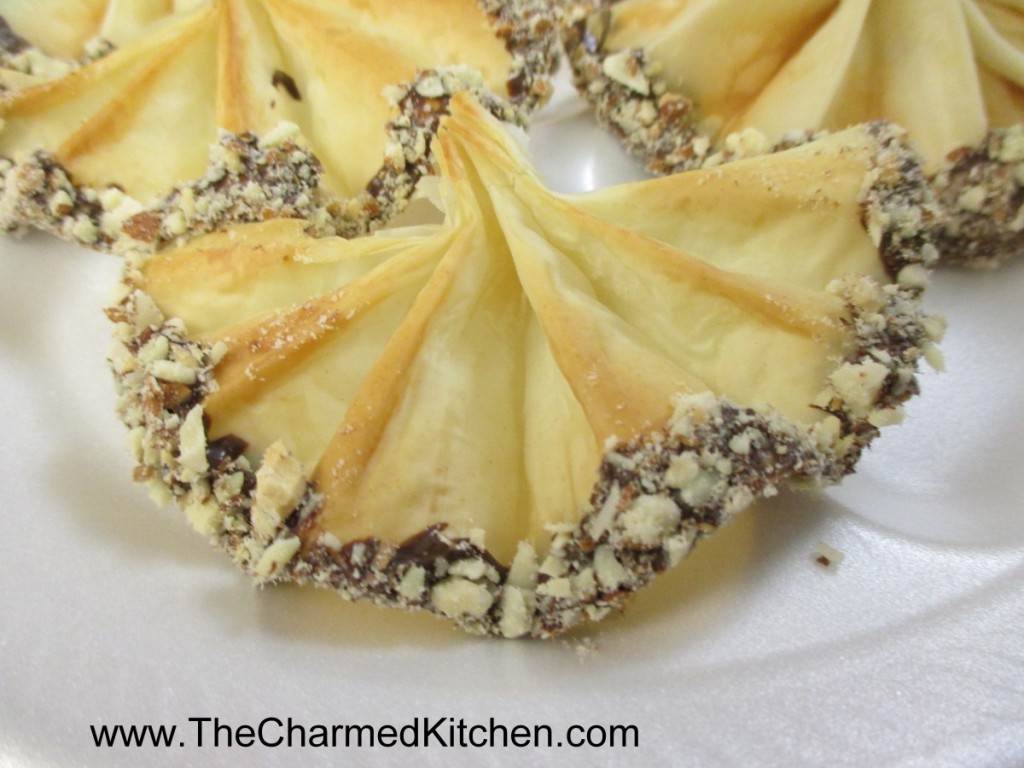
If you want a cookie that is really going to impress, you might want to make these Chocolate Fans. They are crisp, not too sweet, and tipped with chocolate and fine chopped nuts.
While they look difficult to make, they are actually quite easy. For starters, you don’t have to make dough. These are made with store bought phyllo dough.
Phyllo is found in the freezer section at the grocery store. Phyllo dough (also spelled filo) can be a little fussy. Be sure to keep extra dough covered with a damp towel so it won’t dry out and get brittle. It is best to work quickly when making these. We made these dipped in finely chopped toasted almonds. Other nuts could be used. You could also use white chocolate, if you prefer. I have even added a few sprinkles to the nuts for a pop of color.
Chocolate Fan Cookies
1 lb. phyllo dough, thawed
1 c. butter, melted
12-oz. chocolate chips
2 T. shortening- you can use coconut oil instead
1 c. finely chopped nuts or coconut, pistachios are extra nice
Remove phyllo from box, still rolled up and cut crosswise into 5-6 equal pieces.* Keep unused dough covered in a damp towel to prevent drying out. Take one piece of dough and open it up, cutting it in half crosswise. The dough pieces should end up about 3×7 inches or so. Take 1 sheet and brush very lightly with butter. Place another sheet on top and brush again with butter. Place third piece of dough on top but don’t butter again. Starting at short end begin to fold the dough in ¾ inch folds, accordion style. Pinch together at one end and fan out the dough at the other. It should look like a little fan. Place on ungreased baking sheet and repeat with remaining dough. Bake at 375 degrees for 5 minutes. Cool. Melt chocolate and shortening together in microwave or on top of double boiler. Stir to smooth. Dip tip of wide end of fans in melted chocolate and then in the nuts or coconut. Place on a rack to cool and harden. Makes about 65 fans. Can be frozen. You can also use white chocolate. Besides nuts or coconut, you can dip the fans in sprinkles or edible glitter.
*I buy frozen phyllo dough but there are two different sizes. Both are one pound boxes. One has one long roll of dough sheets. The other box has two rolls of phyllo pastry sheets. When using this size, you will cut each roll crosswise into three pieces. Directions in the original recipe above are for the longer roll of dough.
Holiday Boutique

This Sunday, December 3rd, I will be at Wildwood for their craft show. I will be selling my jams, jellies, herb seasoning packets and books!. Hope to see you there.
Sunday, December 3, 2023 – 10 AM – 4 PM
7645 Little Mountain Rd.
Mentor, Ohio
$2 admission, Kids under 12 are free.
Come to the Manor House to find many wonderful holiday items for sale from over 40 vendors including art, jewelry, handmade treasures, live greenery, baked goods, ornaments, stockings and much, much more.
Please contact Wildwood Cultural Center at (440) 974-5735 or email Wildwood@cityofmentor.com.
Cranberry Liqueur

You can do more with cranberries than make sauce. Not that I don’t like cranberry sauce, I do. I love cranberry season and find myself using them in all sorts of recipes.
In the next couple of weeks, I will be posting homemade gift ideas. This is one of my favorites!!
I got the recipe from my sister Cindy, many years ago. It is also called Cranberry Bounce. If you start a batch now, it will be ready to drink, and for gifting, in just a couple of weeks.
Cranberries, sugar and vodka. What a great combination. It’s simple to make and it makes a nice gift, too.
The color is absolutely beautiful. The sweet/tart finished product can be enjoyed by just sipping, on the rocks, or mixed with club soda. It can also be a nice addition to all sorts of cocktails.
Often after Thanksgiving, the price of cranberries goes down. I stock up on them, freeze some and make a batch, or two of cranberry liqueur. This year, even before Thanksgiving, I found a few bargains. .
I hope you give it a try. I am sure you will be pleased with the results.
Cranberry Liqueur
1 lb. fresh cranberries (most bags are 12 oz.)
2 c. sugar
4 c. vodka- at least 80 proof
Grind berries fine in food mill or food processor. Place in large jar and combine with the sugar. Let stand, covered until sugar is dissolved completely, several hours or overnight. Add vodka and let steep 1-3 weeks, stirring occasionally. Strain and filter. Makes 5 cups.
Note: Drained cranberries can be saved in fridge and used, sparingly, in desserts, fruit salads and on cake or ice cream. They do pack a punch.
Buckeyes
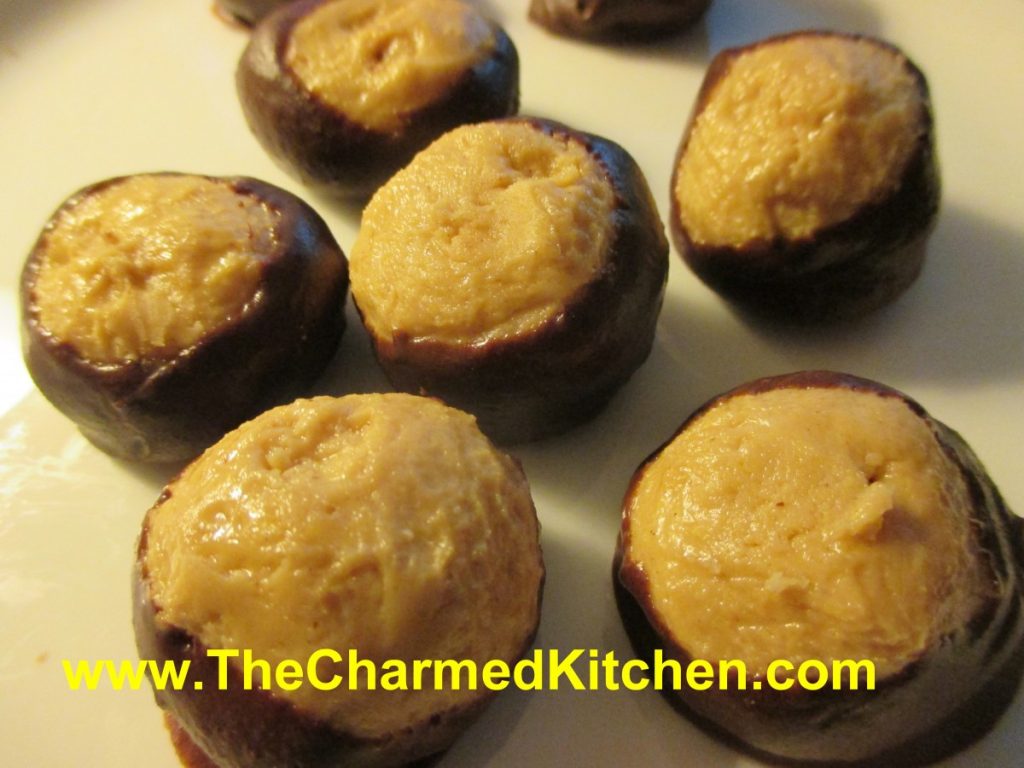
Buckeyes were the first candy I learned to make. A peanut butter filling is rolled into balls, then dipped in melted chocolate. Lovely flavor combination and very easy to make.
When I was a kid, I didn’t see them outside of Ohio much. Today everyone seems to know what buckeyes are.
Buckeyes are simple to make. Fast, too. And a great kid-friendly recipe. If you need some last minute gifts, or you just want them for your holiday party, you still have time to make a batch of buckeyes.
Here is the recipe I use. There are variations of this recipe out there, including one with crispy rice cereal in the mix. This one is still my favorite. Enjoy!!
Buckeyes
1 ½ lb. powdered sugar
1 ½ c. peanut butter
2 sticks softened butter – 1 cup
12 oz. chocolate chips- or dark chocolate
2 T. coconut oil or shortening
Mix together sugar, peanut butter and butter. Chill. Roll into balls, flatten slightly. Melt together, chocolate and coconut oil. Dip the peanut butter balls in melted chocolate to cover about ¾ of the surface. Use a toothpick or fondue fork to hold the balls. It makes the job of dipping a lot easier. Allow to harden on wax paper. Store in a cool place. Can be frozen.
Soft Butter Cookies

If you are looking for a truly tender cookie, this may be it. These cookies are so delicate, they just melt in your mouth!!
The secret ingredient might surprise you. It is oil. Yes, I know I said butter cookies – they also contain butter. But the combination of oil and butter makes them soft and delicate, even days after baking.
They also contain both granulated and powdered sugar. Not your typical cookie recipe, for sure. This just may be my “go to” butter cookie recipe from now on.
You don’t have to chill the dough and they roll very easily, without sticking to your fingers. You could chill the dough, but let it warm up a little before rolling. The dough can also be made ahead and frozen- I tested it.
In class last night we pressed the tops in colored sugars, nonpareils or sprinkles before baking. You can also bake them plain, then dip in melted chocolate and sprinkles or nuts after baking,
Soft Butter Cookies
1 c. butter
1 c. oil, I used avocado oil
1 c. sugar
1 c. powdered sugar
2 eggs
1 T. vanilla
1 t. baking soda
1 t. cream of tartar
½ t. salt
4 ½ c. flour
In mixing bowl, beat together butter, oil, sugars and vanilla. Once well blended, beat in eggs. Stir in the baking soda, cream of tartar and salt, then add the flour, mixing until well combined. Heat oven to 350 degrees. Roll dough into one inch balls and press tops of cookies in sprinkles or colored sugar, if desired. Place one inch apart on ungreased baking sheets. Bake for 12 minutes, or until light golden on bottom. Leave cookies on baking sheets 3 minutes before placing on cooling rack. Makes about 6 dozen cookies.
Classic Gingersnaps
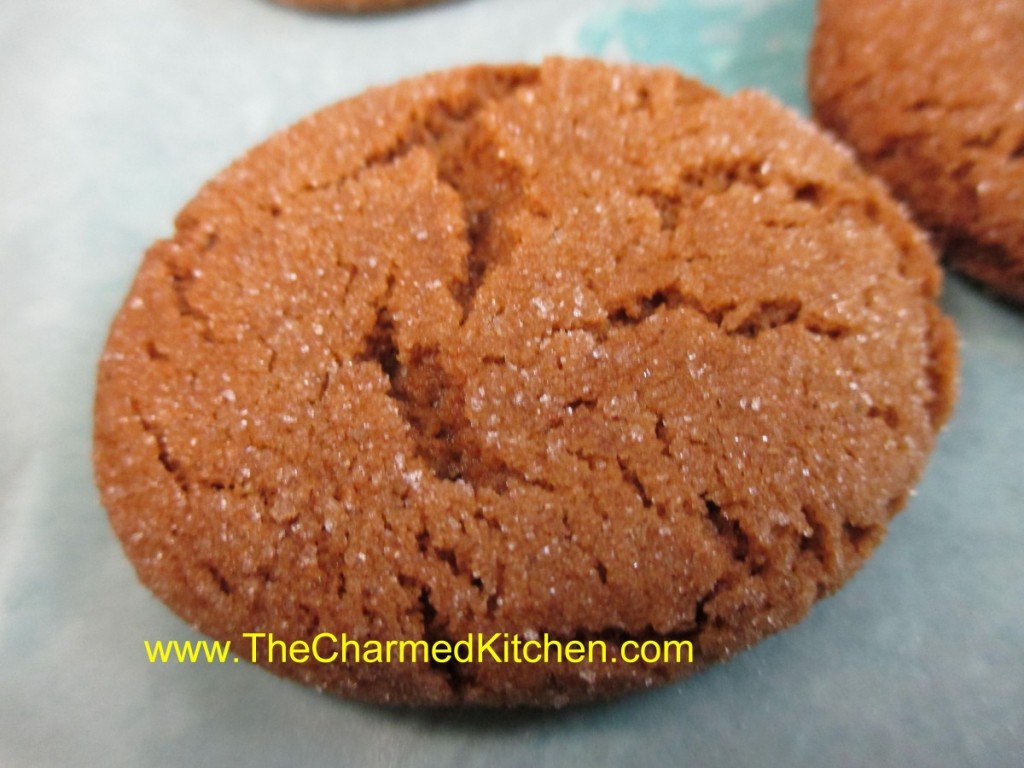
Gingersnaps are one of those cookies- the people that love them – REALLY love them. I will admit to being one of those people. The mixture of spices and crunchy texture just work together so well.
I cannot remember where I first got this recipe. This richly spiced cookie is perfect with a cup of coffee or a cup of tea. They are not too sweet, which I also like.
You can use either dried or fresh grated ginger. I really prefer fresh. I keep a piece of ginger root in my freezer, then just grate what I want, whenever needed. The ginger lasts nearly forever that way.
The original recipe called for shortening. I use butter, but chill the dough at least an hour before baking. You can use shortening, if you prefer.
So here is the recipe. Enjoy!!
Gingersnap Cookies
2 c. flour
2 t. baking soda
1 t. cinnamon
¾ t. ginger (fresh grated preferred)
½ t. cloves
¼ t. salt
1 c. sugar, plus extra for rolling
¾ c. butter
¼ c. molasses
1 egg
Mix together dry ingredients and set aside. Beat together sugar with butter, molasses and egg until light. Stir in dry ingredients and chill dough at least an hour. When ready to bake, roll dough into 1-inch balls. Roll balls in additional sugar. Place 2 inches apart on ungreased baking sheet. Bake in a preheated 350-degree oven for 10-12 minutes. Edges should look dry. Cool on sheet for a few minutes and then move to rack. Makes about 36.
Rye Crackers
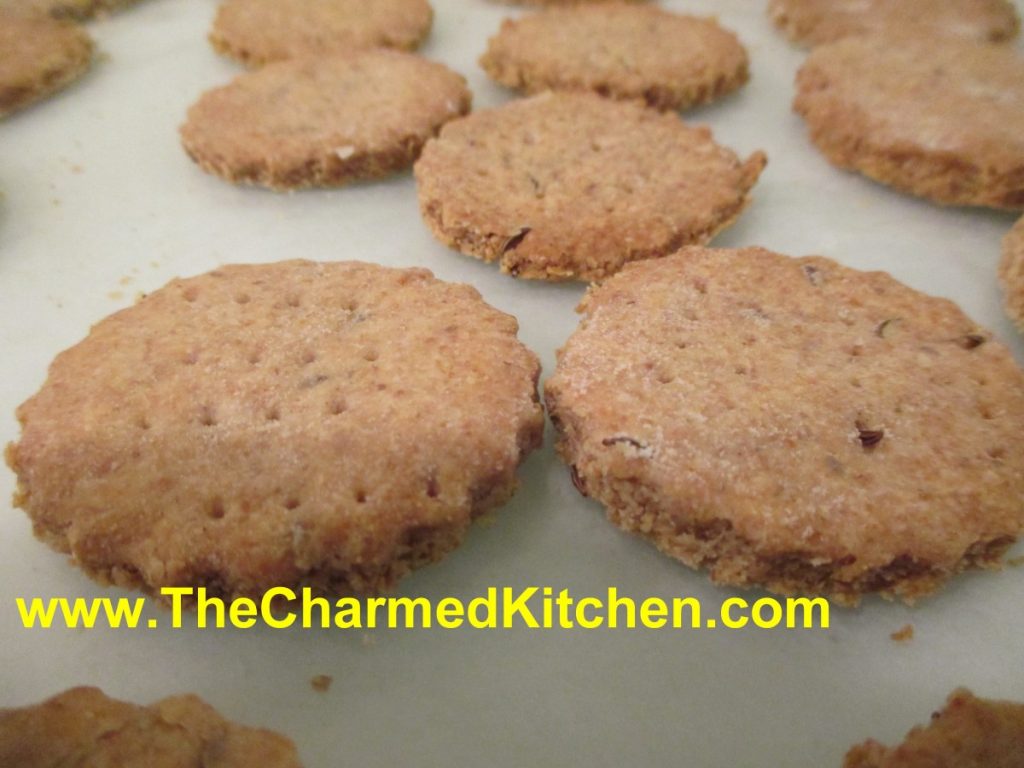
Making crackers is fun, and actually pretty easy. These rye crackers are as simple to make as a batch of cookies. They are crisp and full of flavor. The thinner you roll them out, the crisper they will be.
I am a big fan of rye bread and a fan of these rye crackers, too. I love the flavor of rye flour. I think it pairs so well with any number of toppings. These are great with a little Swiss cheese melted on the top. You can also cut the crackers out in fun shapes. The red onion relish recipe I just posted is also very tasty on these crackers.
So here is the recipe for rye crackers. I hope you’ll give cracker making a try.
Rye Crackers
1 c. rye flour
1 c. all-purpose flour
1 T. caraway seed
1½ t. salt
1 t. onion powder
1 t. garlic powder
1/3 cup oil
1 t. honey
¼ c. water, or as needed
Combine the rye flour, all-purpose flour, caraway seed, salt, onion powder, and garlic powder in a bowl. Stir in the oil and honey. While stirring with a fork, slowly add the water until the dough comes together in a ball. Cover and rest for 10 minutes. Preheat oven to 375 degrees. Divide the dough into 4 sections, rolling each piece out on parchment paper to 1/8 inch thick. Cut into desired shapes, then place on a baking sheet. Prick each cracker a few times with a fork. Bake until the edges are brown and the crackers are crisp, 10 to 12 minutes. Remove immediately to a cooling rack.
Red Onion Relish
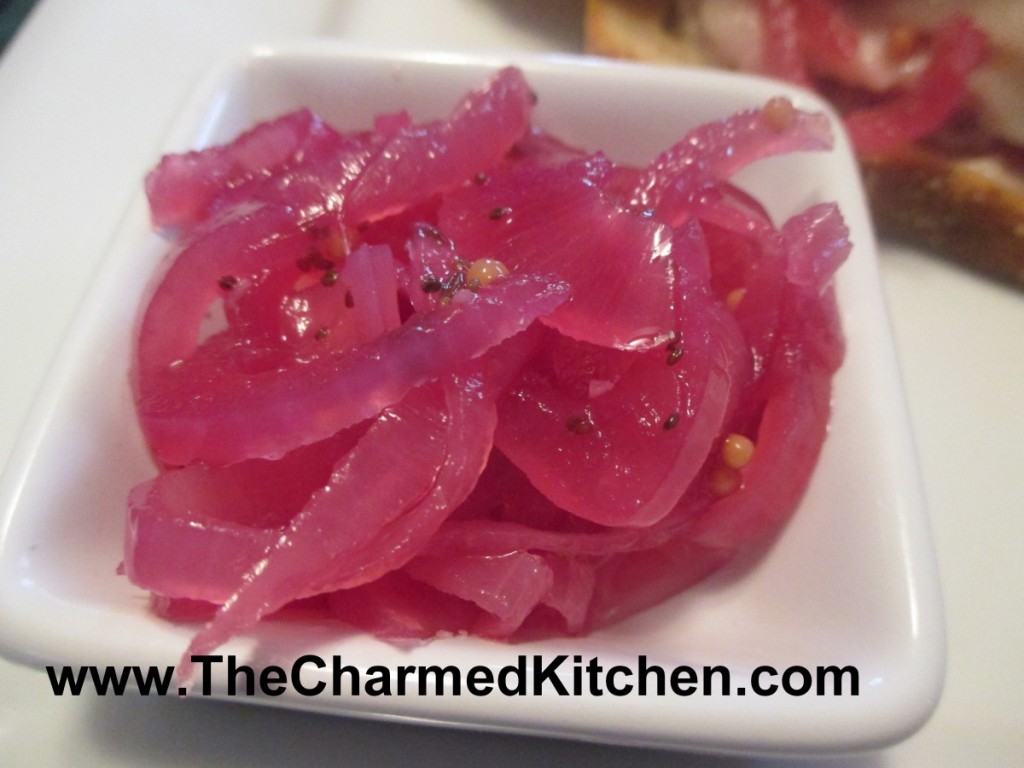
I made this relish last night. I had a few red onions I wanted to use up. I love the tart flavor and bright color it adds to my food. This relish is a great topper for sandwiches, but can be used for a whole lot more.
The onions can be served with cheese and crackers for an easy appetizer. It works great with a charcuterie board. Also nice on toasted baguettes with some melted cheese. You can add some to salads, and the liquid can be combined with a little oil for a simple salad dressing. I even had some with my scrambled eggs for breakfast.
After you cook it, you just ladled into jars, cool it down, and store it the fridge. It will keep for weeks and weeks. Nice to have on hand for last minute entertaining.
Red Onion Relish
4-5 medium red onions, peeled and sliced thin
2 c. red wine vinegar
1½ water
1 c. sugar- or to taste
2 T. salt
1 T. mustard seed
1 T. celery seed
1 t. fennel seeds, optional
2 cloves garlic, minced
1 cinnamon stick- 4 inch
4 whole cloves
Place all ingredients in a pot and bring to a boil. Turn down to a simmer and cook, uncovered for 10-15 minutes. Cool and place in jars, then store in the fridge. Use as a sandwich topper, salad addition, appetizer with cheese and crackers. You can also use the liquid as the base for a salad dressings, with the addition of some oil. Keeps for weeks in the fridge. Makes 5 cups.


