Spinach and Mushroom Quesadillas

Quesadillas are a fun and easy appetizer for any party. They also are great for lunch, brunch or dinner. You can fill them with all sorts of fillings. I used fresh spinach, which had been steamed and squeezed dry, but frozen spinach could also be used. I used Portobello mushrooms caps. Baby Bellas would work nicely as well.
The spinach and mushrooms worked really nicely together. The ones in the picture have Swiss cheese in them. But you can use any number of different cheeses. I have made them with cheddar cheese and once with smoked Gouda. These were cooked in a skillet, you could also bake them in the oven, or brush with oil and cook them on the grill. You can serve them as is- or maybe top with some salsa or sour cream.
Spinach and Mushroom Quesadillas
1 (10 ounce) package fresh or frozen spinach, cooked, thawed and squeezed dry.
2 cups shredded cheese, I like cheddar or Swiss, but use what you like
2-3 tablespoons butter- you can use oil instead
2 cloves garlic, sliced
2 Portobello mushroom caps, sliced
Salt and pepper to taste
Hot sauce to taste
4 (10 inch) flour tortillas
1 tablespoon oil
Saute spinach in a little butter until wilted. Cool and chop. Set aside. Melt the remaining butter in a skillet over medium heat. Stir in garlic and mushrooms, and cook about 5 minutes. Mix in spinach, and continue cooking 5 minutes. Add seasonings to suit your taste. Place a quarter of the mixture on one side of each tortilla. Top with a quarter of cheese. Fold tortillas in half over the filling. Heat oil in a separate skillet over medium heat. Place quesadillas in the skillet, and cook 3 minutes on each side, until golden brown. Cut each quesadilla into 4 wedges to serve.
Cauliflower Flatbread – Gluten Free
I have made this recipe before, but it had been awhile and I knew I wanted to make it again. I love cauliflower and eat it often. I had picked up a huge cauliflower from a local produce market and I just wanted to do something different with it this time. It isn’t that hard to make. It is easier than making bread.
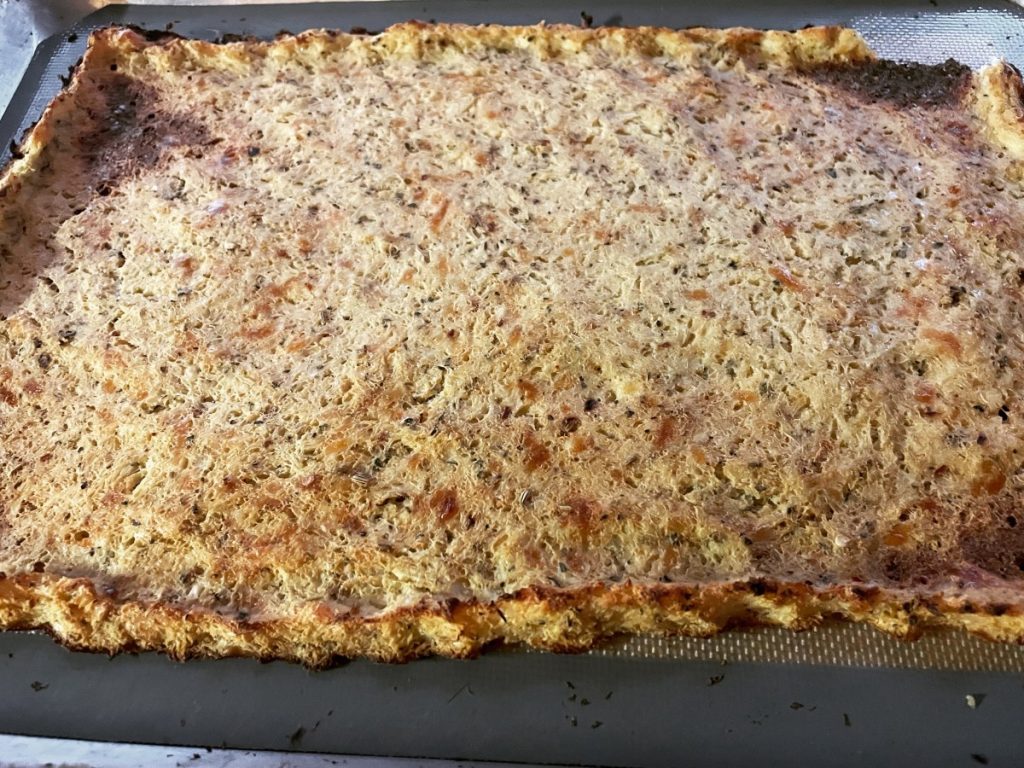
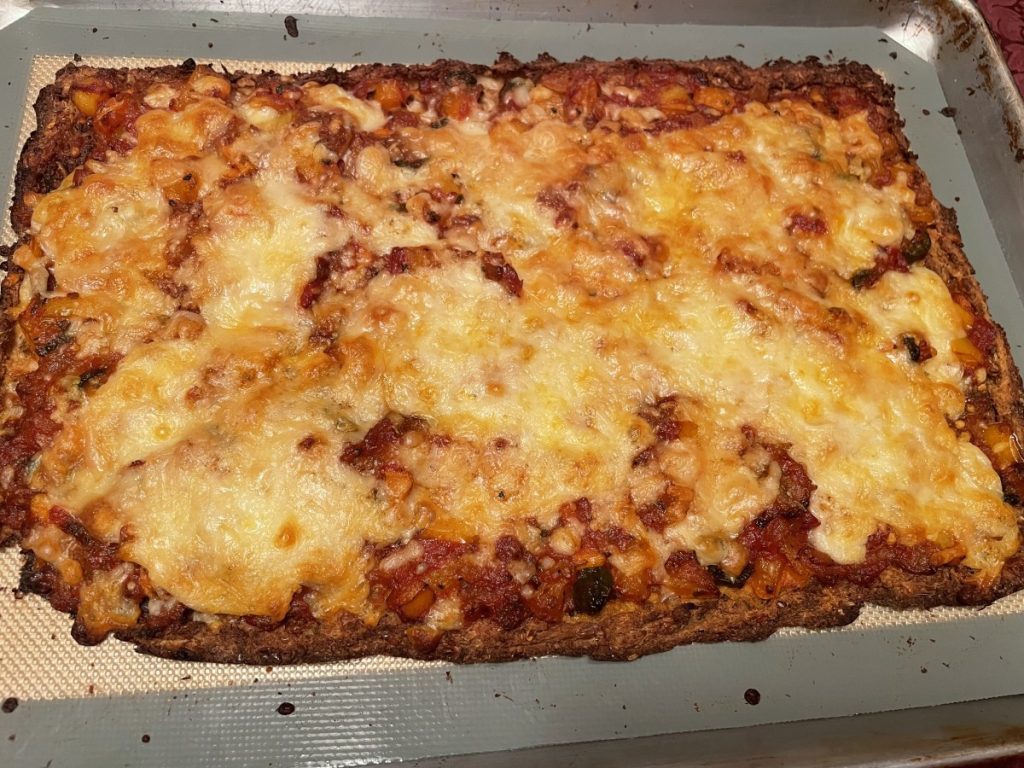
I was torn about what to call it. Often it is called a cauliflower pizza crust, but I think that gives you unrealistic expectations. It is, after all, just a cauliflower. Somehow flatbread works better for me, but call it whatever makes you happy. In spite of not wanting to call it a pizza crust. I ended up treating it like a pizza.
The most time consuming part of this recipe is “ricing” the cauliflower. It involves cutting the cauliflower into flowerets and then chopping them in a food processor until the pieces are about the size of rice grains. Still, not that hard, just takes a few minutes. You can also buy cauliflower already chopped up, so you can even skip this step, if that helps.
After I made the crust, I cooked down a couple of jars of home canned tomatoes, sauteed onions, garlic and peppers and put it all together for the topping. Like a chunky pizza sauce. I added pizza seasoning to it, too. I spread it over the crust then topped with mozzarella and Parmesan cheeses. It was actually very good and was eaten quickly by my guests.
So here is the recipe.
Cauliflower Flatbread Crust
2½ pounds cauliflower florets, riced
2 eggs, beaten
2 oz. cream cheese, softened
½ c. shredded mozzarella cheese
2 t. pizza seasoning- or seasoning of your choice
1 t. salt
To make the cauliflower “rice”, pulse batches of raw cauliflower florets in a food processor, until a rice-like texture is achieved. Fill a large pot with about an inch of water, and bring it to a boil. Add the “rice” and cover; let it cook for about 4-5 minutes. You can also steam the cauliflower or even bake it in the oven at 350 for 10-15 minutes. Just get the cauliflower cooked. Drain into a fine-mesh strainer. Once you’ve strained the cauliflower, let it cool down, then transfer it to a clean, thin dishtowel or several layers of cheesecloth. Wrap up the steamed “rice” in the dishtowel, twist it up, and squeeze all the excess moisture out! It’s amazing how much extra liquid will be released, which will leave you with a nice and dry crust.
In a large bowl, mix up your strained cauliflower, beaten eggs, cheeses, and spices. (Don’t be afraid to use your hands! You want it very well mixed.) It won’t be like any bread dough you’ve ever worked with, but don’t worry– it’ll hold together! Press the dough out onto a baking sheet lined with parchment paper or a silicone liner. (It’s important that it’s lined, or it will stick.) Keep the dough about ⅓” thick, and make the edges a little higher for a “crust” effect, if you like. Bake for 35-40 minutes. The crust should be firm, and golden brown when finished. Now’s the time to add all your favorites– sauce, cheese, and any other toppings you like. Return to the oven, and bake an additional 5-10 minutes, just until the cheese is hot and bubbly. Slice and serve immediately!
Note: I used the cream cheese because I had some leftover from another recipe and it made sense to use it up. I honestly think the recipe would be fine without it- maybe add a bit more mozzarella cheese. I also added a second egg, which I did not do the last time I made the “crust”. I think it helped the crust to hold together better.
Gwen’s Cinnamon Sandy Pecan Cookies – Vegan

I made these cookies when my goddaughter was in town for a visit. She and her boyfriend are vegan and I always want to make them something special. They came out so good. Even better than I had hoped. It’s all about the texture with these cookies. Crunchy, but tender, too. They weren’t the prettiest cookies I ever made, but they are one of my new favorites.
The inspiration for this recipe was Gwen’s great grandmother’s shortbread recipe, with a few important changes. Instead of 2 cups of butter in the original recipe, I used coconut oil and almond butter. I added cinnamon, cornstarch and nuts. I also reduced the amount of flour from the original recipe. In the end I was really happy with how these cookies came out. They have that sandy shortbread quality plus cinnamon and nuts to add flavor and texture. So here is the recipe. Enjoy!!
Gwen’s Cinnamon Sandy Pecan Cookies- Vegan
1 c. sugar
1 c. coconut oil
1 c. almond butter- peanut or other nut butters could be used
2 T. vanilla
3 c. flour
¼ c. cornstarch
1 T. cinnamon
1 t. salt
¾ c. fine chopped pecans
Preheat oven to 350 degrees. In large mixing bowl, combine the first 4 ingredients and stir until smooth. Beat until mixture gets a little fluffy. You can do this with a stand mixer, sturdy hand mixer or by hand. Combine flour, cornstarch, cinnamon and salt in a separate bowl and stir into the sugar mixture. Stir in nuts and continue to blend. It’s going to seem at times like the dough won’t come together, but it will. At the end I mixed the dough by hand. The almond butter and coconut oil had both been in my fridge and were cold. In hindsight, I should have let them come to room temperature first. Use a cookie scoop or by hand form dough into 1-1½ inch balls. Place on ungreased baking sheet or you can use parchment or a silicone baking sheet liner. Leave an inch between the cookies. Bake for about 10-12 minutes. Cookies should be light brown on the bottom and firm. Let them sit on the baking sheet for about 5 minutes before trying to move. They are a bit crumbly. I forgot to count how many cookies it made. I want to say 3-4 dozen.
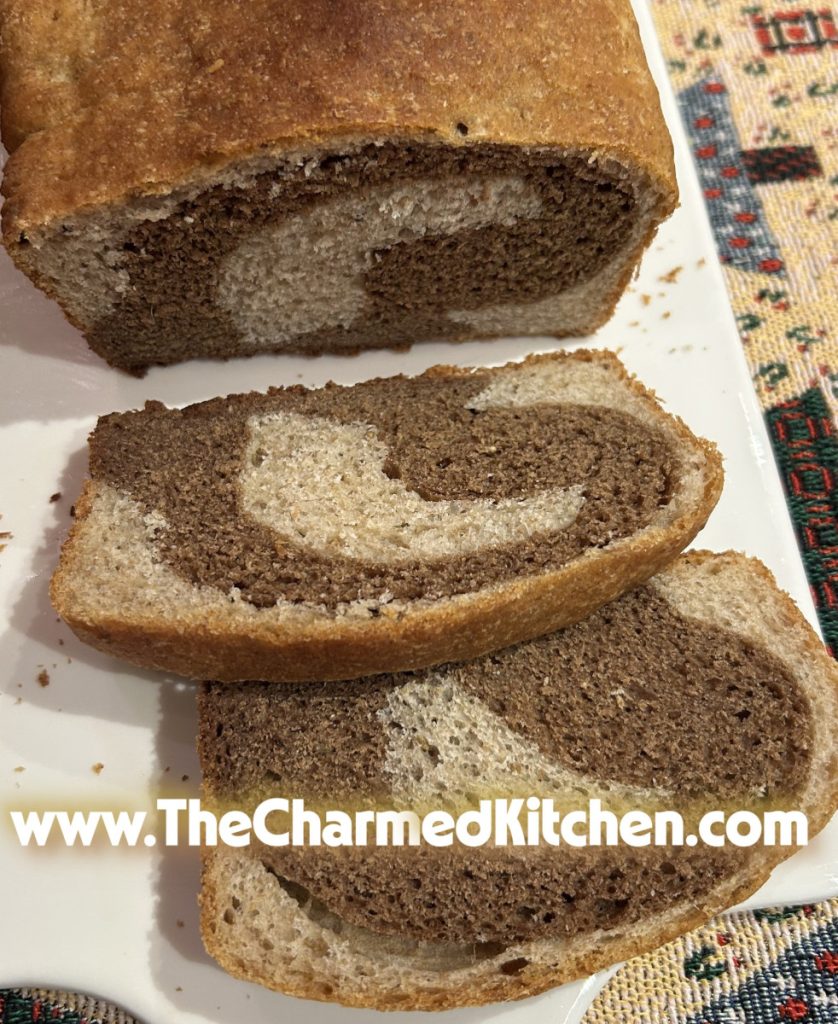
Marble Rye Bread
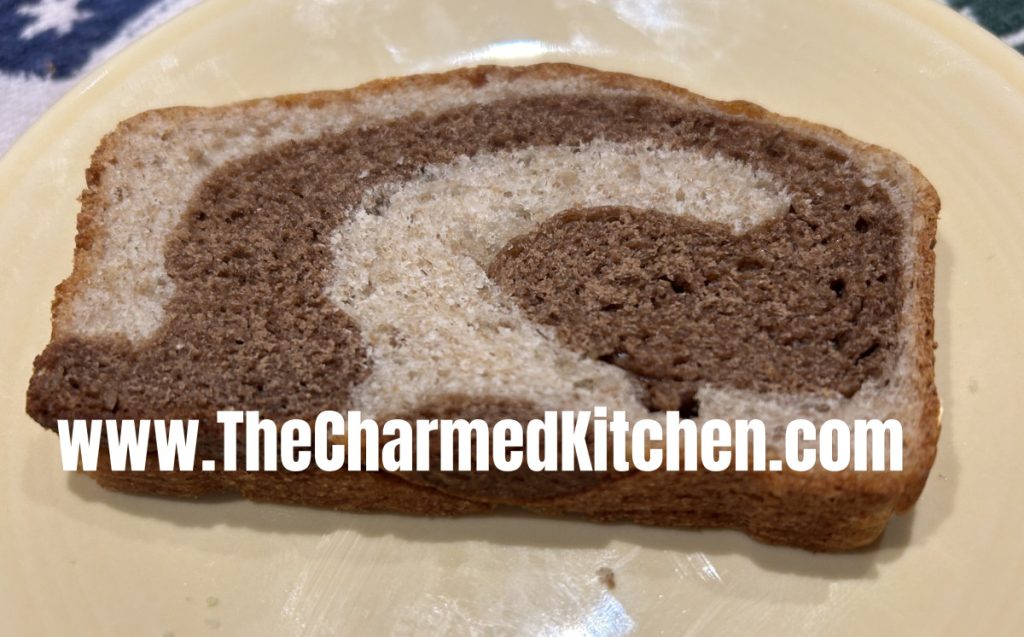
This might be one of my favorite breads. That’s saying a lot because I bake bread all the time. I bake both rye and pumpernickel breads. For some reason I never put the two together. A friend had been asking me for some time to make a marble rye, so I did. It came out really nice. I baked mine in loaf pans, since I wanted the bread for sandwiches. You can also roll the dough out and bake on a baking sheet. Directions for both versions are included below. So here is the recipe. I hope you try it. I think you will be as pleased as we were.
Marble Rye Bread
Light Rye Dough
1 packet active dry yeast or 2½ teaspoons
2 cups all-purpose or bread flour
2 teaspoons salt
2 tablespoons granulated sugar
1 tablespoon caraway seeds
1 cup warm water (120° to 130°F)
¼ c. dill pickle juice – or ¼ c. water
2 Tablespoons oil
1 1/3 cups medium rye flour
Pumpernickel Dough
1 packet active dry yeast or 2½ teaspoons
2 cups all-purpose or bread flour
2 teaspoons salt
1 tablespoon caraway seeds
2 tablespoons cocoa
1¼ cup warm coffee (120° to 130°F)
2 tablespoons molasses
2 T. oil
1 1/3 cups medium rye flour
Make the light rye dough: In a large bowl, combine yeast, 1 cup all purpose or bread flour, salt, sugar and caraway seeds; mix well. Add water, pickle juice and oil to flour mixture. Mix using wooden spoon or dough whisk until all ingredients are incorporated and have a shaggy dough. Gradually stir in rye flour and enough of the remaining bread flour to make a firm dough. Knead on lightly floured surface 5 to 7 minutes until smooth and elastic. Place dough in lightly oiled bowl and turn to grease top. Cover; let rise until indentation remains after poking dough with finger down to second knuckle; about 1-1½ hours.
Make the pumpernickel dough: In a large bowl, combine yeast, 1 cup all purpose or bread flour, salt, caraway seeds and cocoa; mix well. Add coffee, molasses and oil to flour mixture. Mix using wooden spoon or dough whisk until all ingredients are incorporated and have a shaggy dough. Gradually stir in rye flour and enough of the remaining bread flour to make a firm dough. Knead on lightly floured surface 5 to 7 minutes until smooth and elastic. Place dough in lightly oiled bowl and turn to grease top. Cover; let rise until indentation remains after poking dough with finger; about 1-1½ hours.
On lightly floured surface, divide each dough in half. Roll or pat each half to a 14×7-inch rectangle. For a dark crust, place a light rye piece on top of a dark rye. For a light crust, place a dark rye piece on top of a light rye. Starting with shorter side, roll up tightly, pressing dough into roll with each turn. Pinch edges and ends to seal. Working from the center of the loaf to the ends, gently roll the loaf back and forth to form a baguette shape approximately 14-inches long. Place on a greased or silicone-lined baking pan. Repeat for second loaf. Cover loaves; let rise until indentation remains when lightly touched. Preheat oven to 375°F. After dough has risen, bake until internal temperature tests 190°F, about 40-45 minutes. Remove from pan; cool on rack.
Note: You can also bake the loaves in 2 (9×5) loaf pans. When rolling out the dough roll into a 10×8 inch rectangle. Roll up starting on the 10 inch side. Pinch dough together at the seams and place seam side down in greased bread pans. Cover and let rise until doubled. Baking time is about the same.
Carrot Oat Bran Muffins

These muffins are really good for you, but they taste like a treat. I was never a big fan of bran muffins made with wheat bran. I didn’t like the flavor. But I love the way these muffins taste.
I prefer the taste of oat bran over wheat bran. I find it has a natural sweetness. With the addition of carrots and raisins these muffins are moist, light and slightly sweet. They remind me of a cross between a muffin and carrot cake. Vanilla and orange zest makes them fragrant and tasty, too. With plenty of oat bran, they also provide healthy dietary fiber. I make these often, then freeze some for later. They make a great breakfast and an easy snack.
Carrot Oat Bran Muffins
1 c. milk or buttermilk
1 c. oat bran
1 egg
1/3 c. oil
3 T. brown sugar
1 t. vanilla
1 t. orange peel
1 c. shredded carrots
1 c. flour (all purpose, whole wheat pastry flour or spelt flour)
1 t. baking powder
1 t. baking soda
½ t. salt
½ c. raisins
In mixing bowl combine oat bran and milk. Add egg, oil, sugar, vanilla, peel and carrots. Beat well. Combine remaining ingredients in small bowl and mix well. Gently fold into bran mixture. Divide batter in 12 muffin cups that are either greased or lined with paper cups. Bake in a preheated 375-degree oven for 20-25 minutes. Makes 12.
Zesty Tomato Soup – Vegan

This is a fast and easy soup to make and full of flavor. I can tomatoes in the summer, so that is what I used. You can use store bought. If you wanted to use fresh tomatoes, you would need about 2 pounds. I just love the flavor of my home canned tomatoes so much. Next best thing to fresh.
After the soup was finished, it occurred to me that it was vegan. I hadn’t planned it that way, it was just how it worked out. I used an immersion blender to puree the soup. If you don’t have one, you can puree it in a blender. You just have to be careful when blending anything that is hot. It will splash up. To avoid getting burned, remove the center piece from the blender lid and cover with a towel before you turn it on. Or wait and blend the soup when cool.
I simmered the soup uncovered, because I wanted it to cook down a bit to be thick once processed. It only took about 15 minutes. You can cook it longer, if you want a thicker soup. I served it with toasted rye bread croutons, but it would be fine just as it is.
Zesty Tomato Soup
3 T. oil
1 medium onion, chopped
1 rib celery, chopped
1 sweet pepper, seeded and chopped
1 qt. canned tomatoes, or 1 (28 oz.) can whole tomatoes
Cayenne pepper to taste
2 T. fresh parsley or 2 t. dried
1 c. almond milk- or whatever milk you prefer
Salt and pepper to taste
In medium saucepan heat oil and cook onion until it starts to brown a little. Add the celery and pepper and cook about 5 more minutes. Add tomatoes and simmer, uncovered, until vegetables are soft, about 15 minutes. Use an immersion blender to puree the soup and add remaining ingredients. Adjust seasonings. Serve as is, or with croutons. Serves 3-4.
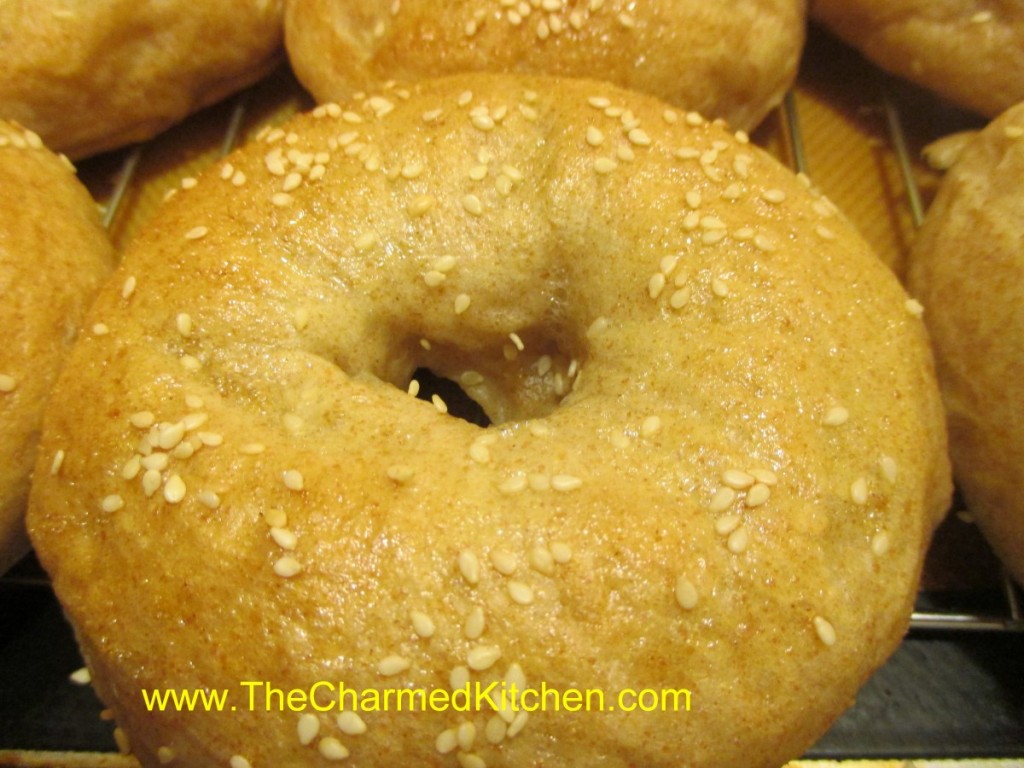
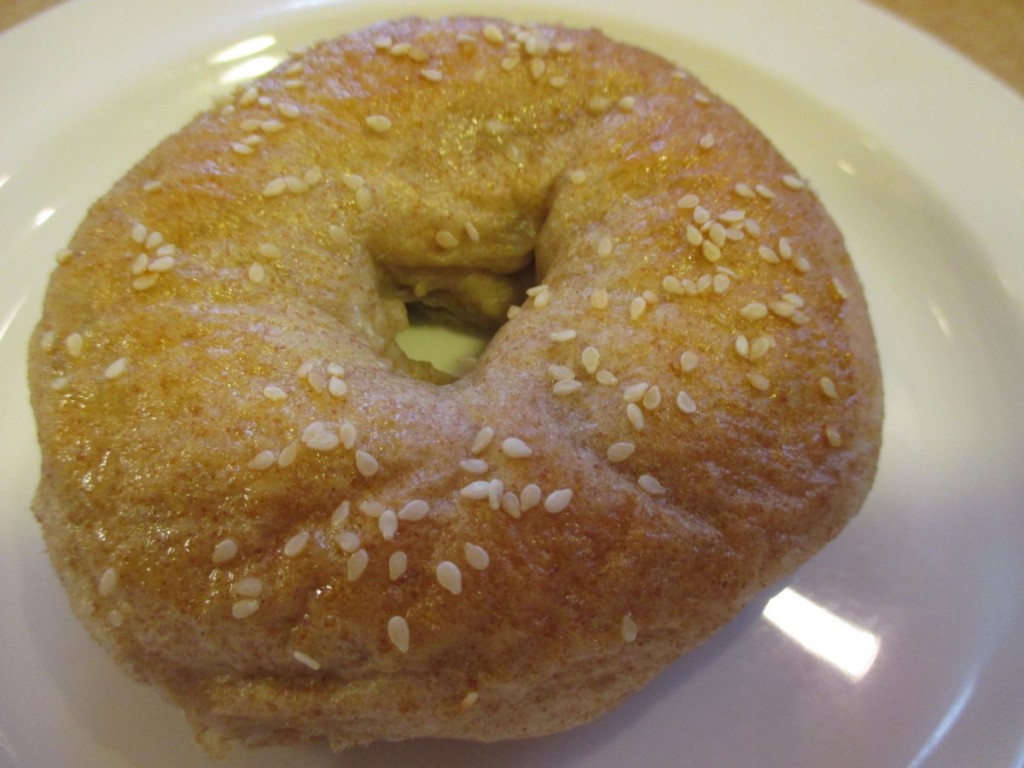
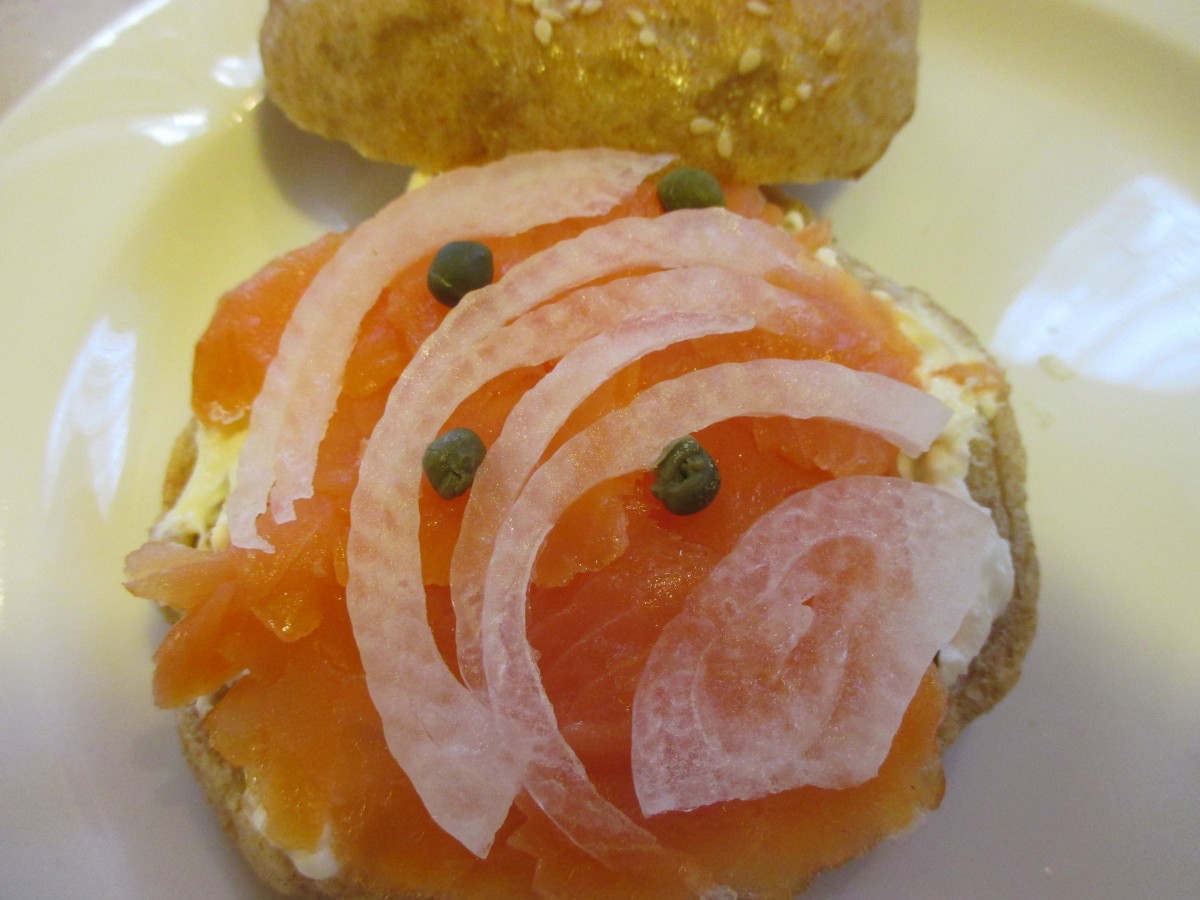
Spelt and Sesame Bagels
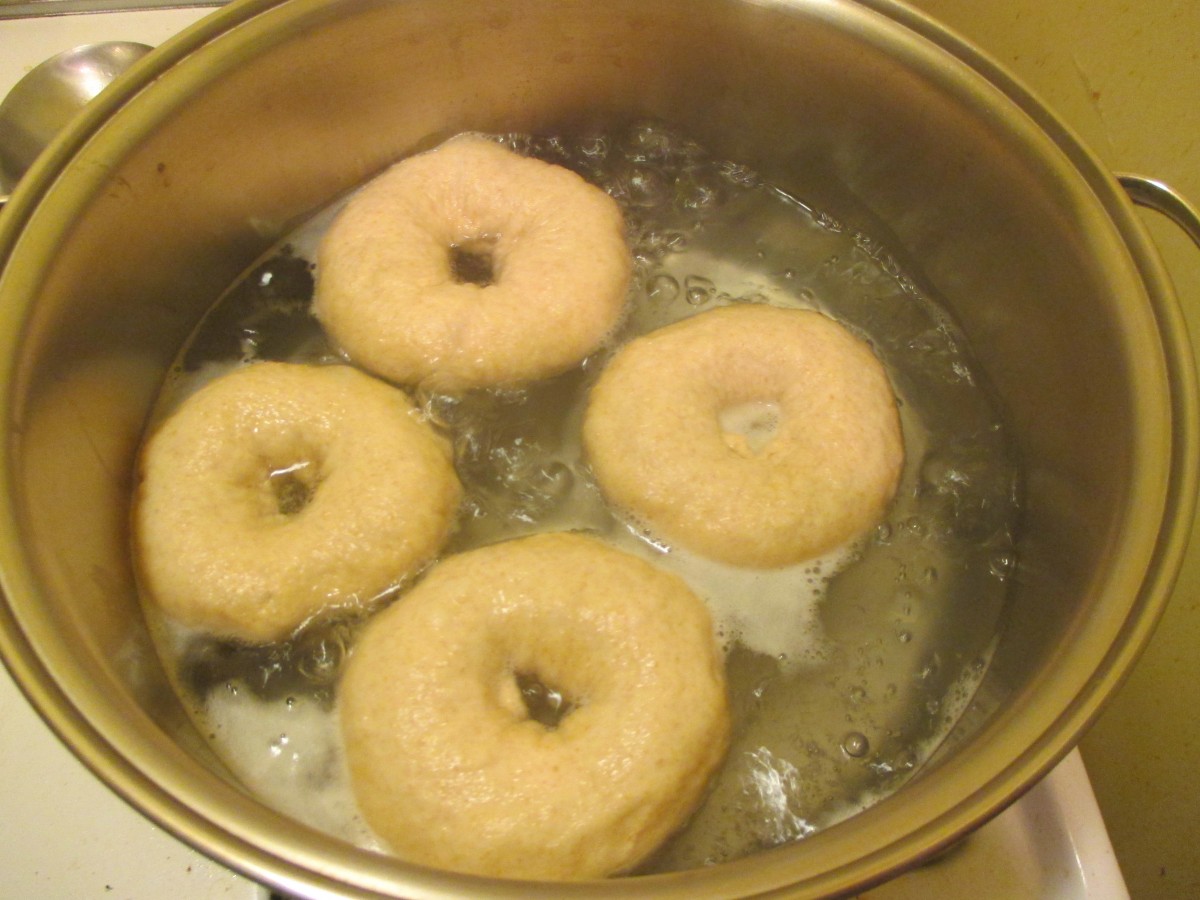
If you never made your own bagels- you really should sometime. They are easy to make, and fun, too. In case you didn’t know, the secret to the chewy texture of bagels in that they are boiled in water before being baked.
There are so many variations. You can swap out the type of flour or add herbs, seeds, onions, garlic or even fruit.
I decided to make my bagels with spelt flour. Spelt is closely related to wheat. It contains gluten, like wheat. Whole grain spelt flour has a lighter texture than whole wheat flour, though. It has all the fiber of a whole grain, but the texture of a white flour. It worked out so well in the bagels. The sesame seeds added even more flavor and texture.
Bagels began in Austria when a baker in Vienna in 1683 wanted to honor the visiting president of Poland. He created a roll that was round, or shaped like the stirrup on the King’s saddle. The new creation was called beugel, which was a variation of the German word for stirrup. Over time the word evolved into bagel. Because they were made with white flour, everyone, other than the rich considered bagels a special treat for special occasions. Today bagels are found in almost every grocery store throughout the country.
Spelt and Sesame Bagels
2 c. bread flour
2 ½- 3 c. spelt flour*
3 T. sugar
1 T. salt
2 pkgs. Yeast
1 ½ c. Water
1 T. oil
1 T. sugar
2 t. salt
1 egg white
Mix 1½ cups flour, 3 tablespoons sugar, 1 tablespoon salt and yeast in a medium bowl. Heat water with oil and add to flour mixture. Beat 2 minutes at medium speed. Add remaining ½ cup of bread flour and beat 1 minute. Stir in enough spelt flour to make a soft dough. Turn onto a floured surface and knead until smooth and elastic, about 8-10 minutes. Set in greased bowl and turn to grease top. Cover and allow to rise in a warm place 1 hour. Punch dough down cover and let rest 15 minutes. Divide dough into 12 pieces and form into smooth balls. Cover with towel and let rest 10 minutes. In large skillet heat 1 inch of water to a simmer. Add remaining sugar and salt to water. With floured finger poke a hole in the center of three of the dough balls. Drop into simmering water cooking 3 minutes. Turn over and cook 2 minutes. Turn to first side and simmer 1 more minute. Remove to greased baking sheet and repeat with remaining dough. Mix egg white with 1 tablespoon of water and brush tops of bagels. Sprinkle with seeds if desired. Bake in a 375 –degree oven for 20 –25 minutes. Makes 12.
* Spelt flour is closely related to wheat. It is used like whole wheat flour in baking, but has a lighter texture while still being a whole grain. If you can’t find spelt flour you can use whole wheat flour in its place in this recipe.

Homemade Vegetable Soup Base
I have made a lot of stuff from scratch- could I make my own soup base? I could, and I did! Not soup stock, but the stuff in jars that you just mix with water for instant broth. I wanted a no-meat soup base for when I was cooking meat-free.
I made a vegetable soup base that is a mixture of vegetables, both fresh and dried, herbs, mushrooms, nutritional yeast, spices and salt. There is pretty good amount of salt, but I wanted to be able to store it in the fridge and be safe.
It worked out that every teaspoonful of the finished base has less than 1/4 teaspoon of salt. Not great, but a lot less than bouillon cubes.
If you want to make yours with less salt or no salt- you’ll have to freeze the mixture in ice cube trays and take it out of the freezer as needed. Sort of like your own bouillon cubes.
The nice part is, I can now make a vegetable soup easily and I know exactly what is in it. It can also be added to chicken or other meat-based stocks, in place of the salt, to add extra flavor.
Homemade Vegetable Soup Base
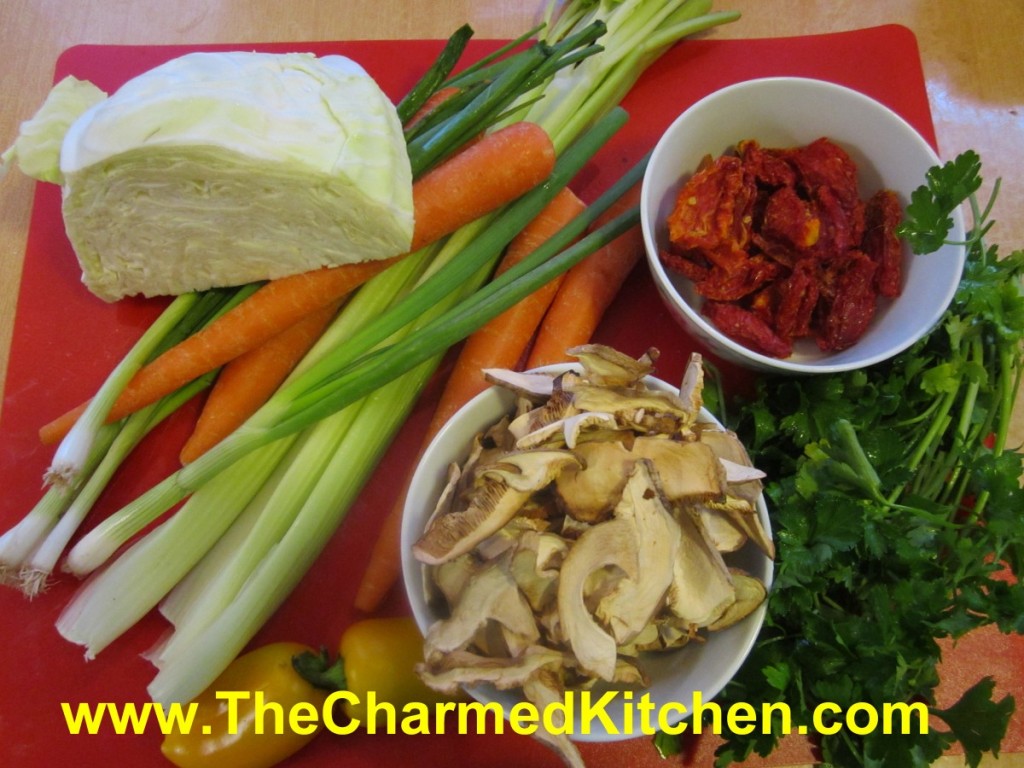
4 carrots, peeled and cubed
3 celery ribs, washed and cubed
1 large sweet onion, peeled and cubed
3 green onions, washed and cut up
1 c. sun- dried tomatoes, soaked in water 30 minutes, and drained
1 c. dried mushrooms, soaked in water 10 minutes and drained
1 c. chopped cabbage
1 c. parsley, chopped
1/2 c. chopped sweet pepper
1/4 c. nutritional yeast, optional
2 T. turmeric
8 oz. salt- I used sea salt and used a scale to weigh it. It’s around a cup but will differ if you are using a coarse salt
Combine all ingredients, except the salt, in a food processor and blend until smooth. I have a decent size Cuisinart and still had to do this in batches. Combine in a bowl with the salt and stir well to blend. Store in a clean jar in the fridge until ready to use. I ended up with about 5 cups of soup base. To use, add about 1 teaspoonful to a cup of hot water for vegetable broth. Use less or more according to your taste. Use in place of salt in other soups, stews and sauces.
Orange and Oatmeal Scones

I love fresh scones, still warm from the oven. Since it is citrus season, I decided to make scones with some seasonal orange flavor. These scones have a nice, crunchy outside and crumbly, tender middle.
The orange juice and orange zest gives them a wonderful flavor. The oatmeal gives them a lovely texture and the raisins add just a bit if sweetness. A very nice combination.
These are great served warm, topped with sweet butter and jam. They are perfect for breakfast or brunch.
You can also use these scones as the base for a berry shortcake. Split, topped with sweetened berries and some whipped cream, they turn into a simple and tasty dessert.
Orange and Oatmeal Scones
2 1/2 cups flour
2 cups rolled oats
1 cup sugar
1 teaspoon salt
1 tablespoon baking powder
1/2 teaspoon baking soda
1/2 cup very cold, unsalted butter – cut into chunks
1 egg
1/2 cup orange juice
2 t. grated orange peel
1 cup raisins – plumped and well dried
Glaze
milk, sugar, orange zest
Line a large baking sheet with parchment paper (double two sheets if you have them – one inside the other). Preheat oven to 425 F. In a large bowl, place flour, oatmeal, sugar, salt, baking powder, baking soda and mix together. Cut or rub in butter to make a mealy mixture. Stir in egg and orange juice. Add orange peel and raisins. Mix to make a soft dough. Turn out onto a lightly floured board and knead for a few minutes. Roll or pat out into a thickness of 1/2 inch. Using a serrated cookie cutter cut into disks or rounds. Brush with milk and sprinkle with sugar and orange zest. Bake until nicely browned – about 14 minutes. Makes about 24.
Amy’s Skillet Chicken Pot Pie
I am not sure there is better comfort food than chicken pot pie, at least not for me. Brings back very nice memories. Maybe we all need a little comfort right now.
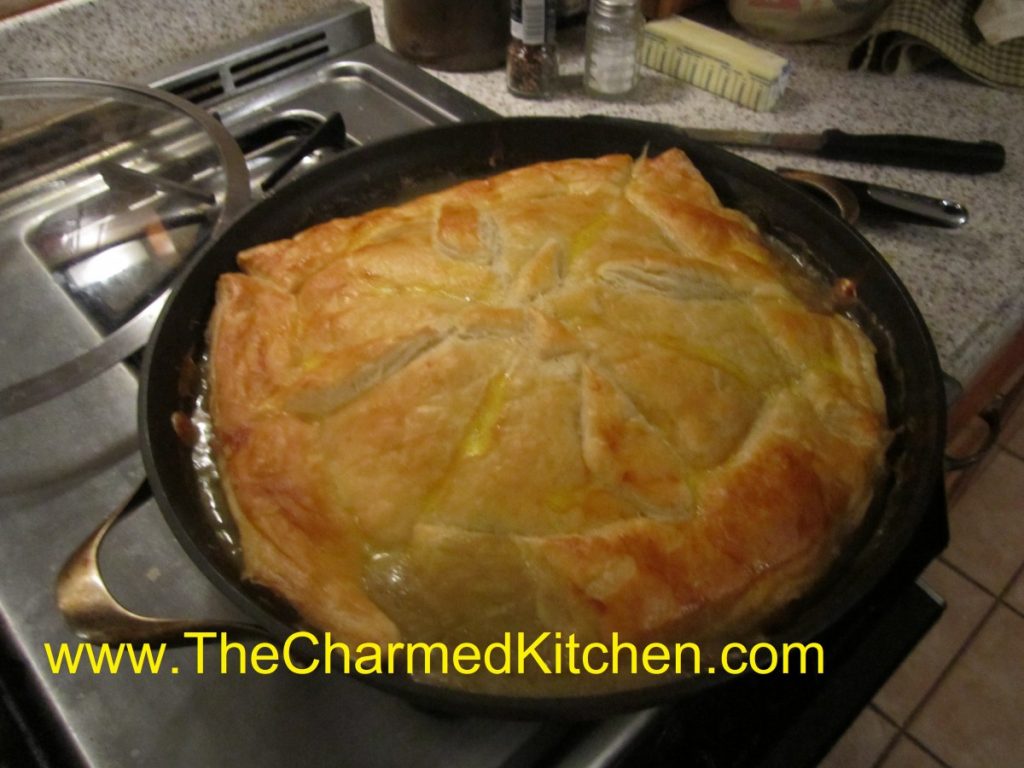
This chicken pot pie is made in a cast iron pan. It is started on top of the stove, then finished in the oven. Kind of the ultimate one-pot dinner.
My friend Amy was so proud of how this recipe turned out. She found the original recipe somewhere, but changed it, to make it her own.
It was, and is, the best chicken pot pie I ever tasted. For our dinner that night, Amy doubled the original recipe, and used a larger skillet. You could easily cut it in half and use an 8 or 10-inch skillet
Here is Amy’s recipe. Enjoy!!
Amy’s Skillet Chicken Pot Pie
¼ c. olive oil
2 T. butter
1 sweet onion, chopped
4 parsnips, peeled and sliced
4 cloves garlic, minced
1 tablespoon chopped fresh sage, optional
1 small bunch kale, center ribs and stems removed, leaves chopped
Kosher salt
freshly ground pepper
¼ cup all-purpose flour
3 cups low-sodium chicken broth
2 T. sherry
½ small butternut squash, peeled, cut into 1/2-inch pieces (about 1½ cups)
½ of a roasted chicken- meat removed from bones, torn into bite sized pieces – about 1½ cups of meat
1 sheet frozen puff pastry, thawed
1 large egg
Place a rack in upper third of oven; preheat to 425°. Heat oil in a deep 12-inch cast-iron or other heavy ovenproof skillet over medium-high heat. Add onions; cook, stirring occasionally, until beginning to brown, about 4 minutes. Reduce heat to medium-low. Add parsnips, garlic and sage to skillet and cook, stirring occasionally, until garlic begins to brown, about 2 minutes. Add kale and season with salt and pepper. Cook, tossing often, until wilted, about 4 minutes. Sprinkle flour over. Cook, stirring constantly, for 4 minutes. Stir in broth, 1/2-cupful at a time, then add squash. Bring to a boil, reduce heat, and simmer until squash is just softened and broth is thickened, 8-10 minutes. Add chicken to skillet, stir, and season with salt and pepper. Unfold pastry and smooth any creases; place over skillet, allowing corners to hang over sides. Whisk egg and 1 teaspoon water in a small bowl. Brush pastry with egg wash; cut four 1-inch slits in top to vent. Bake pot pie until pastry is beginning to brown, 15-20 minutes. Reduce oven temperature to 375° and bake until pastry is deep golden brown and crisp, 15-20 minutes longer. Let cool for 10 minutes before serving.
Dedicated with loving memory of Amy. Miss you forever, my friend.


