My Favorite Apple Cake
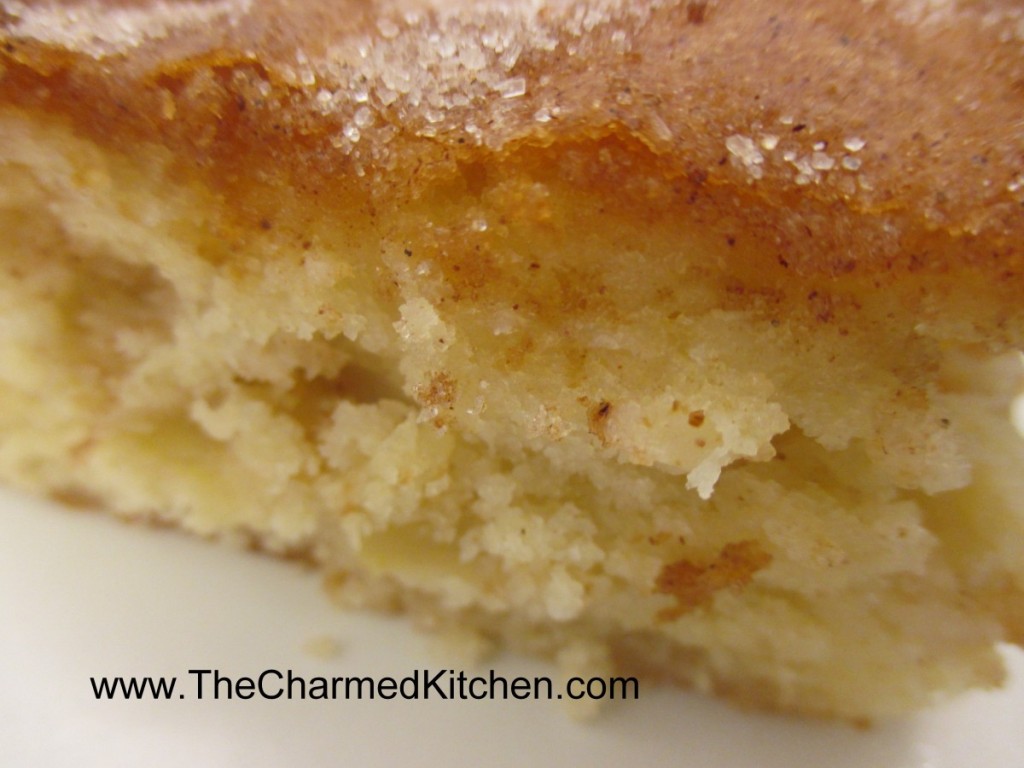
I have posted this cake recipe in the past. It truly is my favorite apple cake ever. I was talking with a cousin about this cake yesterday, so here it is.
I’ve enjoyed this cake since I was a kid. My Aunt Josie gave the recipe to my mom. Not sure where she got, it but it has been a family favorite since we first made it. She called it Jewish Apple Cake. Not sure why. It’s just what we all called it.
It’s a simple recipe that comes out moist and flavorful. I normally bake it in a 13×9- inch pan but it can be baked in a Bundt pan. While the recipe calls for cinnamon sugar- I sometimes add a little fresh ground nutmeg, too. I also like to use olive oil or even avocado oil in this cake. It gives it a really nice flavor.
Almost any apple works in this recipe- except maybe Red Delicious. Perfect for dessert or even served with brunch. Who am I kidding? I would eat this cake for breakfast.
Note: The batter is really thick. Don’t think you’ve done something wrong.
Jewish Apple Cake
1 c. oil, I use olive oil or avocado oil
4 eggs
1 t. vanilla
1/3 c. orange or lemon juice
Combine above ingredients and set aside.
Mix together the following dry ingredients. Make a well and stir in egg mixture to make a stiff batter.
3 c. flour
2 c. sugar
3 t. baking powder
¼ t. salt
Mix ½ c. sugar and 2 t. cinnamon and set aside
Peel, core and slice 4 medium apples.
Grease a 9×13 inch pan or a Bundt pan. Preheat oven to 350-degrees. Place ½ of batter in prepared pan. Arrange apple slices on batter and sprinkle on ½ of the cinnamon mixture. Pour on remaining batter and sprinkle with remaining sugar mixture.
Bake 45-50 minutes for 13×9-inch pan and 1 1/2 hours for Bundt. I find that sometimes it takes less than 90 minutes in a Bundt, so I check at an hour and 15 minutes.
How to Can Applesauce
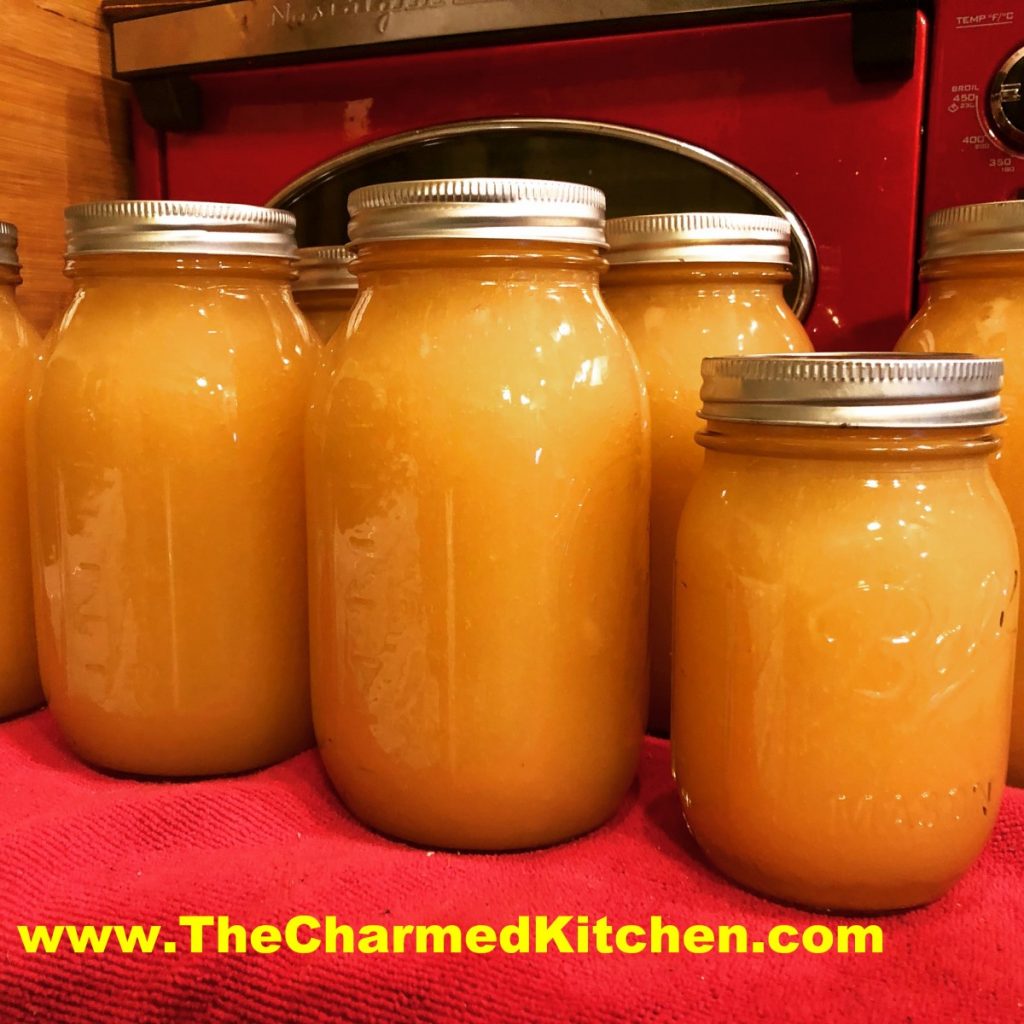
I love homemade applesauce so much better than anything I can buy at the store. It really is easy to make.
There is some disagreement about whether or not you have to peel your apples before making applesauce. It is a personal choice. You can cut up your apples without peeling them, if you are running them through a food mill. The food mill will remove the skins. If you use red-skinned apples, the skins will give your sauce a rosy tint.
I actually peeled my apples, mostly because I knew I was not using a food mill, but was using an immersion blender to make my sauce smooth. Either method is fine.
Sweetening is also a personal choice. You can leave your applesauce unsweetened, if you like. I normally use sweet apples for my sauce, so I don’t need a lot, or any, sugar. Plus, I’ll let you in on a little secret. You need some water to help cook down the apples and keep them from sticking to the pot. Instead of water, I use apple juice or cider. It adds natural sweetness to the applesauce and a more intense apple flavor.
You can also add a couple of cinnamon sticks to the batch- don’t forget to remove them before processing.
Home Canned Applesauce
12 lbs. apples, I used Melrose and Mutsu, but use the apples you like
Water*
2-3 cinnamon sticks, optional
4 T. lemon juice
sugar to taste
Peel and core apples. Put in water with some ascorbic acid, citric acid or lemon juice to prevent discoloration. Place apples in a pot with enough water* to prevent sticking. Add the cinnamon sticks, if using, and lemon juice. Cook over medium high heat until soft. Time will vary depending on the type of apples you are using, and how large the apples are. Turn off the heat and remove cinnamon sticks. I wanted smooth applesauce, so I used an immersion blender. Return apple mixture to a boil. Sweeten with sugar, if you like, or leave unsweetened. Have water bath full of boiling water and have hot, clean canning jars and lids and rings ready. Ladle hot applesauce into hot jars, leaving 1/2 inch of headspace. Wipe rims and apply lids. Process in a boiling water bath for 20 minutes for pints or quarts. Turn off heat and let jars stand in water bath 5 minutes before removing. Set in a draft free area to cool down. Yield: 4 quarts or 8 pints.
*rather than add water, to prevent the apples from sticking, you can use cider or apple juice instead.
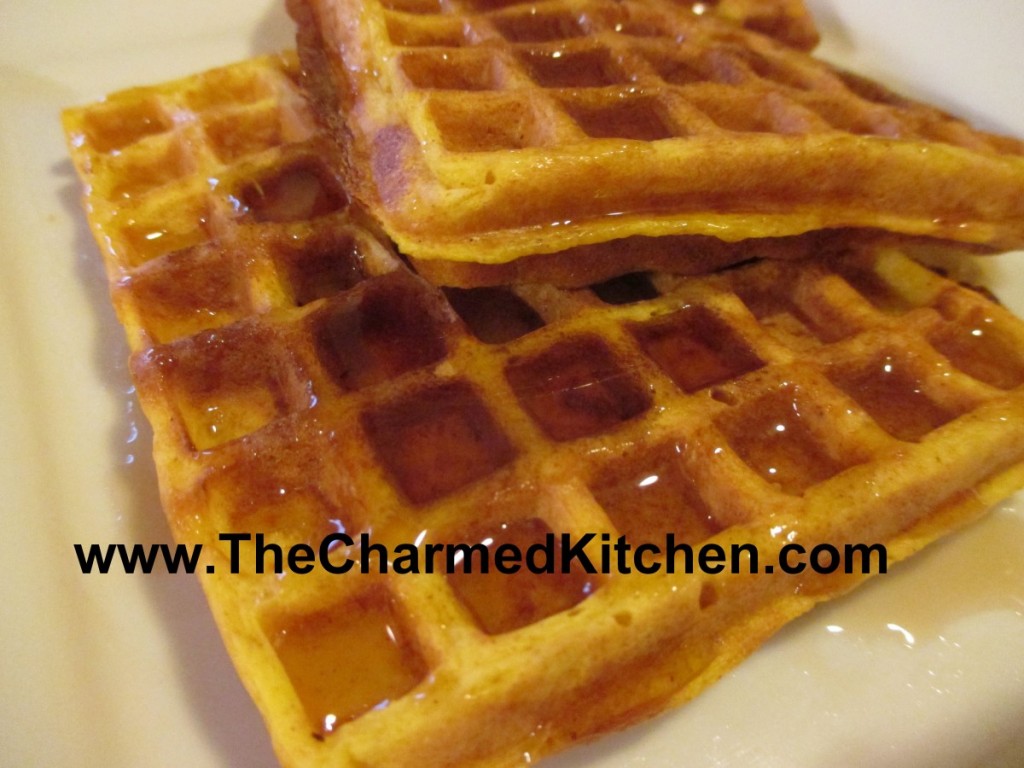
Pumpkin Pancakes

These pancakes make a wonderful breakfast for Thanksgiving morning- or any morning for that matter.
I want to be honest with you from the start. I made these pancakes with cooked butternut squash and not pumpkin. They were terrific. Many winter squash can be used just like pumpkin in cooking. The problem is that when I post a recipe as “squash” instead of pumpkin, people get confused. Perhaps they are thinking summer squash, like zucchini. Maybe the word pumpkin just conjures up a clearer image.
The pancakes were really good, and isn’t that what matters?
I make my own baking mix, and that is what I used as the base for the pancakes. You can just buy a mix, like Jiffy or Bisquick, if you prefer. The pancakes are light and fluffy, with a nice “pumpkin” flavor. I had them with warmed maple syrup, but they would also be nice served with powdered sugar or perhaps a fresh berry syrup.
“Pumpkin” Pancakes
2 c. baking mix – like Bisquick or Jiffy Mix – I make my own*
3 T. brown sugar
2 t. cinnamon
1 t. nutmeg
1 1/2 c. evaporated milk
1 c. pureed pumpkin or winter squash
2 eggs, beaten
2 t. vanilla
Combine dry ingredients in mixing bowl and set aside. Whisk together wet ingredients and stir into dry ingredients. Lightly grease a skillet and cook over moderate heat. Use about 1/3 c. of batter per pancake. Turn when edges appear dry. Makes 16.
*Chef Pastry Mix/ Biscuit Mix
8 cups sifted, all-purpose flour
1 c. powdered milk
1 c. powdered buttermilk
¼ c. baking powder
1 T. salt
2 c. shortening, butter or coconut oil*
Sift dry ingredients together 3 times. Cut in shortening, butter or coconut oil to resemble cornmeal. Keep in an airtight container. Store in a cool dry place and use within six months.
* I use coconut oil and store in the fridge. If you use butter or coconut oil- you have to keep in the fridge.
Russian Tea Biscuits
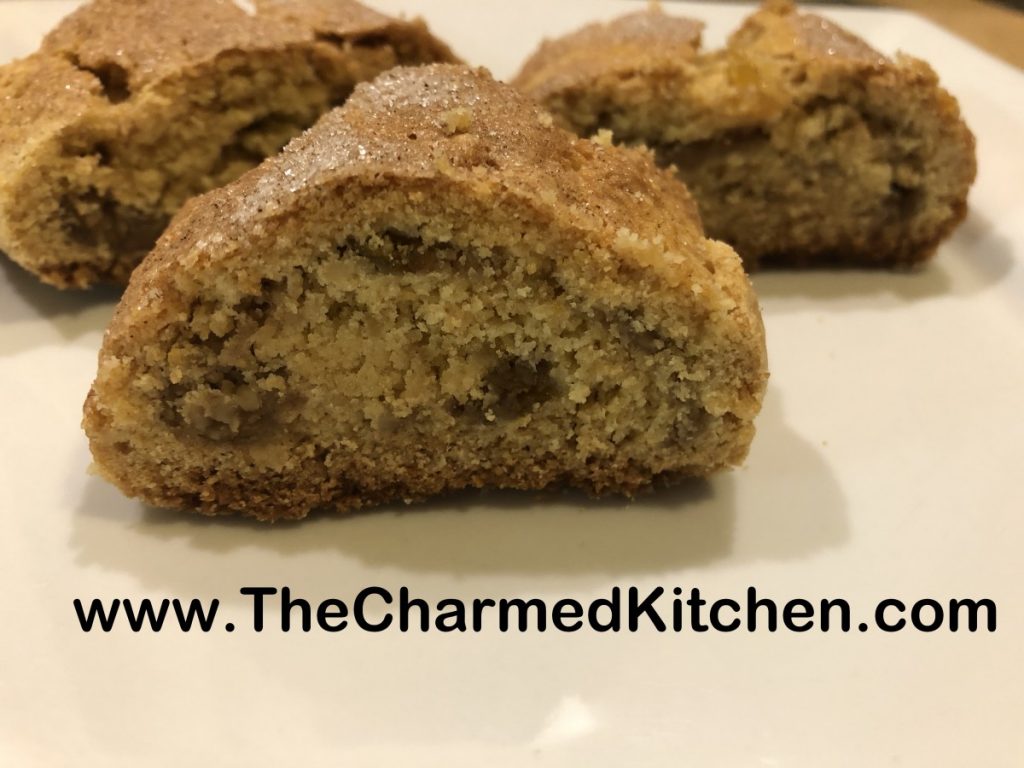
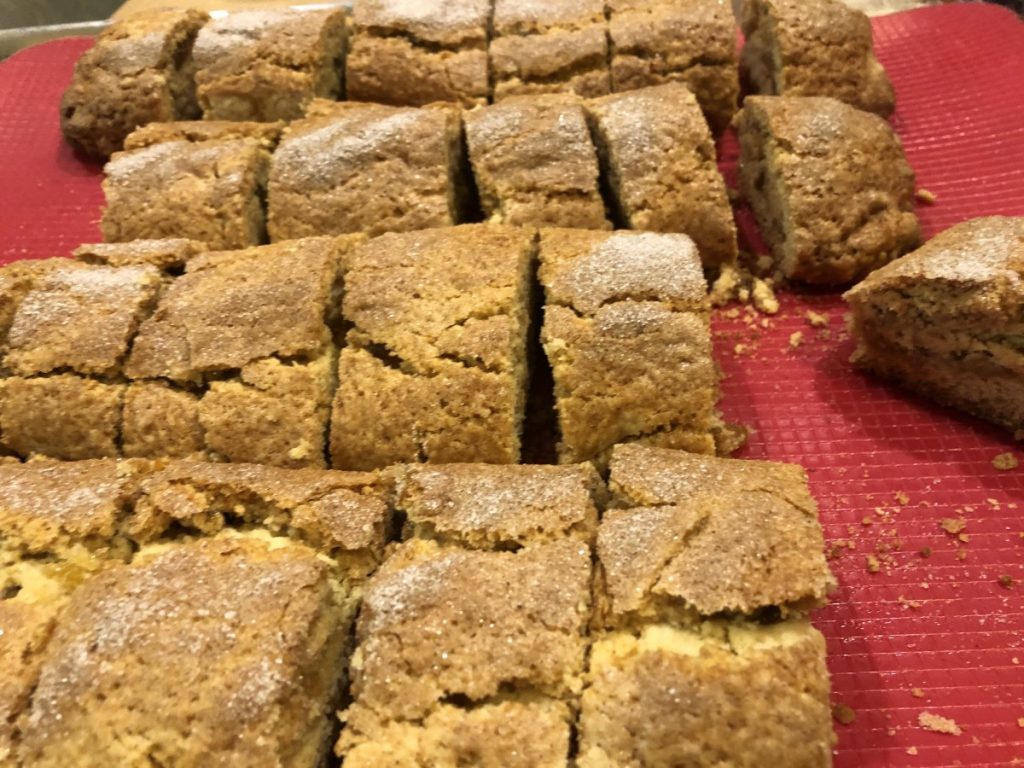
Russian tea biscuits are like a kind of cookie. A magical cookie, filled with jam and raisins and nuts. The are crispy, tender and rich. They also are not all that sweet, which appeals to me. You can serve them as a dessert, but also serve them with breakfast or brunch. And of course, with your tea or coffee.
I can remember the first time I ever had a Russian tea biscuit. It was at the Cedar-Lee theater. I guess you could say I got my love for foreign films and Russian pastry at the same place. I found a recipe in my mother’s recipe collection. I tried them and they were pretty close to the ones at the Cedar-Lee. I did tweak that recipe a bit.
My only regret was not having raspberry jam. That is my favorite. The swirl of red in the biscuits is very pretty. I used what I had- peach- and am happy with them. Not as colorful, but very tasty, all the same.
Here is the recipe. I think you might want to try these with that next cup of tea.
Russian Tea Biscuits
3½ c. flour
½ c. sugar
1 t. baking powder
1 t. baking soda
¼ t. salt
1 c. butter, softened
2 eggs, separated
½ c. orange juice
1 1/3 c. preserves, (strawberry, raspberry, plum or apricot are favorites)
1 c. chopped walnuts
1 c. raisins, dark or golden
1 t. cinnamon
3 T. sugar
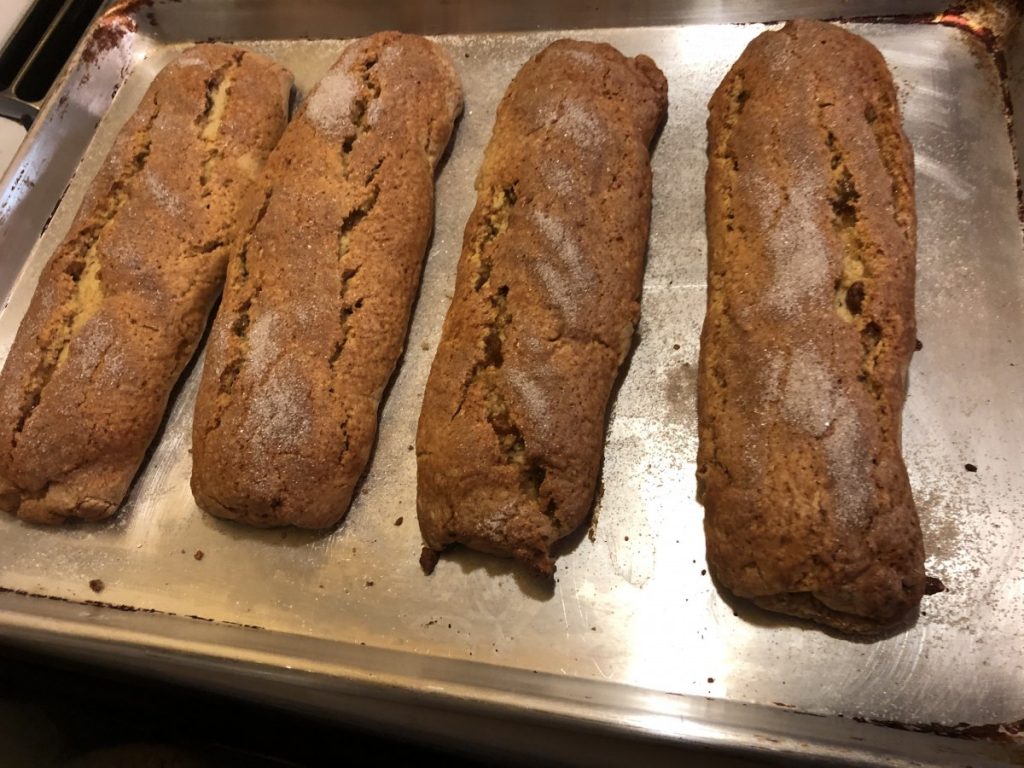
Combine dry ingredients in a mixing bowl and cut in butter until mixture is the size of peas. Stir in egg yolks and orange juice. Knead until dough is well blended. Divide dough into 4 equal pieces. Roll out a piece of dough 1/4 -inch thick into an 8×10-inch rectangle. Spread with 1/3 c. of the preserves and sprinkle with 1/4 c. each of the raisins and nuts. Roll up jelly roll fashion and set, seam side down, on ungreased baking sheet. Repeat with remaining dough. Beat egg whites until foamy and brush on dough. Combine cinnamon and sugar and sprinkle on dough. Bake in a 350-degee oven for 25-35 minutes, or until golden. Use a toothpick to test for doneness. They can be golden, but a little under baked in the middle. Slice while warm into 6 pieces for each roll. Makes 24.
Cheesy Butternut Squash Bake

This recipe turned out to be a wonderful way to prepare squash or pumpkin. It tasted so good. I had some butternut squash I wanted to use in a savory dish. I peeled and cubed the squash, then steamed it until tender. I mashed up the squash, then rummaged in my fridge. I had some sharp white cheddar cheese. I shredded it up, adding it to the squash. I also had an open carton of whipping cream- so I added some, too. I was worried it would be too runny, so in went a little cornstarch. Then I added a generous amount of salt and fresh ground pepper.
I put the mixture in a baking dish and popped it in the oven. I took it out when it was all bubbly and hot. In hindsight, I could have given it a few more minutes to brown a little on the top.
Sometimes the hardest part about cooking is coming up with a name for a new dish. I wasn’t quite sure what to call this one. I thought about calling it a mash or maybe a casserole. I ended up with the innocuous name, “bake”. Well, whatever you call it, I think you will love it as much as I did.
Feel free to play around with the cheese you use. Anything that melts will work. You can also use different winter squashes or pumpkin, too.
So here is the recipe.
Cheesy Butternut Squash Bake
4 c. cubed butternut squash
8 oz. shredded cheese- I used a sharp cheddar
½ c. heavy whipping cream- or half and half
2 T. cornstarch
Salt and pepper to taste
Cook the cubed squash until tender. You can steam, boil or roast. If boiling, be sure to drain well. Place cooked squash in a bowl and mash. It is ok if there are still some small lumps. Add remaining ingredients and combine well. Place in a one-quart baking dish and bake in a 350-degree oven for 30 minutes, or until mixture is bubbly. Serves 4-6.
Lemon Drop Mini Cheesecakes
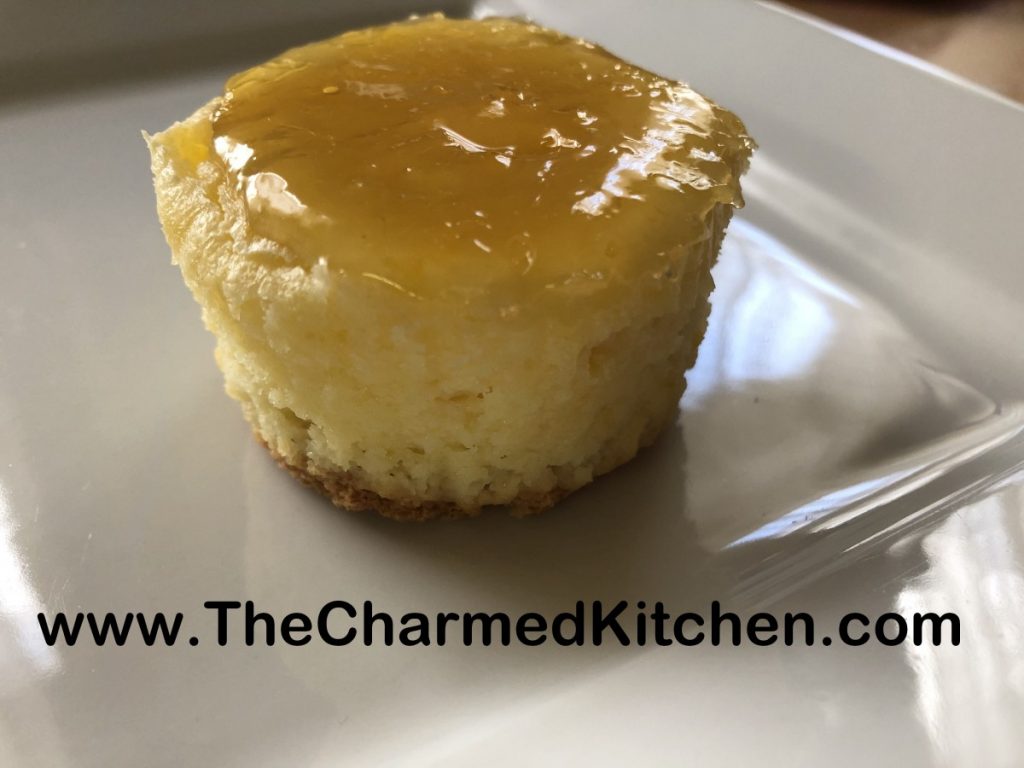
Don’t let their small size fool you. These little cheesecakes pack a punch of lemon flavor. There is lemon zest in the batter and a topping full of lemony tartness. Not too sweet, either, which is a plus in my mind.
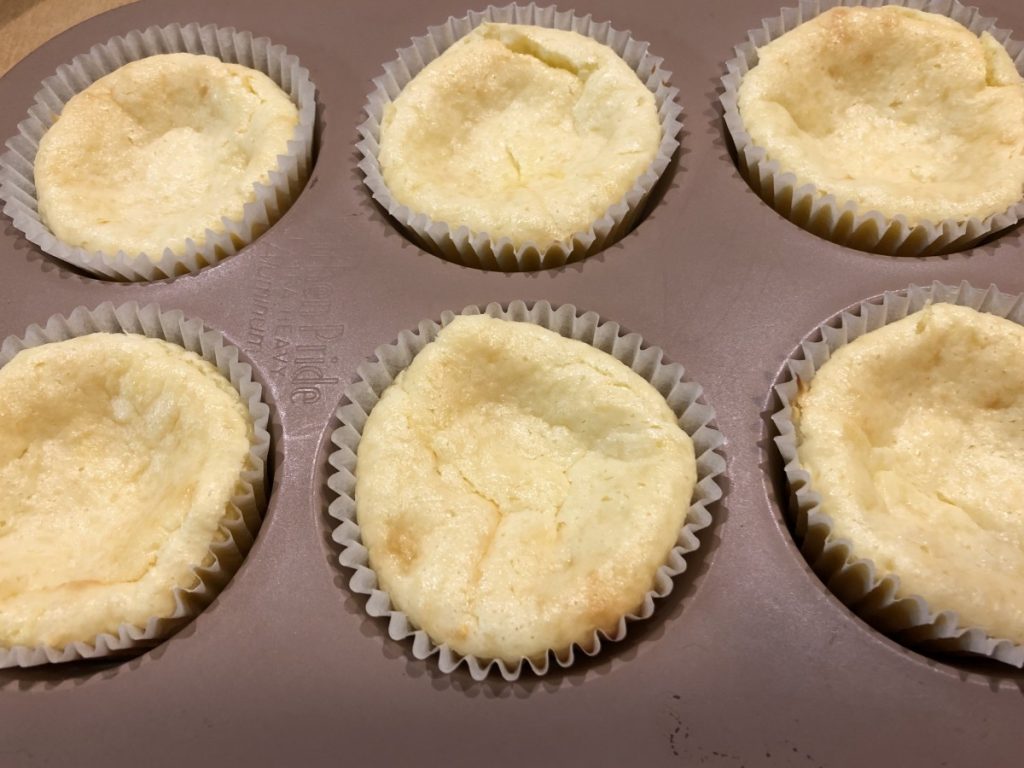
I wanted a dessert but didn’t want to make anything too big. These mini cheesecakes were the right solution. The recipe only uses one package of cream cheese and only makes 6. For the crust you can use vanilla wafers, but since I didn’t have any, I just trimmed off the edges of some graham crackers, so they would fit in the muffin tins. You can even omit a crust and they are gluten free.
So here is the recipe. I hope you enjoy it.
Lemon Drop Cheesecakes
6 vanilla wafers or graham crackers
1 (8 oz.) cream cheese, softened
1/4 c. sugar
Zest of one lemon
1 t. vanilla
1 egg
Topping:
½ c. lemon juice or a combination of lemon juice and pieces of lemon*
½ c. sugar
2 t. cornstarch
Zest of a lemon
Line 6 muffin tins with paper liners. Place 1 wafer in each. If using graham crackers, trim them to fit the muffin tins. Beat together remaining ingredients for 1 minute with electric mixer. Divide this mixture in the muffin tins, filling each almost full. Bake 25 minutes at 325 degrees. Cheesecakes will puff up, then deflate as they cool. While cheesecakes are baking, make the lemon topping. Combine all topping ingredients in a small saucepan. Cook over medium heat, stirring, until mixture thickens and gets bubbly. Set aside. Once the cheesecakes have cooled down, spoon over the lemon topping. Chill before serving. Store leftovers in fridge. Makes 6. These can be frozen. Serves 2-3.
* I only had 2 lemons, so to get the most from them, I removed the peel and white membrane and used the lemon segments in the topping. I was still a little short, so I added some extra lemon juice to get to ½ cup. You could just use all juice.
Coconut Pumpkin Bread
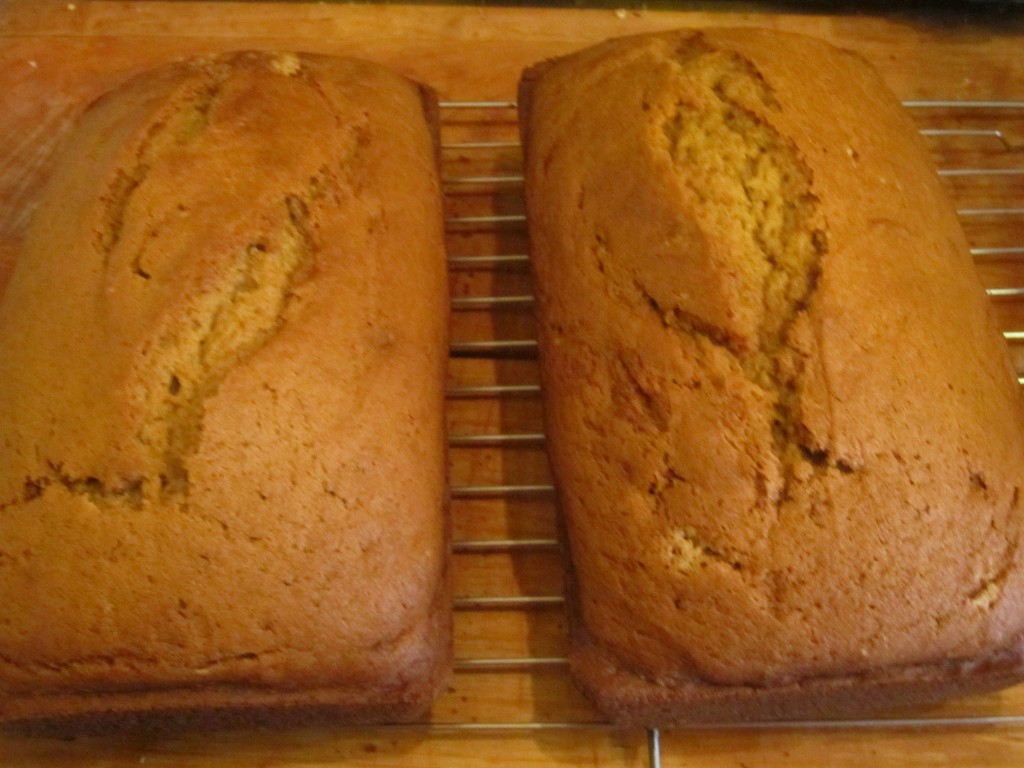
This is one of my favorite quick breads. I often make it with butternut or Hubbard squash, instead of the pumpkin. For some reason, squash bread does not sound as fun as pumpkin bread. I like to make several batches at a time, and freeze the extra. Of course, if word gets out that I have freshly baked pumpkin bread, it never makes it to the freezer. Every year I get a lot of requests. Everyone seems to love it.
The recipe called for butter originally. I decided to use coconut oil as a substitute for the butter, to see if it would work out. It was just an experiment, for a friend who can’t eat dairy. She didn’t want to use shortening, which was another option. The bread came out wonderful. Very similar to the original. Can’t honestly say there is any taste difference between this and the original recipe. Maybe a slight taste of coconut, but that could just be because I know there is coconut oil in the bread.
It is a versatile bread. Served plain, it is a great breakfast. Topped with a dusting of powdered sugar or sweetened fruit and whipped cream or ice cream, it becomes dessert. I often bake smaller loaves for gift giving.
I do find myself adding more spices, sometimes. Play around to find the combination of flavors you like. I often add cloves, allspice or mace.
Coconut Pumpkin Bread
1 ¾ c. flour
1 ½ c. sugar
1 t. baking soda
¾ t. salt
1 t. each cinnamon and nutmeg
½ c. coconut oil
2 eggs, beaten
1 c. pumpkin puree
1/3 c. water
Mix dry ingredients and set aside. Beat together butter and eggs until fluffy. Beat in pumpkin and water until smooth. Stir in dry ingredients until smooth. Pour into a greased 9×5-inch loaf pan. Bake in a preheated 350-degree oven for 60-65 minutes. Cool in pan 10 minutes before removing from pan and placing on cooling rack. Wrap in plastic, best served the next day. Freezes well. Makes 1 loaf.
As with other quick bread you can make this recipe and bake it in smaller pans for gift-size loaves. Baking temperature is the same. Time will vary, so check after 30 minutes and test for doneness as usual.
Foods You Might Not Know You Can Freeze
There are several reasons we freeze foods. Safety is probably the biggest one. Frozen foods last a lot longer than most foods that aren’t frozen. Convenience is another reason. You can make a big batch of soup or chili, then freeze some to eat later. Freezing can also reduce food waste, by allowing you to keep something to use later, that might otherwise go bad before you can use it.
People always seem surprised at some of the foods that I freeze. I’ve been getting more questions lately, so I made a list of some things you can freeze- but maybe didn’t know you can freeze.
If you find something in the frozen food section at the store remember- if they can freeze it- you can freeze it. Part of my pantry challenge is to eat foods I already have, without going to the grocery store. My frozen foods are what really make this easier. Besides the typical meats and veggies, I have some fun ingredients to work with in my freezer. I can also extend the life of some of my foods by freezing them.
So here is a quick list that I came up with, in no particular order.
1. Eggs: While they keep for a pretty long time you can find yourself with more eggs than you can use. Crack the eggs and place them in ice cube trays or small containers- and freeze. No special instructions. Some people prefer to add a tablespoon of water to each egg. I have tried with and without water and both seemed fine. You can also freeze the yolks and whites separately. Add a little water to yolks when freezing them on their own. Don’t freeze eggs in their shells.
2. Avocados: This really prompted a lot of feedback. I posted a recipe for guacamole once and mentioned that you could freeze avocados. I got a lot of response to that. Most people said they never even considered freezing avocados. They freeze great. Frozen avocados work best used in dips and smoothies later. Don’t expect to slice them to top your salad after they were frozen, but they mash up great and would still work on toast. Just cut in half, remove the pit and scoop out the flesh. Dip in lemon juice and place in a freezer bag. Squeeze out any air and seal. You can also just mash them up before freezing. The lemon juice keeps their color better. You could use lime juice, if you like.
3. Pasta and Rice: Decided to lump these together since the information for both is about the same. Easiest way is to just freeze the pasta or rice in portion sized baggies. Thaw in fridge or microwave when ready to use. This is a great way to eat more brown rice, at least it works for me. Rice takes 15-20 minutes to cook. Brown rice takes double that amount of time, at least. I cook up a big batch of brown rice, portion it out and freeze it. Now I can grab a baggie whenever I want. Same for pasta. Not so much the time it takes to cook as getting out that water and getting it boiling. Or sometimes I just cook too much pasta. Freezing the extra means I can have pasta when ever I want.
4. Milk: There are some problems with freezing milk. It will separate so it won’t be quite like the fresh stuff you pour on your cereal, but milk that was frozen is perfect for baking and cooking. I don’t drink much milk. This way, rather than tossing milk, I can freeze the extra and use it for cooking later on. Also easier than me trying to keep milk on hand, when I rarely drink it.
5. Whole Grains/ Whole Grain Flours: This isn’t so much about whether you can freeze them, but rather, why you should. All whole grains contain the germ and bran, which contain fat. Over time, they can become rancid. Don’t panic, doesn’t happen all that quickly, but if whole grains are stored in a hot kitchen they will develop an off taste. Also depends on how much you buy and how quickly you go through it. The last few bags of brown rice I brought suggested refrigerating after opening the package. If you don’t have the freezer space- store them as cool and dry as you can and don’t buy more that you can use in 6-9 months, or so.
6. Cheeses: Yes, you can freeze cheese. Harder cheeses seem to hold up better. There will be textural changes, more noticeable in soft cheeses. If you have more cheese than you can use, freezing will extend its shelf life.
7. Crackers: Some of you are wondering- why freeze crackers? The answer – to keep them fresh and crisp long past the expiration date. I was at a bakery outlet store one time and one of the employees shared that tip with me. There was a great sale on crackers but I was worried they would get stale. She told me to freeze them, in the package. She also said to leave them in the package until they came up to room temp, when I wanted to use them. I left one pack out and froze the rest. Several months later opened the pack I had left out of the freezer- the crackers were stale. All of the packs I had frozen stayed crisp.
8. Cheesecake: Not sure why so many people ask me about cheesecake. Does Sara Lee sound familiar? Yes, you can freeze cheesecake. I like to freeze slices on a baking sheet, then wrap in plastic wrap after they are frozen solid. Defrost with the wrapping loosened, but still on. Best defrosted in the fridge for a few hours.
9. Grapes : A lot of people don’t realize that grapes can be frozen. In fact, frozen grapes are one of my favorite hot weather snack foods. Grapes, like berries, can be frozen by just placing clean fruit on a baking sheet until they are solid. Then transfer to a freezer container or freezer bag. You can eat them right out of the freezer- or use them in cooking. I often make cobbler out of frozen grapes.
10. Baked Goods: Most baked goods freeze great. Cookies, cakes, pies. I prefer to freeze pies unbaked- then bake when ready to use. Again, think about some of the stuff you see in the freezer section at the store. I like to take my cookie dough and shape it into balls. Freeze the balls of dough on a baking sheet- then transfer to a freezer bag. When I need a few cookies I take them right out of the freezer- place on a baking sheet and bake- just add a few minutes to the baking time.
11. Soups, T.V.Dinners etc: Freezing meals is one of the best ways to use your freezer. For one thing, you can freeze stuff before you get sick of it. I know you LOVE your chili- but do you really want to eat it all week? I bet not. By freezing it in portions that are practical for you and your family, you can have chili when you want, without having to make a fresh batch every time. Again, if Stouffer’s can freeze it, you can freeze it. Mac and cheese, stuffed peppers, sliced turkey with gravy and mashed potatoes. Have fun with it. A lot of people save take out containers and use those. You can also buy containers that are used over and over- so the cost isn’t so much over time. I make big batches of vegetable soup- then puree it. I freeze it in both pint and quart containers. Great for a quick lunch or if friends stop by. It can be eaten as is, or you can add rice or pasta- you already have some in the freezer!! I will sometimes use this soup as a of pasta sauce.
12. Breakfast Foods: Really this is a continuation of number 11. You can freeze waffles, pancakes, breakfast sandwiches, smoothies etc. Makes breakfast time a little easier and you will probably like your waffles better than most of what you can buy at the store. Will save you a lot of money, too.
!3. Lemons and Limes: If you are like me, I prefer to have fresh lemons and limes on hand for drinks and cooking. However, they can go bad before I get to using them. I hate to find a fuzzy lemon at the bottom of the fridge. You can freeze them a couple of different ways, depending on how you want to use them later. For adding to drinks later, just cut the fruit in wedges or slices. Place on a small tray and pop in the freezer until solid. Once frozen, remove the fruit from the tray and place in a freezer bag or container. Now they are easy to grab right out of the freezer to add to your favorite beverage. For use in cooking, I zest the fruit and place the zest in a freezer container. Then I juice the fruit and pour the juice in ice cube trays. Once frozen, I can pop out the lemon or lime juice cubes and place in a freezer bag or container. Now, when I want lemon or lime juice for a recipe, I just grab a cube or two.
Some Extra Freezing Info
When it comes to vegetables a general rule is that if it is a vegetable that you cook- then it is a vegetable you can freeze. Works most of the time- we don’t normally cook lettuce and it doesn’t freeze well. Most vegetable are blanched before freezing- that means placed in boiling water, then put in ice water, drained then frozen. This stops certain enzymes from working and keeps the veggies tasting fresher. Some veggies, like onions or peppers- don’t need blanching. You just cut them up- place on a baking sheet and place in freezer until solid, then transfer to a freezer container or bag.
Most fruits don’t get blanched- just washed, cut up if bigger fruits, and frozen. Some in syrup and some frozen “dry”.
High salt foods are not great for freezing. Think about it, we use salt to melt ice. Salty foods, like cured meats, don’t freeze well and will get an off flavor if frozen too long. Freeze them if you must- but use as soon as you can, within a few months, for best flavor.
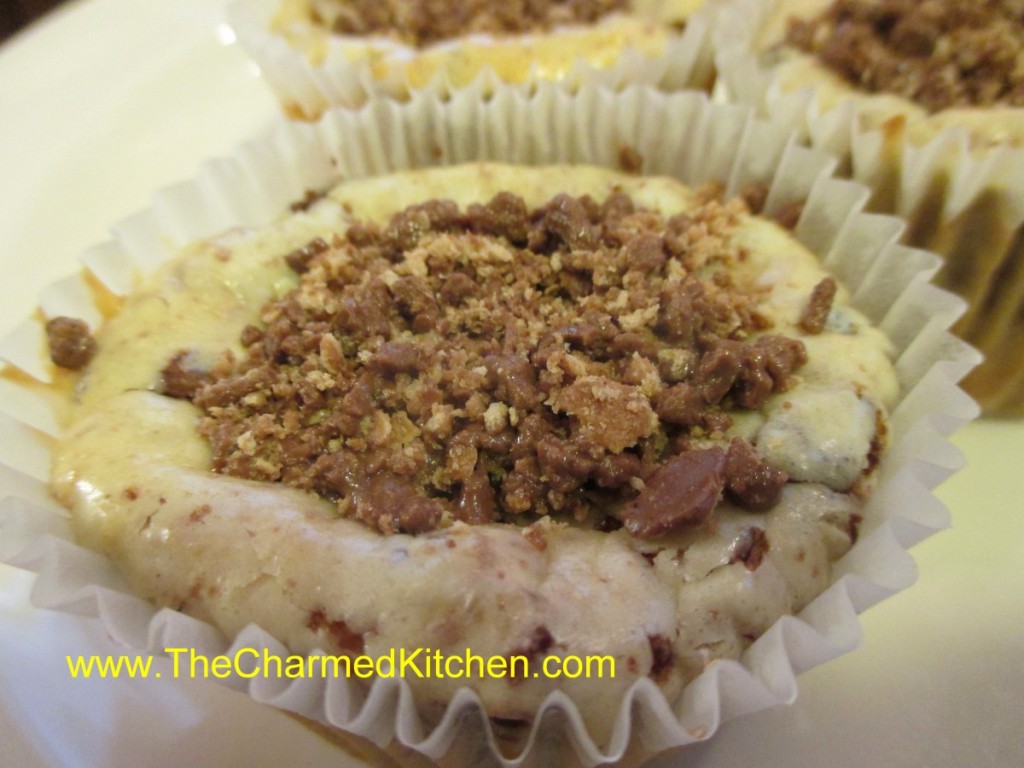
Halloween Candy Mini Cheesecakes

I am posting this as a public service to those of you with leftover Halloween candy.
Sometimes you end up with leftover Halloween candy. You could just eat the candy- or you can transform it into a dessert.
The idea I came up with was mini cheesecakes. I’ve made them before, so I used my recipe, and just folded in crushed candy bars. Once the cheesecakes cool they deflate a little, so I also added some crushed candy bars to the top to make them look nice.
Only change from the original recipe was a slight decrease in sugar, to compensate for the extra sweetness of the candy. I went down to 1/3 cup of sugar. I think 1/4 cup would also have been enough.
I am sure a lot of different candy bars would work. I used a small food processor to really crush up the candy bars. I made 2 batches, one with cookies and cream candy bars and the other with Kit Kat bars.
Since the candy will keep, you could use the candy in a Thanksgiving dessert. Of course, the candy might not last until Thanksgiving.
Halloween Candy Mini Cheesecakes
12 vanilla wafers
2 (8 oz.) cream cheese, softened
1/3 c. sugar
2 t. vanilla
2 eggs
2/3 c. crushed candy bars plus 1/4 c. crushed candy bar, for topping
Line 12 muffin tins with paper liners. Place 1 wafer in each. Beat together remaining ingredients (except candy) for 1 minute with an electric mixer. Fold in candy. Divide this mixture in the muffin tins, filling each 3/4 full. Bake 25 minutes at 325 degrees. Cool and decorate with extra crushed candy. Makes 12. These can be frozen.
Old-Fashioned Pear Cobbler
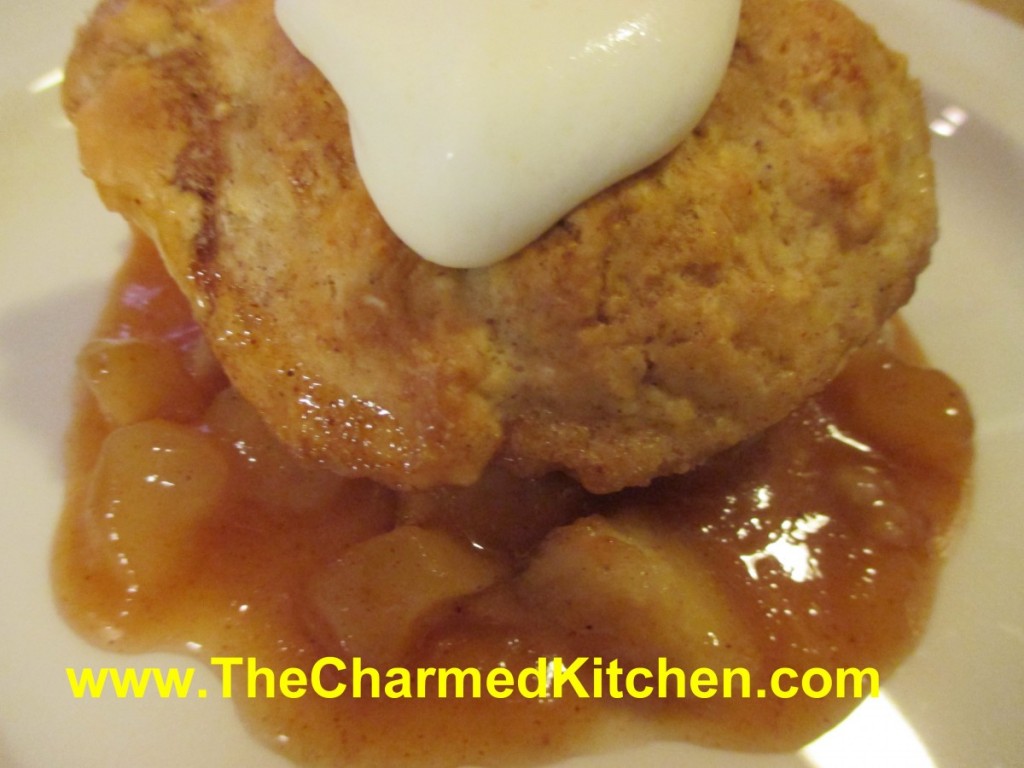
Cobbler is one of my favorite desserts for this time of year. I really enjoy making this pear cobbler for family and friends. Like apples, pears always remind me of Fall.
While cobblers can be made with any number of different fruits, I love using pears. It is one of the simplest desserts you can make from scratch, and one of my favorites, for sure.
In the time it takes to preheat the oven, you can have it ready to bake. This recipe calls for baking mix, like Bisquick or Jiffy Mix. I make my own- recipes follows- but use what you like. The cobbler is fine served plain, or with a dollop of whipped cream or ice cream. It can also be served cold, but I like to serve it warm.
If you prefer, you can also make the cobbler with a combination of pears and apples.
Pear Cobbler
4 c. peeled and sliced pears
½ c. sugar
1 T. plus 2/3 c. baking mix (Like Bisquick or Jiffy Mix or even homemade)- recipe follows
1-2 t. cinnamon
2 T. packed brown sugar
¼ c. butter
2 T. milk
In 1-quart shallow casserole, combine fruit, sugar, 1 tablespoon of the biscuit mix and cinnamon. In medium bowl combine remaining biscuit mix with sugar. Cut in butter to resemble coarse crumbs. Stir in milk to make a soft dough. Drop by spoonfuls over fruit mixture. Bake in a preheated 400-degree oven for 30 minutes, or until toothpick inserted into dough comes out clean. Let stand 5 minutes. Serves 4-6.
Baking/ Biscuit Mix
8 cups sifted, all-purpose flour
1 c. powdered milk
1 c. powdered buttermilk
¼ c. baking powder
1 T. salt
2 c. shortening*
Sift dry ingredients together 3 times. Cut in shortening to resemble cornmeal. Keep in an airtight container. Store in a cool dry place and use within six months.
*You can use butter or coconut oil in place of the shortening. Just store in the fridge, if you do. I use coconut oil.


