Amy’s Baked Beans
Amy’s Baked Beans
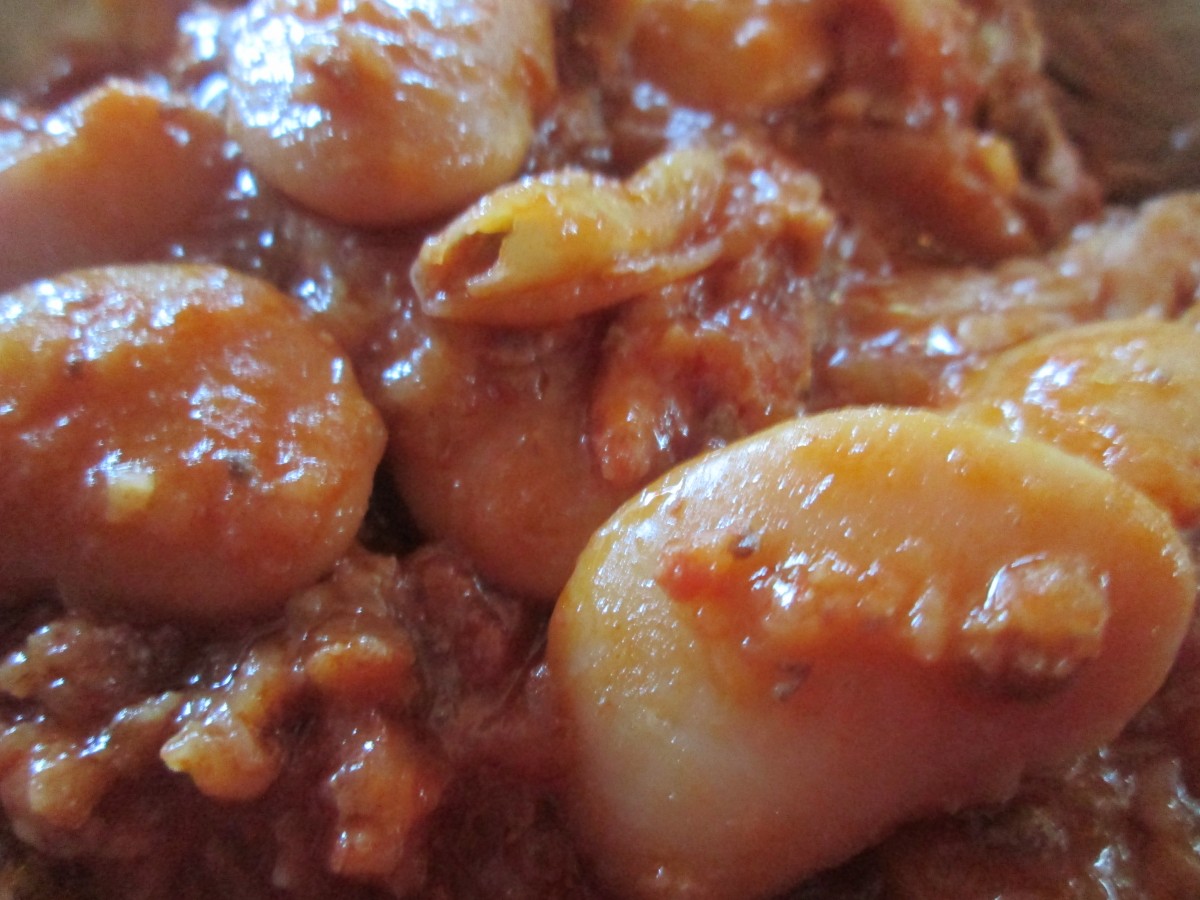
This is a wonderful recipe for baked beans. I got the recipe from my friend Amy. She used to make them for almost every summer barbecue. Unlike traditional “baked” beans, this recipe starts with canned beans.
I love traditional baked beans. The ones baked all day, until the beans get tender and the flavors are perfectly blended. But I don’t always have time to make them. By starting with canned beans, it saves a whole lot of time, without compromising flavor. When I serve these beans, everyone comes back for seconds.
It’s a simple recipe, with relatively few ingredients. It can be baked in the oven, or done in a crock pot.
Super easy and very tasty.
Amy’s Baked Beans*
6 c. chopped onion
1 lb. ground meat
1 lb. bacon, cut into 1-inch pieces
1/2 c. brown sugar
2 cans tomato soup
3 can butter beans, rinsed and drained
Mix onion, meat and bacon in skillet and cook until onions are translucent. Drain off excess fat. Place in Dutch oven with remaining ingredients and cook, covered, in a 350 degree oven for 90 minutes.
Note: You can also cook in a crock pot on high for 4 hours or longer. Uncover, for awhile, if you like, for thicker sauce.
*This recipe has been in the McWilliam family for several generations. They are also called Grandma McWilliam’s Beans and before that Aunt Elizabeth’s Beans.
Mom’s Macaroni Salad
Mom’s Macaroni Salad
I’ve been in a nostalgic mood this week. Some of my mood is because of a conversation with friends. We were talking about childhood memories and summer holidays. It made me think about some of the foods I looked forward to in the summer.
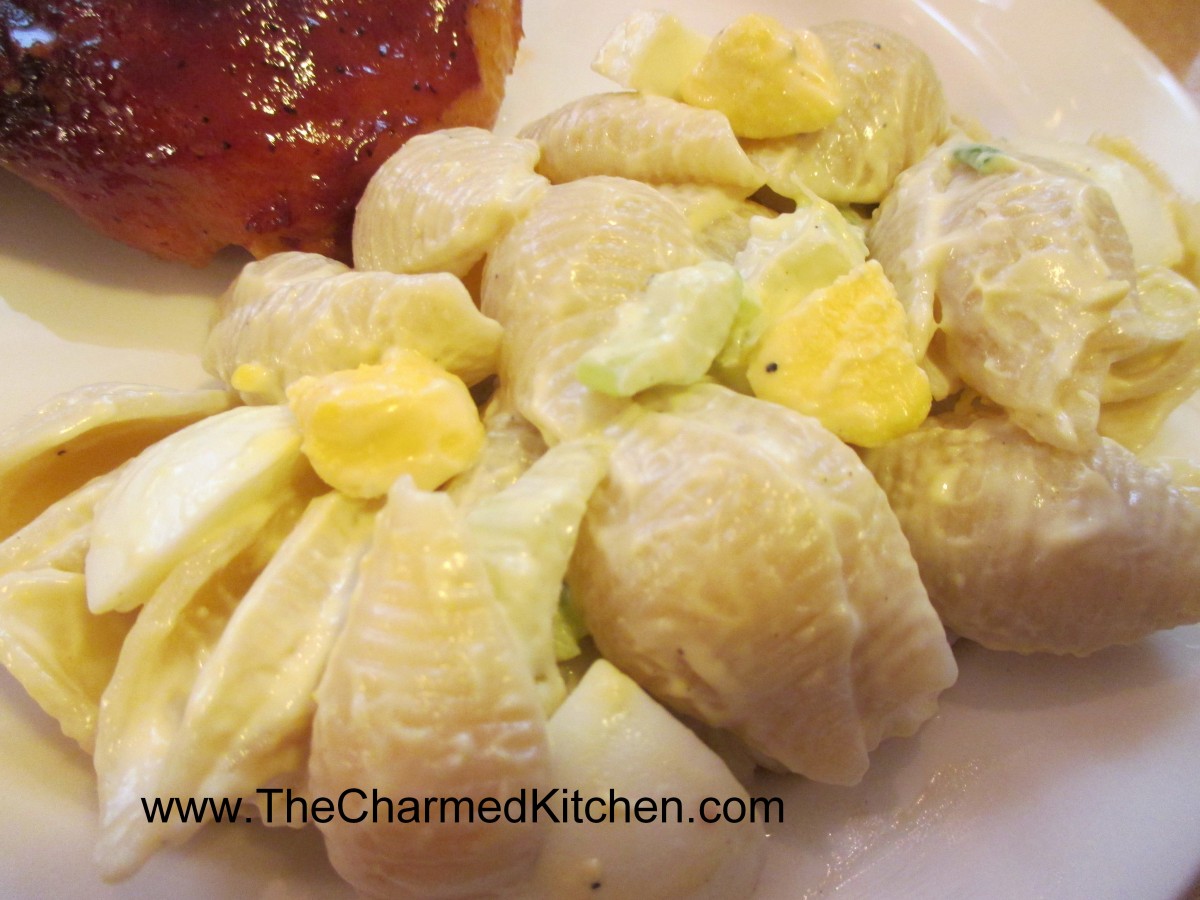
For summer cookouts, we always had this salad. Back then, Mom called it macaroni salad, even though she never made it with macaroni. She used shell pasta. We never referred to it as pasta salad, either. Whatever you call it, it is a wonderful salad. I loved it then, and I love it now.
I won’t say I don’t make other pasta salads. I do. I make all sorts of combinations, but this is the salad that brings me home.
Mom used mostly mayo, with a little salad dressing, like Miracle Whip. She felt it gave the salad just a little more zing. I use straight mayo, but that part of the recipe is flexible.
She added quite a few hard cooked eggs and I think they add a richness to the dish. My dad would cut up the celery and green onions for her. Mom liked the veggies cut into a fairly small dice in this dish, and Dad had great knife skills. I love the image of them cooking together.
So here it is- a family recipe wrapped up nicely with some memories, too.
Mom’s Macaroni Salad
1 lb. uncooked pasta, shells are preferred
Salt and pepper
Mayonnaise, about 1 cup
Salad dressing, like Miracle Whip, about ½ cup or more mayo
3-4 ribs celery, sliced thin
4-5 green onions, trimmed and sliced thin
8-12 hard-cooked eggs, cooled and peeled
Cook pasta according to package directions, but do not overcook. Rinse with cold water and drain well. Place drained pasta in a large bowl and sprinkle with salt and pepper to taste. Add dressings and vegetables and stir until well mixed. You may want to add more dressing to suit your taste. Chop eggs and stir into salad. Adjust seasonings if needed and chill before serving. Serves 8-10.
Broccoli and Cauliflower Salad

Broccoli and Cauliflower Salad
I make broccoli salad pretty often. It is one of my favorites. Sometimes, I like to switch it up a little by adding cauliflower. The result is a salad that has a great mix of flavors, colors and textures.
The addition of bacon also adds a wonderful smoky flavor. Certainly, feel free to omit the bacon for a vegetarian salad.
With or without the bacon, this is a great salad.
I make this salad year round, but more often during the spring and summer. I also like to bring it to picnics and cook outs. Everyone seems to like it.
So if you are looking for a salad t0 bring to your next cook-out, consider this one.
Broccoli and Cauliflower Salad
1 small head cauliflower, trimmed and broken into bite- sized pieces
2 broccoli crowns, cut into bite- sized pieces
1 sweet pepper, seeded and chopped
1 c. shredded cheese- I used a sharp cheddar
8- 10 slices of bacon, cooked and chopped
1/2 cup of mayo – or more according to your taste
salt and pepper to taste
Steam the cauliflower and broccoli until just tender/crisp. About 5 minutes in a microwave steamer, 6 minutes in a conventional steamer. Place in a bowl to cool down then combine with remaining ingredients and stir to combine well. Adjust seasonings, if needed. Serves 6-8.
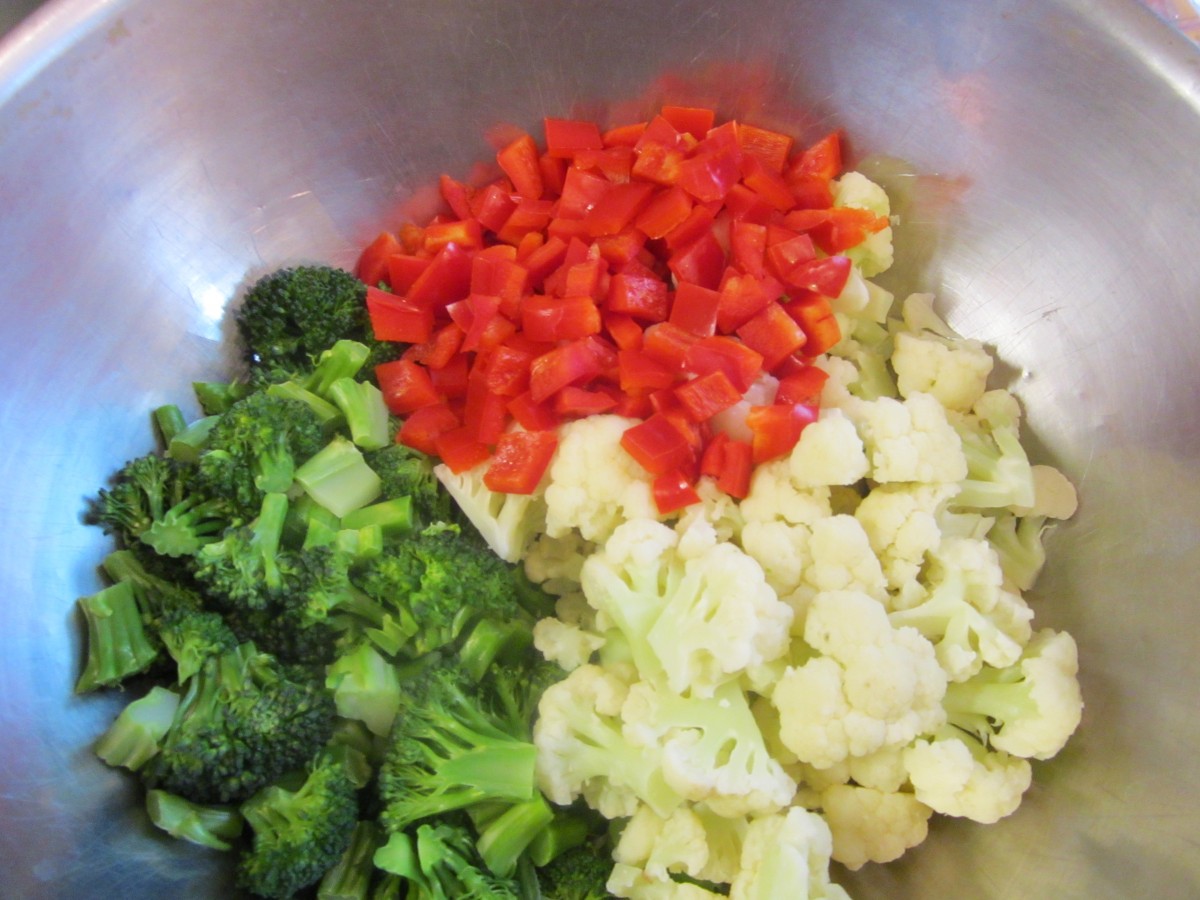
Combine veggies in a large bowl.
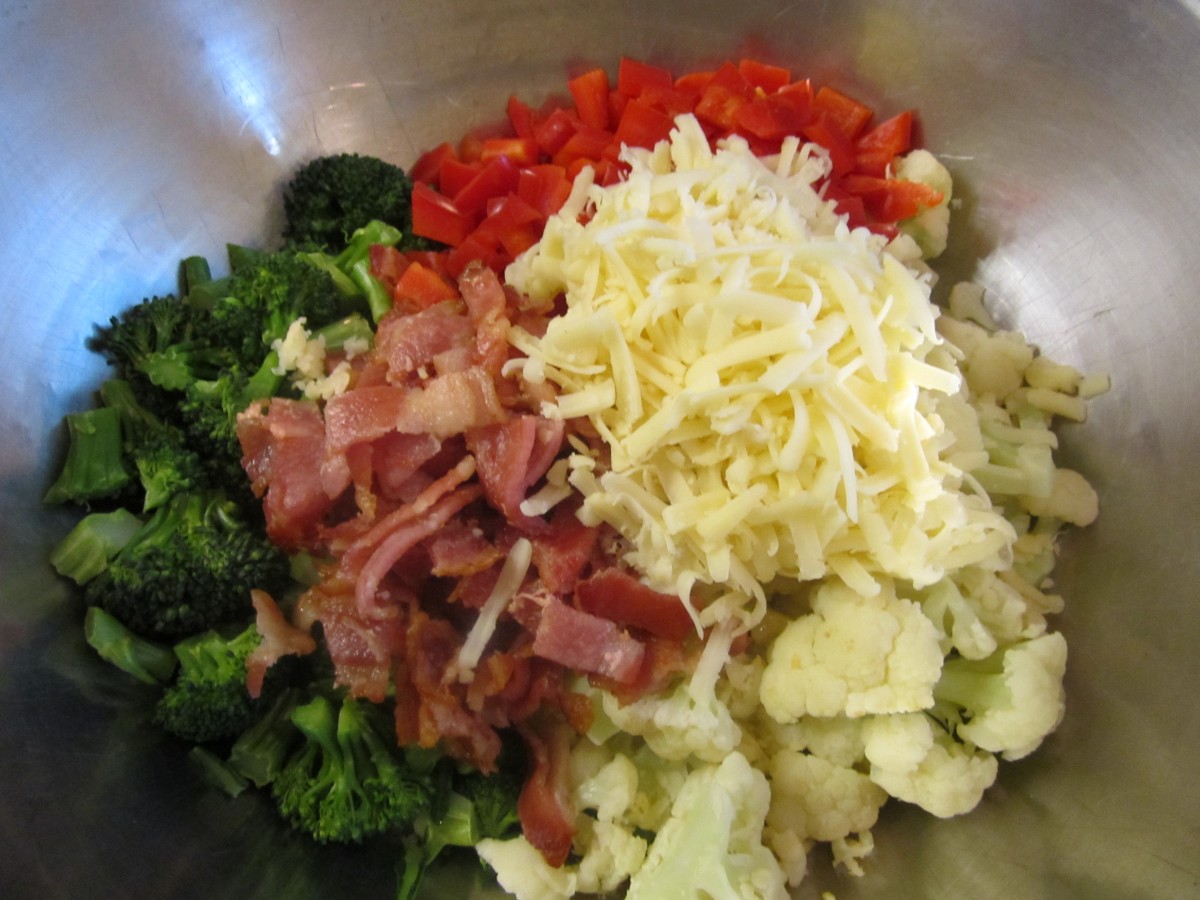
Add cheese and bacon
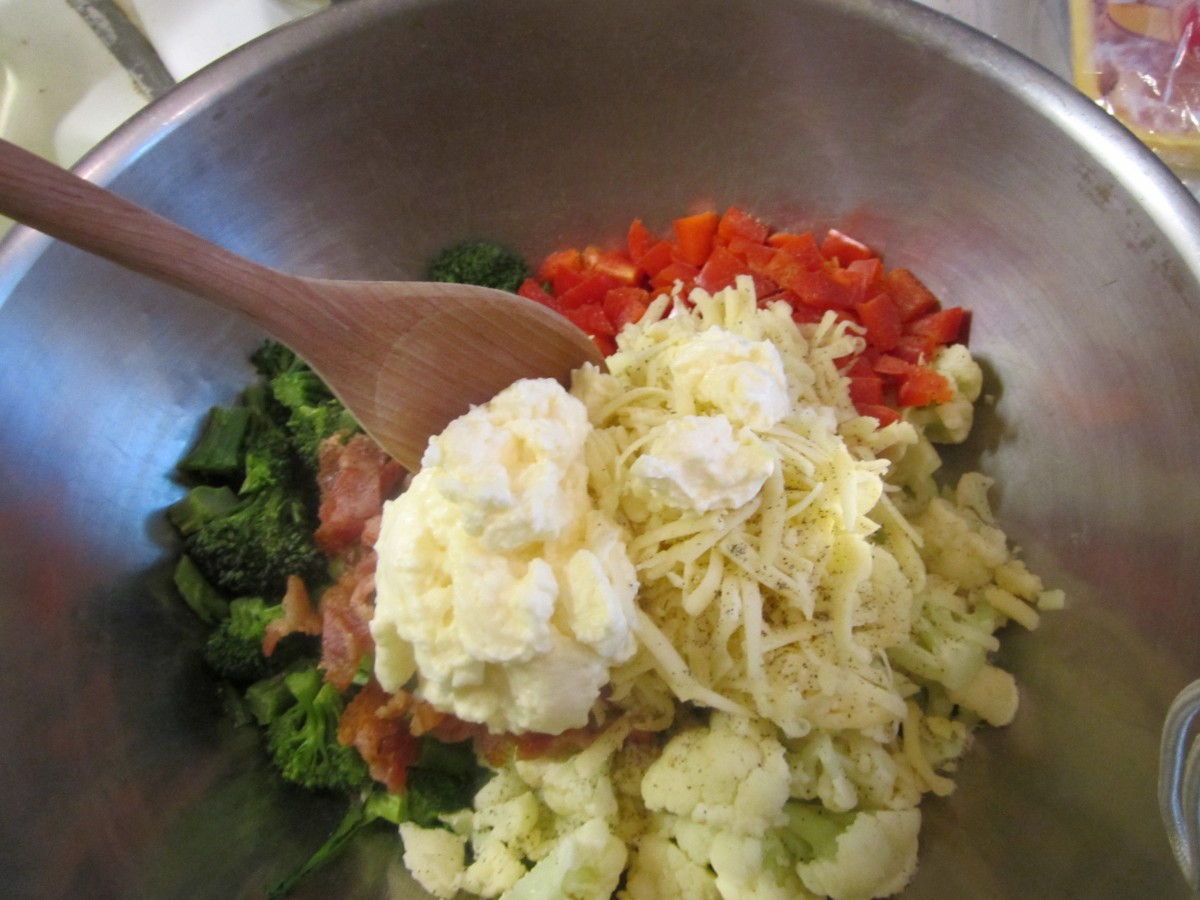
Add mayo, salt and pepper and stir to combine
Spinach-Artichoke Quiche

Spinach and Artichoke Quiche
I had planned to make a quiche with artichoke hearts. Seemed like a nice, spring kind of dish. When I was starting to put the quiche together, it occurred to me that I also had a giant bag of spinach.
Made sense to put the two together. Sort of like spinach and artichoke dip.Why didn’t I think about this sooner? The combo made for a wonderful quiche.
I used about a pound of fresh spinach, cooked, drained and chopped, but a box of frozen spinach would work, too.
I love quiche. It is a perfect dish for any time of the day. It is also so versatile. You can really get creative with the ingredients you put in your quiche. As an added bonus- quiche freezes well. I can make a couple, and freeze one for a day when I am too busy to cook.
Leftover quiche is a favorite breakfast of mine. too.
Here is the recipe.
Spinach and Artichoke Quiche
1 unbaked pie crust – enough for a deep dish pie
4 oz. diced cheddar cheese – I like a sharp cheddar
2 T. flour
1 lb. fresh spinach or 1 (10 oz.) package frozen spinach, cooked, chopped and squeezed dry
3-4 artichoke hearts, drained and chopped coarsely (about 1/2 of a 14 oz. can)
1 c. milk or half and half
3 eggs, beaten
2 T. fresh chopped parsley
Hot pepper sauce to taste
salt and pepper to taste
In 9-inch (deep dish) pie pan place the crust. Toss cheese with the flour and place in crust. Add the spinach and artichoke hearts. Combine milk with the eggs and add seasonings to taste. Pour over the spinach mixture. Place pan on a baking sheet to collect any drips and place in a preheated 400 degree oven. Bake for 30 minutes then turn down oven to 325 and continue baking until quiche is firm near the middle, about 25-30 minutes more. To test for “doneness” insert a butter knife about an inch from the center of the quiche. If it comes out clean, the quiche is done. Serves 4-6.
Nisu Bread
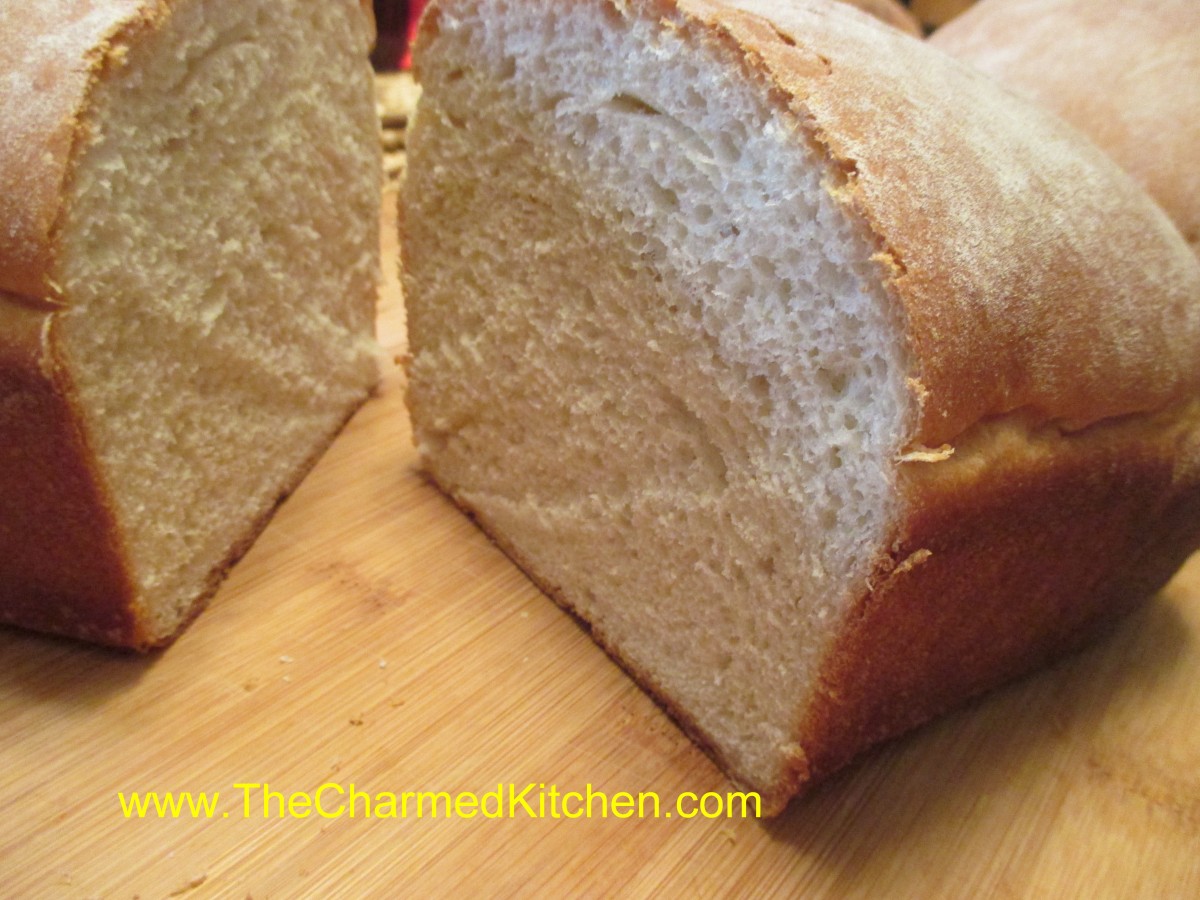
Nisu Bread
This wonderful recipe came from the Finn grandmother of two good friends. I think of her every time I make this bread. She was a sweet and loving woman.
Nisu is a soft, slightly sweet bread, made special with the addition of cardamom.
Cardamom is a spice that has a rich, sweet flavor and fragrance. You can purchase it whole, in pods, or ground.
Cardamom is often used in baked goods and adds a nice flavor to frosting and glazes. It is also used to flavor coffee.
Cardamom is a little pricey. The good news is a little goes a long way. If you buy ground cardamom, you can store it in the freezer to keep it fresh longer.
This bread is lovely just toasted, and makes great French toast.
It is also a nice sandwich bread.
The recipe makes three loaves, so you can leave one out and freeze the other two.
Nisu
½ c. warm water
2 packages active dry yeast
2 c. milk
½ c. sugar
2-3 t. ground cardamom
1 t. salt
6 T. butter
6-7 c. flour, preferably bread flour
2 eggs
Dissolve yeast in water and set aside. Place milk in large bowl and add the sugar, cardamom, salt and butter. Heat in microwave until liquid is very warm. Butter might not be completely melted. Stir mixture until sugar is dissolved. Place 2 cups of flour in a mixing bowl and add the milk mixture, eggs and yeast mixture. Beat on medium speed for 3 minutes. Add 1 cup more of the flour and beat 2 minutes more. Stir in enough of the remaining flour to make a soft dough. Turn onto a floured surface and knead until dough is firm and smooth, about 10 minutes. Place in an oiled bowl and turn dough to coat. Cover with a towel and allow to rest until doubled in bulk, about 1 hour. Punch dough down and divide into 3 pieces. Roll each piece into a loaf and place in greased 9×5 inch bread pans. Cover and allow to rise until doubled in bulk, about 45 minutes. Bake in a 375-degree oven for 30 minutes or until golden and loaf sounds hollow when tapped lightly. Makes 3 loaves.
Rhubarb Glazed Chicken

Chicken with Rhubarb Glaze
It is rhubarb season around here. Rhubarb is turning up at local farm markets and even in some grocery stores.
Like a lot of people, when I think of rhubarb, I first think of dessert, like pie or cobbler. But rhubarb’s tangy, tart flavor, lends itself to lots of savory uses.
I had some rhubarb and could not decide what to do with it. I chopped it up, and cooked it in a little water until tender. I ended up with 2 cups of cooked rhubarb.
I used this as the base for the glaze. I added the other ingredients, cooked it down until it was thick, and ended up with about 2 cups of sauce. It had a nice balance of sweet, tart and heat.
I used some of it as a glaze for chicken I was cooking. I froze the rest. It would also be good on other meats or even on grilled veggies.
Rhubarb Glazed Chicken
8 chicken thighs or 1 whole chicken, cut up
1 cup rhubarb glaze (recipe follows)
salt and pepper to taste
Place chicken pieces in roasting pan, season to taste and bake in a preheated 375 degree oven for 30 minutes. Remove from oven and drain any fat out of the pan. Pour over the rhubarb glaze and return chicken to oven for an additional 35 minutes. Baste the chicken with some of the glaze in the pan and return to oven for 15 minutes more. Serves 4.
Rhubarb Glaze
2 c. cooked rhubarb
1 c. apple cider vinegar
1/4 c. brown sugar
2 T. honey
2 T. dried minced onion
1 T. hot sauce
1 T. paprika
2 t. minced garlic
1 t. Worcestershire sauce
1 t. cumin
1 t. cinnamon
salt to taste
Place all ingredients in a saucepan and cook over medium heat until thickened. Stir more often as mixture thickens. Cook until sauce has reduced to about 2 cups. Use as a glaze on meats and vegetables. It was great on chicken but would also go well on pork or duck. I could also imagine it on portobello mushrooms. Note: I liked the tang of it but you could make it a little sweeter to suit your own taste. Makes 2 cups. Will keep a few weeks in the fridge or can be frozen.
Toasted Sugar
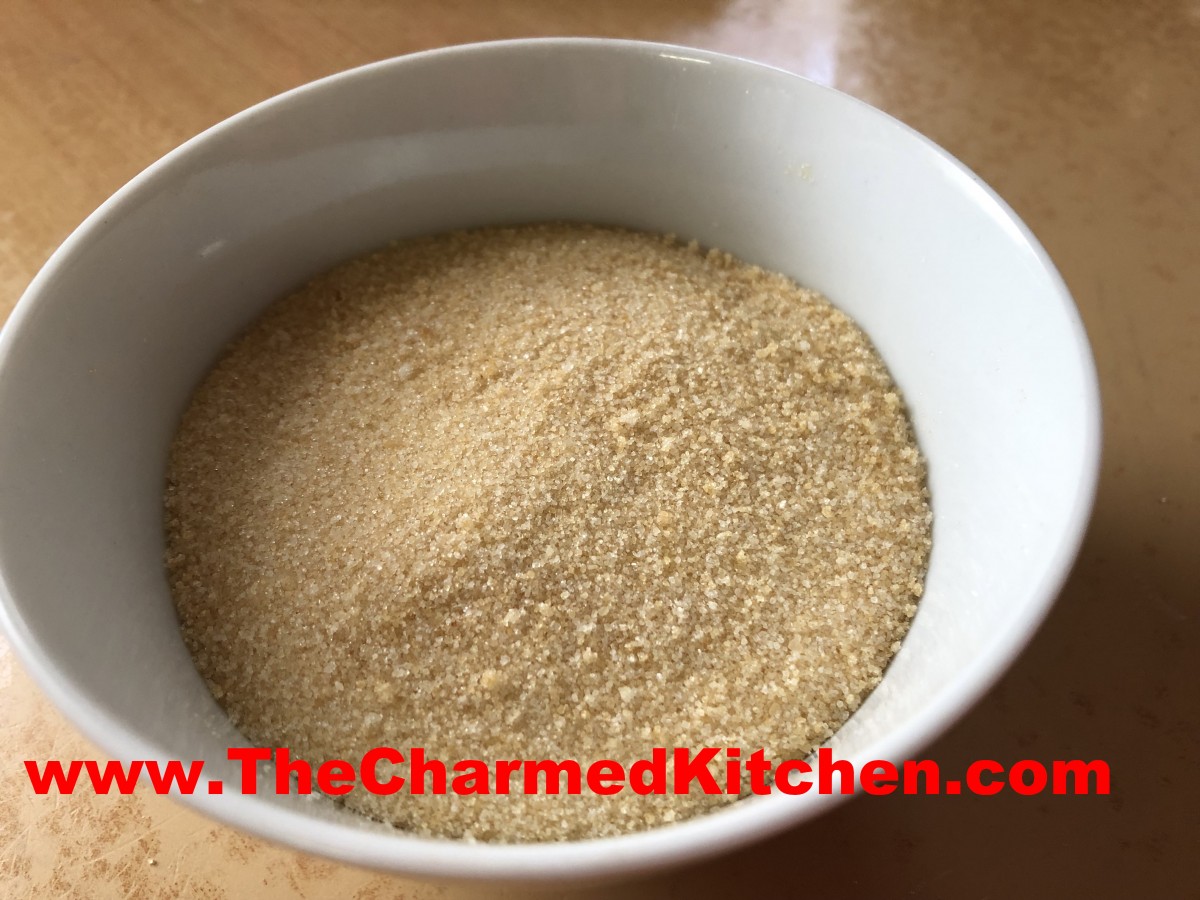
Toasted Sugar
If you never toasted sugar, you might want to start. Toasted sugar is just sugar that is baked, at low heat, until it turns a caramel color. The sugar also picks up a lovely caramel flavor. That flavor change is what really makes it worth it.
I first heard about toasting sugar a few years ago. I was intrigued and decided to try it myself. The flavor was wonderful. I always keep a supply of toasted sugar around.
So how do you use toasted sugar? Simple- just like regular sugar. Measures the same, bakes the same. The only difference is that extra caramel flavor it adds to everything. From your morning coffee, to baked goods, the toasted caramel flavor comes through.
How to Toast Sugar
Preheat oven to 300 degrees- no higher. If your oven runs hot, you might want to bake at 275. Place sugar in a baking dish. I used a glass baking dish. You’re going to stir the sugar a few times during baking, so a dish with high enough sides is a must. I always toast at least 3 or 4 pounds of sugar at a time. It keeps for a long time, so why not? Also, I worry that smaller amounts might toast too fast.
Toast until the sugar turns an ivory color, about 1 hour. Stir thoroughly and continue baking, checking and stirring about every half hour, until the sugar gets to the color you want. The darker the color, the more intense the caramel flavor. You can bake the sugar until it looks like brown sugar, if you like. I usually stop when it looks like light brown sugar.
The sugar will produce steam as it heats up, so it should be stirred to allow that moisture to escape. Stirring will help move hot sugar from the edges toward the center, and cool sugar from the center toward the edges, for even toasting. Continue toasting and stirring every 30 minutes until the sugar has darkened to the desired color. The process can take 2-5 hours in total. It’s not a lot of work, mostly just waiting. You can see why I do a large batch at a time. I would rather bake 4 pounds of sugar- and have plenty for months and months.
When the sugar has finished toasting, remove from the oven and set aside and cool to room temperature, stirring from time to time to speed the process and allow for continued evaporation of steam. I like to transfer the toasted sugar to a large foil pan, where it cools down quicker. Once fully cool, transfer to an airtight container and store as you would plain white sugar. It can be used interchangeably in any recipe that calls for white sugar.
Sometimes, the sugar clumps as it cools. You want to break those clumps up when you see them- or press the cooled sugar through a sieve to get out the lumps.
In the end, I think the effort is worth it. In cookies and other baked goods, toasted sugar adds the nicest flavor.
Coleslaw Chef’s Salad
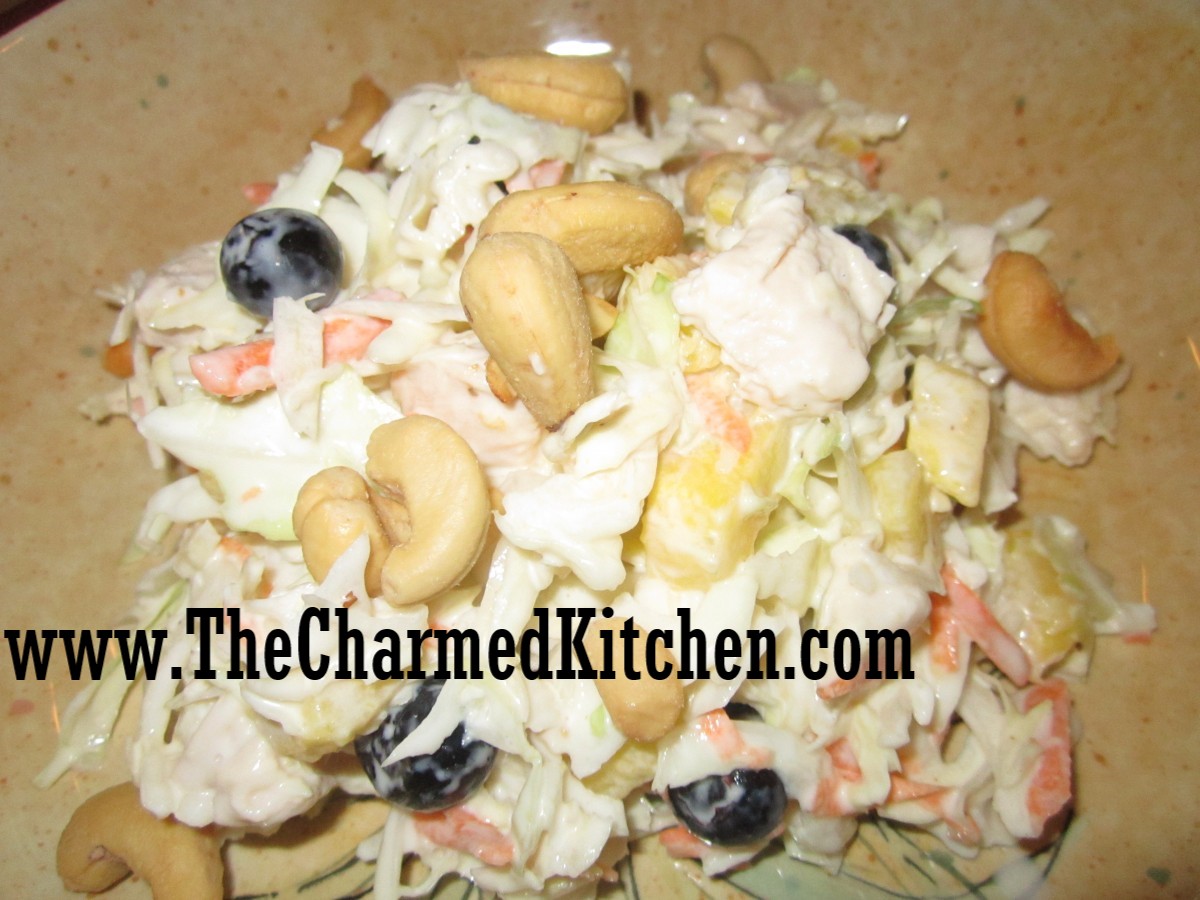
Coleslaw Chef Salad
I love coleslaw and enjoy it as a side with all sorts of foods. This is especially true when the weather warms up. It seems I go from cabbage soup and cabbage and noodles to coleslaw and cabbage salads as the seasons change.
I wasn’t looking for my coleslaw to be a side dish this time, though. I was thinking of ways to make it more of a main dish. I had gotten busy with a project this morning and wanted something simple and quick. I came up with a twist on a chef’s salad.
I took shredded cabbage and added meat, fruits and dressing, then topped it with some cashews. Quick to make, and a great choice when you don’t have a lot of time or it is too hot to cook.
You can use your own imagination and add other fruits or proteins. This is a great way to use up leftovers, too. I think I might add peaches and raspberries next time.
So here is the recipe- taking coleslaw from side dish- to main dish.
Coleslaw Chef’s Salad
5-6 c. shredded cabbage- cole slaw mix is fine
2 c. cubed cooked meat- I used chicken but use what you like- or use a combination
2 c. fresh fruit- I used blueberries and fresh pineapple but use what you like
1 c. cubed cheese., optional
Dressing:
2/3 c. mayo
3 T. cider vinegar
1 T. sugar
1 t. fresh grated ginger
salt and fresh ground pepper to taste
Topping:
1/2 c. cashews, optional
Combine cabbage with fruits, meats and cheeses (if using) in a mixing bowl. In smaller bowl combine the dressing and stir until smooth. Pour dressing over the cabbage mixture and toss to coat. Chill at least 30 minutes before serving. Sprinkle cashews on top just before serving. Serves 4.
Honey Ginger Mango Sorbet

Honey Ginger Mango Sorbet
Sorbet is a great dessert for warm weather. When I saw Champagne mangoes on sale the other day, I knew I wanted to turn them into sorbet. I also picked up a fresh piece of ginger root, and decided to add some to the sorbet, along with some honey for extra sweetness. The flavors worked great together.
The secret to a creamy sorbet is pureeing the mixture twice. Once with the fresh fruit, then again once the mixture has frozen. Once pureed the second time, you can put your sorbet back in the freezer until ready to serve. It is a nice dessert to have on hand.
Sorbet can be served on its own, with cookies, cake or fresh fruit. You can also add a scoop of sorbet to your favorite Summer cocktail.
I like to keep several different sorbets on hand, so my guests can mix and match. Making a fresh fruit sorbet is also a way of saving seasonal fruits for use throughout the year.
Here is the recipe for the mango sorbet. You might want to add a little more, or less, honey to suit your own taste. Once frozen, the sorbet will not taste as sweet. The sweetness of the mangoes will also determine how much honey you add to your sorbet.
Honey Ginger Mango Sorbet
6 ripe mangoes
½ c. honey
1 T. fresh grated ginger
Remove peel and pits from mangoes. Puree the mangoes and add the honey and ginger. Freeze. After the mixture is frozen, place mango puree in a food processor and mix again until creamy. Serve, or place back in freezer until ready to serve. Makes about 1 quart.
Herb Gardening- Library Program

Fresh Rosemary
I will be giving another herb gardening program this week. These programs are free, but it is appreciated if you call ahead so there are enough chairs set up.
So far, I have done talks at the Gates Mills Library, Solon, Richmond Heights and Parma libraries, too.
This week- Maple Heights.
Herb: Spice Up Your Garden program on Thursday, May 16 at 6:30pm at the Maple Heights Library. The branch address is 5225 Library Lane, Maple Hts., OH 44137. Program is about an hour long- and I leave time to answer questions.
If you are new to herb gardening- or want to learn more- please join me for this program.


