Pineapple Glazed Chicken Wings
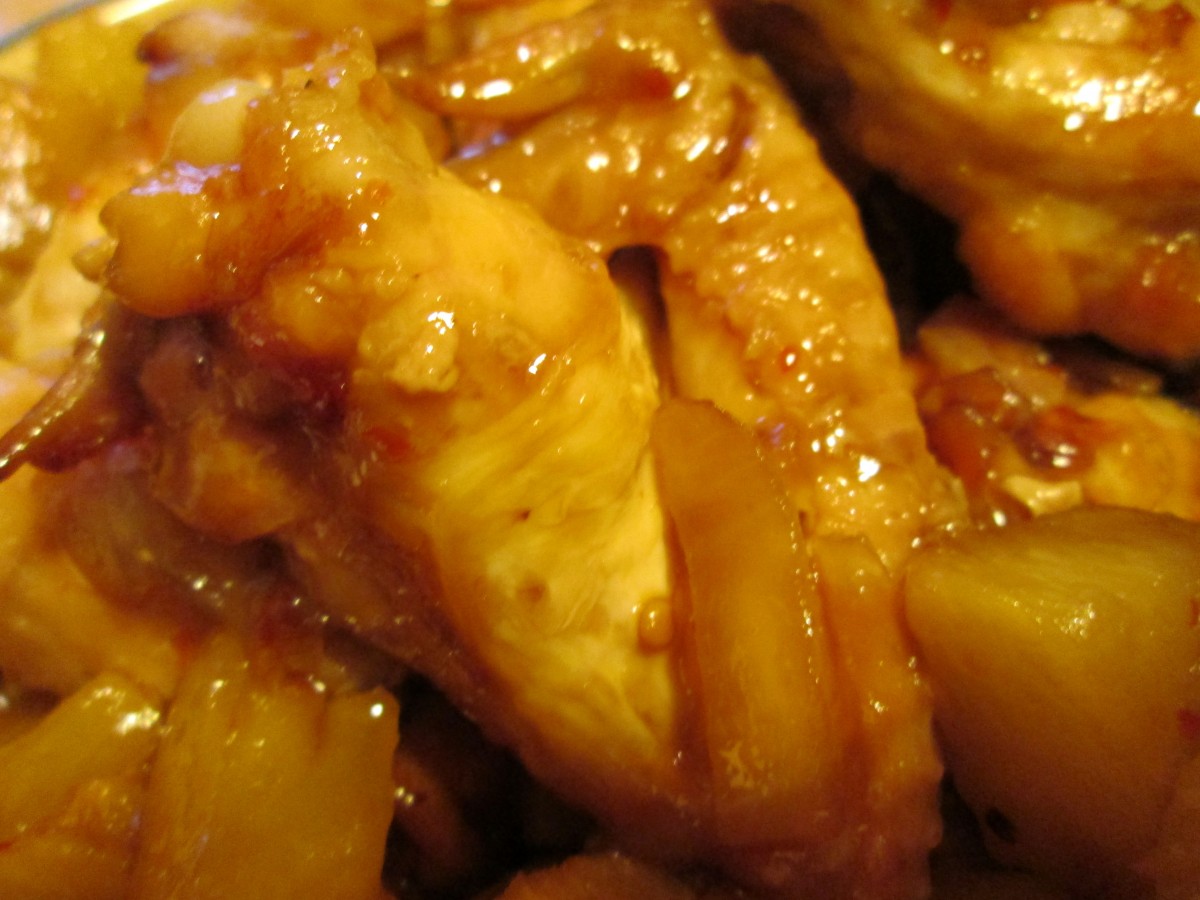
Pineapple Glazed Chicken Wings
I have been using what is in my freezer and pantry fro some time now. Had company for dinner the other night and I came up with this dish, using what I had on hand. I used some chicken wings I had in the freezer and used a jar of pineapple chunks I had canned. You could easily use a can of pineapple chunks from the store or even fresh pineapple cut up. The dinner was a big hit so I thought I’d share the recipe with you.
Pineapple Glazed Chicken Wings
12 chicken wings
1 medium onion, chopped
1 can (or jar) of pineapple chunks, drained, reserving liquid- I used a pint jar- if using store bought use the 20 oz. can.
salt and pepper
Sauce:
1/2 c. apple cider vinegar
1/2 c. sugar
3 T. ketchup
3 T. sherry
2 T. soy sauce
1 t. minced garlic
1 t. red pepper flakes
reserved pineapple juice
3 T. cornstarch
Preheat oven to 400 degrees. Place wings in pan and season with salt and pepper. Bake chicken wings in roasting pan for 30 minutes. Add the onions and pineapple chunks to the pan with the chicken wings and return to the oven for 30 minutes longer. While chicken is cooking combine the first seven sauce ingredients in a small pot and bring to a boil. Check baking pan for any juices- Spoon them out and add to the sauce. Combine pineapple juice and cornstarch in small bowl, stirring until smooth and add to the sauce. Return to boil and stir until sauce is thickened and bubbly. Pour hot sauce over chicken and return to the oven to bake 20-30 minutes longer or until wings look nicely glazed and sauce has started to brown. Serve over hot rice or pasta, if desired. Serves 3-4.
Spiced Split Pea and Rice Soup
Spice Split Pea Soup with Rice
I made this soup the other night and a friend requested I share the recipe. I like it because the split peas are cooked until tender- but not cooked to mush. With the addition of spices like cinnamon and cardamom it has a wonderful flavor and is pretty quick to make. This is a vegetarian version, but feel free to use chicken stock, if you prefer.
Spiced Split Pea and Rice Soup
1 c. dried split peas, green or yellow
3 c. water
2 c. chopped onion
2 cloves minced garlic
2 bay leaves
1/2 t. each cumin, cinnamon and cardamom
1/4 t. cayenne, or more to taste
2 c. vegetable stock
2 t. lemon juice
1/2 c. cooked rice
salt and pepper to taste
1/2 c. chopped parsley or cilantro
Rinse peas and cook them in the water until tender, about 45 minutes. Meanwhile, cook onion and garlic in oil until tender. Add the spices and cook 5-10 minutes longer, being careful not to burn them. Add this to the peas along with the rest of the ingredients and heat through. Adjust seasonings and serve. Serves 4.
Moroccan Date Cake
Moroccan Date Cake
I have liked dates for as long as I can remember. They are truly nature’s candy. In this simple cake recipe I used both dates and nuts to add richness. The hardest part of this dish was cutting up the fresh dates. They are pretty sticky. I used kitchen scissors, dipped in oil, to snip up the dates and that worked pretty well. I suppose you could add frosting or a glaze but I prefer this cake unadorned.
Moroccan Date Cake
1/2 c. butter
1/2 c. sugar
4 eggs
1 t. baking powder
1 c. flour
1 t. cinnamon
1 t. nutmeg
1/2 t. ground cloves
1/2 c. milk
1 t. vanilla
1 c. pitted, chopped dates
1/2 c. chopped walnuts
Cream together butter and sugar and beat in the eggs. Combine dry ingredients and beat into the egg mixture. Beat in milk and vanilla. Stir in nuts and dates and pour batter into a greased 9-inch cake pan. Bake in a preheated 325-degree oven for about 30 minutes or until knife inserted in center comes out clean. Serves 8-10.
Herb Gardening Classes
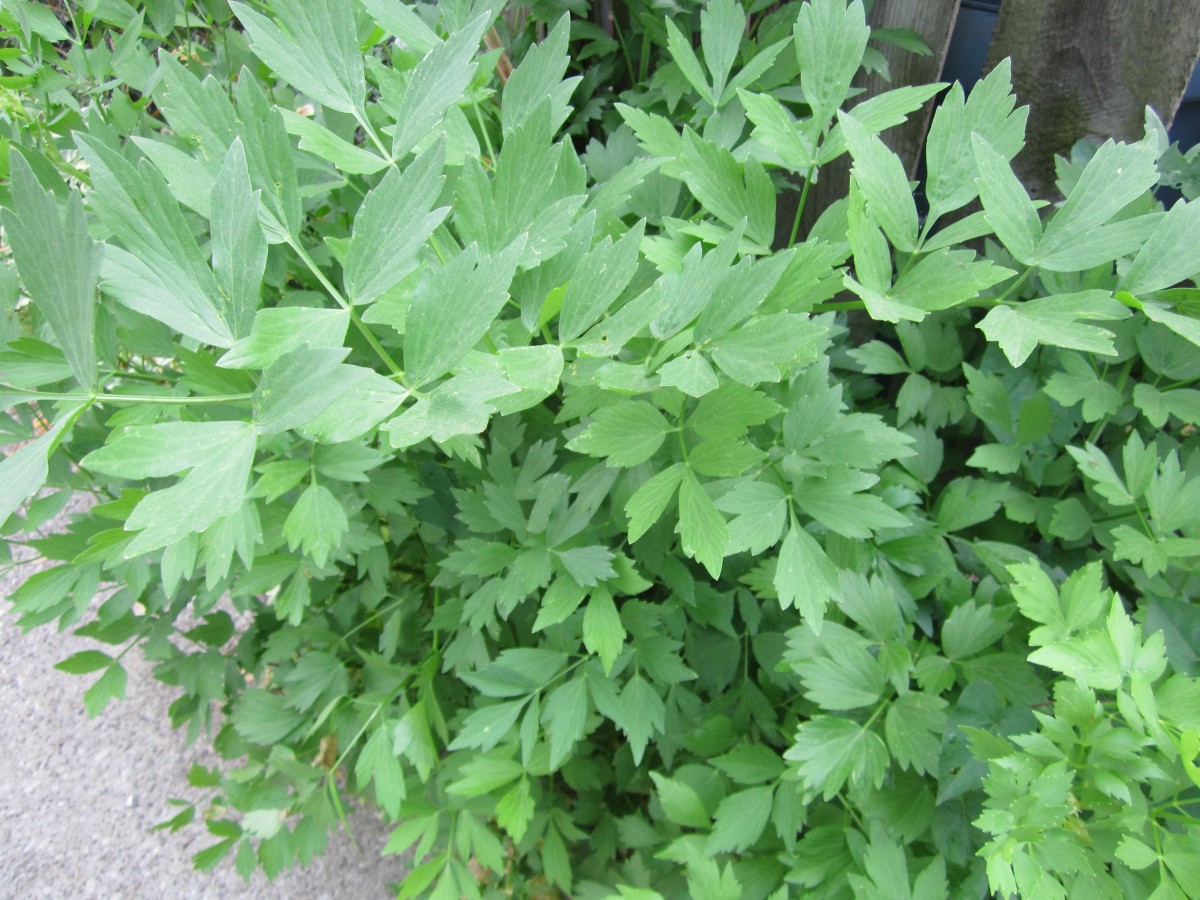
Lovage
If you don’t recognize the herb in the picture it is lovage. Lovage is sometimes called perennial celery. If you want to learn more about it I have a couple of herb gardening classes coming up. The west side location is this Thursday, March 20th, at the Wellness Center in Rocky River. The east side location is at Wildwood in Mentor on April 15th.
Mentor classes are held at Wildwood Center at 7645 Little Mountain Road. You can register online at CityofMentor.com/play or by phone at 440 974 5720 from Cleveland call 440 942 8796.
Tues. April 15: Herb Gardening: Have you ever thought about growing your own herbs? Fresh herbs are easy to grow and most require little maintenance. In class you’ll learn how to plant and maintain an herb garden and we will discuss many specific herbs and their uses. Harvest and storage will also be discussed. Optional text will be available in class.
Wellness Center Gardening Classes
Located at 3035 Wooster Rd., in Rocky River, the Wellness Center is operated by Fairview Hospital, a Cleveland Clinic hospital.For more information, or to register for classes, visit fairviewhospital.org/wellnesscenter or call 440-356-0670.
Mar. 20: Herb Gardening: Have you ever thought about growing your own herbs? Fresh herbs are easy to grow and most require little maintenance. In class you’ll learn how to plant and maintain an herb garden and we will discuss many specific herbs and their uses. Harvest and storage will also be discussed. Optional text will be available in class.
Corned Beef “Calzones”
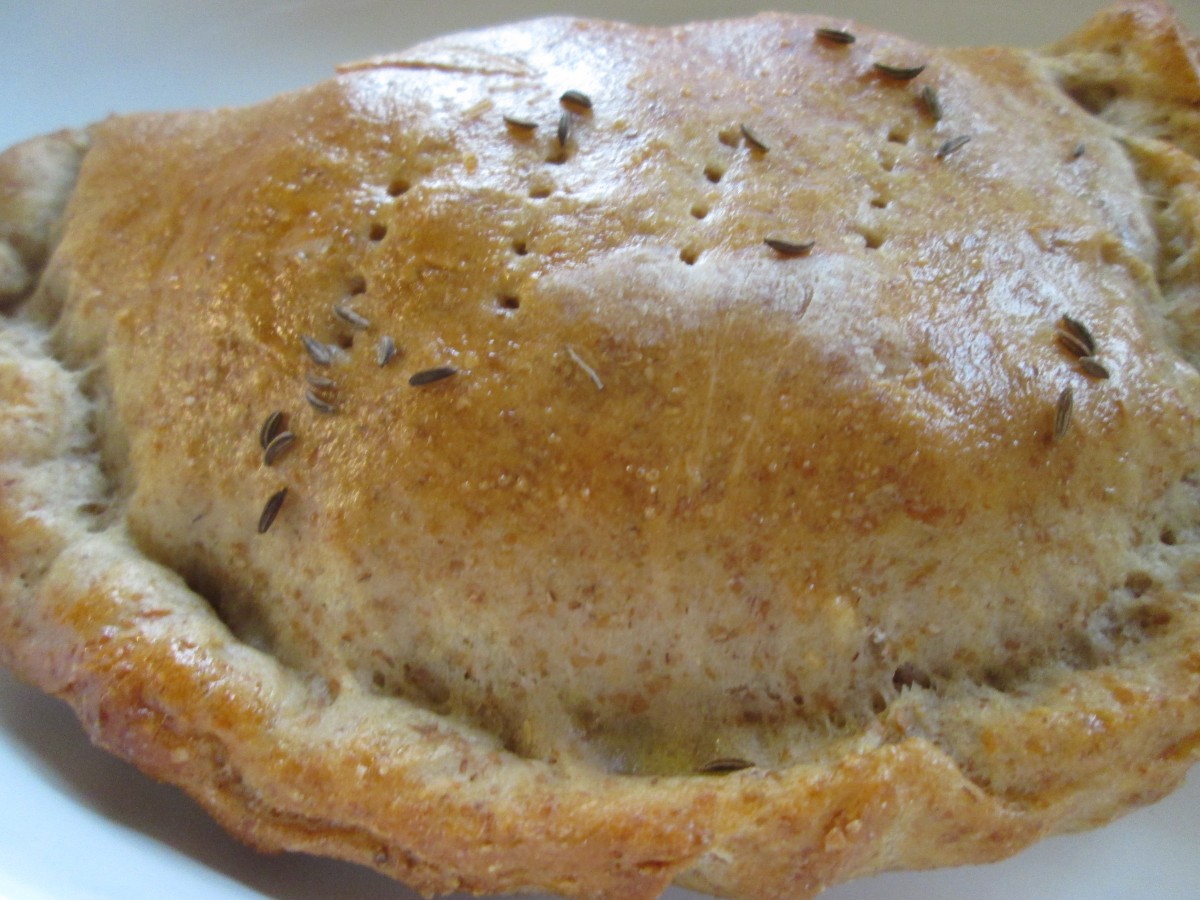
Corned Beef Calzones
I made these for a friend a while back and we were talking about them the other day. I decided to make them again. They are almost a Reuben but I didn’t include the sauerkraut. You could, if you liked. I sometimes make these with thousand island dressing inside them as well, but I decided to leave it out and serve it on the side instead. I thought I would share the recipe with you. Thanks, Jared, for the inspiration.
Corned Beef Calzones
3 ¼ c. flour
1 c. rye flour
1 T. sugar
1 t. salt
1 package quick-rising yeast
1⅓ c. hot water
1 T. oil
1 lb. thin sliced corned beef
8 oz. shredded Swiss cheese
1 egg , beaten
Caraway seeds, optional
Set aside 1 cup of the all-purpose flour. Combine remaining flour with the other dry ingredients in a medium bowl. Stir in water and oil and gradually stir in enough flour to make a soft dough. Turn onto lightly floured surface and knead until dough is smooth and elastic, about 5 minutes. Cover dough and let rest 20 minutes. Divide dough into 8 pieces and roll one piece into a 6-8 -inch circle. In the middle of the dough place 1 ounce of the Swiss cheese and 2 ounces of the corned beef. Brush the edge of the dough with water. Fold over the dough in half and press the edges to seal. Brush the edge again with water and roll the edge over again. It will give you a prettier look and seal the calzone better. Repeat with remaining dough and fillings. Place calzones on greased baking sheets- or on a baking sheet with a silicone liner or parchment paper liner. You will end up with 8 calzones in all. Only put 4 on one baking sheet. Cover and let rest 15 minutes while preheating the oven to 400 degrees. Before placing calzones in the oven brush with beaten egg and sprinkle with the caraway seeds, if you like. Also poke a few holes in the tops with a fork to help steam to escape while baking. I put both baking sheets in the oven at the same time and switch them halfway through baking. Bake in a preheated 400-degree for 20-25 minutes or until golden brown. If baking both at once switch them after 10 minutes or so. Cool slightly before eating. Serve warm and refrigerate leftovers.
If you want to use regular yeast use warm, rather than hot water. Also, allow a little more time for the dough to rise the first time, about 40 minutes. Everything else will work the same.
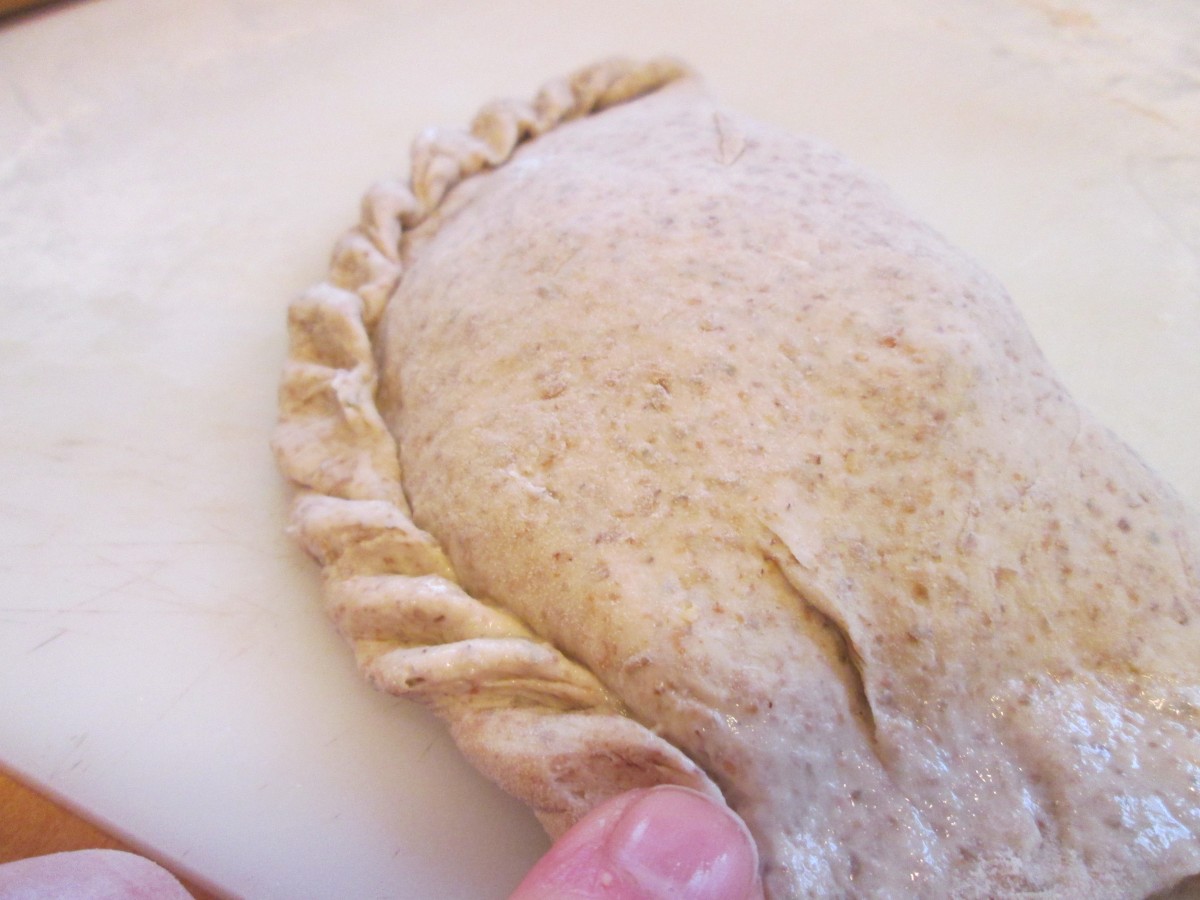
Sealing the edge

Ready for the oven

Fresh from the oven
These are really nice served with thousand island dressing. You can buy it but I prefer to make my own. Just combine equal amounts of ketchup, mayo and sweet pickle relish.

equal parts of ketchup, mayo and sweet relish
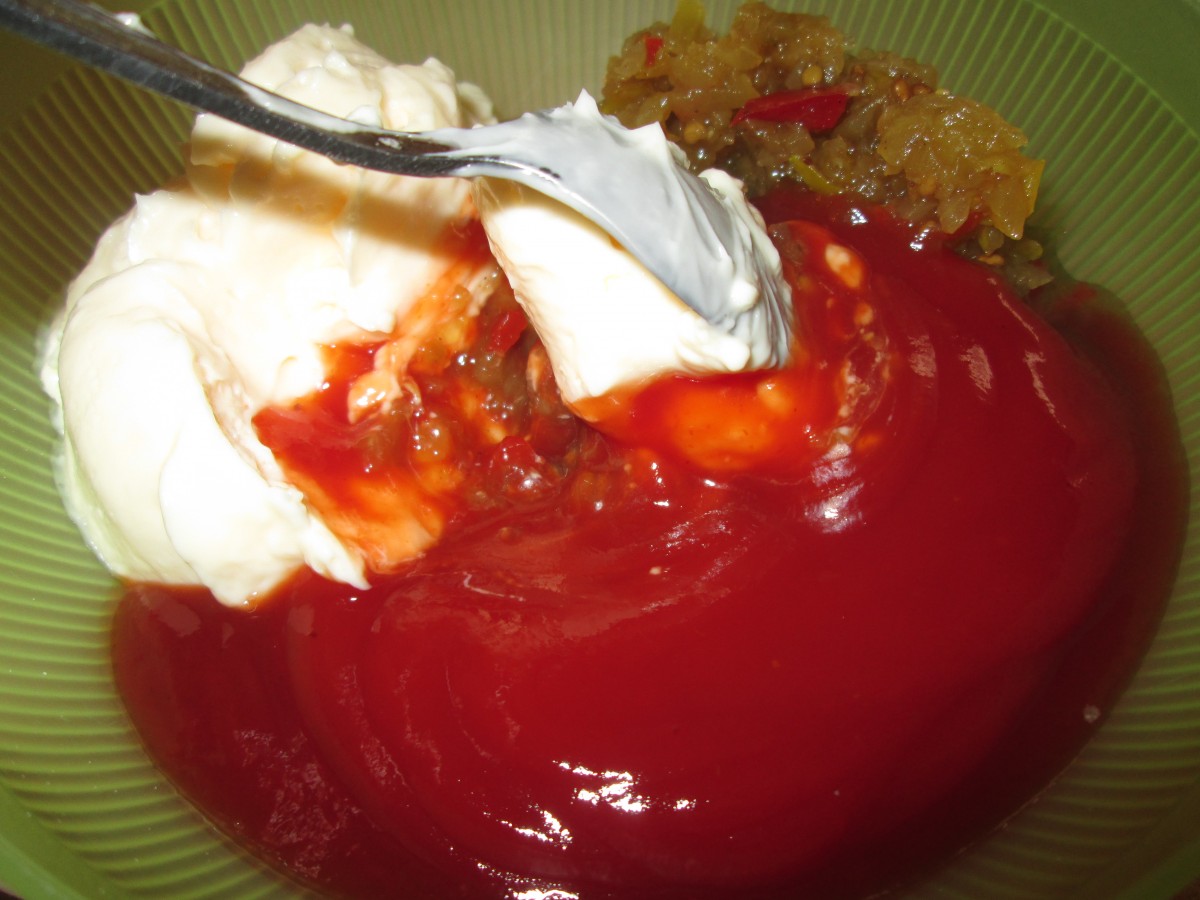
Stir to combine
Irish Soda Bread
Irish Soda Bread
It’s that time of year. But I confess to making Irish soda bread all through the year. It is easy and so good. Right from the oven with some butter and jam. Yum.
Irish Soda Bread
2 c. flour
½ t. each baking powder and baking soda
¼ t. salt
2 T. butter
¾ c. raisins
2 t. caraway seeds
1 egg. Beaten
1 c. buttermilk
Preheat oven to 400 degrees. Dust a baking sheet with a little flour. Combine dry ingredients in bowl and cut in butter to resemble coarse crumbs. Add raisins and caraway seeds. Combine egg and milk and set 2 tablespoons of this mixture aside. Add remaining milk mixture to flour mixture and combine just until dough forms into a ball. Place on baking sheet, brush with reserved egg mixture and cut a crisscross on top of loaf. Bake about 25 minutes or until bread sounds hollow. Makes 1.
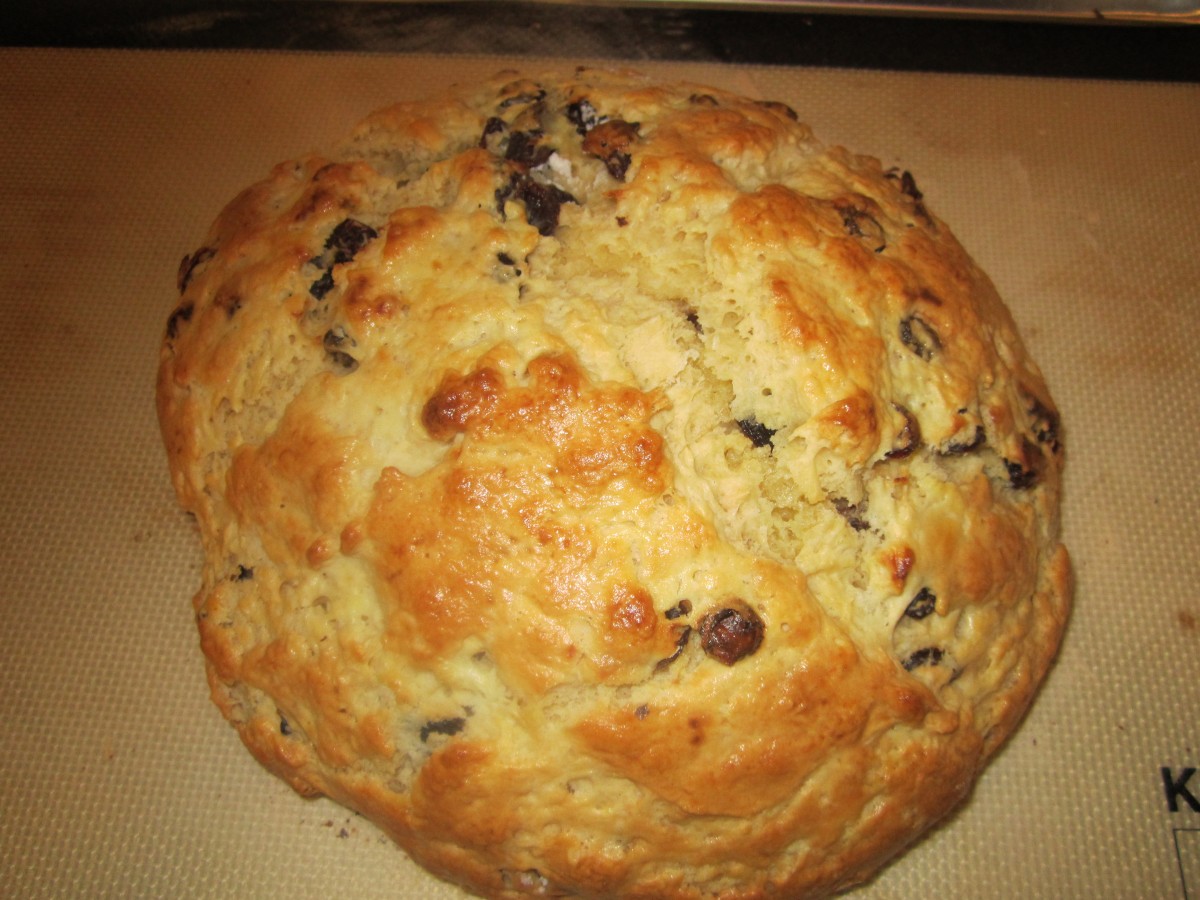
Irish Soda Bread Scones

Irish Soda Bread Scones
I was getting ready to make some Irish Soda Bread but then I got to thinking about scones. Couldn’t make up my mind so I combined them in this recipe. They came out really great. A little crispy on the outside and moist on the inside. Wonderful all on their own but even better with butter and jam or perhaps some Devonshire clotted cream.
Irish Soda Bread Scones
2 c. flour
3 T. sugar
2 t. baking powder
1 t. baking soda
½ t. salt
1/3 c. butter
½ c. raisins
1 t. caraway seeds
2/3 c. buttermilk
1 egg
Milk
Extra sugar for sprinkling
Preheat oven to 425 degrees and lightly grease a baking sheet. Combine dry ingredients in medium bowl and cut in butter to resemble coarse crumbs. Stir in raisins and caraway seeds. Beat together buttermilk and egg and add to flour mixture, stirring with fork until mixture just coming together. Turn onto floured surface and knead 5-6 strokes or until ball of dough holds together. Dust an 8-inch round cake with flour. Press dough into cake pan. Invert pan over onto prepared baking sheet. I find if I do this quickly the dough comes out more easily. Remove cake pan. This will give you a perfect 8-inch circle of dough. With a sharp, floured knife cut dough into 8 wedges. Brush top with milk and sprinkle with extra sugar. Bake 14-16 minutes. Makes 8.
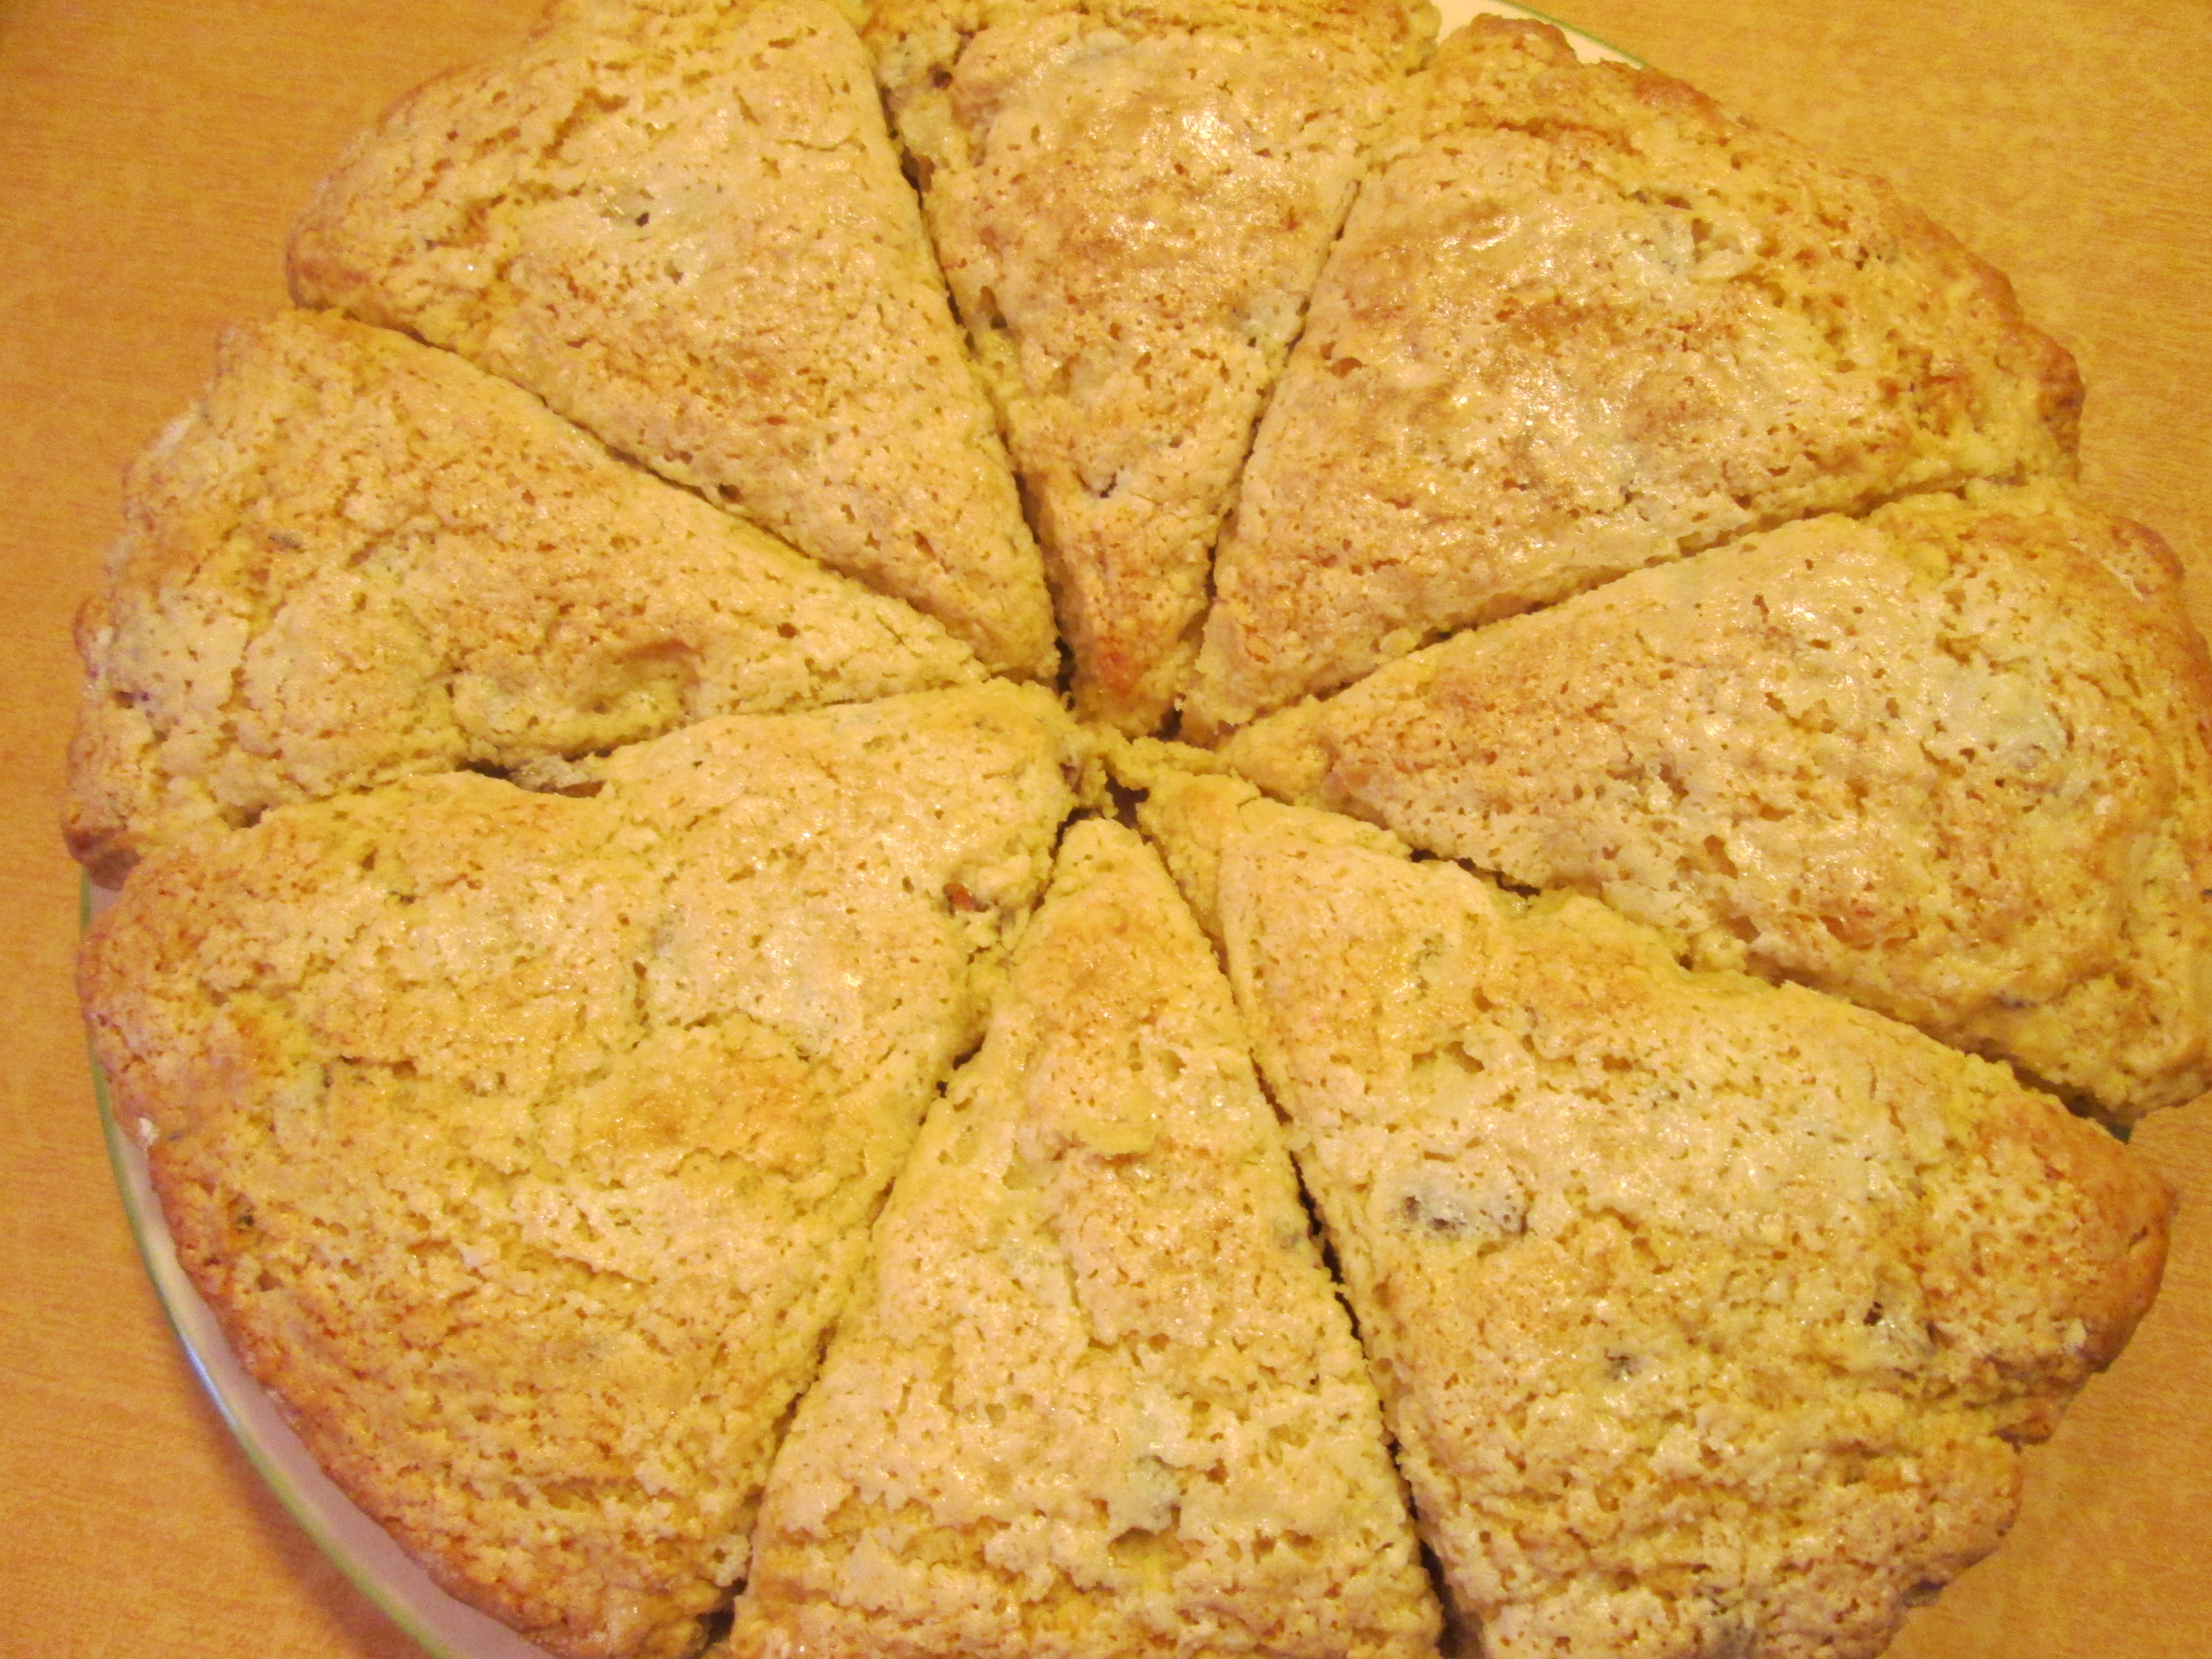
Fresh from the oven
Venetian Cabbage
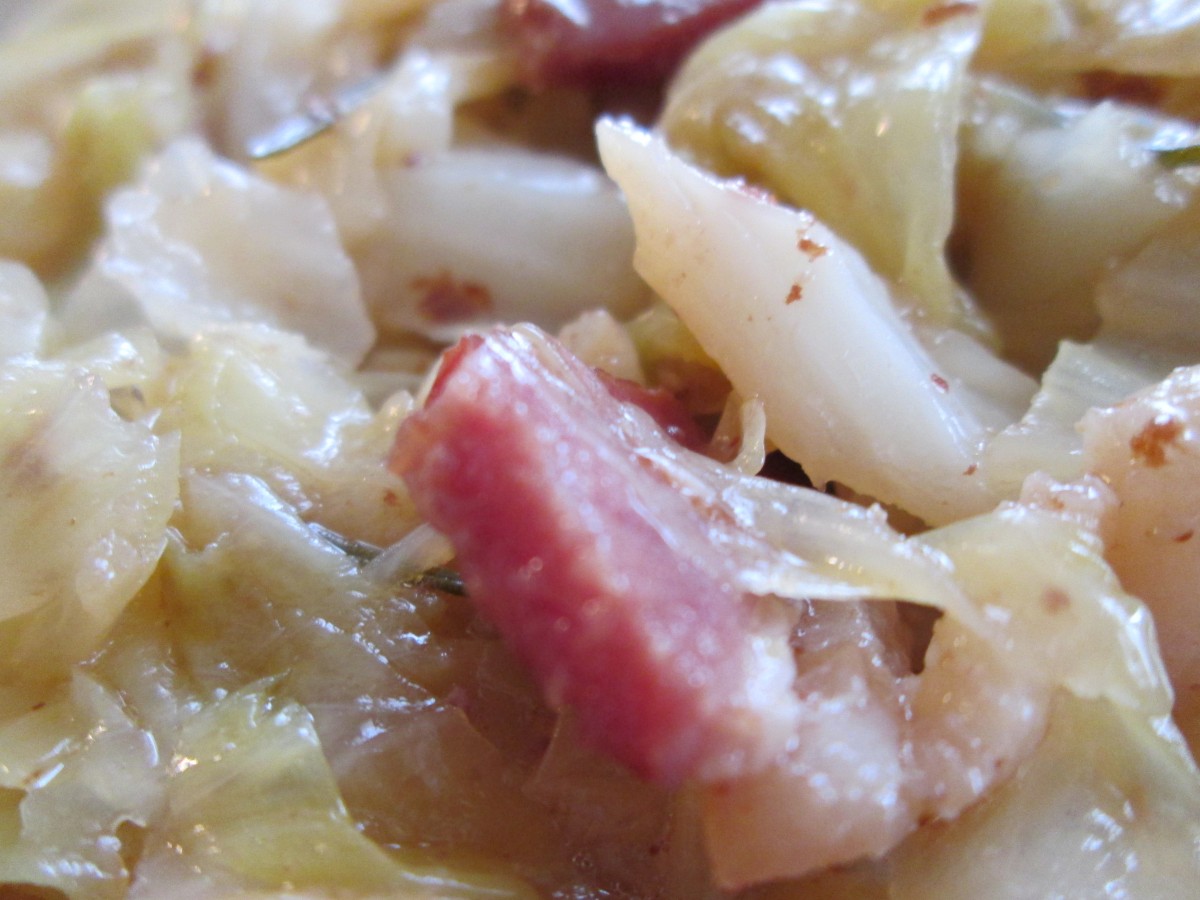
Venetian Cabbage
I love cabbage in all sorts of dishes. Maybe it’s from my Eastern European roots but I like cabbage in salads, soups and side dishes. I really love it prepared this way. Smokiness from the bacon and a hint of rosemary and garlic. If you are looking for an easy and tasty way to prepare cabbage try this recipe for Venetian Cabbage. I think you will be pleased.
Venetian Cabbage
1/2 c. minced pancetta (Italian bacon) or thick bacon
2 cloves garlic, minced
pinch of rosemary, minced- I used a bit more
1 T. olive oil
2 1/2 lbs. green cabbage, trimmed and shredded
1/2 c. chicken stock or white wine
Cook bacon, garlic and rosemary and oil in saucepan until mixture starts to sizzle. Stir in the cabbage, tossing to coat well. Cook, covered, over low heat for an hour adding the stock or wine a little at a time. Add salt to taste before serving. Serves 6.
Polynesian Cole Slaw
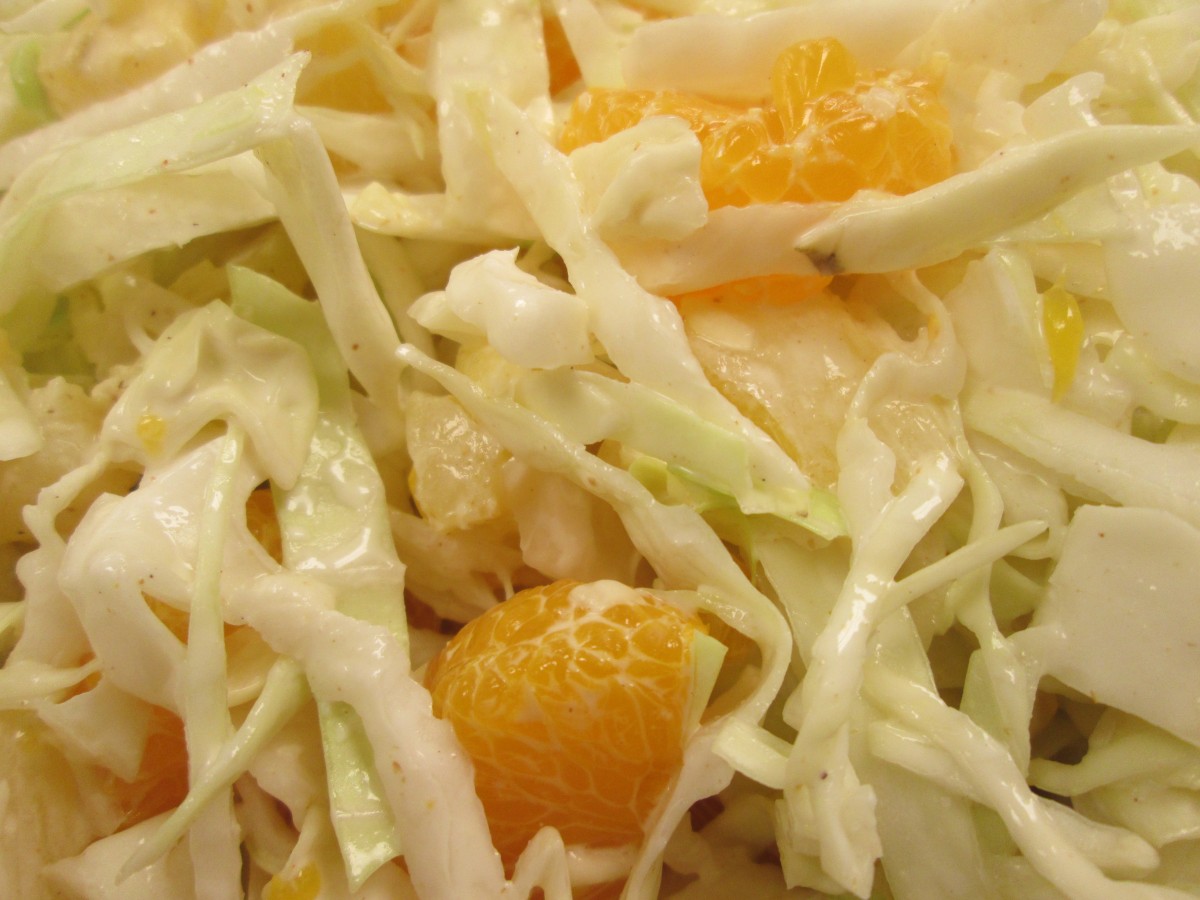
Polynesian Cole Slaw
I got this recipe from a friend many years ago. We made it in class the other night. It’s a nice variation on a salad I enjoy a lot of different ways. The crunch of the cabbage goes well with the sweetness of the fruit. Since cabbage is on sale everywhere lately I thought I would share the recipe with you.
Polynesian Cole Slaw
4 c. shredded cabbage
1 (11oz.) can mandarin oranges, drained or 2 mandarin oranges, peeled and separated
1 (8 oz.) can pineapple tidbits, drained, reserving 2 T. of the juice
1/4 c. mayonnaise
1/2 t. fresh grated ginger
1/4 t. each nutmeg and white pepper
Combine cabbage with fruit and set aside. Combine remaining ingredients including reserved juice to make dressing and pour over cabbage mixture, tossing gently to coat. Chill several hours or overnight before serving. Serves 8.
Turkey with Herb Dumplings
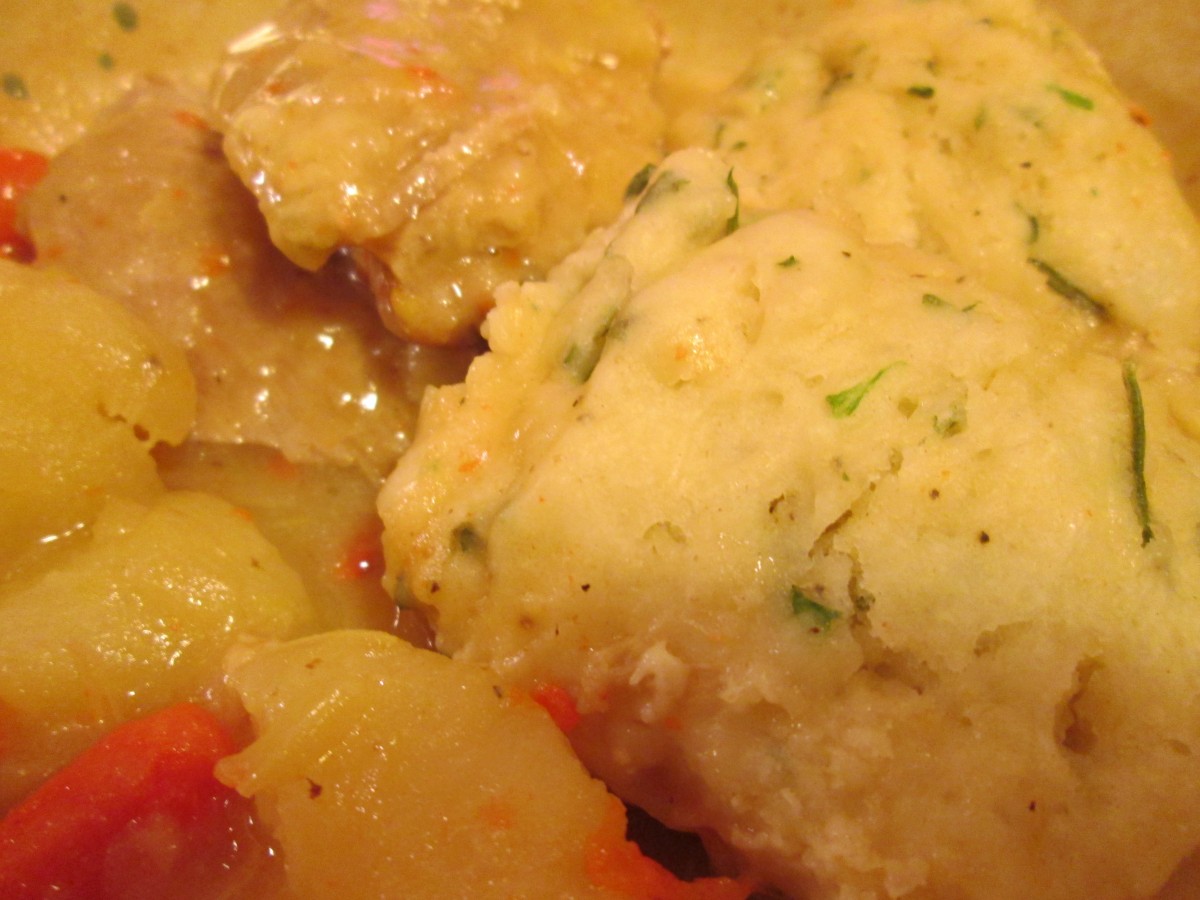
Turkey with Herb Dumplings
I have been using up stuff from my freezer and I came across a turkey thigh. I usually just roast it, but wanted to do something different. Been thinking comfort food lately so I went with turkey and dumplings- adapting a dish I would normally make with chicken. The end result was really wonderful.
Turkey with Herb Dumplings
1 turkey thigh
1 large onion, chopped
2 ribs celery, chopped
4 carrots, peeled and chopped
3 potatoes, peeled and cut into chunks
4 c. turkey stock
4 T. flour
salt and pepper to taste
1 c. baking mix- like Bisquick- I make my own
1/2 c. milk
2 T. chopped green onion
1 T. chopped parsley
1 t. dried basil
In Dutch oven or large pot brown turkey thigh. Add the vegetables and brown them, too, turning to prevent burning. Add stock, cover pot, and simmer until turkey is tender, about an hour. Season with salt and pepper to taste. Remove the turkey thigh and cut the meat off the bone. Return the turkey meat to the pot. Combine flour with some cold water or more stock until smooth. Add to the pot and stir well. Mixture will thicken. Meanwhile combine baking mix with milk and herbs. Drop dumpling batter by tablespoonfuls over the turkey mixture in pot. Reduce heat to low, cover pot and cook until dumplings are cooked, about 20 minutes. To serve place some of the turkey and vegetables with sauce in serving bowls and top with dumplings. Serves 6.
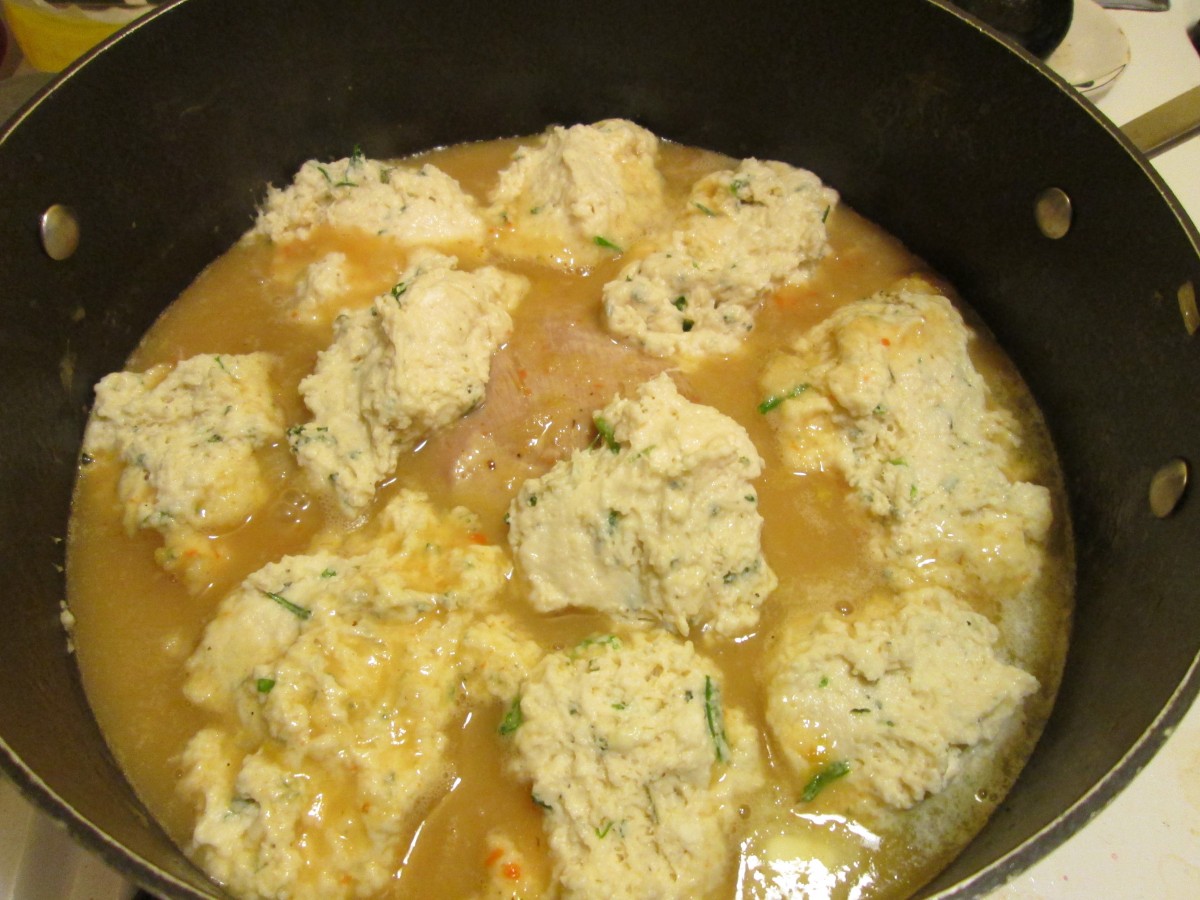
Spoon dumpling batter over turkey mixture
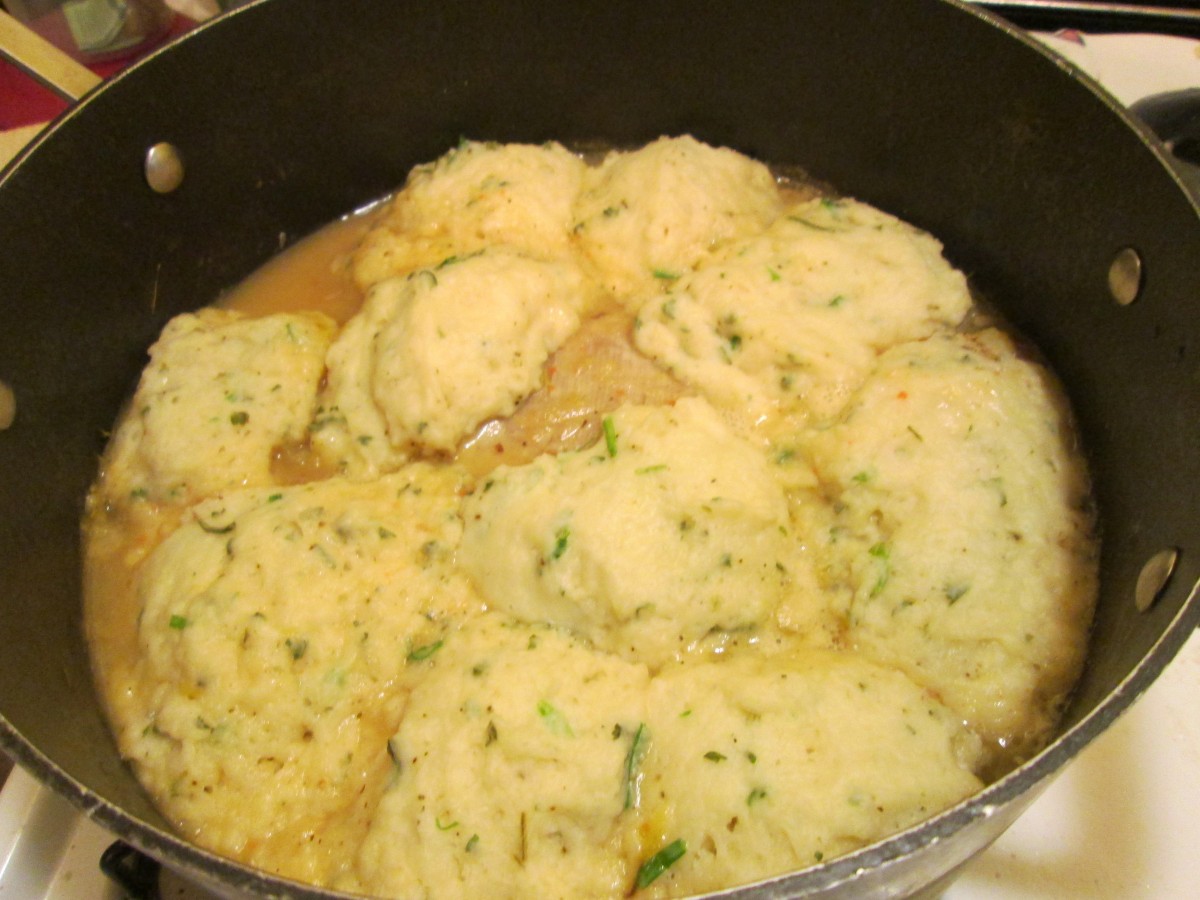
Dumplings will puff up when cooked


