Butternut Squash Saute
Butternut Squash Saute
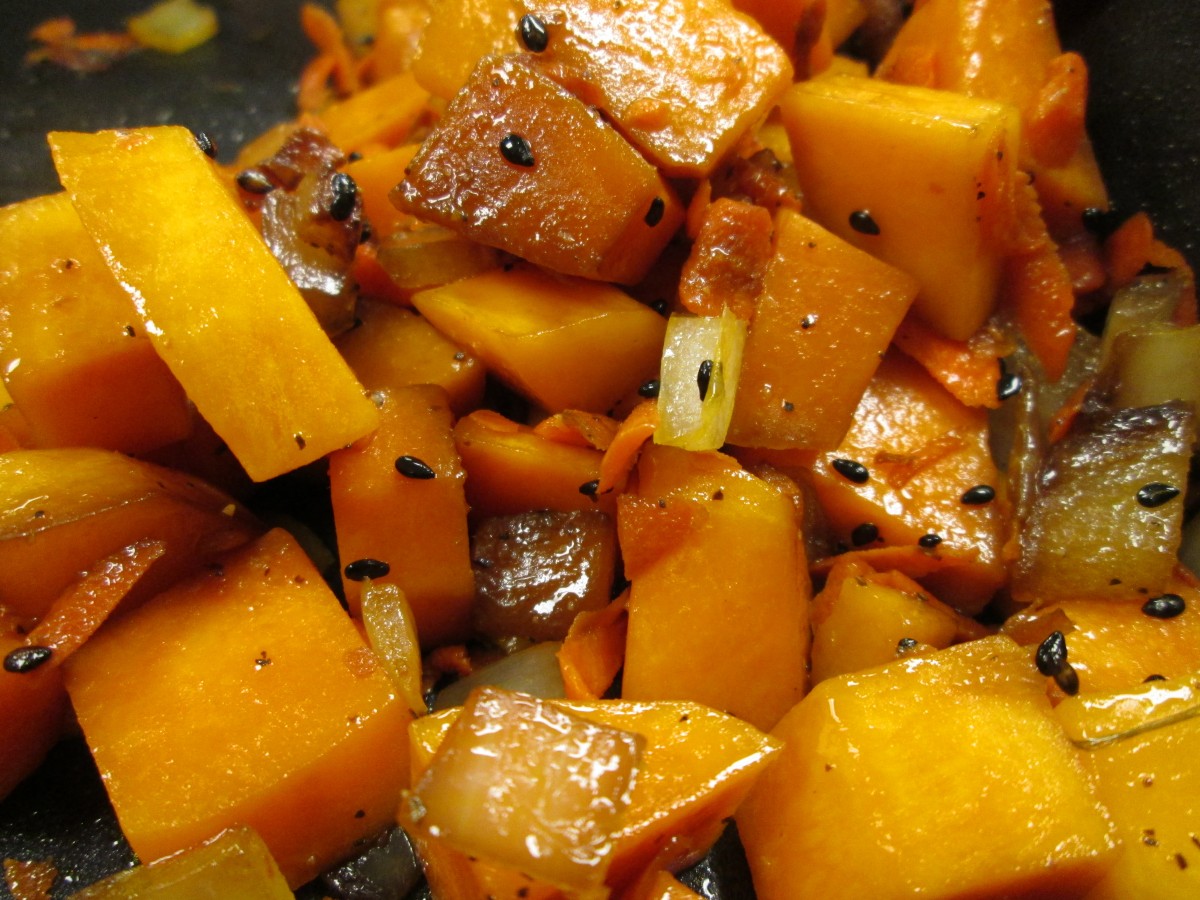
If you have some winter squash around here is a great way to prepare it. You can make this dish with butternut squash, pumpkin or acorn squash. It is a simple side dish with a lot of flavor.
Butternut Squash Sauté
3 tablespoons olive oil
1/2 cup chopped onion
1 teaspoon minced garlic
4 cups cubed fresh butternut squash, acorn squash or pumpkin
1/2 cup grated carrot
2 tablespoons soy sauce
1 teaspoon salt
1 teaspoon ground black pepper
2 teaspoons black sesame seeds
Heat the oil in a large skillet. Add the onion and garlic; cook and stir until the onions begin to brown. Stir in the squash, carrot, soy sauce, salt, and pepper; cook, covered, another 5 to 7 minutes, until squash is tender. Sprinkle with sesame seeds before serving.
Veggie and Pasta Skillet Dinner

Veggie and Pasta Skillet Dinner
We had this dish in class last night. Lots of yummy veggies. Colorful, tasty and very simple. Thanks to all who braved the snowy night to get together to cook.
Vegetable and Pasta Skillet Dinner
1 (16 ounce) package whole wheat rotini pasta, cooked
2 tablespoons toasted sesame oil
1/4 cup soy sauce
1/4 cup balsamic vinegar
2 tablespoons honey or sugar
3 T. oil
3 cups chopped broccoli
1 cup chopped carrots
1 cup chopped red bell pepper
2 cups chopped fresh mushrooms, use whatever mushrooms you can find
1 cup shelled edamame (green soybeans), organic
3/4 cup cashews
In a small bowl, mix the 2 tablespoons sesame oil, soy sauce, vinegar, and honey or sugar. Heat the 3 tablespoons of oil in a skillet over medium heat. Stir in the broccoli, carrots, pepper, mushrooms, shelled edamame, and cashews. Sauté 5 minutes. Mix in the sesame oil sauce. Add pasta and cook 5 minutes longer or until vegetables are tender but crisp and pasta is heated through. Serves 4-6.
Pink Applesauce
Pink Applesauce
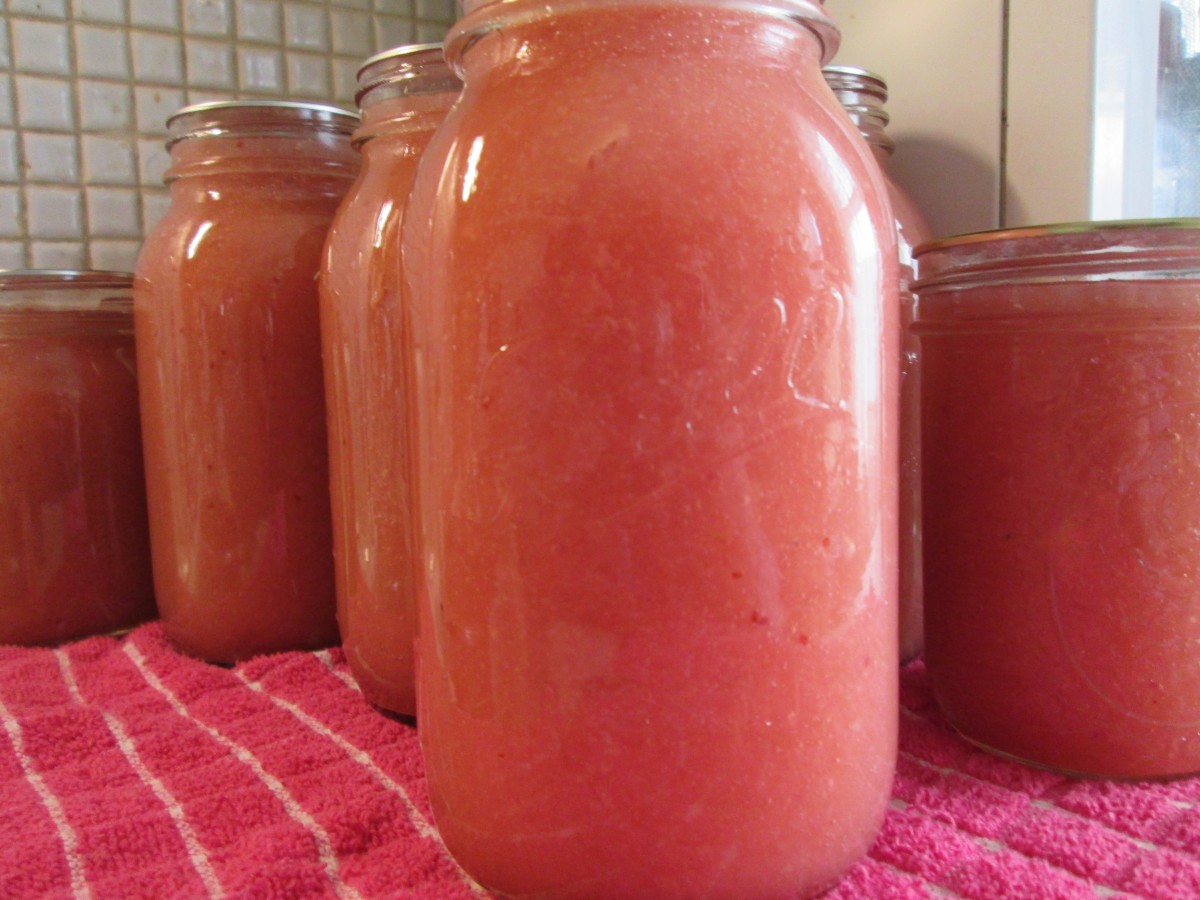
Inspired by some of my canning friends who add all sorts of other fruits to their applesauce I decided to mix things up a little by making applesauce with cranberries.I still had a quite a few apples from Fall harvest and decided to can more applesauce the other day. It came out a pretty shade of pink. The cranberries also added nice tartness to the mix. Doing it over I would add another bag of cranberries, perhaps. The nice thing about applesauce is you can make any amount, depending on how many apples you happen to have. You can also freeze the mixture if you don’t want to can it.
Pink Applesauce
60 apples
12 oz. cranberries
water
1 c. lemon juice
sugar to taste
Peel and core apples. Put in water with some ascorbic acid, citric acid or lemon juice to prevent discoloration. Place apples in a pot with enough water to prevent sticking and add the cranberries and lemon juice. Cook over medium high heat until soft. I wanted smooth applesauce so I ran the cooked apple mixture through a food mill on the medium blade. Return apple mixture to pan and bring to a boil. Sweeten with sugar, if you like, or leave unsweetened. Have water bath full of boiling water and have hot, clean canning jars and lids and rings ready. Ladle hot applesauce into hot jars, leaving 1/2 inch of headspace. Wipe rims and apply lids. Process in a boiling water bath for 20 minutes for pints or quarts. Yield: 8 quarts 0r 16 pints.
Cocoa Mint Hearts

Cocoa Mint Hearts
If you want an easy chocolate treat to make these may just be what you are looking for. They are a simple candy that require little time and no cooking. Easy enough for kids to help, too.
Cocoa Mint Hearts
9 c. powdered sugar
1 c. cocoa
1/2 c. butter, softened
1/2 c. water
2 t. peppermint extract
In large bowl combine ingredients until well blended. You can add more water, if needed, 1 teaspoon at a time. Divide mixture into 2 pieces and shape in balls. Place each between sheets of wax paper and roll out to 1/4 -inch thickness. Cut out with tiny cutters and place on foil-lined tray. Chill several hours, then wrap up in colored foil or place in tiny candy bags. Makes 80 1-inch candies.

Roll out between wax paper

Cut out with heart-shaped cookie cutters
The Challenge- Sprouting
I stopped going to the grocery store about 6 weeks ago. Trying to see how long I can hold out. The first month was pretty easy. I knew I was going to do this so I made sure to have fresh produce in addition to what I had in my freezer and pantry. I also had canned and dried a lot of things.
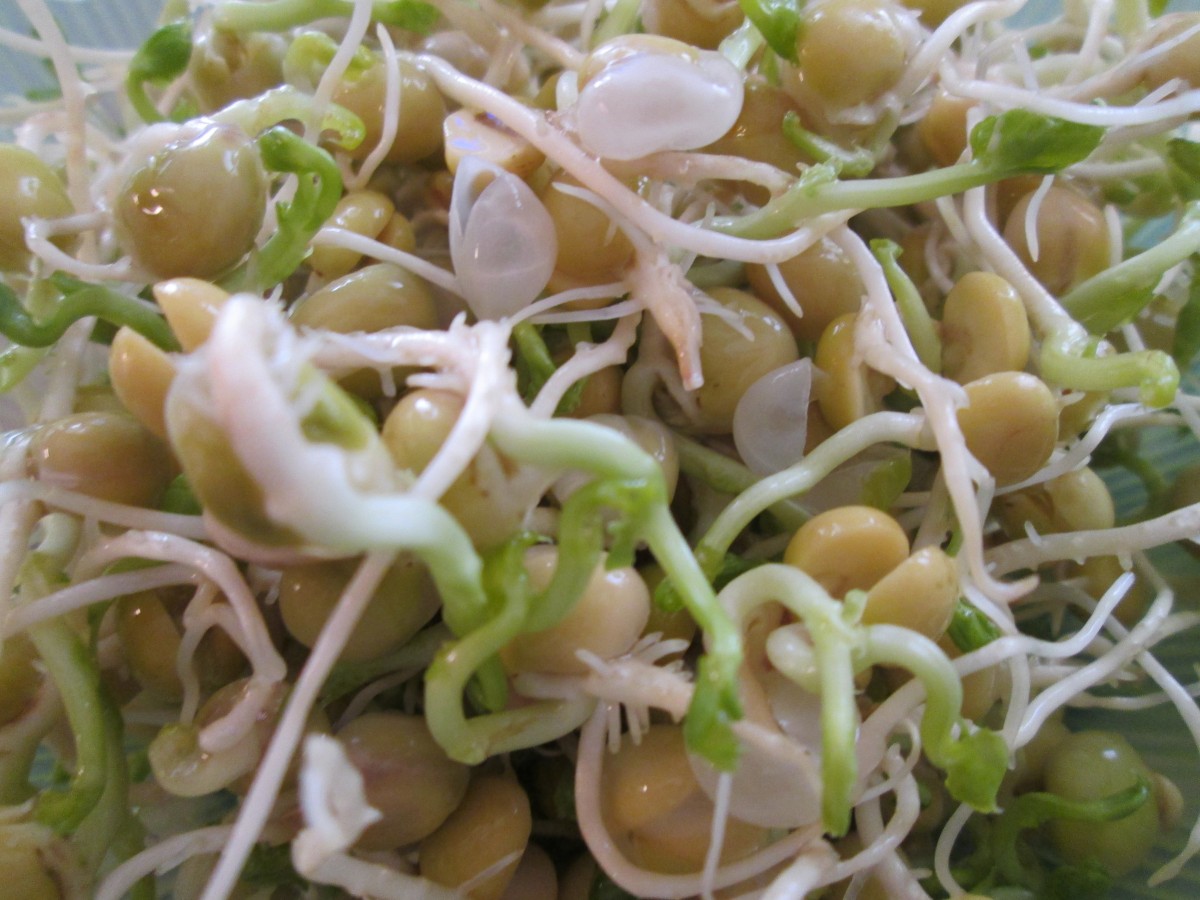
To satisfy my urge for fresh produce I have taken to sprouting. I have a nice assortment of seeds for this purpose and I can start more anytime I like. Because of the variety of seeds that I have I can have sprouts, like pea, garbanzo beans and mung beans that can be eaten cooked or more delicate seeds like alfalfa and radish sprouts that are great as a salad ingredient or on sandwiches. Maybe it is also the time of year, but with snow outside the window the sight of fresh green growth is especially satisfying.
The upside is the seeds last for ages so they will be available for sprouting when I need them. The downside is that it takes a week or more to get sprouts so some planning is required.
Sprouting is pretty simple- although it is a little like having a pet. There is some care than needs to happen. First, start with a clean, wide mouth jar. I have these handy lids with holes in them that are made just for sprouting. Place the seeds in the jars and cover with water. Allow them to be covered in the water for at least several hours. Drain and rinse the seeds. After the first soaking only keep what ever water stays on them after a rinse and drain. That’s pretty much the whole process. Twice a day, maybe three times if the weather is really warm, rinse the seeds and drain off any extra water. Depending on the seeds you can expect your first crop in 7-10 days. You can place the jars in a sunny window for greener sprouts. If you don’t have the lids with holes in them you can cover the jar with some cheesecloth. Hold in place with a rubber band. That will allow the sprouts to get air and make it easy to rinse and drain them.

Sprouts in the jars
Sprouts are full of nutrients and can be eaten cooked or raw. In some cases, like with mung beans the skin of the seed will come off after a few days. They tend to float so if you just place the sprouts in a big bowl of fresh water and agitate them. The skins will come to the top and can easily be discarded.
Also, quantity can be tricky. Very few seeds can produce a heck of a lot of sprouts so go easy. A few tablespoons of tiny seeds like radish, alfalfa or broccoli should be plenty. Perhaps a 1/4 cup of larger seeds like the beans and other legumes is also going to give you a bountiful supply. They do take time so if you want a steady supply start a new batch every few days. Once sprouts are the size you want them to be give them a final rinse and drain well. Store in the fridge until you are ready to use them. Do use them soon. Often they are quite perishable. Besides, if you were sprouting for fresh food- enjoy it while it is fresh.
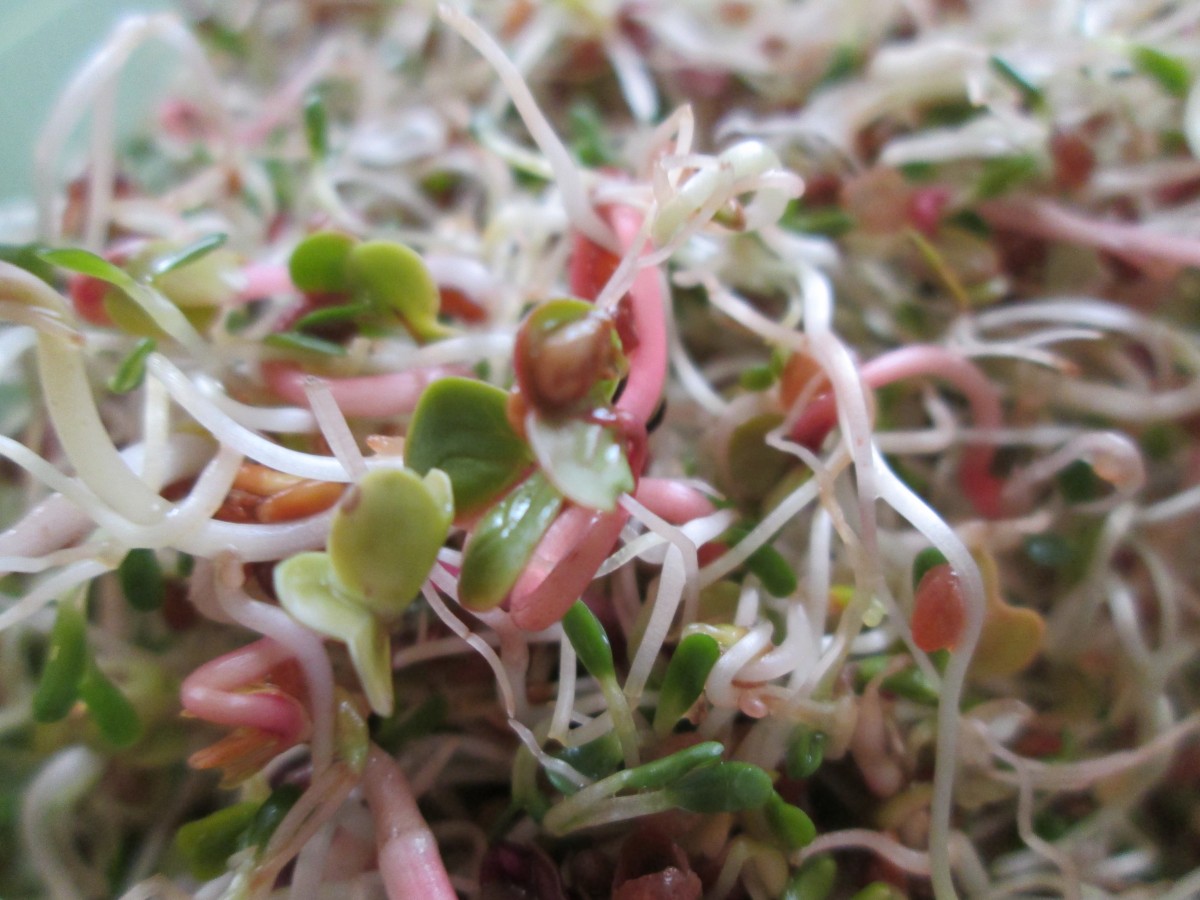
Alfalfa and radish sprouts
Sweetheart Sugar Cookies

Sweetheart Sugar Cookies
I made a batch of these for friends the other day. Used my favorite sugar cookie recipe and cut out hearts. I then used a smaller heart cookie cutter and cut out smaller hearts from half of the cookies. Sandwiched the baked cookies together with homemade strawberry preserves. Since I also had a bunch of tiny heart cookies from the cut outs, I used melted chocolate to turn them into tiny sandwich cookies.
Sugar Cookies
1 c. butter
1 c. sugar
1 egg
1 t. vanilla
3 c. flour
2 t. baking powder
3 T. milk
Extra sugar for sprinkling, if desired
Beat butter and sugar until fluffy. Beat in egg and vanilla. Combine dry ingredients and add to butter mixture. Beat in milk. Heat oven to 375-degrees. Roll dough on lightly floured surface to about 1/3- inch thickness. Cut out with lightly floured cutters and sprinkle with sugar or colored sugar if you like and if you are not going to frost them. Bake on an ungreased baking sheet for 10-12 minutes. Cool on baking sheet 3 minutes before placing on wire rack to cool completely. Frost when cooled. Makes about 4 dozen.
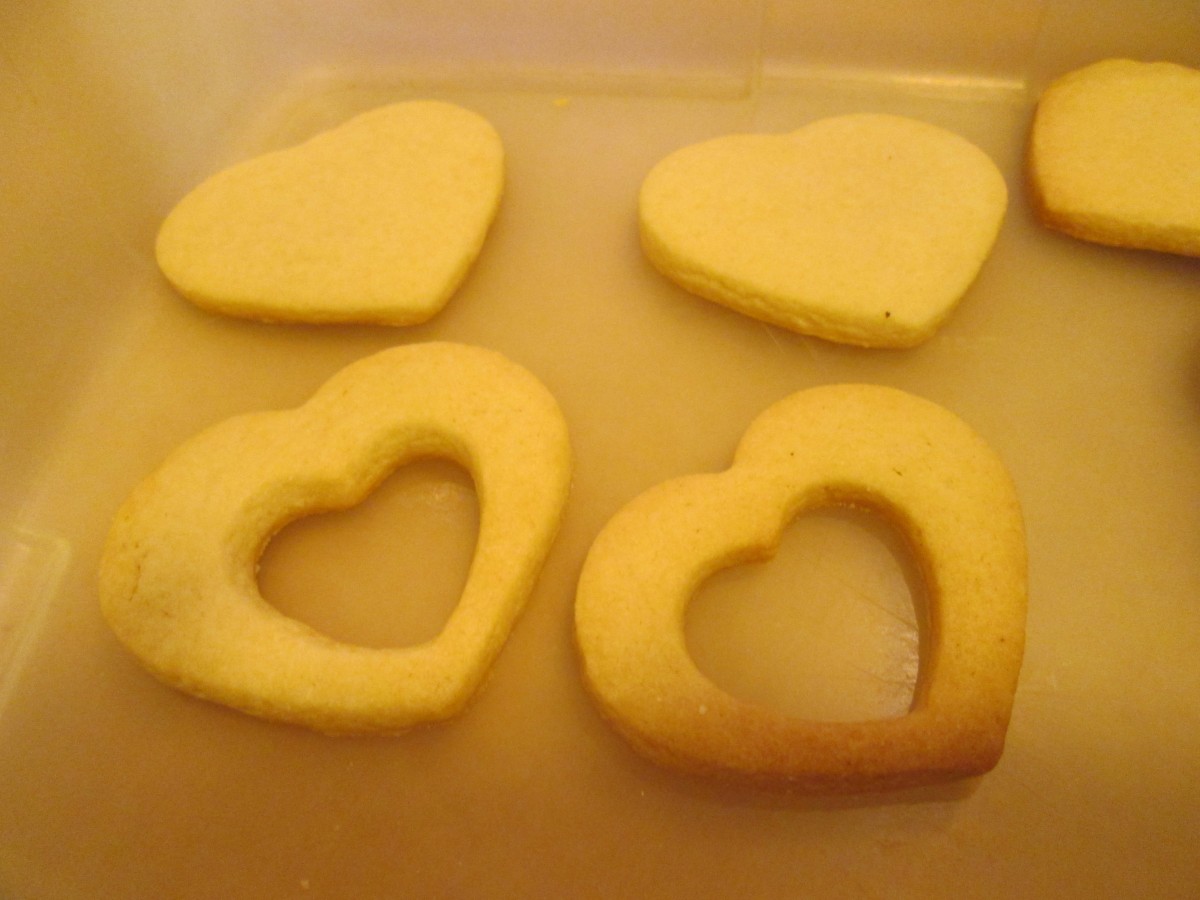
Cookies ready to be sandwiched together

Little heart cookies sandwiched with melted chocolate
Langostino Rolls
Langostino Rolls
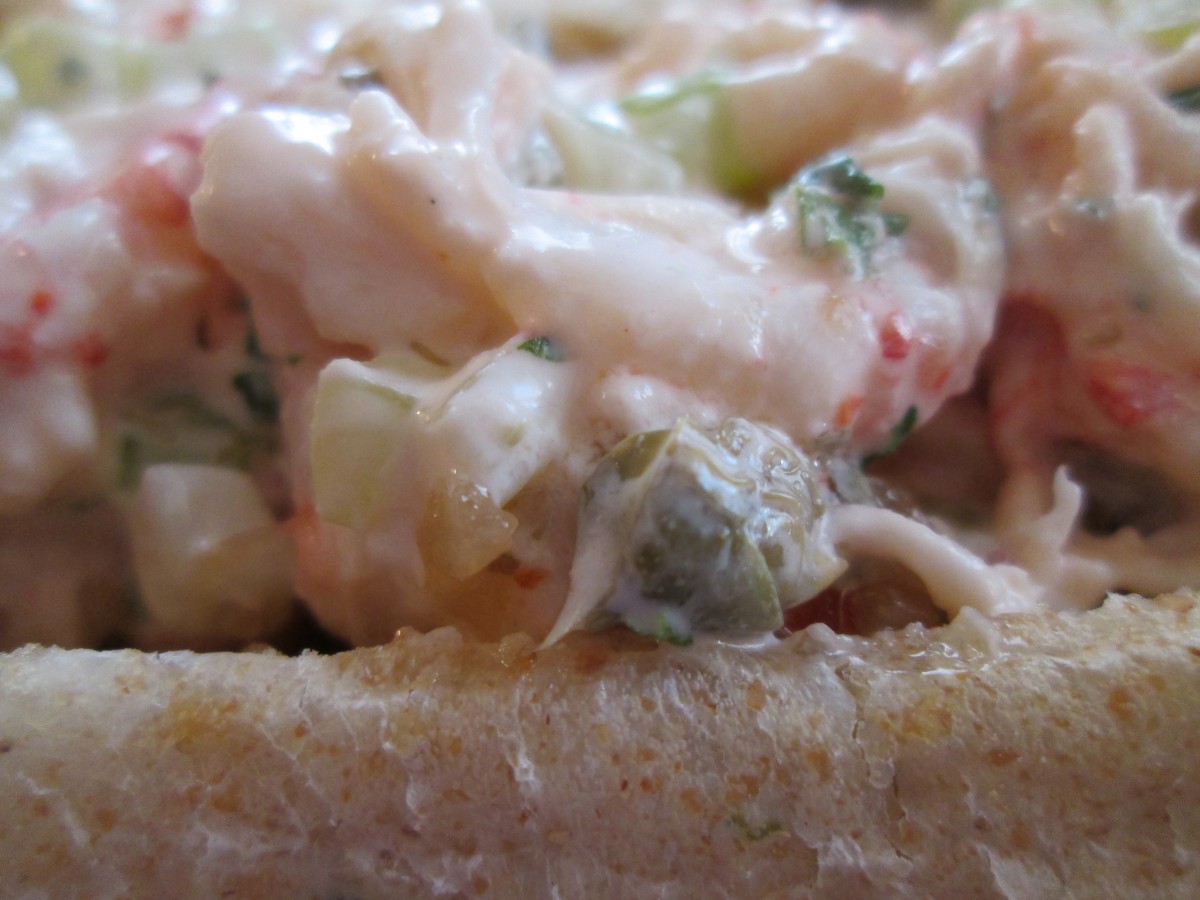
I made these for a dinner with friends last night. They are pretty much the same as lobster rolls, but since I didn’t have lobster I used langostino. The flavor is very similar to lobster. As part of my challenge to see how long I can go without going to the grocery store I used frozen langostinos I had already. I also made the rolls which were much better than anything I might have purchased.
Langostino Rolls
The filling:
2 lbs. frozen, cooked langostino, thawed and squeezed dry
3/4 c. mayo- or a little more to taste
3 ribs celery, minced
1/2 c. parsley
juice of 1 lemon
3 T. capers
salt and pepper to taste
dash of hot sauce
Combine filling ingredients and chill well before using.
To assemble the rolls split rolls most of the way through and open gently. Place in a skillet, cut side down, with some melted butter and cook over medium heat until bread is toasted. Place a generous scoop of the filling in each roll. Makes 12.

Fresh baked Shallot/Garlic Rolls
Shallot/Garlic Rolls
3 ½ -4 ½ c. flour
2 c. whole wheat flour
2 packages yeast
½ c. sautéed minced shallots- I cooked them in a little oil and let them cool down before using
1 T. minced garlic
1 T. honey
2 t. salt
¼ c. olive oil
2 ¼ c. warm water
In a mixing bowl combine 2 c. of flour with the rest of the ingredients and mix until smooth. Beat with electric mixer 4 minutes then add 1-cup additional flour and beat 1 minute longer. Stir in whole wheat flour ½ cup at a time until soft dough forms. Turn onto surface and knead, adding flour gradually until dough is smooth and elastic. Place dough in lightly greased bowl and turn to cover. Cover with a towel and let rise until doubled, about 50 minutes. Turn dough onto surface and cut in half. Divide each half into 8 pieces and roll into 6-7 inch log rolls. Place on greased baking sheet a few inches apart. Repeat with remaining dough. You’ll end up with 16 rolls in all. Cover until doubled in size, about 40 minutes.
Bake in a preheated 375-degree oven for 20 minutes, or until rolls sounds hollow when tapped lightly. Makes 16.
Note: For the recipe you’ll need about 12 of the rolls. Use the rest for other sandwiches.
Flourless Chocolate Mousse Cake

Flourless Chocolate Mousse Cake
If you are still looking for a special dessert for Valentine’s Day this cake might just be what you are looking for. It is easy to make and impressive to serve. I decorated it with powdered sugar and chocolate whipped cream.
Flourless Chocolate Mousse Cake
½ c. each sugar and water
1 stick butter
12 oz. semi sweet chocolate
6 eggs
¼ dark rum or other liqueur
Butter an eight inch cake pan and line with parchment. In saucepan heat together water and sugar until they boil. Stir in butter and bring to boil. Remove from heat and stir in chocolate until melted. Beat in eggs until smooth and stir in rum. Pour batter into prepared pan and place pan in a roasting pan. Pour boiling water into roaster to come up sides of pan 1 inch. Bake in a preheated 325 degree oven for 45 minutes. Cool, invert onto plate.
Serve cake topped with whipped cream and decorate with raspberries, other fresh fruit or even toasted nuts. Dense and rich this cake serves 8-10. Leftovers can be frozen.
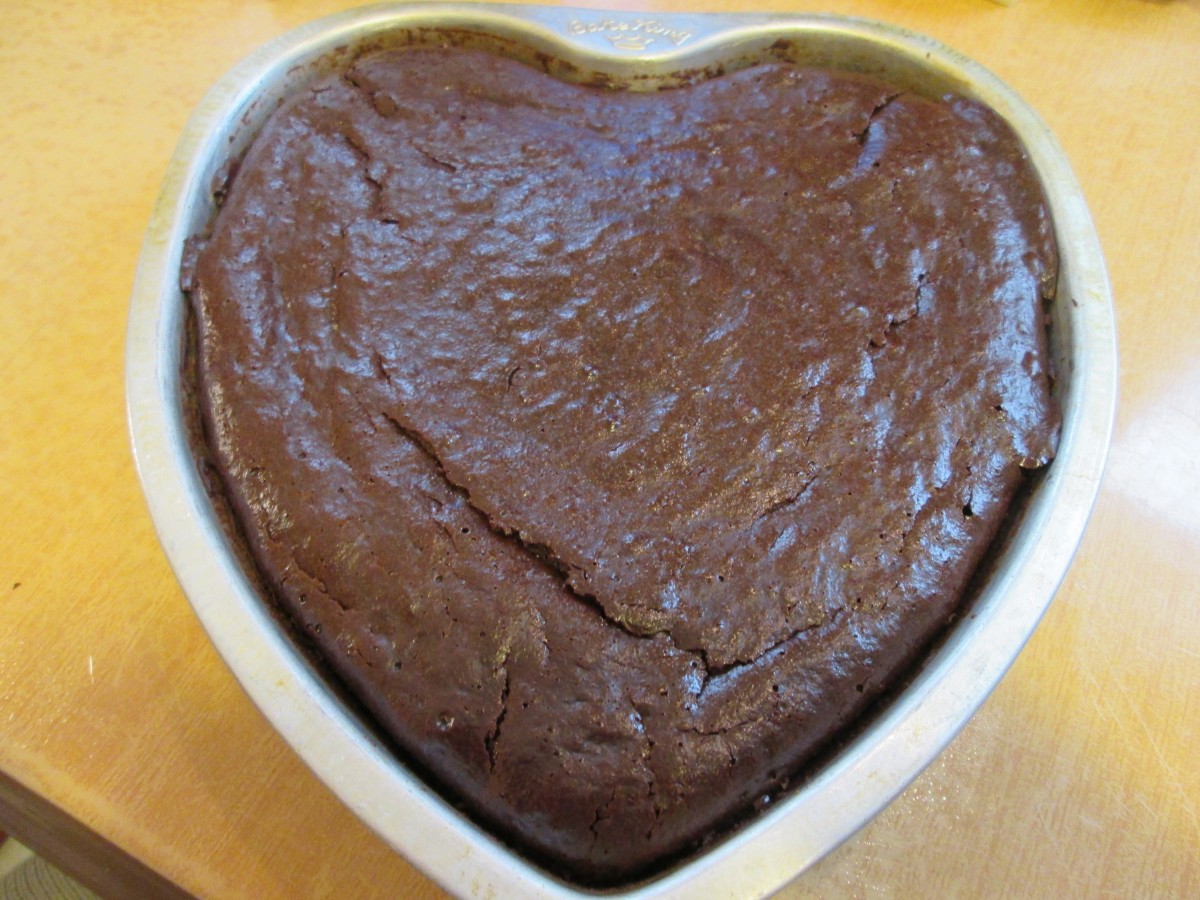
Fresh out of the oven
Chocolate Whipped Cream
1/2 c. whipping cream
1/4 c. powdered sugar
2 T. cocoa
Combine powdered sugar and cocoa and set aside. Whip cream until soft peaks form and then beat in the powdered sugar mixture. Pipe onto desserts.
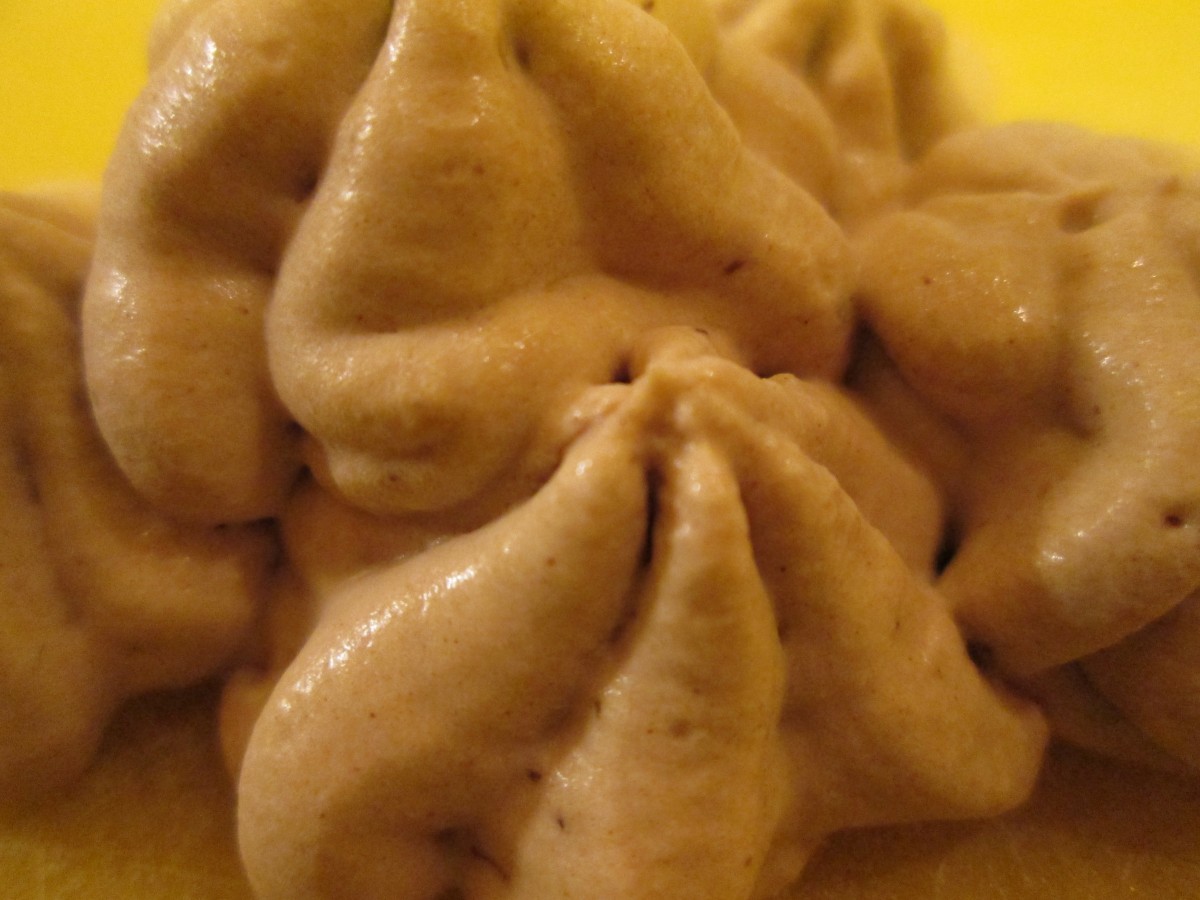
Chocolate Whipped Cream
Chocolate Shortbread Cookies
Chocolate Shortbread Cookies
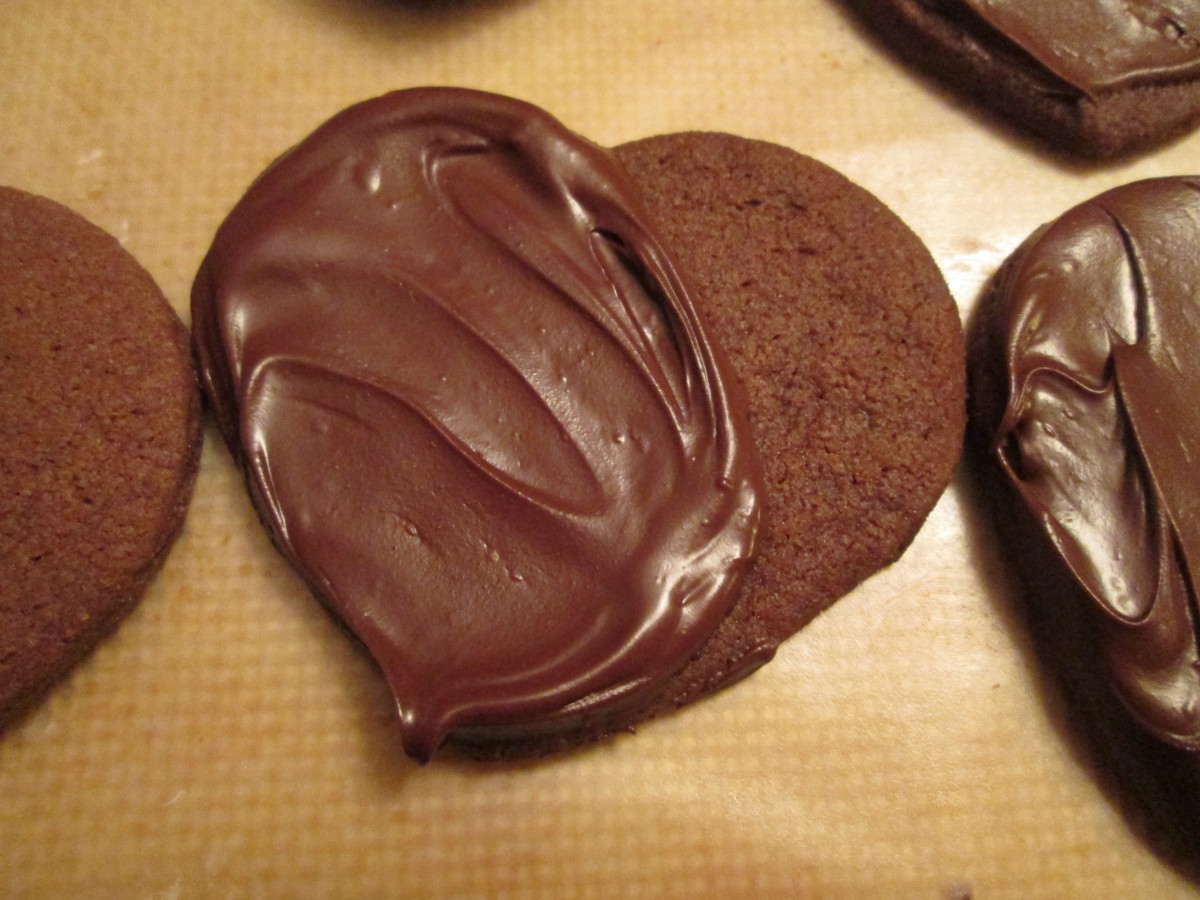
I have always been a big fan of shortbread cookies. This Chocolate Shortbread Cookie ranks up there with one of my favorite cookies of all time. Not too sweet and that wonderful crumbly texture found in all really good shortbread cookies. I finish them of by either brushing them or dipping them in melted chocolate or making a sandwich cookie by holding 2 cookies together with melted bittersweet chocolate. Fun dessert anytime. Extra nice for Valentine’s Day.
Chocolate Shortbread
1 c. butter, room temperature
3/4 c. sugar
2 c. flour
1/3 c. cocoa
1/4 t. salt
8 oz. semi-sweet chocolate
Beat together butter and sugar until well blended. Mix together dry ingredients and slowly beat into butter mixture, stirring it in at the end. Roll out dough about 1/4 inch thick and cut out with cookie cutters. Re-roll scraps and cut out the remaining dough. Place on an un-greased baking sheet and bake at 325 degrees until cookies are firm around the edges, about 20 minutes. Cool on baking sheet 5 minutes before transferring to a rack to cool. Melt chocolate and dip cookies in it or use chocolate to hold 2 cookies together. Makes 2-3 dozen, depending on the size.
Chocolate Orange Scones
Chocolate Orange Scones
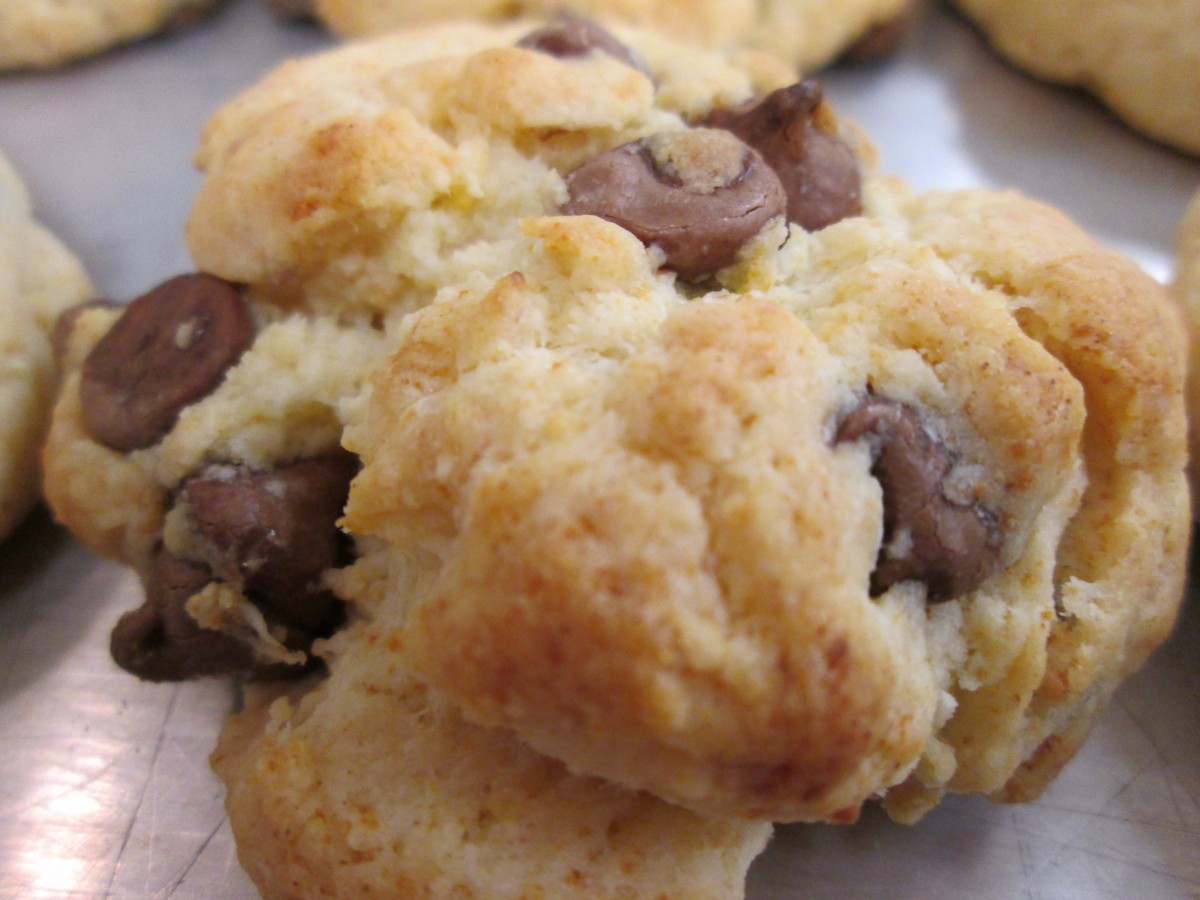
Going with the thought that there is NEVER a bad time of day for chocolate here is a great recipe for breakfast or brunch. They are not very sweet, but very tasty. Serve with butter and preserves or use for the base of a shortcake.
Chocolate-Orange Scones
1 1/2 c. baking mix, like Jiffy or Bisquick or homemade
1 T. grated orange peel
3/4 c. heavy cream
1/2 c. milk chocolate chips or 3 oz. milk chocolate, chopped
Combine baking mix and orange peel in medium bowl. Stir in cream to make a soft dough that forms into a ball in the bowl. With your hands or a 2 oz. cookie scoop form dough into balls and place on an ungreased baking sheet. Flatten slightly. You should get 8. Bake in a preheated 425-degree oven for 8-10 minutes.
Double chocolate version: Knead 3 tablespoons of cocoa into dough with the chocolate chips.


