Cranberry Bounce
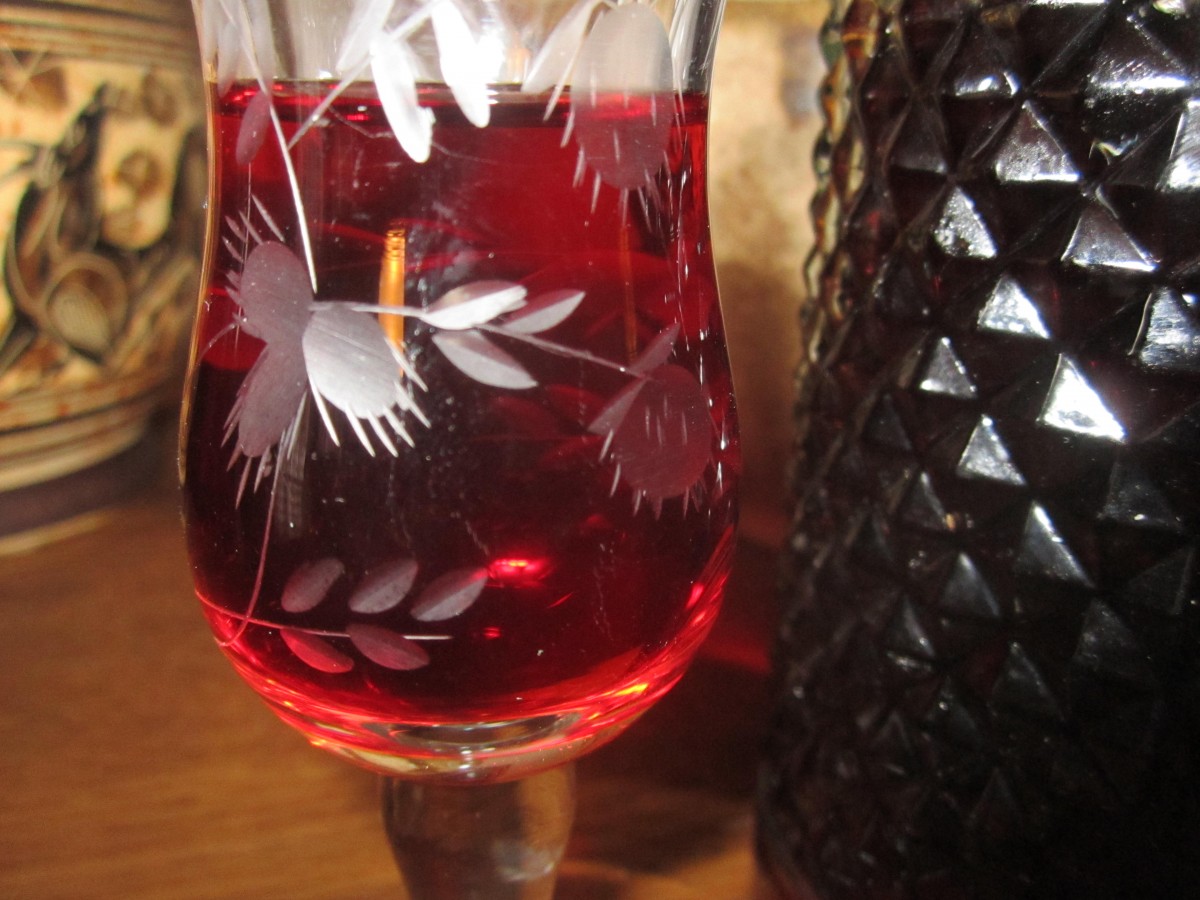
Cranberry Bounce
I love cranberry season and find myself using them in all sorts of recipes. For years I have been making a liqueur called Cranberry Bounce. I got the recipe from my sister a long time ago. Cranberries, sugar and vodka. What a great combination. It’s simple to make and it makes a nice gift, too. The color is absolutely beautiful. The sweet/tart finished product can be enjoyed by just sipping, on the rocks or mixed with club soda.
Cranberry Bounce
1 lb. fresh cranberries (most bags are 12 oz.)
2 c. sugar
4 c. vodka
Grind berries fine in food mill or food processor. Place in large jar and combine with the sugar. Let stand, covered until sugar is dissolved completely, several hours or overnight. Add vodka and let steep 1-3 weeks, stirring occasionally. Strain and filter. Makes 5 cups.
Note: Fruit can be saved in fridge and used, sparingly, in desserts, fruit salads and on cake or ice cream.
Basil Tomato Soup
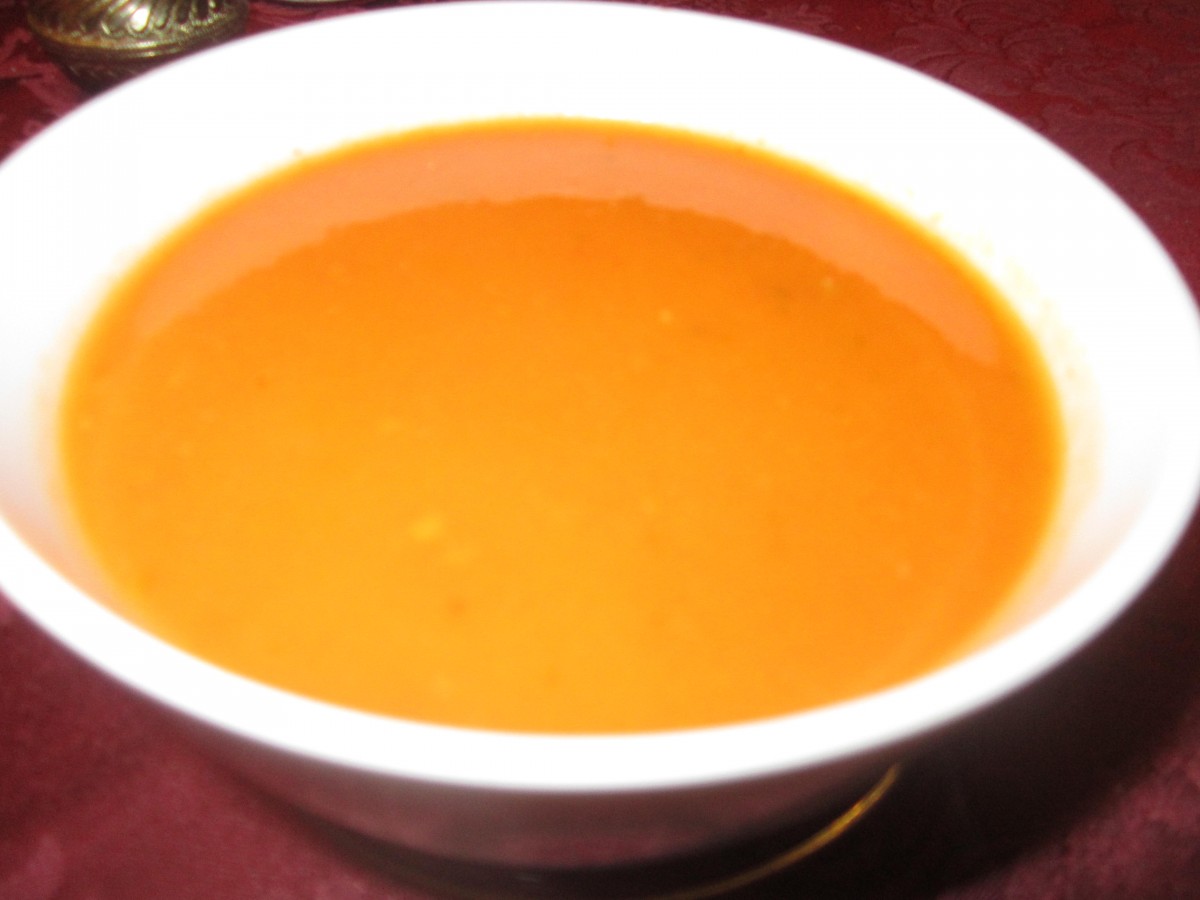
Basil Tomato Soup
Sometimes people ask me why I can so many tomatoes. There are several reasons. Canned tomatoes are very versatile. They can be turned into sauce or used in soup, chili, stew etc… Plus they taste amazing. Whenever the snow is flying and I open a jar of my canned tomatoes the aroma reminds me of a warm summer day. They are full of vitamins and minerals and when they are in season they are so abundant I can’t stand to see a single one go to waste. I find them very handy when I need something for dinner. Give me a jar of tomatoes and a reasonable pantry and I can make any number of things. A couple of days ago I decided to have friends over for dinner and I needed a first course. I wanted soup and used my canned tomatoes for inspiration. The end result was quite wonderful. I have already had requests from several of the guests for the recipe. So here it is…
Basil Tomato Soup
2 onions, peeled and chopped
2 large carrots, peeled and chopped
1 rib celery, washed and sliced
1 qt. stock- any kind will do- I had turkey stock so that is what I used
1 qt. canned tomatoes- or a 28 oz. can of diced tomatoes
2 T. basil paste*
salt and pepper to taste
1 c. diced ham- I used turkey ham because that’s what I had
Combine onions and other veggies in a pot with the stock and tomatoes and cook, covered until veggies a re really tender- about 30 minutes. Use an immersion blender to puree the soup in the pot or puree, in batches, in a blender until smooth and return soup to pot. If using a blender be careful blending hot liquids. Cover the top with a towel and only do small amounts at a time. Add the basil paste and ham and adjust seasonings. Simmer until heated through. Serves 6-8.
* Basil paste is available in many grocery stores. I make my own. I place fresh basil in a blender or food processor and add olive oil until the mixture is a paste consistency. Then I freeze the mixture in ice cube trays. Olive oil will freeze solid. Once frozen I remove the “cubes” and store in the freezer in freezer bags. They are ready whenever I need them. If you don’t have fresh basil or basil paste 2 t. dried basil could be used.
Pineapple-Ginger Preserves

Pineapple-Ginger Preserves
I love pineapple preserves. I make them pretty often. More motivated when I get good price on pineapples like I did recently. I wanted to change things up a little this time. I decided to add candied ginger to the recipe. It turned out to be a really good idea. Just a touch of spice from the ginger to cut through the sweetness of the pineapple. I also added extra lemon juice for tartness. The end result is something special. This makes a great gift for the holidays, too. Thought I would share the recipe with you.
Pineapple-Ginger Preserves
8 cups finely diced fresh pineapple, rind and core removed- about 2 pineapples
2 cups water
3/4 c. lemon juice
1/2 c. candied ginger- or even a little more
6 c. sugar
Place pineapple in a pot with the water, lemon juice and ginger and simmer until pineapple is tender, about 15 minutes. Add sugar and bring mixture to a boil. Cook until mixture reaches gel stage ( 220 degrees F).* Stir from time to time. This should take about 20 minutes, but can take longer. Ladle hot preserves into hot half-pint jars leaving 1/4 inch headspace. Wipe rims and adjust lids. Process in a boiling water bath for 15 minutes. Yield about 9 half-pint jars.
*When you are making jelly recipes that will sometimes say to cook to the jelly (gel) stage and I bet you are thinking “and that is….” There are 3 ways you can check to see if you have cooked your recipe long enough.
1. Use a candy thermometer, attached to the side of the pan and down in the jelly far enough to cover the bulb of the thermometer, but not touching the bottom of the pan. This is the most accurate method.
2. Spoon test by using a cool metal spoon dipped in the jelly and held on its side so the jelly can run off the edge. When jelly is not ready the drops will be light and syrupy. As it gets thicker the drops will falls off the spoon 2 at a time. When it has reached the proper stage two drops will form together and sheet off the spoon.
3. Freezer test just involves spooning a small amount of jelly on a plate and placing it in the freezer for a few minutes, to cool it down quickly. If the mixture gels, it should be done. While waiting for jelly test to cool, remove jelly from heat.
Cranberry Orange Relish
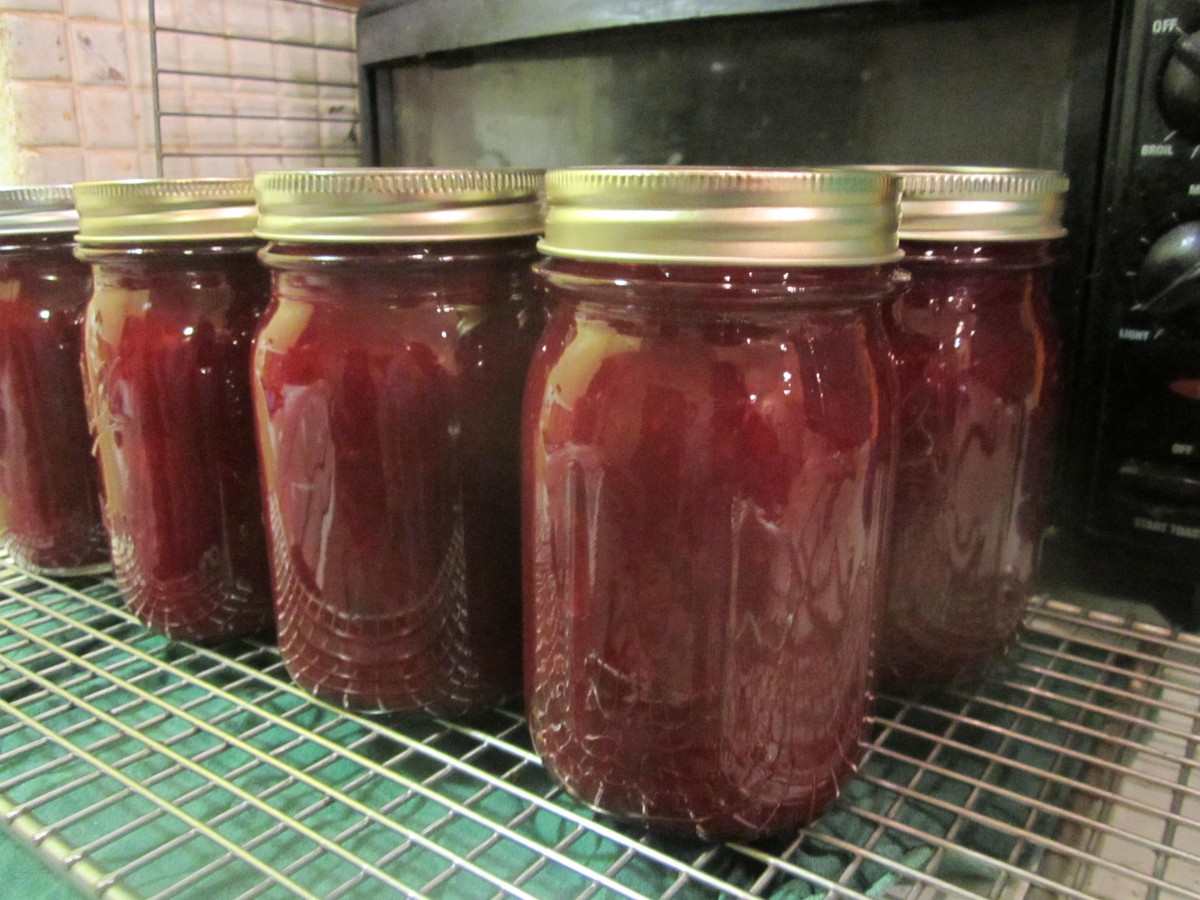
Cranberry Orange Relish
I got a great deal on fresh cranberries and decided to make and can my own cranberry sauce. I could also have frozen it- but freezer space is at a premium right now. I didn’t want plain cranberry sauce so I decided to make cranberry- orange relish.
Cranberry Orange Relish
5 (12 oz.) bags cranberries
5 cups sugar
5 cups orange juice
2 T. grated orange zest
Rinse berries and drain. Place berries with the remaining ingredients in a large pot and bring to a boil, stirring occasionally. Berries will start to pop. Cook until berries are popped and sauce thickens a little. Cranberries have a lot of pectin and will thicken up when they cool. Ladle hot sauce into hot jars. Wipe rims and adjust lids. Process in a boiling water bath for 10 minutes. Makes 7 pints.
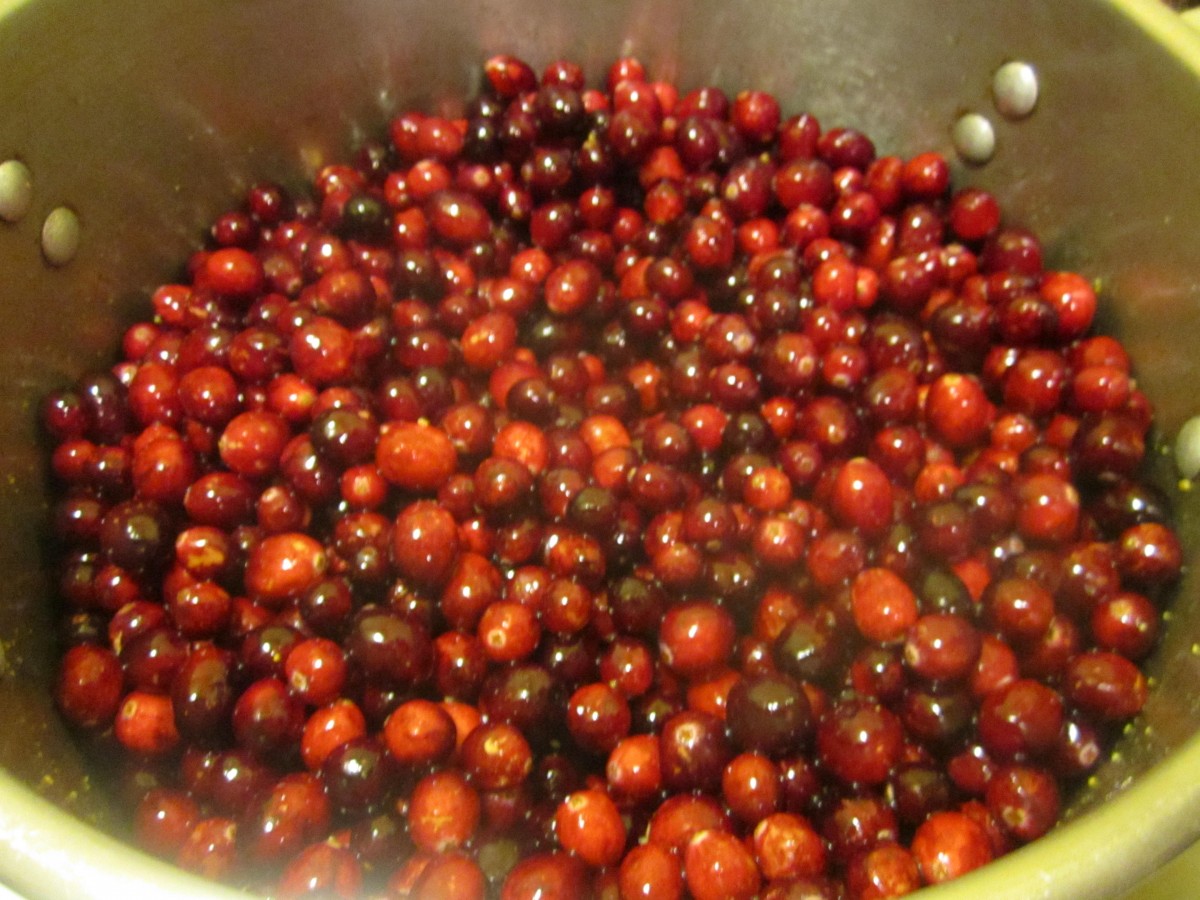
Just starting to boil
Apple Pie Filling
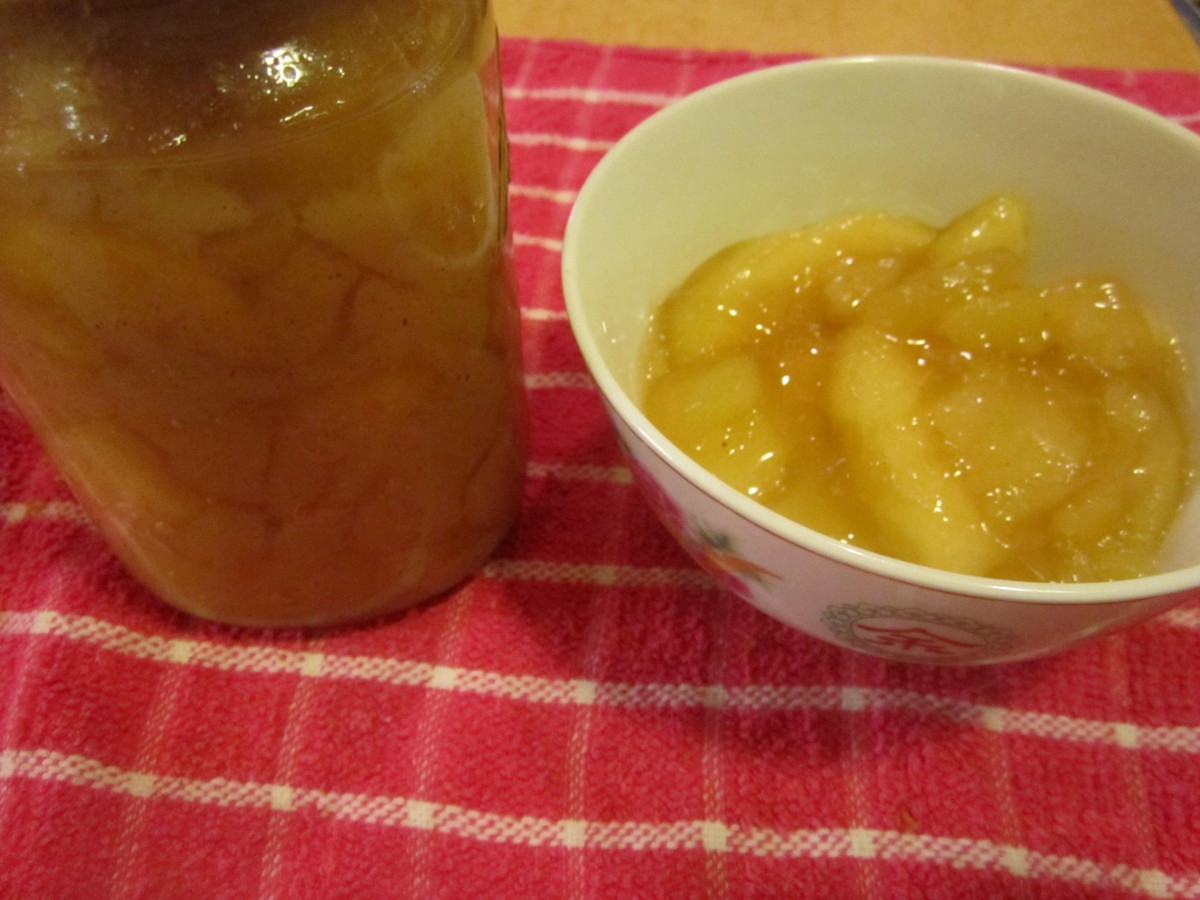
Apple Pie Filling
With an abundant apple season this year I will be making more apple pie filling that usual. Love to make pies but also use it for kolachy, blintzes, cakes and more. This is the recipe I use.
Apple Pie Filling
6 qts. apples, sliced and blanched
5 1/2 c. sugar
1 1/2 c. Clear Gel- modified cornstarch available on line and in Amish stores
1 T. cinnamon
1 t. nutmeg
2 1/2 c. cold water
5 c. apple juice
3/4 c. lemon juice
If apples lack tartness use an additional 1/4 cup of lemon juice. Wash, peel and core apples and cut into 1/2 thick slices. Place in water treated with either lemon juice, citric acid or ascorbic acid to prevent darkening. Remove from solution and drain well. Blanch in boiling water- 2 quarts at a time- for 1 minute. As you finish each batch place in a bowl and cover to keep warm. In large pot combine sugar, Clear Gel, cinnamon, nutmeg, water and apple juice. Stir over medium heat until mixture begins to bubble and thicken. Add lemon juice and boil 1 minute. Add drained apples and stir gently to combine. Ladle into hot, clean jars leaving 1 1/2 inches of headspace. Remove air bubbles. Wipe rims and adjust lids. Process in a boiling water bath- pints or quarts for 25 minutes. Makes 7 quarts.
For only 1 quart
3 1/2 c.apples
3/4 plus 2 T. sugar
1/4 c. Clear Gel
1/2 t. cinnamon
1/8 t. nutmeg
1/2 c. cold water
3/4 c. apple juice
2 T. lemon juice
Almond Pine Cones
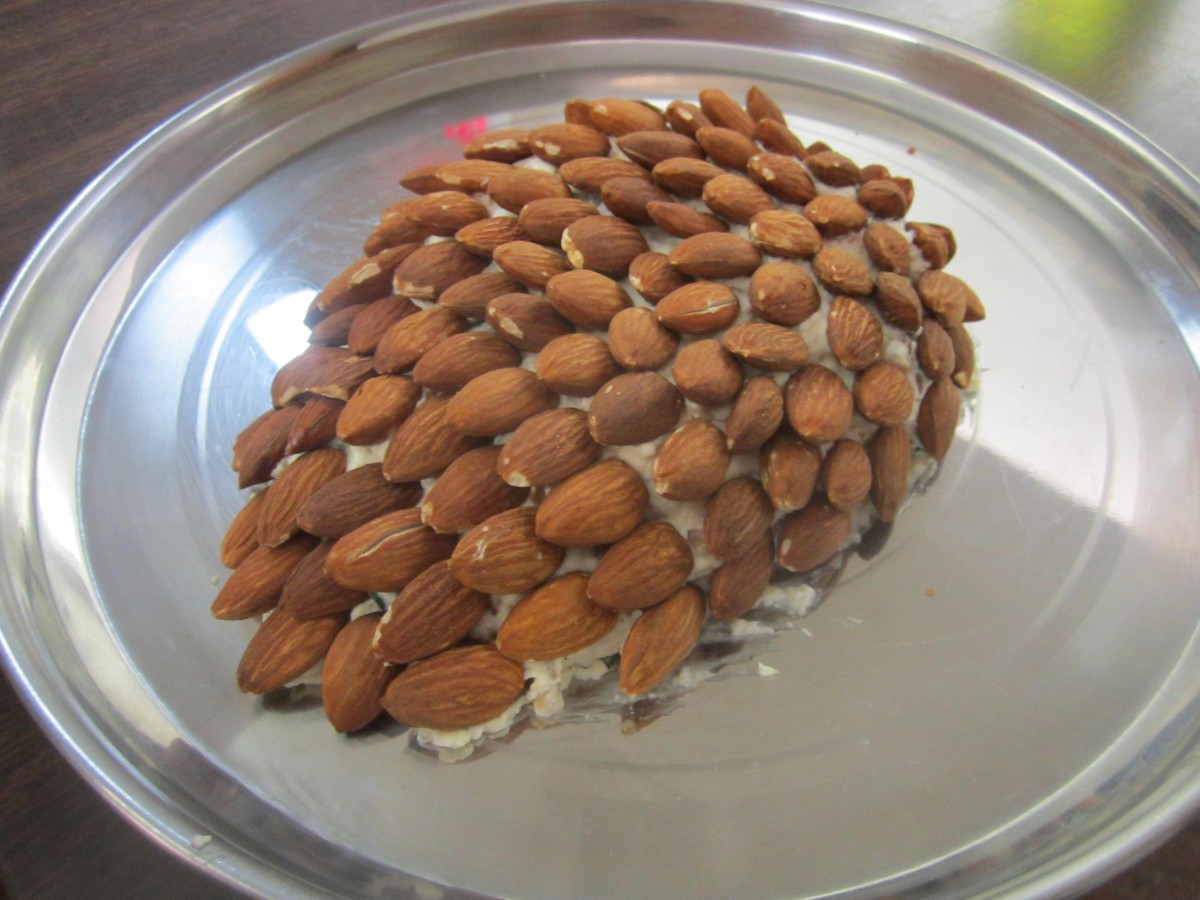
Almond Pine Cones
I wish I knew who to credit for this recipe. My mom pulled it out of one of her magazines ages ago. I have long since lost the picture but I know how to make this. The cheese ball itself is pretty tasty. The fun part is using toasted almonds on the outside to look like a pine cone. You can dress it up with greens if you like.
Almond Pine Cones
1¼ c. whole un-blanched almonds
8 oz. cream cheese, softened
½ c. mayonnaise
5 slices crisp bacon or turkey bacon, crumbled
1 T. chopped green onion
½ t. dill weed
1/8 t. pepper
Place almonds on baking sheet and toast in a 300-degree oven for 15 minutes. Cool and set aside. Combine remaining ingredients and form into an oval (sort of almond shaped) on a serving dish. Starting at the bottom of the oval start laying down almonds at an angle until cheese is covered. The idea is to make the cheese mixture look like a pine cone*. Decorate with a sprig of greenery (real or fake) if you like. Serve with crackers.
* You can also divide the mixture in half and make 2 smaller pine cones. Also very pretty.
Island Meatballs
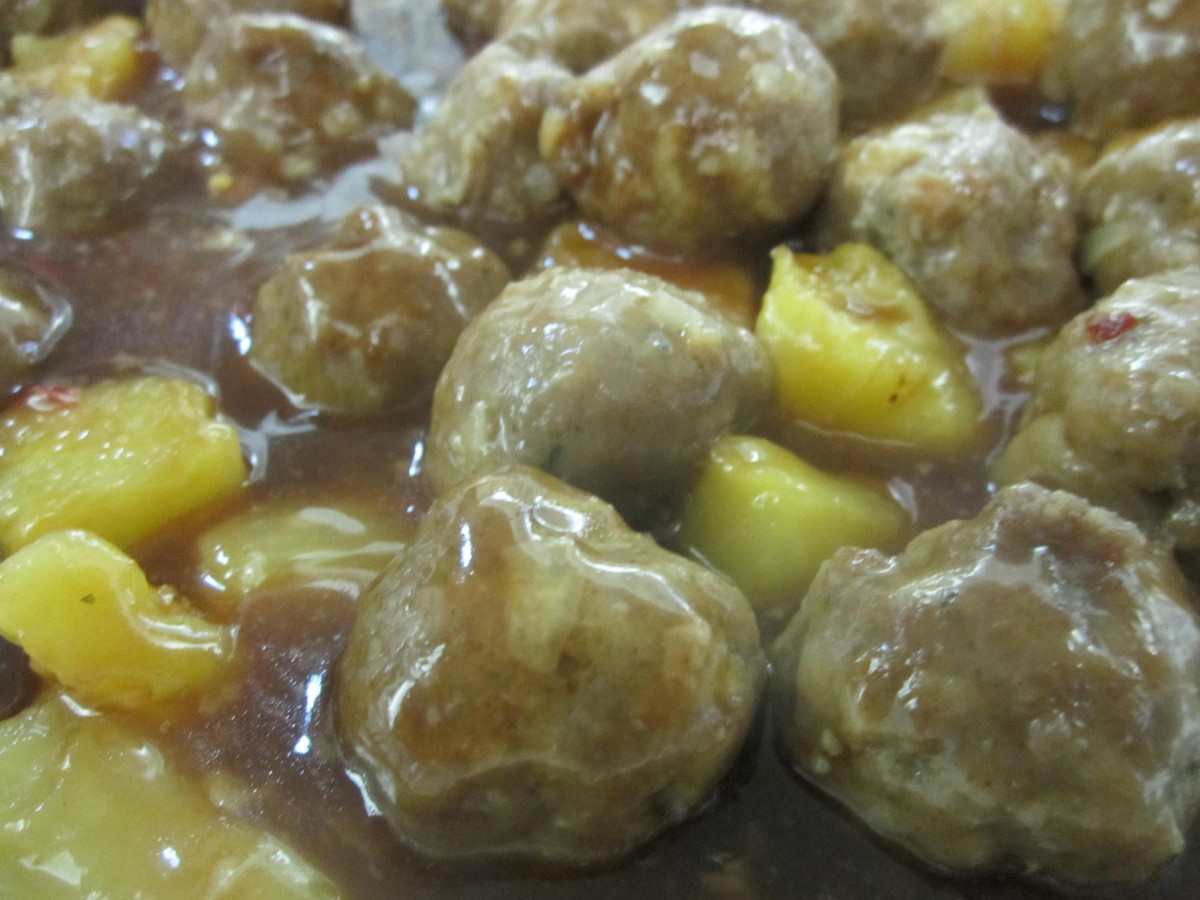
Island Meatballs
With holidays around the corner I thought I’d post some fun and easy appetizers. We made these in class the other night. They can be made ahead of time and frozen, if needed, to take some of the last minute prep time out of the way. I had a fresh pineapple so that is what I used, but canned works fine, too.
Island Meatballs
1 lb. lean ground beef or turkey
1 egg
1/3 c. bread crumbs
1 small onion, diced
2 t. grated ginger
1 t. salt
½ t. allspice
¼ t. red pepper flakes
1 (20oz.) can pineapple chunks, in juice, drained (reserve juice for sweet and sour sauce)
Combine meat with egg, crumbs, onion and seasonings and chill. Formed chilled mixture into 1½-inch balls and bake in a 350-degree oven for 45 minutes. Place 1 meatball on a skewer with a chunk of pineapple and brush with a little sweet and sour sauce. Return to oven for 10 minutes or broil for 3-5 minutes. Serve with extra sauce. Makes about 30.
Sweet and Sour Sauce
½ c. sugar
½ c. vinegar
reserved pineapple juice
3 T. ketchup
2 T. sherry
2 T. soy sauce
2 T. cornstarch
½ t. dried minced garlic
¼ t. red pepper flakes
Combine all ingredients in a saucepan and stir until smooth. Heat until thickened and bubbly. Keeps a couple of weeks in the fridge. Makes 2 cups.
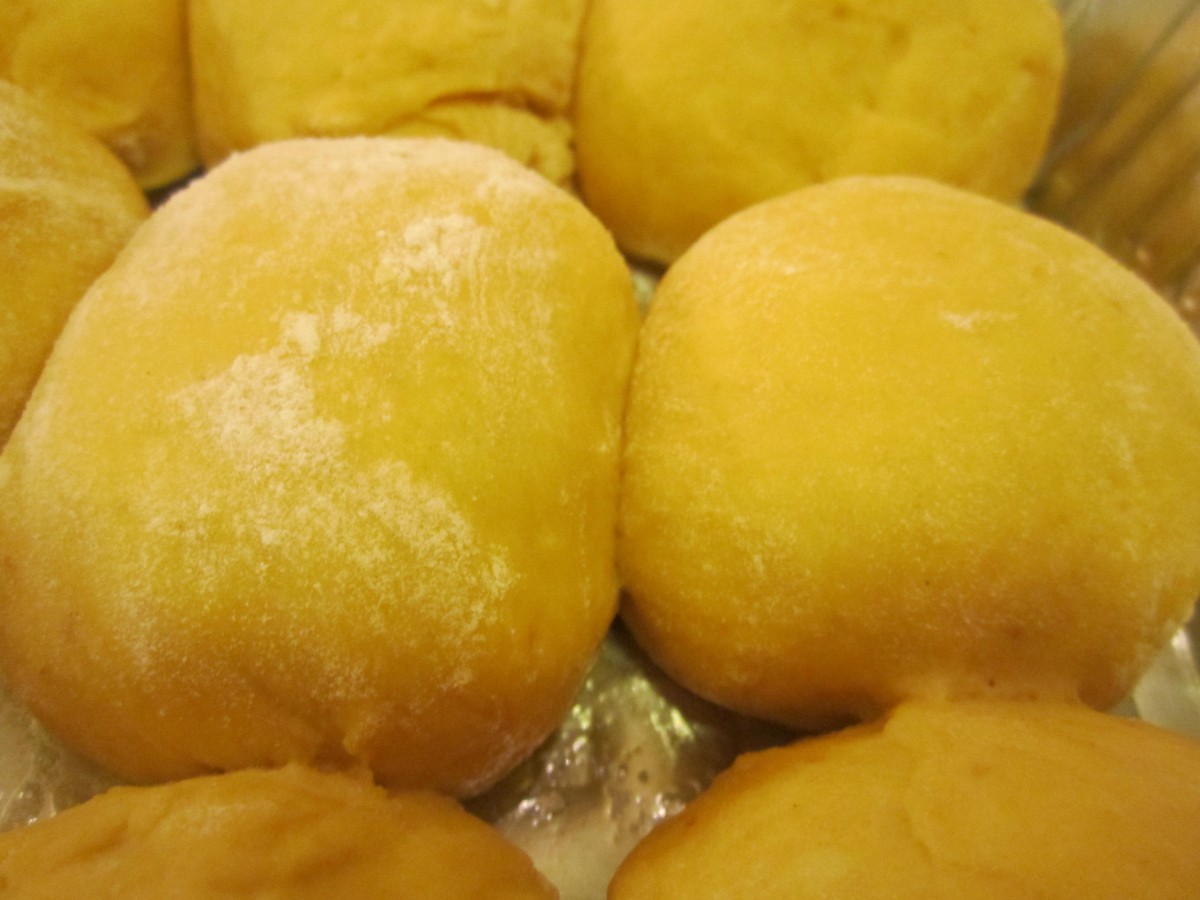
Rich Squash Rolls

Rich Squash Rolls
These rolls are a family favorite. We have them every Thanksgiving. My sister Cindy always makes them and has been making them for years. They are rich, soft and sweet and make a perfect addition to the dinner table. While I use cooked butternut squash in mine pumpkin could be used as well as other winter squashes. They are also a beautiful color.
Rich Squash Rolls
1 c. milk
4 T. butter
½ c. sugar
¼ c. brown sugar
1 t. salt
1 pkt. Yeast
4-5 c. flour
1 ½ c. cooked butternut squash, strained, or 1 (16oz.) can squash or pumpkin
2 eggs, room temperature
Scald milk and butter. Place sugar and salt in large bowl and pour in milk mixture. Cool to lukewarm. Add yeast and 2 cups of flour. Beat at medium speed with mixer for 2 minutes. Add squash and eggs and mix until smooth. Add flour gradually to form a stiff dough. Knead on floured board for 7-8 minutes. Place in a greased bowl, turning dough to coat evenly. Cover with a towel and allow to rise until doubled. Punch dough down and shape into rolls. Dough can be placed in a greased cake pan where they will touch each other as they rise making softer rolls. You can also place them in muffin tins, or shape into rolls and place on greased baking sheet for crispier rolls. Cover and let rise until doubled. Bake at 375 degrees for about 25 minutes. Butter tops while warm. Makes 2 ½ -3 dozen.
Variation: you can also add ½ t. ground nutmeg, 1-2 T. chopped chives or 1 T. parsley flakes for a little different flavor.
Rolls rising
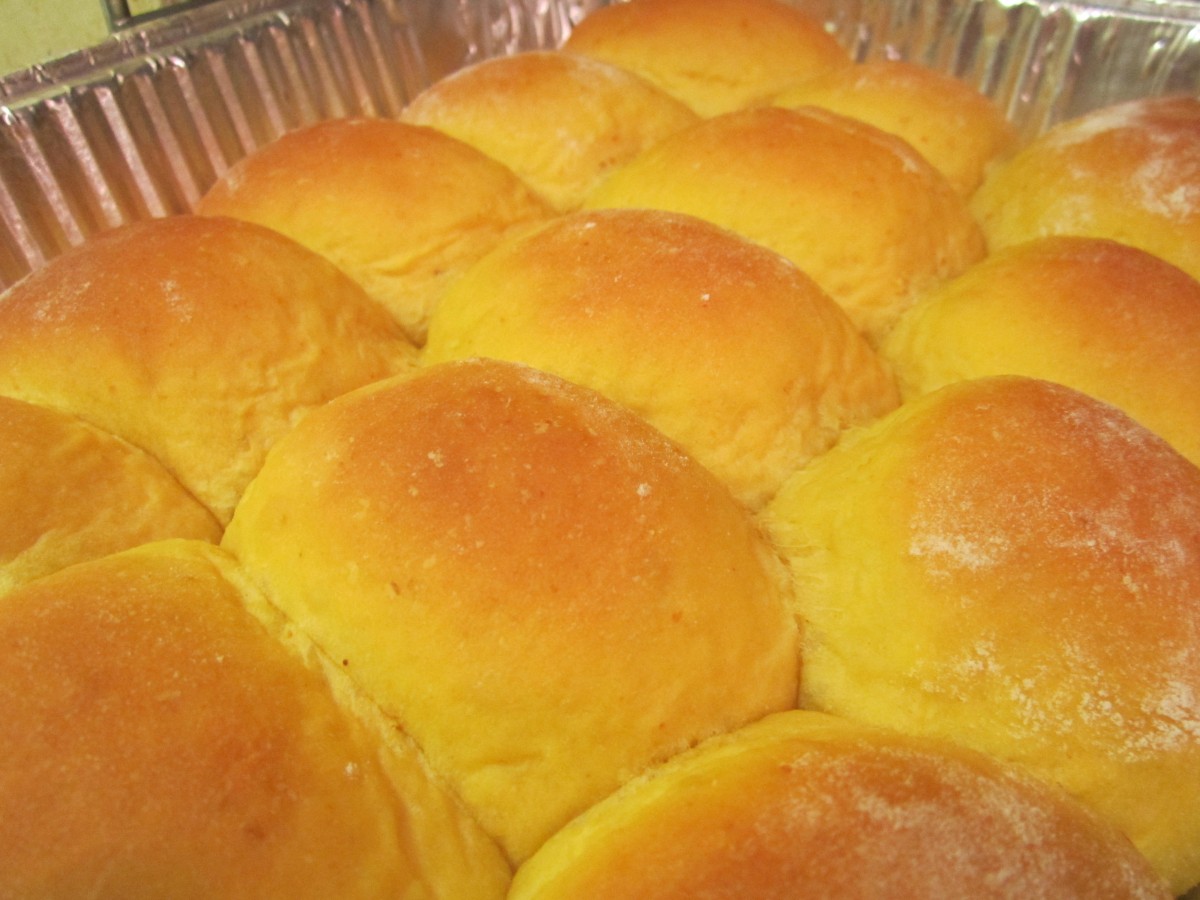
Fresh from the oven
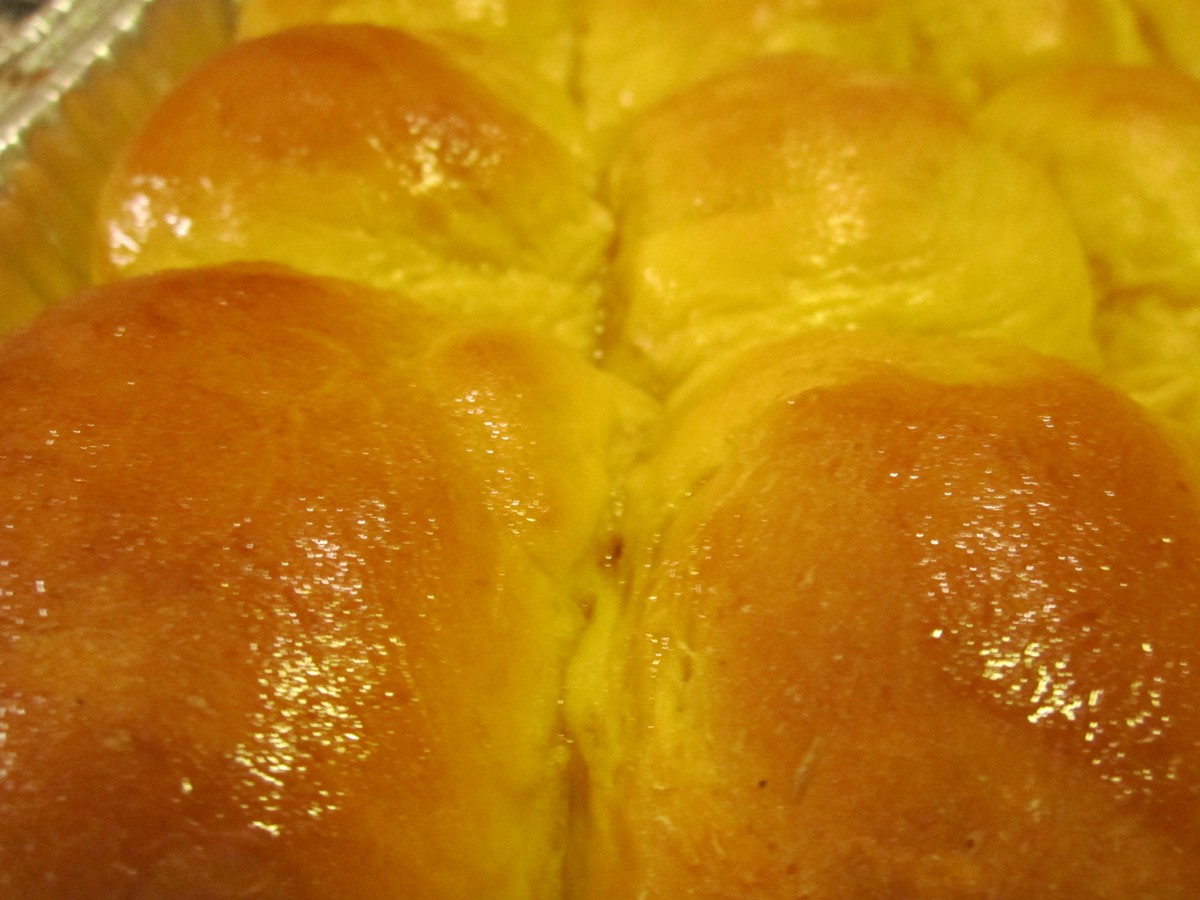
Brush with melted butter while warm
Maple Cookies
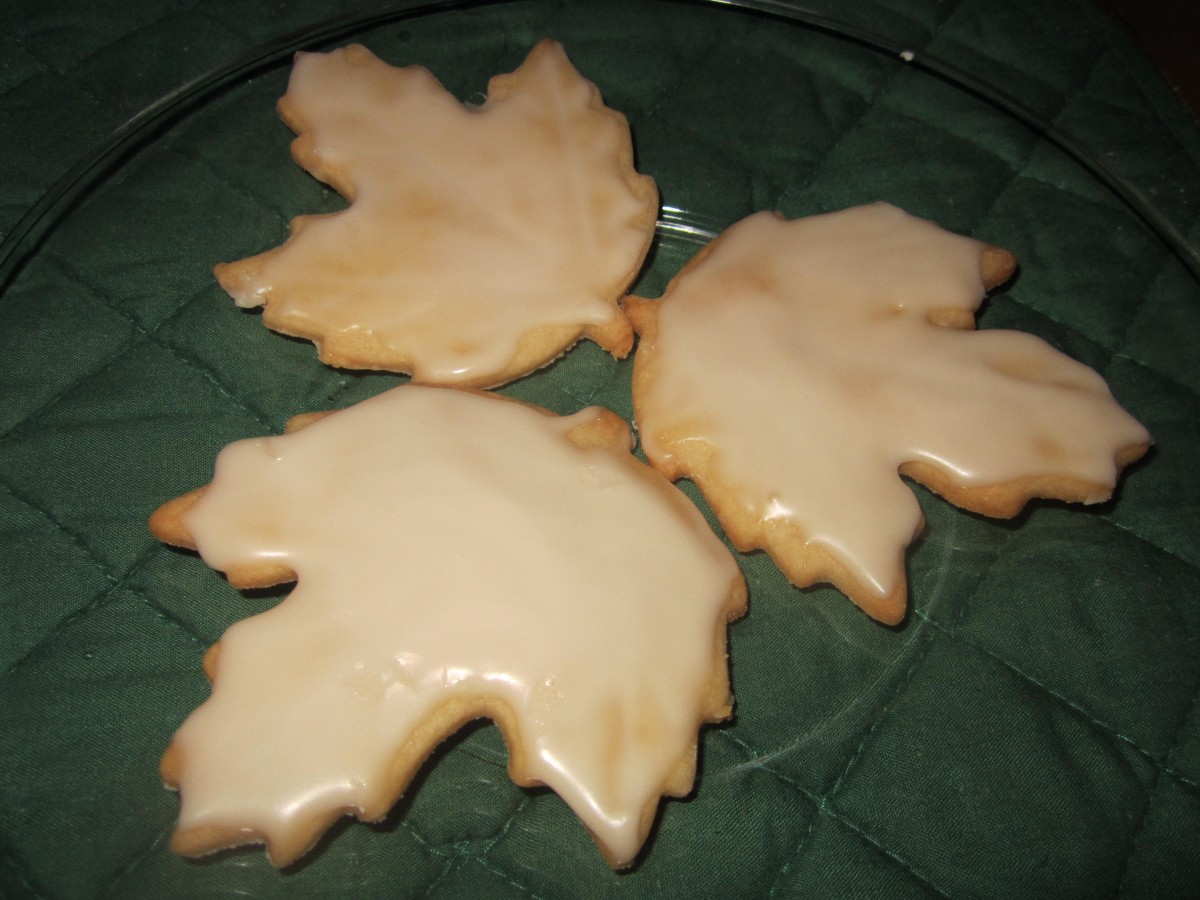
Maple Cookies
Maple syrup is one of my favorite natural sweeteners. I’m referring to REAL maple syrup not the “maple flavored” stuff. The addition of maple syrup makes these cookies really special. Nice dessert for Thanksgiving or any time, really. Crisp and mildly sweet they can be eaten plain or you can coat them with a maple glaze after they have cooled. Cookies are crisp but will soften slightly, if glazed. Either way, they are really tasty.
Maple Cookies
1 c. butter
1 c. sugar
½ c. maple syrup
1 egg yolk
3 c. flour
3/4 t. salt
Glaze:
2 c. powdered sugar
½ c. maple syrup
To make glaze: Beat sugar and syrup together until smooth.
Beat together butter, sugar and syrup. Beat in yolk. Combine flour and salt and add to butter mixture. Mix well. Wrap dough in plastic wrap and chill. Roll chilled dough 1/8 inch thick and cut out with assorted cutters. Leaves and other autumnal cutter shapes are best. Place on an ungreased baking sheet and bake in a preheated 350-degree oven for 12 minutes. Cookies should be lightly browned around the edges. Cool and decorate with glaze. Makes about 4 dozen cookies.
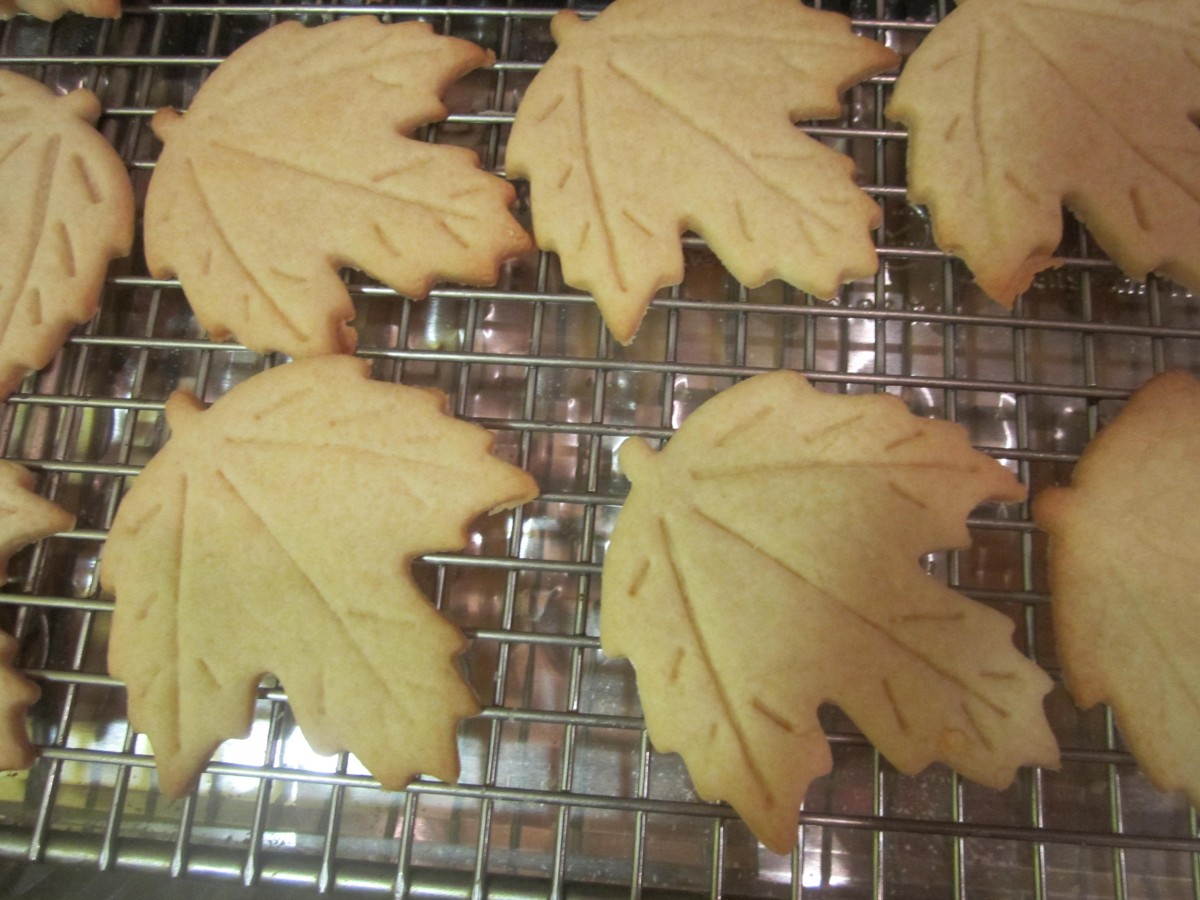
Fresh from the oven
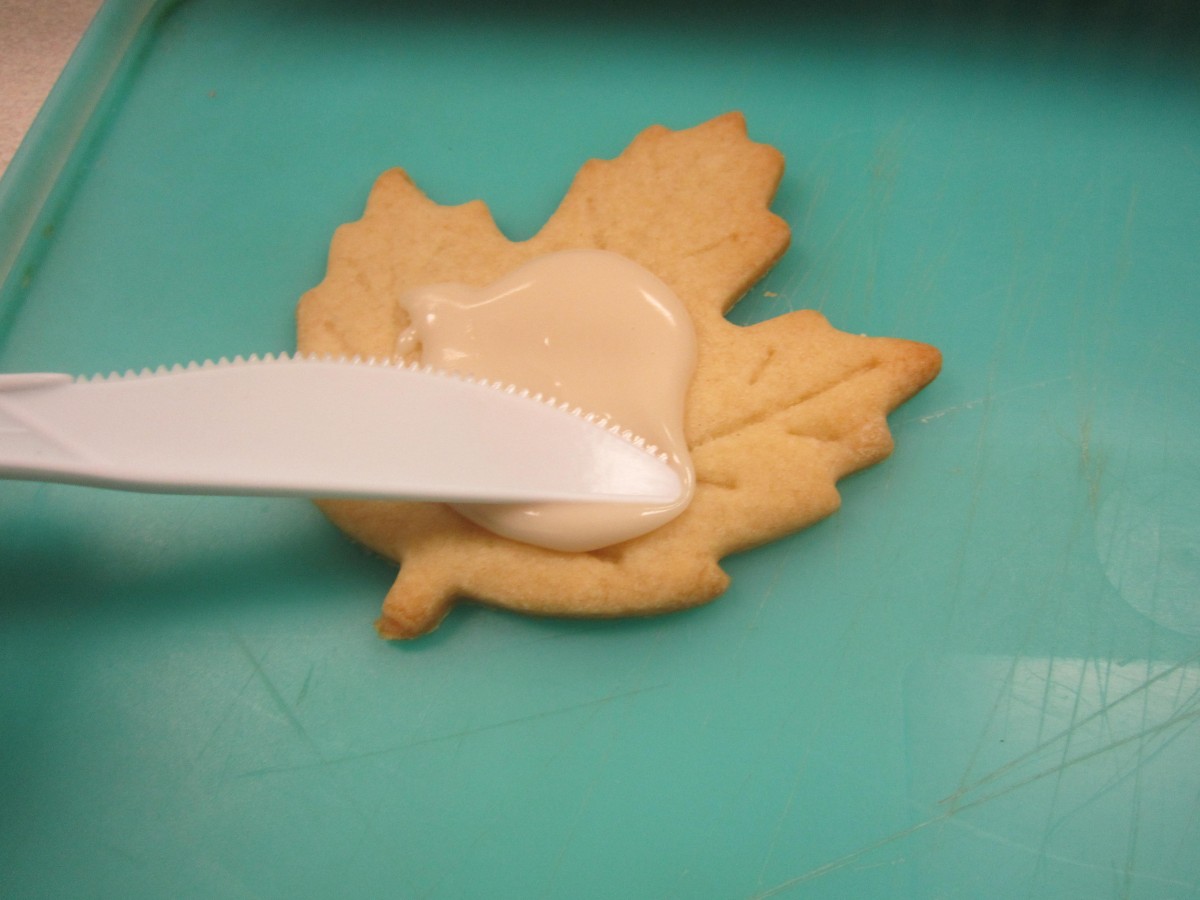
Coat with maple glaze

Glaze will harden
Maple Bacon Apple Fritters
Maple Bacon Apple Fritters
They taste as wonderful as they sound. I wanted to take dessert to dinner last night. I had a lot of apples and a couple of hours. I’d made several apple cakes lately so wanted to go in a different direction. Apple fritters seemed like a good idea. I made a yeast dough and used just enough flour to make a thick batter. I wanted them to be light. The original plan was just to make apple fritters but since I was cooking bacon for another dish already it seemed like a cool idea to add bacon to the dough. Then the idea of making the glaze with maple syrup made sense. I decided I had better post this soon- before I forgot what I did.
Maple Bacon Apple Fritters
3 c. flour
1 packet active dry yeast
2 T. sugar
2 t. cinnamon
1 t. salt
1/2 c. half and half
1/2 c. water
1 egg
2 c. finely chopped apples- peels and cores removed
1/2 c. cooked crumbled bacon
oil for deep-frying
Glaze:
2 c. powdered sugar
several tablespoons maple syrup
In mixing bowl- I used a stand mixer- place 2 cups of the flour with the yeast, sugar, cinnamon and salt. Heat together the half and half and water until warm and add to flour mixture. Beat with electric mixer for 3 minutes. Add the egg and the last cup of flour and mix 4 minutes more. Batter will be very thick. Mix in apples and bacon. Cover and let dough rise for 45 minutes. Flour work surface and scrape dough onto floured surface. It’s sticky so be careful here. I dusted the dough with flour and shaped into a square. Handle as little as possible. Using a dough scraper- a knife would also work- I cut the dough into squares- about 2 inches across. Don’t worry about them being perfect. They are supposed to be rustic. Heat oil in pan to 350 degrees. Make sure oil is at least a couple of inches deep. To save on oil I used a smallish pan- but only cooked a few at a time. To know when I have reached 350 degrees I place a kernel of un-popped popcorn in the pan when heating the oil. The popcorn will pop at 350 degrees. When the oil is hot enough, fry the fritters, a few at a time, until golden on both sides. It will take a couple of minutes. Turn to cook on both sides. Drain 0n paper towels. While fritters are cooling mix powdered sugar with maple syrup to make a thick glaze for dipping. Dip fritter tops into the glaze- allow excess to drip off. Place on tray and glaze will drizzle to cover the fritters. Makes about 24.
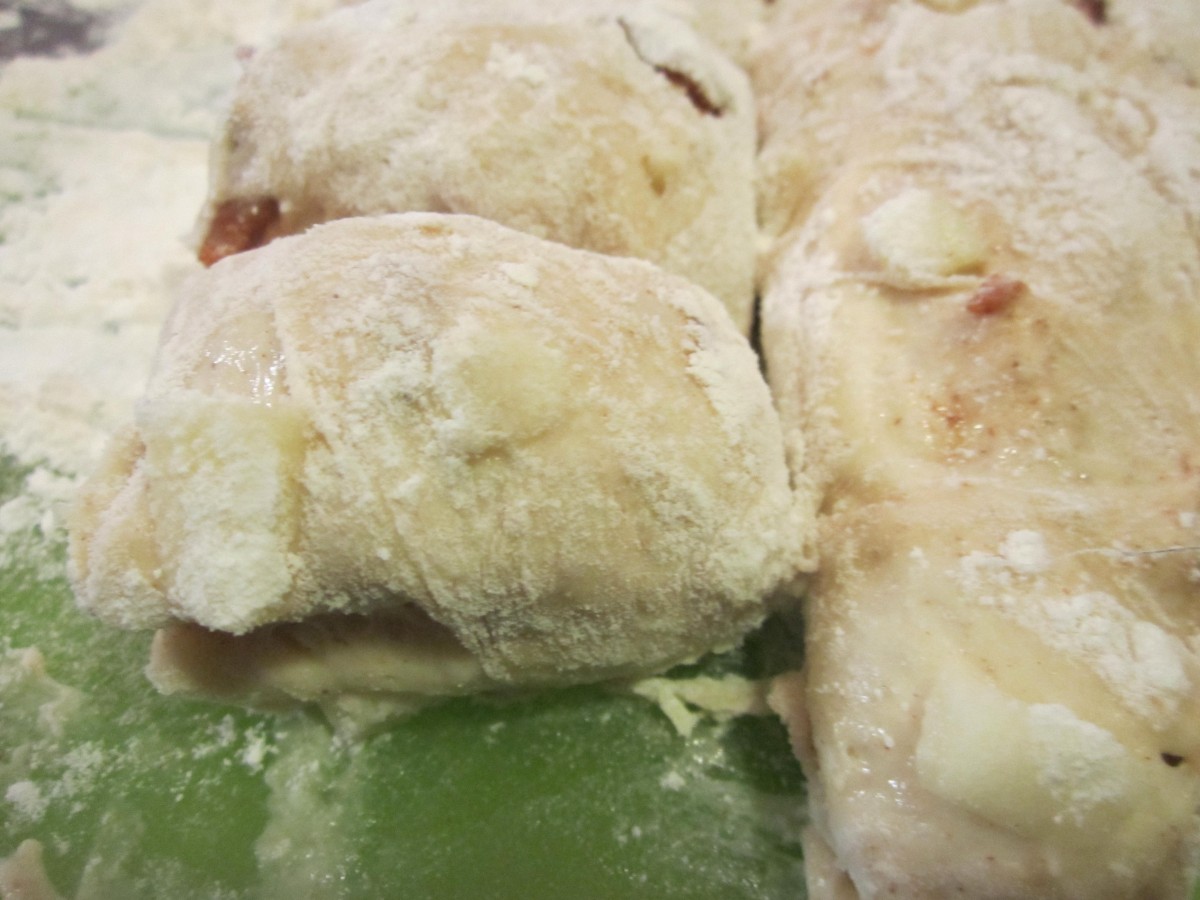
Cut dough into 2-inch squares
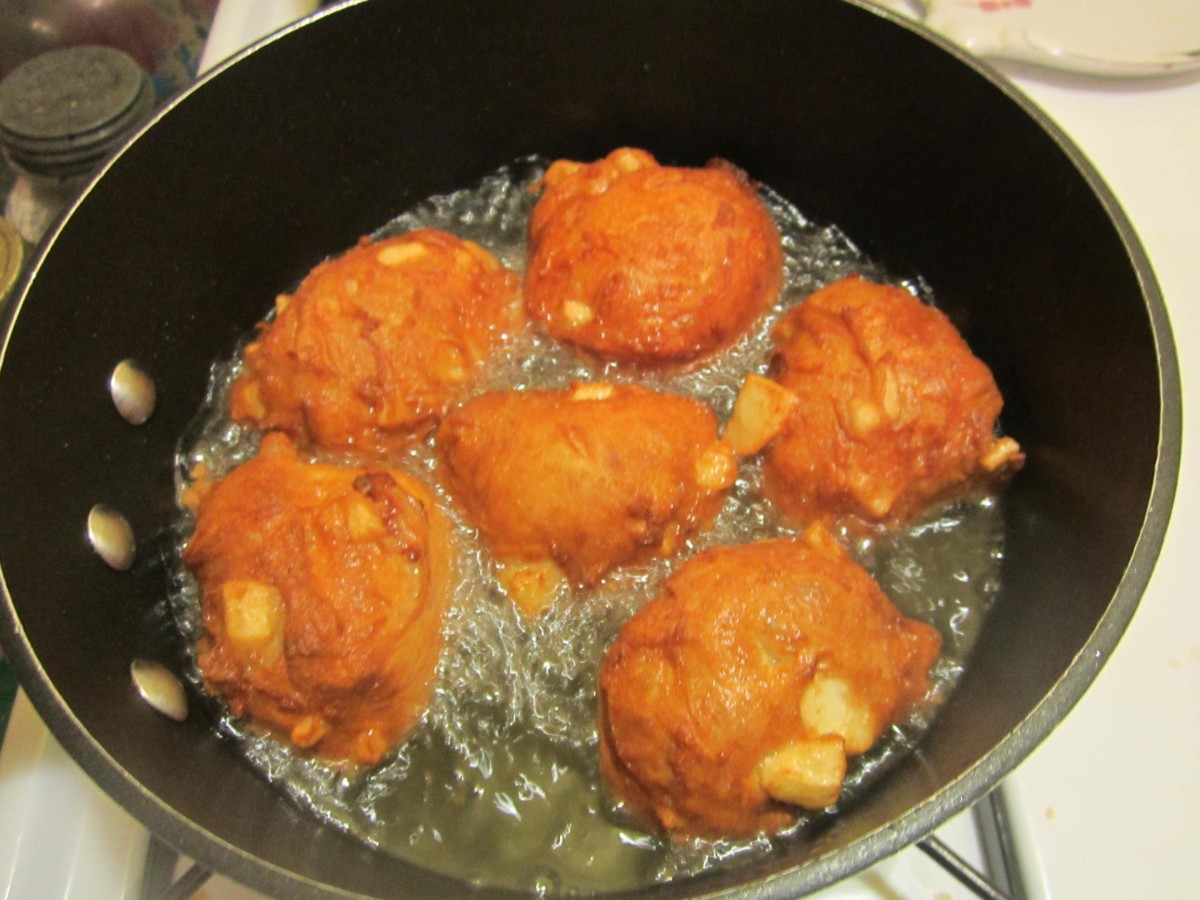
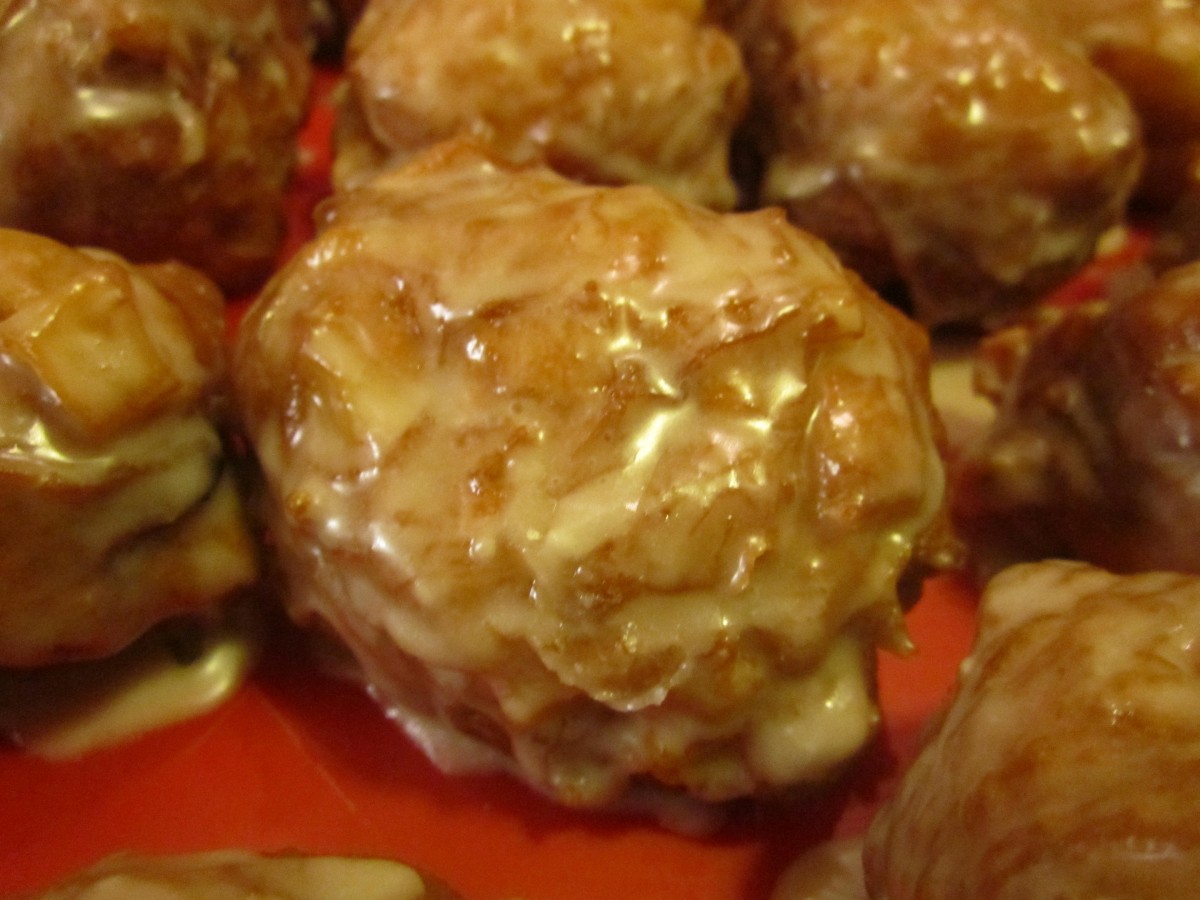
Fry until golden
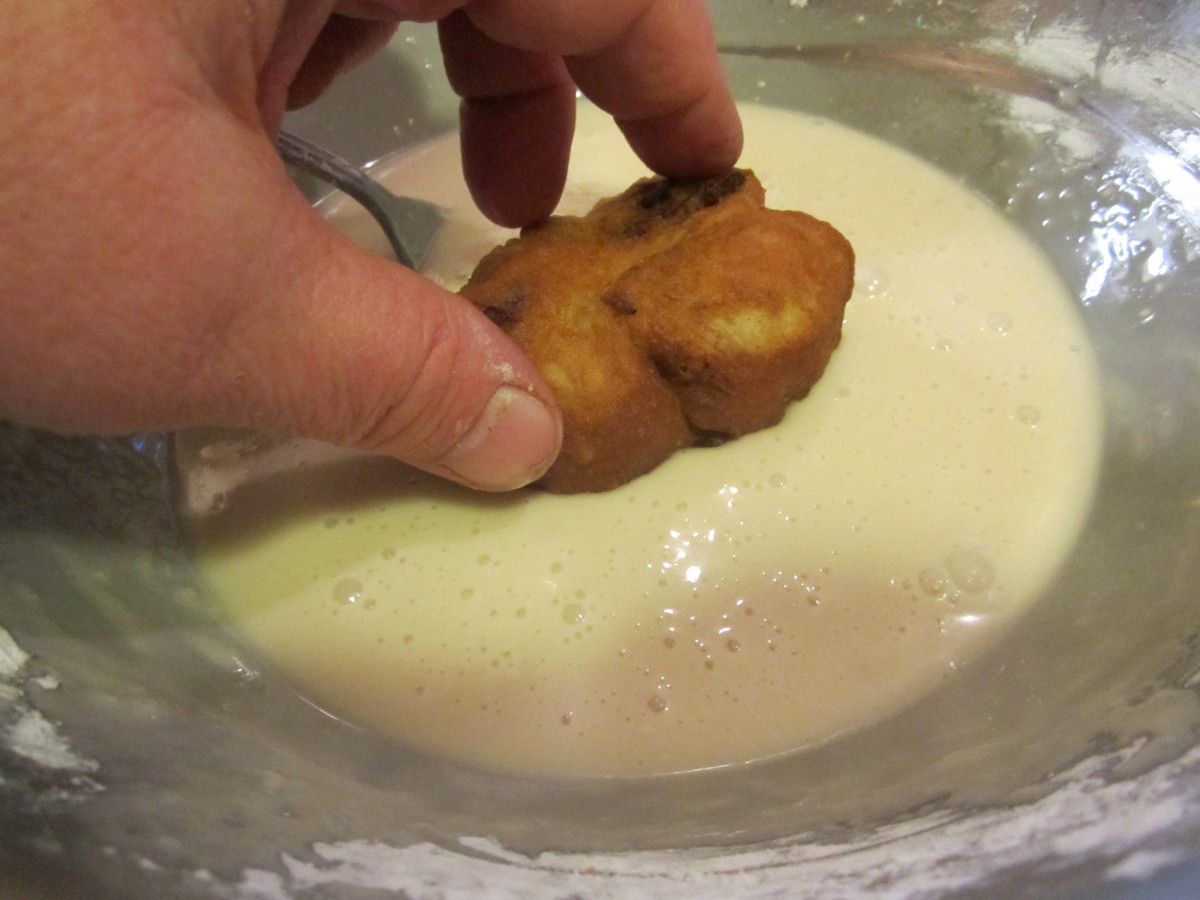
Dip warm fritters into maple glaze

Freshly dipped fritter

Glaze will harden as fritters cool


