Apple Bacon Fritters with Maple Glaze

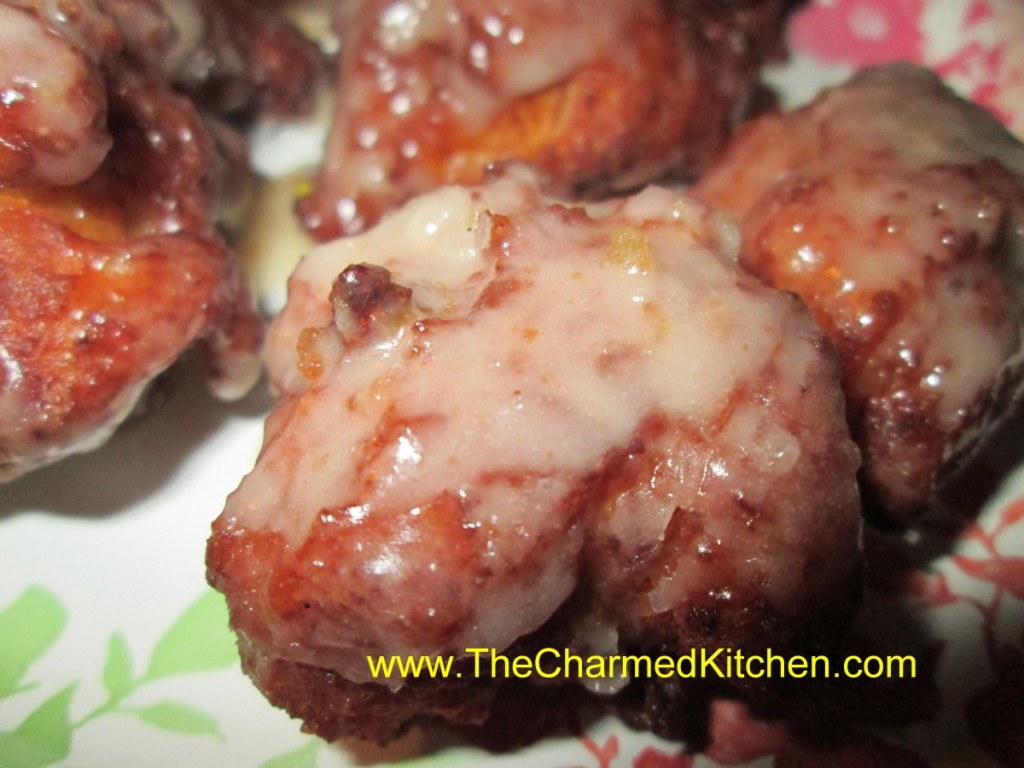
I recently posted a recipe for apple fritters. I also love this variation on that recipe. The batter contains diced, fresh apples and crispy bacon. The combination is really special.
Fritters aren’t difficult to make. They really don’t take that long to make, either. I prefer to make fritters close to when I am serving them- so my guests can enjoy them warm.
They make a wonderful dessert, or a fun addition to a breakfast or brunch menu. I dipped them in the maple glaze, which also went well with the apples and bacon.
I must warn you, they are addictive.
Apple and Bacon Fritters
2 c. flour
2 T. sugar
2 T. baking powder
1/2 t. salt
1 c. milk
2 eggs, beaten
2 T. melted butter
1 c. diced apples
1 c. cooked, crumbled bacon
oil for frying- I used coconut oil
Combine dry ingredients and set aside. Mix together milk with the eggs and butter. Stir in dry ingredients until just moistened and add the apples and bacon. Heat oil to 375. If using gluten free flour, heat oil to 350. Drop dough by tablespoonfuls into the hot oil and fry until golden brown. Don’t do more than 4-5 at a time. It will take about 4 minutes in total but you need to turn them to brown evenly so 2 minutes per side. Drain on paper towels. Dip in maple glaze (recipe follows) while warm. Makes about 32.
Maple Glaze
1 c. Powdered sugar
1/2 c. maple syrup
a little water if mixture gets too thick
Combine all ingredients and set aside until ready to use.
Martha’s Beets


I had picked up some beets from a produce market the other day. I have made this dish many times and it seemed like a good time to make it again. It is so tasty and easy to make. You just have to give the flavors time to develop.
This is a recipe that my friend, Martha, made for us one chilly autumn afternoon, many years ago. The amounts are random for a reason. Just use what you have- more or less – and let the flavors blend together gently. That is what Martha did.
Full of earthiness and great fresh flavors it is always a favorite of mine. I always think of her, with great affection, when I make it. Miss you, my beloved friend.
Martha’s Beets
Oil
2 Onions, chopped
Potatoes, cut in big chunks, peeled, if desired, about 2 lbs.
1 bunch beets, with greens*
Chicken or vegetable stock, 2-4 cups, using as needed
Parsley
Salt and pepper
Cook beets in boiling water for 20 minutes. Cool and slip off skins. Cut up beets into chunks. In large pot, cook onions in oil until tender. Add potatoes and prepared beets with just enough stock to keep them from sticking. Cover and cook over medium-low heat until vegetables are tender. Meanwhile, chop up the beet greens. Add them to the pot and stir in. Cover and continue cooking until greens are tender. Toss in fresh parsley and cook 5 minutes longer.
* If you can’t find beets with greens, or if you like more greens, you can also add red Swiss chard in place of the beet greens.
Apple Fritters

I love apple season. Besides eating them fresh, I enjoy cooking with apples. One of my favorite apple dishes is apple fritters.
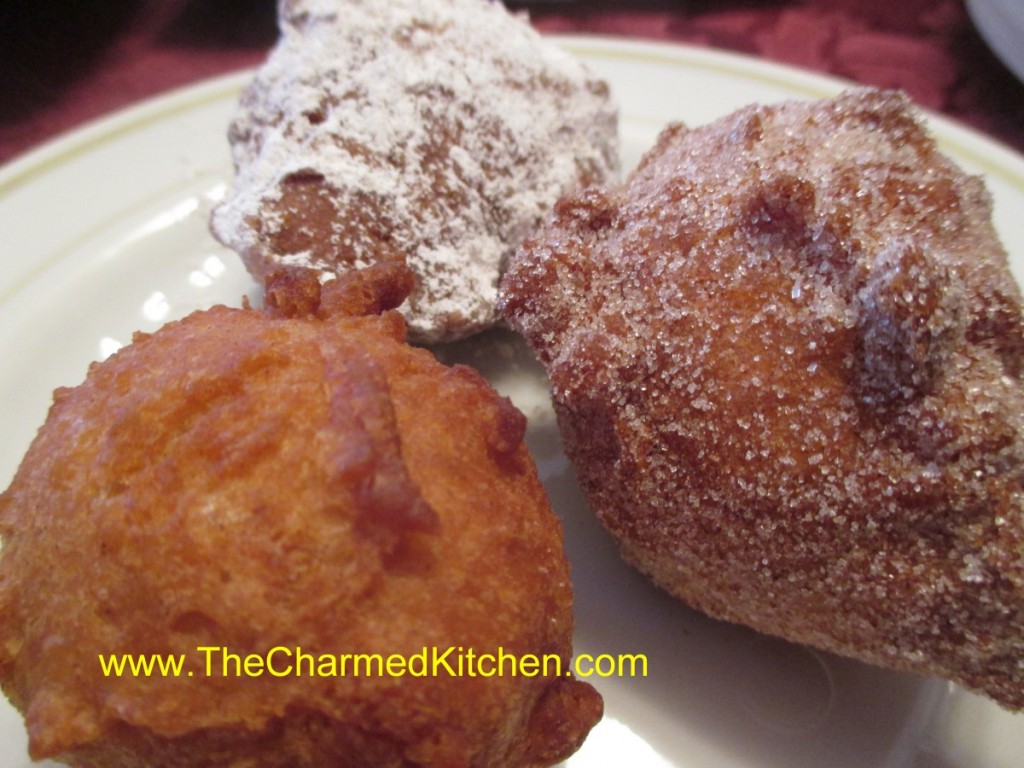
Fritters are similar to doughnuts. Rather than being made from a dough that is rolled and cut, like doughnuts, fritters are made from a batter. The fritter batter is spooned into oil for frying. They are actually very easy to make.
Good fritters are light and airy inside, with a crisp outside. These are very good fritters. These fritters have diced apples and cinnamon in the batter and cook up tender and light. Fritters are good plain, but can be rolled in powdered sugar, cinnamon sugar or drizzled with a powdered sugar glaze. Unlike a lot of the giant-sized fritters I see at local orchards and farm markets this time of year, these fritters are smaller. Only a few bites each. I actually prefer that.
For my gluten-free friends, I have made these fritters with gluten free flour. They tasted great. The gluten free version seemed to brown faster, so I turned down the temperature of the oil to 350 degrees.
So enjoy one of my favorite recipes of the season, and make yourself some fritters.
Apple Fritters
2 c. flour
2 T. sugar
2 T. baking powder
1 T. cinnamon
1/2 t. salt
1 c. milk
2 eggs, beaten
2 T. melted butter
1 c. diced apples
oil for frying
Combine dry ingredients and set aside. Mix together milk with the eggs and butter. Stir in dry ingredients until just moistened and add the apples. Heat oil to 375. If using gluten-free flour heat oil to 350. Drop dough by tablespoonfuls into the hot oil and fry until golden brown. Don’t do more than 4-5 at a time. It will take about 4 minutes in total but you need to turn them to brown evenly so 2 minutes per side. Drain on paper towels. While warm roll in powdered sugar, cinnamon sugar, or drizzle with a powdered sugar glaze. Makes about 32.
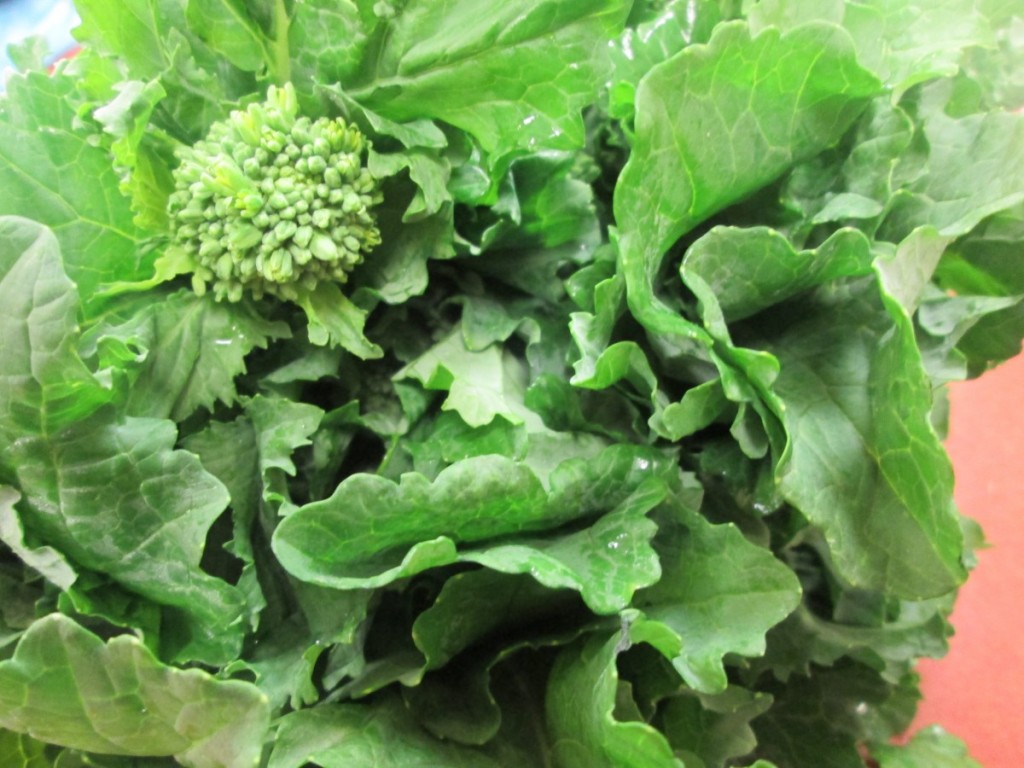
Broccoli Rabe With Pasta and Walnuts


If you haven’t had broccoli rabe before, maybe you should give it a try. I am always surprised at how many people have never tried broccoli rabe- also known as rapini. This versatile vegetable consists of stems, leaves and small florets, with a strong broccoli flavor.
I think perhaps the sometimes strong, even bitter flavor, might turn people away from trying it. I enjoy that bitterness. If you don’t, you can temper it by blanching the broccoli rabe. That’s what we did with this dish. We also paired the broccoli rabe with pasta and some cheese which also mellows out the flavor. We made this dish in cooking class the other night and everyone enjoyed it. even better, none of them had eaten broccoli rabe before class.
Broccoli Rabe with Pasta and Walnuts
1 bunch broccoli rabe (rapini), trimmed and cut into 1-inch pieces
1 (8 ounce) box uncooked pasta
½ c. walnuts
3 tablespoons olive oil
2 large cloves garlic, sliced- I often add a few more
salt and black pepper to taste
1/2 cup shredded Parmesan cheese
Fill a large pot with lightly salted water and bring to a rolling boil over high heat. Once the water is boiling, stir in the broccoli rabe, and cook until just tender, about 5 minutes. Remove with a slotted spoon, and set aside. Return the water to a boil, and stir in the pasta. Cook, uncovered, stirring occasionally, until the pasta has cooked through, but is still firm to the bite. Drain well in a colander set in the sink. While the pasta is cooking, cook and stir the walnuts in a skillet over medium heat until fragrant, about 5 minutes. Set the nuts aside, add the olive oil, and reduce heat to low. Stir in the garlic, and cook until golden brown, about 3 minutes. Stir in the broccoli rabe, and cook 3 minutes to reheat. Season to taste with salt and black pepper, then stir in the drained pasta and walnuts. Toss with Parmesan cheese before serving. Serves 4.
Cheesy Pumpkin Dip

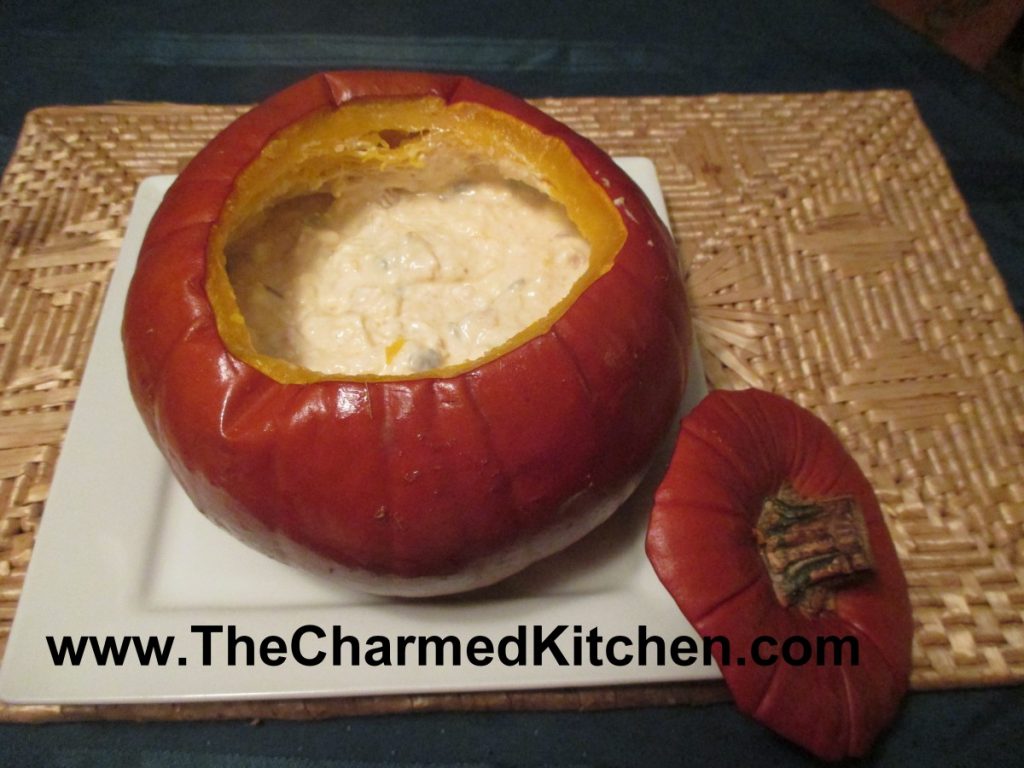
This is a pretty way to serve dips this time of year. The dip bakes inside the pumpkin- and the pumpkin bakes, too. It is served hot. Fun for Halloween, Thanksgiving, or just movie night with the family.
It really is simple and could be filled with any number of combinations of cheesy goodness. I have included the recipe I used in the picture. I also included my recipe for Spinach and Artichoke Dip, to give you another option.
You could also add a hot cheese sauce and serve like fondue, with long forks and pieces of bread.
You just get a pie pumpkin, about 2-3 lbs. Cut off the top to make a lid and scoop out the seeds, like you would if you were making a Jack-o-Lantern. Wipe off the outside and then just fill it up with the dip mixture. Put the lid back on, bake for an hour, and you are good to go. The fun part is scraping some of the cooked pumpkin in with the cheese dip. More detailed directions follow.
So here is the recipe for making the cheesy filled pumpkin. I think it is simple enough to serve anytime, not just on a holiday. Enjoy!!
“Pumpkin” Cheese Dip
Directions: Preheat oven to 350 degrees. Cut off top of pumpkin. Cut in at an angle, so top will fit like a lid and not fall in. Set top aside. Scoop out seeds and clean out any stringy bits*. Set pumpkin on a baking sheet. Combine cheese filling of your choice and place inside the pumpkin. Place the top of the pumpkin back on the pumpkin, and place in oven. Bake for 1 hour. Remove pumpkin and place on heat proof dish. I used a glass pie plate. Remove lid. Serve with crusty bread or crackers.
Smoky Cheese Dip
8 oz. cream cheese, cubed
4 oz. extra sharp cheddar cheese, shredded
8 oz. bacon, cooked and crumbled
½ c. sour cream
¼ c. mayo
¼ c. chopped parsley
½ t. each cumin and smoked paprika
Pinch of nutmeg
½ c. hulled pumpkin seeds
In medium bowl, stir together all ingredients, except the seeds. Place this mixture in the pumpkin when ready to bake. Don’t add the pumpkin seeds until right before serving. Stir them in a little, if you like.
Another nice choice…….
Spinach and Artichoke Dip
1 (12-14 oz.) can artichoke hearts, drained and coarsely chopped
10 oz. package frozen spinach, thawed and squeezed dry
8 oz. cream cheese, cubed
4 oz. shredded cheddar cheese
½ c. diced onion
¼ c. Italian dressing
Dash of hot sauce
In medium bowl, combine dip ingredients, stirring to combine. Place in pumpkin when ready to bake.
* You can rinse off the seeds, lightly salt them and toast them, if you like. Then serve with the pumpkin dip. If you aren’t interested in eating them- please put them outside for the birds to eat.
Pear Sweet and Sour Sauce


I love sweet and sour sauce. I have made many versions over the years and have used different fruits in them. I decided to try to make sweet and sour sauce with a ripe pear. It worked out wonderfully. Even better than I expected, actually. The sweetness of the pear was a great addition to the sauce. It came out a rich, mahogany color and is full of flavor. I will make a double batch the next time. I have already enjoyed it with egg rolls. Thinking of making sweet and sour chicken next.
I try to be as exact in measuring as I can. I had a pretty big Bartlett pear, but use 2 small pears, if that is what you have. Any pear will work in this recipe- just be sure it is ripe. As the sauce cooks the pear pretty much falls apart and disappears into the sauce. I also used Sriracha sauce, which is hot, but not as hot as some other hot sauces. Depending on the brand you are using, you might want to add less. Then again, heat is a matter of personal preference. Spice it up according to your own taste. That is one of the perks of making it yourself.
When I make a sweet and sour sauce- I use Clear Gel, instead of traditional corn starch. It is modified cornstarch (non-waxy) and when you reheat the sauce, it will stay thick. Regular cornstarch will often thin out when reheated. Clear Gel is used in pie fillings and a lot of frozen foods and condiments. Often listed on the label as modified food starch. It looks just like regular cornstarch. I buy mine online or when I am in stores in Amish communities.
So here is the recipe for a sweet and sour sauce I will surely make again. Planning on making some to freeze, too.
Pear Sweet and Sour Sauce
1 large pear, (about 8 oz.) peeled and diced fine
½ c. cider vinegar
½ c. sugar
3 T. soy sauce
1 T. minced garlic
1 T. Sriracha sauce- or other hot sauce- add to suit your taste
2 t. grated ginger
3 T. water
2 T. cornstarch or Clear Gel*
2 t. sesame oil
In medium saucepan, combine all ingredients, except the water, cornstarch and sesame oil . Simmer mixture, covered about 5-7 minutes, or until pear becomes tender. Stir occasionally. Combine cornstarch with water and stir until smooth. Pour slowly into simmering pear sauce, stirring to prevent sticking. Sauce with thicken. Stir in sesame oil. Makes about 2 cups. Keeps in fridge for weeks.
* If you use a type of cornstarch called Clear Gel, you can reheat the sauce without it becoming runny. Clear Gel, also called modified food starch, or modified cornstarch, is available online and at some specialty food stores. I find it in Amish communities.
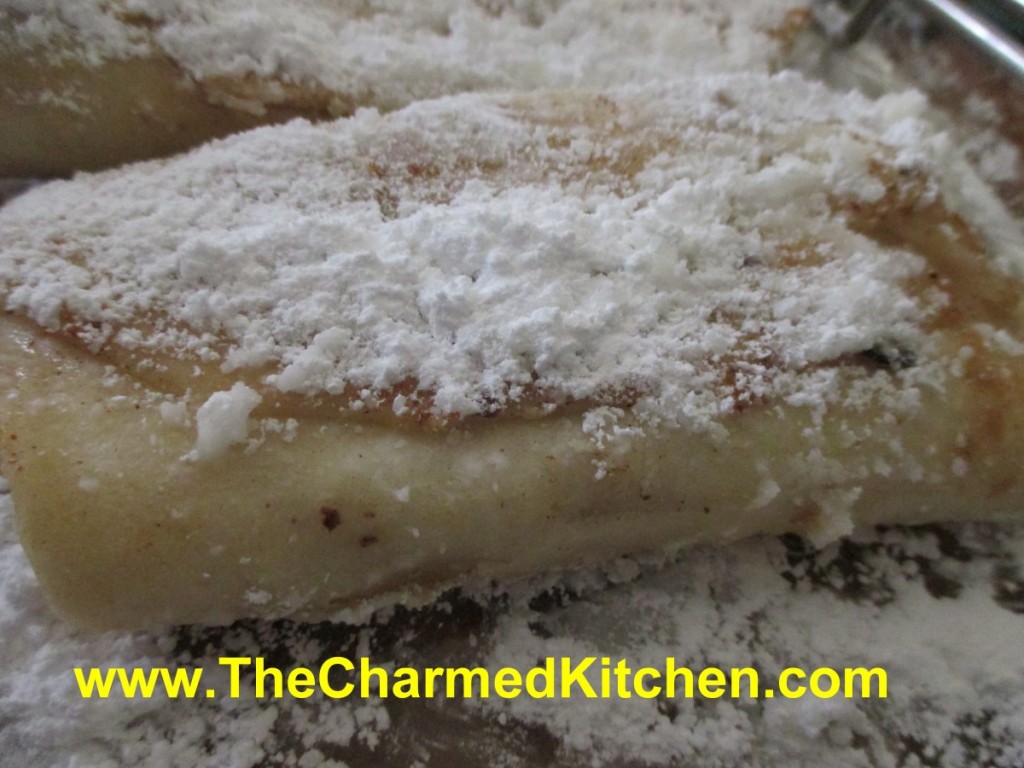
Apple Pie “Blintzes”

Since I posted the recipe for making your own apple pie filling a few days ago., I thought I’d share a fun way to use it- other than in a pie. In a tortilla class with kids, we made “blintzes” with the pie filling.
We used flour tortillas for the crepes. Don’t get me wrong, I love making real crepes. But, when you don’t have the time, the tortillas are a fun and tasty substitute.We soaked the tortillas in milk. By soaking the tortillas in milk, they soften up, and can be used like a crepe. Soak them for about 10 minutes, or up to 30 minutes. If you don’t want to soak them in milk, you can use a milk substitute or even juice or water.
After they are filled, the blintzes are toasted in a pan with butter, than dusted with powdered sugar. They are so tasty. Like a warm apple pie. These were a big hit with the kids.
They make a nice dessert, but they can be served for breakfast or at brunch.
Apple Pie Blintzes
10-12 flour tortillas
1/2 c. milk
2 c. apple pie filling
3-4 T. butter
Powdered sugar or cinnamon sugar, for topping the blintzes
For the filling, I used some of my homemade apple pie filling. If you have fresh apples, you can just peel and slice the apples, then cook them in a little water and sugar until softened. You can make them as sweet as you like. You made need less sugar if the apples are extra sweet. Add some cinnamon and nutmeg, too. If they are too watery- combine a little cornstarch with cold water and drizzle the mixture in until the apples thicken up. Don’t add too quickly or you might them too thick and gummy.
Place tortillas in a shallow pan, drizzling with a little milk as you go. Set aside for a few minutes, so the tortillas will soften.
To assemble the blintzes, place a softened tortilla on your work surface and spoon a little apple filling in the middle. You can do this with hot filling, but cold or room temperature filling is easier to use. Don’t over fill them or you won’t be able to fold them up. I used 8-inch tortillas and used about 1/3 cup of filling for each one. Fold the sides in until they almost meet in the middle and them roll the tortilla up to cover the filling. Place seam side down until ready to fry them.
Heat butter in a skillet, and brown the blintzes over medium heat until lightly toasted on both sides. They will be crispy on the outside, but tender in the middle. Put on a serving plate, sprinkle with powdered sugar and serve while warm. These are fine just as they are, but feel free to add ice cream or whipped cream, too.
I have made these before and use different fruit fillings. I’ve even made a cheese filled version a few times. It seems I usually have a package of tortillas, so it is a go-to dessert for me in a pinch.
Flaming Ghost Cake

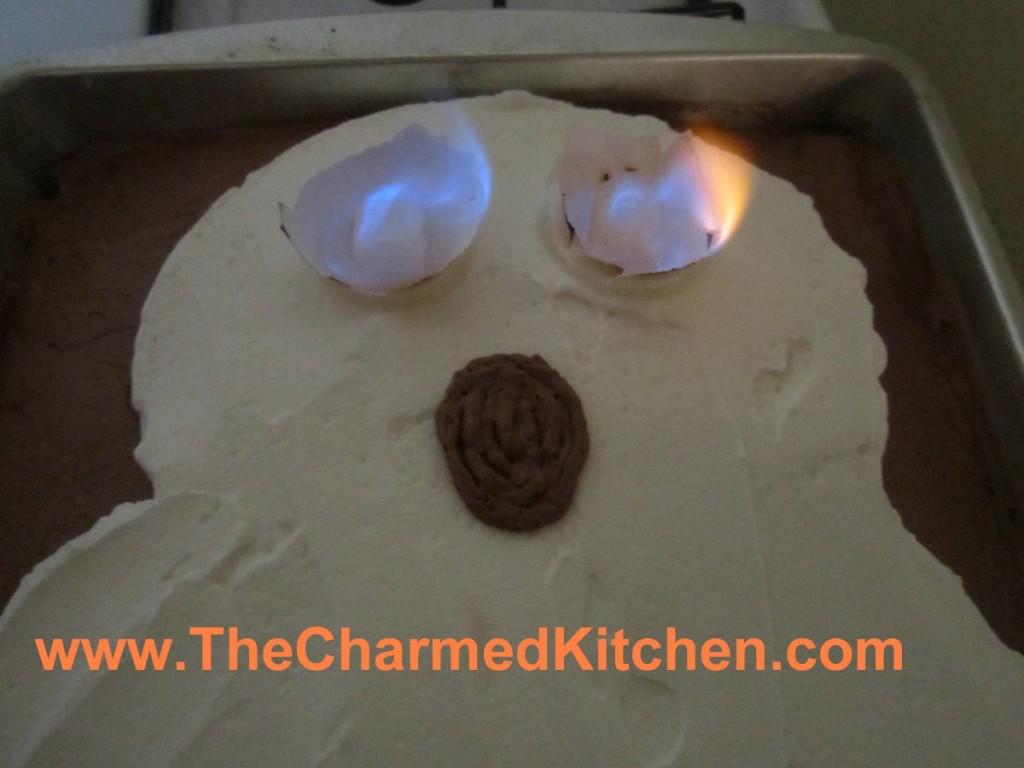
I have posted this recipe before, but thought it might be a good time to post it again. This one is fun for Halloween. You start with a baked 9×13-inch cake. Frost it with chocolate frosting and then use white frosting to draw a ghost on the cake.
You can make all sorts of images- cats, bats, pumpkins. When ready to serve the cake, the eyes are set on fire. Fun effect. Kids and grown-ups both will get a kick out of it.
Just be sure to have proper adult supervision for the kids. The picture doesn’t do it justice. Very cool blue flames. Don’t forget to turn down the lights!
Flaming Ghost Cake
1 prepared 9×13- inch cake, any flavor
2 c. chocolate frosting, I prefer homemade
1 c. vanilla frosting, I prefer homemade
3 oz. semi sweet chocolate, optional
2 empty eggshell halves, washed well and dried
2 sugar cubes
Lemon extract
Frost cake with chocolate frosting, then spread vanilla frosting in the shape of a ghost. Melt chocolate in a small plastic bag. When chocolate is melted snip off the corner of the bag and use to outline ghost. Place eggshell halves in cake, round side down where the ghost’s eyes would be. Soak sugar cubes in lemon extract and place in eggshells. When ready to serve light sugar cubes and turn off the lights. Serve 12-16.
Variations: You can use the flaming eyes effect on cat shapes, pumpkins or even bats. Practice drawing the shape on paper before frosting the cake. If you bake a larger round cake the whole thing can be the pumpkin. Just frost it with orange tinted frosting.
Pear and Pecan Coffee Cake

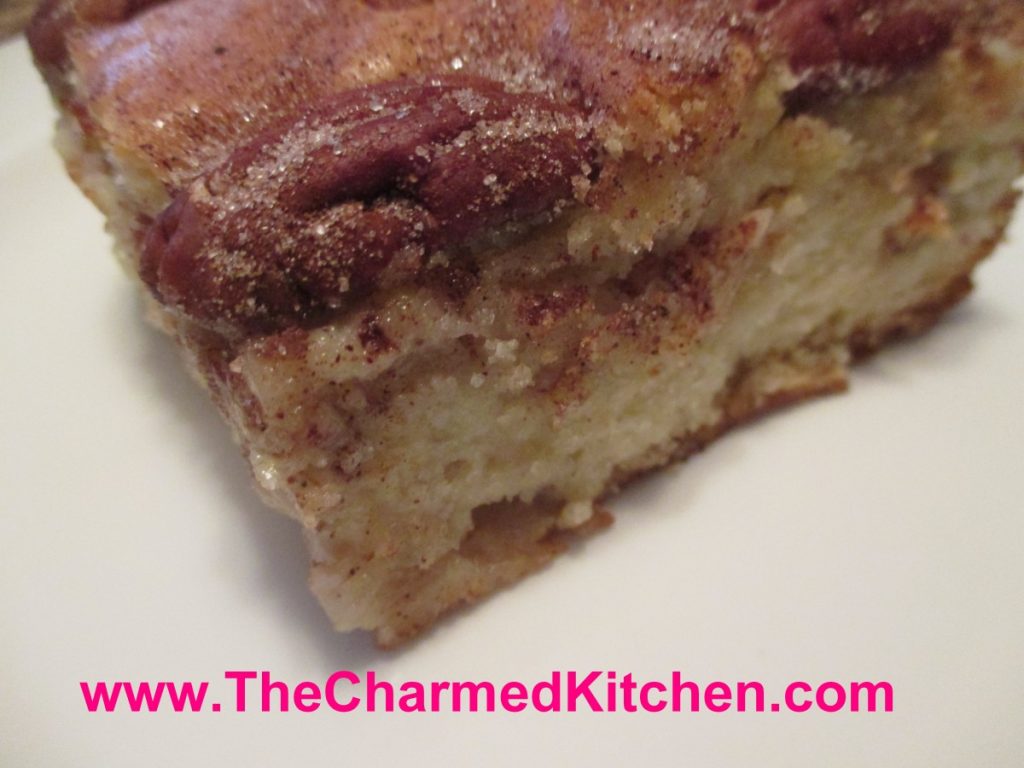
This may be one of my favorite pear desserts. I combined ripe pears with pecans and cinnamon sugar to create this moist and flavorful cake. I had both Bosc and Bartlett pears, but use whatever pears you have on hand. They should be ripe, but still firm. In the recipe directions I say to have the pears peeled and sliced, and ready to go in the cake. I actually made the batter first, then prepped the fruit. Mostly because I was distracted and forgot. It worked out just fine. The upside was that the pears did not have a chance to discolor, and I didn’t have to put them in lemon water until ready to use.
The cake is wonderful served all on its own, but I also enjoy topping it with a scoop of ice cream or whipped cream.
Pear and Pecan Coffee Cake
1 c. oil- I like to use olive oil or avocado oil
4 eggs
1 t. vanilla
1/3 c. orange or lemon juice
3 c. flour
2 c. sugar
3 t. baking powder
¼ t. salt
3-4 pears, peeled, cored and sliced
½ c. sugar
1 T. cinnamon
¾ c. pecan halves or pieces
Grease a 9×13 inch pan. Preheat oven to 350-degrees. Combine oil with eggs, vanilla and juice until well blended. In a separate bowl, mix dry ingredients and add to egg mixture. Beat together until batter is smooth. Batter will be thick. Combine the ½ cup sugar with the cinnamon. Set aside. Place ½ of batter in prepared pan. Arrange pear slices on batter and sprinkle on ½ of the cinnamon mixture. Pour on remaining batter and top with the pecans. Sprinkle with remaining sugar mixture. Bake 50- 60 minutes or until toothpick inserted in cake comes out clean. Cool before slicing. Serves 10-12.
Halloween Spooky Sushi

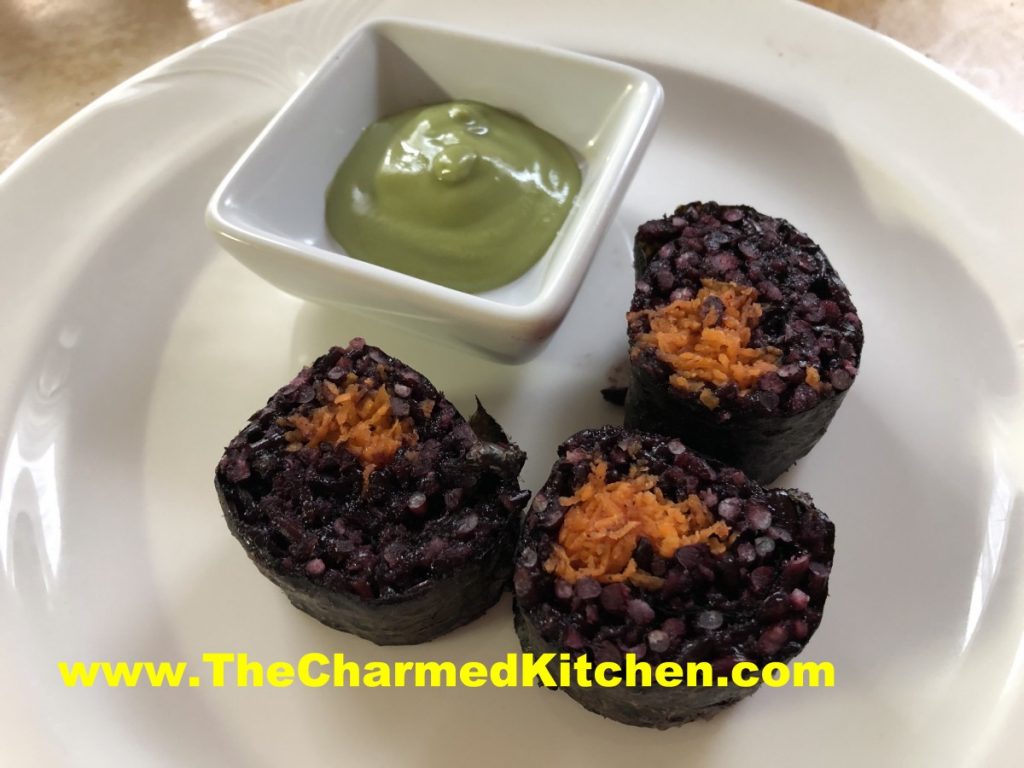
When I make sushi, I often use brown or black sticky (sweet) rice. I actually prefer the texture over the white rice. It occurred to me that the black sticky rice might make fun sushi for Halloween. I find black sweet rice at my local Asian grocery store. That is also where I get nori, rolling mats and wasabi.
To add a pop of color, I finely shredded carrots and added them to the sushi roll, too. The black rice actually cooks to a dark purple color. The color combination is fun for Halloween.
You’ll need a rolling mat, but beyond that, not a lot of special equipment is needed. I served my sushi with wasabi. You could serve with pickled ginger, too. Here is the recipe and directions.
“Spooky” Sushi
To make the rice:
4 c. black sweet rice, uncooked
4 c. water, or a little more
1 recipe Sushi Su, recipe follows
finely shredded carrots
In strainer, rinse the rice repeatedly with cold water until the water runs clear. Place rice in microwave safe container with the 4 cups of cold water. Cover container with a lid and place in microwave. I use a large Pyrex casserole dish that has a lid. Cook 20 minutes. Check for doneness and add a little more water, if needed. Cook another 10-15 minutes. Don’t stir the rice. Black rice takes longer to cook than white sushi rice. You want it to be cooked, but not mushy. Cooking times vary by microwave. Remove from the microwave once cooked and let stand, covered, for 10 minutes. Place rice in a large, cool bowl and pour on the Sushi Su, tossing in. Fan rice while tossing to give it a shiny look. Makes enough for 8 rolls.
Sushi Su:
1/2 cup rice vinegar
4 T. sugar
1/2 t. salt
msg, optional
Combine all and set aside until ready to use. You can also buy a dry powder of Sushi Su and you can use that instead. It is a 2.65 oz. packet.
Assembling Sushi
Place a sheet of nori ( dried seaweed sheets) on mat and spread about 1 cup of the rice over the nori, leaving about 1-2 inches empty on the far side. Place fillings in a strip a little off center away from the side with no rice. Start rolling up the mat using it to press the sushi roll and keeping the fillings in the nori. Once rolled, press the mat once more to seal and make the fillings stick together. Wetting the edge of the nori with a little water can also make the sushi stick better. Slice each piece using a sharp knife dipped in water.
Wrapping the sushi takes practice. Don’t be discouraged if the first few are a little less that perfect, Still, with a little practice it gets pretty easy. Just be careful not to overfill the rolls as it makes the job harder.


