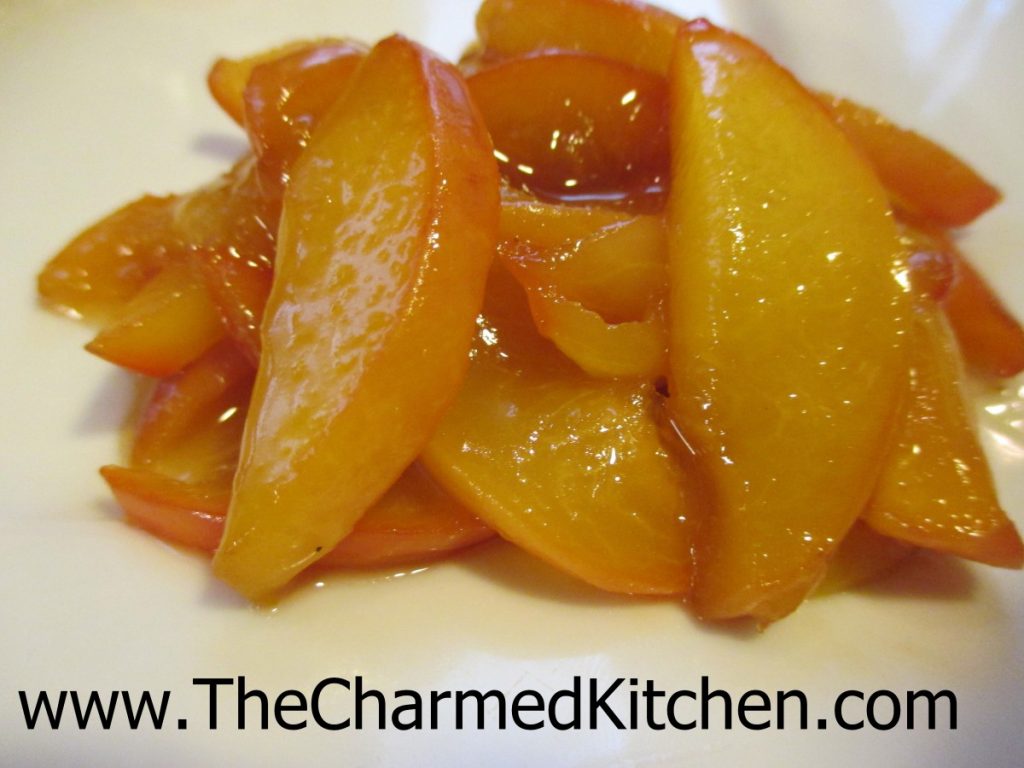
Honey Ginger Glazed Peaches

I am always looking for new ways to cook with old favorites. Peaches are a great example. When they are in season, I can’t get enough of them.
I have made peach ice cream, peach pie, peach pancakes, peach preserves, peach liqueur….. you get the idea. I wanted to enjoy peaches with dinner the other night. I decided, rather than just slicing them up and adding them to a salad, I would do a little more to transform them.
So I glazed them, the way you might glaze carrots. So simple. Why had I never thought of it before? The peaches were soft, slightly sweet, and a perfect side dish for the broiled chicken. I want to try these with lamb, pork or maybe duck next time.
I kept it pretty simple- peaches, butter, honey, ginger, salt and a dash of sriracha. I could see adding other herbs and spices. Might have to do a little experimenting. For now, here is the recipe for glazed peaches. I did not have any leftovers, so a hit, for sure. I did not peel my peaches, but feel free to, if you like.
Honey Ginger Glazed Peaches
4 medium peaches, pitted and sliced thin
2 T. butter
4 T. honey
1/2 t. fresh grated ginger
pinch of salt
Hot sauce to taste
Place peach slices in a small skillet. Add butter and remaining ingredients. Cook over medium heat until peaches start to get tender. This will take about 5 minutes. Stir once in a while to prevent sticking. Be gentle so you don’t mash the peach slices. Reduce heat to low and continue cooking a few more minutes. Peaches should be soft and the sauce thickened. Adjust seasonings.
Zucchini Carrot Cupcakes

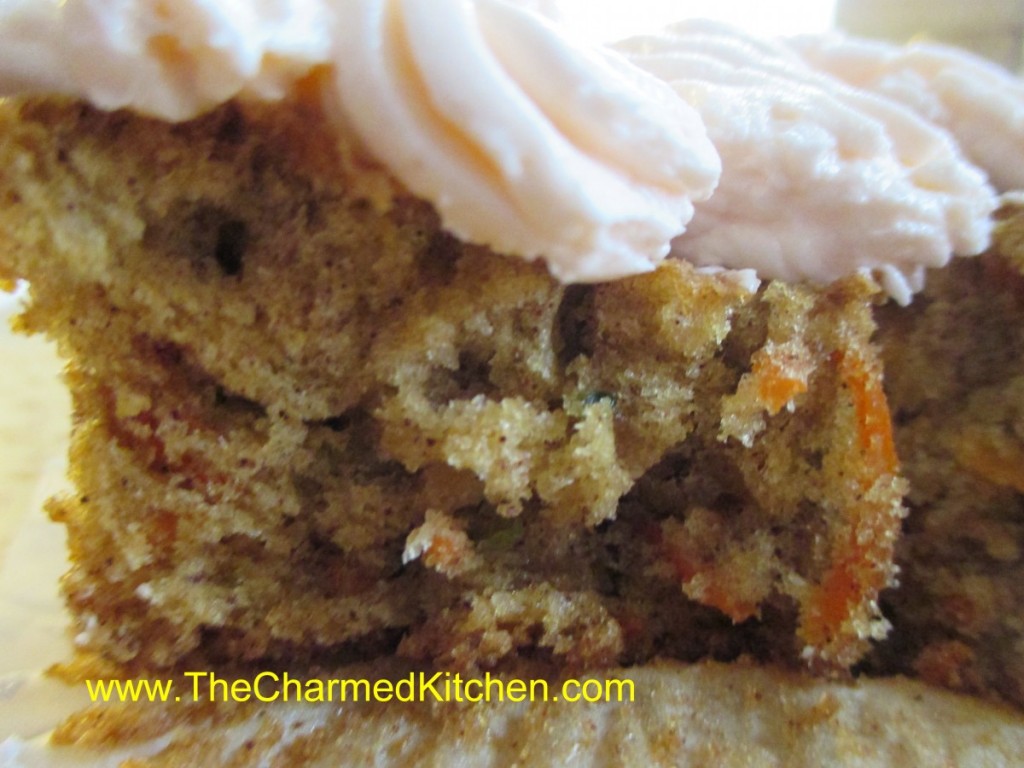
These are really good cupcakes. They are moist and not too sweet with a slightly dense texture. Sort of a cross between carrot cake and zucchini bread, they have more texture than a traditional cupcake and plenty of flavor. I had an abundance of zucchini and carrots and figured they might play well together.
I got 24 cupcakes out of the recipe but they were a little small. Perhaps 18 would be a better way to go. I used simple vanilla buttercream to finish them off. I whipped the frosting a long time so it was extra fluffy. Here are the recipes for both the cupcakes and the frosting.
Zucchini Carrot Cupcakes
2 eggs
1 c. sugar
2/3 c. oil
1¼ c. flour
1 t. baking powder
1 t. baking soda
1 t. cinnamon- I think I would use a little more next time
½ t. salt
1 c. grated carrot
1 c. grated zucchini, squeezed dry and packed tightly
½ c. chopped nuts, optional
Beat eggs with sugar until frothy. Beat in oil then add dry ingredients. Beat on high for 4 minutes. Stir in veggies and nuts. Pour batter into 18- 24 paper lined muffin tins, filling them 2/3 full. Bake in a 350-degree oven for about 15 minutes or until top springs back when lightly touched. Cool and frost. Makes 24.
Note: These cupcakes deflate a little while cooling.
Classic Vanilla Buttercream
3/4 cup butter
6 cups confectioners’ sugar
1/3 cup milk
1 1/2 teaspoons vanilla extract
1/4 teaspoon salt
2 tablespoons milk
Beat butter in a large bowl until fluffy. Gradually add 3 cups of the sifted confectioners’ sugar, beating well. Slowly beat in the vanilla, salt, and 1/3 cup of the milk. Gradually beat in the 3 remaining cups of confectioner’s sugar. Beat in additional milk (1 to 2 tablespoons) if needed, to make frosting of spreading consistency. You can also tint the frosting with juice (like pomegranate or raspberry) or food coloring.
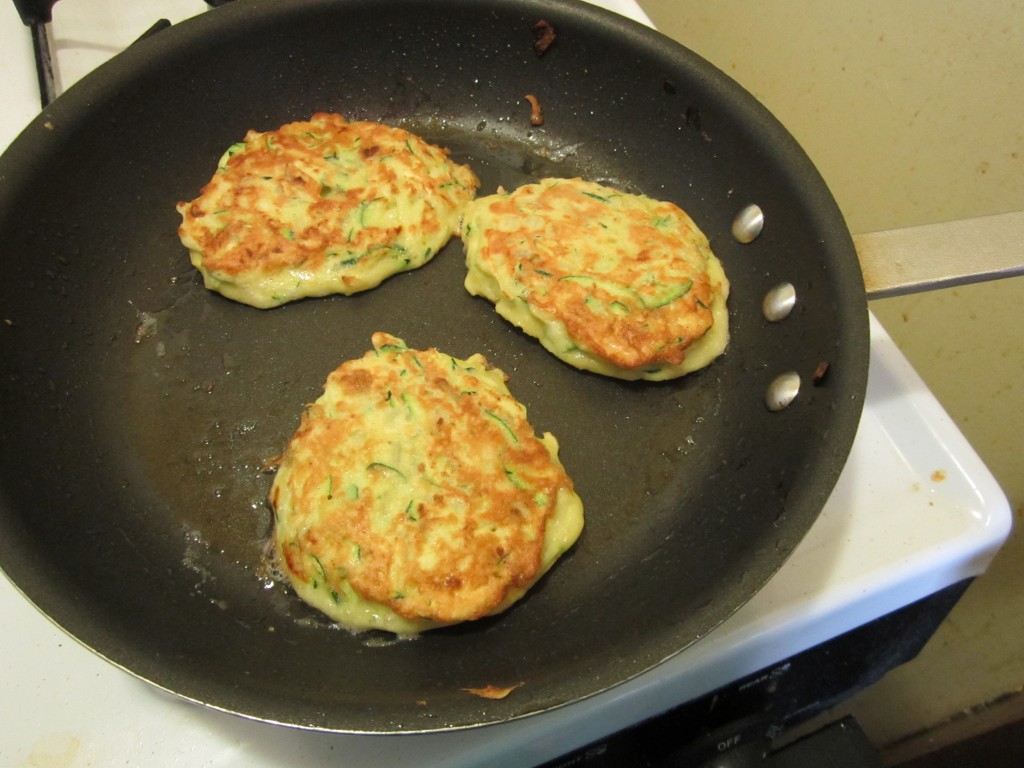
Zucchini Pancakes


You can never have too many zucchini recipes. Especially this time of year. This simple recipe uses zucchini to make tender and flavorful pancakes.
They aren’t the type of pancake you would pour maple syrup over. They are wonderful topped with some fresh salsa, though. I would- and have- eaten them for breakfast. These pancakes make a nice lunch or main dish meal. They can also be served as a side dish. Similar to potato pancakes.
I think they taste best when golden on the outside, a little crisp. They will still be tender inside.
So if you have more zucchini than you know what to do with, and you don’t want to bake zucchini bread, here is a recipe you might want to try.
Zucchini Pancakes
2 c. shredded zucchini
1 medium onion, diced
2 eggs
1/2 c. flour- you made need a little more or less depending on how moist your zucchini is
2 t. hot pepper sauce, or to taste
1 t. baking soda
salt to taste
oil for cooking
Combine all ingredients, except the oil, in a medium bowl. Heat oil in skillet and spoon batter in. I used a little over 1/4 cup for each. Cook over medium heat until lightly browned around the edges. Flip and cook until golden on both sides and pancake springs back when touched lightly. Remove to platter and keep warm. Repeat with remaining batter. Serve with salsa or sour cream. Makes 8.
Eggplant “Fries”

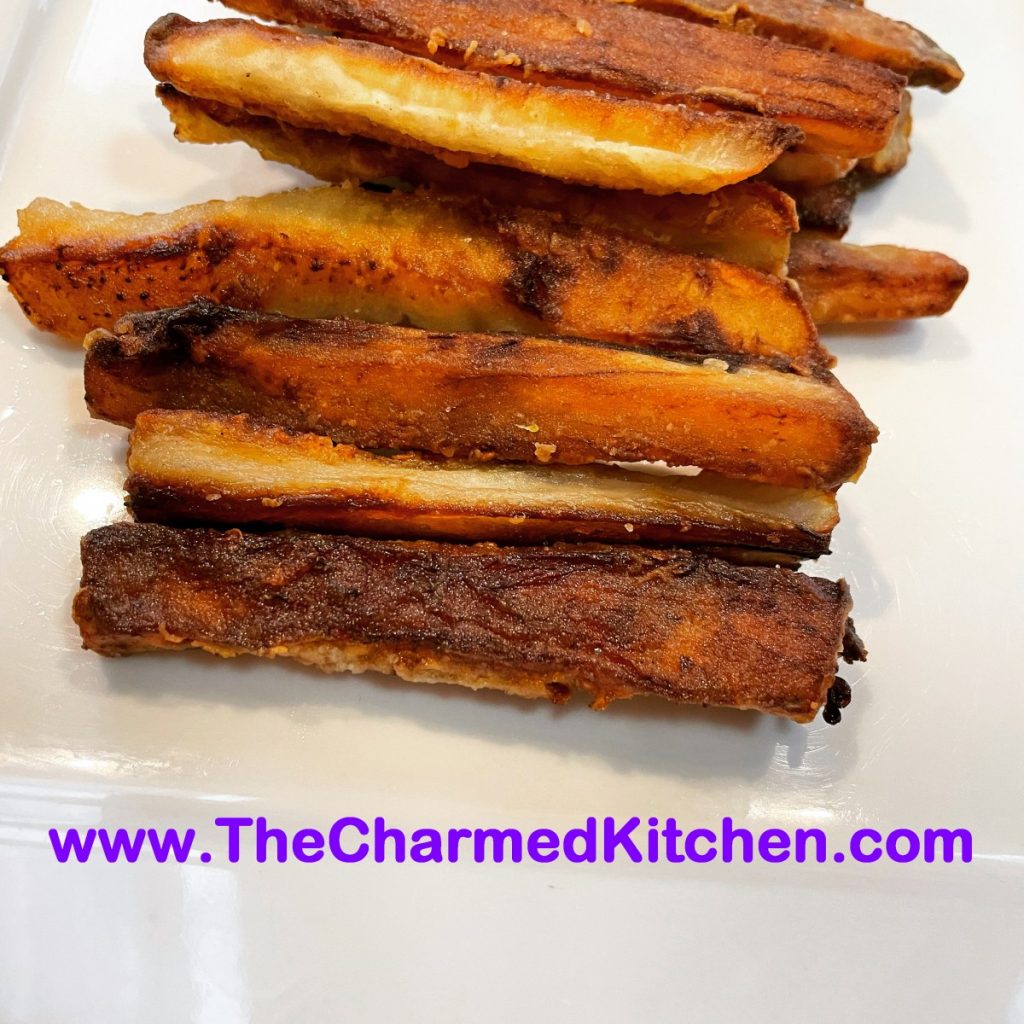
This dish started because I had an eggplant that needed to be used. I love eggplant, but none of my usual recipes were doing it for me. I decided to turn my eggplant into fries. I wasn’t in the mood to actually fry them, so I thought I would try to bake them and see if I could get a result I liked. They came out really good. Plenty crispy.
I shared a picture of my fries and a number of people asked for the recipe. I decided to write out a more detailed version than I posted. People also asked about other ways to make them. I only baked mine, so I can’t give absolute answers, but I can give you a pretty educated guess. Yes, these would work well in an air fryer or convection oven. You’d have to use a lower temp and keep an eye on them for cooking time. Yes, they can be deep fried. I have had deep fried eggplant at restaurants. They were pretty darn good.
So here is a more detailed recipe. I know I say medium eggplant. I hate to be vague, but that is the best I could do.
Enjoy!!
Eggplant “Fries”
1 medium eggplant
Salt
½ c. Flour
½ c. Oil
Preheat oven to 450F. Peel the eggplant, if you like. You don’t have to. Slice and crosscut into “fry” sized pieces. They are going to shrink some in cooking, so allow for the shrinkage. Lightly salt the eggplant and let it sit for about 10 minutes. The salt will draw some of the water out of the eggplant, making it easier for the flour to stick. Place the eggplant slices in a large bowl. Add the flour and toss until coated. Drizzle the oil on a large baking sheet. Add the eggplant slices, leaving room between them. Bake for 15 minutes. Remove from oven and turn the slices over. Return to oven and bake until golden brown- don’t burn them, but pretty dark brown if you want more crunch. Mine were in the oven for about 25 minutes total. Remove to platter with paper towels on it to drain. Toss with more salt, if needed and serve.
Peaches and Cream Crepes


Peaches are such a natural addition to any summer dessert. I decided to use some of my fresh peaches in crepes. Crepes are a nice dessert any time of the year. I think especially nice in summer, using fresh, seasonal fruit.
The crepes were filled with unpeeled, sliced peaches that had been tossed with sugar ahead of time. The sugar softens the peaches a little. I also added some sweetened cream cheese and a little strawberry jam to the filling. We loved them.
They can be assembled ahead of time, and just kept chilled until ready to serve. Serve as is, with a dusting of powdered sugar or even a vanilla caramel drizzle- recipe follows.
Peaches and Cream Crepes
1 recipe basic crepes- recipe follows
2-3 peaches, pitted and sliced thin
¼ c. sugar
1 t. vanilla
1 t. cinnamon
8 oz. cream cheese, softened
¼ c. powdered sugar
Strawberry jam, optional
Make a batch of basic crepes and set aside until ready to use. Place sliced peaches in a bowl with sugar, vanilla and cinnamon and stir until sugar is dissolved. Best to do this at least a couple of hours before you want to use them. This softens the peaches and allows juices to come out of the peaches. You need the juices for the cream cheese. You can do this the day before, then just finish the cream cheese and assemble.
Place cream cheese in a bowl and start beating with an electric mixer. Drain juices off the peaches and add the juice to the cream cheese. Add the powdered sugar, too. Beat until cream cheese is fluffy.
To assemble the crepes: Place a crepe on work surface. Spread with some of the cream cheese. Along one side of the crepe place a small amount of strawberry jam, like a stripe. Place several slices of peach in a row, on top of the strawberry jam. Starting on the side of the crepe with the peaches gently roll up the crepe. Repeat with remaining ingredients. You will have 12. Serve as is, or you can top with powdered sugar, peach slices, warm jam, whipped or caramel sauce – recipe follows.
Basic Crepes
3/4 c. flour
1/8 t. salt
3 eggs, beaten
2 T. melted butter
3/4 c. milk, approximately
Butter or oil for pan
Beat together flour, salt and eggs until smooth. Stir in melted butter and then stir in milk until batter consistency is that of cream. Let stand for 30 minutes before using, or can be refrigerated, covered, overnight. Beat again, just before using.
Heat 6 or 7 inch skillet. Brush with butter or oil and pour in about 2 teaspoons of batter, tipping pan to cover bottom of pan completely with batter. Cook until edges start to brown, turn over and cook until lightly browned (about 2 minutes per side.)
Crepes can be made day ahead or even frozen between sheets of waxed paper and frozen. Makes 12.
Vanilla Caramel
I made a light caramel sauce for the crepes. I just put 1/4 cup of water in a small saucepan with a cup of sugar. Boiled it all together for about 3 minutes. Removed from the heat and added a teaspoon of vanilla, 4 tablespoons of butter and a 1/4 cup of half and half. Stirred until smooth, then added a pinch of salt, for extra flavor.

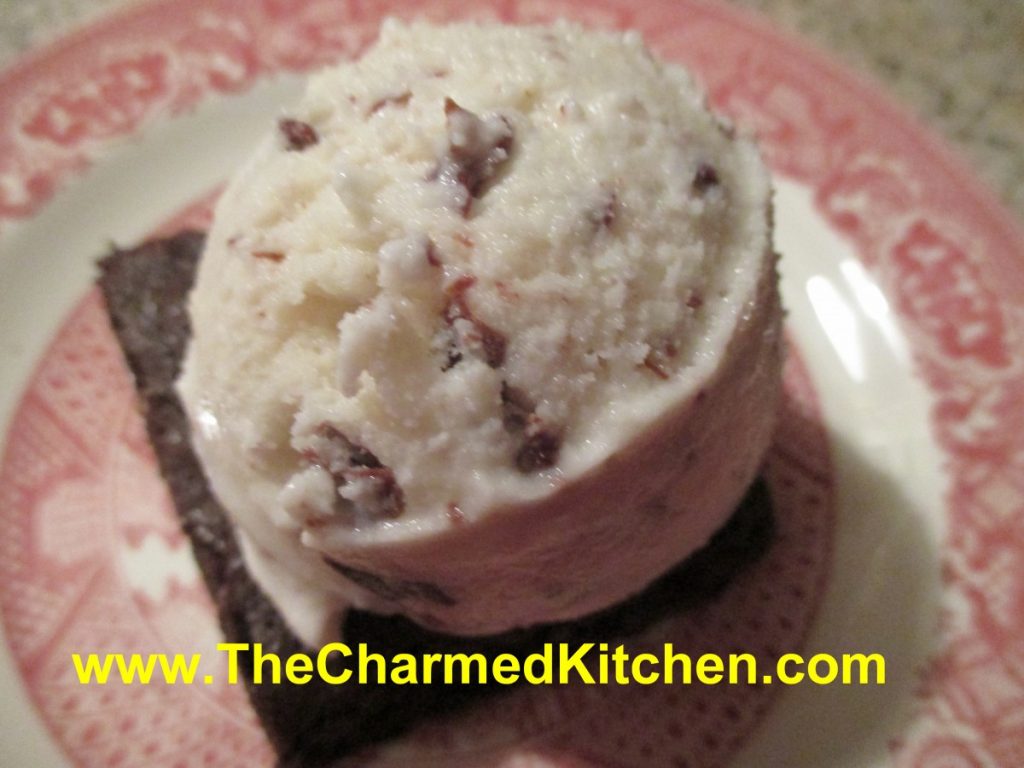
Mint Chocolate Chip Ice Cream

Mint chocolate chip ice cream is a favorite of mine. I have tried a lot of mint chocolate chip ice creams, but was not always happy. I wanted to make my own and see how that turned out.
The tricky part is getting chips that aren’t hard chunks, but rather, little flecks of chocolate, that melt on your tongue when you eat the ice cream. In the past, for chocolate chip ice cream, I have brushed melted chocolate in thin sheets, chilled it, and then broken it into tiny pieces. It worked, but kind of a pain to do.
I tried something different this time, and with a few adjustments, it worked out great. In the past, I posted a recipe for homemade chocolate magic shell. You remember magic shell, the chocolate syrup that hardens when you drizzle it on ice cream. The recipe is quite simple. Chocolate, coconut oil and powdered sugar, melted together. It remains a liquid at room temperature. So, to create the “chips”, I just added some of the magic shell to the ice cream as it froze in the ice cream maker.
After a little playing around, I got the knack of drizzling it slowly. The end result, little flecks of chocolate through the ice cream that were tender and melted as you ate the ice cream. We had the ice cream served on a homemade brownie, then topped with more magic shell and some whipped cream. You will note that my “mint” ice cream is not green. I opted to omit food coloring, but feel free to add some, if you prefer. And, if you just want chocolate chip ice cream, don’t add the mint extract.
Mint Chocolate Chip Ice Cream
2 c. half and half
1 c. whipping cream
½ c. sugar, or to taste*
2 t. mint extract
1 t. vanilla extract
About ½ c. magic shell- recipe follows
Combine half and half, cream, sugar and flavorings. Stir until sugar dissolves. Add more sugar, if needed, to suit your taste. Place mixture in an ice cream maker and start freezing it. Once it starts to thicken, drizzle the magic shell in slowly as the machine is running, to create little flecks of chocolate throughout the ice cream. I have to guess that I used about ½ a cup. Add until you have the amount of chips you like. Once ice cream forms, place in freezer until ready to serve. Makes about a quart.
*The mixture might taste a little sweet to you, but when you freeze it, it will taste less sweet. When making ice cream, the base should be a little”too” sweet to allow for the taste change after freezing.
Homemade Magic Shell
1 c. chocolate chips- I used dark chocolate chips
3/4 c. coconut oil- I used the unrefined
1/2 c. powdered sugar
Heat all together until melted. I melted mine in a microwave for 1 minute, but you could also melt over a double boiler. Stir until smooth. Store at room temp. To use, drizzle over ice cream, wait about 10-20 seconds- and it will harden.
Hot or Cold Beet Soup

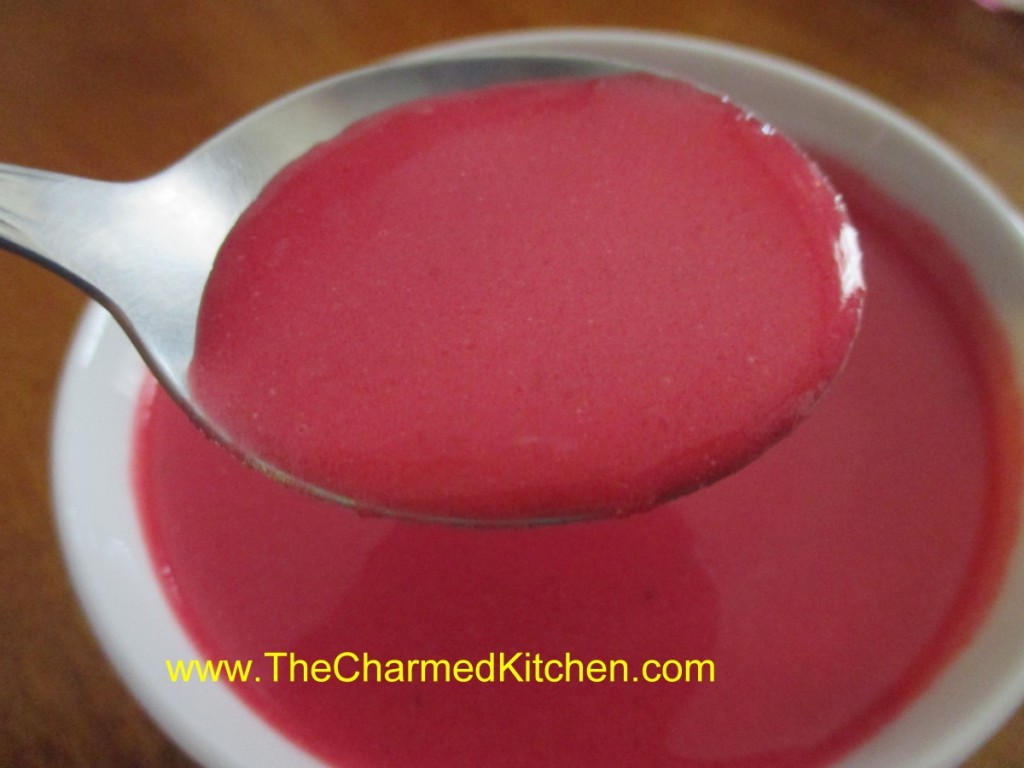
Since I had a beautiful bunch of beets, I decided to make this soup. On cooler days, I heat it up. On hot days, I serve it chilled. That is one of the nice things about this recipe. This soup is good, what ever temperature you serve it.
It is also a pretty soup. The color is so beautiful. A friend came over and I offered her a bowl. When I set it down in front of her she said, “Wow, this is really pink soup.”
People seem to have strong opinions about beets. They either love them or hate them. I love them and I enjoy them in soups, salads, relishes, casseroles and more. The earthy flavor really appeals to me and the color is a delightful bonus. I added some extra veggies for more flavor and sour cream for a tart, creamy flavor and texture element. The result was a very tasty dish that is also sort of striking to look at.
Hot or Cold Beet Soup
6 or 7 small beets – or 3 large beets
2 T. olive oil
1 large onion, chopped
2 carrots, peeled and chopped
1 rib celery, chopped
3 medium potatoes, peeled and chopped
6 cups stock- I used chicken but vegetable stock or beef stock would also work
2 t. dill weed
salt and pepper to taste
1 c. sour cream- or a little more if you like
Cut beets off of their stems- leaving about 2 inches attached- this will reduce bleeding and retain more color in the beets. Place beets in a pot of water deep enough to cover them and cook until the beets are just getting tender, about 20 minutes – longer for larger beets. Remove and place in cold water. Once the beets are cool enough to handle trim off the stems and slip off the skins. Cut the beets into chunks and set aside. In soup pot heat the oil and cook the onion until tender. Add the carrots and beets and cook a few minutes longer. Add the rest of the vegetables, stock, dill and simmer, covered, until vegetables are very tender. This will take at least 30 minutes- but cooking longer is better- around an hour. Puree the soup. To add the sour cream place sour cream in a bowl and add a ladle full of the hot soup to the sour cream, whisking until smooth. Add another ladle or two of the soup and whisk again. Return sour cream mixture to the soup. By warming the sour cream gently you prevent it curdling. Adjust seasonings and serve right away, or refrigerate and serve cold. Serves 6-8. Freezes well.
Ratatouille Salad

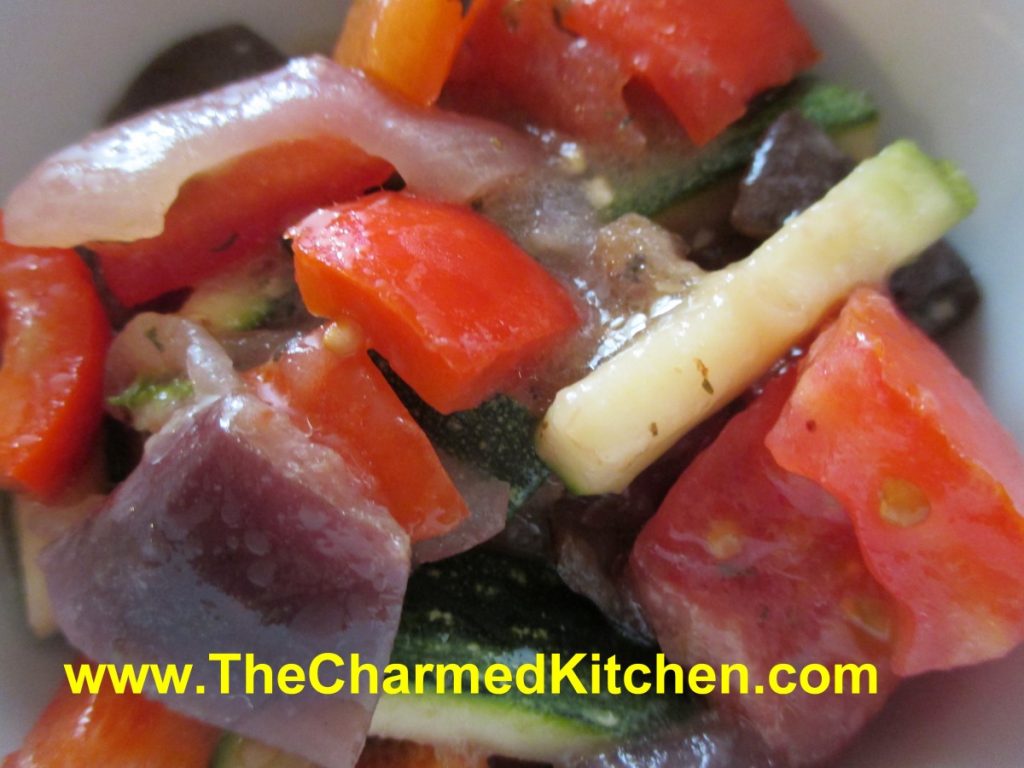
I had all the ingredients for ratatouille, a lovely French vegetable stew. I had eggplant, tomatoes, summer squash, peppers, onions and fresh herbs. But I was in the mood for a salad. I decided to use the same ingredients that I would use for the ratatouille, but transform them into a salad. It came out quite nice. I could see serving it on toasted bread, or using it like a dip. It reminded me of caponata, in a way.
I decided to cook the eggplant and onion, but leave the rest of the vegetables raw. I also decided to leave the skin on the eggplant. I did not salt the eggplant beforehand. The eggplant was fresh and tender- I saw no need for peeling or salting, but you could do both, if you like.
I always have roasted garlic on hand. I make a big batch and store in smaller containers in the freezer, until needed. The directions for roasting garlic follow the recipe. If you don’t have roasted garlic, you could add several cloves of garlic, peeled and minced. I invited a neighbor to try it- and she ended up taking the rest home.
Ratatouille Salad
1 medium eggplant, cubed. I had about 3 cups of eggplant.
3 T. oil
½ t. salt
1 medium onion, sliced
2 T. roasted garlic*
½ c. red wine vinegar
1 med. zucchini, cut in matchstick pieces, about 3 cups
1 sweet pepper, seeded and diced
1½ c. diced fresh tomato, seeded, if desired
Dressing:
1/3 c. red wine vinegar
1/3 c. olive oil
2-3 T. honey, or to suit your taste
2 T. chopped parsley
1 t. chopped basil
2 t. thyme leaves
Hot sauce to taste
Salt and pepper to taste
In skillet, heat oil and saute eggplant until tender and just starting to brown. Season with salt. Remove from skillet and set in a mixing bowl. In same skillet, saute onion and cook until wilted and tender. Add the garlic and vinegar to the skillet and cook until most of the liquid has evaporated. While liquid is cooking down, place remaining veggies in mixing bowl with the eggplant. When most of the liquid is cooked off, place onion in mixing bowl with eggplant mixture. Combine dressing ingredients in a small bowl or jar and whisk to combine. Pour over the eggplant mixture and toss to coat. Adjust seasonings. Chill until ready to serve. Serves 6-8 as a side.
*Once you have roasted garlic on hand for cooking, you will wonder how you did without it before. I get large amounts of freshly peeled cloves. Place the peeled garlic cloves in a roasting pan and pour a generous amount of olive oil over the garlic. Cover tightly with foil and bake at 350 until garlic is tender and golden. This will take at least 30 minutes, but up to 40 minutes. It depends on how much garlic you are roasting. Be careful not to burn it. Once cooled, place the garlic cloves, and oil, in small freezer containers. Store in freezer.
Corn and Black Bean Salad


This salad was inspired by ingredients I had on hand. I had picked up some beautiful local sweet corn the other day. I also had some sweet peppers and home canned black beans. I knew the trio would work well together.
I used fresh corn in this dish. You could use frozen corn, if that was all you had. Fresh corn season is too short around here. I always buy extra corn for freezing. I just blanch the shucked corn for a few minutes in boiling water, then drop into ice water. Once the corn is cool enough to handle, I cut the corn off the ears. Then I package up the corn and freeze it.
You could also grill corn and cut it off the cob to freeze.
I like to boil the cobs after the corn is cut off, for a corn stock, which I also freeze. The cobs have a lot of flavor.
If using the frozen corn in a salad, you’ll want to drain it after thawing.
So here is the recipe. Pretty simple. You could add some sweet onion, if you like, too.
Corn and Black Bean Salad
4 c. cooked corn
1 can black beans, rinsed and drained
1 sweet pepper, seeded and chopped
¼ c. olive oil
3 T. red wine vinegar
1 T. Balsamic vinegar
2 t. Italian seasoning- I used my Tuscan blend
Salt and pepper to taste
Hot sauce to taste, optional
Combine all ingredients in medium bowl. Stir to combine well. Chill before serving. Serves 6-8.
Carrot Pasta Sauce

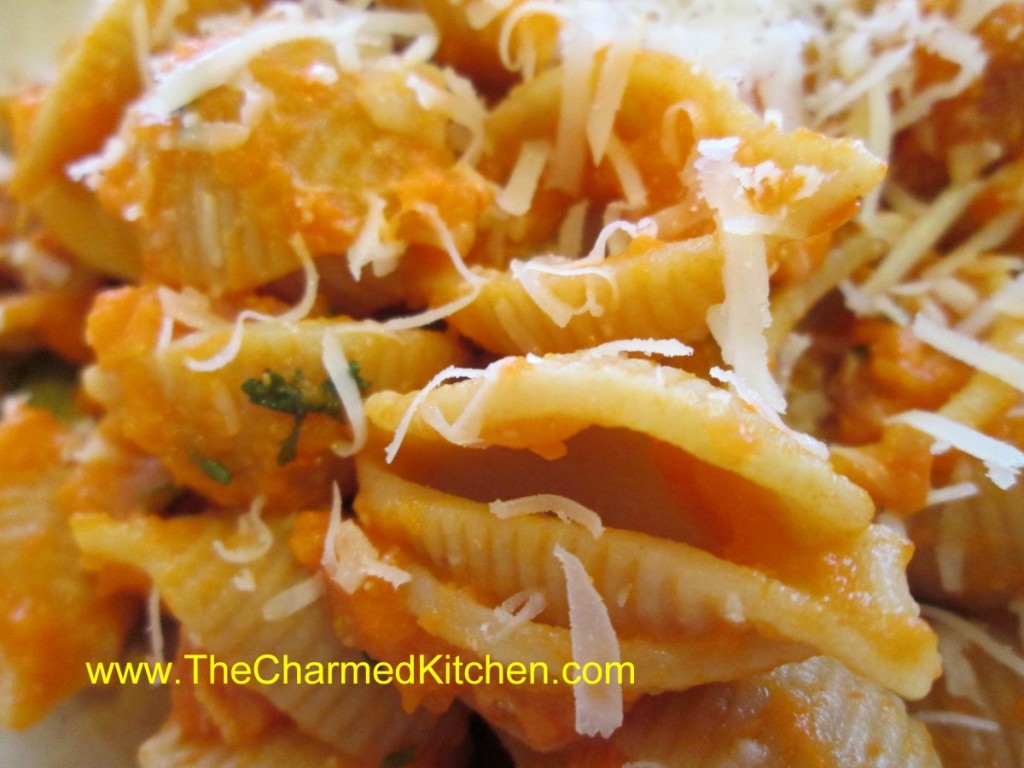
This pasta sauce is one of my favorites. Most people don’t think of carrots, when they think of pasta sauce, but maybe they should. It tastes wonderful and looks pretty, too. It’s a simple sauce that packs a lot of flavor.
We made this sauce in cooking camp last week. The kids seemed to doubt that they would like it. Turned out, most of them loved it.
The process is easy. Just cook carrots, with sauteed onions and garlic in stock, until the carrots are really tender. Most of the liquid cooks off. Puree, adding cream or half and half and some dill. Adjust seasonings and you are done!
I used chicken stock, but you could use a vegetable stock for a vegetarian version of this dish. Toss the sauce with pasta, rice, or even with veggies or meats. You can add some fresh grated cheese, too, if you like. For the version we did in camp, I was going to have the kids sprinkle some cheddar cheese over the pasta once it was tossed with the carrot sauce. The cheese got dumped in the carrot sauce instead, so we just mixed it in until it melted. The carrot sauce tasted like mac and cheese.
Here is the recipe. I hope you try it.
Carrot Pasta Sauce
1 T. oil
1 onion, chopped
1 garlic clove, minced
1 lb. carrots, peeled and sliced
2 c. chicken or vegetable stock
Salt and pepper to taste
1/2 c. cream, half and half or evaporated milk
1T. fresh dill or 1 t. dried
Hot cooked pasta
Sauté onion in oil until tender. Add garlic, carrots and stock and cook until carrots are very tender. Much of the liquid should have evaporated by then. Place mixture in blender and add cream or milk, mixing until smooth. Add dill and adjust seasonings, tossing over hot pasta to serve. I sometimes top with some shredded Parmesan cheese, too.
Variations: Use sweet potatoes, pumpkin, winter squash or even peas for different tastes.


