Strawberry Ice Cream Cake Roll

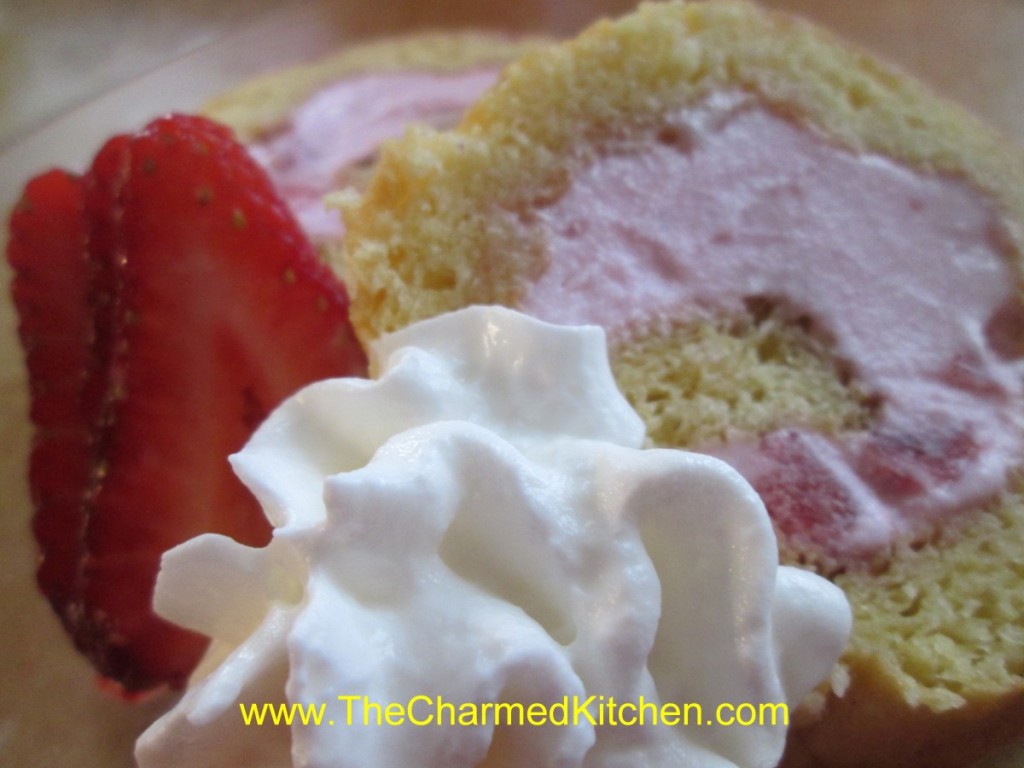
This is the perfect summer dessert. Fresh berries, a light, citrus-scented cake and ice cream. What more could you want?
When you say cake roll, I think a lot of people first think of a pumpkin roll or Buche de Noel (yule log).
There are so many more desserts you can make with them. Cake rolls can be made in many flavors and they can be filled with custard, frosting, fruit, ice cream and more.
For this sponge cake roll, I used homemade strawberry ice cream to fill it, recipe follows. You could use store bought ice cream, if you prefer.
Start with the sponge cake roll recipe below, and use whatever flavor ice cream you like. You’ll need about a quart of ice cream- or a little more.
Once finished, you just wrap it up and pop the cake in the freezer until needed. Great to have on hand for summer parties and cook outs. You can decorate with fresh berries when serving. Blueberries would make this a fun red, white and blue dessert for Memorial Day or the 4th of July.
Sponge Cake Roll
This sponge cake roll can be filled with whipped cream or ice cream, or use your favorite filling.
5 eggs, separated
2/3 cup granulated sugar
1 teaspoon lemon juice
1/2 teaspoon finely grated lemon zest
2/3 cup cake flour*
1/4 teaspoon salt
1 teaspoon baking soda
3 tablespoons melted butter
Beat egg yolks until thicken and lemon colored; gradually add 1/3 cup of
the granulated sugar, the lemon juice and the lemon zest. Beat egg
whites until almost stiff then gradually beat in the remaining 1/3 cup
sugar. Beat until stiff peaks form. Fold yolk mixture into whites. Sift
dry ingredients into a separate container; add to egg mixture, folding
in carefully. Fold in melted butter. Pour batter into waxed paper-lined
10x15x1-inch jelly roll pan. Bake at 375° for 12 minutes. Sprinkle with
confectioners’ sugar. Turn onto a clean kitchen towel which has been
generously dusted with confectioners’ sugar. Trim edges, if necessary;
roll cake up, towel and all, while still warm. Let cool completely.
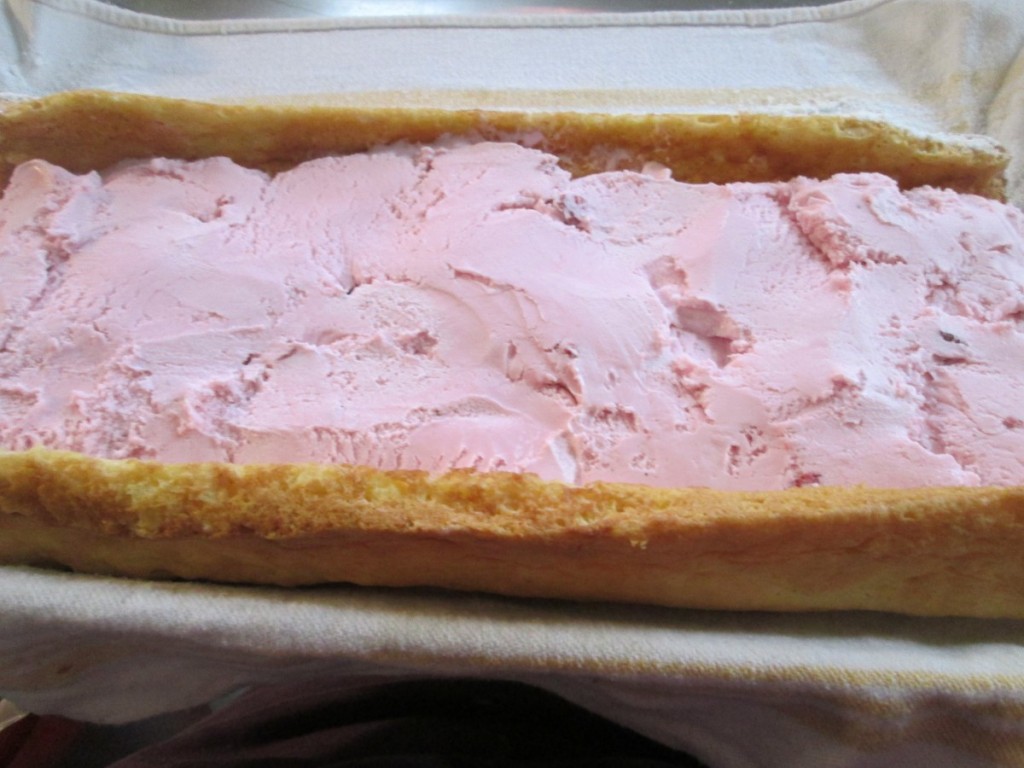
Unroll and fill with whipped cream or ice cream then re-roll cake. The
trick is to let the ice cream soften up a few minutes before spreading
it on the cake. But don’t wait too long. Rather than trying to let the
ice cream get soft enough to spread I used a spatula to sort of cut
slices of ice cream and place them on the cake. Store ice cream cake
roll in freezer until ready to slice and serve.
*If you don’t have cake flour you can make your own. Measure out a cup of all purpose flour, remove 2 tablespoons of flour and replace them with 2 tablespoons of cornstarch. For larger amounts place 7 cups of flour in a bowl and combine with 1 cup of cornstarch. Mix well or even sift together. Store in an airtight container.
Strawberry Ice Cream
2 c. chopped strawberries
1 c. sugar
1 T. vanilla
2 c. cream or half and half or a combination. You can also use some milk or even almond or rice milk.
Additional sugar to taste
Place strawberries, vanilla and sugar in saucepan and bring to a simmer, stirring occasionally. Remove from heat and chill. Combine chilled berry mixture with cream. Add additional sugar if you like. Remember that once it is frozen the ice cream will not taste as sweet so make this mixture a little sweeter than you want the final product to be. How much sugar you add varies with personal taste, and how sweet the berries are. Place in an ice cream maker and process according to manufacturer’s directions. Once finished put in an air- tight container and place in freezer. Makes about 1 quart.
Firecracker Chicken

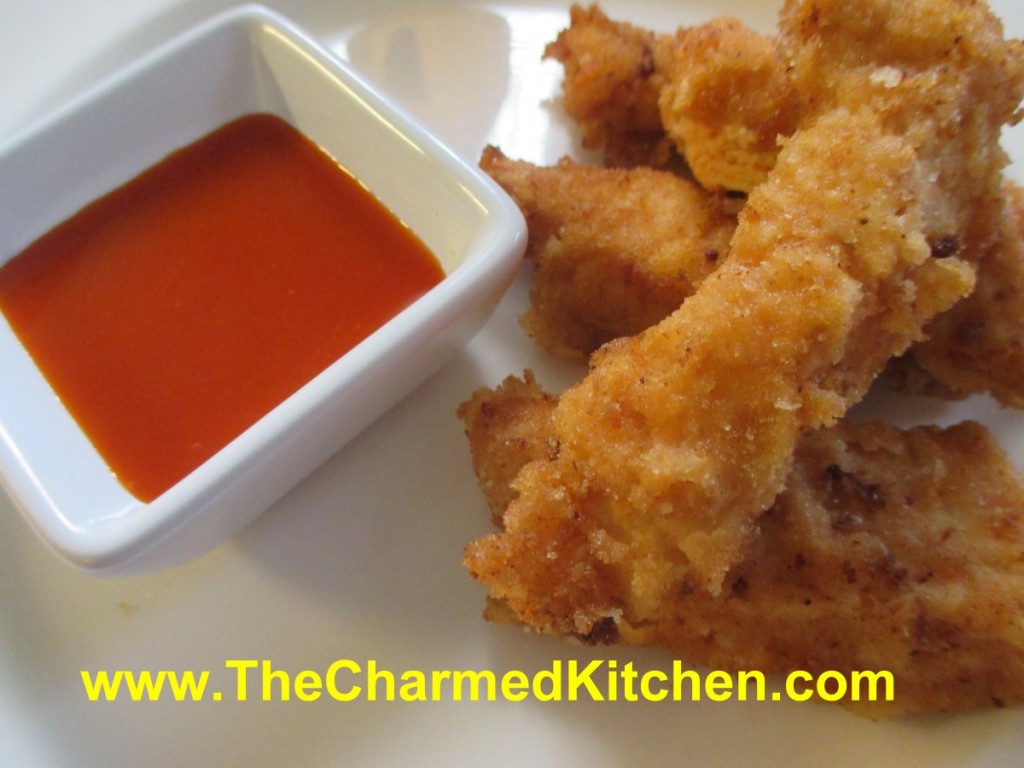
Sometimes the best recipes happen when you don’t have time to plan. This is one of those recipes. Even better because it only uses 4 ingredients. Fun for the 4th of July, too.
I needed an appetizer, but didn’t have extra time for prep. I also did not have time to go to the store, so used what I had on hand. I had some boneless chicken breasts. I could also have used boneless thighs or even chicken wings. I used what I had.
I cut them into strips and poured a bunch of hot sauce over them. Put them in the fridge to marinade overnight. The next day I just tossed the chicken strips in breadcrumbs and fried them in a little oil. Served with extra hot sauce on the side, they were a big hit.
Firecracker Chicken
2 lbs. boneless chicken, I used breasts, but thighs would be good, or wings
3/4 c. hot sauce, plus extra when serving
2 c. bread crumbs
2 c. oil, for pan frying
Cut chicken into strips and place in a bowl. Pour over the hot sauce and stir to coat evenly. Cover and chill overnight, or even for a couple of days. Place bread crumbs in a plastic bag. Place a small handful of chicken in the bag and shake to coat. Place on a plate and continue with the rest of the chicken. Heat oil in skillet to 350- 375 degrees. fry chicken in several batches- you don’t want to crowd them in the skillet- that will make the oil col down too much. Fry for a minute or two per side. Remove to platter lined with paper towels and cook the rest of the chicken. Keep chicken warm until ready to serve. serve with extra hot sauce on the side. Serves 8 or more as an appetizer, but can be served as a main dish, too.
Berry White Cake

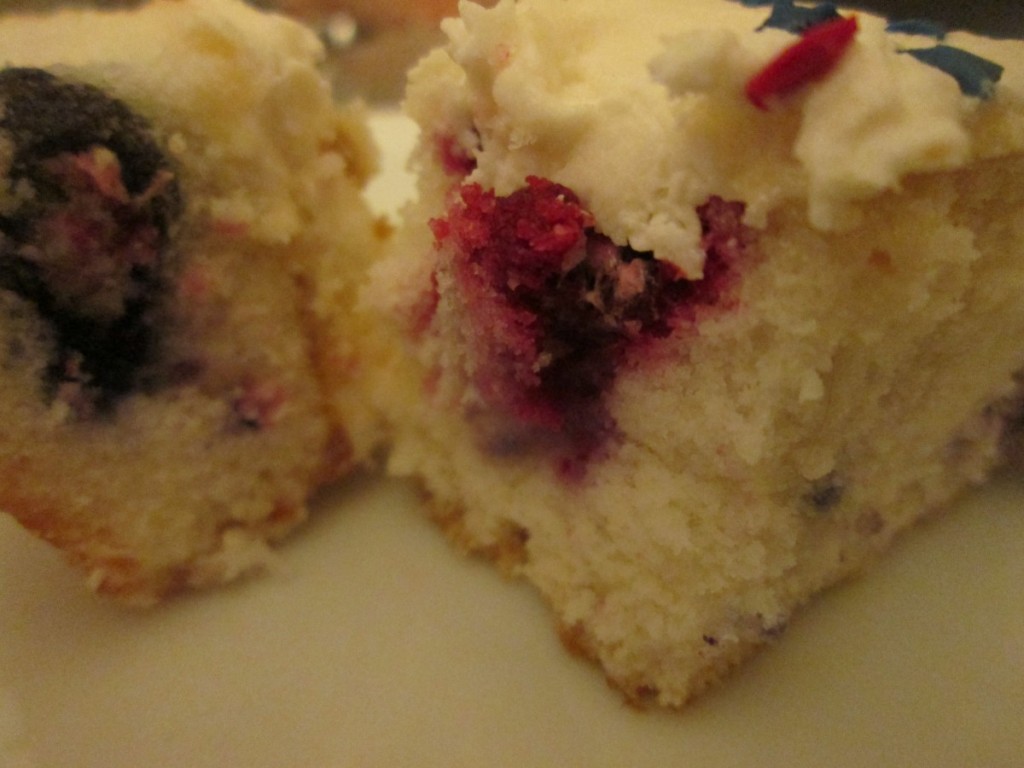
What else would you call a white cake, studded with berries, but Berry White? While this red, white and blue cake would be lovely for a 4th of July party, it would be great anytime. You can use fresh, or even frozen berries. They really make a simple white cake special.
I topped it off with a lemon butter cream frosting and since it was for the 4th of July I added a few star sprinkles.
To make the cake, start by making a white cake batter. I used homemade -recipe follows- but you could use a box mix if that is what you prefer. After you pour the batter into your pan, or pans, sprinkle with some blueberries and raspberries- or whatever berries you happen to have. Don’t fold the berries into the batter. Fresh or frozen berries could be used. I used about 2 cups of berries in all. Once cooled, frost the cake. I used a lemon butter cream- recipe follows.
Classic White Cake
2 c. sugar
1 c. butter
4 egg whites or whole eggs
4 teaspoons vanilla extract
3 c. all-purpose flour
3 ½ teaspoons baking powder
1 c. milk
Preheat oven to 350 degrees. Lightly grease a 13×9-inch pan. In a medium
bowl, cream together the sugar and butter. Beat in the eggs, one at a
time, then stir in the vanilla. Combine flour and baking powder, add to
the creamed mixture and mix well. Finally stir in the milk until batter
is smooth. Pour or spoon batter into the prepared pan. Sprinkle berries
over the surface of the cake. Bake 35-40 minutes. Cake is done when it
springs back to the touch. Makes 1.
Note: I actually made 3 smaller cakes from this recipe- reduced baking time to 20- 25 minutes.
Lemon Butter Cream
½ cup butter
4 1/2 cups sifted confectioners’ sugar
3 T. milk
1 T. lemon juice
1 1/2 teaspoons vanilla extract
In a bowl beat butter until fluffy. Gradually add 2 cups of the
confectioners’ sugar, beating well. Slowly beat in the milk, juice and
vanilla. Slowly beat in remaining sugar. Beat in additional milk, if
needed, to make of spreading consistency.
Ready for the oven

Freshly baked
Butterscotch Sauce

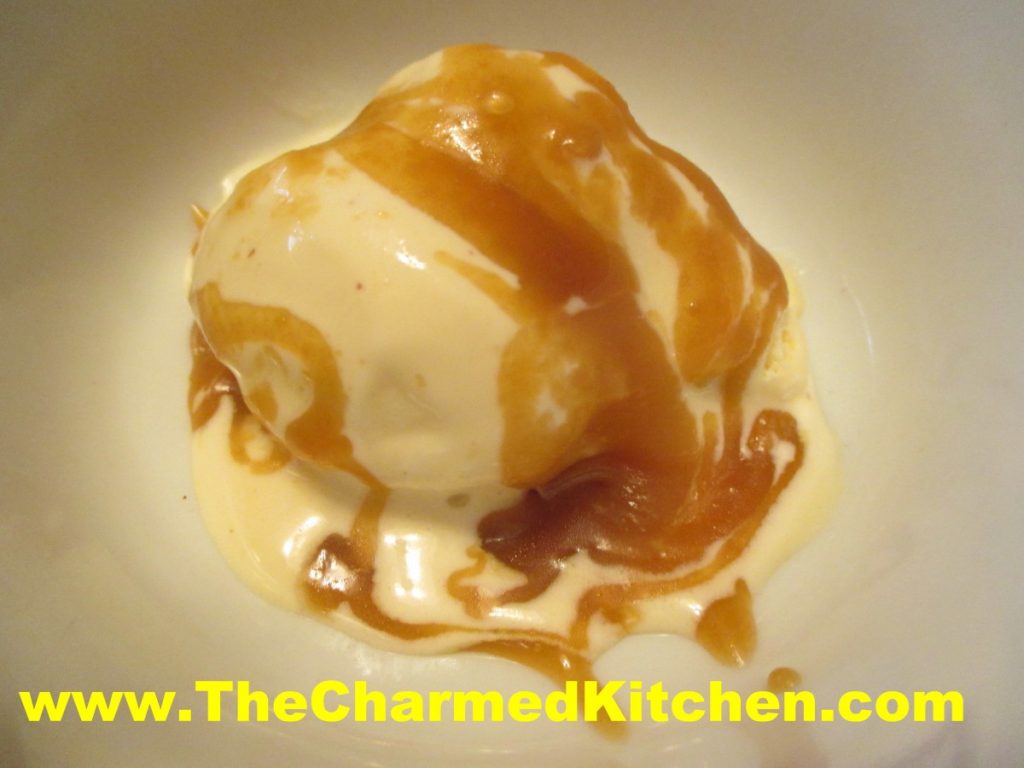
Any time is a good time for an ice cream sundae, in my opinion. Still, when the weather warms up- it is even nicer. I have been known to have an ice cream sundae for dinner on really hot days.
I was talking to some friends about ice cream sundaes and our favorite toppings. I had mentioned how much I loved a hot fudge sundae. My friend Jill said that she loved butterscotch sauce. I had to agree. I love a butterscotch sauce, too.
I had made butterscotch sauce before, but not in a very long time. I found my old recipe and made it. I thought it could be better, so I played around and tweaked it a little. The end result is bliss. Creamy, sweet, smooth and buttery with just a hint of saltiness.
This sauce is a great topper for ice cream, but is also a tasty sauce for cakes, and fresh fruit.
It is really easy to make, which is a nice bonus. Start to finish, this sauce can be done in about 10 minutes. No special equipment needed, either.
I used a heavy bottomed pan, which worked great. I didn’t want my sauce to scorch while cooking. I think I might have stirred it once, just to be safe.
The sauce will thicken when it cools down. Thickens even more once stored in the fridge. It is best served warmed up a little or at room temp.
So here is my butterscotch sauce recipe. Thanks Jill, for the inspiration.
Butterscotch Sauce
6 T. butter
½ c. half and half
½ c. brown sugar
1 t. molasses*
½ -1 teaspoon salt
1 t. vanilla
Melt butter in a heavy bottomed pan. Add remaining ingredients, except vanilla, to the pan. Stir to mix well, then bring to a boil over medium heat. Boil 5 minutes. After 5 minutes, remove from the heat and stir in the vanilla. Sauce will thicken as it cools. Store in fridge and warm a little before using. Makes about a cup of sauce. Keeps for weeks in the fridge, but you’ll eat it long before that.
*The addition of a little molasses was because my original recipe called for dark brown sugar. I only had light brown sugar. I liked the flavor that extra molasses added to the finished sauce. Feel free to omit the extra molasses, or add a pinch more, depending on how dark you want your finished sauce.
Cherry Bombs

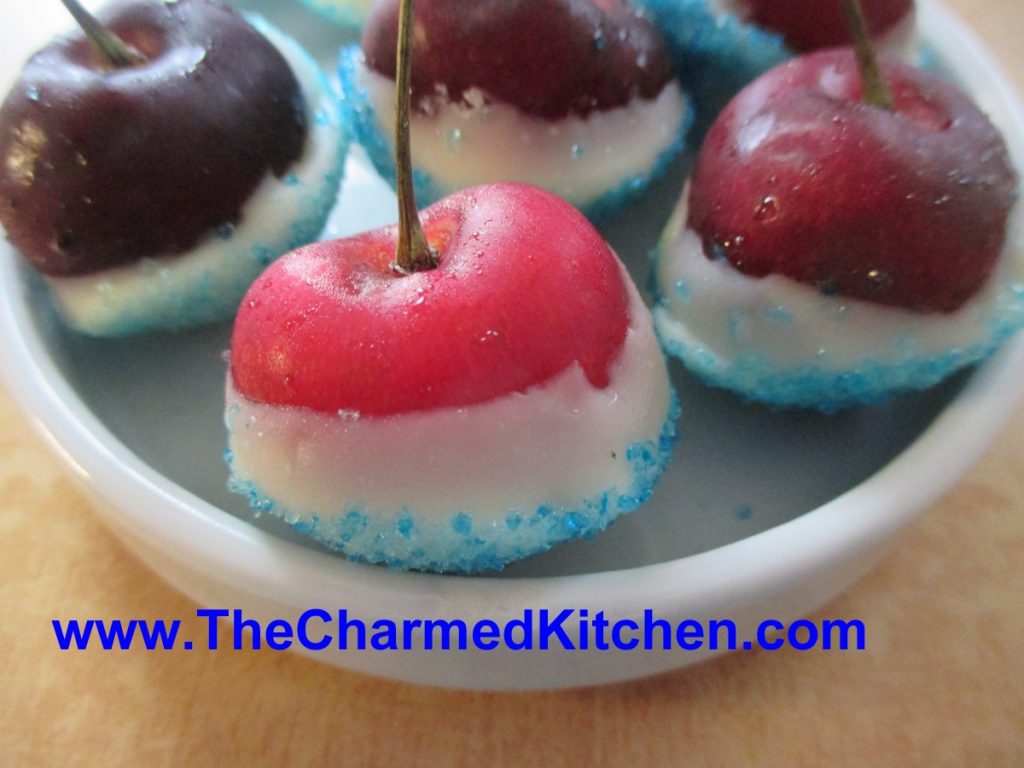
These little treats make a great addition to your 4th of July party. They are simple to make, with only three ingredients. You can make them in no time at all. It is a fun treat for kids to make, too.
Think of the cherry bombs as a type of candy. A simple, sweet treat that can be served just as they are. They can also be used to top a cake or other dessert. You can even garnish a cocktail with them. I did the same thing with strawberries, but “strawberry bombs” did not have the same ring to it.
To make the cherry bombs, you will need cherries, white chocolate and blue sugar. If you don’t have blue sugar, you can put granulated sugar in a bag, add a few drops of blue food coloring, seal the bag and shake it up. The sugar will turn blue. You could also use blue sprinkles.
Wash and dry off some large, sweet cherries. Melt white chocolate, stirring until smooth. Dip the cherries in the white chocolate, then the blue sugar. Place on wax paper to firm up. Store in fridge.
Honey-Pomegranate Glazed Ribs

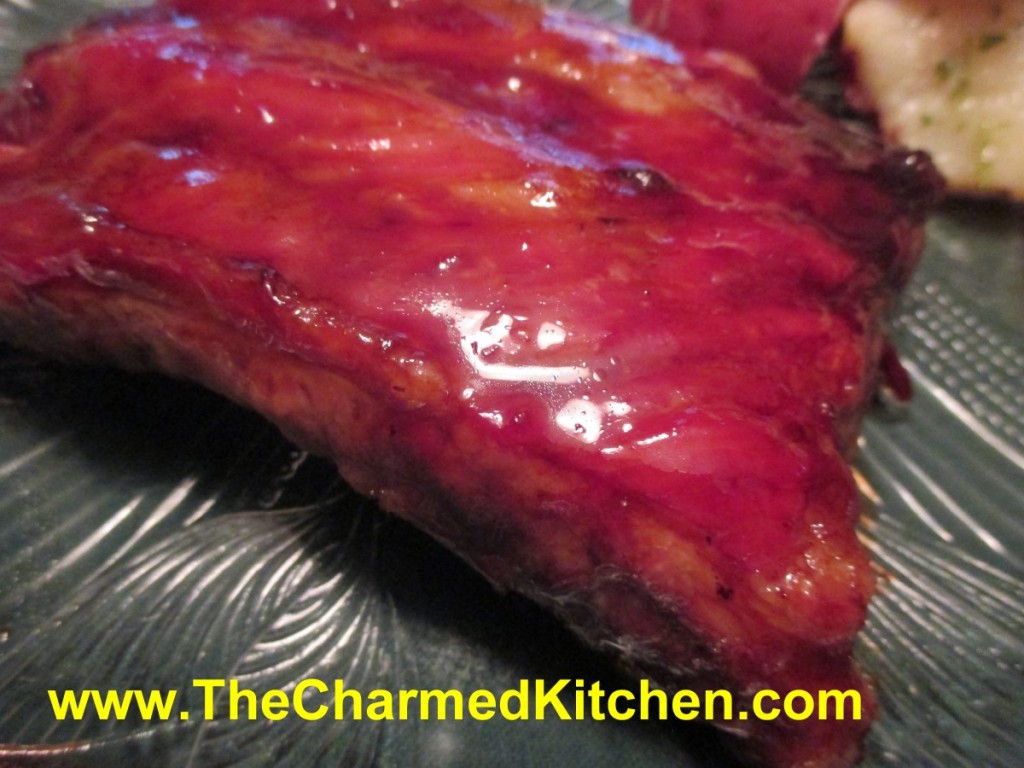
I like my ribs to be fall off the bone tender, but still have a crispy exterior glaze. I decided to use a combination of moist and dry heat to get the result I wanted. I finished them off with a sauce made from pomegranate molasses and honey. They were really good.
While I prefer cooking ribs on the grill, you can cook them indoors with good results. Sometimes the weather isn’t right for cooking them outside. Sometimes, you realize too late, that you are out of charcoal. With so many rainy days lately, you might be forced to cook your ribs indoors.
Honey-Pomegranate Glazed Ribs
1 slab ribs, cut into 3-4 rib portions
salt and pepper
1 c. apple cider vinegar
2 T. soy sauce
1 T. hot sauce
1 t. garlic powder
1 t. smoked paprika
Glaze:
3/4 c. pomegranate molasses*
1/2 c. honey- or more to taste
1 T. hot sauce, or more to taste
Place rib portions in a large pan and season with salt and pepper. Pour over the vinegar, soy sauce, hot sauce, garlic powder and smoked paprika. Cover and chill for a couple of hours. You could even do this the night before. Preheat oven to 425 degrees. Place rack in large baking dish. Pour 2 cups of water into the bottom of the pan. Place rib portions on the rack. Pour over the marinade. Season with salt and pepper then place in the oven and bake for 1 hour. Turn heat down to 400 degrees. Remove ribs from oven. Place ribs in a fresh baking pan. Combine glaze ingredients and brush all over the ribs. Return to oven and bake 20-30 minutes longer, or until glaze has gotten sticky and browned a little.
*Pomegranate molasses is available in some specialty stores, or you can make your own by boiling down pomegranate juice until it gets thickened.
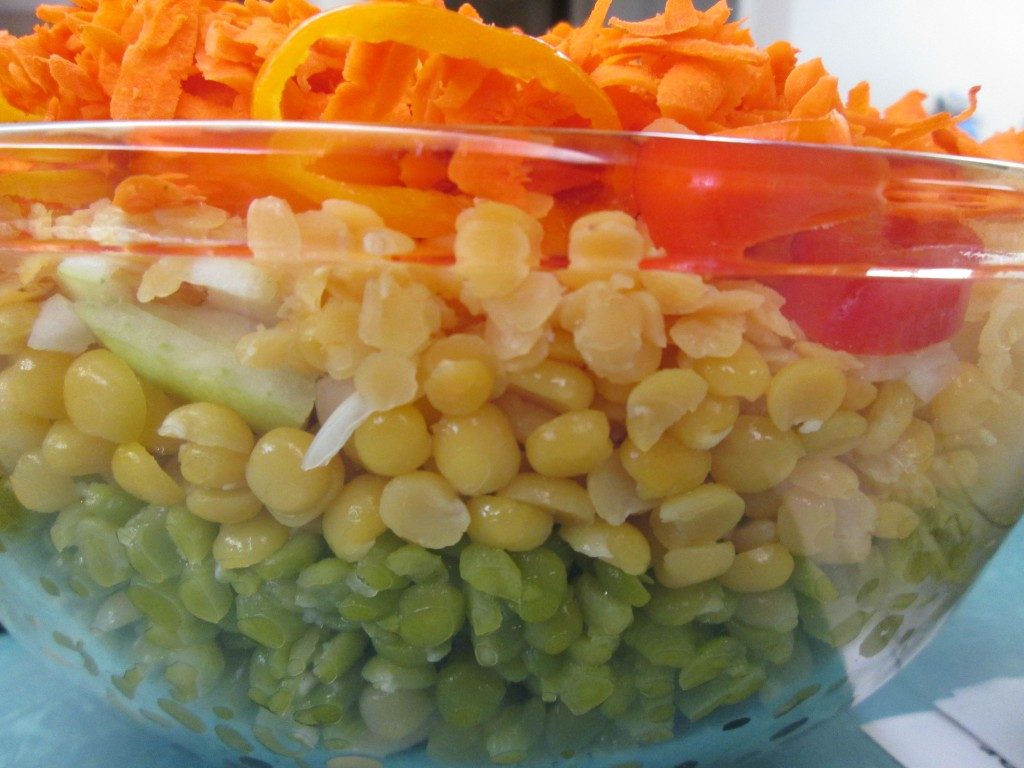
Rainbow Salad

When you hear green or yellow split peas- do you think of soup? You probably do. But when cooked until just tender, split peas make a great salad ingredient. I often add cooked split peas to a tossed salad. They add flavor, protein and a nice texture to salads. An added bonus: split peas can be cooked from dry, to tender, in about 20 minutes. That makes them a great choice when time is tight.
This is one of my favorite salads using both green and yellow split peas. Fresh and colorful, it is a big hit with vegetarian and non-vegetarian friends. If some of you are looking for new salad ideas this summer, this one is a winner.
The salad uses both green and yellow split peas, along with black beans, butter beans, red lentils and assorted veggies. It is a great combination of colors and textures. It does make a lot, but you can easily cut the recipe in half. Or maybe, invite more friends over!!!
The dish was inspired by my nephew Danny’s love of sand art when he was a kid. The ingredients are layered in the bowl for a pretty presentation. It is also an homage to the layered salads I remember from my youth. I like this one a whole lot more.
Rainbow Bean Salad
1 c. each green split peas, yellow split peas and red lentils
1 can black beans, rinsed and drained
1 can butter beans, rinsed and drained
1 c. diced sweet onion
1 c. diced sweet pepper
1 c. grated carrot
Cook split peas and lentils separately just until tender. Split peas, both green and yellow will take 20 minutes. Red lentils will take about 8-10 minutes. Drain and rinse each under cold water when done and set aside until ready to use, or you can cook them a day ahead and keep chilled. Each will yield about 2 1/2 c. cooked.
In large glass bowl, place the following ingredients in this order.
Black beans, butter beans, green split peas. yellow split peas. onion, red lentils. carrots and peppers. Pour over dressing and chill several hours or overnight. Serve on a bed of greens.
Dressing *
1/2 c. oil
1/2 c. vinegar
1 (14 oz.) can diced tomatoes, undrained- I use a pint of home canned tomatoes
2-3 T. sugar
1/2 c. parsley or cilantro
1 t. each chili powder, cumin and salt
dash hot sauce
Combine in a blender or food processor until smooth.
*Note: Any fresh or bottled dressing you like can be used. Balsamic works very well. I often serve it with homemade Italian dressing.
Compound Butters

I enjoy making flavored, or compound butters, all the time. But even more so this time of year. My herb garden is growing wildly and there really is nothing better than the flavor of herbs, picked fresh out of the garden. Chop them up, add to some butter and you have a great spread for all sorts of foods. Now that local veggies are here, I have even more reason to make some herb and butter blends.
I like to make several batches, shape into rolls and wrap in plastic wrap. Now I can freeze them and just cut off a piece whenever I want. This is also a nice way to preserve some of this summer freshness for the cooler days ahead.
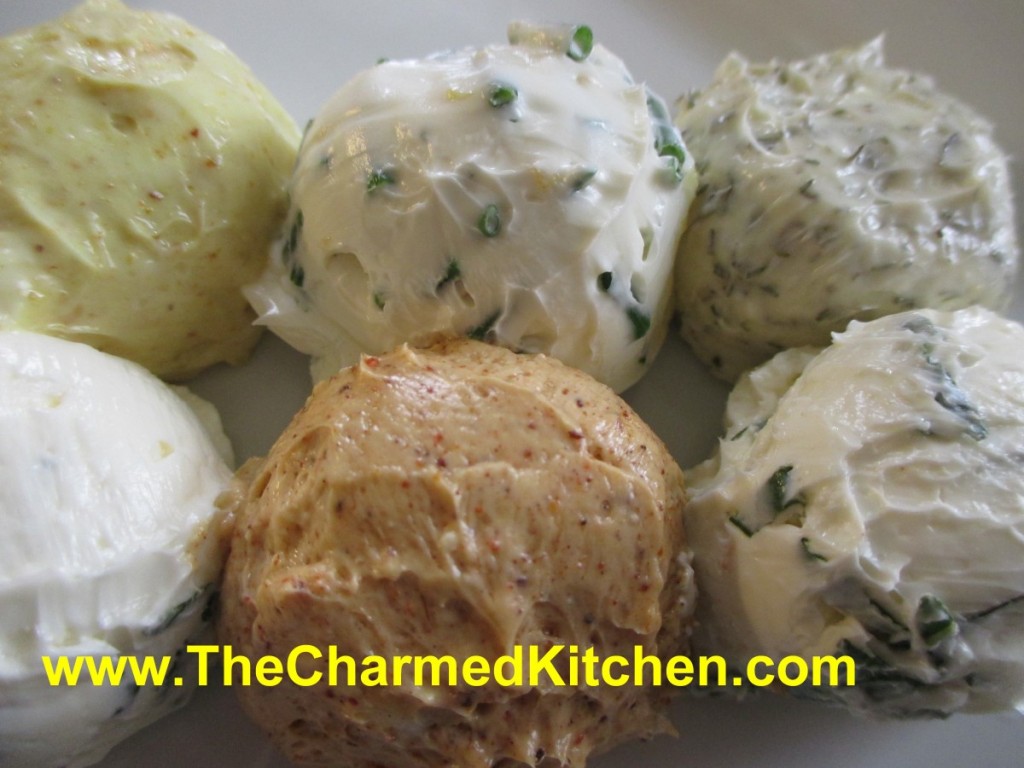
Herbal or spicy butters can add flavor to any meal. They can be used on breads, crackers, veggies, meats, or fish. Flavored butters can also be molded into shapes for special occasions. Here are the recipes for the butters in the picture.
Compound Butters
All recipes are for use with one stick (½ cup) butter.
Soften butter slightly to make mixing easier. Roll into logs, balls, or press into molds. Finished butters can be rolled in herbs, spices, or nuts for a decorative appearance. Chill several hours or overnight before using. Keep butter wrapped tightly in waxed paper for freshness. Let stand at room temperature 30 minutes before serving. Flavored butter keeps in the fridge for 1 – 2 weeks. Makes ½ cup.
Chive Butter: 3 T. snipped chives, ½ t. lemon zest. Good with fish, poultry, carrots, and potatoes.
Chili Butter: 1½ t. chili powder, ½ t. cumin, ½ t. garlic powder. This is good on breads, beans, grilled chicken, or popcorn.
Curry Butter: 1 t. curry powder, 1 t. fresh lime juice. Use on lamb, poultry, rice, and veggies.
Dill Butter: 2 T. fresh snipped dill, 1 – 2 t. fresh lemon juice. Good with chicken, potatoes, carrots, seafood, or rice.
Mint Butter: 2 – 3 T. fresh chopped mint leaves, 1 t. fresh lemon juice, ½ t. lemon zest. This is great with lamb, peas, chicken, or vegetables.
Sage Butter: 1 T. fresh sage leaves, chopped very fine, or 1 t. dried sage, 1 t. each lemon juice and lemon zest. This is excellent with chicken or pork dinners. Great on breads and rolls, too.
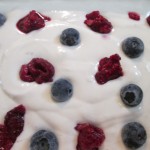
Fresh Strawberry Ice Cream

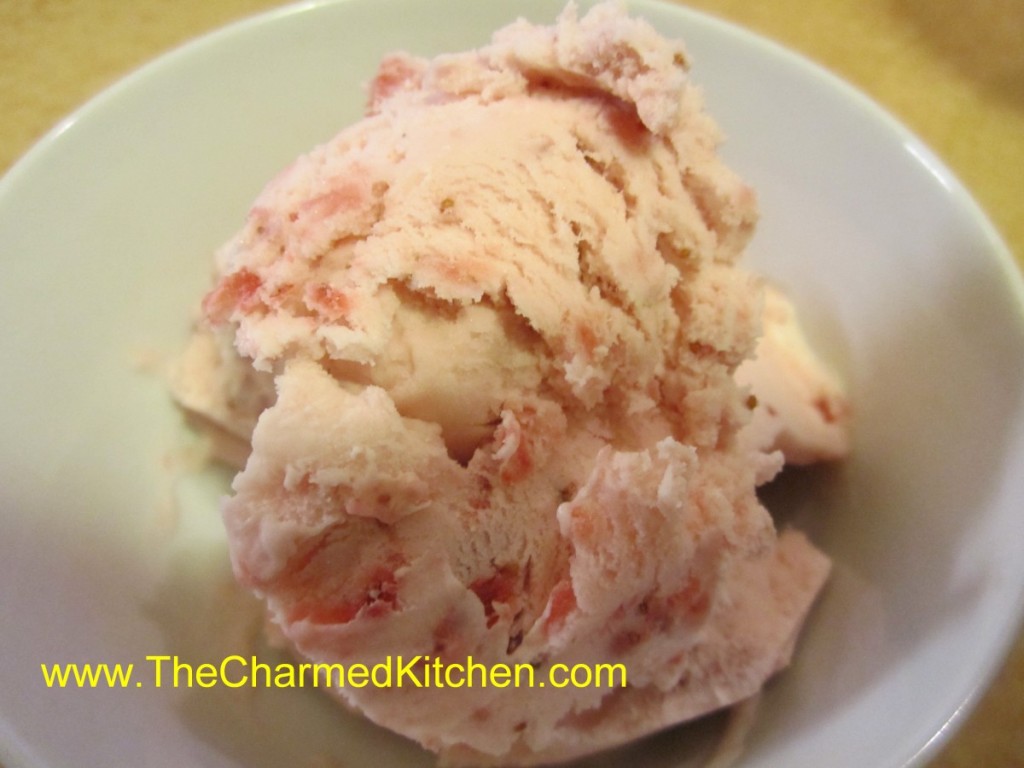
It is strawberry season around here, and I am loving it. Since the weather was finally warming up, I decided to make ice cream with some of the berries. Homemade ice cream is easy to make. When you make your own, you can adjust flavorings and sweetness level, too.
Studded with plenty of berries, this ice cream will put anything store-bought to shame. Feel free to add blueberries or raspberries, too.
Strawberry Ice Cream
2 c. chopped strawberries
1 c. sugar
1 T. vanilla
2 c. cream or half and half or a combination. You can also use some milk or even almond or rice milk.
Additional sugar to taste
Place strawberries, vanilla and sugar in saucepan and bring to a simmer, stirring occasionally. Remove from heat and chill. Combine chilled berry mixture with cream. Add additional sugar if you like. Remember that once it is frozen, the ice cream will not taste as sweet, so make this mixture a little sweeter than you want the final product to be. How much sugar you add varies with personal taste and how sweet the berries are. Place in an ice cream maker and process according to manufacturer’s directions. Once finished put in an air- tight container and place in freezer. Makes about 1 quart.
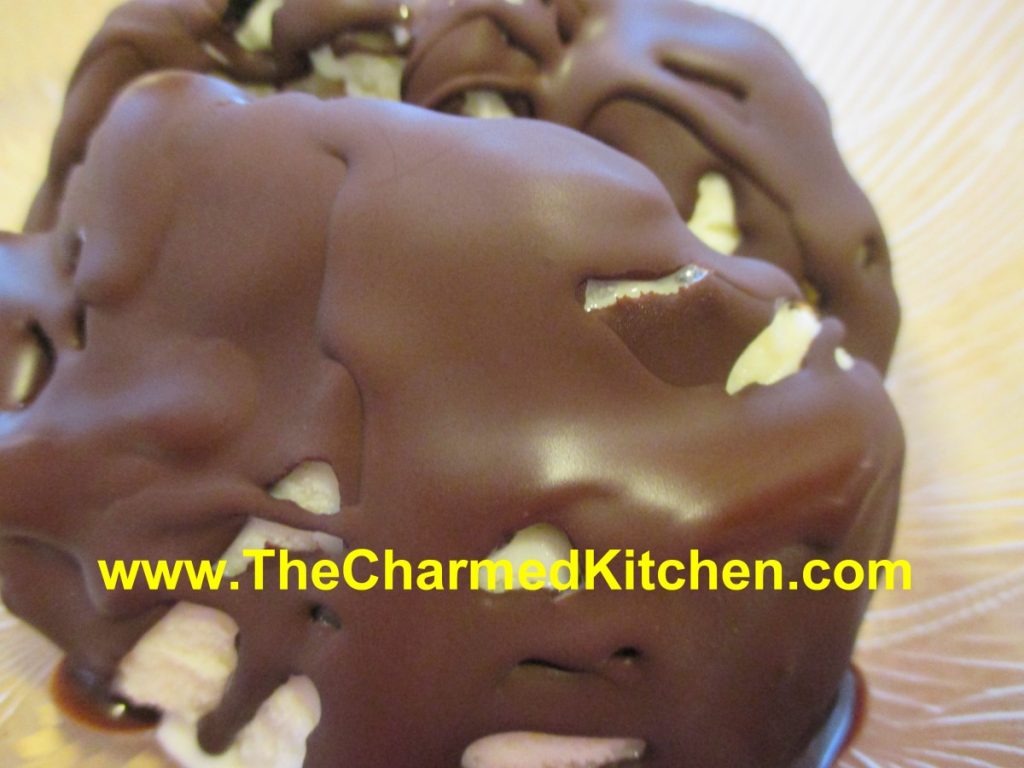
Homemade “Magic” Chocolate Shell

I used to love getting a chocolate-dipped ice cream cone when I was a kid. I still do.
The ice cream shop near my house had them. I watched as the soft serve was swirled onto the cone, then turned upside down and dipped into a vat of melted chocolate goodness. Like magic, the chocolate hardened, and made this lovely, crisp shell.
Then they came out with the squeeze bottles of the stuff. Just a drizzle onto your ice cream and the chocolate hardened like, well, magic.
There are a lot of recipes out there for “magic” shell. I tried a few. All tasted fine, but some just worked better than others. I played around and found the mix that worked best for me.
It is very easy to make- just three ingredients. So easy- so good.
Homemade Chocolate Shell
1 c. chocolate chips- I used dark chocolate chips
3/4 c. coconut oil- I used the unrefined
1/2 c. powdered sugar
Heat all together until melted. I melted mine in a microwave for 1 minute, but you could also melt over a double boiler. Stir until smooth. Store at room temp. To use, drizzle over ice cream, wait about 10-20 seconds- and it will harden.


