Cooking with My Father

One of my favorite memories of my Dad involved a very special breakfast only he and I shared. Every summer there was a park we would go to for family picnics. We went to a place call Pine Way Trails. It has long ago been sold and the land developed. The place would get very crowded so we had to go early to get a prime location by the lake and enough tables for everyone. My Dad and I would go before anyone else. Back then it made me feel so special to go and to help. I am guessing it was because I was the baby and no one else wanted to have to get up so early.
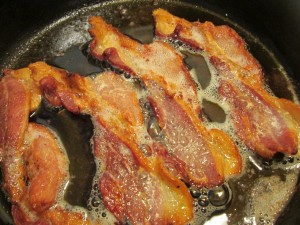
We’d get there and the mist would still be rising off the lake. I’d help him unpack the car and place the tables where we wanted them. He’d get a fire started in one of the grills and get out the cast iron skillet. Over the fire he’d cook us bacon and then cook a couple of eggs. He had his thermos of coffee and I had orange juice. On paper plates we’d sit and enjoy our breakfast together. I don’t think as a kid I really appreciated the skill it took to get that fire just right. The bacon was crisp, but never burnt and the eggs would be sunny side up- with the yolks warm yet runny. I’d use my bacon to get the last of the yolks off my plate.
Later in the day everyone else would arrive. My mom, sister and brother, aunts, uncles, cousins, friends. We’d have a wonderful day together swimming and fishing and eating grilled hot dogs and hamburgers, chicken and salads and fresh melon. It was noisy and so much fun. But that special part of the day for me was the breakfast my Father and I shared, quietly by the lake. I got out the cast iron skillet this morning- cooked some bacon and eggs and thought of him.
Bacon Waffles for Dad

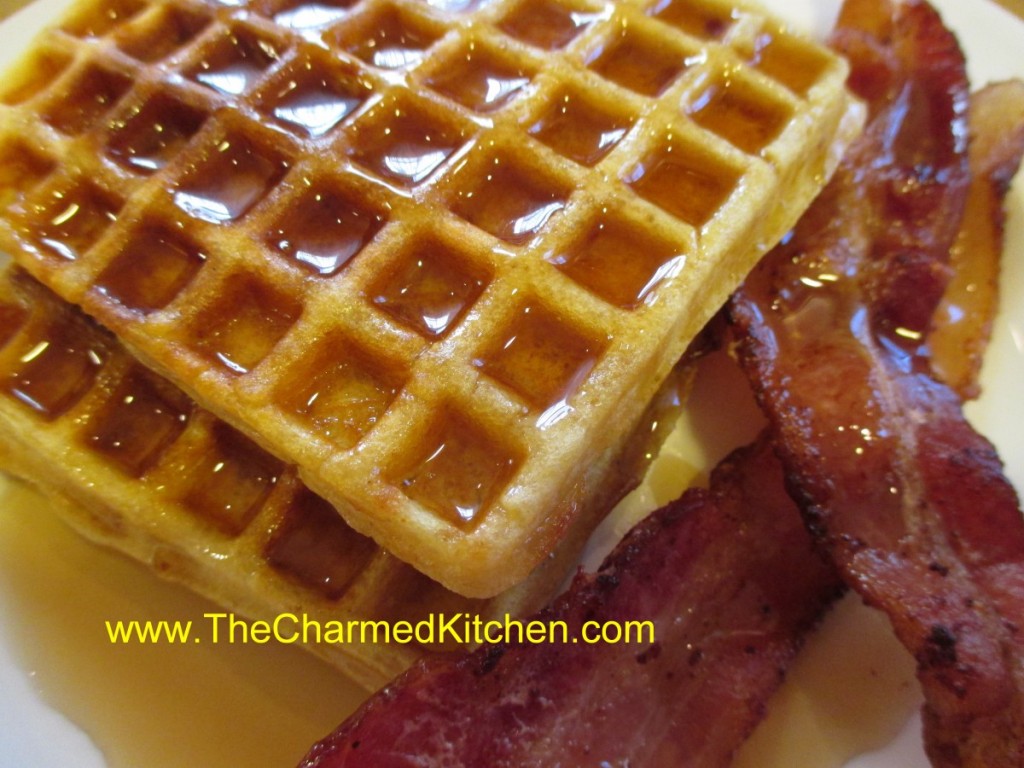
If you are looking for a special breakfast for Father’s Day, maybe dad would like some waffles. Even better, make him waffles with bacon inside them. Then serve your bacon waffles with extra bacon on the side!!!
For me, breakfast doesn’t get much better than waffles. Well, unless maybe you add bacon to the waffle batter.
Truth is, I don’t treat myself to waffles all that often, but if I am going to eat waffles, I go all out.
These are truly wonderful waffles. Light, crispy on the outside and studded with bacon. A drizzle of warm maple syrup and you are good to go.
So, if you are looking for a special treat for dad for breakfast, or lunch, or dinner or a snack… try these bacon waffles. You can thank me later.
Bacon Waffles
1 pound sliced bacon
1 3/4 cups all-purpose flour
1 tablespoon sugar
2 teaspoons baking powder
1/2 teaspoon salt
3 eggs, separated
1½ cups milk
¼ cup butter, melted
In a skillet, cook bacon until crisp. Drain; crumble and set aside. In a
mixing bowl, combine the flour, sugar, baking powder and salt. Beat egg
yolks, milk and butter; stir into dry ingredients until smooth. Beat
egg whites until stiff peaks form; fold into batter. Add bacon. Before
making each waffle, stir batter. Bake in a preheated waffle iron
according to manufacturer’s directions until golden brown.
Strawberry Cupcakes

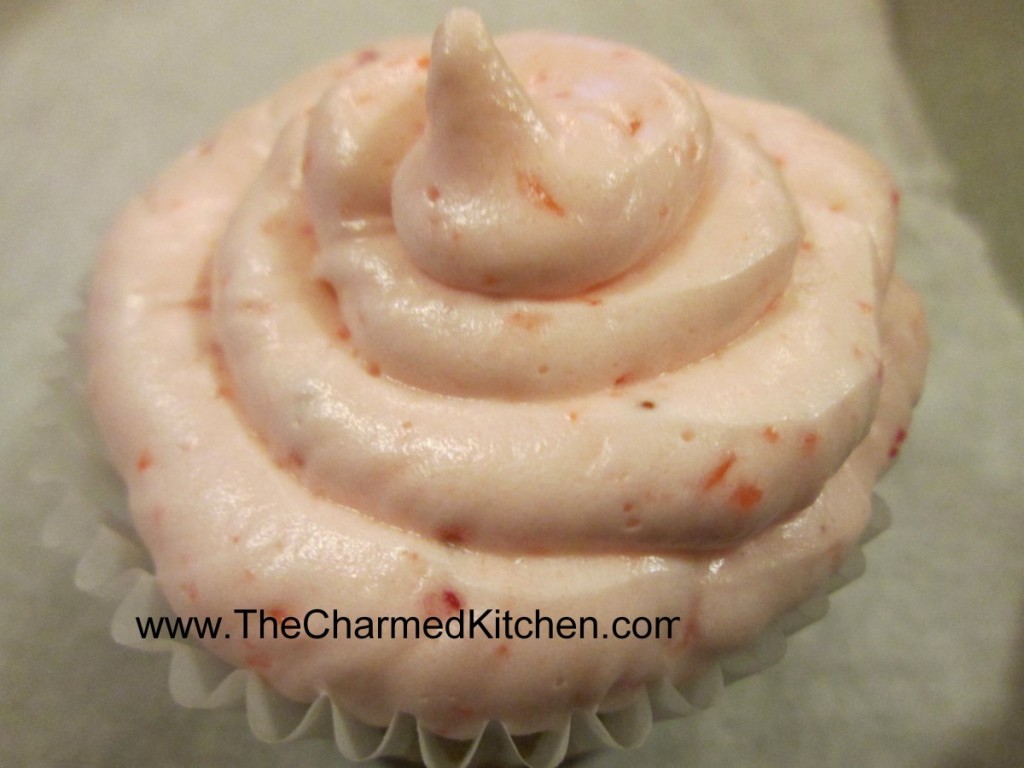
I just don’t get tired of strawberries. Maybe because the season for local berries is so short- and sweet. Local strawberries are at all the markets now- and they are fabulous. The season for local berries is short and I try to use them as much as I can. I also will freeze some for use throughout the year.
Cooking camp starts in Hudson next week. We will be making these cupcakes. I am sure the kids will love them as much as I do. The recipe came about on a whim. I was making cupcakes for some friends and decided to make some with strawberries. As you might expect, they were a big hit. The berries add sweetness and color in a delicate, natural way. You could also make these with frozen berries. I like to get extra strawberries and freeze some, so I will have them, even when the season is over.
Strawberry Cupcakes
2/3 cup whole fresh strawberries
1 1/2 cups all-purpose flour, sifted
1 teaspoon baking powder
1/4 teaspoon coarse salt
1/4 cup whole milk, room temperature
1 teaspoon pure vanilla extract
1/2 cup (1 stick) unsalted butter, room temperature
1 cup sugar
1 large egg, room temperature
2 large egg whites, room temperature
Preheat oven to 350 degrees. Line a 12-cup muffin tin with cupcake liners; set aside. Place strawberries in a small food processor; process until pureed. You should have about 1/3 cup of puree, add a few more strawberries if necessary or save any extra puree for frosting; set aside. In a medium bowl, whisk together flour, baking powder, and salt; set aside. In a small bowl, mix together milk, vanilla, and strawberry puree; set aside. In the bowl of an electric mixer fitted with the paddle attachment, cream butter on medium-high speed, until light and fluffy. Gradually add sugar and continue to beat until well combined and fluffy. Reduce the mixer speed to medium and slowly add egg and egg whites until just blended.
With the mixer on low, slowly add half the flour mixture; mix until just blended. Add the milk mixture; mix until just blended. Slowly add remaining flour mixture, scraping down sides of the bowl with a spatula, as necessary, until just blended.
Divide batter evenly among prepared muffin cups. Transfer muffin tin to oven and bake until tops are just dry to the touch, 22 to 25 minutes. Transfer muffin tin to a wire rack and let cupcakes cool completely in tin before icing. Makes 12.
Strawberry Frosting
1/2 cup whole fresh strawberries or frozen strawberries, thawed
1 cup (2 sticks) unsalted butter, firm and slightly cold
Pinch of coarse salt
3 1/2 cups confectioners’ sugar, sifted
1/2 teaspoon pure vanilla extract
Place strawberries in the bowl of a small food processor; process until pureed. In the bowl of an electric mixer fitted with the paddle attachment, beat together butter and salt on medium speed until light and fluffy. Reduce mixer speed and slowly add confectioners’ sugar; beat until well combined. Add vanilla and 3 tablespoons strawberry puree (save any remaining strawberry puree for another use); mix until just blended. Do not over-mix or frosting will incorporate too much air. Frosting consistency should be dense and creamy, like ice cream. Makes enough for 1 dozen cupcakes.
Cheese Fondue


I had been wanting to have a fondue party for a long time. I have fond fondue memories from when I was a kid. My mother had fondue parties and I loved them.
I decided to start things off with two different cheese fondue recipes. One was made with Jarlsberg cheese and the other with smoked Gouda. The recipe for both was pretty much the same. Probably pretty close to what my mom used to make, too.
There was one ingredient I used that my mom would not have even heard of- sodium citrate. Sodium citrate has several applications in molecular gastronomy. For me, its value is what it does when added to cheese sauce. Sodium citrate makes cheese sauce super creamy. If you have ever made a cheese sauce and ended up with a grainy texture, you know how frustrating that can be. Sodium citrate makes that problem go away. I get mine online. If you don’t have sodium citrate, your cheese sauce will still be good- but not as creamy.
So here is the recipe I used for my cheese fondue.
Smoked Gouda Cheese Fondue
1 garlic clove, peeled*
½ a bottle of white wine- dry preferred
2 T. sodium citrate
2 T. Kirsch
2 lbs. shredded Smoked Gouda
Dash of hot sauce
*In a classic cheese fondue, you are supposed to rub a garlic clove around the inside of the fondue pot, to give just a hint of garlic flavor to your fondue. I just put the garlic in the pot and removed it just before adding the cheese.
In pot, place garlic, wine, sodium citrate and Kirsch. Bring to a boil. Remove garlic. Start adding the cheese, a handful at a time, stirring vigorously. As each batch of cheese melts, add another handful until all the cheese has been added. Stir until smooth. Add a bit of hot sauce- if you like. Transfer to a fondue pot. Keep warm. Serve with crusty bread cubes and assorted veggies.
Note: I opted to make my fondue in a separate pot, then transfer it to the fondue pot. I just found it easier for me, but you can make the whole thing in the fondue pot, if you prefer.
The dippers: I had crusty bread, that I cubed up and toasted. I also roasted baby potatoes, asparagus, sweet peppers and mushrooms. I steamed broccoli until it was just a bit past raw- 4 minutes in the microwave.
The Jarlsberg fondue was pretty much the same recipe, but it seemed to need a little something extra. I added some roasted garlic, which was good. It also needed a bit of salt.


Special thanks to Jonathan, Jill and Dale for your extra help to make this happen.
Curry Cauliflower Salad


Long before cauliflower became trendy, I was a fan. I love it steamed, served with a little butter and salt or pan fried and mixed with garlic and a bit of Parmesan cheese. I have enjoyed cauliflower in any number of salads as well.
I picked up a huge cauliflower from a local produce market. I decided to turn it into a salad. I was not disappointed.
Here is the recipe I made with a head of cauliflower.
I used curry powder- I make my own- but you can use a store bought one. The recipe for curry powder is at the end of the recipe. I also added some green onions and peanuts for crunch. It came out quite nice.
I have used curry powder in hot cauliflower dishes before, but the salad was a pleasant change of pace.
Curry Cauliflower Salad
1 head cauliflower, cooked
½ c. chopped green onions
¾ c. mayo – or less or more depending in the size of the head of cauliflower
1 T. curry powder- or to taste
1 t. hot sauce, or to taste
Salt and pepper to taste
1 c. peanuts
First break the cauliflower into florets. Cook the cauliflower any way you like. I steamed mine for about 5 minutes. You could roast it, or sauté it in a little oil. You want it tender, but still a little crisp. Don’t cook it to mush. I would also advise against boiling it, as it gets too wet. Once the cauliflower is cooked, let it cool down before proceeding. Combine the cauliflower with the green onions, the mayo and seasonings. It was hard to be exact because your head of cauliflower might be bigger or smaller than mine. I could have said 5 cups of cooked cauliflower- but would that really help? Then you’d have leftover cooked cauliflower. Or perhaps not enough. So add a little more mayo, if needed, and adjust the seasonings to suit your taste and the amount of cauliflower you have. Chill and toss the peanuts in closer to serving time. If you add the peanuts at the end, they stay crunchier.
Curry Powder
2 t. ground cumin
2 t. ground coriander
2 t. ground turmeric
1 t. nutmeg
1 t. salt
½ t. cinnamon
¼ t. cayenne pepper
¼ t. ground black pepper
Combine all ingredients and store in a cool, dry place.
Mini Strawberry Shortcakes

Mini Strawberry Shortcakes
With strawberry season in full swing, I thought I would share another favorite strawberry recipe. These little shortcakes are as cute as they are tasty. You can have all the components ready, then just assemble when ready to serve.
Fun to serve at parties. Because these are small, they work well with other desserts on larger dessert trays.
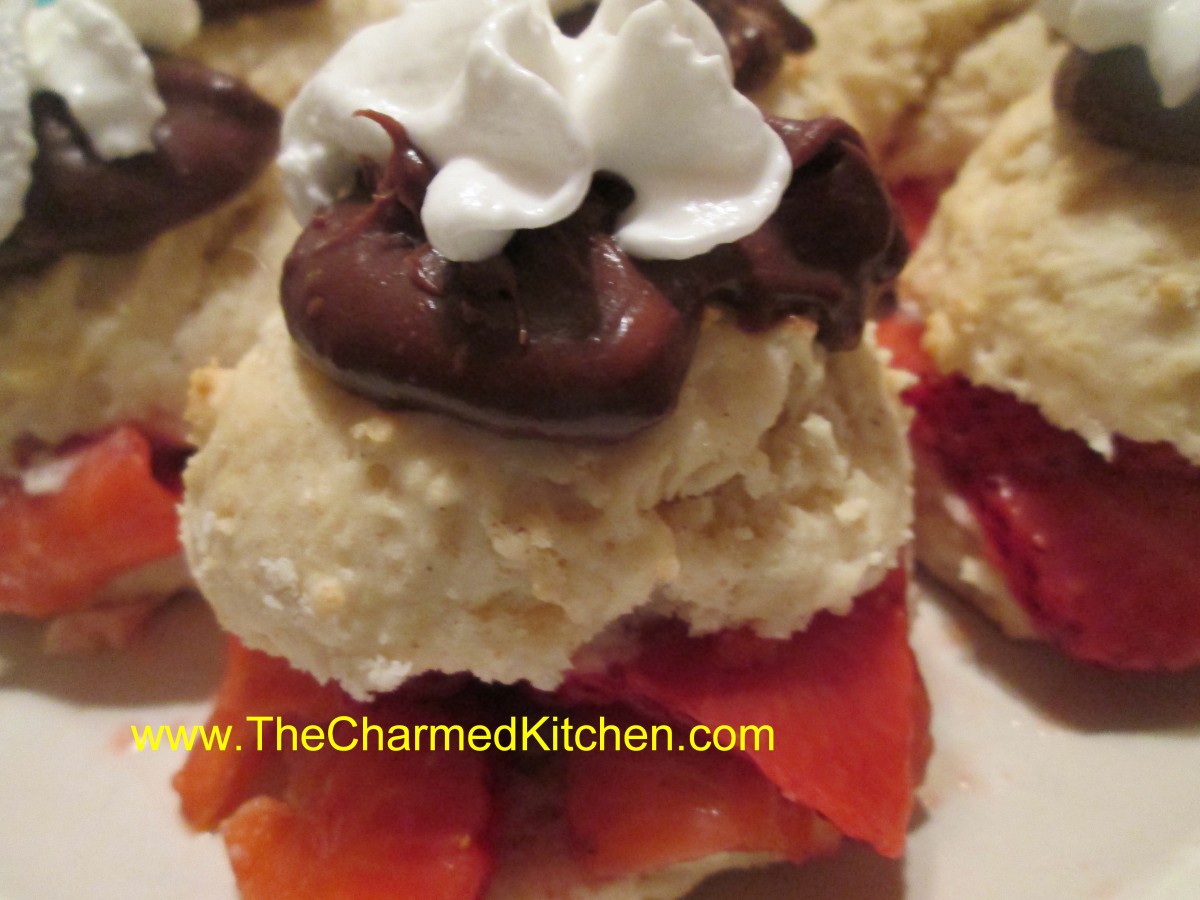
I made the shortcake base with a scone recipe, and used a small ice cream scoop to put the batter on the baking sheet. They ended up looking like little sandwich buns. My friend said I should call them shortcake sliders.
I split them, and filled with sweetened strawberries. I replaced the top and added chocolate ganache and whipping cream to finish them off.
The scone is tender and not too sweet. Satisfying and light at the same time.
Mini Strawberry Shortcakes
The shortcakes
2 c. flour
1/4 c. sugar
½ t. salt
1 T. baking powder
1 1/4 c. heavy cream or 1 cup half and half
Preheat oven to 425 degrees. Sift together dry ingredients and gradually add cream to form soft dough. Stir mixture until it just holds together. Using an ice cream scoop place batter on baking sheet a couple of inches apart. You should get about a dozen. Bake 10-12 minutes or until golden. Makes about 12. Cool on rack until ready to use.
The berries
2 lbs. strawberries, sliced thin
1/2 c. sugar, or to taste
Combine berries and sugar in medium bowl and place in fridge until ready to use. Berries should be in the sugar for at least a couple of hours and can even be prepped a day ahead to allow the juices to come out of the berries.
The ganache
1 c. semi sweet chocolate chips or 6 oz. semi sweet chocolate, chopped
1/2 c. heavy whipping cream.
Combine both in double boiler or in microwave and heat until mixture is just warm enough to melt the chocolate. Stir until smooth.
The whipped cream – use whipped cream, sweetened or unsweetened according to your taste.
Assembly: Slice the caps off the tops of the shortcakes. Place a generous spoonful of the sliced berries on the bottoms of the shortcakes and spoon some of the strawberry liquid over them as well. Place the tops of the shortcakes back on and spoon on a dollop of the chocolate ganache. I let me get to room temperature so it didn’t drip down exactly as I had planned. Top with some whipped cream and serve. Makes about 12.
Strawberry Liqueur


Strawberry Liqueur
This strawberry liqueur is like summer in a bottle. I make a lot of different liqueurs and strawberry is one of my absolute favorites. It is wonderful for sipping or over ice. It is also a fun addition to any number of cocktails. A friend adds it to ice cream with extra berries and blends it up for an adult strawberry milkshake.
With strawberries in season, this is the time of year to enjoy them. I have been eating strawberries in breakfasts, desserts, chocolate fondue and salads.
I want to preserve some for later, too. I made strawberry jam and dehydrated some. I will also freeze some.
Another way to preserve strawberries, is by making a liqueur with them. It is pretty simple. Just combine berries with vodka and a small amount of powdered sugar. I use half gallon canning jars for this, but you could use any food safe container with a tight fitting lid.
Let the mixture steep long enough for the berries to infuse the alcohol with their flavor. You can sweeten it later on, or even leave it unsweetened, if you prefer. I like to sip the liqueur as is, or serve on the rocks with a splash of club soda.
Strawberry Liqueur
3 cups fresh strawberries, sliced
3 T. powdered sugar
3 c. vodka
1 c. simple syrup*
Sprinkle powdered sugar over berries and let dissolve. Pour over vodka and let steep 2 weeks. Crush berries and strain then filter. Add sugar syrup and mature 1 week. Makes 5 cups.
*Simple syrup is made from 1 cup of sugar and ½ cup of water. Bring to a boil, then cool. You will have 1 cup of syrup. You can sweeten your liqueur with honey, if you prefer. Watch when you substitute honey for sugar, as it is sweeter and stronger flavored. Better to use orange or clover honey. Add to suit your taste.
Strawberry Sorbet


Strawberry Sorbet
If you are looking for a versatile dessert, sorbets are a great option. Almost any fruit can be used, and you can sweeten, or not, to suit your own taste. If you start with frozen fruit, you can blend up your sorbet and serve it right away. Even better, if you can process and freeze it a couple of times.
Sorbets can be served on their own, with cake, or drizzled with chocolate sauce. I sometimes add a scoop of sorbet to a glass of lemonade or ice tea on a hot day. So refreshing. Sorbet can be a fun topper in cocktails, too. I sometimes combine a couple of fruits in one sorbet.
I made this strawberry sorbet the other day. I had some strawberries in the freezer and I needed a quick dessert. It came out just wonderful.
You can make the sorbet in an ice cream machine, if you have one, but you don’t need to. I don’t. It really is simple. As an added bonus, once your sorbet is made, you have it on hand whenever you need a dessert. The secret is to blend the sorbet a couple of times after it is frozen, if you can. Each time, the sorbet gets smoother and creamier. I use my food processor.
So here is the recipe for my strawberry sorbet. You can substitute any number of different fruits.
Strawberry Sorbet
1 1/2 lbs strawberries, fresh or frozen
1/2 c. sugar, or to taste – you could also sweeten with honey, if you prefer, or use no sweetener
1 T. lime or lemon juice
Wash and stem berries. Place in food processor with juice and blend until smooth. Sweeten to taste, stirring until sugar is dissolved. Place in a container with a lid and freeze. Once frozen, remove strawberry mix from freezer and sit it on the counter to soften a little bit. This is really the important part. You don’t want it to thaw, but you do want it soft just enough to break into chunks. Place chunks in food processor and blend it again. It will actually start to look a little creamy and lighter in color. You can serve it right away- or put it back in the freezer to serve later. At this point the sorbet is ready- but you can repeat the soften/process step once more, if you like, for even creamier sorbet. Makes 3-4 cups.
Black-eyed Pea Salad

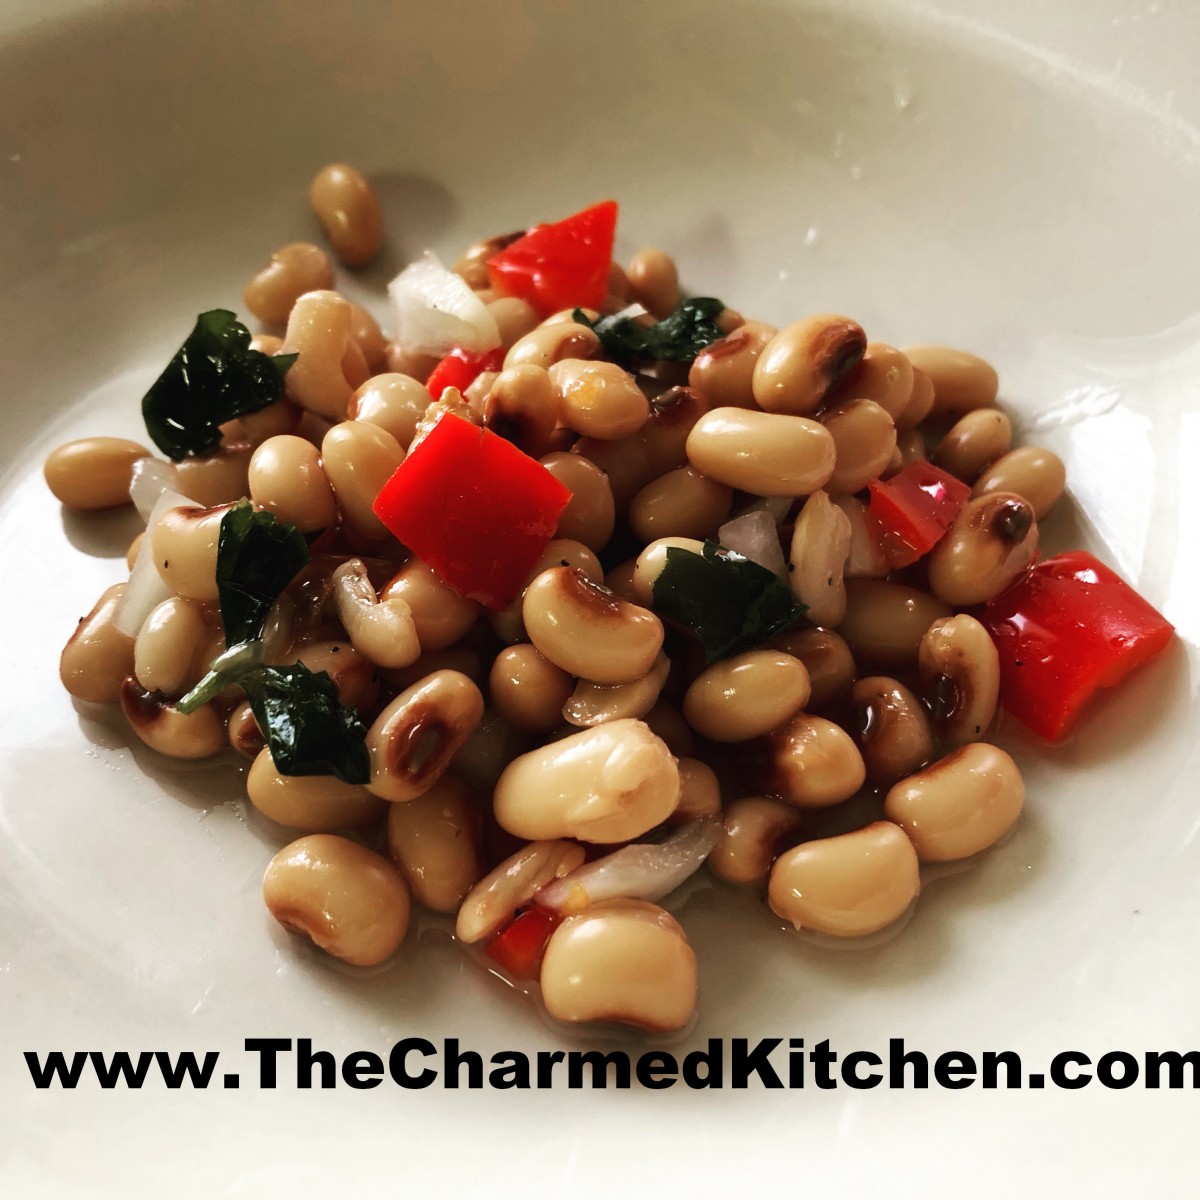
Black-eyed Pea Salad
I taught a vegetarian cooking class last week and this recipe was a big hit. Several of the people in class said they never thought of eating black-eyed peas in a salad. They had only had them in hot dishes before.
Black-eyed peas, like other legumes, are a wonderful addition to both hot and cold dishes. This recipe was presented as a great vegetarian option for dinner. Truth is, this makes a nice salad for almost any summer party, picnic or cookout. Even the carnivores should be pleased.
It is a simple recipe you can make ahead of time. Not too many ingredients, but packed with flavor.
I used dried peas and cooked them in my pressure cooker. If you are really pressed for time, you could use canned black-eyed peas instead. You’d need 4 or 5 cans. A can of black-eyed peas ( 14 oz.) will give you about a cup and a half of peas. A pound of dried gives you about 7 cups of cooked peas.
Here is the recipe. Great summertime salad. Serve it plain- or over a bed of salad greens.
Black-eyed Pea Salad
1 lb. dried black-eyed peas
1 large sweet onion, chopped fine
1 sweet pepper, seeded and chopped
1/4 c. olive oil
1/4 c. red wine vinegar
1/4 c. chopped fresh parsley
1/2 t. dried thyme
salt and pepper to taste
Cover beans with cold water in saucepan and bring to a boil. Boil 5 minutes. Turn off heat and allow to stand 1 hour. Drain and rinse beans. Return to saucepan and cover with cold water. Simmer beans until tender, about 1 1/2 hours. Drain. Place cooked beans in a bowl and cover with remaining ingredients. Toss to coat, cover and chill. Serve as a main dish or on the side. Also tasty served over salad greens or stuffed in a hollowed out tomato. Serves 6-8.
Strawberries and Cream Bread

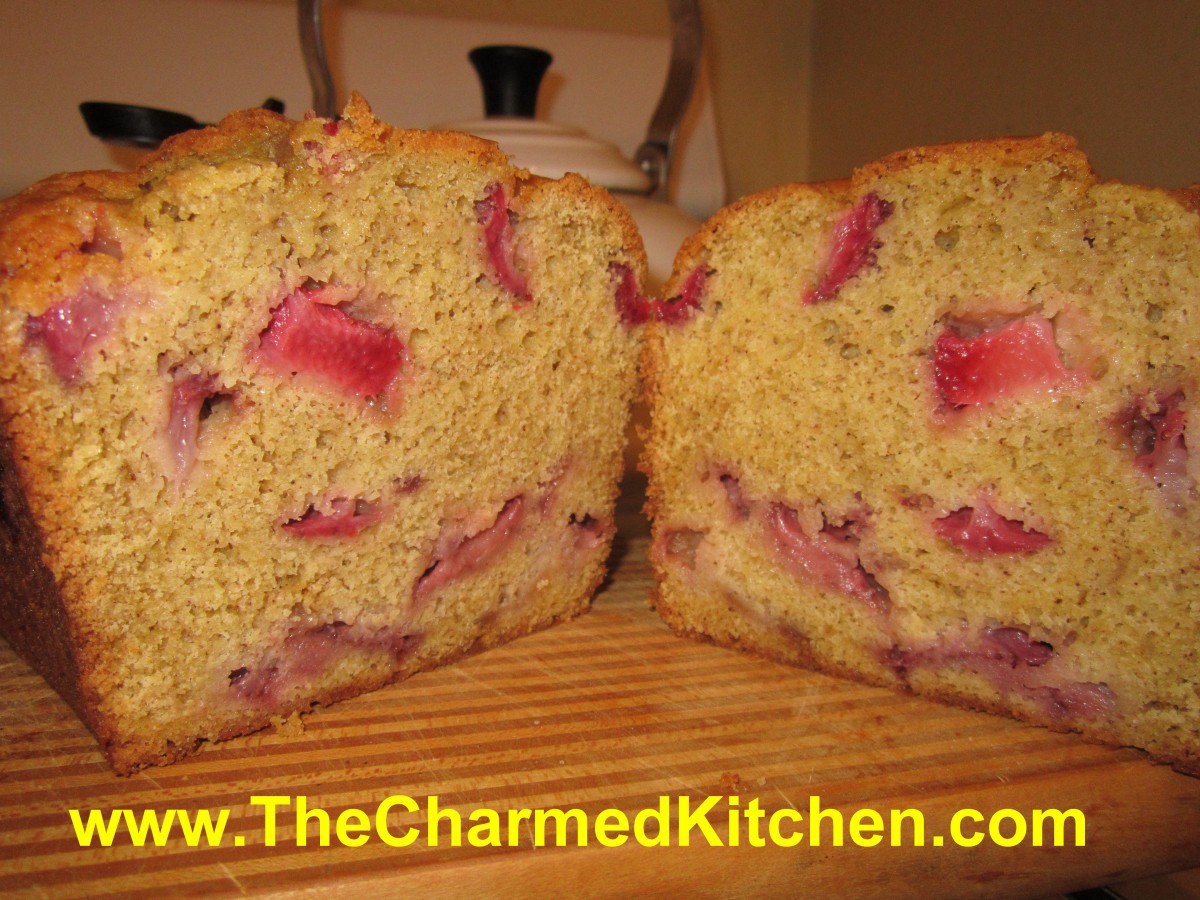
Strawberries and Cream Bread
I have posted this recipe before, but have been getting requests for it, so I thought it was worth sharing again. Since strawberries are in season, it seemed like the right time to post this recipe.
This is one of my favorite quick breads. The bread is tender and full of the sweet taste of fresh strawberries.
The batter will be very thick- don’t worry- it is supposed to be that way. When it cooks, the juices from the fresh berries keeps it moist.
I always end up making a double batch, one loaf to eat fresh and one to give as a gift, or freeze.
This bread is fine just the way it is for dessert, or you can top with sliced strawberries, ice cream, whipped cream or some melted chocolate. Or top it with all of them!!
Here is the recipe. Enjoy!!
Strawberries and Cream Bread
1 ¾ c. flour
½ t. baking powder
½ t. baking soda
½ t. salt
½ t. each cinnamon and nutmeg
½ c. butter, at room temperature
¾ c. sugar
2 eggs, room temperature
½ c. sour cream, room temperature
1 t. vanilla
1 c. fresh strawberries, coarsely chopped*
¾ c. chopped nuts, optional
Grease an 8×4 inch loaf pan and preheat oven to 350 degrees. In a large bowl combine dry ingredients. Set aside. In small bowl beat butter until creamy. Add sugar and beat 1 minute. Beat in eggs one at a time. Beat in sour cream and vanilla. Stir in flour mixture until just moistened. Fold in strawberries and nuts and place batter in prepared pan. Bake 60-65 minutes, or until toothpick inserted in center comes out clean. Let stand in pan 10 minutes. Remove from pan and cool on wire rack. Makes 1 loaf. Freezes well.
* frozen berries are not recommended in this bread.


