Mom’s Pierogi

Mom’s Pierogi
My mother taught me how to make pierogi, the way her mother taught her. They are part of my family’s food traditions.
Pierogi, if you didn’t know, are pasta, filled with different fillings, often potato based. They are also sometimes stuffed with prune filling or sauerkraut. Today you can find pierogi filled with all sorts of fillings.
Filled with potato and cheese, they make a great meat-free meal, too. We often had pierogi on Fridays in Lent when I was a kid.
There are variations in the dough, too. Some use just eggs, flour, water and salt. Others add some dairy, in the form of milk or sour cream.
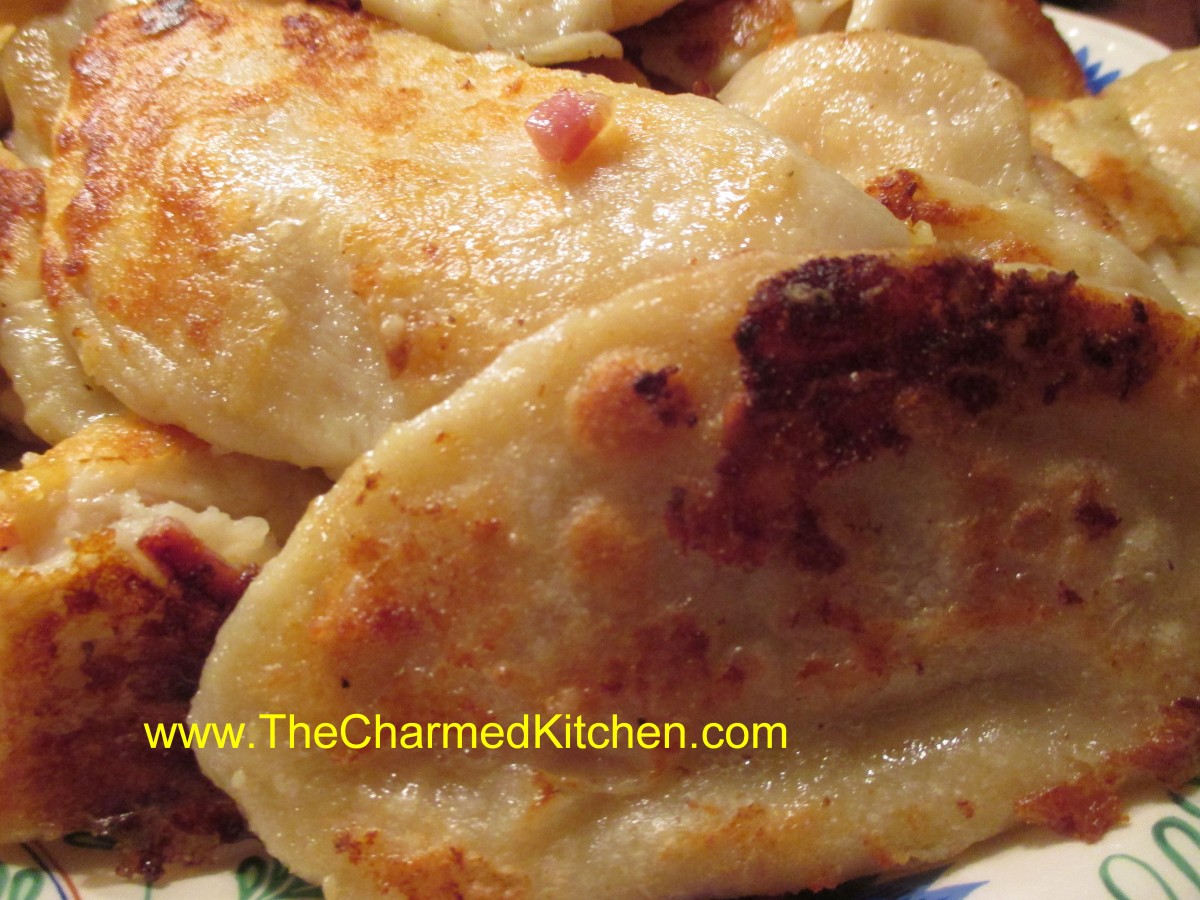
Once the pierogi are made, you can boil them and just serve them up, or brown the boiled pierogi in butter and serve with caramelized onions and sour cream. My mother used to make sweet and sour cabbage and serve it with the pierogi, or sometimes even use it as a filling. I can’t make them without remembering her.
Pierogi
Dough:
2 c. flour
1 t. salt
½ c. water (you can also use half milk and half water)
1 egg
Mix all ingredients together and knead on floured surface until smooth. Cover and let rest at least 15 minutes. Roll out thin and cut into circles. Re-roll scraps. You should get between 20-30. Spoon filling of your choice on center of dough circle. Fold dough in half over filling and press edge with fork to seal. Wetting the edge of the dough will help the dough to stick. Don’t overfill or the pierogi will split. Test a couple first to get the hang of it. Place a few at a time into salted boiling water and cook until they float. You can eat them as is or brown cooked pierogi in butter in a skillet. Serve with grilled onions and/or sour cream. We would often make a larger batch and then freeze them, uncooked on wax paper-lined baking sheets. When frozen they would be transferred to a freezer bag or container. Place right from the freezer into boiling water when ready to use.
Potato filling:
2 lbs. Potatoes, peeled and boiled
½ onion, minced
2-3 T. cottage cheese or farmer’s cheese, optional
salt and pepper to taste
Mash potatoes with other ingredients and season to taste.
Note: you can also add cheddar cheese if you like. In class we had some with cheddar cheese and added ham, too.

Fresh made pierogi
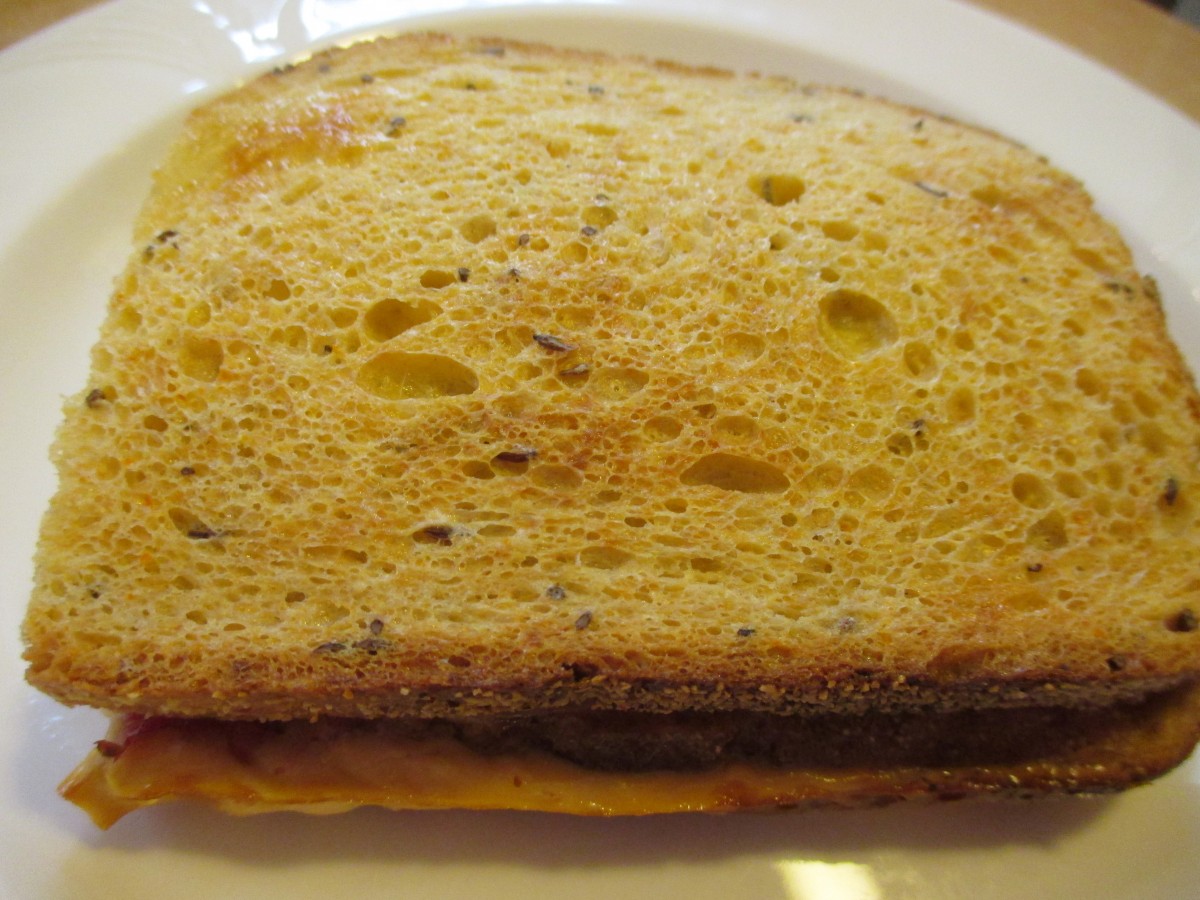
Reuben Strata

Reuben Strata
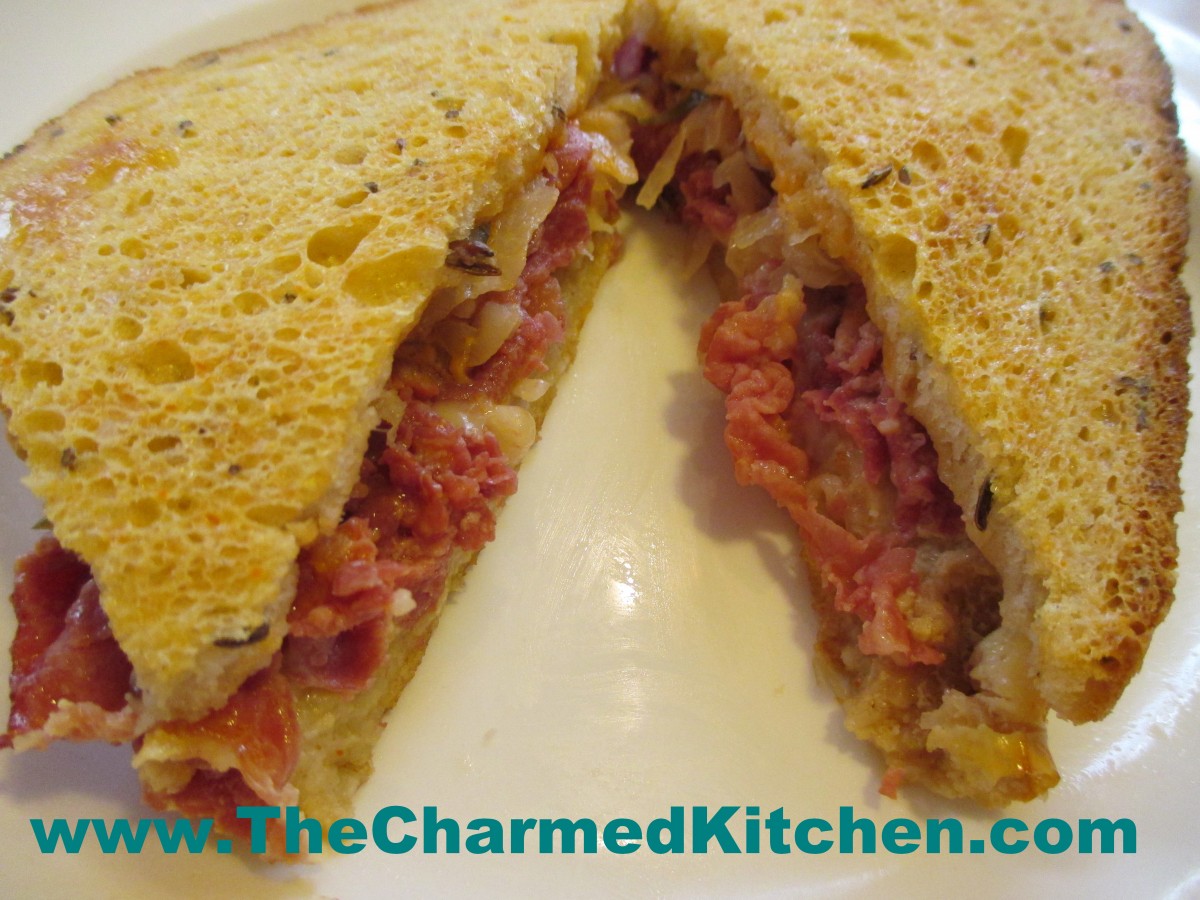
If you need a new recipe for corned beef- I would suggest making this strata. It contains all the ingredients found in a traditional Reuben sandwich, but with a twist. These “Reubens” are baked, after being soaked in an egg custard.
The dish is assembled at least a few hours before baking, so you can make it the day before, or in the morning. Just pop in the oven about an hour before you want to serve it.
Strata just means layers. Ingredients are layered before pouring over an egg/milk mixture. These layers add flavor to the final dish. In this strata, layers include rye bread, Swiss cheese, corned beef, sauerkraut and thousand island dressing. Of course, you can play around with the ingredients you use. If you don’t like sauerkraut, you can leave it out- or only put in on some of the sandwiches. Strata can be served for breakfast, brunch, lunch or dinner.
I used very thinly sliced corned beef from the deli. You can also use home-cooked corned beef. Just dice it or shred it up. I also used homemade Thousand Island dressing, but use what you like. You can also serve extra dressing on the side.
Reuben Strata
12 slices rye bread
6 slices Swiss cheese
12 oz. thinned sliced corned beef- or 2 cups chopped corned beef
1 c. sauerkraut, squeezed dry
½ c. Thousand Island dressing*
3 eggs
2 c. milk
½ t. salt
½ t. hot pepper sauce, or to taste
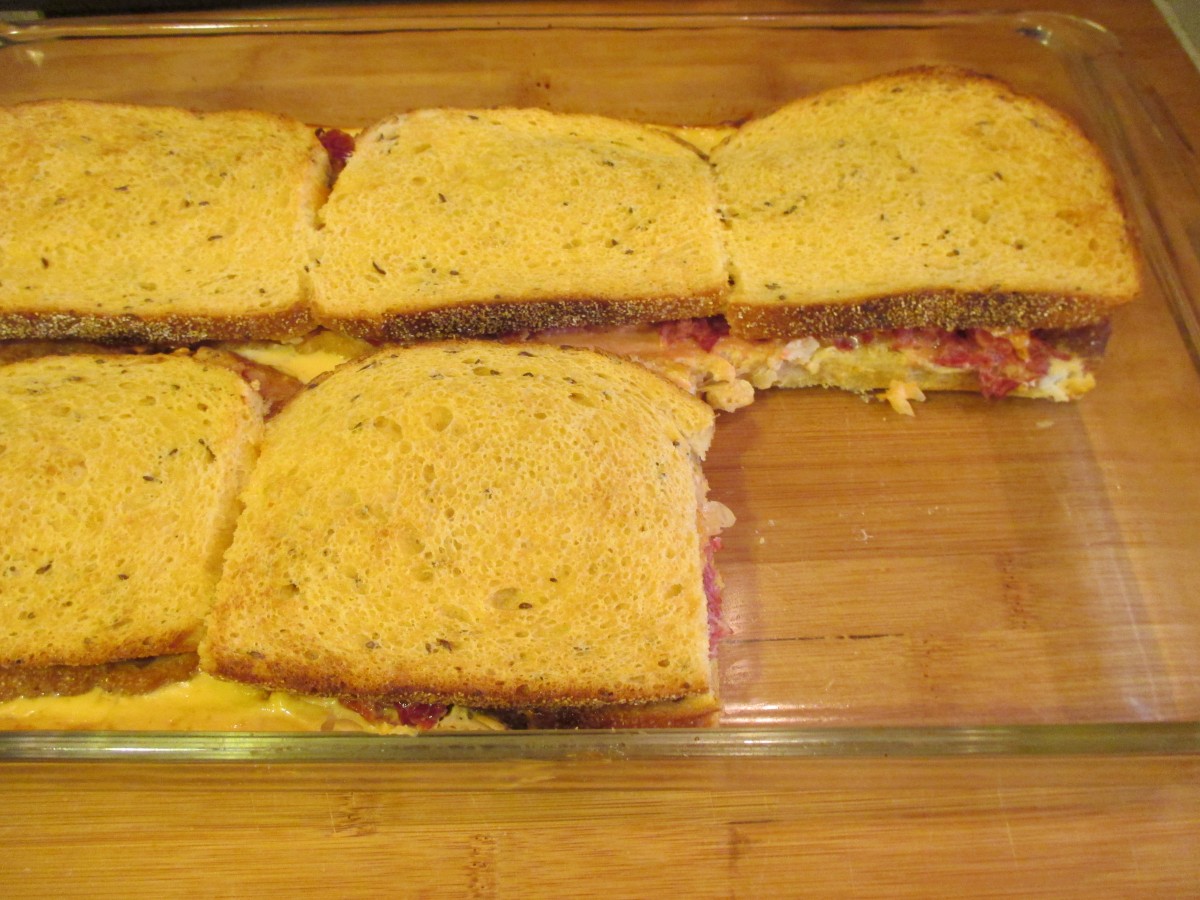
Lightly grease a 9×13-inch baking dish. Place six slices of bread on bottom of the dish. You might have to trim the bread to fit. Top each slice of bread with a slice of cheese. Top cheese with the corned beef and sauerkraut. You can use a little more or less sauerkraut, depending on your taste. Spoon about a tablespoon of the dressing over each “sandwich”. Top with remaining six slices of bread, trimmed to fit pan, if needed. Combine remaining ingredients and pour over sandwiches. Cover dish and let stand in the fridge, several hours or overnight. Bake, uncovered, in a 350-degree oven for 40-45 minutes, or until puffed and set. Let sit a few minutes before serving. Serves 6.
*Homemade Thousand Island Dressing is just equal parts of sweet pickle relish, ketchup and mayo. You can make your own pretty easily.
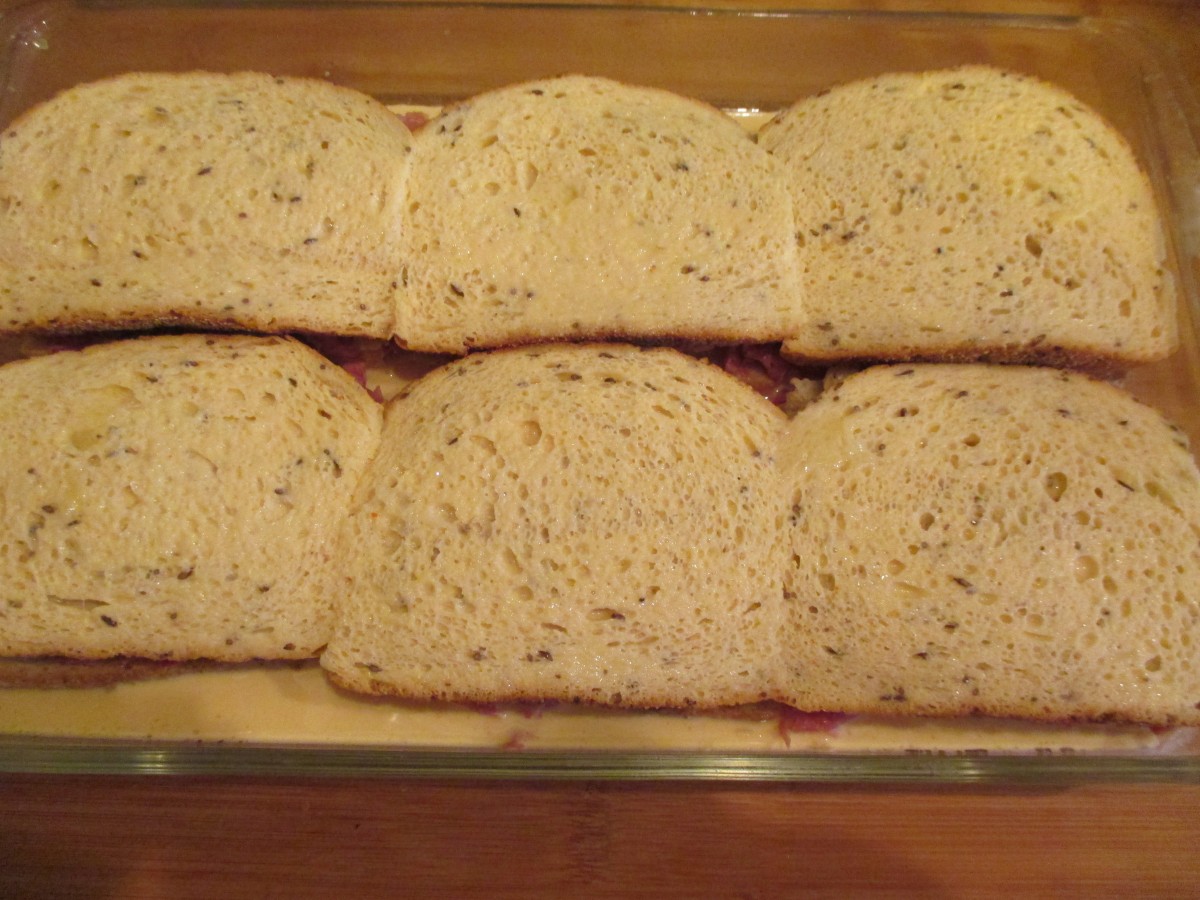
Strata, before baking
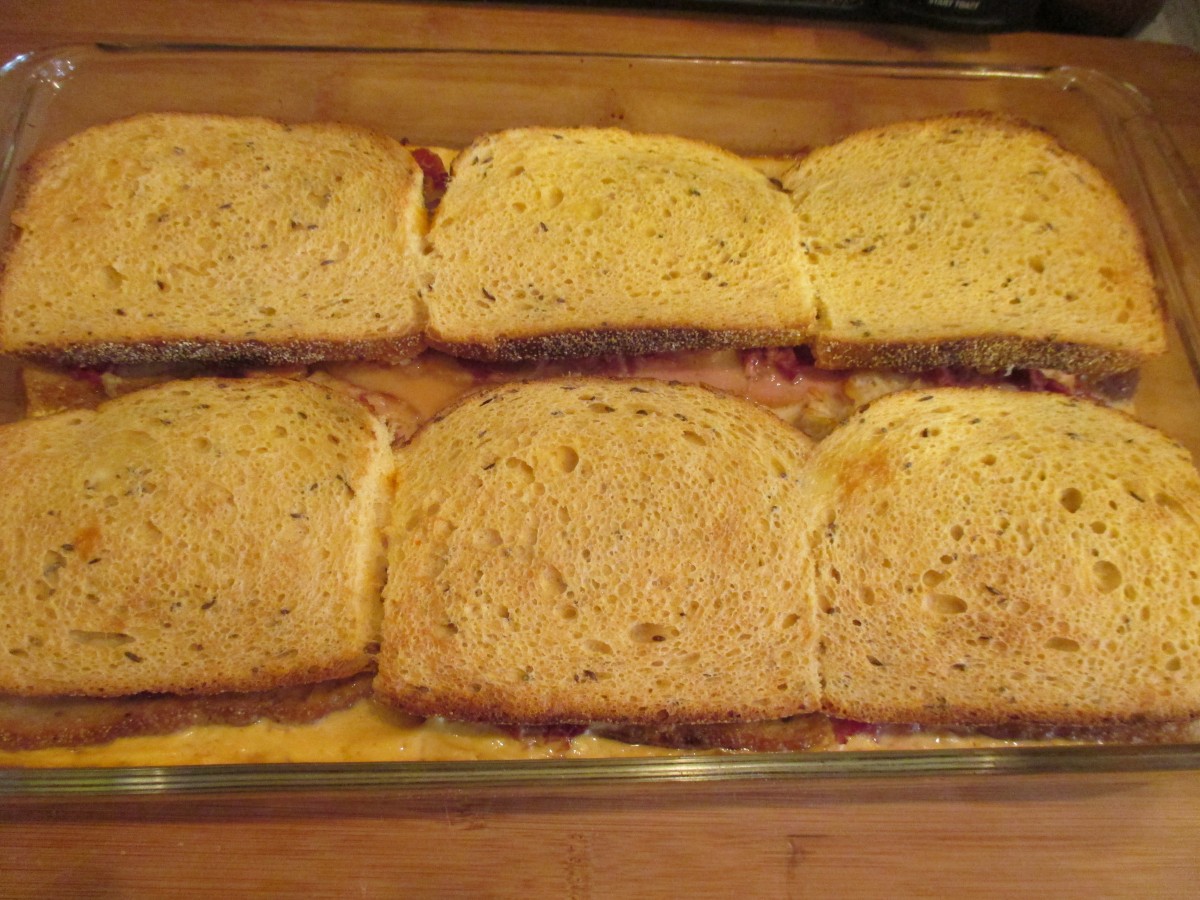
Right out of the oven
Irish Soda Bread Scones

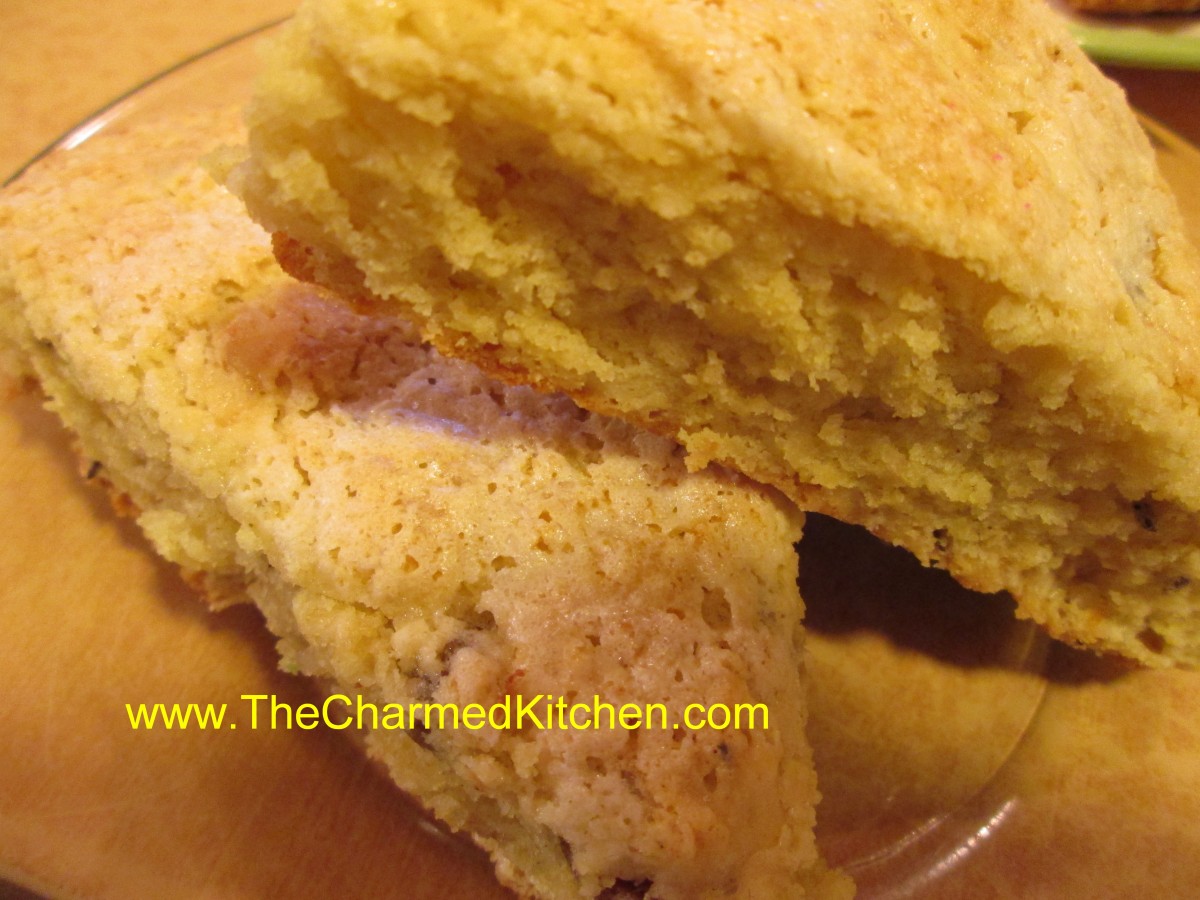
Irish Soda Bread Scones
If you are in the mood for the flavor of Irish Soda Bread- you can get the same wonderful experience in a scone. I made a batch of these scones last night. I had one with a cup of hot tea. It was the perfect breakfast.
I will admit that most mornings, breakfast is a bowl of oat bran. Scones are so much more fun. They don’t take a lot of time to make, either. These would be a great addition to your St. Patrick’s Day meal.
While traditionally served for breakfast or tea time, scones are really good any time of the day. They certainly can also be served with dinner.
I used golden raisins, but you could use regular raisins, currants, or even leave them out.
Irish Soda Bread Scones
2 c. flour
3 T. sugar
2 t. baking powder
1 t. baking soda
½ t. salt
1/3 c. butter
½ c. golden raisins
1 t. caraway seeds
2/3 c. buttermilk
1 egg
Milk
Extra sugar for sprinkling
Preheat oven to 425 degrees and lightly grease a baking sheet. Combine dry ingredients in medium bowl and cut in butter to resemble coarse crumbs. Stir in raisins and caraway seeds. Beat together buttermilk and egg and add to flour mixture, stirring with fork until mixture just coming together. Turn onto floured surface and knead 5-6 strokes or until ball of dough holds together. Dust an 8-inch round cake with flour. Press dough into cake pan. Invert pan over onto prepared baking sheet. I find if I do this quickly the dough comes out more easily. Remove cake pan. This will give you a perfect 8-inch circle of dough. With a sharp, floured knife cut dough into 8 wedges. Brush top with milk and sprinkle with extra sugar. Bake 14-16 minutes. Makes 8.
Easy Fried Catfish

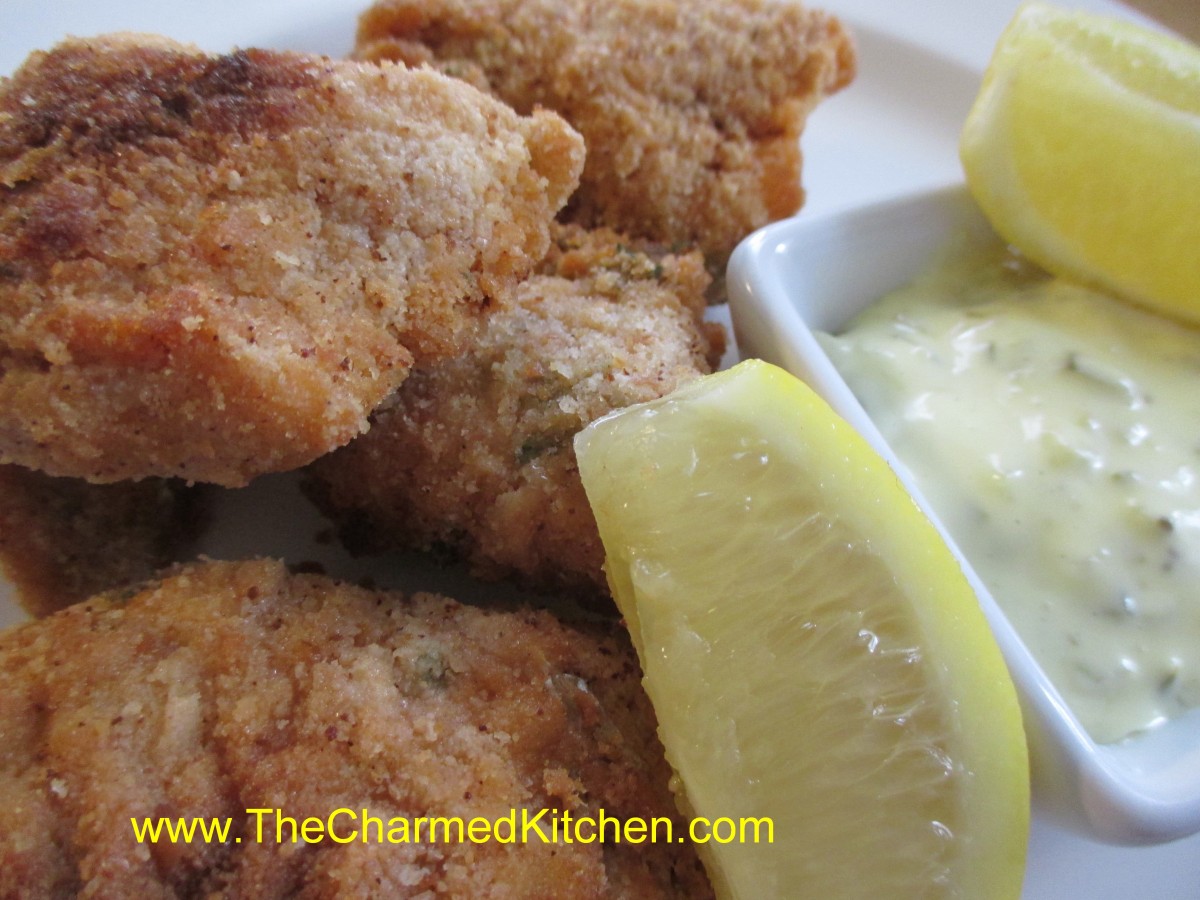
Easy Fried Catfish
I love fried fish. I don’t make it at home that often. It is more of a treat around here than an every day meal. After making this catfish, I decided I might want to fry fish more often.
This time of year, Friday night fish fries are very popular. I love them. But, you don’t have to go out to have great fish at home. I’ve been on a catfish kick lately, so I decided to make fried catfish.
I toyed with the idea of baking it, but frying won out. Nothing quite as good as fried catfish in my mind.
This is going to be one of those recipes that is more narrative that exact amounts. I really am good about writing stuff out. I just can’t seem to locate my notes for this one- so I’ll share what I did as best I can remember. It is also so easy to fry fish. Don’t be scared to try. Fresh fried fish is such a treat.
I started with catfish fillets that were cut down into smaller pieces. The smaller size made them fast and easy to cook. It also made them fun to eat. Like chicken nuggets, only made with catfish.
I made a mixture of eggs, a little buttermilk, salt, pepper, garlic powder, parsley and hot sauce. I dipped the fish in this mixture and let it soak in there while I got the breadcrumbs ready. I had some bread crumbs made from plain bread, so I added a little paprika, dry parsley flakes and lemon peel to the crumbs.
I took the fish out of the egg wash a few pieces at a time and dropped them in the bread crumbs. I had the crumbs in a good sized bowl- but only filled about a quarter of the way with crumbs. I added the fish and sort of tossed it in the crumbs by shaking and tossing the bowl. Placed fish on a baking sheet. Once the fish were all coated in bread crumbs, I put the oil on to heat up.
I was using an electric pot with a thermometer so I knew when the oil reached 350. I wanted to fry the fish between 350 and 375 degrees. If you don’t have a pot with a thermometer you can tell if your oil has reached 350 degrees with the use of popcorn. Yes, popcorn. Just put in a kernel of popcorn when you start heating up the oil. Popcorn pops at 350 degrees. When the popcorn pops, you know the oil is ready.
I had a pan, lined with paper towels ready as I started to drop the pieces of fish, several at a time, into the hot oil. They were cooked in just a few minutes. I pulled them when they were golden brown. Allowed them to drain on paper towels, in a warm oven, while I cooked the rest of the fish.
I served the fish with lemon wedges and homemade tartar sauce- which is just sweet pickle relish and mayo. I sometimes add capers and a little mustard, too.
The fish was a big hit.
As to the oil. You’ll have plenty left over. I let it cool and strained it out. Then I poured it in the bottle it came from. You can save it for your next frying project, but don’t use it again and again. Just a few times, then toss the rest. The flavor gets funky after a while.
Eggplant Parmesan

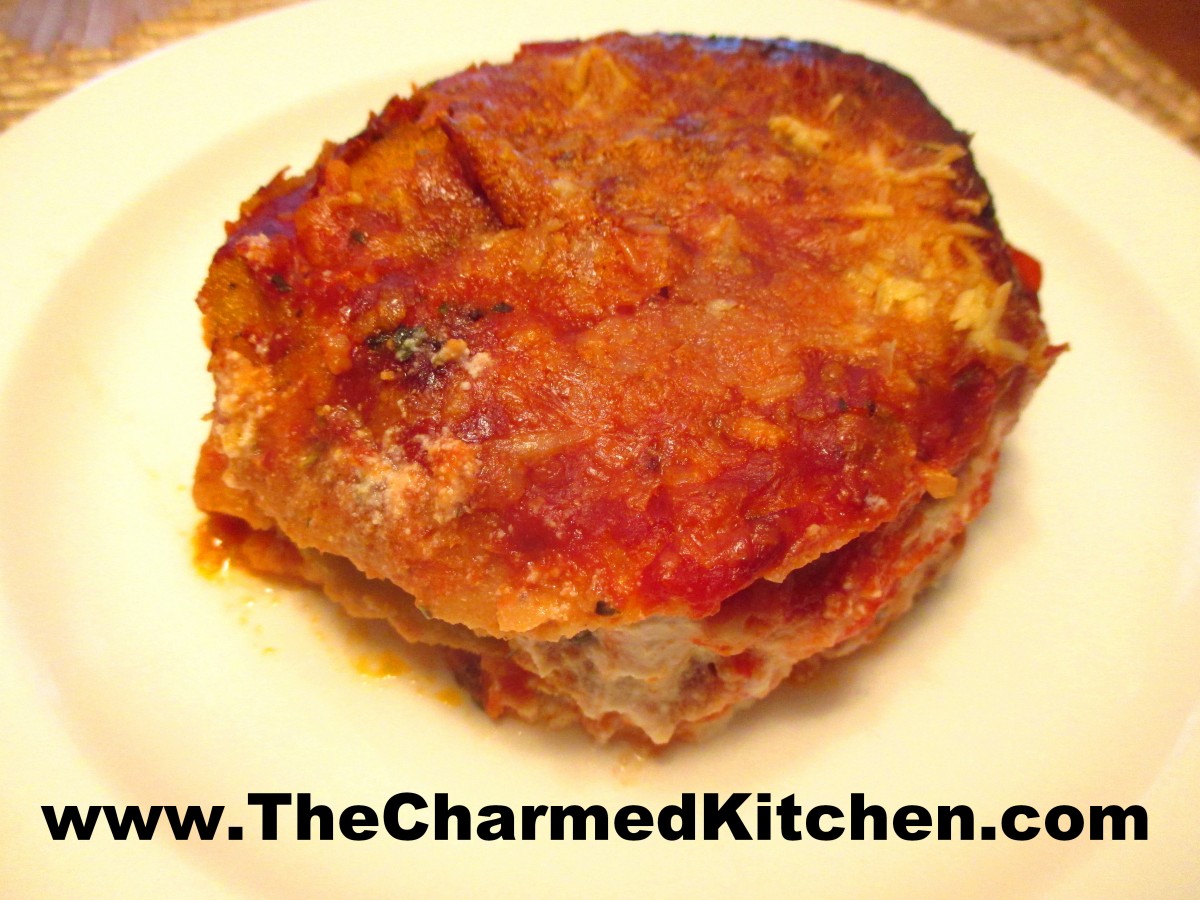
Eggplant Parmesan
I have been making this dish for a long time and it is always a favorite. Eggplant Parmesan is a cheesy and satisfying vegetarian meal, even for the die-hard meat lovers among us.
The recipe has changed over time. I used to dredge the eggplant slices in flour before baking. It was very good that way. My mom used to bread eggplant slices for my father, using bread crumbs. She would serve the eggplant with a little tomato sauce on top and sprinkled with mozzarella cheese. He loved them.
That is what first inspired me to bread the eggplant slices, rather than just using the flour dredge. I think the breaded eggplant slices stand up well to the other ingredients. They stay a little crunchier than the “flour only” version.
I also used to just use mozzarella cheese and the Parmesan. A friend said she added ricotta, like you would for a lasagna. I tried it and liked the addition of the ricotta. Now I make it that way all the time.
The biggest change might have been how I cook the eggplant before adding them to the rest of the ingredients. I used to pan fry the eggplant. Let me just say that eggplant soak up oil like a sponge. I remember making Eggplant Parmesan for a group of 250 once and went through an enormous amount of oil. Now, I just place the breaded eggplant slices on a baking sheet and drizzle oil all over them, before baking them in the oven. I use a lot less oil that way. It is also a lot simpler than pan frying.
So here is my often revised recipe for Eggplant Parmesan. In my family, we just call it E.P.
Eggplant Parmesan
2 large eggplants
salt
flour
1 egg
½ c. half and half or milk
Pepper
1 T. Tuscan seasoning- recipe follows
About 2 c. of bread crumbs
oil
1 (15 oz.) container ricotta cheese
3 c. tomato sauce or marinara sauce
12 oz. mozzarella cheese
Parmesan cheese – you could also use Asiago or Romano cheese, if you prefer
Peel and slice eggplant about ¾ -inch thick. Place in a bowl and salt lightly. Allow eggplant to stand 30 minutes, then rinse and drain. Combine egg, half and half, pepper to taste, and half of the Tuscan seasoning in bowl. Whisk to combine. Set aside. Place bread crumbs in a shallow dish, set aside. Dredge eggplant slices in flour, dip each slice in egg wash, then dip in bread crumbs, turning to coat evenly. Place eggplant slices on a baking sheet lightly coated with oil. Once all the slices are in the pan, drizzle with a little more oil. Bake in a 400-degree oven, turning once until browned and tender, about 20 minutes. Drain. Place a small amount of sauce in the bottom of a casserole dish. Add a layer of eggplant slices. Combine ricotta with remaining Tuscan seasoning and spread over the eggplant. Top cheese with a little more sauce and another layer of eggplant. Top with mozzarella, remaining eggplant and remaining sauce. Sprinkle generously with Parmesan cheese and bake, uncovered in a 350-degree oven for about 40 minutes, or until bubbly and browned around the edges. Serves 6-8.
Tuscan Seasoning
½ c. dried basil
½ c. dried oregano
½ c. dried marjoram
3 T. dried minced onion
2 T. dried minced garlic
2 T. dried rosemary
2 T. dried parsley
1 t. crushed red pepper
Combine all. Store in a cool, dry place. Use for any number of recipes, from marinara sauce, to salad dressings.
Maple Bacon Doughnuts

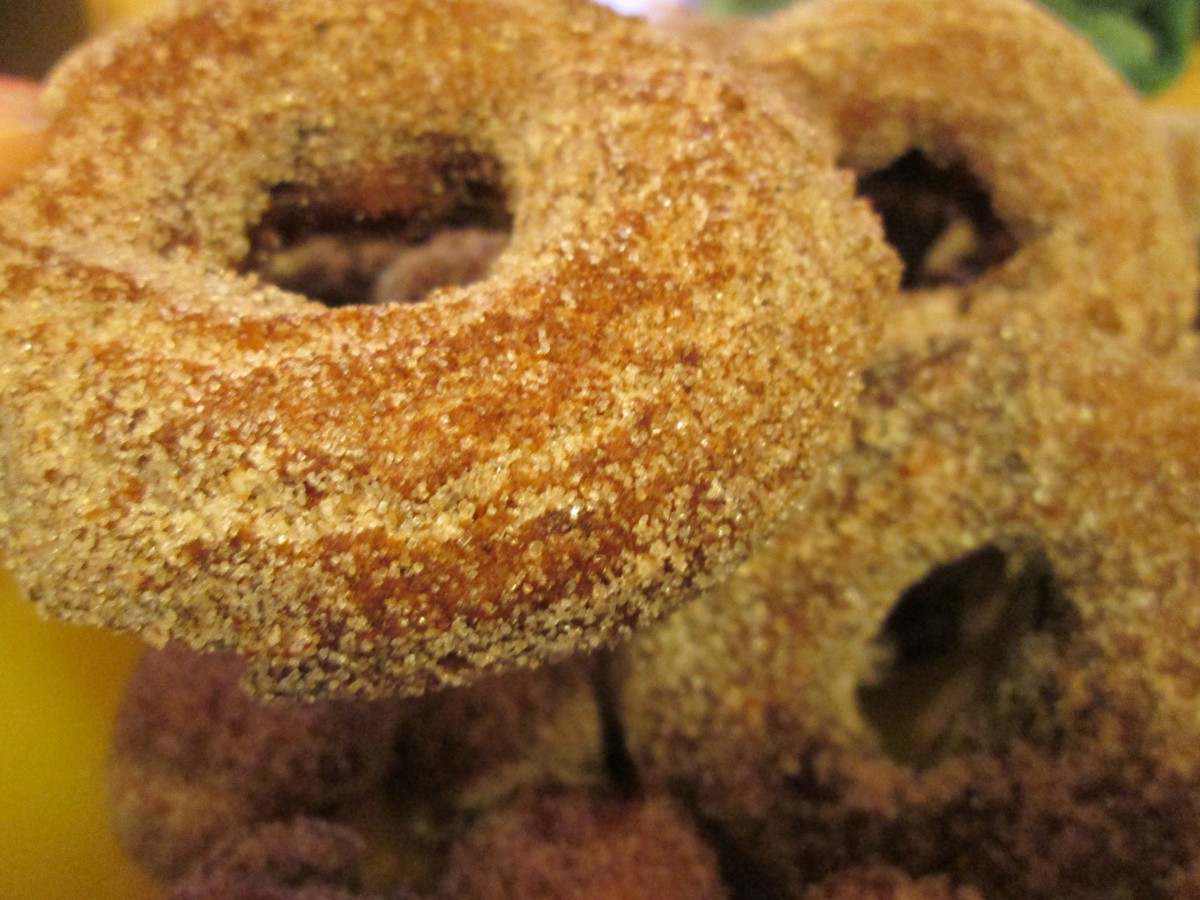
Maple Bacon Doughnuts
If you want homemade doughnuts, you can’t much easier than these Maple Bacon Doughnuts. They are a cake-style doughnut. That means baking powder is used to leaven the doughnuts, not yeast. You can mix up a batch of dough in just a few minutes.
You do need to let the dough chill before frying, so allow time for that.
The sweetness from the maple syrup pairs so well with the smoky bacon. Once the doughnuts are fried, I like to roll them in cinnamon sugar, but you can dust them with powdered sugar, or even make a powdered sugar glaze.
Maple Bacon Doughnuts
3 c. flour
1 T. baking powder
2 t. cinnamon
1 t. salt
1/2 t. grated ginger
2 eggs
1/2 c. sugar
1/2 c. maple syrup
1/3 c. buttermilk
1/4 c. melted butter
1 c. cooked, crumbled bacon
oil for deep frying
cinnamon sugar
Combine dry ingredients and set aside. In another bowl beat together eggs, sugar and syrup until well mixed. Stir in buttermilk and butter then stir in dry ingredients and bacon. Do not over mix. Chill dough at least a couple of hours before using. Overnight is better. When ready to use, heat oil to 375 degrees. While oil is heating roll dough out, on floured surface, 1/2 inch thick and cut out with a doughnut cutter. Fry several at a time for 1 minute per side. Drain on paper towels. Roll warm doughnuts in cinnamon sugar. Re-roll scraps. You will end up with about 18 doughnuts and 18 doughnut holes.
Tiramisu Doughnuts


Tiramisu Doughnut
These doughnuts are inspired by the flavors of tiramisu, a traditional Italian dessert. They are a filled doughnut, like jelly doughnuts. I used the filling that I would normally use for making tiramisu. It is an egg custard, combined with mascarpone cheese and whipped cream. After the doughnuts are filled, they are topped with a mocha ganache. The end result is sublime.
I started making these doughnuts a few years ago. It was Fat Tuesday and I was making jelly doughnuts, a family tradition. Not everybody likes jelly doughnuts and I wanted to switch things up. As a kid, I loved the cream filled doughnuts my folks would make. I decided to use the filling recipe I used for tiramisu. To finish it off, a little coffee is added to the ganache to give it the flavors of classic tiramisu.
You do need to store finished doughnuts in the fridge, assuming any are leftover.
I won’t lie, these doughnuts are a bit of work, but worth the effort. Here is the recipe.
Tiramisu Doughnuts
Filling:
5 egg yolks
1/4 c. sugar
1/2 c. Marsala wine (not cooking wine)
2 c. whipping cream
4 T. sugar
1 lb. mascarpone cheese
Make zabaglione (egg custard). In double boiler, over simmering water, beat together egg yolks and sugar until lemon colored. Stir in Marsala and continue cooking, stirring constantly until mixture thickens and will mound on a spoon. This will take about 10 minutes. Remove from heat and cool down. You can place in bowl in fridge 30 minutes or so. Beat together whipping cream and sugar until stiff peaks form. Beat in mascarpone and chilled zabaglione. Chill 1 hour.
Dough:
4 c. flour
2 T. sugar
1 t. salt
½ c. butter
1 packet yeast
¼ c. warm water
2 t. sugar
1 c. evaporated milk
2 eggs, beaten
Combine flour with sugar and salt. Cut in butter and set aside. Dissolve yeast in warm water and 2 t. sugar and set aside. Combine milk with eggs. Stir in yeast mixture and add to flour mixture stirring well. On lightly floured surface knead dough until dough is smooth, about 5 minutes. Dough will be very sticky. Cover and let rise until doubled, about 1½ hours. Remove dough from bowl and punch down. Using about a third of the dough at a time roll dough out to about an ½ -inch thickness and cut out with a 2½ -inch biscuit cutter. Re-roll scraps and cut out. You should get about 2 dozen. Place dough circles on a floured surface and cover with a towel until doubled, about an hour. Heat oil in a deep pan until it reaches 375 degrees. Cook doughnuts a few at a time until golden on both sides, about 1 minute per side. Drain on paper towels and cool before filling.
Note: You can also refrigerate the dough after kneading it if you would prefer. Just place dough in an oiled bowl, cover with plastic wrap and chill overnight. Roll and cut dough into doughnuts when cold from the fridge. Allow to rise, covered, until doubled in bulk, about 2-3 hours. Fry as directed.
To fill doughnuts use a pastry bag fitted with a long tube tip for filling. I have these handy plastic syringes which are easy to use. Insert tube tip into doughnut and squeeze gently until doughnut is filled with cream (or jelly). Be careful not to overfill or doughnut will split. Once filled doughnuts can be frosted or topped with a sugar glaze. For the Tiramisu Doughnuts I made a mocha ganache.
Mocha Ganache
2 c. chocolate chips
1 c. whipping cream
1 T. instant coffee powder
Combine all ingredients in a microwave safe dish and heat in microwave for 2 minutes. Stir mixture until smooth and return to microwave if chocolate is not fully melted. Heat in microwave for 30 seconds more at a time, stirring after each time until mixture is smooth. For extra smooth mixture strain before using. Dip the top of the filled doughnuts in ganache.
Jambalaya

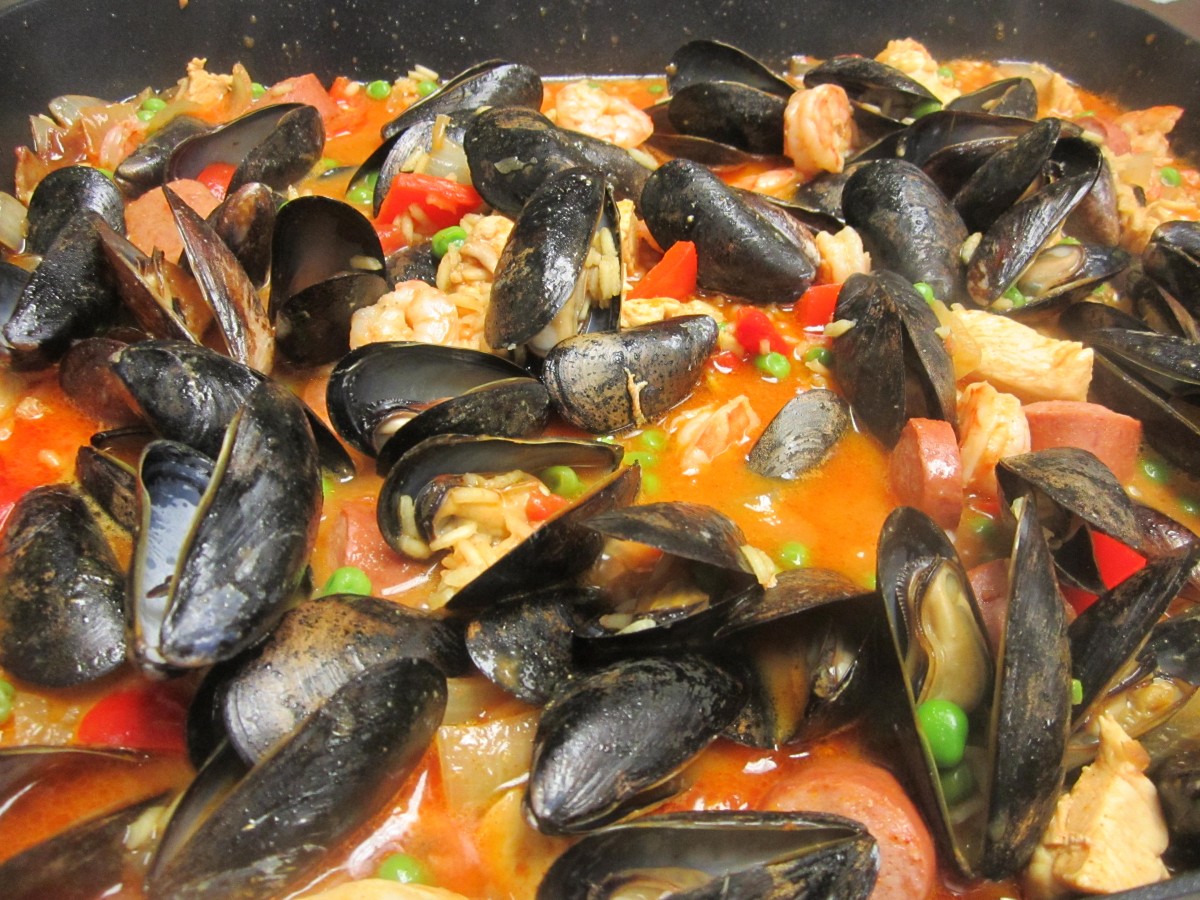
Creole Jambalaya
There are so many variations for Jambalaya. I don’t think I ever had a Jambalaya I didn’t like.
This Creole dish varies a little with each person who makes it. The assortment of ingredients adds so many layers of flavor.
Traditionally, Jambalaya would include smoked sausage or ham, chicken, shellfish, rice, tomatoes and assorted veggies and seasonings.You can see why there are so many variations. For me, it just isn’t Jambalaya without mussels. Lots and lots of mussels.
It is definitely a great dish for a party. It is impossible to make a small batch of Jambalaya!!!
This recipe is a tweaked version I got from a boss of mine a long time ago. I must say, every time I make this for friends or family it gets rave reviews.
The heat level in this dish is really about personal preference and for the people who are going to be eating it. I like it a bit spicier, so I add more cayenne. If I am making it for friends who like their food less spicy, I use less. Of course, you can always serve it with hot sauce on the side, so people can spice it up a little more.
Creole Jambalaya
1 lb. smoked sausage, sliced into 1 inch pieces
1 c. chopped onions
1 c. chopped celery
2 garlic cloves, chopped
1/4 c. oil
2 c. cubed uncooked chicken
3 c. chicken stock
1 1/2 c. uncooked rice
1 16 oz. can tomatoes
2-3 t. paprika
Cayenne pepper to taste
Black pepper to taste
1/4 t. ground turmeric
1 lb. medium shrimp, peeled and deveined, uncooked
1 1/2 c. frozen peas
1/2 c. chopped red pepper
1-2 lb. mussels, scrubbed
In Dutch oven cook sausage, onion, celery and garlic in oil until onion is tender. Add remaining ingredients, except shrimp, peas, sweet red peppers and mussels. Bring to a boil, turn down to simmer and cook 20 minutes. Stir in shrimp, and peppers, cover and cook 10 minutes. Stir in peas and stick in mussels. Cover and cook 5 more minutes. Discard any mussels which have not opened in 5 minutes. Serves 8.
My Family’s Jelly Doughnuts

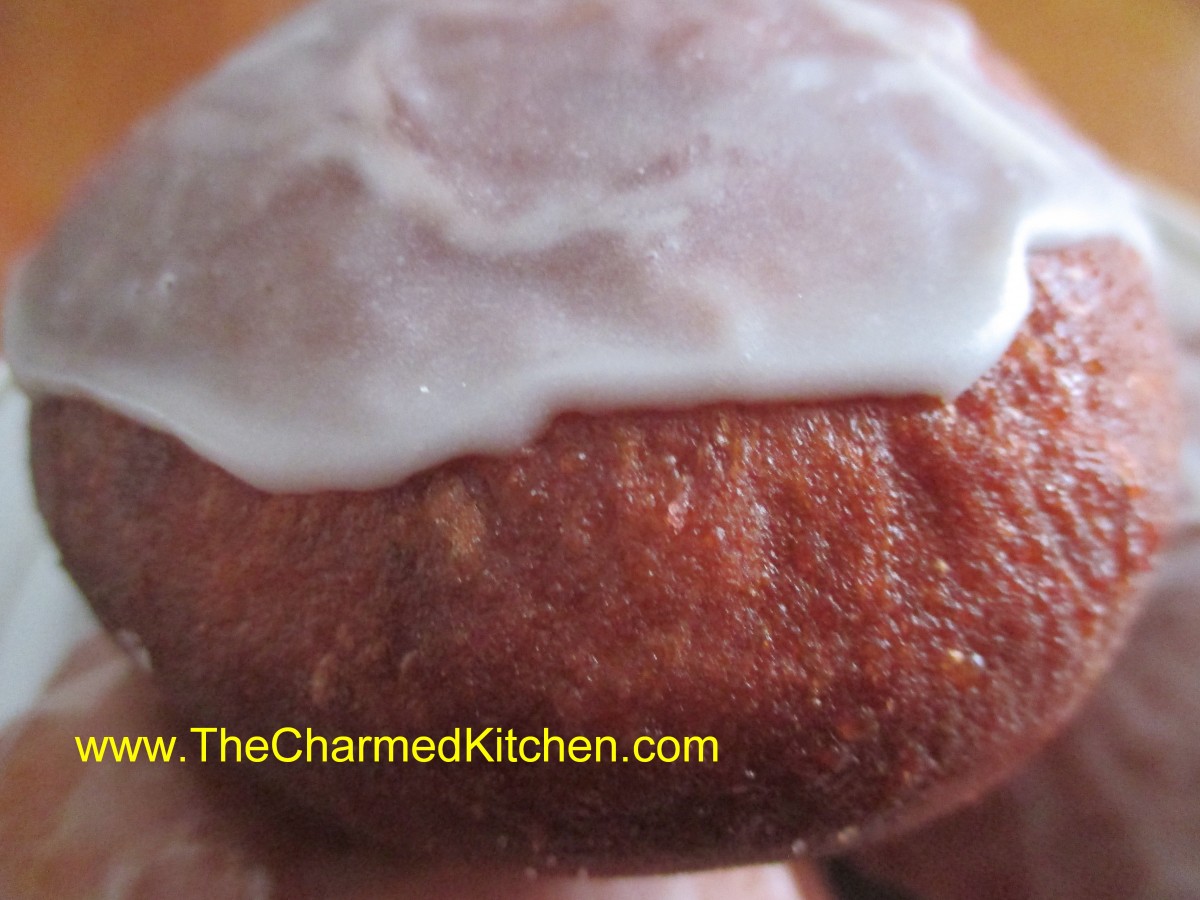
Jelly Doughnuts
I remember how fun it was to watch my parents making doughnuts. The making of the dough, then cutting the dough into circles. The dough circles would then rise on the counter, under linen towels, until puffed up. Gently they would be fried, then set on paper towels to drain. Once cooled, the filling would be piped into them through a pastry bag filled with some wonderful jelly or jam.
I also remember learning to fill them. Squeezing the jelly from the pastry bag into the doughnut was tricky. You wanted to make sure there was enough filling, but not so much that they split open. After a couple of tries, I realized you could figure it out by the weight of the filled doughnut in your hand.
My parents were both excellent bakers. My father had even been a professional baker at one time. I thought it was normal to have parents who made doughnuts. It was the norm in my family.
My folks only made them for special occasions. Unless my Mom got a taste for homemade jelly doughnuts. Then, my dad would make them for her. She loved jelly doughnuts. More than pretty much anyone else I knew.
You can fill them with any number of jellies, jams and cream fillings. I had fresh strawberries and dried apricots so I used them to make both a strawberry filing and an apricot filling. Once fried and filled, the doughnuts can be eaten plain or topped with a drizzle of powdered sugar glaze or just rolled in granulated sugar or powdered sugar. They are a bit of work, but well worth the effort.
Jelly Doughnuts
Dough:
4 c. flour
2 T. sugar
1 t. salt
½ c. butter
1 packet yeast
¼ c. warm water
2 t. sugar
1 c. evaporated milk
2 eggs, beaten
Combine flour with sugar and salt. Cut in butter and set aside. Dissolve yeast in warm water and 2 t. sugar and set aside. Combine milk with eggs. Stir in yeast mixture and add to flour mixture stirring well. On lightly floured surface knead dough until dough is smooth, about 5 minutes. Dough will be very sticky. Cover and let rise until doubled, about 1½ hours. Remove dough from bowl and punch down. Using about a third of the dough at a time roll dough out to about an ½ -inch thickness and cut out with a 2½ -inch biscuit cutter. Re-roll scraps and cut out. You should get about 2 dozen. Place dough circles on a floured surface and cover with a towel until doubled, about an hour. Heat oil in a deep pan until it reaches 375 degrees. Cook doughnuts a few at a time until golden on both sides, about 1 minute per side. Drain on paper towels and cool before filling.
Note: You can also refrigerate the dough after kneading it if you would prefer. Just place dough in an oiled bowl, cover with plastic wrap and chill overnight. Roll and cut dough into doughnuts when cold from the fridge. Allow to rise, covered, until doubled in bulk, about 2-3 hours. Fry as directed.
To fill doughnuts use a pastry bag fitted with a long tube tip for filling. I have these handy plastic syringes which are easy to use. Insert tube tip into doughnut and squeeze gently until doughnut is filled with jam. Be careful not to overfill or doughnut will split. Once filled doughnuts are topped with a powdered sugar glaze or rolled in powdered sugar.
Apricot Filling
12 oz. dried apricots, chopped up
2 c. water
2 c. sugar, or to taste
Combine apricots with water in saucepan and simmer, covered until apricots are really tender. This will take at least an hour- add more water, if needed. Add sugar to taste and cook until thickened. Puree mixture in a blender.
Strawberry Filling
1 lb. strawberries
1½ c. sugar
½ c. water
3 T. cornstarch
Crush berries and place in saucepan with the sugar. Cook until berries are tender, about 10 minutes. Combine water with cornstarch and add to strawberries. Cook until thickened and bubbly. Cool. , Puree. Makes 2 cups.
King Cake

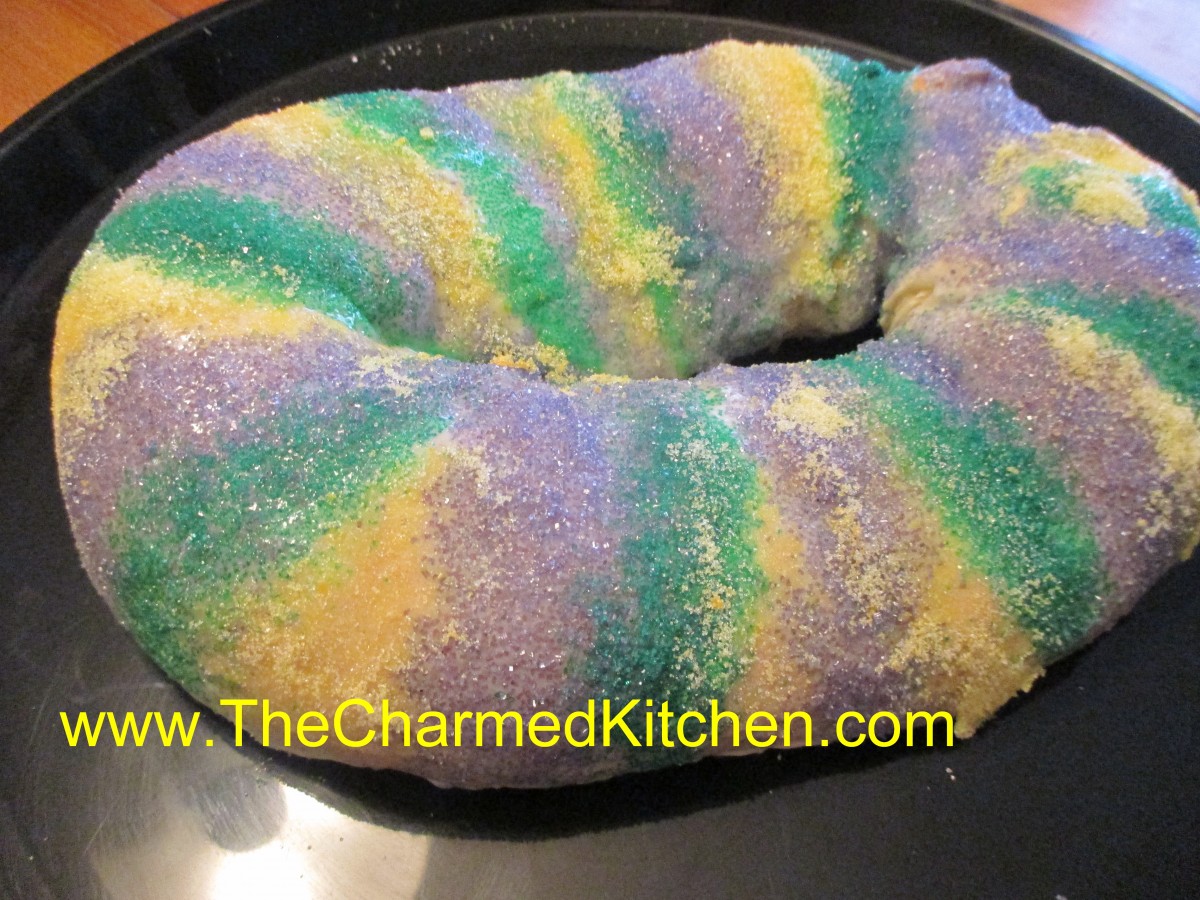
King Cake
If you are planning a Mardi Gras party, you will want a King Cake. King Cakes are a long-standing tradition in New Orleans at Mardi Gras. A small plastic baby is often hidden in the cake, although you can use a bean or even a whole pecan or almond.
Tradition has it that the guest who finds the “surprise” in their piece will host next year’s party. Be careful to warn guest so they don’t break a tooth or swallow the “prize”. You can also use the whole nuts inside the cake and just set the baby on top of the cake when serving.
The “cake” is really a sweet cinnamon swirl bread. The yeast dough is rolled out, spread with butter and cinnamon sugar, and rolled up. Then the dough is shaped into an oval shape.
After it is baked, the king cake is decorated with colorful frostings, sugars or both. Traditionally the colors used are yellow, green and purple, but, hey it’s your cake have fun with it.
If you want just the sugars, and no frosting, then brush the king cake with a beaten egg before baking and sprinkle with the sugar then. Otherwise, you’ll decorate the cake once baked and cooled.
King Cake
1/4 c. butter
16 oz. container sour cream
1/3 c. sugar
1 t. salt
2 packages active dry yeast
1 T. sugar
1/2 c. warm water
2 eggs
6 /2 c. flour
1/2 c. white sugar
1 1/2 t. cinnamon
1/3 c. butter, softened
Colored sugars and frostings (recipes follow)
Heat together the first 4 ingredient to about 100 degrees. Dissolve yeast and sugar in warm water in large bowl and let stand 5 minutes. Add butter mixture, eggs and 2 cups of the flour. Beat 2 minutes at medium speed and gradually work in enough flour to form a soft dough. Knead until smooth and elastic, about ten minutes. Place dough in a greased bowl, turning to grease top and cover. Allow to rise in a warm place until doubled, about 1 hour. Stir together 1/2 c. sugar with cinnamon and set aside. Punch dough down and divide in half. Roll out one piece of dough into a 28×10-inch rectangle. Spread dough with half of the butter and sprinkle with half of the sugar mixture. Starting at long end roll up jelly roll fashion and pinch seam to seal. Shape dough into an oval shape and pinch ends together. Place seam side down on a greased baking sheet. Repeat with remaining piece of dough except remember to add the toy baby, nut or bean if you want the “surprise”. Cover and let rise about 20 minutes. Bake in a preheated 375-degree oven for 15-20 minutes, or until golden brown. Cool before decorating with tinted frostings and colored sugars. Makes 2, serving 24.
Frostings
3 c. powdered sugar
3 T. melted butter
3 t. milk
1/2 t. vanilla
Green, yellow, red and blue food coloring
Combine sugar and butter and add enough milk to make the glaze a drizzling consistency. Add vanilla and divide mixture in three small bowls. Tint one bowl yellow, one green and one purple, using both the red and blue food coloring. I often don’t bother to tint the frostings, but rely on the tinted sugars for color.
Tinted sugars
1 1/2 c. granulated sugar
Food coloring
Place 1/2 c. sugar in each of three small bags and add a couple of drops of food coloring to each. One use yellow, one green and one both the red and blue for purple. Shake the bags to distribute the color. You should only need a couple of drops of each.
Decorate the cake by making bands of the colored frostings and then sprinkling on the sugars.


