Coconut Ginger Soup

Coconut Ginger Soup
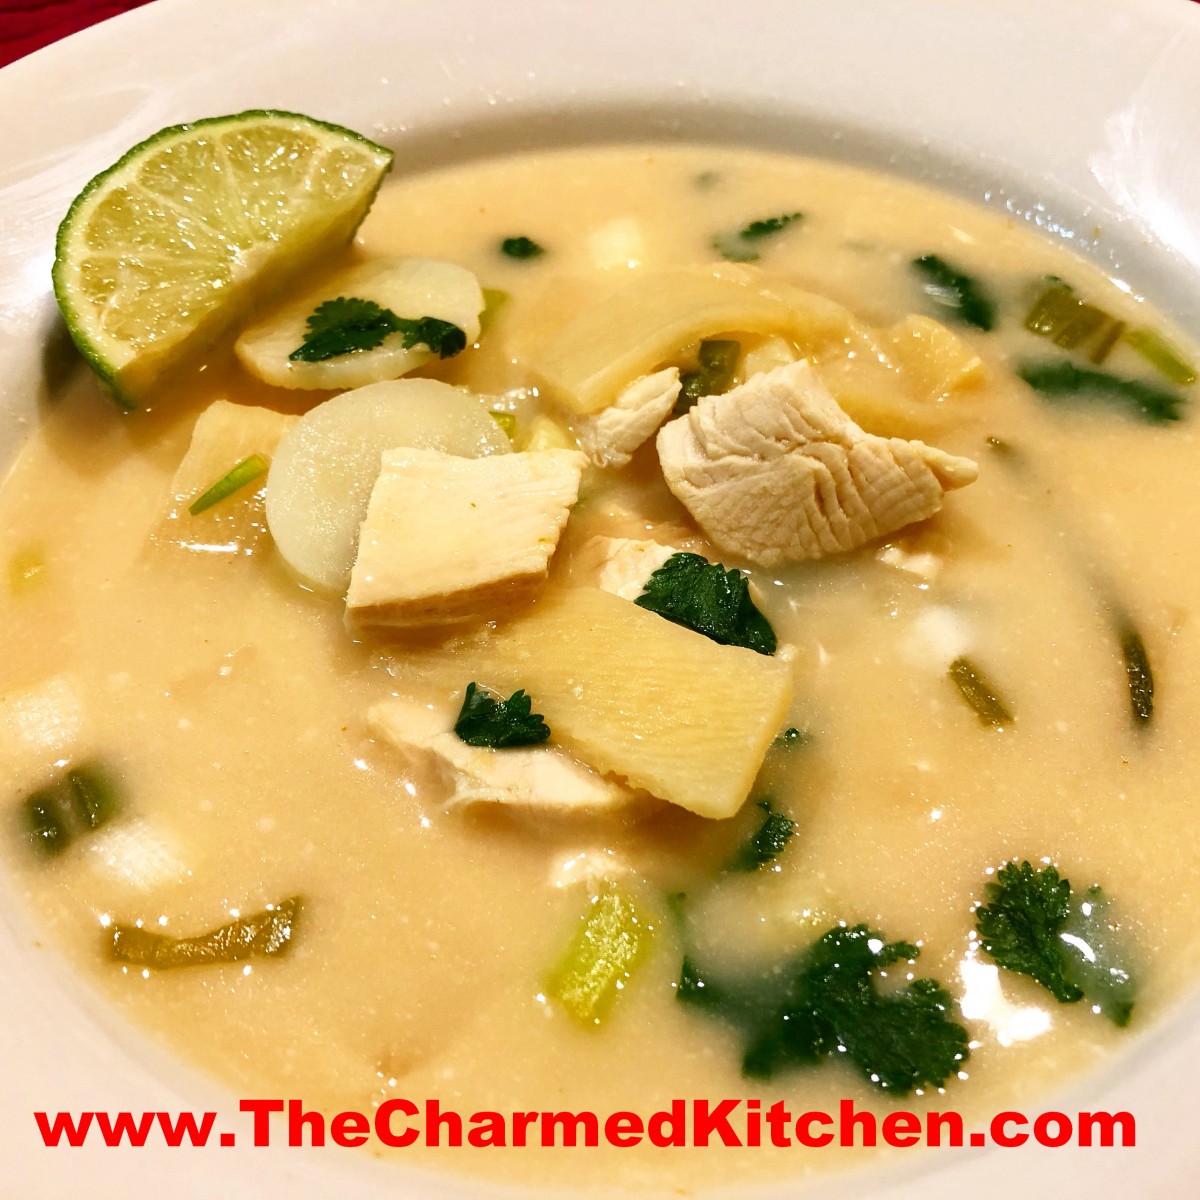
This recipe is inspired by a favorite dish at a local Thai restaurant. The recipe is pretty simple. Coconut milk and chicken stock are the base. The soup has a few veggies added and a healthy dash of lime juice and ginger. Then it is just a matter of adding some additional seasoning and the cooked chicken.
If you are starting with raw chicken, you could add it with the initial ingredients and just simmer long enough to cook the chicken. Small slices of chicken would cook in a few minutes. Since I had cooked chicken, I added it at the end. It was in the soup just long enough to warm it up. That way the chicken wouldn’t get tough from over cooking.
The soup is also meant to have a nice, citrus flavor from the lime juice. Adding the juice from three or four limes should be plenty, but all limes are not the same. If your limes are smallish, or not really juicy, feel free to add a little more.
For a soup thrown together so quickly, it really has a wonderful flavor. It is one of my favorite quick meals. So here is the recipe. Enjoy.
Coconut Ginger Soup
1 can, (13.5 oz.), coconut milk
2 c. chicken stock
1 can sliced water chestnuts, drained
1 jar bamboo shoots, drained
2 T. fresh grated ginger
Juice of 3-4 limes
Hot sauce to taste
3 T. fresh chopped cilantro- or parsley
3 T. chopped green onions
salt to taste
8 oz. cooked chicken, sliced in bite-sized pieces
Heat first 7 ingredients in a saucepan until heated through. Simmer about 5 minutes. Add cilantro and green onions and season to taste. My limes were pretty juicy. Feel free to add a little more lime juice, if you like. Add the chicken and simmer a few minutes longer. Serves 2-3.
Cinnamon Sticky Buns

Cinnamon Sticky Buns
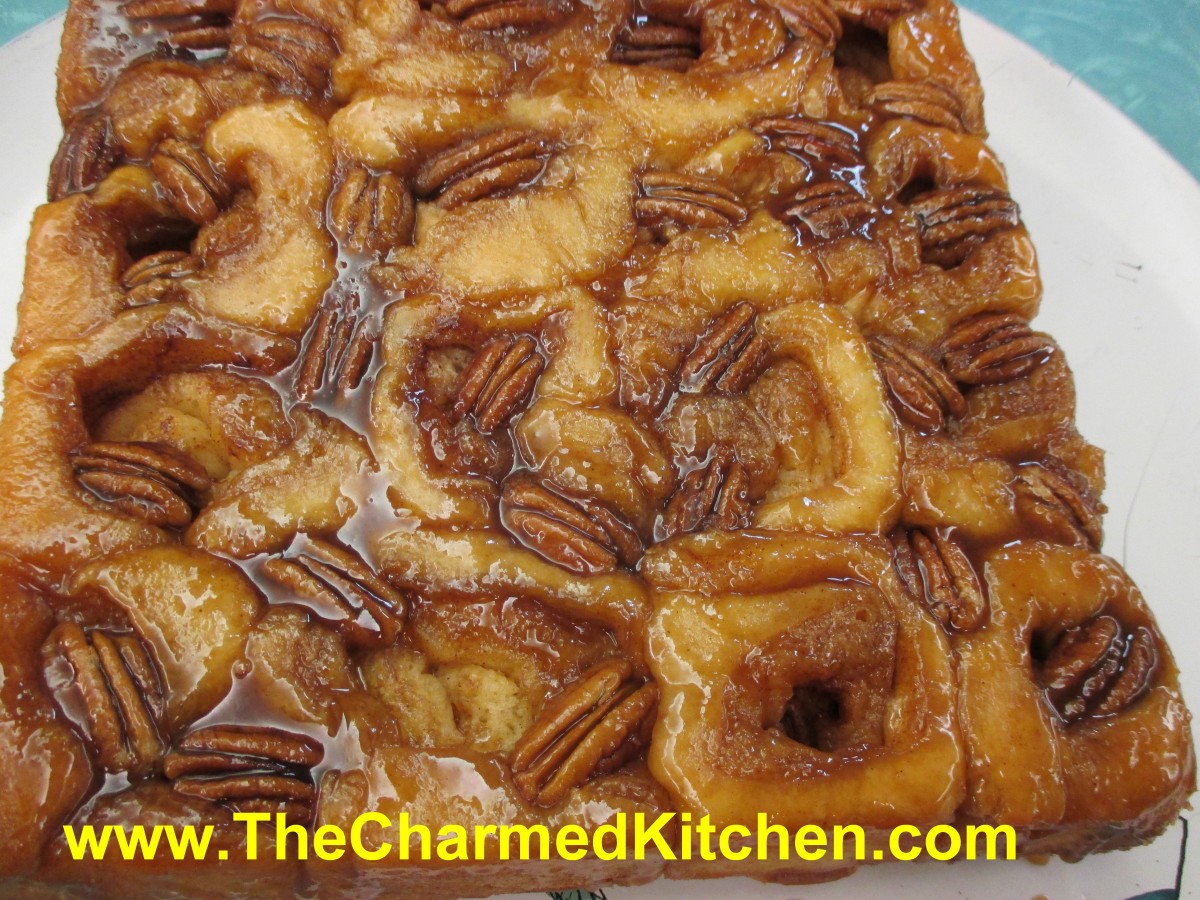
What could be better than a warm sticky bun? These are even better with the addition of plenty of nuts and cinnamon.
I like this recipe because they are rich, soft and not too sweet. The rolls are full of brown sugar, butter and cinnamon and topped with a lovely later of soft caramel.
They aren’t hard to make, although they look tricky. While the recipe makes 12 rolls you can cut them bigger, or smaller, to suit your needs.
Cinnamon Sticky Buns
Dough:
1/3 c. milk
¼ c. sugar
½ t. salt
¼ c. butter
¼ c. warm water
1 package active dry yeast
1 egg
2 ½ c. flour
Topping:
¼ c. butter, softened
¼ c. brown sugar
½ c. pecan or walnut halves – I use a little more, maybe 2/3 cup
Filling:
¼ c. soft butter
½ c. brown sugar
½ c. raisins, optional
1 t. cinnamon
In small pan heat milk until bubbles just form around edges. Remove from heat; stir in sugar, salt and butter. Allow to cool to lukewarm. Dissolve yeast in warm water in medium bowl and stir in milk mixture, egg and 2 cups of the flour. Mix by hand until dough leaves sides of the bowl. Turn onto lightly floured surface and knead until dough is smooth and elastic, adding more flour if needed. Lightly oil dough in bowl and cover with a towel allowing to rise in a warm place until doubled, about 1-1 ½ hours. Meanwhile, make topping. Cream together butter and brown sugar and spread on bottom and sides of 9×9 inch baking pan. Sprinkle with nuts and set aside.
Punch down dough and roll into a 16×12- inch rectangle. Spread with the softened butter, sprinkle on the brown sugar, cinnamon and raisins. Roll up from long side. Cut crosswise into 12 pieces. Hint: Using a knife tends to flatten the rolls. Instead use a piece of thread, string or even dental floss. Slide piece of string under dough where you wish to slice. Holding string ends above roll cross the ends over each other and pull outward. String will cut through easily. Repeat with remaining rolls. Place in prepared pan and cover with cloth, allowing to rise until doubled, 1- 1 ½ hours.
Bake 25-30 minutes in a preheated 375 degree oven. Invert onto board and let stand 1 minute. Remove pan. Serve warm. Makes 12.
Pineapple Rum, A Tropical Treat


Pineapple Rum
I make all sorts of homemade liqueurs. This is one of my favorites. Pairing pineapple and rum is such a natural thing to do. Their tropical flavors blend together so well.
Pineapples are on sale this week, so it seemed like a good time to make a fresh batch. I want to have plenty made for summer parties.
You can flavor rum with any number of fruits, flowers and spices. I have paired rum with citrus fruit, vanilla and more.
I think my favorite rum flavoring is still pineapple.
So simple to make- just cut up pineapple and put in a jar. Add the rum- light or dark- and leave the jar in a cool, dark place long enough for the pineapple to flavor the rum. I like mine to sit at least a month before straining.
You can sweeten later, if you like. You can also add herbs for extra flavor, or a piece of vanilla bean.
The hardest part is just waiting for it to mature!!
Pineapple Rum
½ lb. fresh pineapple
3 c. rum
Cut pineapple into chunks and place in a jar with a tight-fitting lid. Add rum, close jar, and steep for 3 weeks. You can leave it longer, if you like. Strain out the pineapple. You can just toss out the pineapple, or sweeten it and use it in desserts. Once you have strained out the pineapple, you want to filter the rum to make sure it is clear. I filter mine through coffee filters or you can use layers of cheesecloth. Mature at least 1 month for better flavor. Makes 3 cups.
Dagwoods- My Favorite “Blondies”


Dagwood Blondie
One of the recipes we made in brownie class the other night, was for blondies. Blondies are the non-chocolate version of brownies. Good blondies are dense, moist, sweet and have a caramel-like flavor. These are VERY good blondies.
The name for this dessert comes from the old comic strip, Blondie. Blondie’s husband is Dagwood. I found this recipe in my Mom’s recipe collection. Not sure where it came from, but the name was funny, so I kept it.
They are easy to make and taste so good. Soft, chewy and just what you want from a Blondie, or a Dagwood.
They aren’t the prettiest dessert I have ever made. They are more dark tan than blonde, but looks can be deceiving. They also puff while baking, then sink down a bit when cooling. Don’t worry, it’s just what they do. You can certainly dress them up with a drizzle of caramel or chocolate. Perhaps a dusting of powdered sugar.
So here is the recipe.
Dagwoods
1¼ c. flour
1½ c. brown sugar
1½ t. baking powder
¼ t. salt
2 eggs
10 T. melted butter
2 t. vanilla
½ c. chopped nuts
½ c. vanilla or butterscotch baking chips, optional
Heat oven to 350 degrees. Grease an 8×8 inch pan. Combine flour, sugar, baking powder and salt in medium bowl and set aside. Whisk eggs until frothy and whisk in butter and vanilla. Make a well in the dry ingredients and add the egg mixture, stirring to blend well. Fold in nuts and chips, if adding. Spread batter in pan and bake 35-40 minutes. Bars should be golden and tester will come out clean or with a few moist crumbs attached. Cool in pan on a rack before cutting.
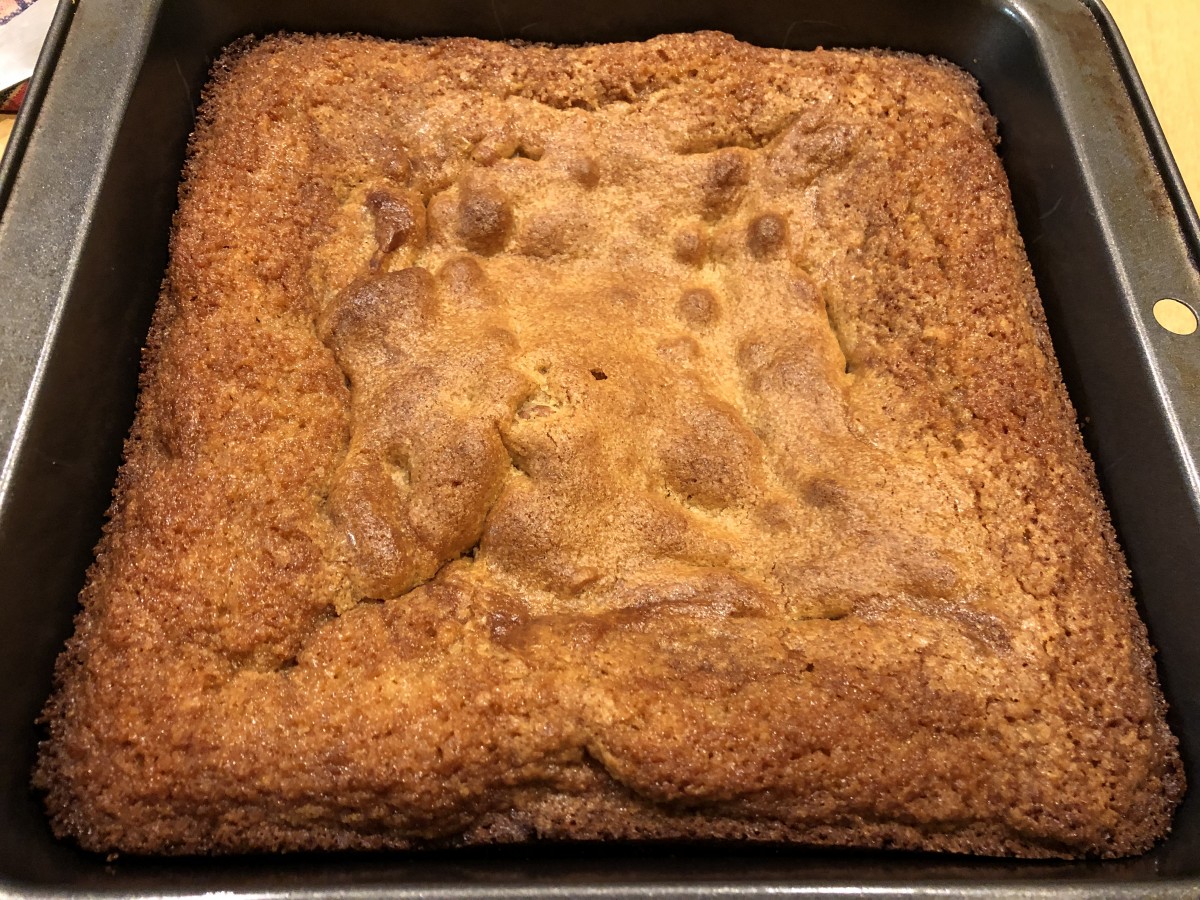
See, I told you they weren’t very pretty. They do taste good, though.
Minty Cocoa Love Hearts

Minty Cocoa Hearts
If you are looking for a simple chocolate treat- that requires no cooking – try Minty Cocoa Love Hearts. They are tiny, but pack a lot of flavor.
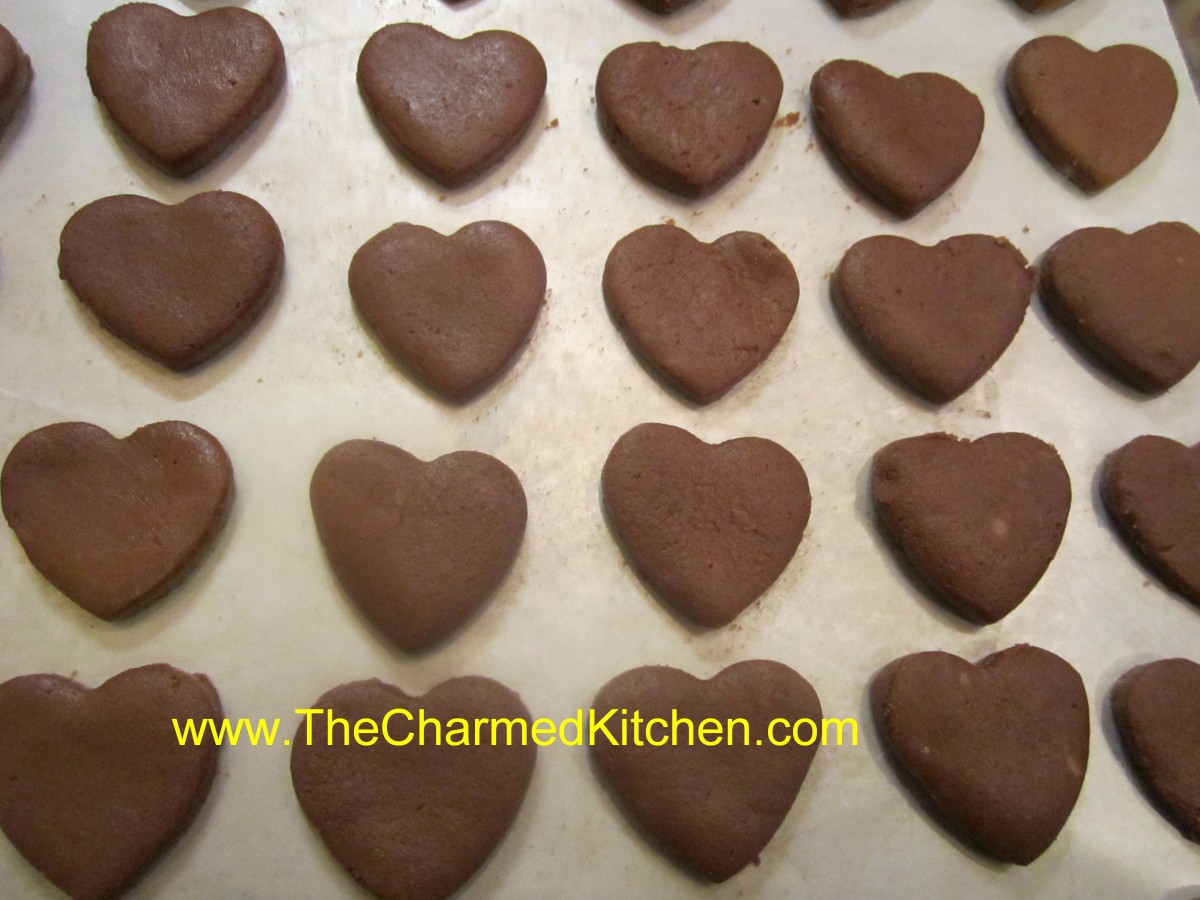
This easy to make candy is made with just a few ingredients. The “dough” is mixed and rolled out. Then you just cut them out into little hearts.
They taste great and they are also a nice project for kids. There is no special equipment needed other than a tiny heart-shaped cookie cutter.
Once they have time to set up- they can be boxed up- or wrapped in individual foils.
So if time is short, and you really want to make something homemade this Valentine’s Day- these could be the answer.
Minty Cocoa Hearts
9 c. powdered sugar
1 c. cocoa
1/2 c. butter, softened
1/2 c. water
2 t. peppermint extract
In large bowl combine ingredients until well blended. You can add more water, if needed, 1 teaspoon at a time. Divide mixture into 2 pieces and shape in balls. Place each between sheets of wax paper and roll out to 1/4 -inch thickness. Cut out with tiny cutters and place on foil-lined tray. Chill several hours, then wrap up in colored foil or place in tiny candy bags. Makes 80 (1-inch) candies.

Cut out with heart-shaped cookie cutters
Sweetheart Sugar Cookies

Sweetheart Sugar Cookies
For Valentine’s Day, not every dessert has to be chocolate. These sugar cookies would be a great way to share the love.
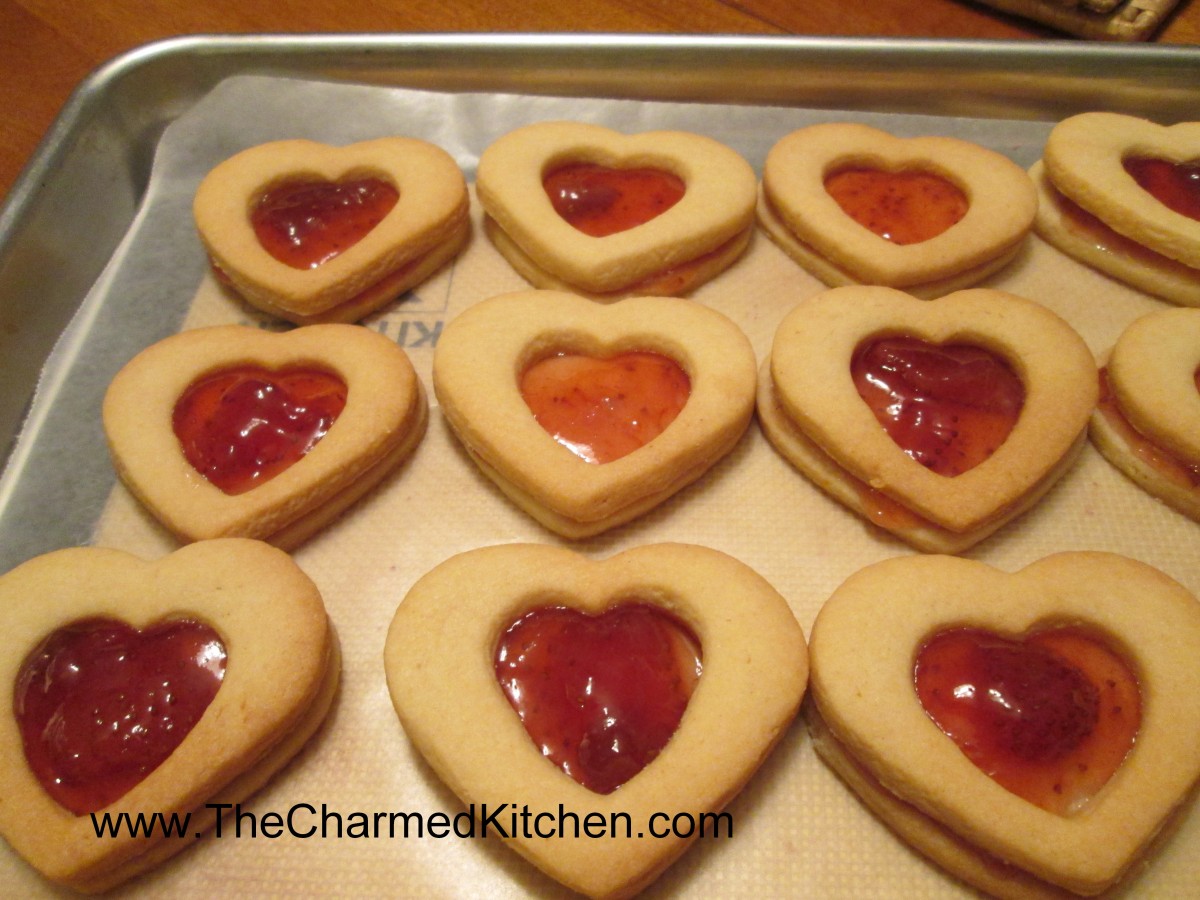
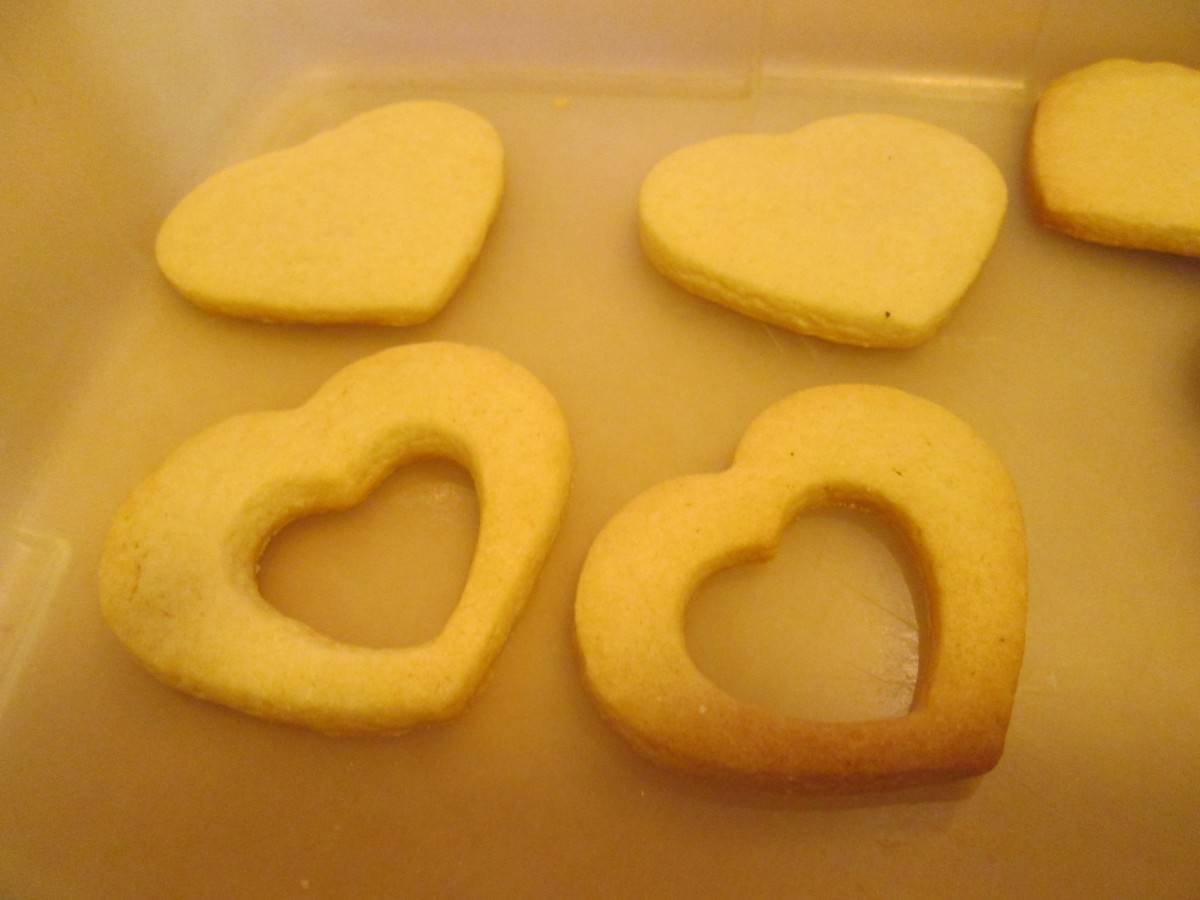
I used my favorite sugar cookie recipe and cut out hearts. Then used a smaller heart cookie cutter and cut out smaller hearts from the center of half of the cookies.
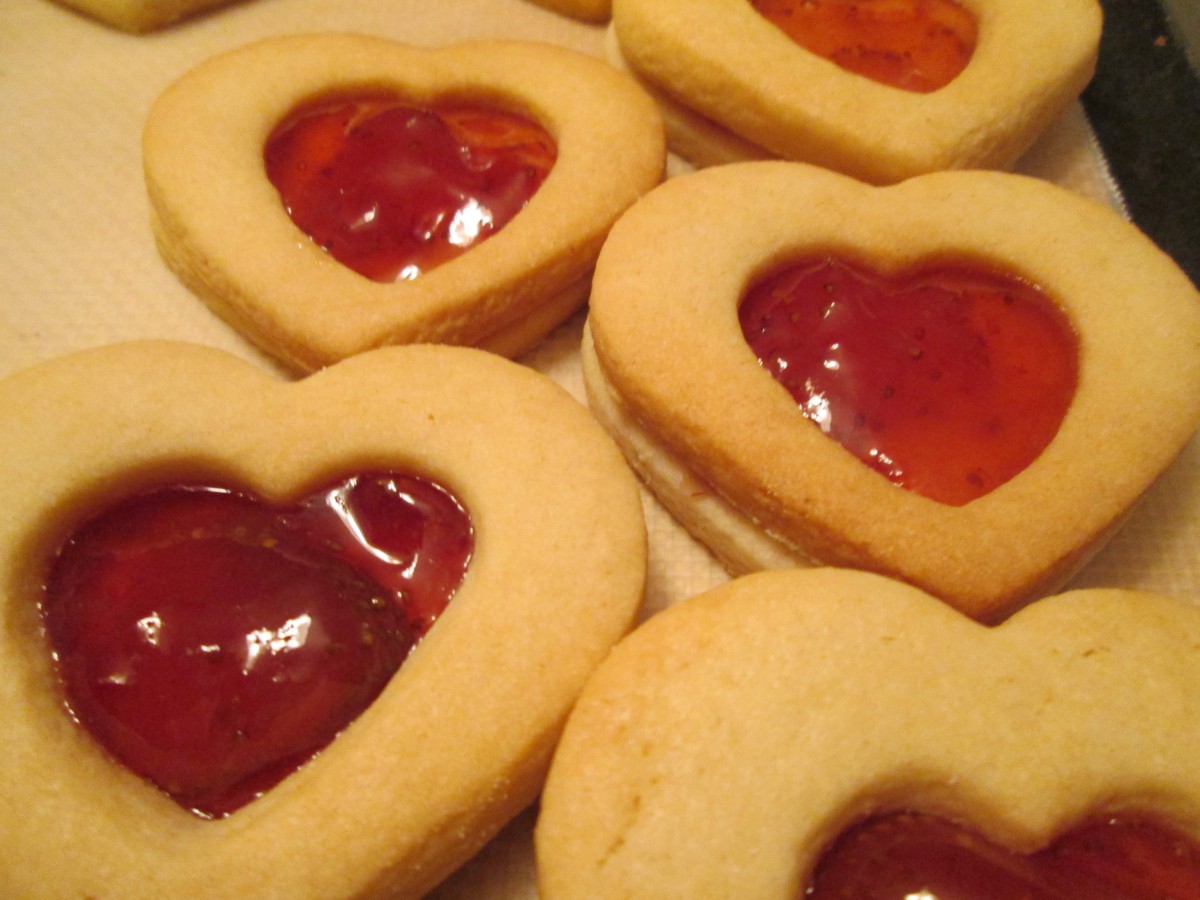
Sandwich the baked cookies together with homemade strawberry preserves. Use one of the “cutout” cookies on top. It gives a pretty effect to the finished cookies. I used strawberry jam, but any red jelly or jam could be used.
Since I also had a bunch of tiny heart cookies from the cut outs, I used melted chocolate to turn them into tiny heart shaped sandwich cookies.
Sweetheart Sugar Cookies
1 c. butter
1 c. sugar
1 egg
1 t. vanilla
3 c. flour
2 t. baking powder
3 T. milk
Extra sugar for sprinkling, if desired
strawberry preserves or jam
Beat butter and sugar until fluffy. Beat in egg and vanilla. Combine dry ingredients and add to butter mixture. Beat in milk. Heat oven to 375-degrees. Roll dough on lightly floured surface to about 1/3- inch thickness. Cut out with lightly floured cutters and sprinkle with sugar or colored sugar if you like and if you are not going to frost them. Bake on an ungreased baking sheet for 10-12 minutes. Cool on baking sheet 3 minutes before placing on wire rack to cool completely. Frost when cooled. Makes about 4 dozen.
Sweetheart Sugar Cookies
Chocolate Lovers’ Waffles

Chocolate Waffles
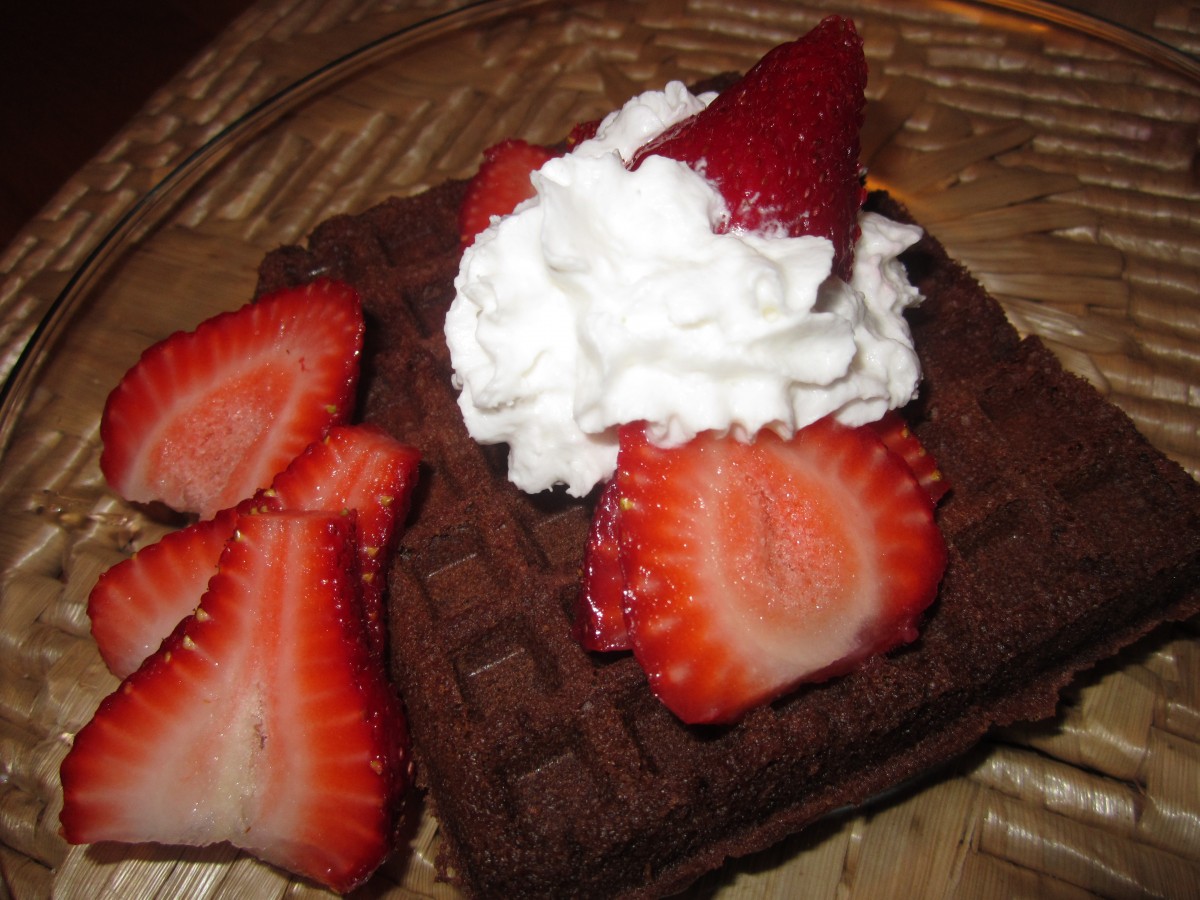
These waffles can make a great start to Valentine’s Day. Chocolate for breakfast? Why not? They also make a wonderful dessert.
The waffle batter has cocoa in it, for the chocolate flavor, but I added some cinnamon and nutmeg for a little spice. The flavor is wonderful.
Top them with whatever you like. For breakfast, warm maple syrup or a dusting of powdered sugar work well.
I enjoy topping them with whipped cream and berries. You can also top with a scoop of ice cream and hot fudge. If you like, you can even add some chocolate chips to the batter for a stronger chocolate taste.
Chocolate Waffles
2 eggs, room temperature
1/2 stick butter, melted and cooled
1 t. vanilla
1 c. buttermilk
1 c. flour
3/4 c. sugar
1/2 c. cocoa
1 t. cinnamon
1/2 each baking powder and baking soda
1/4 t. salt
1/4 t. nutmeg
Beat first three ingredients until light and foamy, about 2 minutes. Stir in milk. Beat in dry ingredients just until blended. Bake until waffles are cooked through. Makes 4 cups batter. Serve with whipped butter or sour cream and fresh fruit. I like them just dusted with powdered sugar, too.
Rich and Chewy Brownies

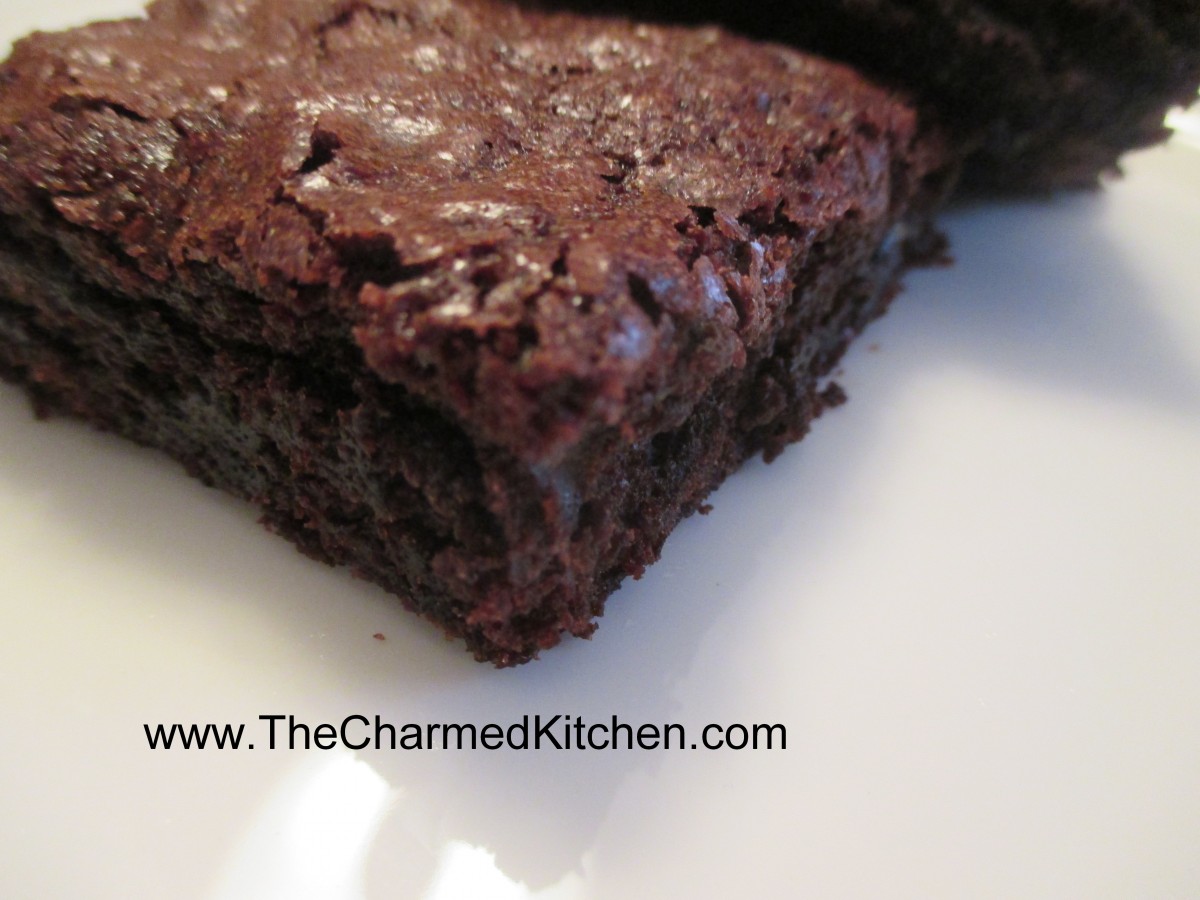
Rich and Chewy Brownies
Brownies have been around for almost 100 years. The story about the creation of brownies, is that they were an accident. A woman was making a chocolate cake. She couldn’t find her recipe, so she made the cake as best she could from memory. The cake didn’t rise- and brownies were invented.
What a happy accident that was for the rest of us.
There are a lot of versions of brownies around. Some are more like a chocolate cake, just a little denser. Others are moist, and so dense they are almost fudge like.
I have a lot of brownie recipes. This is one of my favorites. If you make them, you will understand why. They are soft, rich and a little chewy. They can be serves plain, dusted with powdered sugar, or frosted.
Rich and Chewy Brownies
3 sticks butter, melted and cooled
3 c. sugar
1 T. vanilla
6 large eggs
1½ c. flour
1 c. cocoa
1 t. baking powder
1 t. cinnamon
1 c. chocolate chips
Heat oven to 350 degrees and grease a 13×9 inch pan. Beat together butter, sugar and vanilla. Whisk in eggs one at a time. Combine dry ingredients and stir into batter. Stir in chocolate chips and spread batter in prepared pan. Bake 40-45 minutes, or until brownies pull away from sides of pan. Cool brownies completely in pan, on a rack and cover with foil. Let stand 6 hours before serving. Makes 24.
To serve, you can leave them plain, dust with powdered sugar, or frost. Here is a great frosting recipe for these brownies.
Easy Chocolate Butter Cream
6 T. butter, softened
1/3 – 3/4 c. cocoa, depending on how dark you want your frosting.
2 2/3 c. powdered sugar
1/3 c. milk
1 t. vanilla
Cream butter. Combine cocoa and sugar. Beat cocoa mixture in alternately with the milk until frosting is spreading consistency. Beat in vanilla. You may need an additional tablespoon of milk. Makes about 2 cups.
Mini Chocolate Eclairs

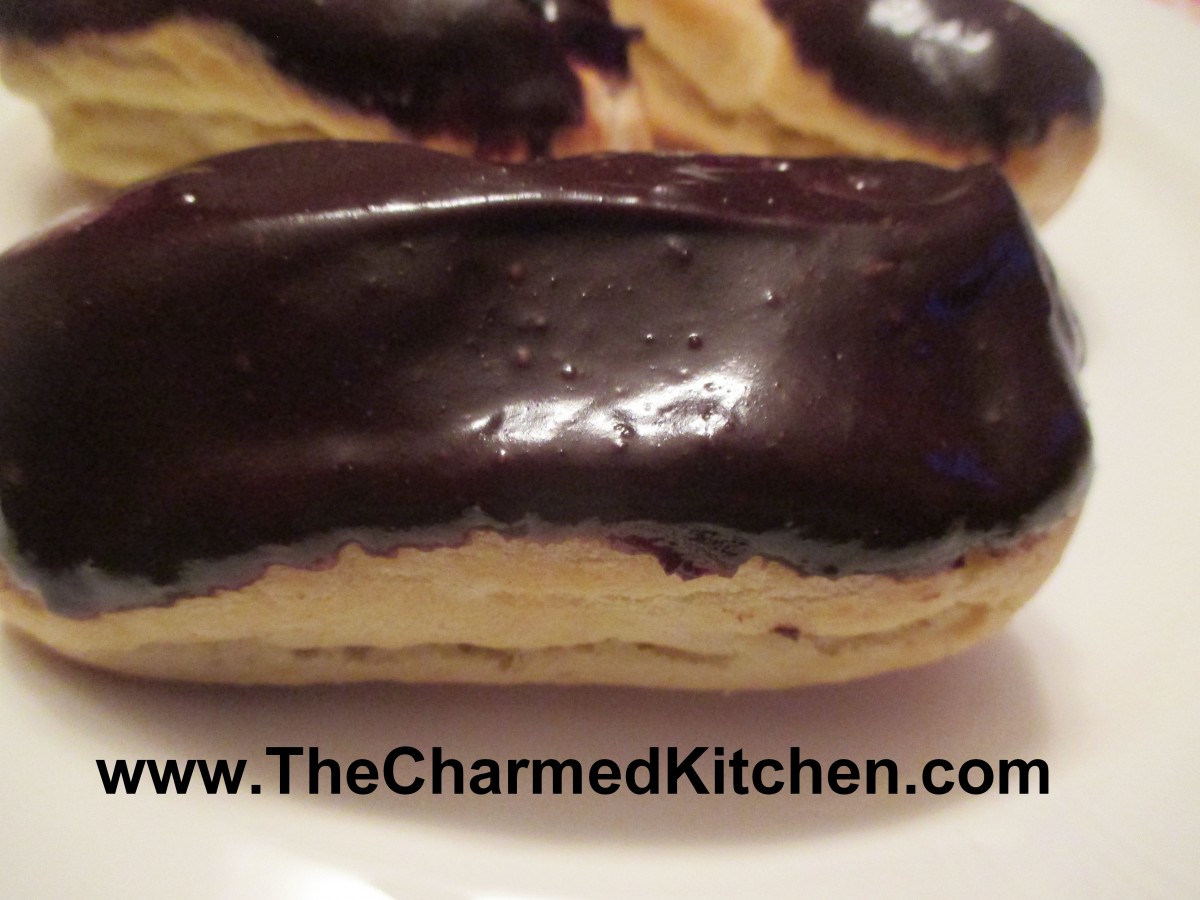
Homemade Mini Chocolate Eclairs
If you want to surprise someone with a very special sweet treat, you could make eclairs. These are a bit or work, but the end result is so wonderful. I think they are worth the effort, especially for special occasions.
I decided to make a mini version this time. Not everyone wants to eat a full size eclair, especially after a big meal.
You start by make a pate a chou, or cream puff pastry. This is the same dough used to make cream puffs. It is a combination of water, butter, milk and flour- cooked on top of the stove, then enriched with the addition of eggs. The dough is piped onto baking sheets and baked until puffed, golden and crisp. Once cooled, they are filled with sweetened whipped cream or, more traditionally, a custard filling, then topped with chocolate ganache.
Mini Eclairs
1 recipe Cream Puff Pastry (Pate a Chou)- recipe follows
Egg custard- for filling, or sweetened whipped cream- recipe follows
Chocolate Ganache- for topping- recipe follows
Start by making the dough. This recipe will make 12-18 medium eclairs or 3 dozen of the mini ones.
Cream Puff Pastry
¾ c. water
¼ c. milk
¼ t. salt
½ c. (1 stick) unsalted butter
1¼ c. flour – unbleached or bread flour preferred
4 large eggs
Extra milk for brushing
In saucepan, heat together water, milk butter and salt into a full boil. Butter has to be melted. While stirring, dump flour into saucepan, stirring constantly. Mixture will form into a ball. Reduce heat to medium and continue cooking dough, while stirring, for another minute or two. Place dough in an electric mixer and allow it to cool down a little before adding the eggs. Mixture has to be at 140 degrees F, or below, before you start adding the eggs. I use the paddle attachment and beat the dough before adding the eggs. This cools the dough down faster. Beat in eggs, one at a time, until each is fully incorporated. Beat until dough is shiny. A spoon, lifted out of the batter, should leave a peak that does not fall down.
Preheat oven to 425. Line a baking sheet with foil or parchment. I used a silicone liner and was happy with the result. Don’t grease the pan. Using a piping bag, squeeze the dough into 2-3-inch strips on the baking sheet- leaving a little room in between. Strips should be about ¾ -inch in diameter. Using a little milk on your finger, smooth down any peaks on the puffs. They should resemble miniature hot dog buns. Bake at 425 for 10 minutes, then turn oven down to 375. Bake eclairs 10 more minutes, or until golden brown. Tap the shells. They should sound hollow. Turn off the heat and leave oven door open a crack, allowing them to dry completely. Cool before filling. Makes about 36.
Custard Filling
2 cups milk
2 tablespoons cornstarch
1⁄3 cup sugar
2 eggs, lightly beaten
1 teaspoon vanilla
Using a whisk, combine milk, sugar and cornstarch in a medium saucepan over medium heat on stove top. Allow milk to scald (heat to the point when tiny bubbles form around edges of pan). Whisk occasionally to prevent cornstarch from clumping on bottom edges of pan. Remove milk mixture from heat, preferably to a burner that’s turned off.
Mix about 2 tablespoons of scalded milk mixture into eggs using whisk, then introduce eggs into milk mixture in a slow stream, whisking milk mixture constantly. Immediately return pan to heat and whisk gently until custard thickens, another two or three minutes. Do not allow to boil. (If you find that you have egg white strands in custard, feel free to pass it through a fine-mesh sieve into a different bowl now.) Remove pan from heat and stir in vanilla. Cool before using. Makes 3 cups.
To fill the eclairs, using a small piping tip with a pastry bag, filled with the custard. Squeeze filling in on one end, on through the bottom, squeezing until it seems full.
Once eclairs are filled, top with a chocolate ganache. I just dip the tops of the eclairs in the warm ganache and chill until chocolate sets. Filled eclairs should be stored i8n fridge until ready to serve. They can be frozen.
Chocolate Ganache
4- 6 oz. dark chocolate, chopped- or 1 cup chocolate chips
2 oz. heavy whipping cream
In saucepan, heat chocolate and cream together until just heated through. Remove from heat and stir until smooth. You can also do this in a microwave safe bowl, in the microwave for about a minute. Remove and stir until smooth. Makes 1 cup.
Richest Blueberry Muffins

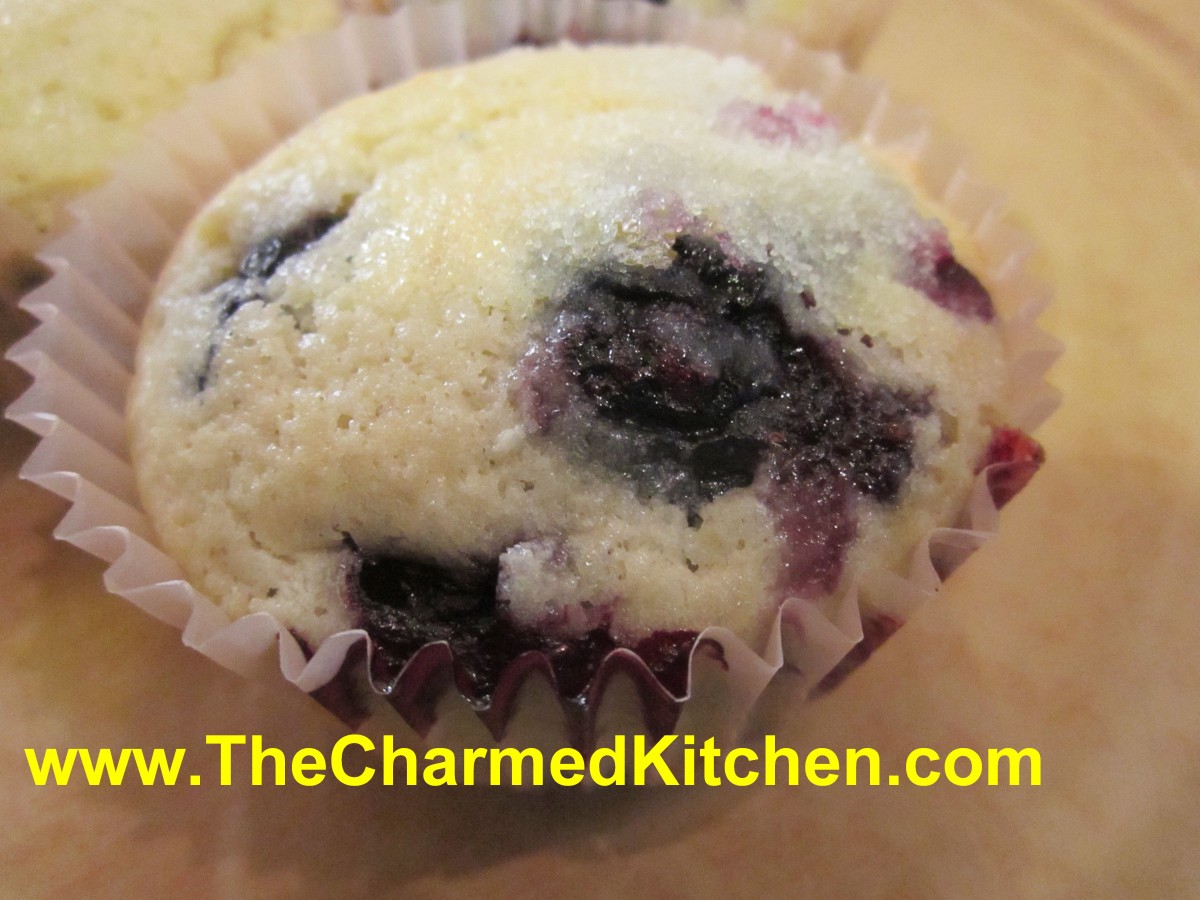
Rich Blueberry Muffins
I froze a lot of blueberries when they were in season. This time of year I often enjoy using some of those frozen berries in baked goods.
This muffin recipe is one of my favorites. The secret, I think, is the cup of melted butter that is folded into the batter. I also add a little cinnamon, which goes so well with the berries.
You end up with a rich muffin with a crumbly, tender texture and a great flavor. This recipe makes 36 muffins, so you will have extra to freeze. They freeze great.
Rich Blueberry Muffins
4 c. flour
2 T. baking powder
1 ½ t. salt
1 t. cinnamon
1½ c. sugar, plus extra for sprinkling
2 eggs
1 ½ c. milk
2 sticks (1 cup) butter, melted
4 c. blueberries -fresh or frozen
Paper line 36 muffin cups or grease lightly and preheat oven to 375 degrees. In large bowl mix dry ingredients. In smaller bowl mix eggs and milk and beat until smooth. Stir into flour mixture with a fork and mix until just moistened. Fold in melted butter and blueberries divide batter among cups. Sprinkle muffins with a little extra sugar. Bake 25 minutes, or until light golden. Makes 36.


