Hot Fudge Sauce


Hot Fudge Sundae
Yesterday, I did a cooking program with about 50 kids. It was our last session of the school year, and we always finish up with ice cream. We had fresh strawberry milkshakes and sundaes, topped with hot fudge sauce and whipped cream. The sundaes were a big success.
On a hot summer day, I am not sure anything is better than ice cream. When it comes to topping ice cream, hot fudge sauce is one of my favorites. The warm, rich sauce on the cold ice cream is such a great combination.
When I was a kid, getting a hot fudge sundae was the ultimate treat. I knew the kids would love it, too.
This simple recipes duplicates that sauce. It is easy to make and will keep for a couple of weeks in the fridge. I doubt it will last that long, once you taste it.
Hot Fudge Sauce
1 c. unsweetened cocoa powder
¾ c. sugar
½ c. brown sugar
1/8 t. salt
1-c. heavy or whipping cream
½ c. butter, cut into pieces
1 t. vanilla extract
In saucepan , stir together dry ingredients then stir in cream and butter. Heat to boiling and boil 1 minute. Remove from heat, cool 5 minutes and stir in vanilla. Store leftovers in fridge. Rewarm before using. Makes 2 ½ cups.
Lilac Vinegar

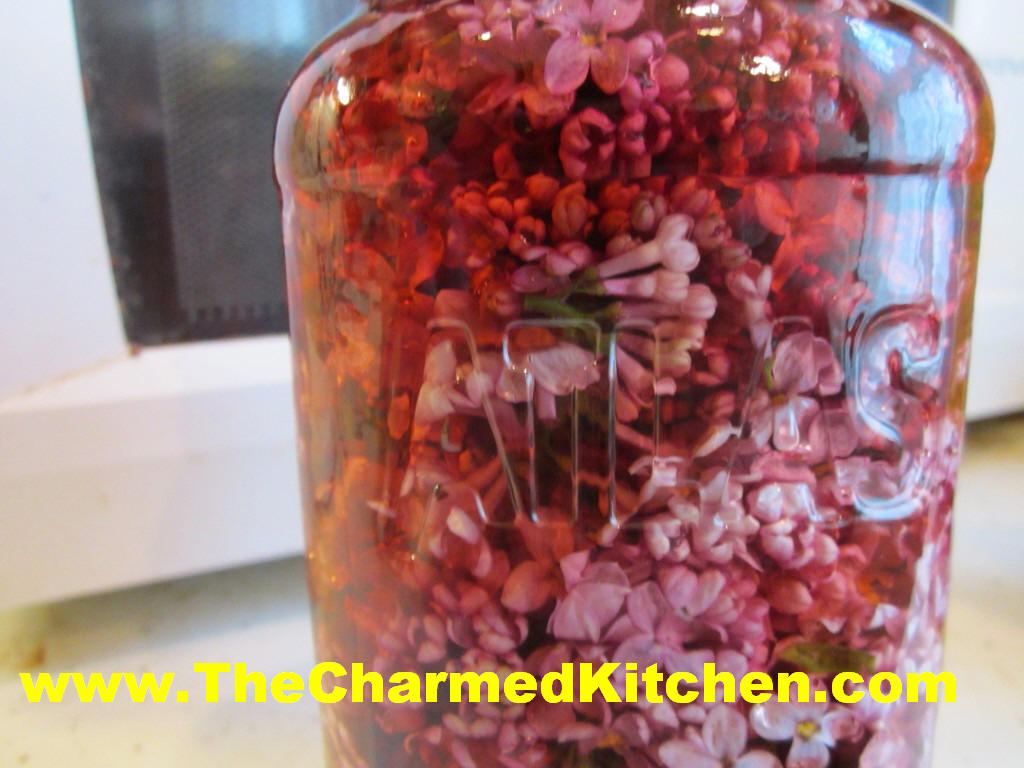
Lilac Blossoms Steeping in Vinegar
Since the lilacs are in bloom, I decided to preserve some of them and make lilac vinegar. As long as they are grown where chemicals haven’t been sprayed, lilacs blossoms are edible. The flavor is floral, with a touch of spice.
I use the lilac vinegar in salad dressings, marinades and in pickling. I also like to add a splash to soups or chili, to brighten them up.
To make lilac vinegar, just place clean lilac blossoms in a jar and cover with red wine vinegar.* Put a lid on the jar and store in a cupboard for 10 days or longer. Ideally, you want at least one cup of blossoms for every 2 cups of vinegar- to get enough lilac flavor into the vinegar. A one to one ratio- one cup blossoms, one cup vinegar, will give you an even more flavorful vinegar in the end.
When ready to use, strain out the blossoms and discard them. Pour the vinegar through a coffee filter to get out any remaining plant material. You can transfer the lilac vinegar to a decorative bottle. It can be stored at room temperature but will hold its color longer if kept cool, even refrigerated.
* always use vinegar that is 5% acidity. You can use white wine vinegar, cider vinegar or whatever vinegar you like.
Spinach and Artichoke Quiche


Spinach and Artichoke Quiche
I love quiche. It is a perfect brunch dish, with endless variations. Also a nice dish to serve for dinner or lunch. I often make two at a time. That way I can freeze one to enjoy later on. Leftover quiche is a favorite breakfast of mine.
I had planned to make a quiche with artichoke hearts. When I was starting to put the quiche together it occurred to me that I had just brought home a giant bag of spinach.
Made sense to put the two together. Sort of like spinach and artichoke dip. I used about a pound of fresh spinach, cooked, drained and chopped, but a box of frozen spinach would work, too.
This one was a big hit. Here is the recipe.
Spinach and Artichoke Quiche
1 unbaked pie crust – enough for a deep dish pie
4 oz. diced cheddar cheese – I like a sharp cheddar
2 T. flour
1 lb. fresh spinach or 1 (10 oz.) package frozen spinach, cooked, chopped and squeezed dry
3-4 artichoke hearts, drained and chopped coarsely (about 1/2 of a 14 oz. can)
1 c. milk or half and half
3 eggs, beaten
2 T. fresh chopped parsley
Hot pepper sauce to taste
salt and pepper to taste
In 9-inch (deep dish) pie pan place the crust. Toss cheese with the flour and place in crust. Add the spinach and artichoke hearts. Combine milk with the eggs and add seasonings to taste. Pour over the spinach mixture. Place pan on a baking sheet to collect any drips and place in a preheated 400 degree oven. Bake for 30 minutes then turn down oven to 325 and continue baking until quiche is firm near the middle, about 25-30 minutes more. To test for “doneness” insert a butter knife about an inch from the center of the quiche. If it comes out clean, the quiche is done. Serves 4-6.
Homemade Blueberry Liqueur


Blueberry Liqueur
I always stock up on blueberries when they are in season. I end up with a lot of frozen berries to enjoy throughout the year. I was cleaning out the freezer awhile ago, and decided to use some of my frozen berries to make blueberry liqueur.
I made two different ones, actually. One is unsweetened- just blueberries, vodka, lemon zest and a clove. It is sometimes called an eau de vie- French for water of life- or just blueberry vodka.
The other is sweetened a little with a sugar syrup- but you could use honey. That is blueberry liqueur or blueberry cordial. Both are wonderful.
The color is so pretty and they can be sipped, as is, or used in cocktails. You can use other berries, if you prefer.
I look forward to summer parties and enjoying these with friends and family.
Blueberry Liqueur
4-c. fresh or frozen blueberries
Sliced and scraped peel of one lemon, optional
1 clove, optional
3-c. vodka or 2 c. vodka and 1 c. brandy
1 c. sugar syrup, optional, recipe follows
Lightly crush berries with a fork. Combine with peels and clove and vodka and steep 3 months. Strain and filter and add sugar syrup. Mature 4-6 weeks.
Sugar Syrup
Simple syrup is made from 1 cup of sugar and ½ cup of water. Bring to a boil, then cool. You will have 1 cup of syrup. Some recipes call for plain sugar and others for honey. Watch when you substitute honey for sugar, as it is sweeter and stronger flavored. Better to use orange or clover honey.
Violet Liqueur


Violets and Vodka
Since I posted a picture of some of my violets, steeping in vodka, I have received requests for directions on how to make violet liqueur. So here it is.
Violet liqueur is, in its most basic sense, a combination of violets and vodka, steeped together for several weeks, then strained and filtered. Once strained, the mixture is sweetened to taste with simple syrup.
Violet liqueur can just be sipped and enjoyed as is, but it is often used as an ingredient in cocktails.
I have made violet liqueur with the violets that grow in my yard. They are mostly white, with a small amount of purple color. The liqueur tastes great, but doesn’t have a lot of color. It comes out a light golden color. That is fine with me.
For this batch, I am using purple violets I got from a friend’s garden. The color will end up a light purple color. To make the color of your liqueur more purple, you can add a few raspberries or blackberries to the mix.
We need to talk about sweetening, too. A simple syrup is added to suit your taste. The recipe for simple syrup is at the end of this post. How sweet you make your liqueur determines whether it is a liqueur, or creme de violette. Lightly sweetened and it is violet liqueur. Double the amount of simple syrup and it is creme de violette. Strictly your choice and preference.
If you prefer to leave your violet mixture unsweetened, it is a violet eau du vie, which translates to violet water of life.
I use 1/2 cup of simple syrup for each cup of liqueur. Equal amounts of liqueur and syrup creates the creme de violette.
Violet Liqueur
1- 1 1/2 c. violet flowers, rinsed and drained
1 c. vodka
1″ piece vanilla bean, optional
a few fresh raspberries or blackberries, optional
1/2 c. simple syrup recipe follows
Combine violet flowers and vodka in a jar with vanilla bean and berries, if using. Screw on the lid and place the jar in a cool, dark place for at least 3 weeks for the flavors to combine. You can add more violets as you harvest them, if you don’t have enough at first. After a few weeks, strain out the flowers and other ingredients and discard them. Filter vodka mixture through coffee filters or several layers of cheesecloth to get it really clear. Sweeten to taste. Return to jar, seal and allow flavors to mellow another week. Enjoy!!
Simple Syrup
Simple syrup is made from 1 cup of sugar and ½ cup of water. Bring to a boil, then cool. You will have 1 cup of syrup. You can sweeten with honey, if you prefer. Watch when you substitute honey for sugar, as it is sweeter and stronger flavored. Add a small amount, let it sit for a day or so- and give it a taste. You can always add more sweetener later.
Mom’s Challah Bread


Challah
I thought I would share one on my Mom’s favorite recipes today. I miss her everyday. She was such a wonderful mother. She taught me how to bake and cook. She taught me how to make a dollar stretch and not to be wasteful. She taught me how to have compassion for others. She taught me to never go to bed mad. She also taught me to stand up for myself.
I remember a story she told me of her and my dad. They were dating and he was acting jealous, because she was talking to a friend at a party. She walked out. She left the party and he ran after her. She told him that he needed to respect her, or she would not stay with him. She would not take any sort of crap from him. Good lesson for us all.
I have wonderful memories of my mother making this bread. Whenever I make it, I think of her. It is a simple egg bread, in many ways, but the braiding makes it look so pretty. You can bake the bread in loaf pans, or on baking sheets. Both look great.
This is one of my favorite sandwich breads, but I also like it for French toast. Challah is a nice option for bread in your holiday stuffing (or dressing) and it makes great bread pudding.
I had a bread class last night, and we made dinner rolls with the dough, instead of the traditional loaves. It gave everyone in the class a chance to play around with the dough. They got about 30 dinner rolls!! If you do choose to make rolls, bake 15-20 minutes.
Challah
2 c. hot water
1 T. each sugar, salt and oil
1 package active dry yeast
¼ c. warm water
About 8 cups flour
2 beaten eggs
Poppy or sesame seeds, optional
In large bowl combine hot water, salt, sugar and oil. Dissolve yeast in warm water in small bowl and add to oil/water mix. Stir in 1 cup of the flour and eggs, reserving 2 tablespoons of the eggs for later. Gradually stir in enough of the flour to make soft dough. When dough pulls away from sides of bowl remove to floured surface. Knead dough, adding flour as necessary about 8-10 minutes. Dough should be smooth and elastic. Place dough in a lightly greased bowl, turning to grease top, cover with a towel and allow to rise in a warm, draft free place until doubled, about 1 hour.
Punch dough down and divide into 8 equal pieces. Roll three of the pieces into 12- inch ropes. Place in a greased 9×5-inch loaf pan. Take one of the remaining pieces of dough and divide into thirds. Roll the pieces into 3-nine inch ropes and place on top of the braid already in the pan. Repeat with remaining dough and cover. Allow to rise until doubled in bulk, about 1 hour. Preheat oven to 400 degrees. Brush loaves with reserved eggs and sprinkle with sesame or poppy seeds, if desired. Bake 40-45 minutes. When done loaves will be nicely browned and sound hollow when tapped. Makes 2 loaves.
Note: Bread dough can also be placed on greased baking sheets instead of in loaf pans. The result will be longer and flatter, but very pretty.
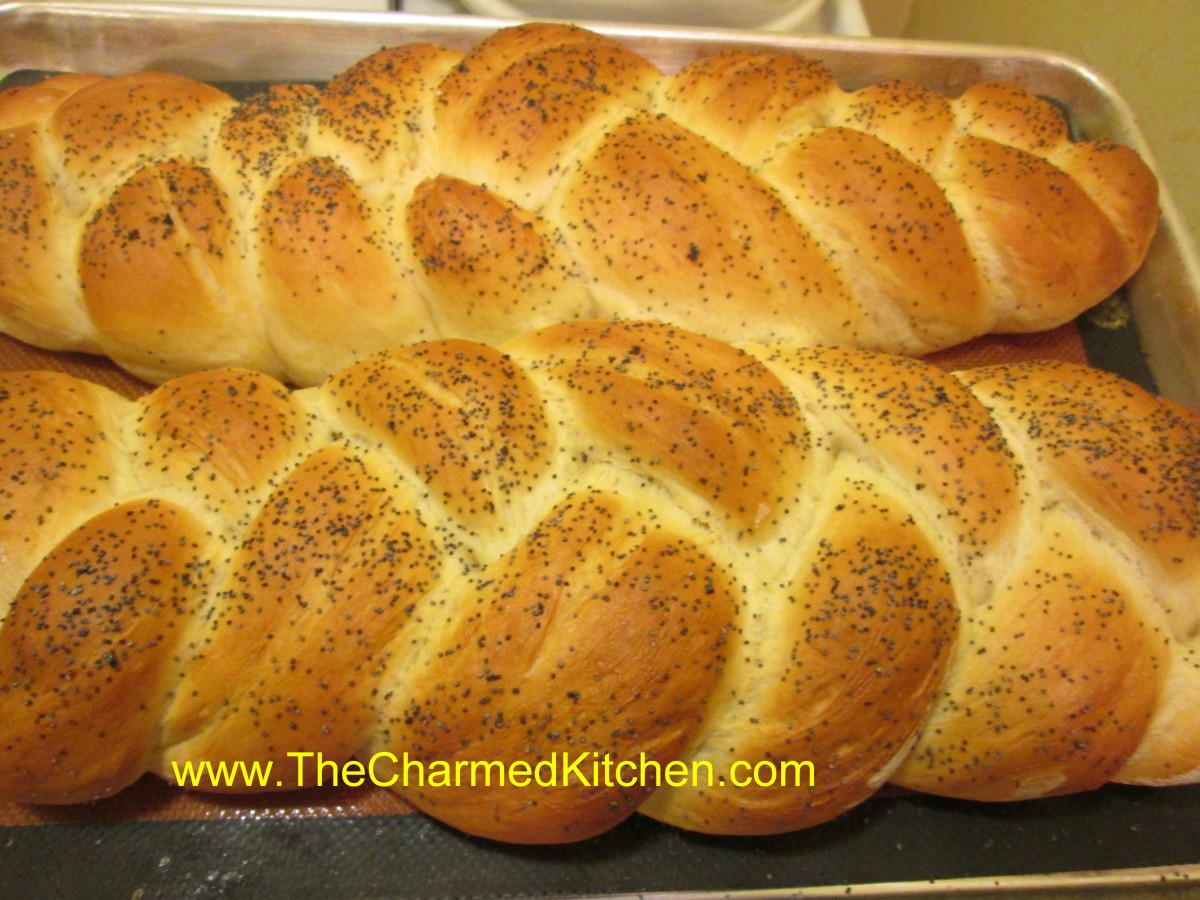
Challah Bread, baked on a baking sheet, instead on in loaf pans
“Ramping” It Up

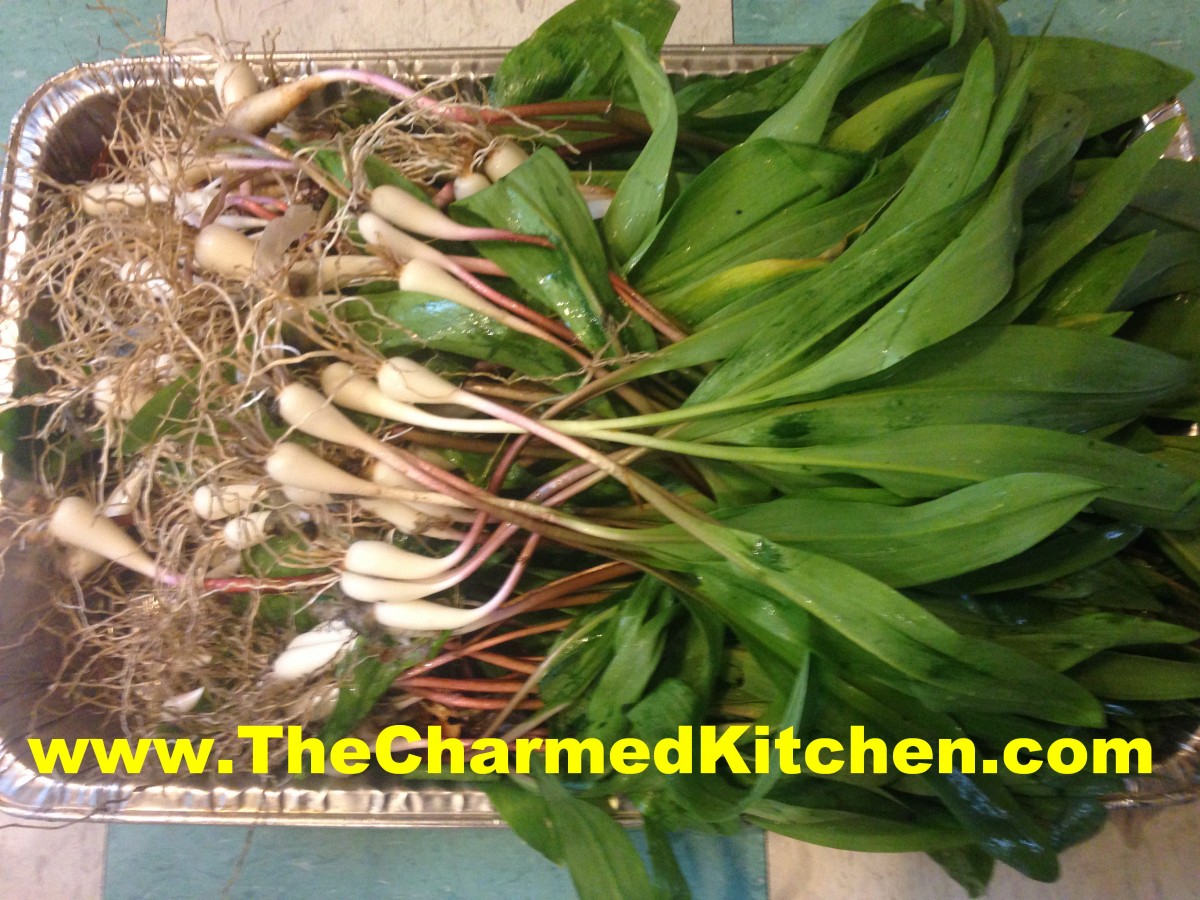
Ramps
I had a request from two friends to forage some ramps. I was meaning to get some, but hadn’t done it yet. I used their requests to get me moving. We went to a location where I am allowed to harvest ramps. We each brought home one five gallon bucket of ramps.
If you haven’t tried ramps, you really don’t know what you are missing. Ramps are a member of the onion/allium family. They grow wild in wooded areas and are only around for about a month, during the Spring. They are sometimes called wild leeks or wild onions. Their flavor might best be described as a garlicky leek.
People have been foraging ramps forever. A recent increase in their popularity has put them at risk in some areas. Only pick ramps where it is legal to harvest them. Only purchase ramps from someone who you trust to harvest responsibly. While I love the bulbs, I only have a small patch of ramps in my yard, so I just harvest the leaves from them. That way the plants is not killed.
I first had ramps when I was in college. We were on a weekend scavenger hunt for a biology class. One of my classmates came upon a stand of ramps. She explained to me what they were. We harvested a few and made soup out of them for dinner that night. Our professor, Dr. Peter Gail, was a forager and he showed us other wild edibles. This is where my love for foraging started.
So here are some of the ways I use my ramps.
Ramp Butter
Ramp butter is a wonderful way to preserve the ramps and a great way to prep them for use in all sorts of recipes. The recipe is pretty simple- ramps, mixed with softened butter, perhaps a little lemon zest and some salt, if desired. The butter is then put in small containers, or shaped into little logs and frozen. Whenever you want some ramp flavor in your cooking, you just spoon out or slice off a bit of ramp butter.
I don’t know that I have a hard and fast “recipe” for ramp butter. I can tell you how I make mine, though.
I like my ramp butter with lots of ramps in it. Ramp forward, if you will.
I also like to blanch my ramps first. I find that blanching the ramps brightens their color, and mellows their flavor just a bit.
Start by bringing a pot of water to a boil. Place cleaned ramps leaves (or leaves and bulbs) in the boiling water. Have a large bowl of ice water handy. After one or two minutes, at the most, drain off the boiling water. Drain the ramps and then submerge them in the ice water. You want to stop the cooking quickly. Once cooled, drain the ramps and squeeze out excess moisture.
I mix equal parts of butter and blanched ramps. The ramps cook down a lot, kind of like spinach, so a cup of squeezed out blanched ramps is quite a few. I had 2 cups of ramps and combined them with 1 pound of unsalted butter. To that amount, I added a tablespoon of lemon zest. You can add some salt to the mix, too. Use a food processor to get the mixture well mixed and to chop the ramps up. I divided the mixture into 6 or seven containers and threw all but one in my freezer. The last container is in my fridge, being used in all sorts of dishes.
Ramp Oil
The process is similar to making ramp butter, but you use oil instead of butter. I used a lemon olive oil and some avocado oil. I use those oils because I like the flavors, but also because they will freeze solid. For long term storage- ramp oil should be frozen. Any stored in the fridge should be used up in a week or two.
The uses are somewhat similar to ramp butter. You can use some of the ramp oil to make ramp pesto or ramp pasta. You can use it as a base for salad dressing. It is really good added to potato salads.
Prepare the ramps the same way you would for ramp butter. Blanch, drain, chill, squeeze dry. I placed the prepared ramps in a food processor and added about a cup of oil to two cups of ramps. I ran the machine until the mixture was pretty smooth. Add a little more oil, if needed. The mixture should be thick, but pour-able. The flavor is intensely ramp. That is what I like. I can cut it down with other ingredients later on.
I use just the greens for my ramp butter and ramp oil- and save the bulbs to pickle. I made a sweet pickle with them. This is a “quick” pickle product, it is not fermented. You can eat them right away, but the ramp pickles are better if you wait a week or so, before eating. They are stored in the fridge. I used some of my Tuscan seasoning, rather than the more traditional pickling spice. Use what floavors you prefer.
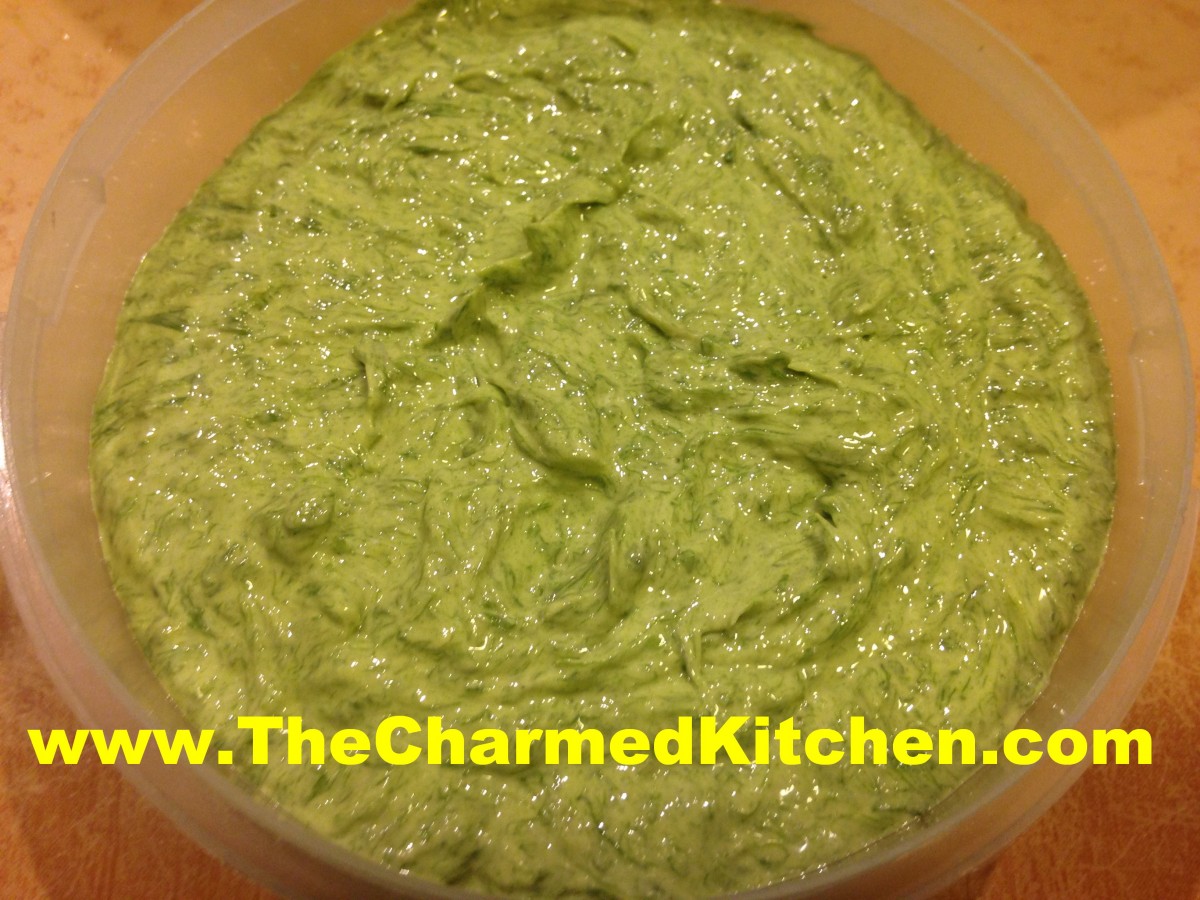
Ramp Butter
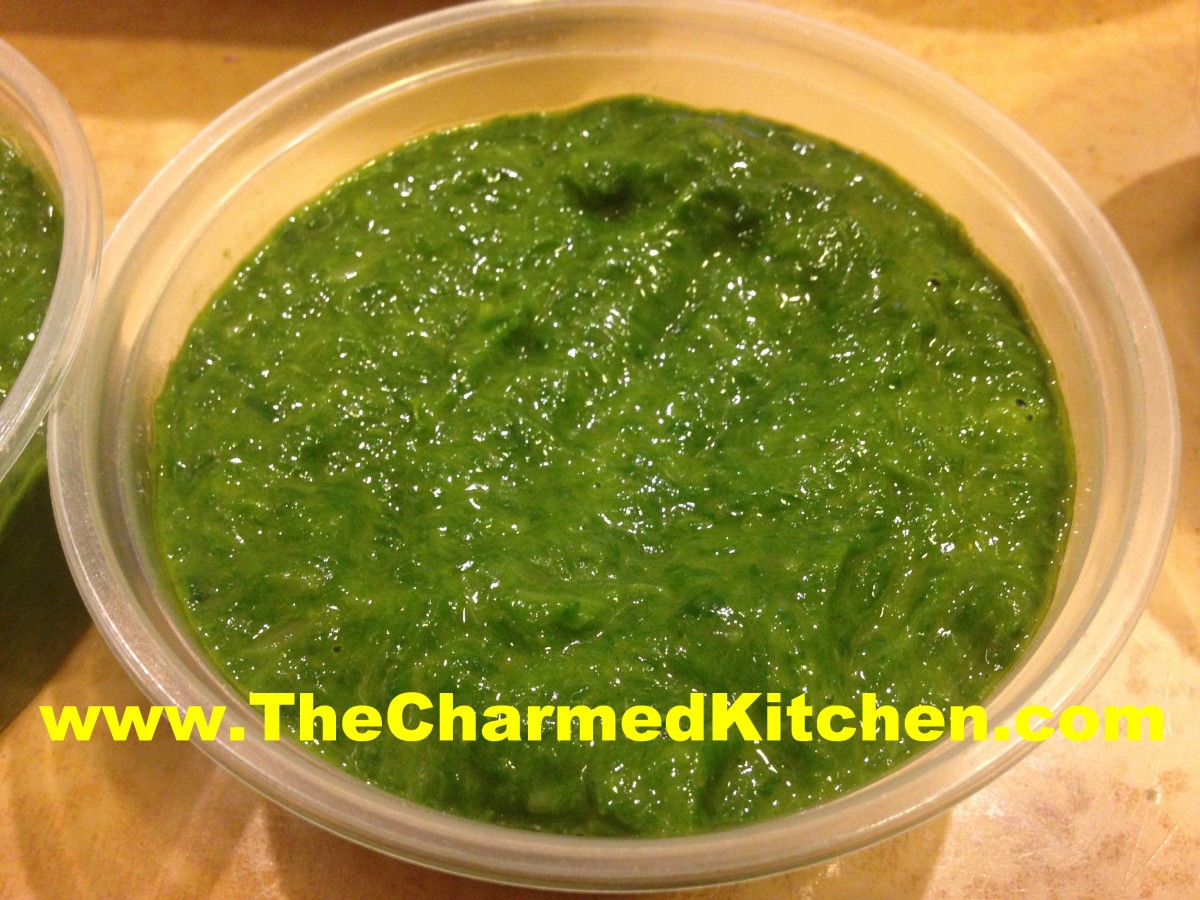
Ramp Oil
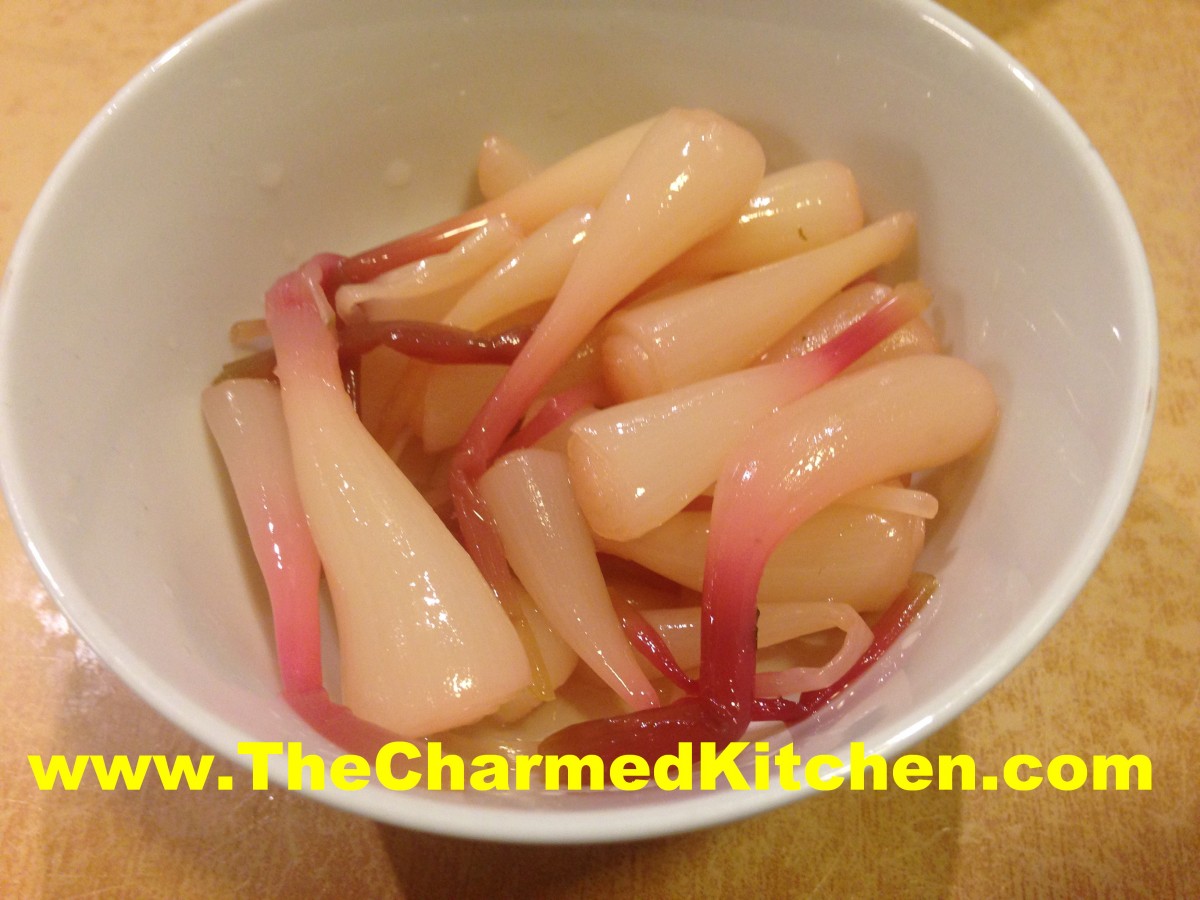
Pickled Ramps
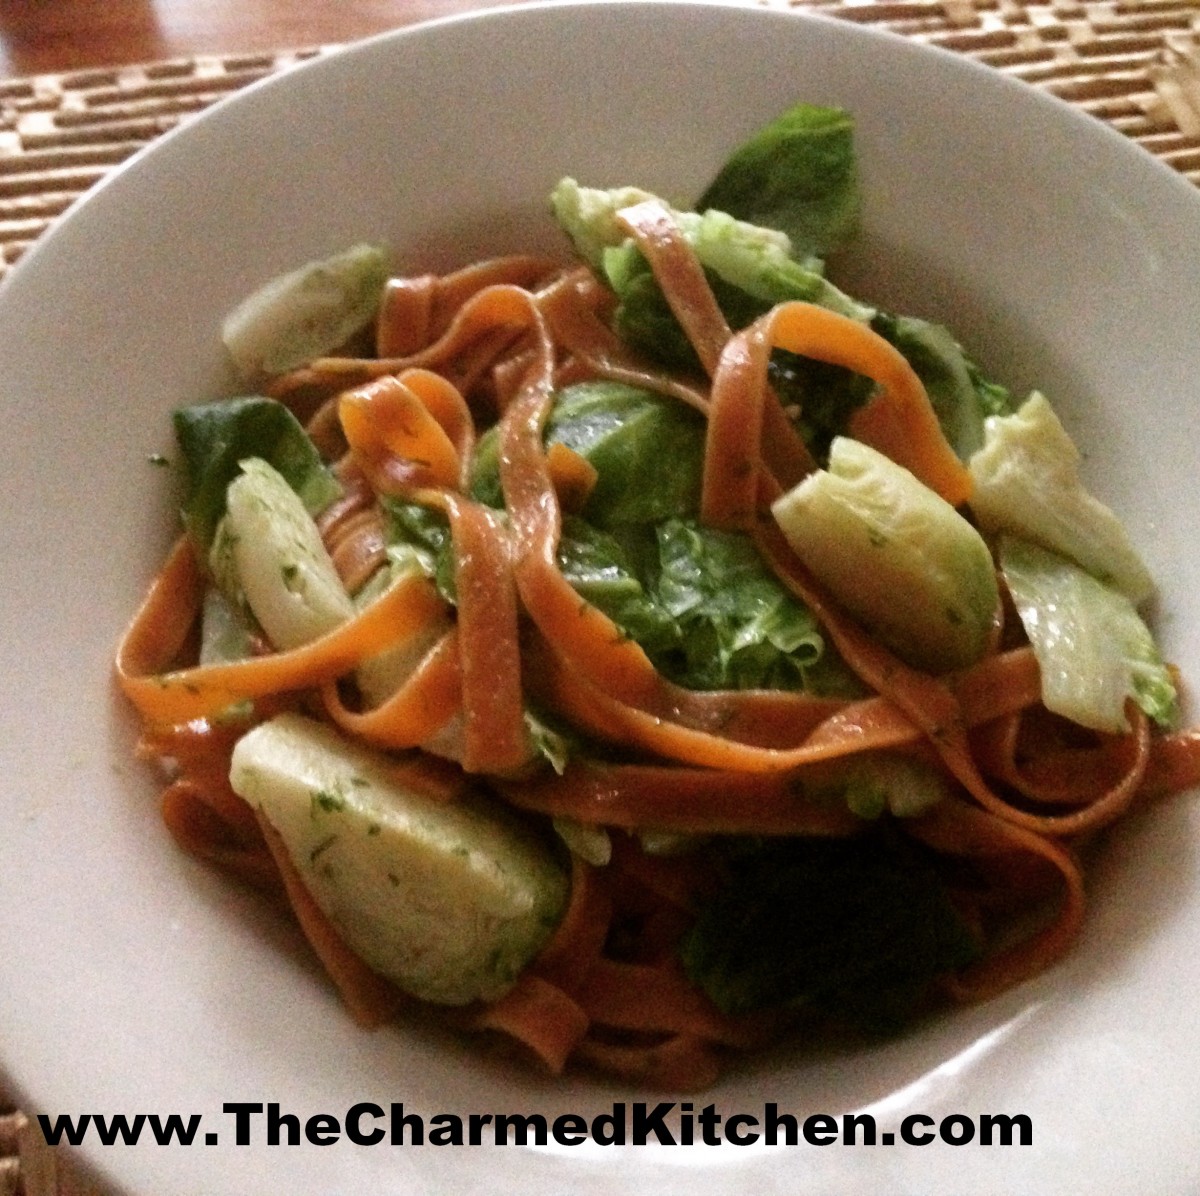
Tomato Pasta, Brussels Sprouts and Fresh Ramps
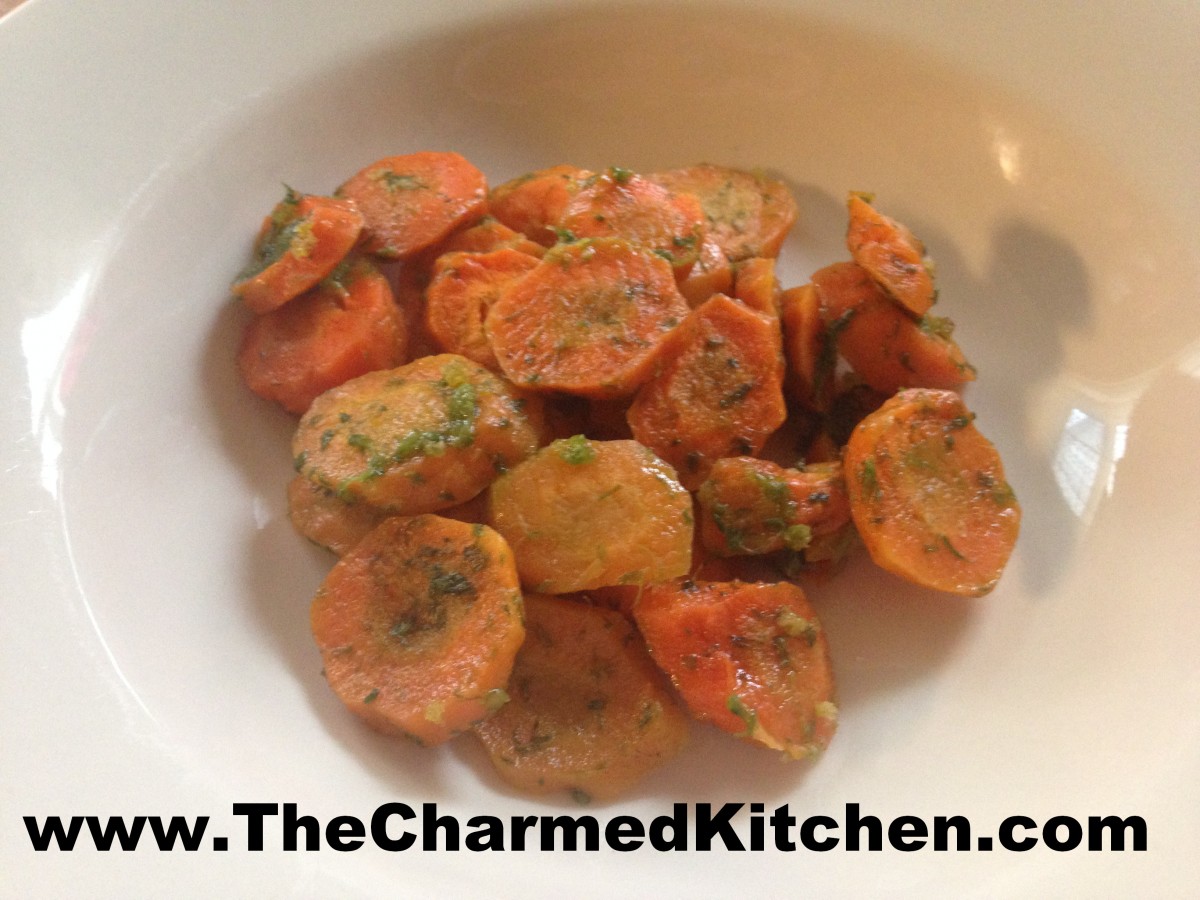
Carrots with Ramp Butter
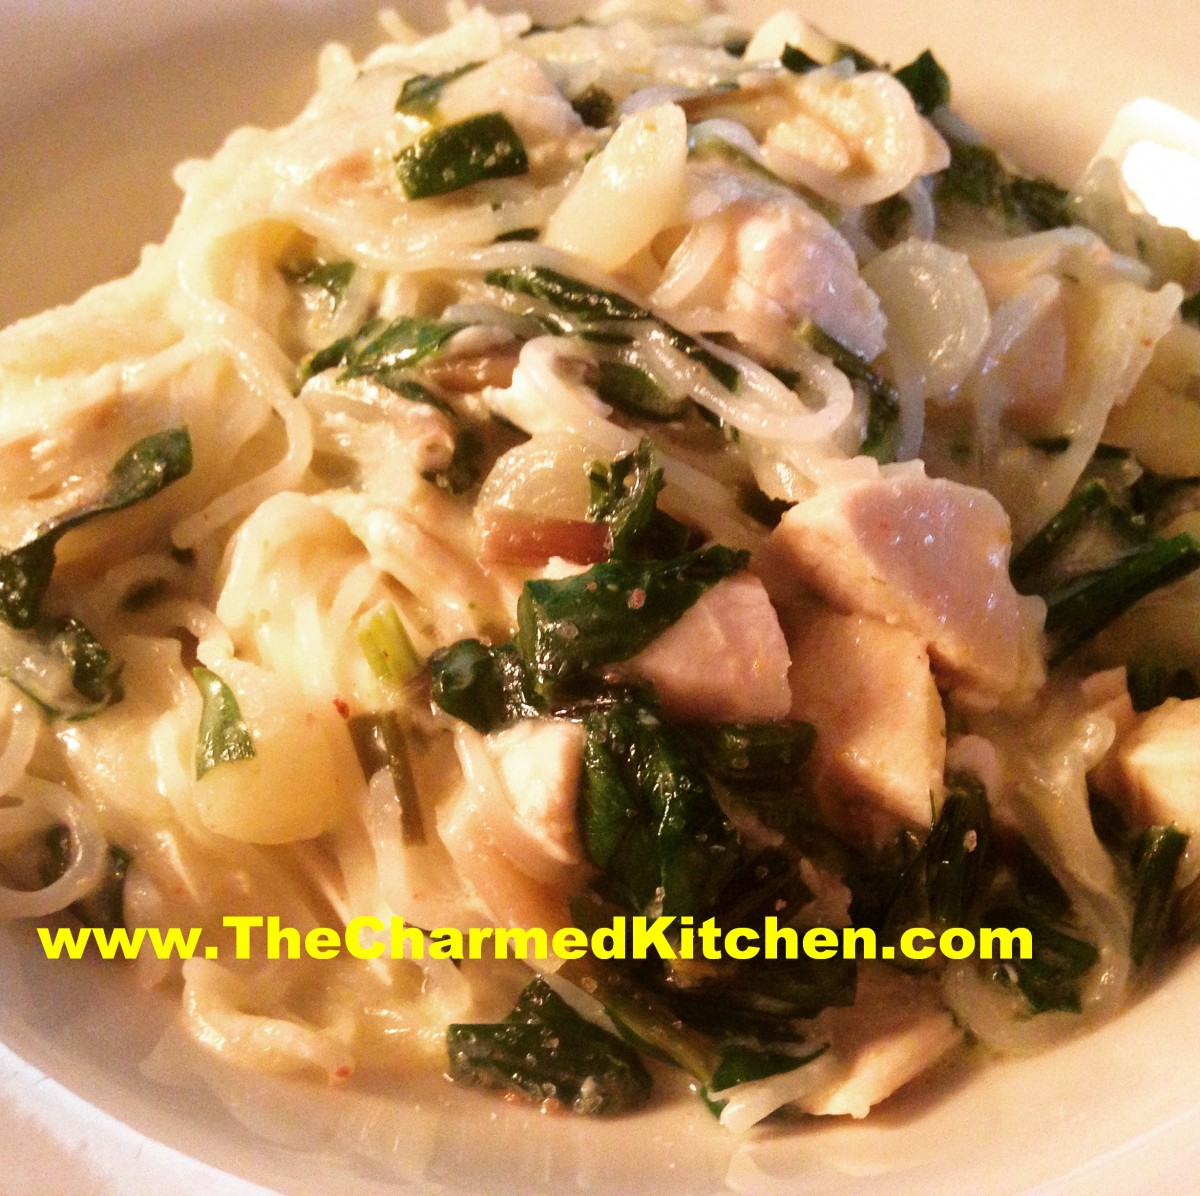
Ramps with Rice Vermicelli and Chicken in a Cream Sherry Sauce
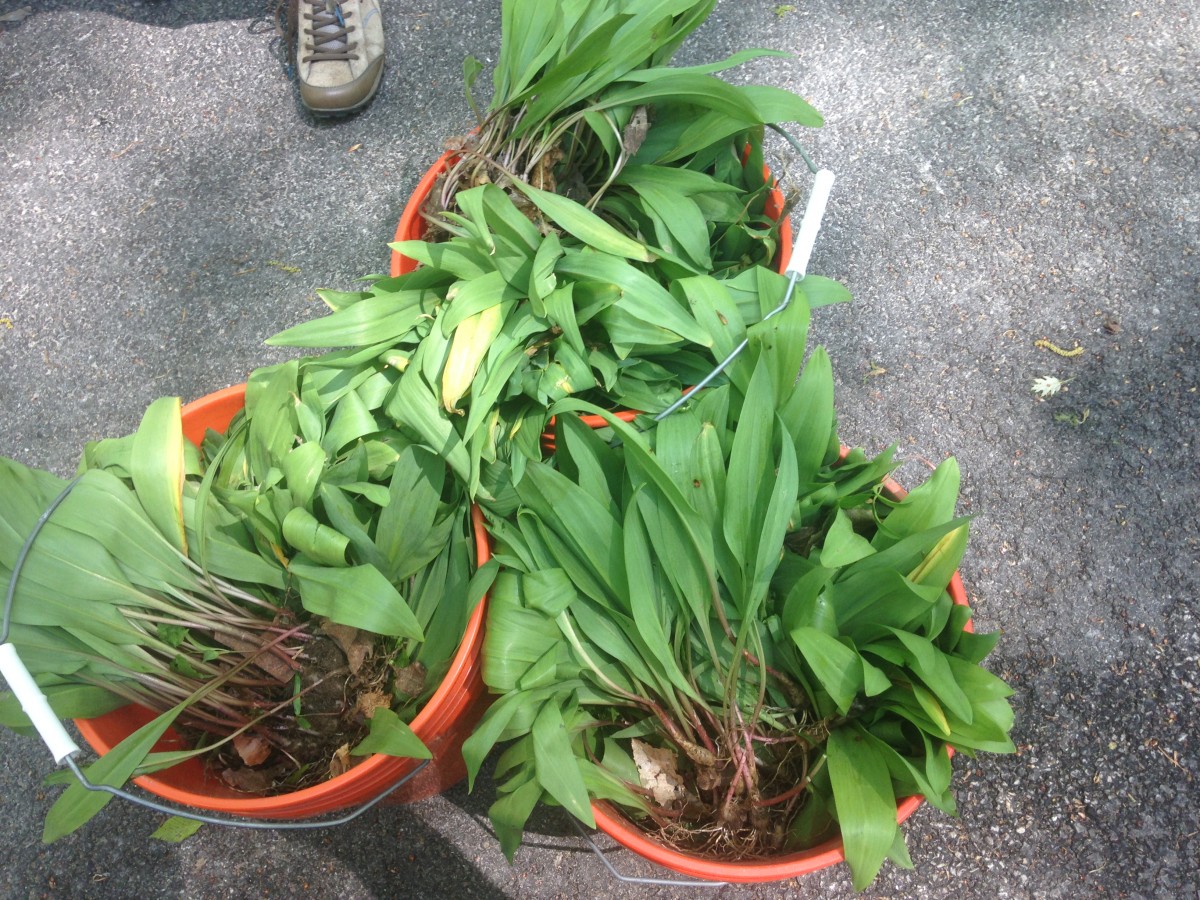
Our Ramp Harvest
Pickled Ramps
4-5 c. ramp bulbs, some stem attached, if you like
2 c. cider vinegar
1½ c. water
1 c. sugar
2 T. salt
1 T. Tuscan seasoning*
Wash ramp bulbs well and remove any roots. In pot, combine all ingredients and bring to a boil. Turn down heat to a simmer. Cover pot and simmer 10-15 minutes. Remove from heat. Pour into a heat-proof jar. Cool a little, cover and place in fridge. You can eat the ramp pickles right away, but they taste even better if you wait a few days. Will keep in the fridge for a few months.
*Tuscan Seasoning
½ c. dried basil
½ c. dried oregano
½ c. dried marjoram
3 T. dried minced onion
2 T. dried minced garlic
2 T. dried rosemary
2 T. dried parsley
1 t. crushed red pepper
Combine all. Store in a cool, dry place. Use for any number of recipes, from marinara sauce, to salad dressings.
Again, enjoy ramps, but only if they were responsibly harvested.
Bacon Waffles


Bacon Waffles
If you are looking for a special breakfast for Mother’s Day, maybe mom would like some waffles. Even better, make her waffles with bacon inside them!!!
For me, breakfast doesn’t get much better than waffles. Well, unless maybe you add bacon to the waffle batter. Truth is, I don’t treat myself to waffles all that often, but if I am going to eat waffles, I go all out.
These are truly wonderful waffles. Light, crispy on the outside and studded with bacon. A drizzle of warm maple syrup and you are good to go.
So, if you are looking for a special treat for mom for breakfast, or lunch, or dinner or a snack… try these bacon waffles. You can thank me later.
Bacon Waffles
1 pound sliced bacon
1 3/4 cups all-purpose flour
1 tablespoon sugar
2 teaspoons baking powder
1/2 teaspoon salt
3 eggs, separated
1½ cups milk
¼ cup butter, melted
In a skillet, cook bacon until crisp. Drain; crumble and set aside. In a mixing bowl, combine the flour, sugar, baking powder and salt. Beat egg yolks, milk and butter; stir into dry ingredients until smooth. Beat egg whites until stiff peaks form; fold into batter. Add bacon. Before making each waffle, stir batter. Bake in a preheated waffle iron according to manufacturer’s directions until golden brown.
Hazel’s Sweet Potato Pie


Hazel’s Sweet Potato Pie
I was teaching a pie class the other night, and this is one of the recipes we made. I love sweet potato pie, but am always surprised at how many people have never had it. It must be one of those north/south things. Several people in class said they had never had a sweet potato pie. They really liked it and I was glad to have them try something they had never tasted before.
I used to work with a wonderful woman named Hazel Pruitt. She grew up in Alabama and taught me so much about southern cooking. I first made collard greens with Hazel. She also taught me how to make sweet potato pie. This is her recipe and I want to share it with you. I think of her every time I make it.
We used Martha Stewart’s recipe for the crust, but use whatever crust you like. Her recipe makes two crusts, so we used the other half of the dough for another pie.
Hazel’s Sweet Potato Pie
½ c. sugar
1 t. cinnamon
½ t. allspice
½ t. salt
¼ t. cloves
1 ½ c. cooked, mashed sweet potato
2 eggs, beaten
1 c. milk or almond milk
2 T. melted butter or 2 T. olive oil
1 (9-inch) unbaked pie crust
Combine sugar with seasonings. Stir in remaining ingredients and combine until smooth. Pour into pie crust and bake in a preheated 400 degree oven for 40 minutes, or until filling is set.
Martha Stewart’s Pie Crust Recipe
2½ c. flour
1 t. salt
1 t. sugar
2 sticks (1 cup) butter, very cold
About 6 T. ice water
Combine dry ingredients and cut in butter to resemble coarse crumbs. Using a fork to mix the dough start to add the ice water a tablespoon or 2 at a time until mixture just holds together. Wrap and chill until ready to use. Makes 2.
Ham and Gouda Quiche


Ham and Gouda Quiche
If you are looking to make breakfast for mom on Mother’s Day, consider making her a quiche. Quiches are so versatile. You can fill them with almost any ingredients. They can also be served for breakfast, brunch, lunch or dinner. You can also bake it right away, or freeze it for later.
I often make two quiches, just so I can freeze one for later use.
This is one of my favorite quiche recipes. We made it in class last night. Everyone loved it. The original recipe called for Swiss cheese, but we used Gouda instead. The mix of ham and Gouda cheese works well together.
We used a homemade crust, but you can use a store bought crust, if you prefer.
Ham and Gouda Quiche
1 (9-inch) unbaked pie crust
1½ c. shredded Gouda cheese
4 t. flour
1 c. diced cooked ham or turkey ham
3 eggs
1 c. milk or half-half or evaporated milk
2 T. fresh chopped parsley or 2 teaspoons dried
¼ t. salt
¼ t. dry mustard
Dash of hot sauce
Toss cheese with flour in a bowl and place in pie crust. Sprinkle the ham over the cheese and set aside. Combine remaining ingredients in a small bowl beating well to combine. Pour over the ham and cheese mixture and bake in a preheated 400-degree oven for 15 minutes. Turn down heat to 350-degrees and bake until knife inserted off-center comes out clean, about 30 minutes more. Makes 1
Note: This quiche freezes well. After adding the fillings just wrap in heavy foil and freeze solid until ready to bake. When ready to bake unwrap and allow to sit at room temperature for 30-60 minutes. Bake as with the fresh version, but add another 10-15 minutes to the baking time. If you don’t want to freeze the pie pan, you can line the pie pan with foil before you add the crust. Once it is frozen you can remove the frozen quiche from the pie pan and wrap, returning to freezer. When ready to use unwrap and put the quiche back in the pie pan before baking.
You can also use a foil pie pan.


