Tomato Pasta Salad
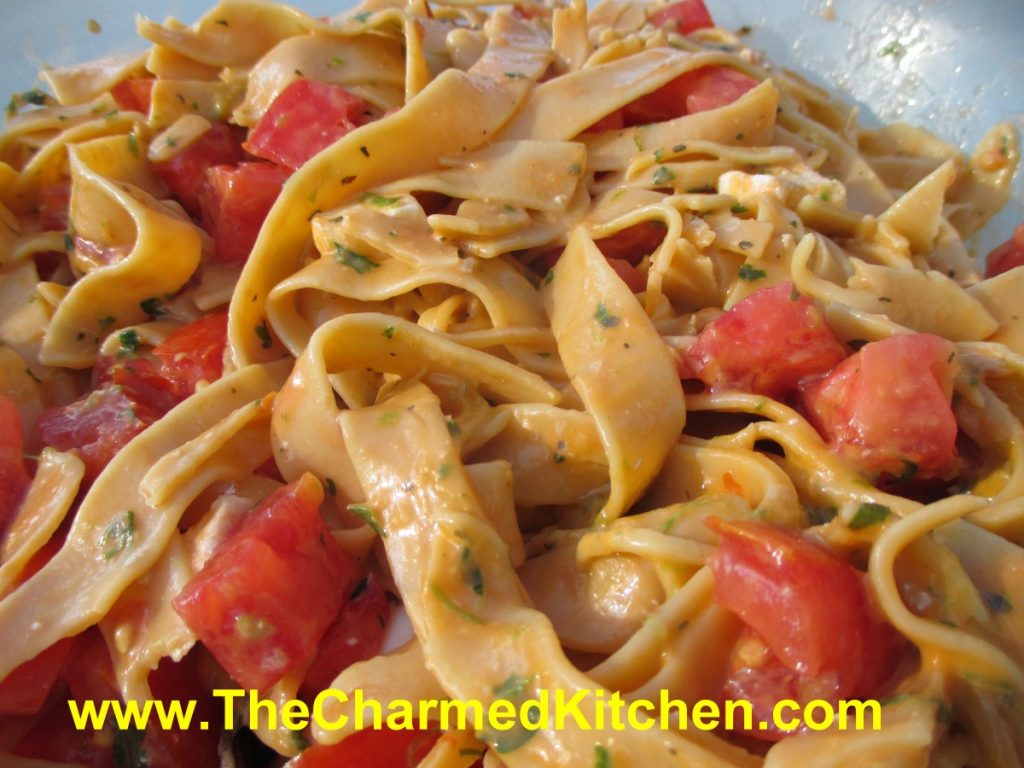
I have been enjoying plenty of fresh, local tomatoes and I am always looking for new ways to enjoy them. This salad really celebrates the tomato.
I used tomatoes three different ways in this one salad. I started with a homemade tomato pasta, added fresh diced tomatoes and finished it with a tomato salad dressing.
The salad has fresh mozzarella cheese added to it, along with some hard cooked eggs. You could easily add cooked chicken or shrimp, if you prefer.
Here is the recipe for the salad and the dressing. I posted the recipe for the homemade tomato pasta at the bottom of this post. You can, of course, use store-bought pasta, if you prefer.
Tomato Pasta Salad
8 oz. tomato pasta or tri-color pasta, I used homemade
12 oz. diced tomatoes
2 sweet peppers, seeded and chopped
½ c. sliced green onions
4 oz. mozzarella cheese, cubed or shredded
3-4 hard cooked eggs
Tomato herb dressing- recipe follows- or use the vinaigrette of your choice.
Cook pasta according to package directions. Drain. Combine with remaining ingredients and toss. Serve immediately or chill. Serves 4.
Tomato and Herb Dressing
1 c. tomatoes, peeled and seeded, fresh or canned
½ c. chopped parsley
2 green onions, chopped
2 T. fresh celery or lovage leaves
2 T. fresh basil leaves or 2 t. dried
½ t. each salt and garlic powder
½ c. olive oil
Dash hot pepper sauce
Combine all ingredients in blender until smooth. Makes 1½ cups.
Fresh Tomato Pasta
2 c. flour
1 t. salt
½ -2/3 c. tomato juice- I just pureed a fresh tomato in the blender, seeds, skin and all. You might need a little more.
Fresh minced herbs, like chives, basil, parsley, rosemary, optional
Place flour and salt in bowl and stir to blend. Start adding the tomato juice, stirring to form a firm dough. Knead until smooth and cover dough, allowing to rest at least 20 minutes. I like to mix the dough in a food processor. Just mixes faster. You can also mix in a stand mixer using the dough hook. Once dough is rested, roll out to desired thickness and cut into noodles or use as the base for ravioli. Fresh pasta cooks in just a couple of minutes. Watch carefully. Serves 3-4.
Easy Cherry “Danish”

If you are a baker, you might balk at calling these Danish. They are not the traditional Danish we are used to. They are tasty, though, and easy to make. I call them pastries, although that seems a little vague.
Mom always called them Danish. My Mom used to make a batch whenever she had unexpected guests. They are ready in no time. I used cherry pie filling in these, but you can use other fruit fillings or even make cheese Danish.
They are made with baking mix- like Jiffy Mix. I make my own mix and the recipe follows. You can prep them in the time it takes to preheat the oven. They bake for just a few minutes, so a batch made in no time at all.
Easy “Danish”
2 c. biscuit mix, like Bisquick or Jiffy Mix- I make my own.
2 T. sugar
1/2 c. butter
2/3 c. milk
Assorted preserves or pie fillings or even sweetened cream cheese or ricotta for cheese “Danish” I prefer pie filling over preserves because preserves melt a lot and tend to spill out during baking.
1/2 c. confectioner’s sugar
milk
Combine biscuit mix and sugar. Cut in butter. Stir in milk. Drop rounded tablespoonfuls on lightly greased baking sheet. Indent middle using spoon. Leave 2-3 inches in between, as they grow. Spoon preserves, or pie filling, into indents. Bake in 400 degree oven for 10-15 minutes or until lightly browned. Combine confectioner’s sugar with enough milk to make a runny glaze. Drizzle over cooled Danish. Makes 12.
Biscuit Mix
8 c. flour
1 c. powdered milk
1 c. powdered buttermilk
¼ c. baking powder
1 T. salt
1½ c. shortening- I like to use coconut oil- you can also use butter, but mixture needs to be kept in the fridge if you use butter. I keep mine in the fridge in hot weather if I use coconut oil.
In large bowl combine dry ingredients and mix well. Cut in shortening until mixture resembles coarse crumbs. Store in a tightly-closed container and use it in 2-4 months. Makes 10 cups.


Ratatouille Salad
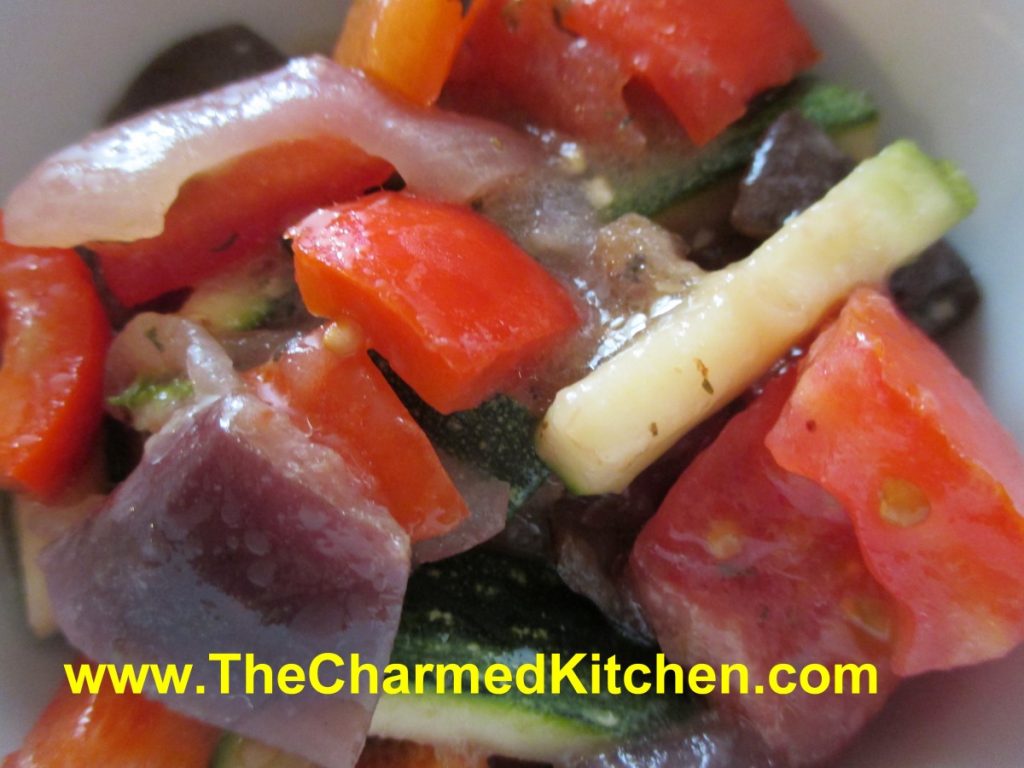
I had all the ingredients for ratatouille, a lovely French vegetable stew. I had eggplant, tomatoes, summer squash, peppers, onions and fresh herbs. But I was in the mood for a salad. I decided to use the same ingredients that I would use for the ratatouille, but transform them into a salad. It came out quite nice. I could see serving it on toasted bread, or using it like a dip. It reminded me of caponata, in a way.
I decided to cook the eggplant and onion, but leave the rest of the vegetables raw. I also decided to leave the skin on the eggplant. I did not salt the eggplant beforehand. The eggplant was fresh and tender- I saw no need for peeling or salting, but you could do both, if you like.
I always have roasted garlic on hand. I make a big batch and store in smaller containers in the freezer, until needed. The directions for roasting garlic follow the recipe. If you don’t have roasted garlic, you could add several cloves of garlic, peeled and minced. I invited a neighbor to try it- and she ended up taking the rest home.
Ratatouille Salad
1 medium eggplant, cubed. I had about 3 cups of eggplant.
3 T. oil
½ t. salt
1 medium onion, sliced
2 T. roasted garlic*
½ c. red wine vinegar
1 med. zucchini, cut in matchstick pieces, about 3 cups
1 sweet pepper, seeded and diced
1½ c. diced fresh tomato, seeded, if desired
Dressing:
1/3 c. red wine vinegar
1/3 c. olive oil
2-3 T. honey, or to suit your taste
2 T. chopped parsley
1 t. chopped basil
2 t. thyme leaves
Hot sauce to taste
Salt and pepper to taste
In skillet, heat oil and saute eggplant until tender and just starting to brown. Season with salt. Remove from skillet and set in a mixing bowl. In same skillet, saute onion and cook until wilted and tender. Add the garlic and vinegar to the skillet and cook until most of the liquid has evaporated. While liquid is cooking down, place remaining veggies in mixing bowl with the eggplant. When most of the liquid is cooked off, place onion in mixing bowl with eggplant mixture. Combine dressing ingredients in a small bowl or jar and whisk to combine. Pour over the eggplant mixture and toss to coat. Adjust seasonings. Chill until ready to serve. Serves 6-8 as a side.
*Once you have roasted garlic on hand for cooking, you will wonder how you did without it before. I get large amounts of freshly peeled cloves. Place the peeled garlic cloves in a roasting pan and pour a generous amount of olive oil over the garlic. Cover tightly with foil and bake at 350 until garlic is tender and golden. This will take at least 30 minutes, but up to 40 minutes. It depends on how much garlic you are roasting. Be careful not to burn it. Once cooled, place the garlic cloves, and oil, in small freezer containers. Store in freezer.
Spicy Pickled Beets
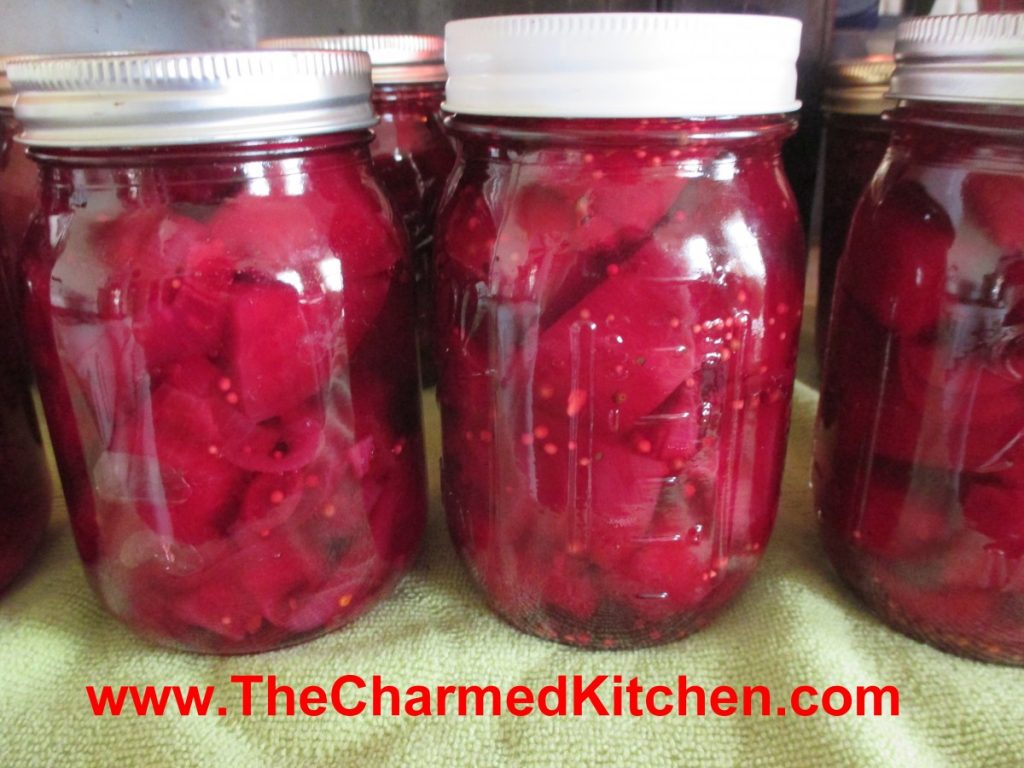
Beets are just one of those foods. People seem to love them, or hate them. I am a beet lover. I enjoy them in all sorts of dishes. The nice thing about making a batch of pickled beets is being able to open up a jar whenever you want.
This recipe is a pretty classic way to preserve beets. The brine is a sweet and sour mixture with pickling spice, salt and red pepper flakes for added flavor. You could play around with the seasonings a little. Maybe adding more heat.
Pickled beets are great served as a side dish with all sorts of foods. I like them served with cheeses, crackers and other pickled foods as an appetizer. If you don’t want to can them- you can store them in the fridge for up to a couple of months.
Spicy Pickled Beets
4 lbs. beets, smaller sizes preferred
3 c. thin sliced onions
2 c. sugar
2 T. Pickling spice
1 T. canning salt
2 t. red pepper flakes
2½ c. cider vinegar- 5% acidity
1½ c. water
Wash and trim beets, leaving a couple inches of stem attached. Cook in boiling water until tender. Cool beets down so you can handle them. Peel beets and cut into 1½- 2-inch diameter pieces, if beets are large. Leave whole if beets are small. Set aside. Combine the rest of the ingredients in a pot and bring to a boil. Reduce to simmer and simmer 5 more minutes. Add beets and cook a few minutes, until beets are warmed through. Ladle hot beets into clean pint jars, leaving ½ inch headspace. Ladle in hot liquid, leaving ½-inch headspace. Remove air bubbles, wipe off rim, screw on lid to finger-tip tightness. Repeat with remaining beets and liquid. You should fill about 5 pint jars. Process in a boiling water bath for 30 minutes. Turn off the heat and leave jars in water bath 5 minutes before removing to counter to cool. Yield: 5 pints.
Adapted from The Ball Blue Book
Peach Sorbet with Herbs
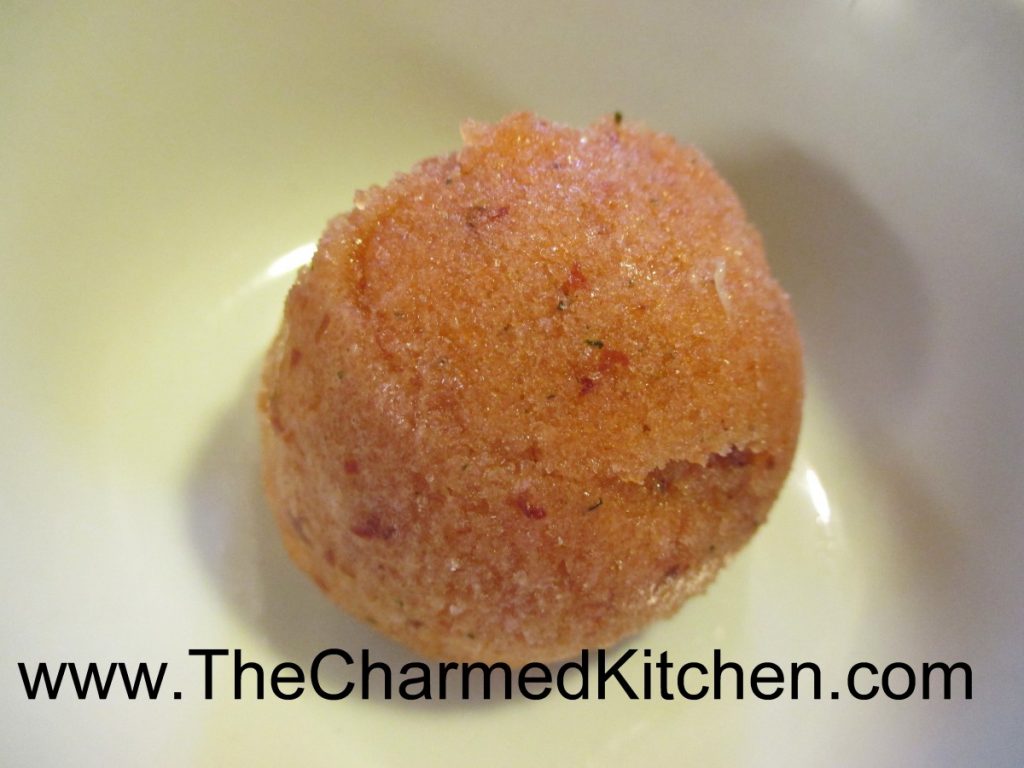
Sorbet is such a nice dessert for summer. Light, fruity and fresh. I try to keep a few different kinds on hand. So many fruits are abundant this time of year. They are the perfect start for a great sorbet.
This peach sorbet combines ripe peaches with both basil and mint from my garden. The combination worked well together. Adding herbs and other flavorings can make sorbet even more fun to eat.
You don’t need an ice cream machine to make it, either. You just puree the fruit with the other ingredients and freeze. The secret to a smooth sorbet, is to puree the frozen mixture a time or two. I place the frozen sorbet in my food processor and run it until the sorbet looks creamy. Then I put it in the freezer again. For extra creamy sorbet , repeat this process a third time. Easy to make, but there is wait time for the sorbet to freeze.
Here is the recipe for the peach sorbet. I thought the herbs added a really nice touch to the final product. Feel free to experiment with the flavors you like.
Peach Sorbet with Herbs
5-6 medium peaches, pitted. You can peel, if you like
honey to taste – I used 1/4 cup, but depends on how sweet the fruit it
3-4 basil leaves
2 sprigs of fresh mint
Puree all ingredients together until smooth. Adjust sweetener and seasonings. Mixture will taste less sweet after it freezes. Freeze until solid. Remove from freezer and break into chunks. Process in a food processor until mixture looks creamy. Depending on how cold your freezer is, you might have to let the sorbet soften a few minutes before processing it. Place back in freezer until ready to serve. Makes about 1 quart.
Note: For even creamier sorbet- process a another time or two- refreezing after each time.
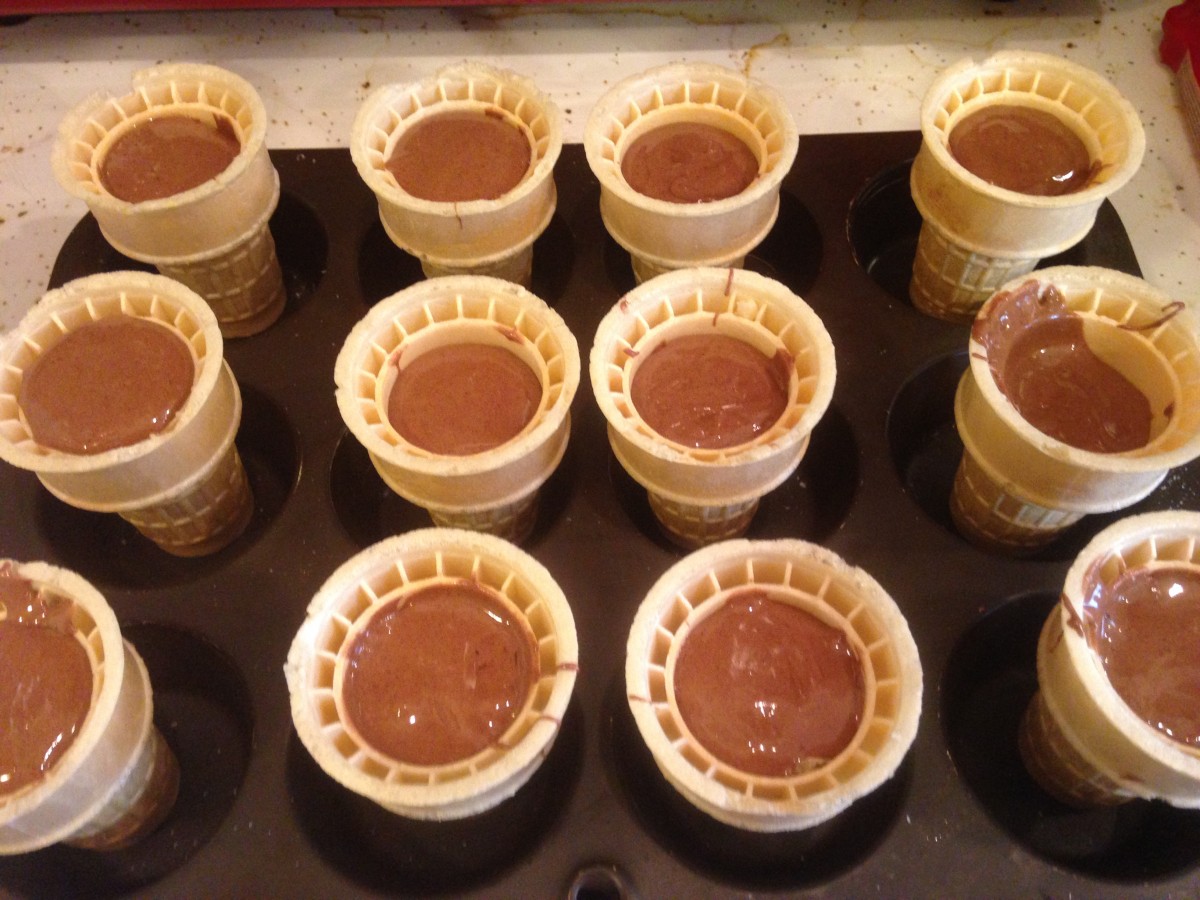
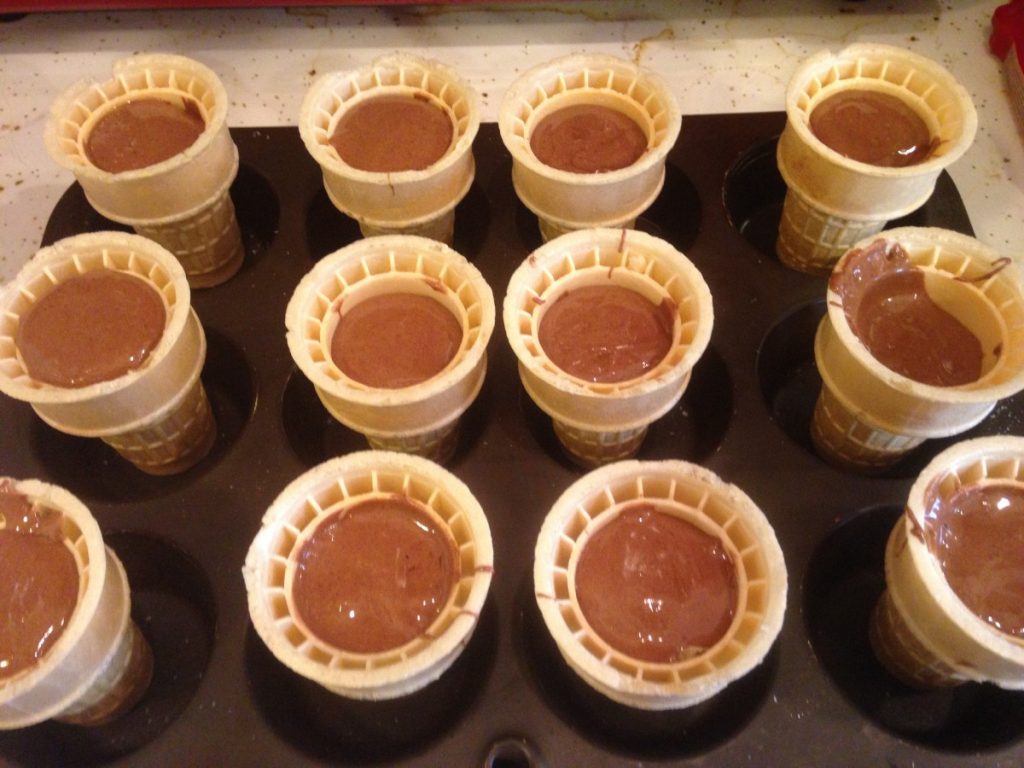
Ice Cream Cone Cupcakes

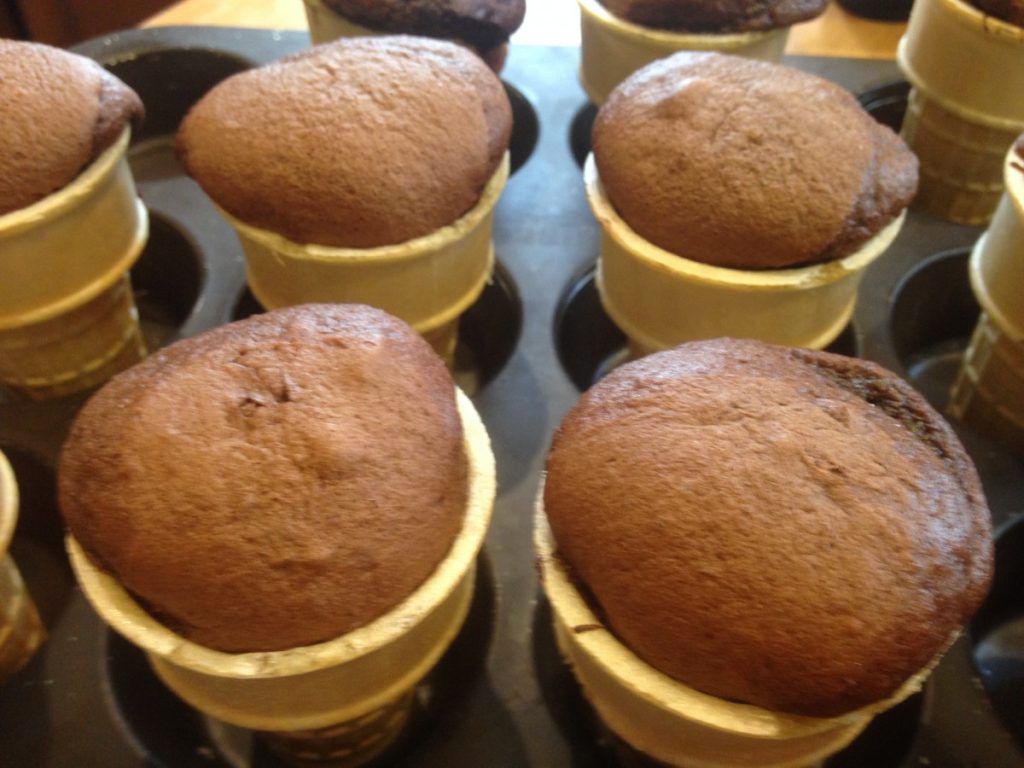
This might look like an ice cream cone, but it isn’t. It is a cupcake!! The batter is baked inside ice cream cones, then decorated to look like ice cream cones. I used from scratch recipes for both the cupcake batter and the frosting, but feel free to use what ever recipe you like. This is such a fun twist on a cupcake. Great for summer parties.
Because you use more frosting than you might normally use for more traditional cupcakes, make sure to have extra. I chose the recipe I did because it makes plenty of frosting. I did not tint my frosting, but you can, if you like.
These are fun for kids to make. We made them in cooking camp yesterday. You can let them decorate their own “cone”. For a kid’s party you can even have a couple of different cupcake flavors and frostings to pick from- and some assorted toppings, like cherries, tiny candies and assorted sprinkles.
Once you frost the cupcakes, they become a little top heavy. I find setting them together, letting them touch each other a little, helps to keep them from tipping over.
Sometimes, some of the batter drips over the edge of the cone when baking. Just pretend some of the “ice cream” has melted and cover drips with frosting.
Here are the recipes I used, with the directions for baking the cupcakes.
Chocolate “Ice Cream Cone” Cupcakes
4 oz. semisweet chocolate
1 cup butter
1 cup all-purpose flour
1 3/4 cups sugar
4 eggs
1 teaspoon vanilla extract
24 flat bottomed ice cream cones
Preheat oven to 325 degrees. In the top of a double boiler, combine chocolate and butter. Heat, stirring occasionally, until mixture is melted and smooth. Remove from heat and allow to cool to lukewarm.
Sift flour and sugar together into a large bowl. With mixer on low speed, beat in eggs one at a time. Stir in chocolate mixture and vanilla. Place 24 cones in muffin tins to hold them up and fill 2/3 full with batter. Bake for about 20 minutes, or until cupcakes puff to top of cones. Test with a toothpick. Cool and frost to look like ice cream. Decorate with sprinkles. Makes about 24.
Super Fluffy Frosting
1½ cup butter
1 1/2 tablespoons vanilla extract
1½ lbs. confectioners’ sugar –
1/8 teaspoon salt
3 T. milk
In a mixer, combine the butter, vanilla and 1 tablespoon milk. Add the sugar and salt, beat until well mixed. Add a tablespoon or two more of milk, if needed. Turn mixer to the highest speed and beat for 15 minutes.

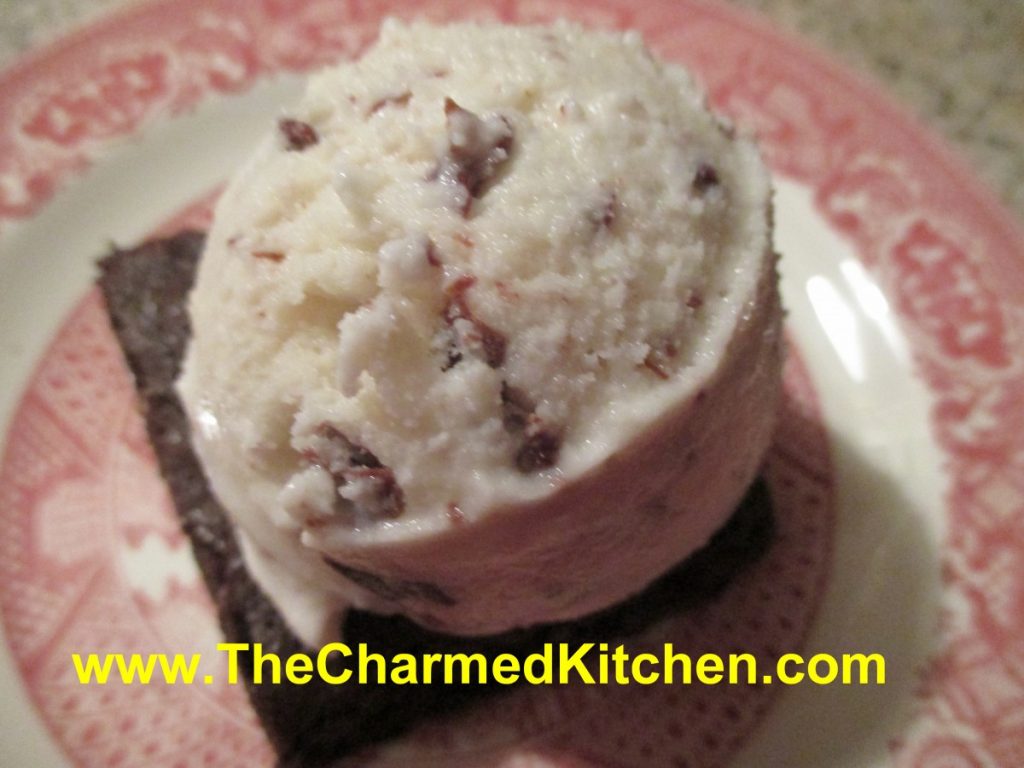
Mint Chocolate Chip Ice Cream
Mint chocolate chip ice cream is a favorite of mine. I have tried a lot of mint chocolate chip ice creams, but was not always happy. I wanted to make my own and see how that turned out.
The tricky part is getting chips that aren’t hard chunks, but rather, little flecks of chocolate, that melt on your tongue when you eat the ice cream. In the past, for chocolate chip ice cream, I have brushed melted chocolate in thin sheets, chilled it, and then broken it into tiny pieces. It worked, but kind of a pain to do.
I tried something different this time, and with a few adjustments, it worked out great. A couple of weeks ago, I posted a recipe for homemade chocolate magic shell. You remember magic shell, the chocolate syrup that hardens when you drizzle it on ice cream. The recipe is quite simple. Chocolate, coconut oil and powdered sugar, melted together. It remains a liquid at room temperature. So, to create the “chips”, I just added some of the magic shell to the ice cream as it froze in the ice cream maker.
After a little playing around, I got the knack of drizzling it slowly. The end result, little flecks of chocolate through the ice cream that were tender and melted as you ate the ice cream. We had the ice cream served on a homemade brownie, then topped with more magic shell and some whipped cream. You will note that my “mint” ice cream is not green. I opted to omit food coloring, but feel free to add some, if you prefer. And, if you just want chocolate chip ice cream, don’t add the mint extract.
Mint Chocolate Chip Ice Cream
2 c. half and half
1 c. whipping cream
½ c. sugar, or to taste*
2 t. mint extract
1 t. vanilla extract
About ½ c. magic shell- recipe follows
Combine half and half, cream, sugar and flavorings. Stir until sugar dissolves. Add more sugar, if needed, to suit your taste. Place mixture in an ice cream maker and start freezing it. Once it starts to thicken, drizzle the magic shell in slowly as the machine is running, to create little flecks of chocolate throughout the ice cream. I have to guess that I used about ½ a cup. Add until you have the amount of chips you like. Once ice cream forms, place in freezer until ready to serve. Makes about a quart.
*The mixture might taste a little sweet to you, but when you freeze it, it will taste less sweet. When making ice cream, the base should be a little”too” sweet to allow for the taste change after freezing.
Homemade Chocolate Shell
1 c. chocolate chips- I used dark chocolate chips
3/4 c. coconut oil- I used the unrefined
1/2 c. powdered sugar
Heat all together until melted. I melted mine in a microwave for 1 minute, but you could also melt over a double boiler. Stir until smooth. Store at room temp. To use, drizzle over ice cream, wait about 10-20 seconds- and it will harden.
Zucchini and Carrot Cupcakes
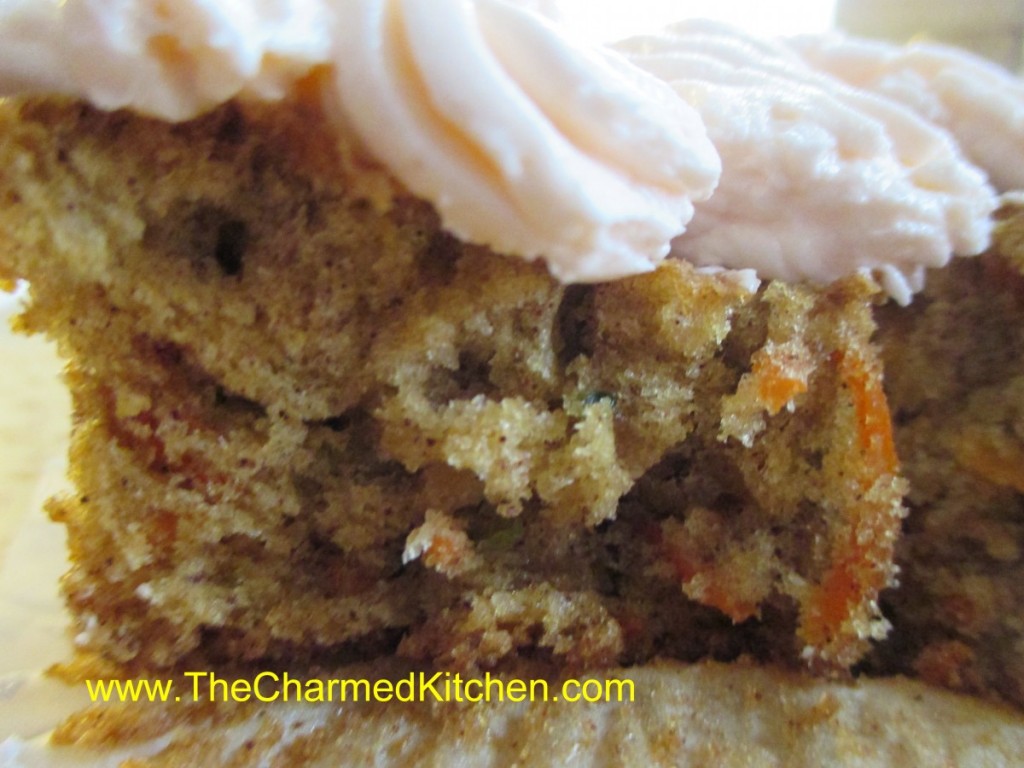
These are really good cupcakes. They are moist and not too sweet with a slightly dense texture. Sort of a cross between carrot cake and zucchini bread, they have more texture than a traditional cupcake and plenty of flavor. I had an abundance of zucchini and carrots and figured they might play well together.
I got 24 cupcakes out of the recipe but they were a little small. Perhaps 18 would be a better way to go. I used simple vanilla buttercream to finish them off. I whipped the frosting a long time so it was extra fluffy. Here are the recipes for both the cupcakes and the frosting.
Zucchini Carrot Cupcakes
2 eggs
1 c. sugar
2/3 c. oil
1¼ c. flour
1 t. baking powder
1 t. baking soda
1 t. cinnamon- I think I would use a little more next time
½ t. salt
1 c. grated carrot
1 c. grated zucchini, squeezed dry and packed tightly
½ c. chopped nuts, optional
Beat eggs with sugar until frothy. Beat in oil then add dry ingredients. Beat on high for 4 minutes. Stir in veggies and nuts. Pour batter into 18- 24 paper lined muffin tins, filling them 2/3 full. Bake in a 350-degree oven for about 15 minutes or until top springs back when lightly touched. Cool and frost. Makes 24.
Note: These cupcakes deflate a little while cooling.
Classic Vanilla Buttercream
3/4 cup butter
6 cups confectioners’ sugar
1/3 cup milk
1 1/2 teaspoons vanilla extract
1/4 teaspoon salt
2 tablespoons milk
Beat butter in a large bowl until fluffy. Gradually add 3 cups of the sifted confectioners’ sugar, beating well. Slowly beat in the vanilla, salt, and 1/3 cup of the milk. Gradually beat in the 3 remaining cups of confectioner’s sugar. Beat in additional milk (1 to 2 tablespoons) if needed, to make frosting of spreading consistency. You can also tint the frosting with juice (like pomegranate or raspberry) or food coloring.
Zucchini and Corn Saute
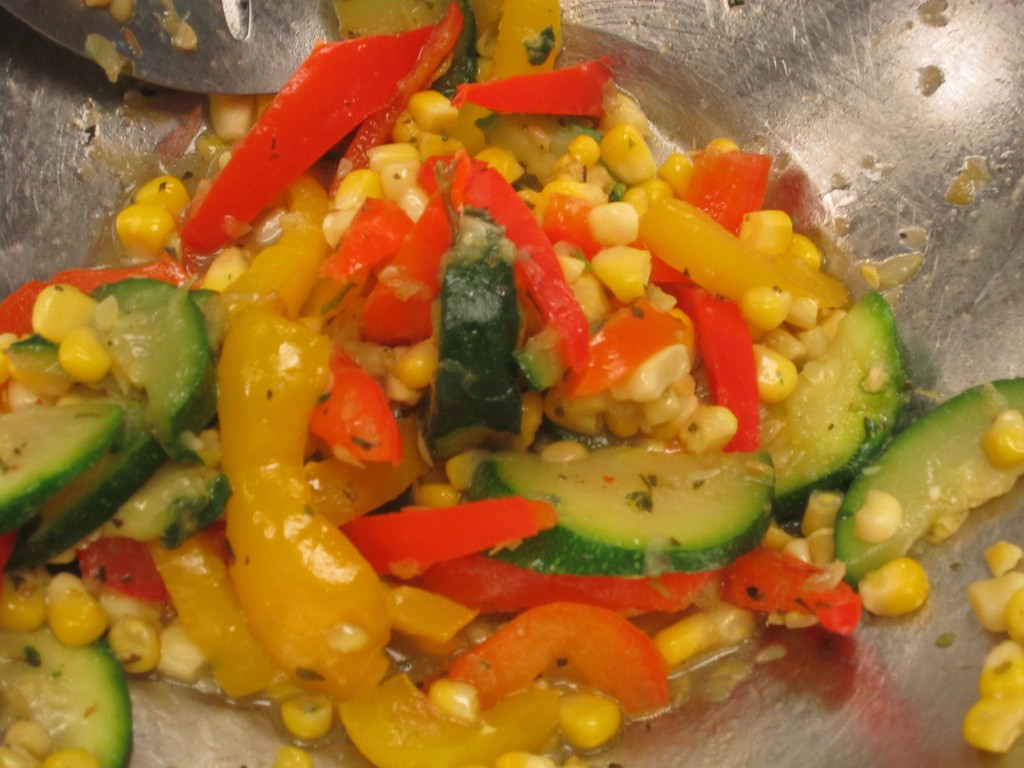
For those of you looking for another way to use some of those zucchini this dish is really fun and easy. The flavors of the zucchini, corn and peppers work really well together and makes a tasty side dish in just a few minutes. I served mine in pita bread and added a little cheese for a main dish.
Thanks, Irene, for the zucchini.
Quick Zucchini and Corn Sauté
2 sweet peppers, seeded and cut into strips
2 medium zucchini, sliced
Oil
2 c. corn kernels cut from cobs, about 3 ears
2-3 cloves garlic, minced
1 t. salt
2 t. Italian seasoning
In oil, cook peppers and zucchini until crisp tender, about 5 minutes. Add remaining ingredients and cook 4 more minutes, or until heated through. Serves 6-8.
Canning Tomatoes
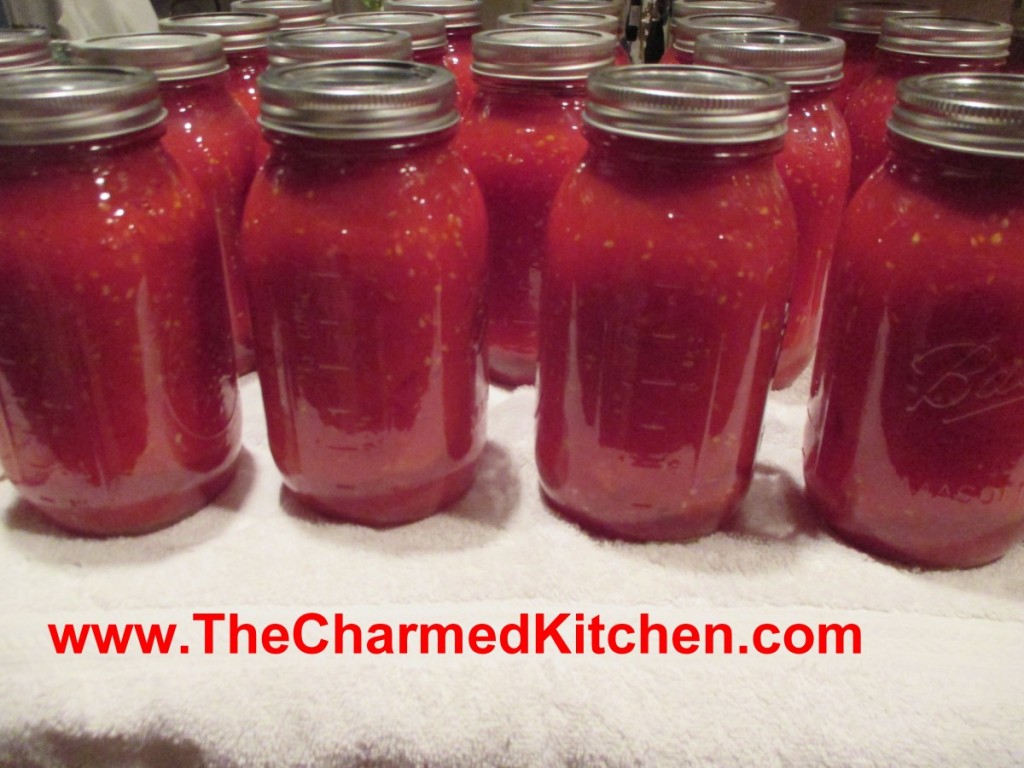
I love my home-canned tomatoes. They taste so much better than anything than comes in a can. Worth the effort.
You have options when canning tomatoes- crushed, juice, sauce- and more. The one option you won’t see for home- canned tomatoes is diced. There is a reason for that. When tomatoes are canned commercially, calcium is added to keep them firm. That is why commercially canned diced tomatoes hold their shape. Home canned diced tomatoes will just cook down, get very soft and not hold their shape. Canning tomatoes whole will give you a firmer end product, if that is what you want.
I have been asked several times in canning classes, if it is safe to can yellow or orange tomatoes. We have all heard that yellow and orange tomatoes are lower in acid, so are they still safe to can? The answer is yes, they are safe to can.
Why?
In spite of you might have been told, orange and yellow tomatoes are not acid free or low acid.
Truth is, that yellow and orange tomatoes have just as much acid as red tomatoes.
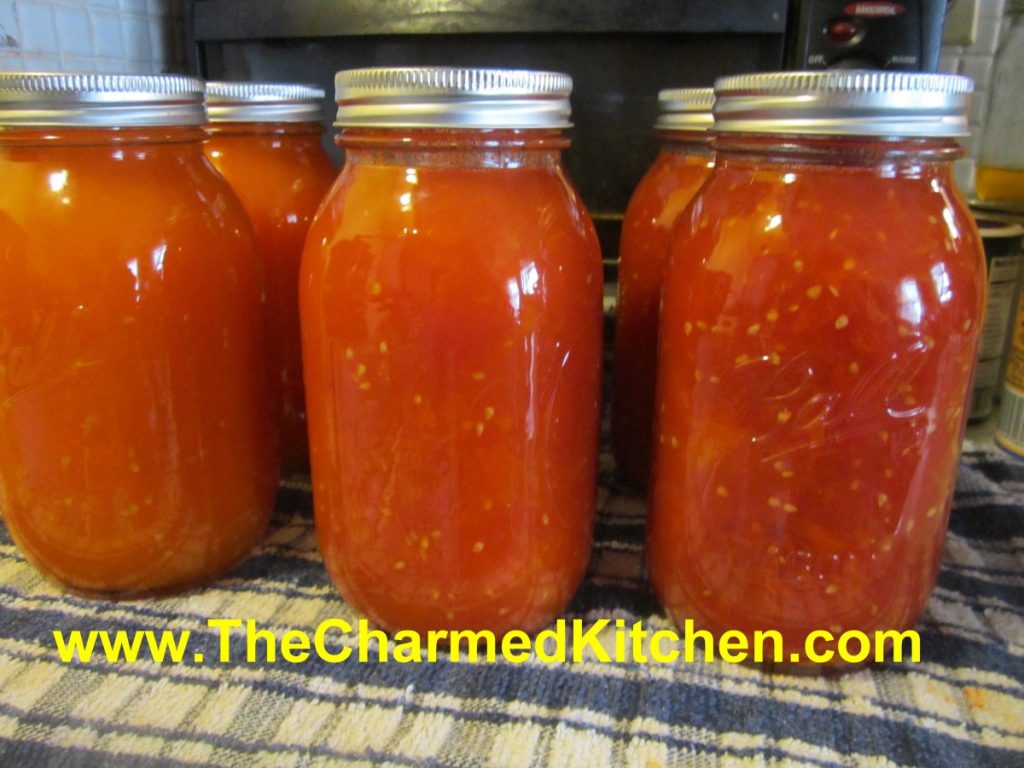
Well, for the most part at least. In terms of acidity or Ph, yellow and orange tomatoes are about average. Some cultivars have more, some less. Bottom line is that all tomatoes are safe to can- as long as you acidify them.
Adding salt is optional, and is for flavor only. Use canning/pickling salt or non-iodized salt when canning.
Here are some popular canning recipes to get you started.
All follow the NCHFP (National Center for Home Food Preservation) recommended procedures.
Crushed Tomatoes
Peel and core tomatoes , trim off any bad spots and quarter. Place about 1/4 of your prepared tomatoes in the kettle and cook, stirring constantly over high heat. Use a potato masher to crush tomatoes and extract juices. Once they are boiling add remaining tomatoes, stirring constantly. You don’t need to crush these tomatoes. Bring to a boil and boil for 5 minutes. In clean, hot jars add needed acidity listed below. You can also add 1 teaspoon of canning salt per quart if desired. Ladle in hot tomatoes, leaving 1/2-inch headspace. Wipe jar rims clean and adjust lids. Process in boiling water bath. Pints 35 minutes, quarts, 45 minutes. 1,000-3000 ft over sea level add 5 minutes. Twenty-two pounds of tomatoes will yield about 7 quarts of tomatoes.
Whole Tomatoes in Juice
Use any extra tomatoes to make juice. I use tomatoes that are too big to can whole, or those that have blemishes that need to be trimmed. Cut up clean, unpeeled tomatoes in a kettle and cook, stirring often until tomatoes are mushy. Strain mixture, pressing on solids or run through a food mill or tomato juice extractor. Set aside,. Place peeled, whole tomatoes in kettle and add enough tomato juice to cover them. Heat to a simmer and simmer gently 5 minutes. Add lemon juice or citric acid to jars, using amounts listed below. Add salt, if desired. Add tomatoes and cover with hot juice, leaving 1/2 -inch headspace. Wipe rims and adjust lids. Process both pints and quarts 85 minutes in a boiling water bath.
Tomato Juice
Wash, stem and trim bruises off tomatoes. Cut into chunks. Add about 1 pound of tomatoes to kettle and bring to a boil while crushing. Continue to add additional cut up tomatoes slowly, keeping mixture boiling. This will keep the juice from separating later. Simmer an additional 5 minutes once the tomatoes have all been added. Press mixture through a strainer , sieve or food mill to remove seeds and skins. Add lemon juice or citric acid to jars according to directions listed below. Add salt if desired. Return juice to boil and add to prepared jars leaving 1/2-inch headspace. Wipe rims and adjust lids. Process n a boiling water bath pints 35 minutes and quarts 40 minutes. Add 5 minutes processing time at elevations between 1,001 and 3,000 ft.
Tomato Sauce
Prepare as for juice. After juice is made return to pot and start cooking down to desired thickness. You’ll lose about 1/3 of the volume for thin sauce and 1/2 of the volume for thick. Add lemon juice or citric acid to prepared jars as described below. Add salt if desired. Add boiling sauce leaving 1/4 -inch headspace. Wipe rims and adjust lids. Process in a boiling water bath 35 minutes for pints and 40 minutes for quarts. Add five minutes at 1,001-3,000 ft. elevation.
Acidity and Tomatoes
Tomatoes must be acidified before canning. When canning either whole, crushed or juiced tomatoes you must add either 2 T. bottled lemon juice per quart or 1/2 t. citric acid . For pint use 1 T. lemon juice or 1/4 t. citric acid. You can also use 4 T. (5%) vinegar per quart, but it will alter the flavor and is not recommended. You can add a little sugar to offset the flavor, if you like.


