Mom’s Pumpkin Chiffon – Gluten Free
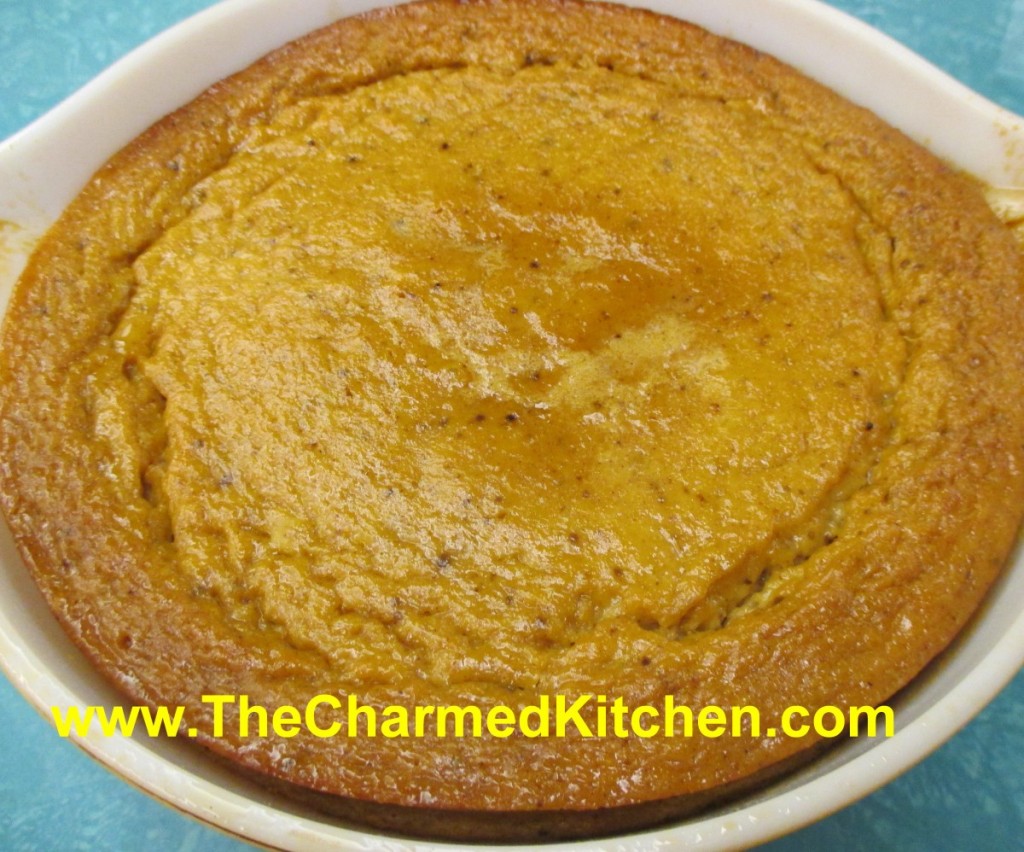
I fondly remember when my Mom used to make this dessert. I think of her whenever I make it. From a technical cooking standpoint, it’s not really a chiffon, but that is what my Mom called it, so I will leave it as Pumpkin Chiffon.
It’s more like a pumpkin pie, without the crust. Super easy to make and quite tasty. I bake it in a casserole dish but you could also make it in individual ramekins. This recipe is always a big hit when I make it for friends.
You could use canned or fresh cooked pumpkin or winter squash, like butternut or Hubbard. I always cook up and freeze pumpkin and squash for later use, so frozen would work, too. Because there is no crust, it is also gluten-free. I sometimes serve it with gingersnaps and whipped cream. It is a lovely Fall dessert. Perfect for Thanksgiving, too.
Mom’s Pumpkin Chiffon
½ c. applesauce
1 c. cooked or canned pumpkin or squash puree
¾ c. brown sugar
1 t. cinnamon
½ t. salt
½ t. nutmeg
1/8 t. cloves
4 eggs, well beaten
1 c. half and half or evaporated milk
Stir together first seven ingredients. Beat in eggs and stir in milk. Place mixture in 1 ½ quart casserole and bake in a 350-degree oven for 1 hour and 15 minutes. Serve alone or with cookies. Serves 6-8.
Mom’s Polish Mushroom Soup

There are many variations of mushroom soup in Eastern European culture. Some have barley, others add sauerkraut. This is my family’s version. Plenty of mushrooms in rich stock, slightly thickened, and made creamy with the addition of sour cream. Ours is served with spaetzle or kluski noodles.
This soup is a tradition in my family. When I was a kid, my Busha would make it every Easter. My Mom made it for Christmas Eve. Now my niece makes it, and we have it the day before Thanksgiving.
It is one of those dishes that brings back so many wonderful childhood memories. I love the rich, earthy flavor of the mushrooms, and the slightly sweet/sour flavor of the broth. It is made with dried mushrooms, usually. I can remember watching my mom get out a big bowl and soaking the mushrooms to get them clean, and to soften them, before starting the soup.
I use dried shiitake mushrooms, but often add fresh mushrooms as well. Sometimes I use other dried mushrooms, too. I like to have a variety of mushrooms in the soup. I use chicken or beef stock. If made with vegetable stock, it could make a great meatless meal.
Mom’s Polish Mushroom Soup
4 qt. Chicken, beef or vegetable stock
5 c. dried mushrooms, about 4 0z. I use Shiitake.*
Water for soaking
½ c. flour
1 pint sour cream
¼ c. balsamic vinegar
2 T. sugar
Spaetzle or kluski noodles, cooked and drained- spaetzle recipe follows
Soak mushrooms in water for 1-2 hours. Lift mushrooms carefully out to leave any sand in the bowl of water. Rinse and drain. Set aside. Bring stock to a boil and add the mushrooms. Simmer, covered for about 1½ hours, or until mushrooms reach desired tenderness. Mushrooms will retain some “chewiness”. In medium bowl whisk sour cream into flour gradually until smooth. Stir in vinegar and sugar until smooth. Add a small amount of the hot soup to the sour cream mixture, whisking until smooth. Continue adding hot soup to the sour cream mixture until sour cream mixture is warm. Add the warm mixture to the pot of soup and stir to combine. Return to simmer and simmer 1 minute, stirring continuously. Place desired amount of kluski into bowls and ladle over the hot soup. Serves12.
Note: You can add a variety of fresh mushrooms to the soup to make it even more special. You might use portabellas; crimini, button or whatever mushrooms are at the store that day. Add in addition to the dry mushrooms; don’t reduce the amount of shiitakes.
*The dried shiitake mushrooms can be found at specialty grocery stores, some larger grocery stores and at Asian markets.
Homemade Spaetzle
3 eggs
1/2 c. half and half or evaporated milk
1/2 t. salt
1 1/2 c. flour
Combine all ingredients and let rest 30 minutes. Drop by small spoonfuls into boiling water. Cook until they float and puff up, about 5 minutes. I use a spaetzle maker, which produces smaller pieces. I only cook them a couple of minutes. Drain and serve with soups, stews, sauces or buttered.You can toss them with a little butter. I sometimes heat butter in a pan and brown them up a little. You can also add some fresh, chopped herbs to the batter.
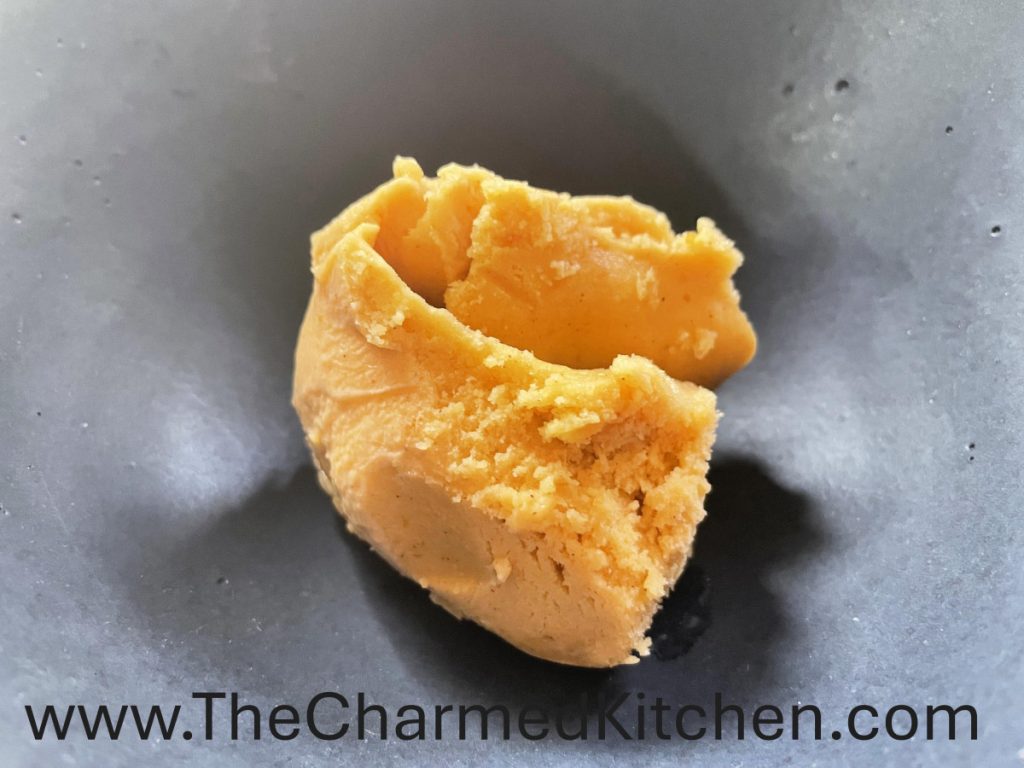
Malted Pumpkin Custard
This custard came about because my friend Joe brought me some malted ice cream one day. We started talking about malt. We wondered what malt was exactly and why did we like it so much.
Malt is a sprouted grain, usually barley, that is dried after it has sprouted. It had a unique flavor that is used in baking, beer making and desserts to name a few. For this recipe I used malted milk powder, which also contains some sugar and dairy.
You can also buy diastatic malt, which I use in bread baking and malt syrup. Let’s not forget how good malt vinegar is on fries.
So back to this recipe. I decided to make a custard base, using whole eggs. I like the texture of the final product. Plus, since I was using a fair amount of pumpkin, I liked the eggs for a little added fat in the recipe. The first time I made it, a couple of friends were over. I put it in the ice cream maker while we were having dinner. Both of them loved it. I knew I had to make it again.
I might have used more than a cup of pumpkin with the latest batch. I know it was at least a cup. It doesn’t matter a whole lot in the scheme of things, but the pumpkin flavor was more pronounced in the batch I made last night. I was fine with that.
I used pumpkin this time, but you can just as easily use other winter squash like butternut or Hubbard.
So here is the recipe. I think you’ll like it as much as we did.
Malted Pumpkin Custard
4 eggs
1 c. half and half
¾ c. sugar
1 c. cooked pumpkin puree – you can use other winter squash
½ c. malted milk powder
1 t. cinnamon
½ t. nutmeg
½ t. salt
In medium saucepan combine eggs, half and half and sugar. Whisk ingredients together. Cook over medium low heat, stirring constantly until mixture thickens and bubbles. Be careful not to scramble the eggs. If the mixture does get lumpy, you can press it through a fine strainer to remove lumps. Let the mixture cool down a little then stir in the remaining ingredients. You can add more or less seasonings according to your taste. When you freeze it, the flavors will be less pronounced. It will taste less sweet, too. Chill mixture several hours or overnight. Freeze using an ice cream maker for best results. Makes about 1 quart.
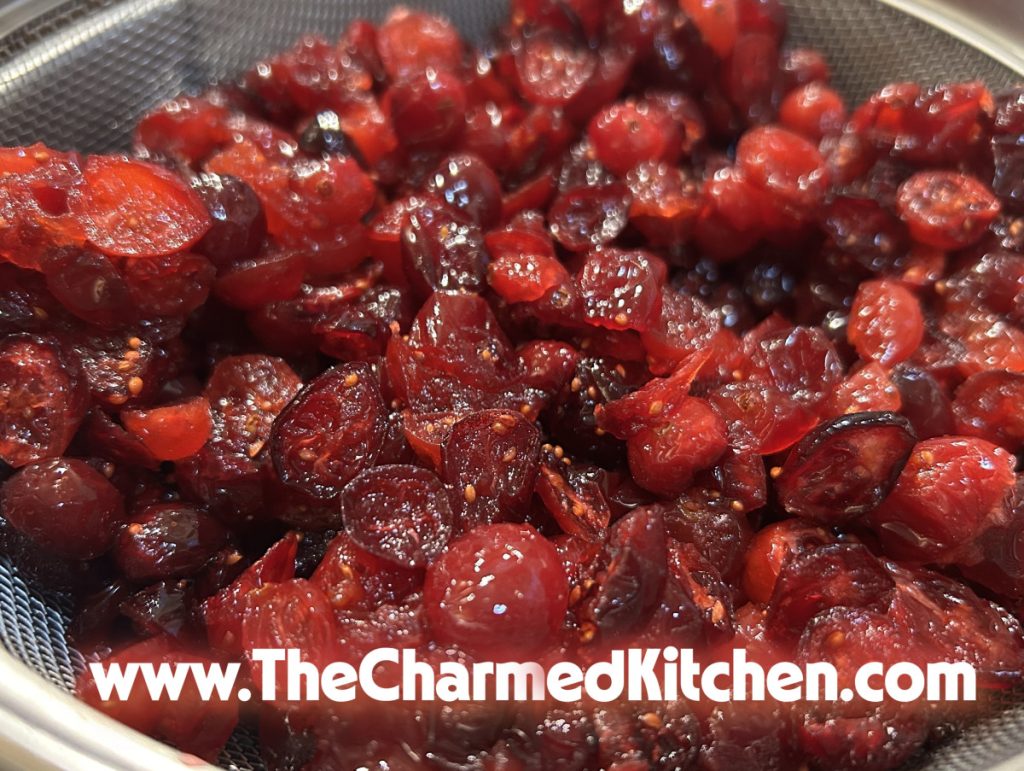
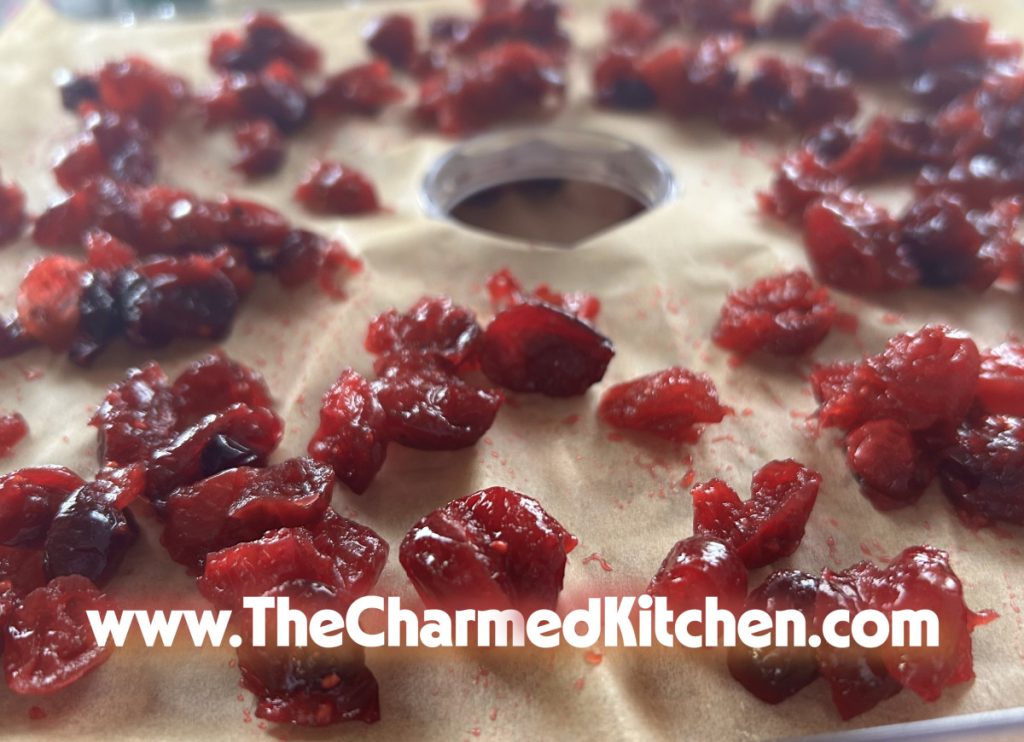
Dried Sweetened Cranberries
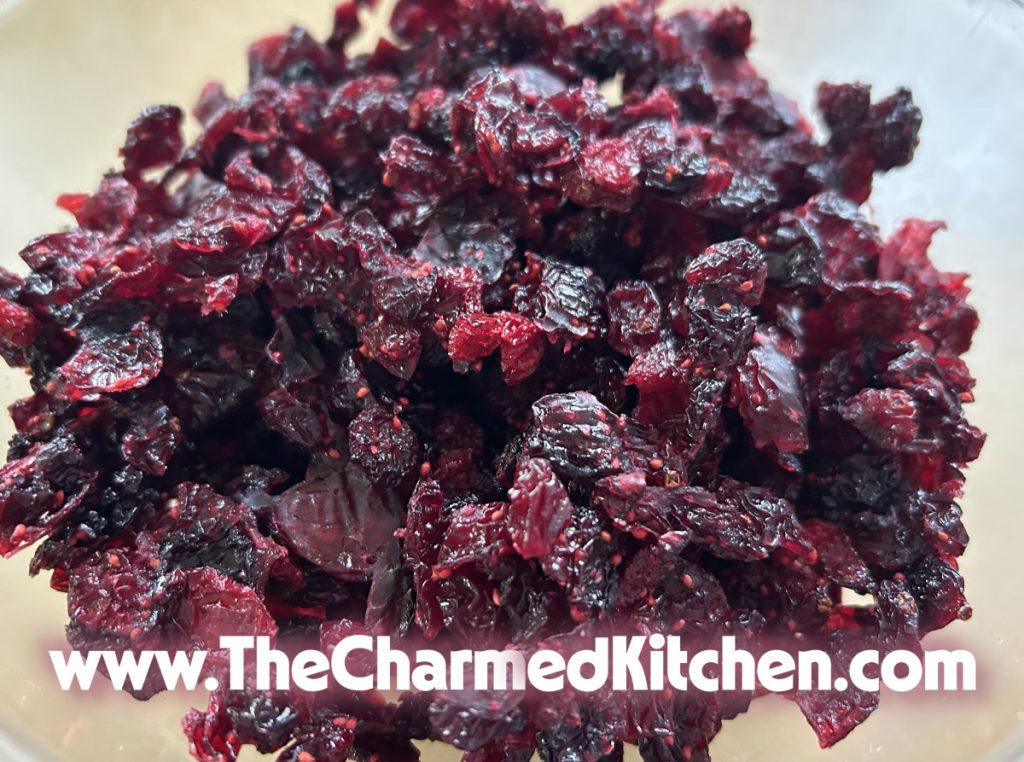
I love cooking and baking with dried cranberries, especially around the holidays. I seem to be adding them to all sorts of dishes. They can be pricey and I seem to always be running out. I decided it was time for me to make my own.
I must mention that I had been burned in the past. I had dehydrated cranberries before, but they came out too sour and dry. The missing factor in the equation was sweetener. I had just dried plain cranberries before and they didn’t have the right texture.
I started exploring options online to sweeten them. Most recipes included sugar, which as fine. Then I started finding a few recipes that used honey. Oh, that sounded even better. Armed with a few bags of cranberries and a jar of honey I went ahead and made a batch. They worked, but they were a bit of work. Do I think they were worth the time? I finished a second batch yesterday, so I guess so. I certainly liked the idea of sweetening them with honey, so that was a plus. I had found these cranberries on sale at Aldi for 99 cents for a 12 oz bag. Looking forward to stocking up and making more after Thanksgiving when prices drop.
So here are the directions. You might want to give them a try, especially if you use them as much as I do.
Homemade Sweetened Cranberries “Craisins”
24 oz. cranberries, 2 bags
¾ c. water
½ c. honey
Pinch salt, optional
Rinse the cranberries and cut them in half, discarding any bad berries. This is kind of tedious, but you really don’t want to skip this step. Definitely try to buy larger berries, if you can. Fewer of them to slice that way. Once the berries are cut in half, place in a food dehydrator. Set around 150 degrees F and dry for 4-6 hours. You want them partially dried. Now you are going to rehydrate them in a honey syrup. In a saucepan, combine the water and honey. Add a pinch of salt, if you like. Add the cranberries. Bring the mixture to a simmer. Simmer 3 minutes, then turn the heat off. Let the berries steep another 15 minutes. You’ll need to drain the berries well, before returning them to the dehydrator. Save any syrup that you drain off. It tastes great and can be used for cocktails and “mocktails”. Store syrup in the fridge. Another important thing. Don’t place these honey soaked cranberries right on the dehydrator racks. It will make a mess. Cut out parchment paper to line the trays and place the berries on that. You’ll thank me later. Try to separate them as much as possible. You don’t want a solid blob of dried cranberries. Return to the dehydrator at around 150 degrees again for 6-8 hours. When done, the berries will be soft and pliable, but not sticky. They can be stored at room temp, refrigerated of even stored in the freezer. Your choice. Some of mine were still a bit sticky, so I put them in small containers and froze them.
Note: All dehydrators vary. Yours might take longer, or even less time. Because of the parchment paper, they take longer, too. Less air circulation. You can, of course, place them directly on your trays for a quicker finish, but then you’ll have very messy trays to clean, even if you oiled them first.
Butternut Squash Saute
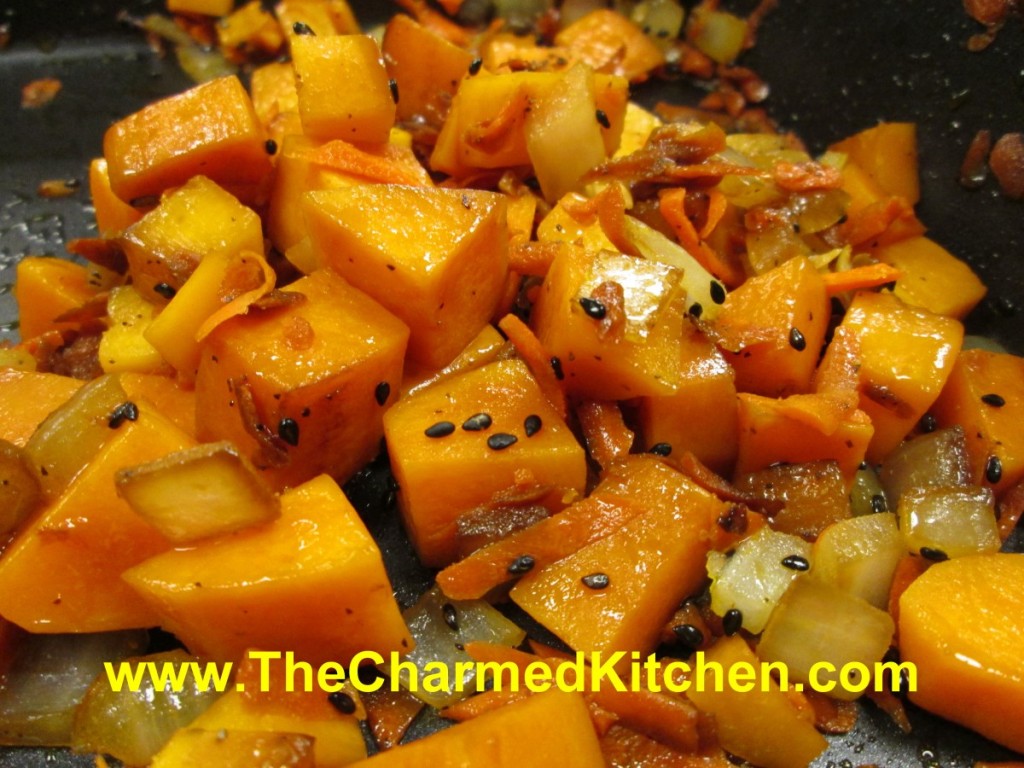
Winter squash season is here, and I could not be happier. I love the variety of squash (and pumpkin) at the markets this time of year. They are both beautiful and tasty.
This dish is a combination of butternut squash with onions, garlic, carrots, and finished off with black sesame seeds. It makes a great seasonal side dish.
I used butternut squash, but you could use any number of hard squashes, or even pumpkin. If you are looking for a different way to cook some of those squash- try this dish. I think you might be surprised at just how good it is.
When cutting up hard squashes, you have to be careful not to cut yourself. A round, hard squash, with a tough outer skin can be a recipe for disaster. I trim a small slice off one end of my squash, creating a flat side. Then I lay it down on that side, to make it more stable for cutting. With the butternut, once it was sliced on one side, I was able to cut in in half pretty easily. Recently I had a small, very hard Hubbard squash to cut open. My friend suggested softening it up by cooking it in the microwave. We cooked it for 5 minutes and it sliced in half so easily. Thanks, Joe.
To peel a hard squash, so you can cut it into cubes, use a vegetable peeler to remove the skin. You will need to run the peeler over the skin a few times to get off all of it. Then cut into cubes. You can also use a sharp knife. Just be careful.
So here is the recipe. Simple, but very tasty.
Butternut Squash Sauté
3 tablespoons olive oil
1/2 cup chopped onion
1 teaspoon minced garlic
4 cups cubed fresh butternut, acorn or Hubbard squash or pumpkin
1/2 cup grated carrot
2 tablespoons soy sauce
1 teaspoon salt
1 teaspoon ground black pepper
2 teaspoons black sesame seeds, or a bit more
Heat the oil in a large skillet. Add the onion and garlic; cook and stir until the onions begin to brown. Stir in the squash, carrot, soy sauce, salt, and pepper; cook, covered, another 5 to 7 minutes, until squash is tender. Sprinkle with sesame seeds before serving.
Roasted Curry Cauliflower Soup

This may be one of my favorite soups yet. Creamy and flavorful it was a big hit at dinner the other night. This recipe was inspired by what I had on hand and a dinner planned with friends. It started with this enormous cauliflower I had picked up at a produce market. I knew I wanted to use it. I had thought of just roasting it and having it as a side.
I also knew we needed a soup for dinner. Ended up roasting the cauliflower anyway but using it as part of the soup. Added other veggies for color as well as flavor. I also made sure to get it really smooth. I used an immersion blender but it could have been processed in a blender. We topped it with croutons, but it could be served without, if you prefer.
Roasted Curry Cauliflower Soup
3 onions, peeled and sliced
1 large cauliflower, cut into florets
3 T. oil
salt
6 c. stock- chicken or veggie- or more if needed
2 medium or 1 large sweet potato, peeled and sliced
3 large carrots, peeled and sliced
1 can ( 13.5 oz.) coconut milk
1 c. half and half- or more coconut milk, if you prefer
2 T. curry powder
2 t. turmeric
Salt and pepper to taste
Preheat oven to 400 degree. Place onions in and cauliflower in roasting pan and drizzle with oil. Sprinkle on some salt and place in oven. Roast until veggies are turning golden brown, stirring occasionally. This will take about 20-30 minutes. Place cauliflower mixture in a crock pot and add the stock and other vegetables and cook on high for at least 4 hours. Add remaining ingredients and puree soup until smooth. Adjust seasonings. You can add more stock if soup is too thick. Serve as is, or top with croutons when serving. Serves 6-8.
Mussels in White Wine
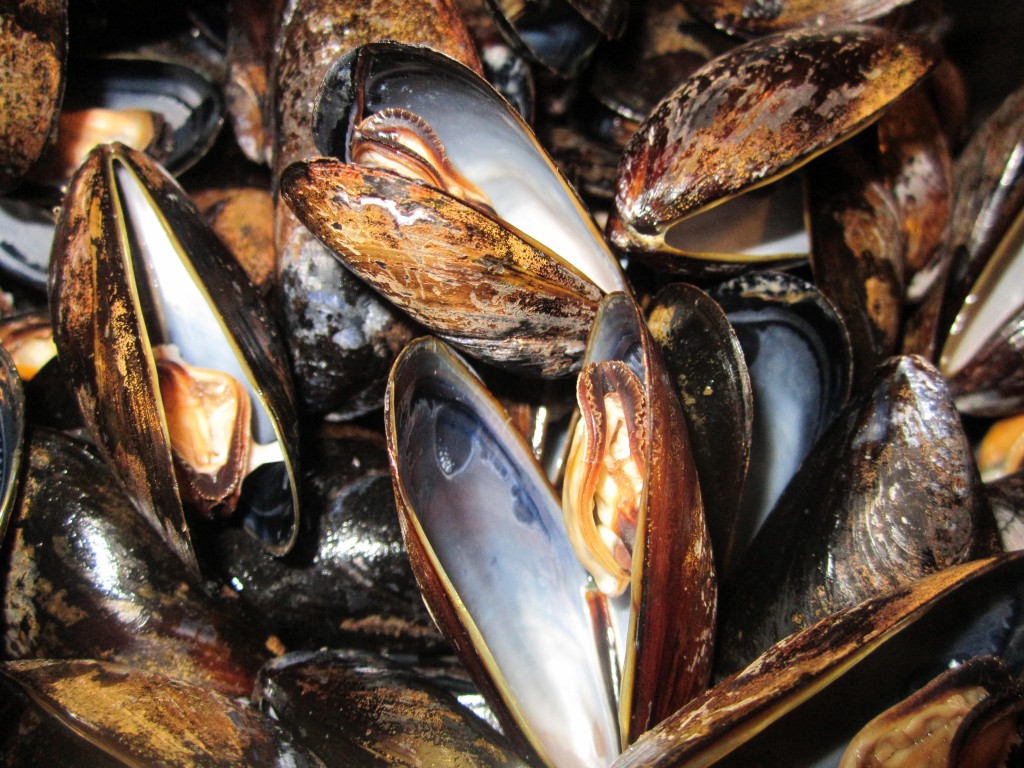
I love mussels. Just steamed and dipped in butter is good for me. If you want to make them a little special try steaming them this way. Simple and packed with flavor.
Mussels in White Wine
2 lbs. mussels
2 T. butter
2 cloves garlic, minced
1 c. dry white wine
1/4 c. packed fresh basil, chopped
1/4 c. packed parsley, chopped
Scrub and rinse mussels. In large skillet melt butter. Add garlic and sauté 30 seconds. Add mussels and remaining ingredients and bring to a boil, covered. Simmer 4-5 minutes, tossing skillet a couple of times until shells open. Discard any mussels that do not open. You can serve with the broth, or you can remove the mussels, keeping them warm and boil the broth to reduce it by a third to make it more intense. Consider have some crusty bread along with the mussels to dip in the sauce. Serves 4.
Toasted Sugar
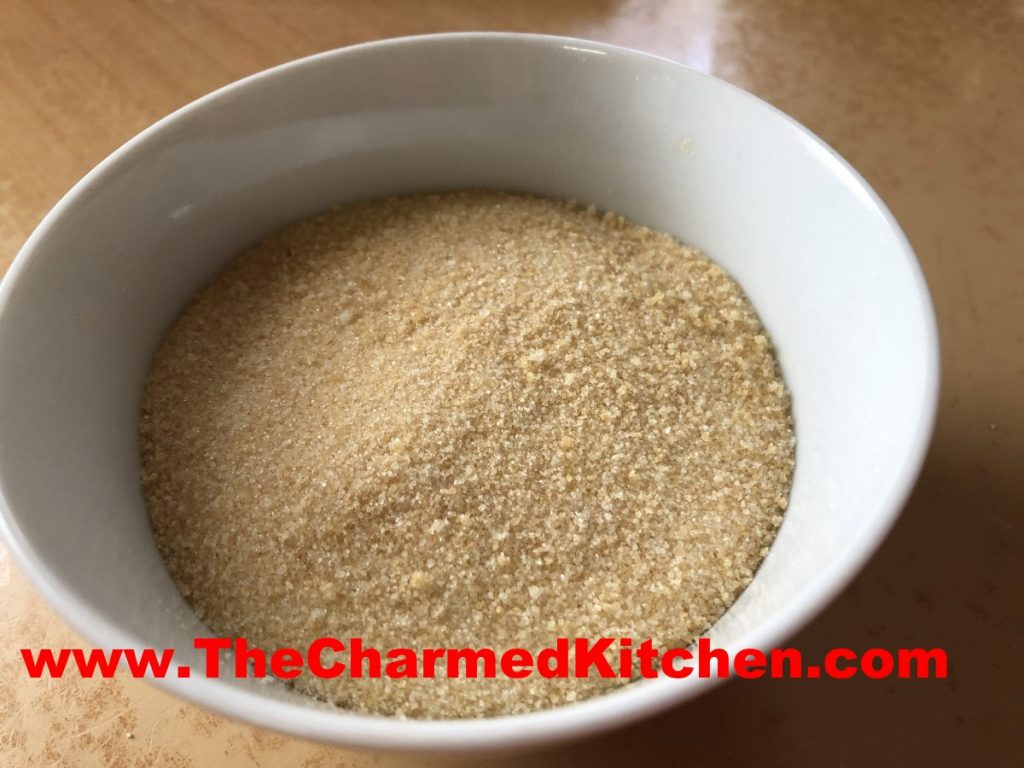
If you never toasted sugar, you might want to start. Toasted sugar is just sugar that is baked, at low heat, until it turns a caramel color. The sugar also picks up a lovely caramel flavor. That flavor change is what really makes it worth it.
I first heard about toasting sugar a few years ago. I was intrigued and decided to try it myself. The flavor was wonderful. I always keep a supply of toasted sugar around.
So how do you use toasted sugar? Simple- just like regular sugar. Measures the same, bakes the same. The only difference is that extra caramel flavor it adds to everything. From your morning coffee, to baked goods, the toasted caramel flavor comes through.
How to Toast Sugar
Preheat oven to 300 degrees- no higher. If your oven runs hot, you might want to bake at 275. Place sugar in a baking dish. I used a glass baking dish. You’re going to stir the sugar a few times during baking, so a dish with high enough sides is a must. I always toast at least 3 or 4 pounds of sugar at a time. It keeps, so why not? Also, I worry that smaller amounts might toast too fast.
Toast until the sugar turns an ivory color, about 1 hour. Stir thoroughly and continue baking, checking and stirring about every half hour, until the sugar gets to the color you want. The darker the color, the more intense the caramel flavor. You can bake the sugar until it looks like brown sugar, if you like. I usually stop when it looks like light brown sugar.
The sugar will produce steam as it heats up, so it should be stirred to allow that moisture to escape. Stirring will help move hot sugar from the edges toward the center, and cool sugar from the center toward the edges, for even toasting. Continue toasting and stirring every 30 minutes until the sugar has darkened to the desired color. The process can take 2-5 hours in total. It’s not a lot of work, mostly just waiting. You can see why I do a large batch at a time. I would rather bake 4 pounds of sugar- and have plenty for months and months.
When the sugar has finished toasting, remove from the oven and set aside and cool to room temperature, stirring from time to time to speed the process and allow for continued evaporation of steam. I like to transfer the toasted sugar to a large foil pan, where it cools down quicker. Once fully cool, transfer to an airtight container and store as you would plain white sugar. It can be used interchangeably in any recipe that calls for white sugar.
Sometimes, the sugar clumps as it cools. You want to break those clumps up when you see them- or press the cooled sugar through a sieve to get out the lumps.
In the end, I think the effort is worth it. In cookies and other baked goods, toasted sugar adds the nicest flavor.
Apple Cider Sorbet
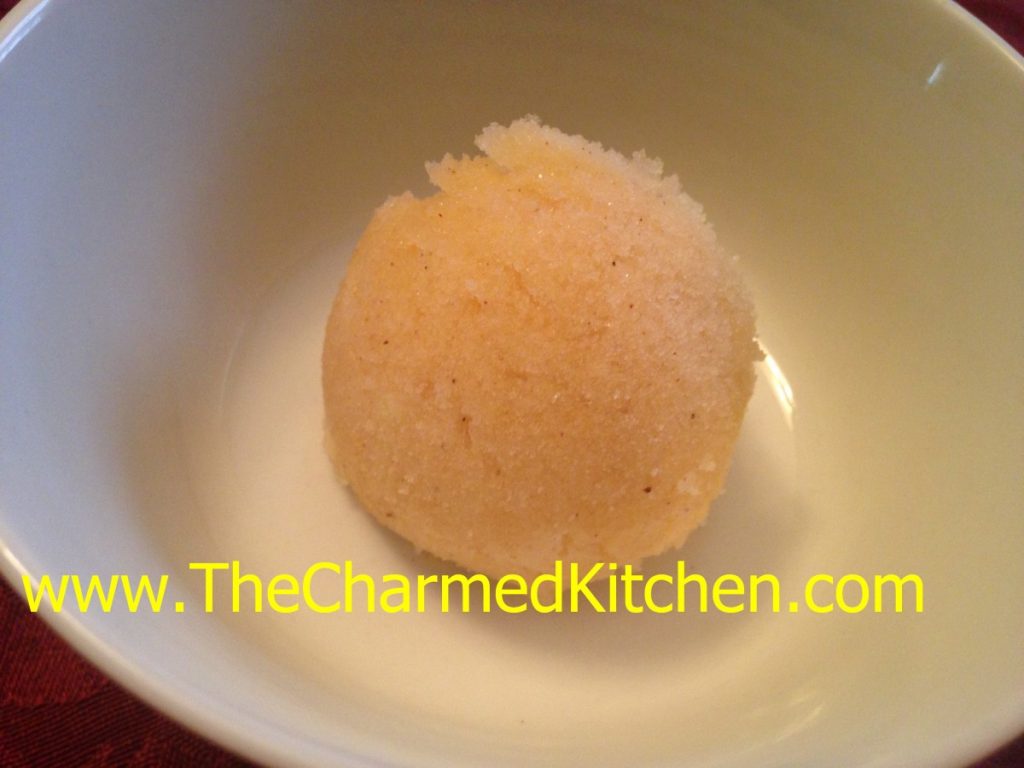
I’ve had my share of warm apple cider, but I never froze it before. This sorbet is such a nice dessert option. Light and naturally sweet, it is the perfect finish for any meal.
The cider is boiled down, to concentrate the sweetness. Then fresh apples are added and pureed. The mixture gets frozen, then pureed one more time- to really smooth out the texture. Cinnamon sticks impart their flavor when boiled in the cider. You could certainly used ground cinnamon, if you don’t have cinnamon sticks. Feel free to add other spices, too, like allspice, cloves or ginger.
Over the years, I have made all sorts of sorbets. I love the light, creamy texture. I am not sure why I never tried to make an apple sorbet before. I am so glad I finally did. This is a nice, lighter option for dessert. It is also a dairy-free option, for those who can’t have ice cream.
Apple Cider Sorbet
6 c. apple cider
2 (4-inch) cinnamon sticks
3 apples, peeled, cored and diced
In saucepan place cider and cinnamon sticks. Cook over medium high heat, uncovered, until cider has cooked down to 2 cups. Remove cinnamon sticks and discard them. Cool cider and combine in food processor with the apples. Puree until smooth. Transfer mixture to a container with a lid. Freeze until solid. Remove from freezer and allow to soften for a few minutes. Break into chunks and puree in processor, until smooth and creamy in texture. You can serve it right away, or return to freezer to enjoy later. Makes 1 quart of sorbet.
Spiced Pumpkin Scones

These scones are easy to make and are not only great for breakfast and snacks- they make a fun base for shortcakes. The spice mixture gives them a rich, warm flavor.
The dough is slightly sticky and you form the scones by dropping balls of dough onto the baking sheet using an ice cream scoop. You could just use a couple of large spoons, too. Because the dough is not rolled out and cut, it makes for a more tender scone. They are a little rustic looking, with some lumps and bumps, but they taste wonderful and their texture is soft and tender on the inside with a nice crispness on the outside.
Once baked, they are drizzled with a vanilla glaze and then a cinnamon glaze.
Spiced Pumpkin Scones
4 c. all purpose flour
1/2 c. sugar
1 T. baking powder
1 t. each salt, cinnamon, allspice, nutmeg and ginger
1/2 t. cloves
1 1/2 sticks cold butter
1 c. cooked pumpkin or winter squash
3 oz. milk
2 eggs
Vanilla glaze
2 c. powdered sugar
1 t. vanilla
4-6 T. milk
Cinnamon Glaze
2 c. powdered sugar
2 t. cinnamon
4 T. milk
Preheat oven to 400. Lightly grease 2 baking sheets or line them with parchment paper. Set aside. Combine flour with sugar, baking powder and spices and stir to blend. Cut in butter until the mixture looks like coarse crumbs. Combine pumpkin or squash with the milk and eggs and stir into the flour mixture. Stir until well mixed. Dough should be just a little sticky. Use an ice cream scoop to scoop dough onto the prepared baking sheets- leaving a couple of inches between them. Hint: If you spray a little non-stick spray on the cookie scoop first the dough will pop out easier. Bake for 15 minutes or until scones are browned on the bottom and just getting golden on the top. If you want to put both baking sheets in the oven at the same time- switch them half way through the baking time and allow a few extra minutes. Remove scones to cooling rack. Meanwhile make both glazes by combining ingredients and stirring until smooth. Drizzle with the vanilla glaze while still warm and allow scones to cool and glaze to harden before drizzling with the cinnamon glaze. Makes about 20-30 depending on the size of the scoop you use.