Bird Seed Wreaths

Birdseed Wreath
The other day, my friend Dale posted a recipe for making these bird seed wreaths on my wall. I had recounted my frustration on trying to fill my bird feeder on a very windy day. He thought these might be a solution. He was right. They are also fun to make.
This recipe comes from a website called Garden Answer.
My first attempt, I didn’t follow the recipe exactly. The wreath, while pretty, was a little crumbly. The birds still loved it, though. I didn’t hang it up, as the original post suggested. I have a porch with a wide concrete ledge, so I just put it on the ledge. It was gone in a day and a half.
I decided to try again, this time following the recipe. They came out great. Nice and sturdy.
I made two different sizes the second time. I made one large one, then made a second batch of the seed mixture and made 12 smaller ones as well. Not only are these a nice way to feed the birds, it can be a fun craft project for kids and they would be a nice gift for a bird lover.
Once dried, you can tie a ribbon on them and hang in a tree- or just hang on a hook. I have several shepherd’s hooks in my yard and would use them.
Not sure how well they would hold up in rainy weather, but should hold up well on snowy days.
So here is the recipe. You could add some peanuts or dried fruit for more variety.
Bird Seed Wreaths
2 packets unflavored gelatin- or two tablespoons
1 c. warm water
6 T. light corn syrup
1 1/2 c. flour
8 c. bird seed
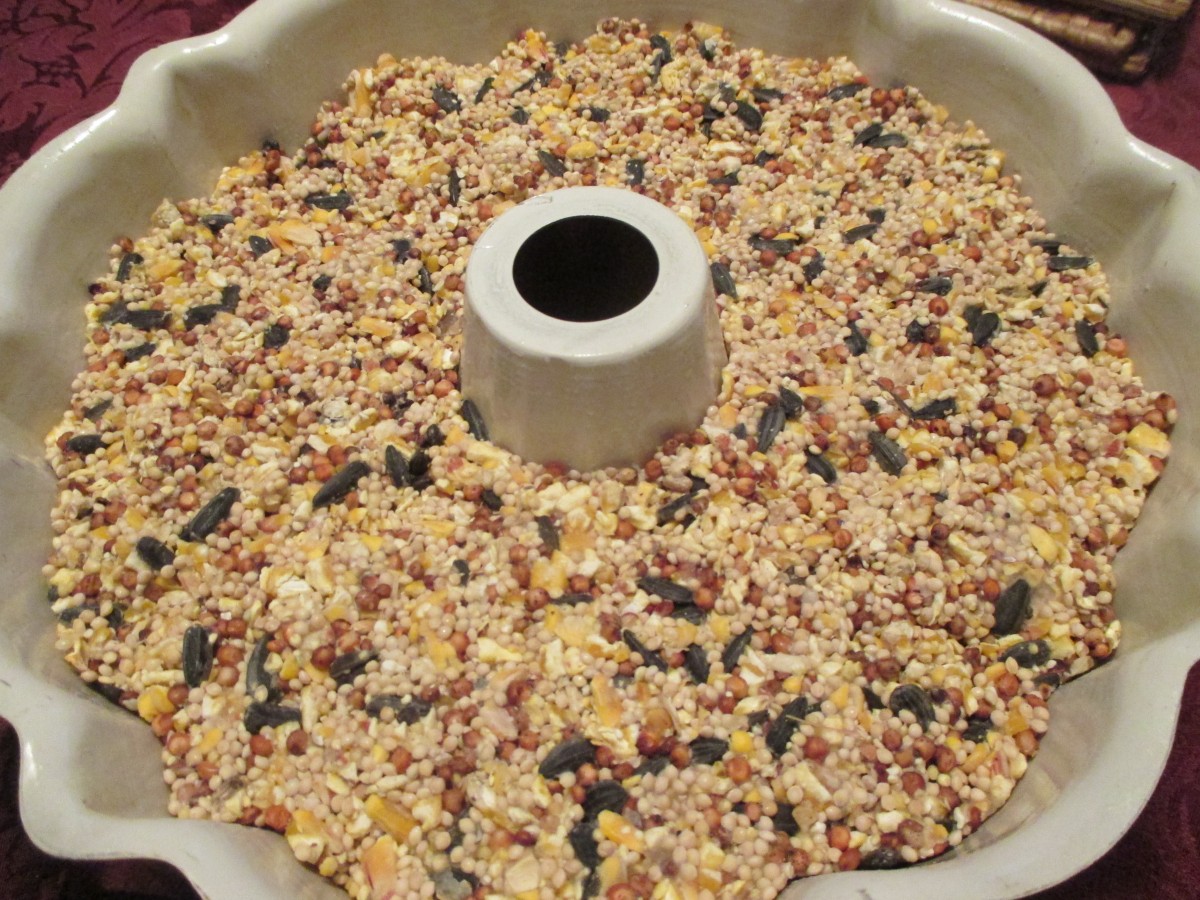
Grease a full sized Bundt pan or 12 small ones. You can use a non-stick spray or lightly brush with oil. Set aside. In large bowl, combine the gelatin and warm water and stir until gelatin is dissolved. Stir in the corn syrup, then the flour and mix well. Stir in the birdseed and make sure it gets evenly coated with the gelatin mixture. Press mixture into prepared pan. Press firmly. This part is important. Pressing firmly gives you a firmer final product. Allow the wreaths to dry for 24 hours before un-molding. To hang you can tie on a ribbon or place on a hook. You can also place them on platform feeders.

Smaller version
Allow to dry a full day

You can make different sizes
Spiced Yellow Pea Soup

Spiced Yellow Split Pea Soup
While a lot of people think of green split peas when they think of pea soup, I enjoy making pea soup with yellow split peas, too. The color of the peas leaves you with a pretty golden yellow soup. I added some turmeric for extra color, too. For this batch, I had a ham bone, so I cooked the bone in water with aromatic veggies to make a soup stock. I then strained and used the stock for the liquid in the soup- adding extra flavor. I also added some of the ham to the soup. I added a fair number of herbs and spices, to add more even more flavor. On a chilly day, a soup with a little extra spice suits my mood. Simple and satisfying this is a soup that is also a meal in itself.
Spiced Yellow Split Pea Soup
1 lb. yellow split peas, rinsed
8 c. stock or water
2 c. chopped onion
2 carrots, peeled and sliced
3 potatoes, peeled and cubed
½ lb. sliced green beans
1 T. parsley
2-3 t. hot pepper sauce
1 t. chopped fresh sage- or ½ t. dried sage
1 t. dried thyme
1 t. ginger
1 t. cumin
1 t. turmeric
½ t. white pepper
2 cups diced ham
Salt to taste
Note: you can use 1 teaspoon liquid smoke if omitting meat.
Combine peas, water or stock and simmer, covered, about an hour, stirring occasionally. Add remaining ingredients, except salt, and cook, covered, over low heat for about 60 minutes. Add salt to taste. Freezes well. Serves 6-8.
Orange Tea Bread
Orange Tea Bread
Winter is citrus season and I have been eating a lot of oranges lately. Besides eating them fresh, I also like to cook with oranges. If you are looking for a new recipe for a quick bread, and like oranges as much as I do, I would recommend trying this one.
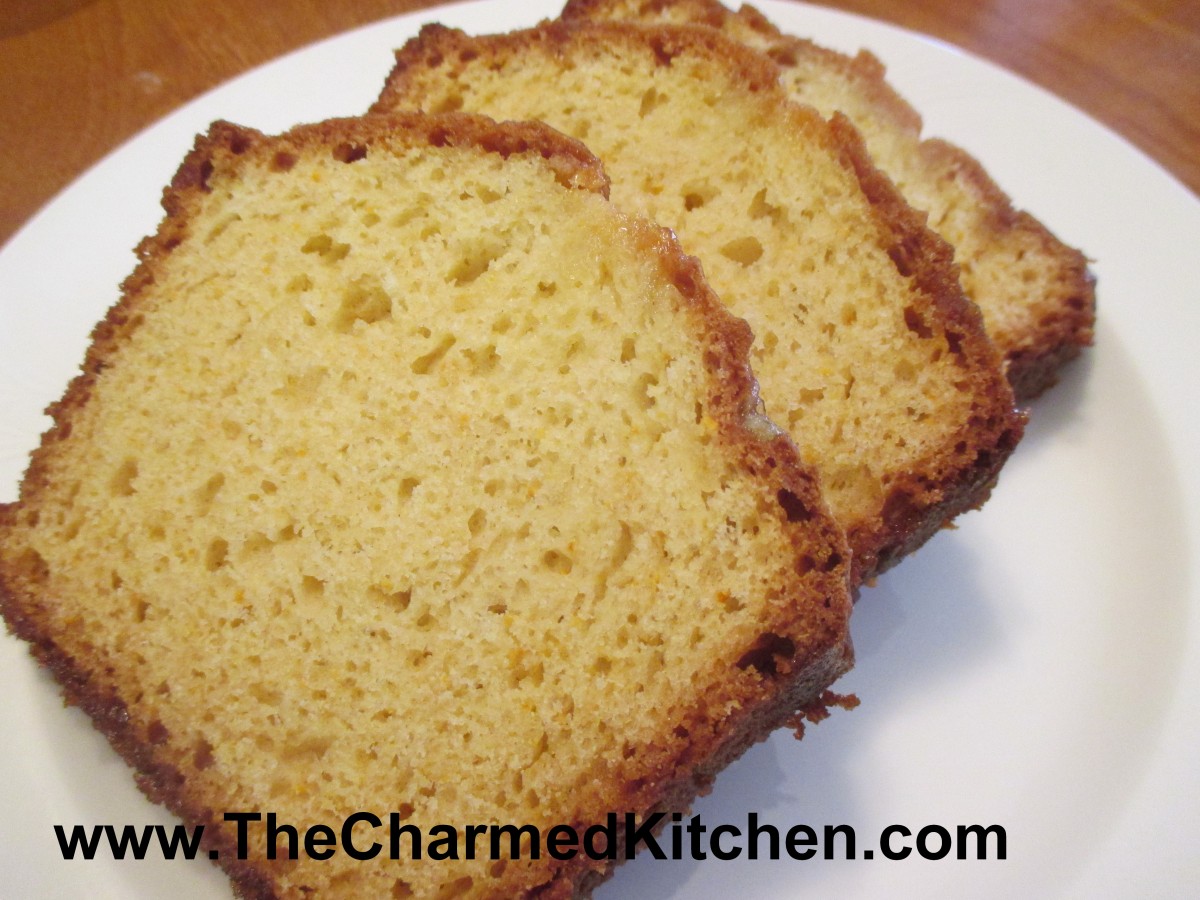
The bread is flavored with orange zest in the batter, then a warm orange syrup is drizzled over the bread, right out of the oven. This makes for a bread that is flavorful and moist. It can be breakfast, a brunch dish or even a dessert, when topped with ice cream or whipped cream. The recipe makes one loaf, but I often double the recipe and make two. It seems to disappear around here pretty quickly. The bread freezes well, too.
Orange Tea Bread
2 cups all-purpose flour
1-1/2 teaspoons baking powder
1 teaspoon baking soda
1/2 teaspoon salt
2/3 cup Greek yogurt or sour cream
2/3 cup sugar
2 large eggs
3 tablespoons melted unsalted butter
1 tablespoon grated orange zest
Syrup:
1/2 cup orange juice
1/4 cup sugar
Preheat oven to 350 degrees. Grease an 8-1/2″x4-1/2″x2-5/8″ loaf pan. Line pan with wax paper or parchment and set aside. Sift flour, baking powder, baking soda and salt into a bowl. In a separate bowl, whisk together yogurt, sugar, eggs, butter and orange zest. Add liquid ingredients to dry ingredients, and stir mixture until well combined. Transfer batter to loaf pan, smoothing top, and bake in oven for 45 to 50 minutes, or until skewer inserted in middle comes out clean. While the bread is baking, combine orange juice and sugar in a saucepan. Bring mixture to a boil over moderate heat while stirring, and simmer for 1 minute. Keep syrup warm. Make holes in top of bread with a thin wooden skewer and drizzle with syrup. Let stand in pan until cool. Makes 1 loaf.
Smoky Corn Chowder

Smoky Corn Chowder
I was defrosting my freezer and found local sweet corn I had frozen last summer. I had forgotten all about it. I wanted to make soup for a dinner with friends, so I decided to use the frozen corn to make this chowder. I also had a pound of bacon, which gave the soup a wonderful smoky flavor. I cooked the bacon in the soup pot, allowing it to get pretty crisp. I removed as much of the fat as I could, but left the bacon in the pot. Then, when I cooked the onions and added the stock, all the little brown bits of bacon in the pot added even more flavor. It was a big hit. A perfect dish for a snowy evening.
Smoky Corn Chowder
1 lb. bacon
1 onion, chopped
2 carrots, peeled and sliced
6 c. chicken stock
2 potatoes, peeled and cubed
6 c. corn – I used frozen corn
2 cups half and half or milk
¼ c. flour
Salt and pepper to taste
Hot sauce to taste
Fresh chopped parsley
Cut bacon in 1-inch pieces and fry in a Dutch oven until crisp. Tip pot and spoon out most of the fat. Add the onion and sauté until translucent. Add carrots and stock. Cover and simmer 10 minutes, then add the potatoes and corn. Cover and simmer 15-20 minutes, or until potatoes are tender. In jar with a tight fitting lid, combine 1 cup of the half and half or milk with the flour. Put on the lid and shake until mixture is smooth. Stir into the pot along with the remaining half and half or milk and cook, stirring often until mixture thickens up. Adjust seasoning to taste. Stir in parsley and serve. Serves 6.
Mini Cream Puffs

Mini Cream Puffs
If you want to surprise someone with a very special sweet treat, you could make cream puffs. These are a bit or work, but the end result is so wonderful. I think they are worth the effort, especially for special occasions. I have a dear friend who had to miss our New Year’s Eve party, due to illness. I wanted something special for our make-up party last night. There were not any leftover, so that is a good sign.
You start by make a pate a chou, or cream puff pastry. This is the same dough used to make eclairs. It is a combination of water, butter, milk and flour- cooked on top of the stove, then enriched with the addition of eggs. The dough is piped onto baking sheets and baked until puffed, golden and crisp. Once cooled, they are filled with sweetened whipped cream or, more traditionally, a custard filling. You can serve them as is, or top with chocolate or dust with powdered sugar.
The size you make your cream puffs is really a matter of personal choice. I decided to make mini puffs- about an inch in size. I find them a fun size to serve at a party.
Homemade Cream Puffs
1 recipe Cream Puff Pastry (Pate a Chou)- recipe follows
Egg custard- for filling, or sweetened whipped cream- recipe follows
Chocolate Ganache- for topping- recipe follows, or just use melted chocolate.
Start by making the dough. This recipe will make 3-4 dozen mini cream puffs.
Cream Puff Pastry
¾ c. water
¼ c. milk
¼ t. salt
½ c. (1 stick) unsalted butter
1¼ c. flour – unbleached or bread flour preferred
4 large eggs
Extra milk for brushing
In saucepan, heat together water, milk butter and salt into a full boil. Butter has to be melted. While stirring, dump flour into saucepan, stirring constantly. Mixture will form into a ball. Reduce heat to medium and continue cooking dough, while stirring, for another minute or two. Place dough in an electric mixer and allow it to cool down a little before adding the eggs. Mixture has to be at 140 degrees F, or below, before you start adding the eggs. I use the paddle attachment and beat the dough before adding the eggs. This cools the dough down faster. Beat in eggs, one at a time, until each is fully incorporated. Beat until dough is shiny. A spoon, lifted out of the batter, should leave a peak that does not fall down.
Preheat oven to 425. Line a baking sheet with foil or parchment. I used a silicone liner and was happy with the result. Don’t grease the pan. Using a piping bag, squeeze the dough into 1-inch balls on the baking sheet- leaving a little room in between. Using a little milk on your finger, smooth down any peaks on the puffs. I missed a few and did get a couple that had cracks on the top. The smoother the balls look, the nicer your puffs will look. Bake at 425 for 15 minutes, then turn oven down to 375. Bake puffs 5- 10 more minutes, or until golden brown. Tap the shells. They should sound hollow. Turn off the heat and leave oven door open a crack, allowing them to dry completely. Cool before filling. Makes 3-4 dozen.
Custard Filling
2 cups milk
2 tablespoons cornstarch
1⁄3 cup sugar
2 eggs, lightly beaten
1 teaspoon vanilla
Using a whisk, combine milk, sugar and cornstarch in a medium saucepan over medium heat on stove top. Allow milk to scald (heat to the point when tiny bubbles form around edges of pan). Whisk occasionally to prevent cornstarch from clumping on bottom edges of pan. Remove milk mixture from heat, preferably to a burner that’s turned off.
Mix about 2 tablespoons of scalded milk mixture into eggs using whisk, then introduce eggs into milk mixture in a slow stream, whisking milk mixture constantly. Immediately return pan to heat and whisk gently until custard thickens, another two or three minutes. Do not allow to boil. (If you find that you have egg white strands in custard, feel free to pass it through a fine-mesh sieve into a different bowl now.) Remove pan from heat and stir in vanilla. Cool before using. Makes 3 cups.
To fill the puffs, using a small piping tip with a pastry bag, filled with the custard. Squeeze filling in on the bottom, squeezing until it feels full.
Once cream puffs are filled, top with melted chocolate or chocolate ganache. I just dipped the tops of the cream puffs in melted chocolate. The chocolate hardened into a thin, crisp shell of chocolate on the puffs, adding a fun crunch.Filled puffs should be stored in fridge until ready to serve. They can be frozen.
Chocolate Ganache
4- 6 oz. dark chocolate, chopped- or 1 cup chocolate chips
2 oz. heavy whipping cream
In saucepan, heat chocolate and cream together until just heated through. Remove from heat and stir until smooth. You can also do this in a microwave safe bowl, in the microwave for about a minute. Remove and stir until smooth. Makes 1 cup.
Lemon Liqueur
Lemon Peels in Vodka
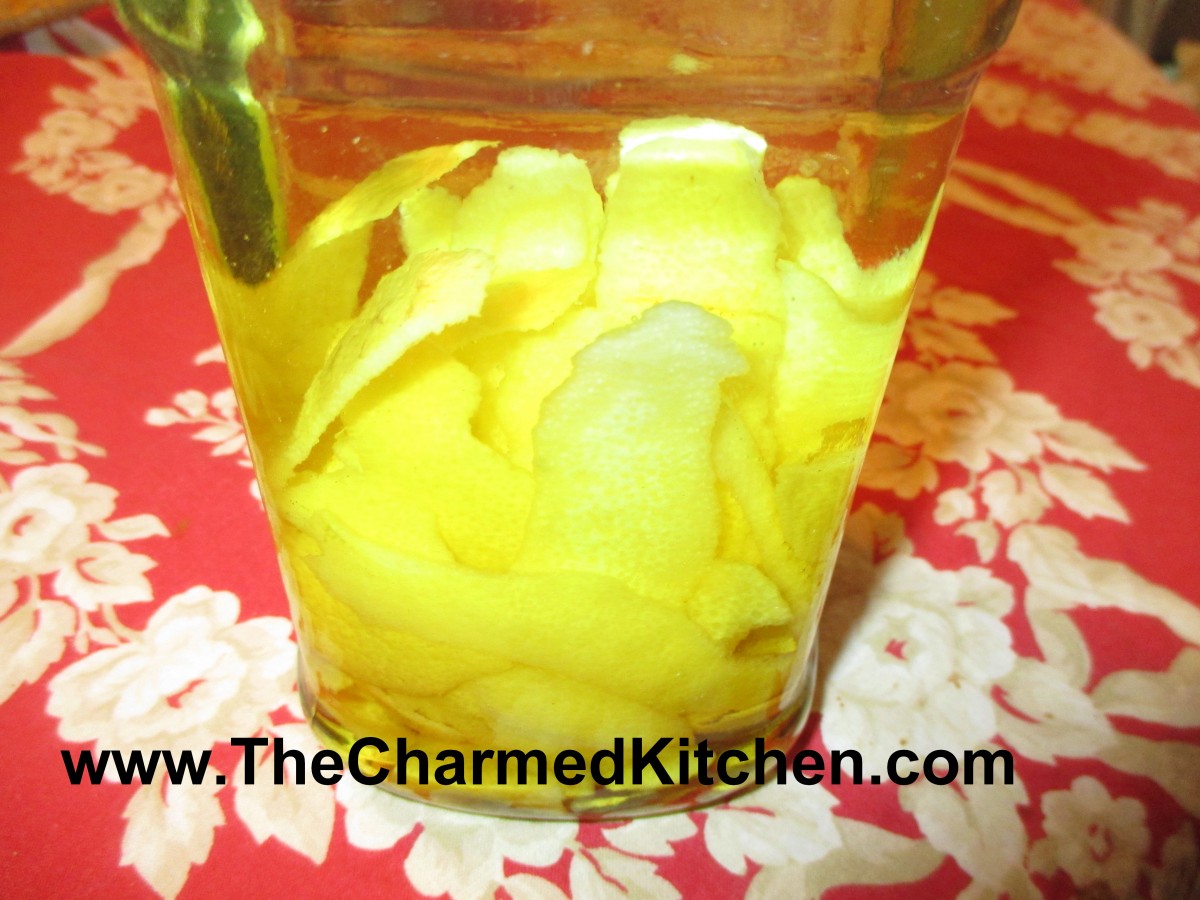
I make homemade liqueurs throughout the year, using seasonal fruits. Fall and winter are best for citrus, so it is lemon liqueur time!!! All you need to get started is a jar, some vodka and lemons. Since you are using the peels, best to use organic lemons, if you can find them. Use a vegetable peeler to get just the yellow part of the lemon peel. A little of the white is OK, but too much will make your liqueur bitter. Combine the peels with the vodka in a jar with a tight-fitting lid. Now it’s just a waiting game. Once the peels have steeped long enough to flavor the vodka, just sweeten, if you like, and let the liqueur mature a little longer. Well worth the wait. You can use the same recipe to make lime liqueur, too. You can also use half lemon and half lime peels in the same batch for lemon/lime liqueur. You can also add other flavors, like mint, to your mixture.
Homemade Lemon Liqueur
8 lemons
3 c. vodka
1 c. sugar syrup
Peel lemons using a vegetable peeler. Use only the yellow part of the peel. If you get larger pieces of the white pith, scrape off and discard. Place peels in jar with the vodka. Cover and place in a cupboard.
Steep peels 2-3 weeks. Strain and filter and add sugar syrup. Mature 1-2 weeks.
Note: you can also make lime liqueur with the peels of 8 limes, or use 4 lemons and 4 limes for a lemon-lime liqueur.
Variation: You can also use rum as the base for a great daiquiri!
Note: To make citrus flavors without the peels substitute 2 t. pure extracts for the fruit and add sugar syrup right away. Just steep a few days to mature a little.
Also, lemon or lime are terrific unsweetened, to add to other cocktails. You can make some without the added simple syrup.
Candied Orange Peels

Candied Orange Peels
During the winter months, when citrus is in season, I find myself eating a lot of oranges. I also find myself with a lot of orange peels. I dry some, and powder it up for use in baking and cooking. But there is always more. A dear friend of mine loves candied orange peel so I am sure to make her at least a couple of batches this time of year. It’s a pretty easy thing to make and a nifty way of turning something that might otherwise be discarded into something tasty. You can also candy other citrus peel this way like grapefruit or even make candied ginger by using slices of fresh ginger. Best to use organic oranges, since you are eating the peels.
Candied Orange Peel
2 large oranges ( you can also use 1 grapefruit or 3 lemons)
or 1 lb. of ginger root*
¾ c. water
¾ c. sugar, plus extra for rolling
3 T. light corn syrup, optional
Remove peel from fruit using a sharp knife. Try to get the peel off in 4 pieces. Cut the peel into ¼-inch wide strips. Place peel in a pot with cold water and bring to a boil. Boil 1 minute, drain and rinse under cold water. Repeat process 2 more times. Return to pan with fresh water and boil 15 minutes. Drain and pat dry. Bring ¾ c. water and ¾ c. sugar to boil in sauce pan with the corn syrup. Boil 2-3 minutes and then add the peel. Simmer, stirring occasionally until all but a spoonful of the syrup is left. This should take about 10 minutes. On a wax-paper lined baking sheet sprinkle 1 cup of sugar and arrange the peels on top of the sugar. Toss the peels around until cooled adding more sugar if needed. Place peels on a drying rack for 24 hours before storing. Once dried you can also dip one end of the peels in dark chocolate. Makes ½ pound.
* If making the candied ginger root peel and cut into 1/4- inch slices. Then cut the slices into 1/4-inch thick strips
Winter Savory- The Bean Herb

Winter Savory
This wonderful, easy to grow herb, is one of my favorites. When I talk to people about herbs, savory seems to be one of the lesser known ones. It is called the “bean” herb, because its flavor pairs so well with all sorts of dry beans. I love to add savory to both baked beans and bean soups.
There are actually two different plants that are both called savory. One is a perennial (winter savory) and one is an annual (summer savory). Winter savory is pretty cold tolerant and will often be green into January. It is great used fresh or dried in recipes. The older leaves can be tough, so either chop them before adding to your dish, or use whole sprigs to flavor your dish, then remove before serving.
When asked what it tastes like, I can only say savory tastes a little like thyme, if that helps.
I made a turkey and black bean soup last night, using winter savory, and thought I would share the recipe with you.

Turkey and Black Bean Soup
Turkey and Black Bean Soup
2 T. oil
1 medium onion, chopped
3 qts. Turkey, chicken or vegetable stock
3 medium carrots, peeled and sliced
3 ribs celery, sliced
1 sweet red pepper, seeded and chopped
4 c. cooked black beans, rinsed and drained*
3 c. cubed cooked turkey
3-4 sprigs winter savory- or 1 T. dried**
1 bay leaf
Salt and pepper to taste
In soup pot, heat oil and sauté onion until lightly browned. Add remaining ingredients and bring to a boil. Cover and simmer until veggies are tender, about 20 minutes. If using fresh savory sprigs, remove them and the bay leaf before serving. Adjust seasonings. Serves 8.
* I cooked the dry black beans myself. If using canned black beans use 2 cans of beans to yield about 4 cups.
** If the leaves of the winter savory are tender, you can just strip them off the stems and throw them right into your soup. If leaves are tougher, leave on the stems so you can remove them later.
Ice Cubes in Your Soup- and Other Helpful Hints
Ice Cubes in Soup Stock
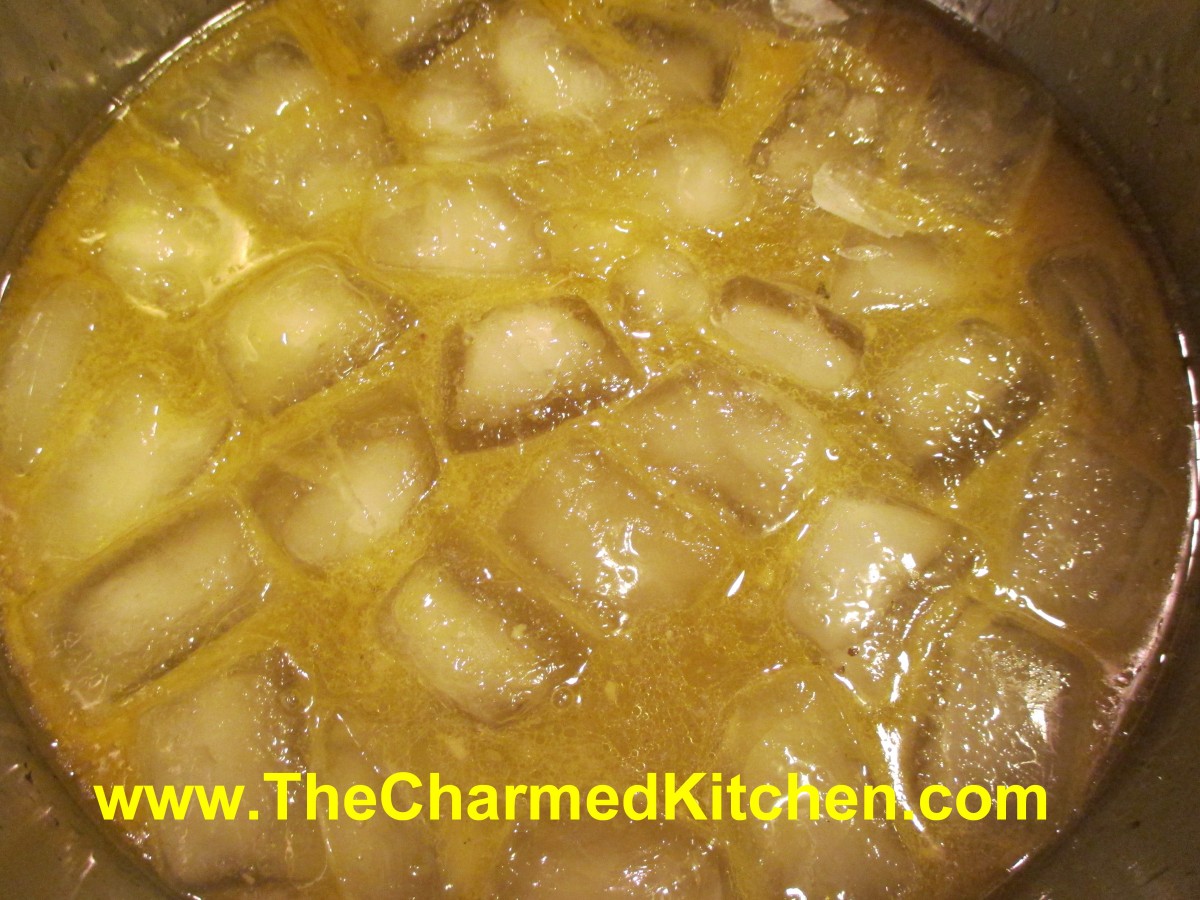
So why are there ice cubes in my soup? Well, not in my soup, but rather in my pot of soup stock. This is an old trick of my Grandmother’s. When you make a pot of soup stock, there is often quite a bit of fat on top. If you have the time, you can just chill the soup and remove the fat later. But what if you want to use the stock right away, when it is still pretty hot? If there is a lot of fat you can skim some off with a spoon. Then just drop in a tray of ice cubes. Bob them gently on the surface with a slotted spoon. The fat will freeze around the ice cubes. Work fast so they don’t melt. After the cubes are coated with fat just lift them out with the slotted spoon. You won’t dilute the soup- you’ll only add a couple of ounces of water, if that.
Over the years, I have collected some really good tips for around the kitchen- and around the house. I thought I might share some of these tips with you today.
When is the oil hot enough? You’re wanting to fry something and you aren’t sure the oil is hot enough. Low-tech solution- just put a single kernel of un-popped popcorn in the pan with the oil. It will pop when the oil reaches 350 degrees.
How do I get all the food out of my food processor? It’s very frustrating to make something in the food processor and then try to navigate around the blade to get it all out. I am sure I am not the only person who has cut a rubber scraper on that sharp blade. The easy solution- scrape out what you can easily- leaving anything on the blade behind. Then turn the processor back on. Since it is nearly empty the remaining food will go to the outside of the work bowl- leaving the blade clean. Just remove the blade and finish scraping out the bowl.
How do I clean the flour off the work surface after making bread? I love baking bread. My father was a baker and he taught me a little trick. Using hot water will cook the flour- causing it to get thicker and stickier. first scrape off any loose flour. Then clean counter tops with cold water. It will dissolve the flour without making it sticky. Use cold water to clean out bowls, too. Once the flour is gone you can wash with warm, soapy water. This also works when cutting raw meats on a cutting board. If you start washing the surface with hot water, you cook the meat and it sticks. Better to do a cold water rinse first, to remove any residue, then follow up with a hot, soapy wash.
How can I peel garlic faster? This is really fun. Just break apart a head of garlic into individual cloves. Place them in a bowl. Get another bowl that is the same size and turn it over on top of the bowl with the garlic, like a dome. I like to use bowls with a nice edge on them- makes it easier to hold. Grab the bowls and shake them really hard for 10 seconds., When you take off the top bowl you will have a bowl full of peeled garlic cloves! You can do this in a jar, too. Just make sure it has a tight fitting lid.
How do I get honey and other sticky foods out of a measuring cup? The easiest way I know is to spray the measuring cup with non-stick spray before adding the honey, molasses or other thick liquid. It will pour out quite easily. You can also add a little oil instead or coat the measuring cup with butter or margarine.
Fruit flies are around my kitchen- how do I get rid of them? Fruit flies are more common in warm weather but can show up any time of the year. Just take a jar or glass and pour in a little apple cider vinegar. Add a drop of dish washing liquid then cover the glass with plastic wrap. Poke a few holes in the wrap with a pencil and set on a kitchen counter- closest to where you are seeing the fruit flies. They will fly into the jar- but can’t find their way out. The detergent removes the surface tension of the vinegar so if they land on it, they will sink.
How do you get the rest of the spaghetti sauce out of the jar? My niece Sarah, also shared a good tip. When using a jar of pasta sauce, use wine to rinse out what is left in the jar. That way the wine adds extra flavor to the dish. I love this tip- I normally use water. Thanks, Sarah.
How do I make my salad greens crisper? For crisper salad greens, wash them and spin dry several hours before using. Keep in the fridge until ready to use and they will crisp up nicely. If you don’t have a salad spinner, shake off as much water as you can before storing in the fridge.
How can I keep my salad green from getting rotten? Speaking of storing leafy greens, have you ever tried storing them in a fabric bag? Plastic does not allow air in, and can cause the greens to spoil more quickly. You can purchase, or even make a fabric bag. Linen and muslin both work well. Just place washed greens in the bag and store in the fridge. They stay fresh so much longer.
My drain is running slow. How can I fix it? An easy fix is to use baking soda and vinegar. Just pour some baking soda in the drain- a few tablespoons should be fine. Then pour a cup of vinegar in. It will bubble like crazy. Let it alone for 30 minutes, then flush the drain with hot water. It really helps drains to drain faster.
How can I keep fruit juices from getting all over when I cut up large fruits, like melons or pineapples? When you cut up a pineapple, melon or other juicy fruits do you get annoyed at juices dripping everywhere? Simple solution: Place your cutting board in a jelly roll pan. That way drips are contained and clean-up is so much easier.
How can I keep my linen closet more organized? I know how annoying it is when changing sheets to find the whole sheet set. There always seems to be one pillowcase missing. One easy solution is to use one pillowcase to hold the whole set of sheets. When you wash your sheets and are getting ready to put them away- fold the top and fitted sheets and one of the pillowcases. Take the sheets and folded pillowcase and put them inside the unfolded pillowcase. Now, when you are ready to change the sheets, the whole set will be together.
Honeymoon Soup

Honeymoon Soup
The silly name for this soup stems from a sandwich I made when I was a kid. I was making my sandwich with Swiss cheese on toasted rye bread. I put one single slice of cheese on the bread and then proceeded to pile up all this lettuce on the sandwich. What can I say? I really like a lot of lettuce on my sandwiches. I cut it in half and was sort of struggling to eat it without the lettuce tumbling everywhere, when my father came in the kitchen. He said I had made a honeymoon sandwich, lettuce alone. Get it? Let us alone. It took a second before I got it. My dad was the king of puns. The name stuck.
I make lettuce soup from time time. Mostly when I have a lot of lettuce I need to use up. The lettuce actually adds nice flavor to the soup. For this one, I decided to add the other elements of my sandwich by topping the soup with some shredded Swiss cheese and fresh rye bread croutons. The combination was really nice- kind of light and satisfying at the same time. Hope you’ll try it.
Honeymoon Soup
6 c. stock- I used chicken, but vegetable or beef stock would work, too
3 carrots, peeled and sliced
6 c. shredded Romaine lettuce- you can use other lettuces – I often use Spring Mix
2 T. butter or oil
3-4 slices rye bread, cubed
1 c. shredded Swiss cheese- or whatever cheese you prefer
Heat stock and simmer carrots in stock until tender. While carrots are cooking heat butter or oil in a skillet and toast the bread cubes in the skillet. Stir often so they don’t burn. You end up with nice rye croutons. You can just set them aside and add to the soup at room temperature. I prefer to warm them in the skillet right before serving.
Back to the soup- once the carrots are tender add the lettuce to the stock. It will wilt down a lot and cook quickly. Allow about 3-4 minutes for the lettuce to wilt down. Ladle the hot soup into serving bowls. Top with some shredded cheese and then the croutons. Serves 3-4.


