Strawberry Sorbet


Strawberry sorbet is a wonderful dessert to keep around, especially in summer. It is sweet and a little tart and very refreshing. It is such a pretty color.
You can play around with adding other flavors. I sometimes add fresh herbs, like mint or lavender. Extracts, like vanilla, can be added, too.
Sorbets can be served on their own, with cake, or drizzled with chocolate sauce. I sometimes add a scoop of sorbet to a glass of lemonade or ice tea on a hot day. So refreshing. Sorbet can be a fun topper in cocktails, too.
You can make sorbet in an ice cream machine, if you have one, but you don’t need to. I don’t. It really is simple. As an added bonus, once your sorbet is made, you have it on hand whenever you need a dessert. The secret is to blend the sorbet a couple of times after it is frozen, if you can. Each time, the sorbet gets smoother and creamier. I use my food processor.
Strawberry Sorbet
1 1/2 lbs strawberries, fresh or frozen
1/2 c. sugar, or to taste – you could also sweeten with honey, if you prefer, or use no sweetener
1 T. lime or lemon juice
Wash and stem berries. Place in food processor with juice and blend until smooth. Sweeten to taste, stirring until sugar is dissolved. Place in a container with a lid and freeze. Once frozen, remove strawberry mix from freezer and sit it on the counter to soften a little bit. This is really the important part. You don’t want it to thaw, but you do want it soft just enough to break into chunks. Place chunks in food processor and blend it again. It will actually start to look a little creamy and lighter in color. You can serve it right away- or put it back in the freezer to serve later. At this point the sorbet is ready- but you can repeat the soften/process step once more, if you like, for even creamier sorbet. Makes 3-4 cups.
A Dozen Summer Salads

If you are looking for a salad for the holiday weekend – or any time – I think you will find one here that you and your family will enjoy.
Between cookouts and picnics, it seems there is always a need for more salads. Maybe, something you haven’t made before. And of course, a recipe that the family will like.
These are some of my favorite salads. Some are pretty traditional. Others are a little different. I am sure you will find one that is just right for your family and friends.
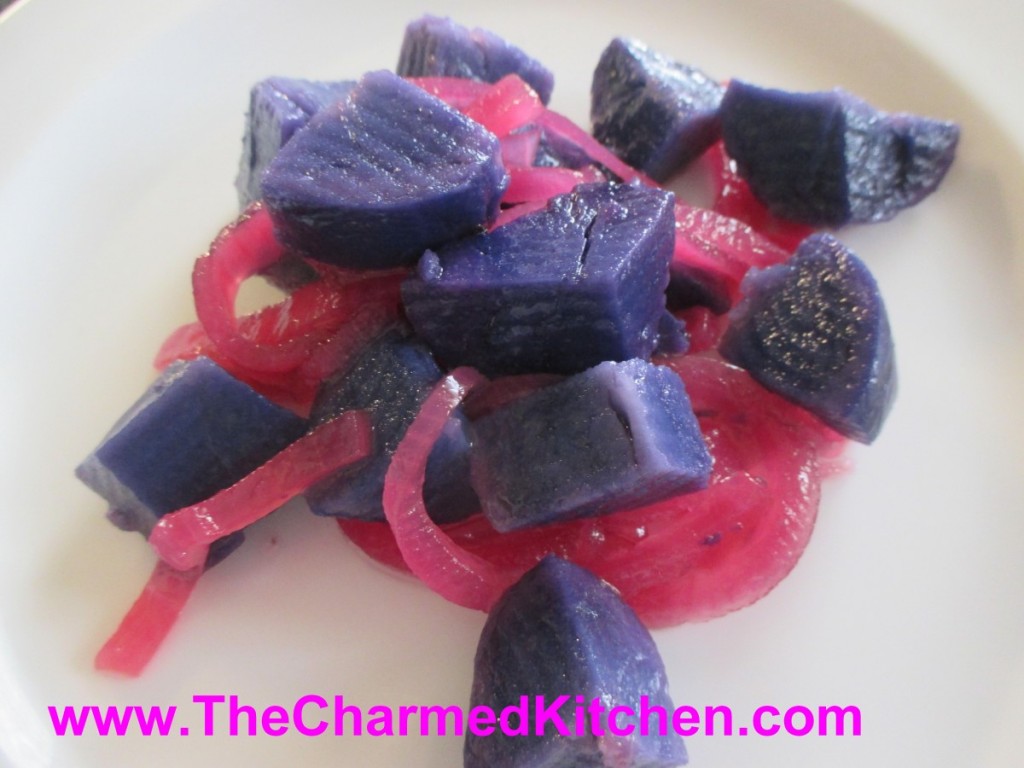
Purple and Pink Salad
1 lb. purple potatoes
1 lb. red onions
1 c. apple cider vinegar
1/2 c. sugar
1/4 c. water
salt and pepper to taste
1 t. celery seed
1/4 c. oil
Bake potatoes until tender. I used the microwave and it took about 7 minutes, but you can bake in a conventional oven, too. While potatoes are baking, peel, then slice onions thin and place in a saucepan with the rest of the ingredients, except the oil. Bring to a boil, then simmer for about 5-8 minutes until onions are just tender. Some of the liquid will cook off. Peel and cube potatoes and place in a bowl. Drizzle with the oil. Add the onion mixture and stir gently. Adjust seasonings, if needed. Chill. Serves 4.
Curry Cauliflower Salad
1 head cauliflower, cooked
½ c. chopped green onions
¾ c. mayo – or less or more depending in the size of the head of cauliflower
1 T. curry powder- or to taste
1 t. hot sauce, or to taste
Salt and pepper to taste
1 c. peanuts
First break the cauliflower into florets. Cook the cauliflower any way you like. I steamed mine for about 5 minutes. You could roast it, or sauté it in a little oil. You want it tender, but still a little crisp. Don’t cook it to mush. I would also advise against boiling it, as it gets too wet. Once the cauliflower is cooked, let it cool down before proceeding. Combine the cauliflower with the green onions, the mayo and seasonings. It was hard to be exact because your head of cauliflower might be bigger or smaller than mine. I could have said 5 cups of cooked cauliflower- but would that really help? Then you’d have leftover cooked cauliflower. Or perhaps not enough. So add a little more mayo, if needed, and adjust the seasonings to suit your taste and the amount of cauliflower you have. Chill and toss the peanuts in closer to serving time. They are fine, even when in the salad for a while, but the peanuts crunchier when first put in.

Curry Cauliflower Salad
Succotash Salad

Cauliflower and Broccoli Salad
Sweet Potato Salad

Multi Bean Salad
Cucumber and Carrot Salad

Pesto Potato Salad

Artichoke and Edamame Salad
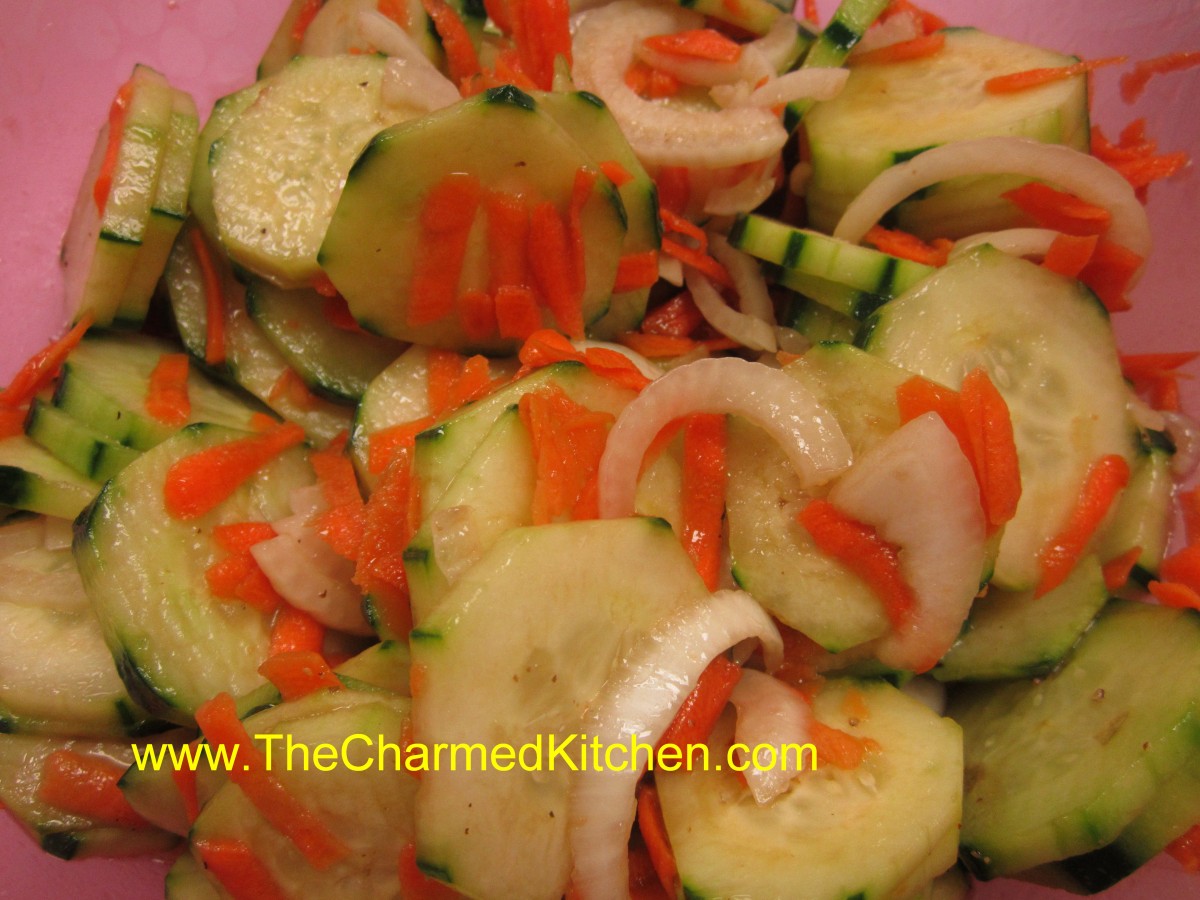
Cucumber and Carrot Salad
This refreshing salad combines carrots and cucumbers in a simple dressing. So easy and fast. Perfect side for your picnic or barbecue.
4 cucumbers, peeled, leaving strips of skin
1 c. coarsely shredded carrots
1 c. thin sliced sweet onion
1/3 c. vinegar- I like cider vinegar in this dish
2 T. Balsamic vinegar
¼ c. oil
1 T. sugar
1 ½ t. salt
Fresh ground pepper
Slice cucumbers. Combine vegetables in bowl. Combine dressing ingredients and pour over the vegetables, tossing to coat well. Chill at least 1 hour before serving, Spoon over lettuce, if desired. Serves 4-6.
Cornbread Salad
A little different- people always seem to like this salad. A nice way to use up stale cornbread, too. ?
4 c. crumbled cornbread or corn muffins
1 c. shredded mild cheese
1 sweet red pepper seeded and diced
1 c. diced celery
½ c. diced green onion
4 hard-cooked eggs, peeled and chopped
¼ c. chopped parsley
1-1 ½ c. mayonnaise or salad dressing, sometimes I use potato salad dressing or even slaw dressing
2 c. diced fresh tomatoes
1 c. toasted pecans
paprika for sprinkling on the top, optional
Place cornbread and next 6 ingredients in a medium bowl. Stir in dressing until desired moistness is achieved. Chill and stir in tomato and nut just before serving. Sprinkle with paprika if you like. Serves 6.
Note: You can add whole kernel corn also if you like.
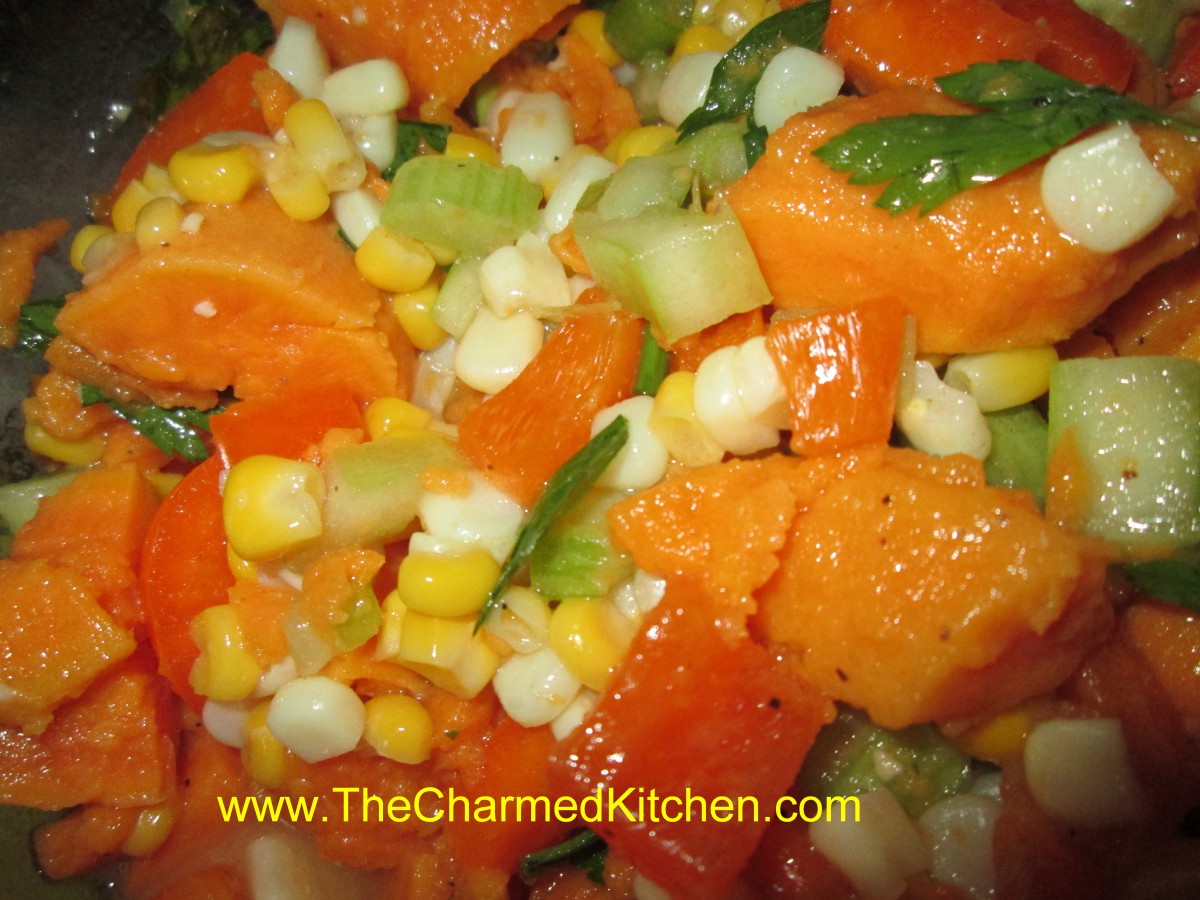
Sweet Potato Salad
A nice twist on potato salad.
3 large sweet potatoes
2 c. corn kernels, fresh off the cob preferred but frozen is O.K.
2 ribs celery, sliced
1 sweet onion, diced
1 c. sweet pepper, seeded and chopped
2-3 T. fresh parsley
1/3 c. oil
1 t. Dijon mustard
3 T. apple cider vinegar
1 T. lemon juice
1 clove garlic, minced
Salt and pepper to taste
½ c. cashews
In medium saucepan boil or steam potatoes until tender, about 20-25 minutes. Remove with slotted spoon and place in a large bowl of ice water. Add corn to saucepan and cook until just tender about 2-3 minutes. Drain corn and add to ice water with the potatoes. Once the vegetables have cooled down drain them and peel and cut the potatoes into bite-sized pieces. Place potatoes and corn in a mixing bowl with remaining vegetables. Combine remaining ingredients, except cashews, in a jar with a tight-fitting lid and shake well before pouring over the sweet potato mixture. Toss to blend and chill until ready to serve. Add cashews just before serving. Serves 6.
Multi- Bean Salad
1 lb. cooked green beans, sliced
1 can lima beans, rinsed and drained
1 can dark red kidney beans, rinsed and drained
1 can garbanzo beans, rinsed and drained
1 medium sweet onion, chopped
1/2 c. chopped fresh parsley
1 c. apple cider vinegar
1/4 c. sugar
1/4 c. oil
2 T. Italian seasoning- or whatever herb blend you like
1 T. hot sauce, or to taste
Salt and pepper to taste
Combine beans with onions and parsley in a medium bowl. Combine remaining ingredients in a small bowl and pour over the bean mixture. Stir well and chill a couple of hours before serving. Serves 8.
Pesto Potato Salad
2 lbs. Boiling potatoes, cut into bite sized pieces
1 c. basil leaves
3 T. pine nuts, walnuts or pecans
3 T. olive oil
2 garlic cloves, minced
1/3 c. Parmesan cheese
Salt to taste
Cook potatoes until tender. Cool. In blender combine remaining ingredients, except 1 tablespoon of the nuts. Pour blended mixture over potatoes and sprinkle with the reserved nuts. Chill. Serves 6-8.
Just in Thyme Potato Salad
2 lbs. boiling potatoes, cut into bite sized pieces*
½ c. olive oil
¼ c. red wine vinegar
1 T. fresh lemon juice
2 t. fresh thyme leaves
Salt and pepper to taste
Cook potatoes until tender. Drain and toss with the rest of the ingredients and serve right away or chill to serve later. Serves 6-8.
* You can really use any potato you like. I often bake the potatoes whole and then peel and cut up. Cook them any way you prefer.
Mustard Potato Salad
4 lbs. potatoes- I used Klondike Rose and I did not peel them
4 hard cooked eggs, peeled and chopped
1 sweet pepper, seeded and chopped
1 c. mayo- maybe a little less
1/4 c. prepared mustard
salt and pepper to taste
dash of hot sauce
Bake whole potatoes until tender and allow to cool. Cube potatoes into large bowl and combine with remaining ingredients. Chill until ready to serve. Serves 8.
Artichoke and Edamame Salad
1 lb. edamame (fresh soybeans)*
1 can artichoke hearts, drained and chopped
2 c. cooked corn
1 c. chopped sweet onion
1/3 c. olive oil
1/2 c. cider vinegar
1 t. sugar, optional
fresh chopped parsley
fresh chopped basil
salt and pepper to taste
To prepare edamame steam them, in their pods, until tender, about 8 minutes. Place in cold water. Once cool enough to handle slip the edamame out of their pods. Discard pods and place edamame into a mixing bowl. Add remaining ingredients and stir to mix well. Chill until ready to serve. Serves 4-6.
* A lot of stores have them in the freezer section. They are in the pods. The pods are not edible. If you don’t have edamame you can substitute fresh lima beans.
Cauliflower and Broccoli Salad
1 small head cauliflower, trimmed and broken into bite- sized pieces
2 broccoli crowns, cut into bite- sized pieces
1 sweet pepper, seeded and chopped
1 c. shredded cheese- I used a sharp cheddar
8- 10 slices of bacon, cooked and chopped
1/2 cup of mayo – or more according to your taste
salt and pepper to taste
Steam the cauliflower and broccoli until just tender/crisp. About 5 minutes in a microwave steamer, 6 minutes in a conventional steamer. Place in a bowl to cool down then combine with remaining ingredients and stir to combine well. Adjust seasonings, if needed. Serves 6-8.
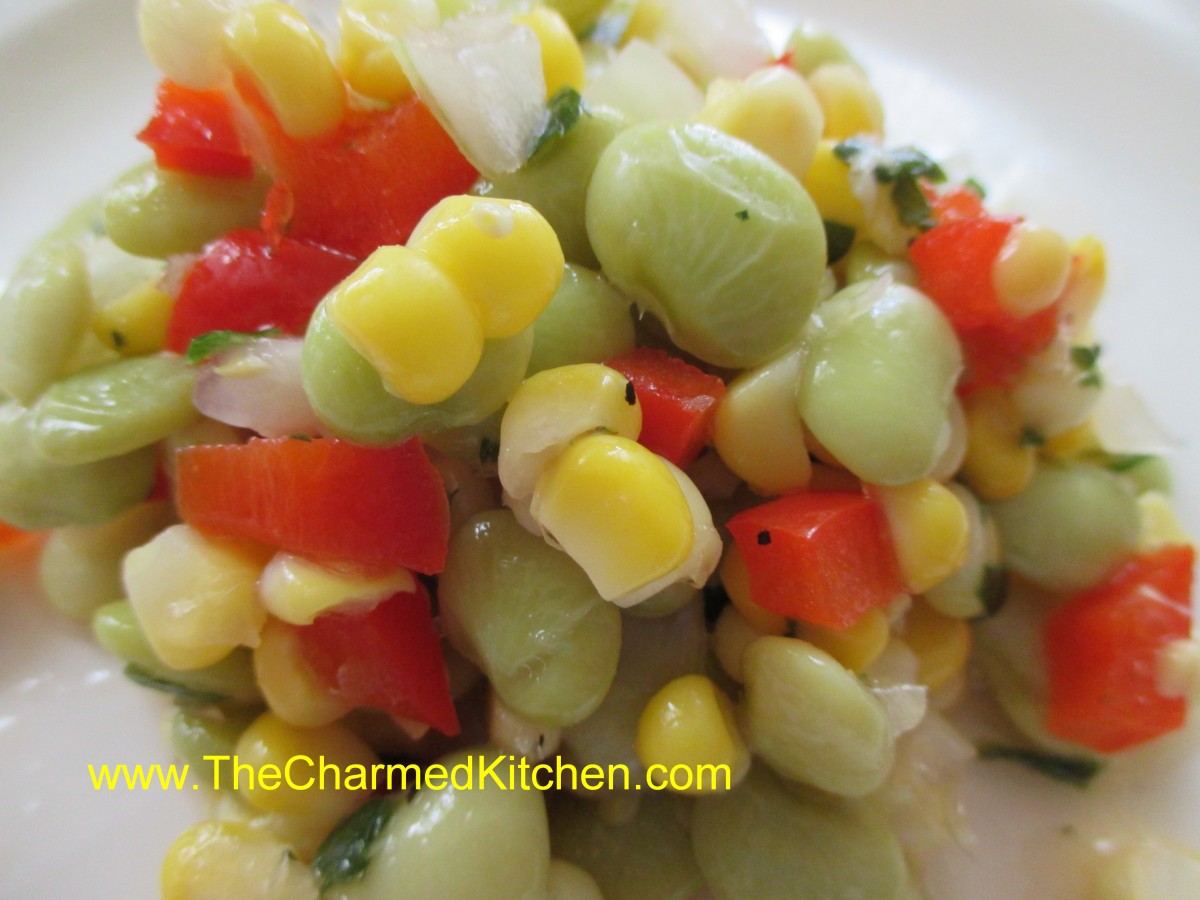
Smoky Succotash Salad
1 lb. lima beans, cooked and cooled
4 c. corn off the cob, cooked and cooled
1 sweet pepper, seeded and chopped
1-2 c. cooked ham, diced
Dressing:
2/3 c. sour cream
3 T. apple cider vinegar
2 T. sugar
1 t. grated ginger
1 t. hot sauce, or to taste
salt and pepper to taste
Combine veggies with the ham in medium bowl. In small bowl stir together dressing ingredients until smooth and toss with the veggie mixture. Chill until ready to serve. Serves 6.
Spiced Blackberry Muffins


Sometimes, little things can just improve your day. For me, it was starting the day with a mug of tea and a warm blackberry muffin. I had some beautiful fresh blackberries, and decided to make muffins with some of them. So happy that I did.
I used a recipe I had made before, but decided to add cinnamon and nutmeg to the batter. I also dipped the tops of the warm muffins in melted butter and a spiced sugar mixture to finish them off. So good. So very, very good.
I used fresh blackberries, but frozen would work, too. Don’t thaw frozen berries before adding them to the batter- and give the muffins a few extra minutes in the oven.
Spiced Blackberry Muffins
1 c. milk
1 egg
¼ c. oil
2 c. flour
1/3 c. sugar
1 T. Baking powder
¾ t. salt
½ t. each cinnamon and nutmeg
1 c. blackberries, I used fresh but frozen would work, too.
Topping:
1/2 c. sugar
1 t. each cinnamon and nutmeg
4 T. butter, melted
Beat together milk, egg and oil. Combine dry ingredients and add to milk mixture, stirring to just moisten flour. Fold in blackberries. Fill 12 paper lined muffin cups to 3/4 full. Bake in preheated 400-degree oven for 20 minutes or until golden brown. Combine sugar and spices in a small bowl. Place melted butter in another bowl. When muffins are removed from the oven carefully dip the top of a muffin in the melted butter and then in the spiced sugar. If muffins are too hot to hold wait a few minutes before dipping. Repeat with remaining muffins. Serve warm. Makes 12.
Classic Corn Muffins

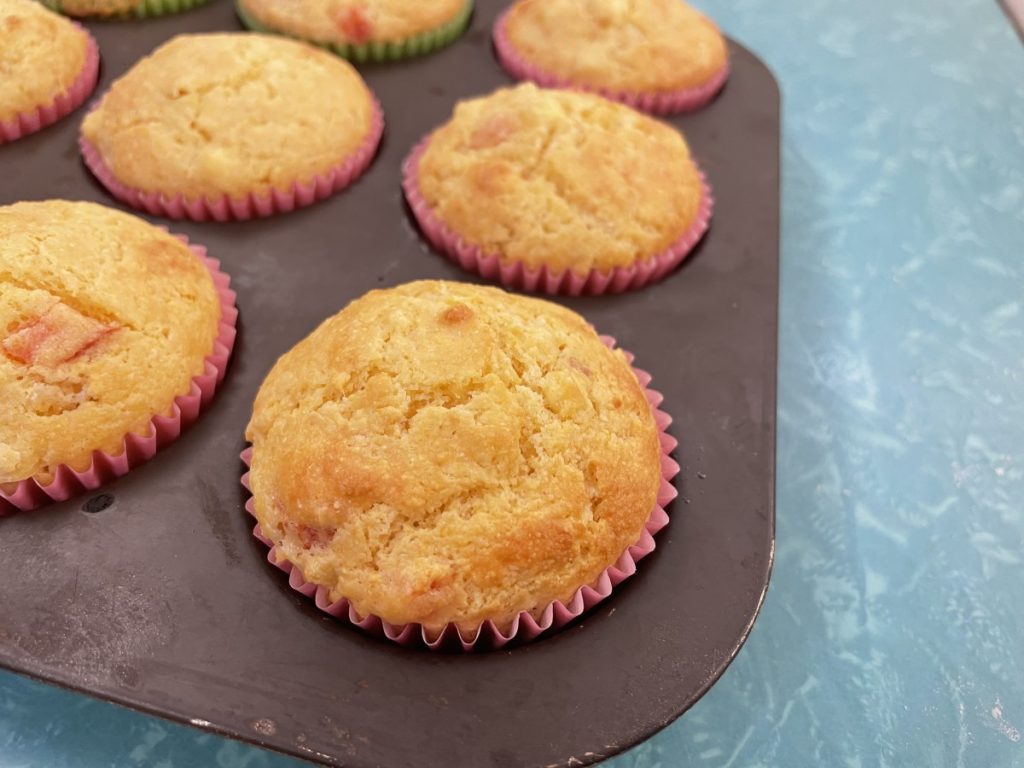
Corn muffins are a classic, old fashioned recipe. I love them, but I like to shake things up a little, too. Below is my recipe for corn muffins with eight recipe variations. I made the confetti variation the other night. They came out great.
Pictured: Confetti Corn Muffins are a great side dish for chili or stew. I like them with melted butter and a little honey. They make a nice addition to breakfast. For this variation we added corn, sweet peppers and pepper flakes to the batter. It makes them just a little special. The recipe follows along with the classic version and the other variations.
Corn Muffins
1 c. flour
¾ c. cornmeal
3 T. sugar
4 t. baking powder
½ t. salt
¼ c. butter
1 c. milk
2 eggs, beaten
Preheat oven to 400 degrees. Grease or paper line 12 muffin cups. In medium bowl combine dry ingredients. Cut in butter to resemble coarse crumbs. Combine milk and eggs and add all at once to dry mixture, stirring until flour is just moistened. Spoon batter into prepared pans and bake 20-25 minutes or until golden brown. Serve warm. Makes 12.
Variations
Bacon, Pepper and Tomato
Add ½ teaspoon fresh ground pepper to dry ingredients. Add ½ cup cooked, crumbled bacon (regular or turkey bacon) and 8 oz. can tomatoes, well drained and chopped to milk mixture.
Confetti
Add ½ cup whole kernel corn, ¼ cup minced green or red sweet pepper and ¼ teaspoon crushed red pepper to milk mixture.
Ham and Swiss
Add 1 cup fine chopped Swiss cheese and ½ cup ham or turkey ham to milk mixture.
New England
Add 2 tablespoons molasses to milk mixture.
Sausage
Add ½ pound cooked, crumbled bulk sausage to milk mixture.
Sesame
Add 3 tablespoons toasted sesame seeds to dry ingredients.
Southland
Add 1 cup cooked rice and 1 t. hot sauce to milk mixture.
Chilies and Cheese
Add 1 C. shredded Cheddar cheese and 1 (4 oz.) can chilies, chopped and drained to milk mixture.
Bacon-Wrapped Water Chestnuts


Bacon-wrapped water chestnuts are always a big hit when I make them. People can’t seem to get enough of them. The combination of salty and sweet, with the smokiness of the bacon, a little heat, and the crunch of the water chestnuts is a flavor explosion.
When I make them for parties, everyone loves them. OK, not my vegetarian friends, but everyone else does. There are never any leftovers.
What is it about the smell of bacon cooking? Maybe for you, like me, it is a childhood memory. We never had bacon for breakfast during the week. Not even every weekend. But on some magical Sunday mornings, I would wake up and smell bacon cooking. No one slept in on those mornings. Mom or dad would be frying the bacon in the cast iron skillet. If we had pancakes or waffles, I would dip my bacon in the syrup on my plate.
This recipe combines some of those flavors. You can assemble them ahead of time, then just cook when you are ready. You can also cook them a day or two ahead, then reheat before serving. I have even been known to freeze them. They are easy to make, too.
So here is the recipe that I use. You can adapt it to suit your taste. Perhaps make them spicier? I hope you try them for a party soon.
Bacon-Wrapped Water Chestnuts
20 slices bacon, cut in half
40 water chestnuts, whole
Hot sauce
Maple syrup
Brown sugar
Roll ½ a slice of bacon around water chestnut and place rolls in a baking dish. Make sure the edge of the bacon is on the bottom, so it stays in place. It will save you from having to put a toothpick in each one. Cook in a 400-degree oven for 20 minutes or until rolls are well-browned. Remove from pan and drain on paper towels. Return rolls to baking dish. Drizzle with maple syrup and sprinkle with brown sugar and hot sauce. Return to oven and bake until caramelized, about 10 minutes. Makes 40.
Herb Breads

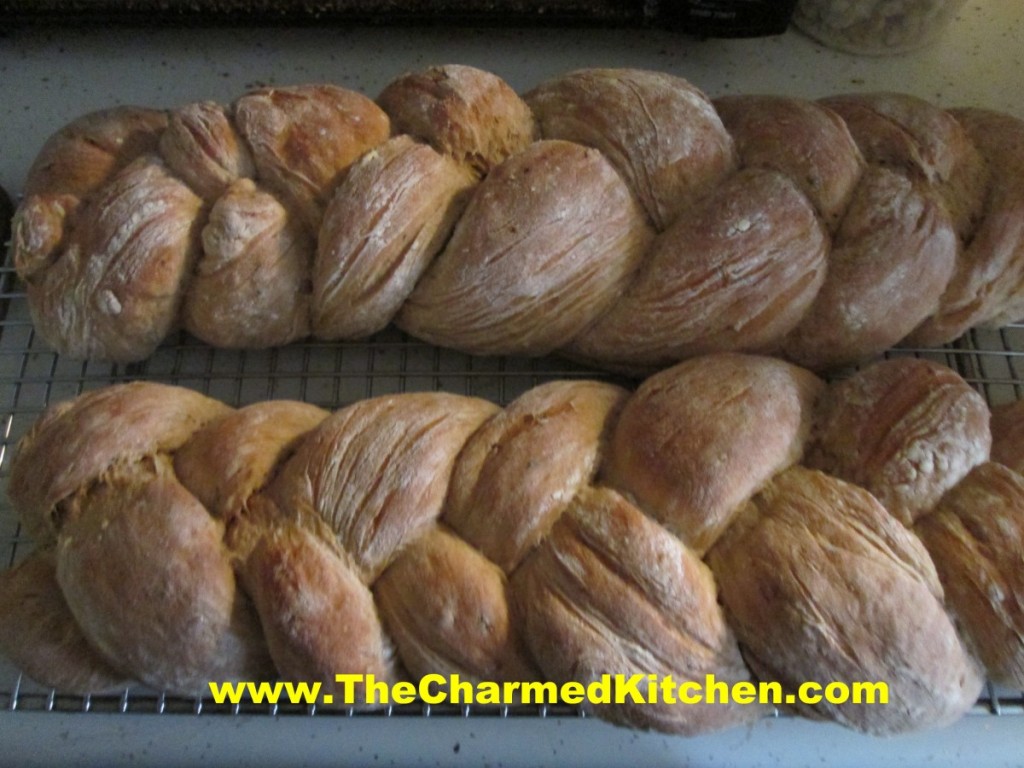
One of the benefits about baking your own bread is the aroma. The house gets filled with the most wonderful smells. In this case, the experience is even better because the breads I baked are filled with herbs and shallots, so those fragrances are also in the mix.
I like to make these loaves in braids and place them on a baking sheet- but they could just as easily be baked in bread pans for more traditional loaves. Great for sandwiches.
I like to toast some of this bread, and use as croutons or as a base for stuffing. I served it sliced and toasted with a salad the other night.
You can also slice the bread, brush with softened butter, then toast, for a twist on garlic bread. The garlic is already in the bread, but feel free to add more to the butter, before brushing it on the bread.
Braided Herb Bread
5 ½ -6 ½ c. flour
2 packages quick rising yeast
¼ c. sauteed shallots
2 T. each dried marjoram and parsley
1 T. each dried oregano and minced garlic
1 T. honey
2 t. dried thyme
2 t. salt
¼ c. olive oil
2 ¼ c. hot water
In a mixing bowl combine 2 c. of flour with the rest of the ingredients and mix until smooth. Beat with electric mixer 4 minutes then add 1-cup additional flour and beat 1 minute longer. Stir in flour ½ cup at a time until soft dough forms. Turn onto surface and knead, adding flour gradually until dough is smooth and elastic. Place dough in lightly greased bowl and turn to cover. Cover with a towel and let rise until doubled, about 30 minutes. Turn dough onto surface and cut in half. Cut each half into thirds. Roll each piece of dough into an 18-inch rope. Loosely braid three ropes together and repeat with the remaining dough. Place on greased baking sheet and cover until doubled in size, about 20 minutes.
Bake in a preheated 375-degree oven for 25-30 minutes, or until bread sounds hollow when tapped lightly. Makes 2.
Variation: Whole wheat: Add 2 cups of whole-wheat flour to replace 2 cups of white flour. Also try adding ¼ c. of wheat germ, oat bran or 2 tablespoons of seeds (sesame, pumpkin, sunflower, poppy, etc.)
Regular yeast can be used, but rising times will be longer and water should be warm, not hot.
Lovage – How to Grow and Use

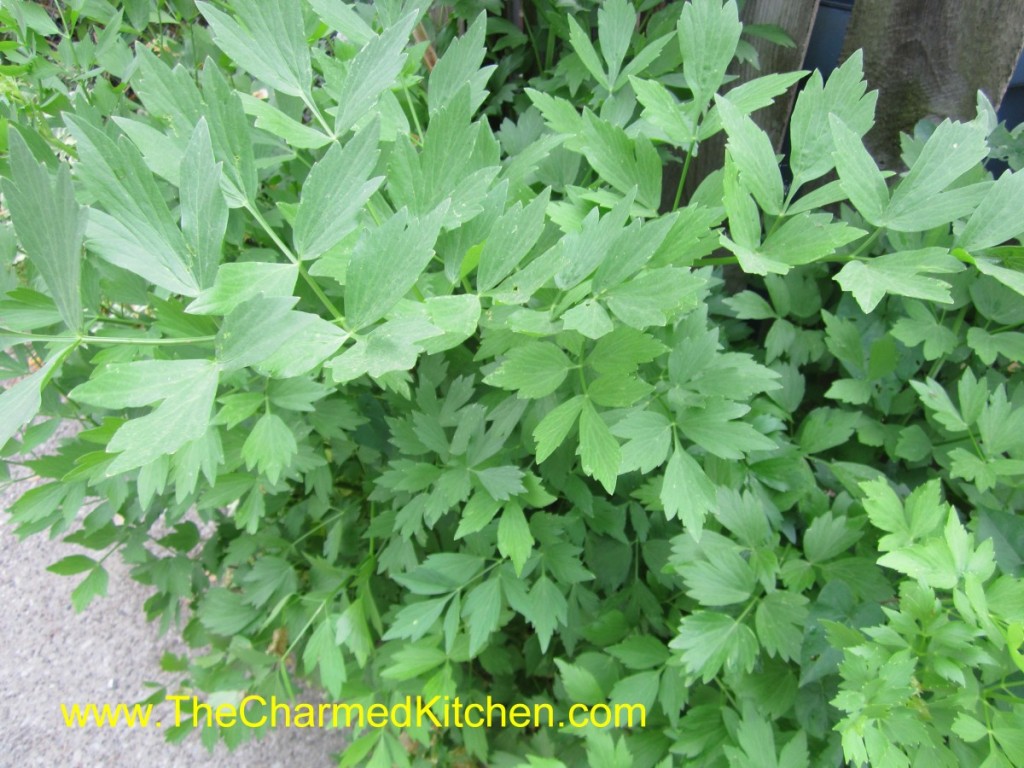
Lovage is one of my favorite herbs. I feel like it doesn’t get enough attention. So many people have never even heard of lovage. Its leaves taste just like celery leaves, so it is very useful in the kitchen. As an added bonus, lovage is easy to grow- and it is a perennial.
I love celery in so many foods. I don’t think you can make a decent stock without it. I especially like using celery leaves. Problem is, often the celery I see in the store has few, if any, really nice leaves. The solution? Lovage.
Lovage leaves can be used in any dish you would use celery leaves: soups, stews, stocks and salads. The seeds can also be used as a substitute for celery seeds in recipes.
Lovage grows to a height of 2-3 feet, except when it is in bloom. When blooming, lovage sends up stems that can reach 6 feet!
The stems of lovage are tough, almost woody. While they can’t be used chopped like celery, the stems are hollow and can be cut to size and used as straws in drinks like Bloody Marys or vegetable juices.
I’ve never seen lovage sold as a fresh herb. As far as I know, the only way you can enjoy this lovely plant is to grow it yourself. It thrives in sun, but will tolerate some shade. For a little effort you can have fresh “celery” leaves whenever you want. I also freeze plenty for use throughout the year.
Here is a favorite recipe of mine using lovage. Perfect for Spring.
Fresh Pea Soup with Lovage
2 T. butter or oil
1 medium onion, chopped
2 c. fresh English peas, pea pods (sliced), or sugar snaps (sliced)
¼ –½ c. fresh lovage leaves, chopped fine
3 c. chicken stock or veggie stock
salt and pepper to taste
1 c. sour cream
Heat butter or oil in medium saucepan. Sauté onion until tender. Add peas, lovage, stock, and salt and pepper. Cook until peas are the desired tenderness, about 3 – 7 minutes. Puree soup in batches until smooth. Place sour cream in a small bowl. Ladle 1 cup of hot soup into the sour cream, and stir to smooth. Pour this mixture into the soup and cook, barely simmering, until soup is heated through, about 2 minutes. To serve, ladle into bowls and garnish with lovage sprigs. Serves 3 – 4.
Note: You can also serve this soup cold.

Edible Flowers


When deciding which flowers to plant in your yard- why not plant flowers that are also edible? That way they do double duty. They make your yard look beautiful and they can make your food look beautiful, too.
I cook a lot with flowers. I often add them to salads, infuse vinegar and make jelly with them. You can also use them to decorate cakes or other desserts, in salad dressings and marinades, floating in tropical cocktails, in punch bowls and in ice cubes.
Flowers can also top off dips, cheese, fruit trays and other appetizers, be used to make teas, infused in honey or mixed with soft cheese and spread on crackers or toast. I candy violets every year.
Add some to baked goods like quick breads, cookies and muffins or in yogurt, cottage cheese or sorbet. Wherever your food needs a little color or flavor, flowers make it special.
Below are 2 lists- one of edible flowers- the other a list of flowers that are poisonous. I would be remiss if I didn’t caution you about flowers that are not edible. Be sure to get a positive identification of any flower before you eat it. Only eat flowers that have been grown pesticide free.
Some Edible Flowers
Calendula, Chives, Daylily, Mint, Nasturtium, Pansy, Rose, Sage, Signet Marigold, Squash Blossoms, Anise Hyssop, Apple, Arugula, Basil, Bee Balm, Borage, Broccoli, Chamomile, Chicory, Chrysanthemum, Coriander, Dandelion, Dianthus, Dill, Elderberry, English Daisy, Evening Primrose, Fennel, Garlic Chives, Hibiscus, Honeysuckle, Hyssop, Jasmine, Johnny-Jump-Up, Lavender, Lemon, Lilac, Linden, Magnolia, Marjoram, Mustard, Nasturtiums, Nodding Onion, Okra, Orange, Oregano, Pea, Pineapple Guava, Pineapple Sage, Radish, Red Clover, Redbud, Rose of Sharon, Roselle, Rosemary, Runner Beans, Sage, Safflower, Scented Geraniums, Shungiku, Society Garlic, Sunflower, Sweet Woodruff, Thyme, Tuberous Begonia, Tulip, Violet, Winter Savory, Yucca
Some Poisonous Flowers
Aconite, Anemone, Anthurium, Atamasco Lily, Autumn Crocus, Azalea, Baneberry, Black Locust, Bloodroot, Boxwood, Burning Bush, Buttercup, Butterfly Weed, Caladium, Call, Carolina Jasmine, Castor Bean, Cherry Laurel, Chinaberry, Christmas Rose, Clematis, Daffodil, Deadly Nightshade, Death Camas, Delphinium, Dogbane, Dumbcane, Elephant Ears, False Hellebore, Four O’clock, Foxglove, Gloriosa Lily, Golden Chain Tree, Goldenseal, Heavenly Bamboo, Henbane, Horse Chestnut, Horse Nettle, Hyacinth, Hyacinth Bean, Hydrangea, Iris, Ivy, Jack-in-the-Pulpit, Jerusalem Cherry, Jessamine, Jetbead, Jimsonweed, Jonquil, Kentucky Coffee Tree, Lantana, Larkspur, Leopard’s Bane, Lily of the Valley, Lobelia, Marsh Marigold, May Apple, Mescal Bean, Mistletoe, Morning Glory, Mountain Laurel, Nightshade, Oleander, Periwinkle, Philodendron, Pittosporum, Poison Hemlock, Potato, Privet, Rhododendron, Rock Poppy, Schefflera, Spring Adonis, Spurge, Star of Bethlehem, Sweet Pea, Tobacco, Trumpet Flower, Water Hemlock, Wild Cherry, Wisteria, Yellow Allamanda, Yellow Oleander, Yesterday, Today and Tomorrow.
Neither of these lists in meant to be complete. Most important of all is to be sure you can identify these plants. If you are unsure plant identifications can be done at your local Extension office, garden center, nursery, arboretum and botanical garden. When in doubt, err on the
Maple Lime Vinaigrette

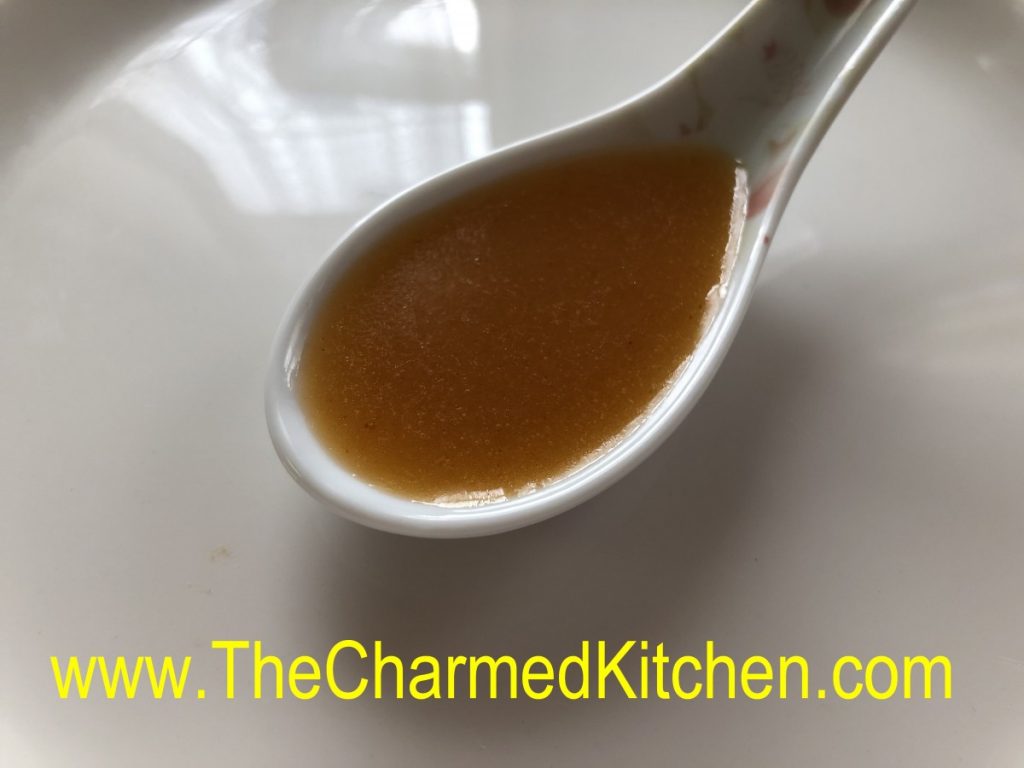
I am always playing around with new salad dressings. I had lovely salad greens, but needed a dressing. I looked in my fridge and was inspired by what I had on hand- limes. I knew I needed a sweet element and I decided to use maple syrup. That idea came from my cousin Laurie, who had a maple syrup based salad dressing somewhere and loved it. I played around adding a few more ingredients, until I got a dressing I really liked.
I served it that night on our salad. My friend loved it and said I should bottle it. I decided to just share the recipe, instead.
It really has turned out to be one of my favorite salad dressings. That is saying a lot, because I make a lot of salad dressings.
Here is the recipe. I hope you try it. I think you will love it as much as my friend and I do.
Maple Lime Vinaigrette
1/3 c. maple syrup
1/3 c. lime juice
1 T. Dijon mustard
1-2 t. Sriracha
½ t. salt, or to taste
2/3 c. oil
In jar with tight fitting lid, place all ingredients, except the oil. Shake well to blend. Add the oil and shake well again. Adjust seasonings. Use as a salad dressing or as a dipping sauce. Store leftovers in fridge. Keeps for a few weeks. Makes about 1½ cups.
Tara’s Brunch Enchiladas


These are not traditional enchiladas, and I am OK with that. Made with a ham and cheese filling, then topped with an egg-based custard, they are a wonderful addition to any brunch menu. They would be fine served for breakfast or lunch, too. The prep in all done the day before, so you just have to pop them in the oven when ready to bake and serve. Nice for Mother’s day.
The recipe can be easily tweaked, to work with other ingredients. Maybe a corned beef and Swiss cheese version or chicken with broccoli. You could also go vegetarian with a combination of beans and veggies. You can cut the recipe in half, or freeze leftovers. I love a versatile recipe.
I started calling them Tara’s Enchiladas for my friend Tara, who needed a recipe for a Mother’s day brunch a few years ago. She made them and really loved them.
So here is the recipe. Hope you give it a try.
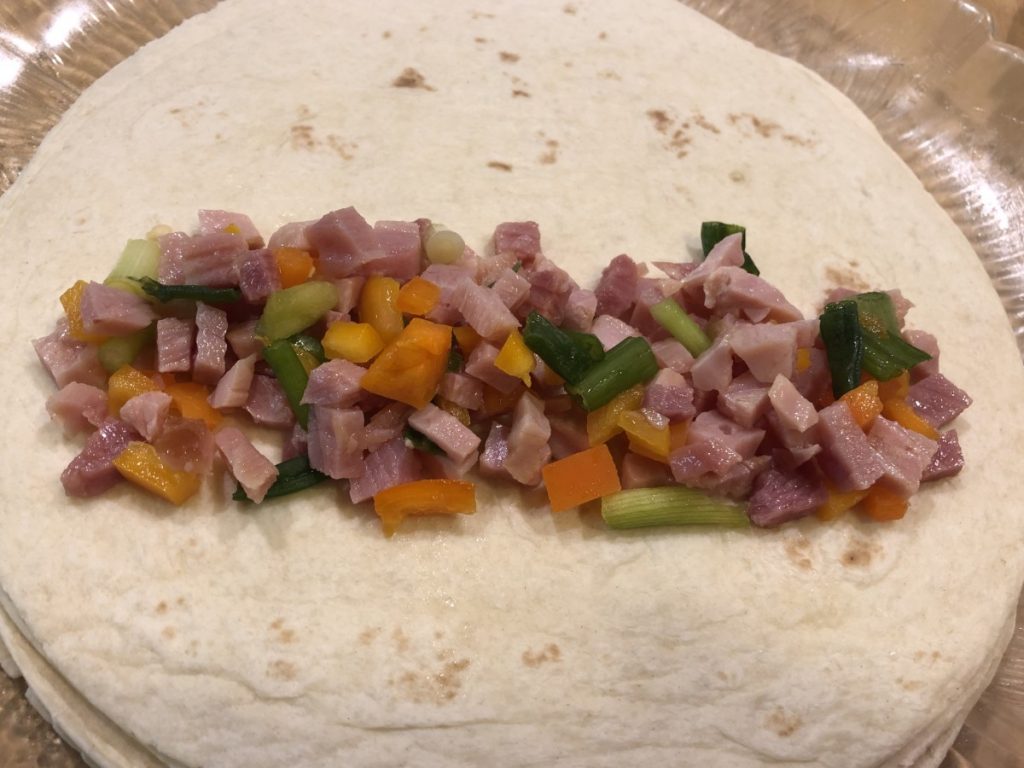
Brunch Enchiladas
12 oz. fully cooked ham, chopped fine or ground
½ c. sliced green onions
½ c. chopped sweet pepper
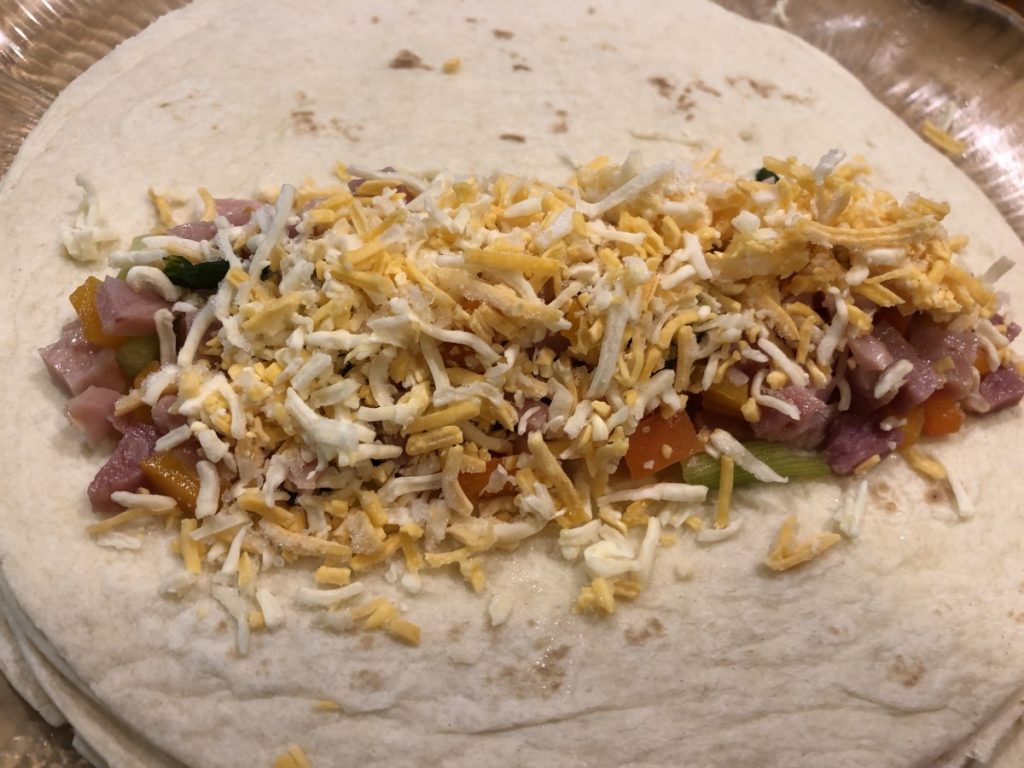
2½ c. shredded cheddar cheese
8 (8-inch) flour tortillas
4 beaten eggs
2 c. half and half or milk
1 T. flour
salt, pepper, and garlic powder to taste- ham is salty- so go light on salt
In bowl, combine ham with vegetables. Place 1/3 c. of ham mixture and 3 tablespoons of cheese in each tortilla and roll up. Place tortillas, seam side down, in greased 9×13-inch pan. Combine remaining ingredients and mix well. Pour over tortillas. Refrigerate several hours or overnight. Uncover and bake in a 350-degree oven for 45-50 minutes or until set. To check for doneness, insert a knife off center. Knife should come out clean. Sprinkle with remaining cheese and return to oven for 3-5 minutes to melt cheese. Serves 8.
Note: Let enchiladas sit a few minutes before serving to make cutting easier. I cut them down the middle, then into squares to serve.