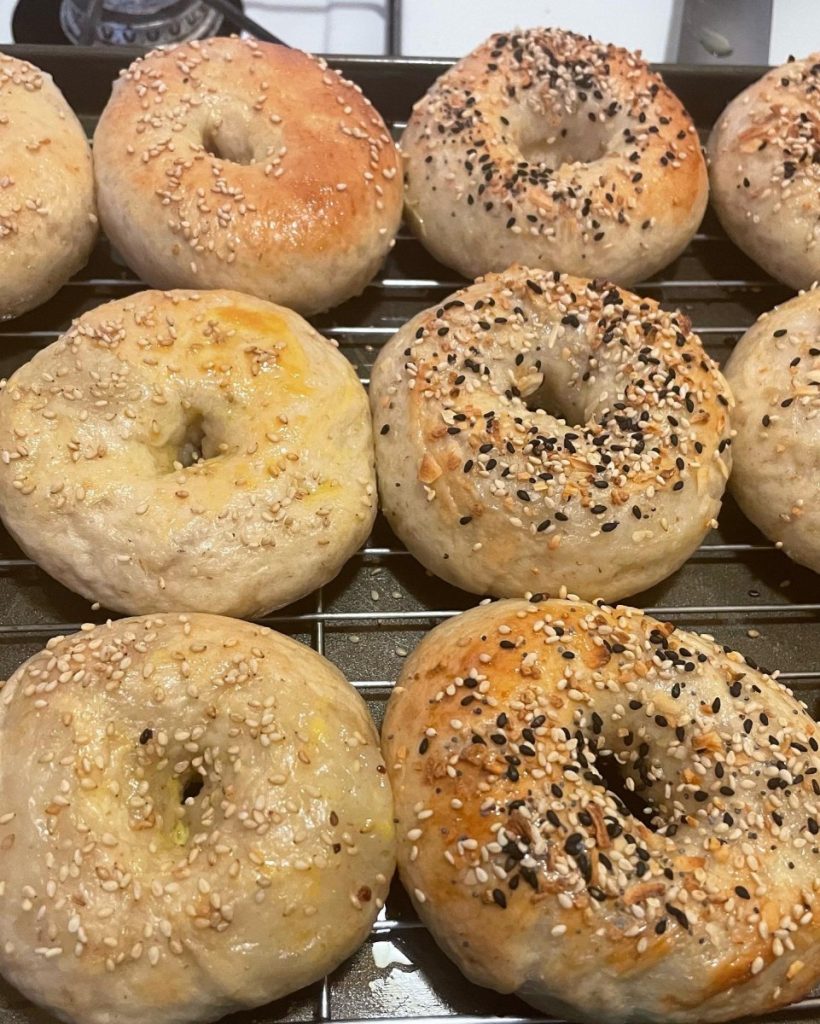
Carrot Oat Bran Muffins


These muffins are really good for you, but they taste like a treat. I was never a big fan of bran muffins made with wheat bran. I didn’t like the flavor. But I love the way these muffins taste.
I prefer the taste of oat bran over wheat bran. I find it has a natural sweetness. With the addition of carrots and raisins these muffins are moist, light and slightly sweet. They remind me of a cross between a muffin and carrot cake. Vanilla and orange zest makes them fragrant and tasty, too. With plenty of oat bran, they also provide healthy dietary fiber. I make these often, then freeze some for later. They make a great breakfast and an easy snack.
Carrot Oat Bran Muffins
1 c. milk or buttermilk
1 c. oat bran
1 egg
1/3 c. oil
3 T. brown sugar
1 t. vanilla
1 t. orange peel
1 c. shredded carrots
1 c. flour (all purpose or whole wheat pastry flour)
1 t. baking powder
1 t. baking soda
½ t. salt
½ c. raisins
In mixing bowl combine oat bran and milk. Add egg, oil, sugar, vanilla, peel and carrots. Beat well. Combine remaining ingredients in small bowl and mix well. Gently fold into bran mixture. Divide batter in 12 muffin cups that are either greased or lined with paper cups. Bake in a preheated 375-degree oven for 20-25 minutes. Makes 12.
Creamy Spinach Sauce


The sauce reminds me of creamed spinach, a favorite childhood dish of mine. The recipe makes enough to generously sauce a pound of pasta. It is very tasty and easy to make. Great when you need a home made meal, but don’t have a lot of time. You can also use this sauce on hot cooked rice or baked potatoes.
The recipe uses frozen spinach, but you can use fresh spinach , if you prefer. Just cook down 12-16 oz. of fresh spinach and use like the frozen spinach.
There is Parmesan cheese in the sauce. I like to serve extra on the side.
Creamy Spinach Sauce
1/4 c. butter
1 (10 oz.) package frozen spinach, thawed and drained
1 t. salt
1 c. ricotta cheese
1/4 c. grated Parmesan cheese
1/4 c. milk
Heat spinach in butter for 5 minutes. Add remaining ingredients and heat gently until warmed through. Do not boil sauce. Toss sauce over hot, cooked pasta. Makes 2 1/2 cups, enough for about a pound of pasta.
Winter/Spring Cooking Classes

Here is the listing of my Mentor classes for Winter and Spring 2024.
Classes fill up pretty quickly. If you can’t get in to a particular class, be sure to get on the waiting list. We often hold second classes when we have enough people on the waiting list.
Thanks.
Cooking Classes
Finnish Nisu Bread


I wanted to share one of my favorite bread recipes. I seem to bake bread more often in winter. This wonderful recipe came from the Finn grandmother of two good friends. I think of her every time I make this bread. She was a sweet and loving woman.
Nisu is a soft, slightly sweet bread, made special with the addition of cardamom.
Cardamom is a spice that has a rich, sweet flavor and fragrance. You can purchase it whole, in pods, or ground. Cardamom is often used in baked goods and adds a nice flavor to frosting and glazes. It is also used to flavor coffee. Cardamom is a little pricey. The good news is a little goes a long way. If you buy ground cardamom, you can store it in the freezer to keep it fresh longer.
This bread is lovely just toasted, and makes great French toast. It is also a nice sandwich bread. The recipe makes three loaves, so you can leave one out and freeze the other two.
Nisu
½ c. warm water
2 packages active dry yeast
2 c. milk
½ c. sugar
2-3 t. ground cardamom
1 t. salt
6 T. butter
6-7 c. flour, preferably bread flour
2 eggs
Dissolve yeast in water and set aside. Place milk in large bowl and add the sugar, cardamom, salt and butter. Heat in microwave until liquid is very warm. Butter might not be completely melted. Stir mixture until sugar is dissolved. Place 2 cups of flour in a mixing bowl and add the milk mixture, eggs and yeast mixture. Beat on medium speed for 3 minutes. Add 1 cup more of the flour and beat 2 minutes more. Stir in enough of the remaining flour to make a soft dough. Turn onto a floured surface and knead until dough is firm and smooth, about 10 minutes. Place in an oiled bowl and turn dough to coat. Cover with a towel and allow to rest until doubled in bulk, about 1 hour. Punch dough down and divide into 3 pieces. Roll each piece into a loaf and place in greased 9×5 inch bread pans. Cover and allow to rise until doubled in bulk, about 45 minutes. Bake in a 375-degree oven for 30 minutes or until golden and loaf sounds hollow when tapped lightly. Makes 3 loaves.
Vegetable Soup Base


I have made a lot of stuff from scratch- could I make my own soup base? I could, and I did! Not soup stock, but the stuff in jars that you just mix with water for instant broth. I wanted a no-meat soup base for when I was cooking meat-free.
I made a vegetable soup base that is a mixture of vegetables, both fresh and dried, herbs, mushrooms, nutritional yeast, spices and salt. There is pretty good amount of salt, but I wanted to be able to store it in the fridge and be safe.
It worked out that every teaspoonful of the finished base has less than 1/4 teaspoon of salt. Not great, but a lot less than bouillon cubes.
If you want to make yours with less salt or no salt- you’ll have to freeze the mixture in ice cube trays and take it out of the freezer as needed. Sort of like your own bouillon cubes.
The nice part is, I can now make a vegetable soup easily and I know exactly what is in it. It can also be added to chicken or other meat-based stocks, in place of the salt, to add extra flavor.
Homemade Vegetable Soup Base
4 carrots, peeled and cubed
3 celery ribs, washed and cubed
1 large sweet onion, peeled and cubed
3 green onions, washed and cut up
1 c. sun- dried tomatoes, soaked in water 30 minutes, and drained
1 c. dried mushrooms, soaked in water 10 minutes and drained
1 c. chopped cabbage
1 c. parsley, chopped
1/2 c. chopped sweet pepper
1/4 c. nutritional yeast, optional
2 T. turmeric
8 oz. salt- I used sea salt and used a scale to weigh it. It’s around a cup but will differ if you are using a coarse salt
Combine all ingredients, except the salt, in a food processor and blend until smooth. I have a decent size Cuisinart and still had to do this in batches. Combine in a bowl with the salt and stir well to blend. Store in a clean jar in the fridge until ready to use. I ended up with about 5 cups of soup base. To use, add about 1 teaspoonful to a cup of hot water for vegetable broth. Use less or more according to your taste. Use in place of salt in other soups, stews and sauces.
Pork Lo Mein

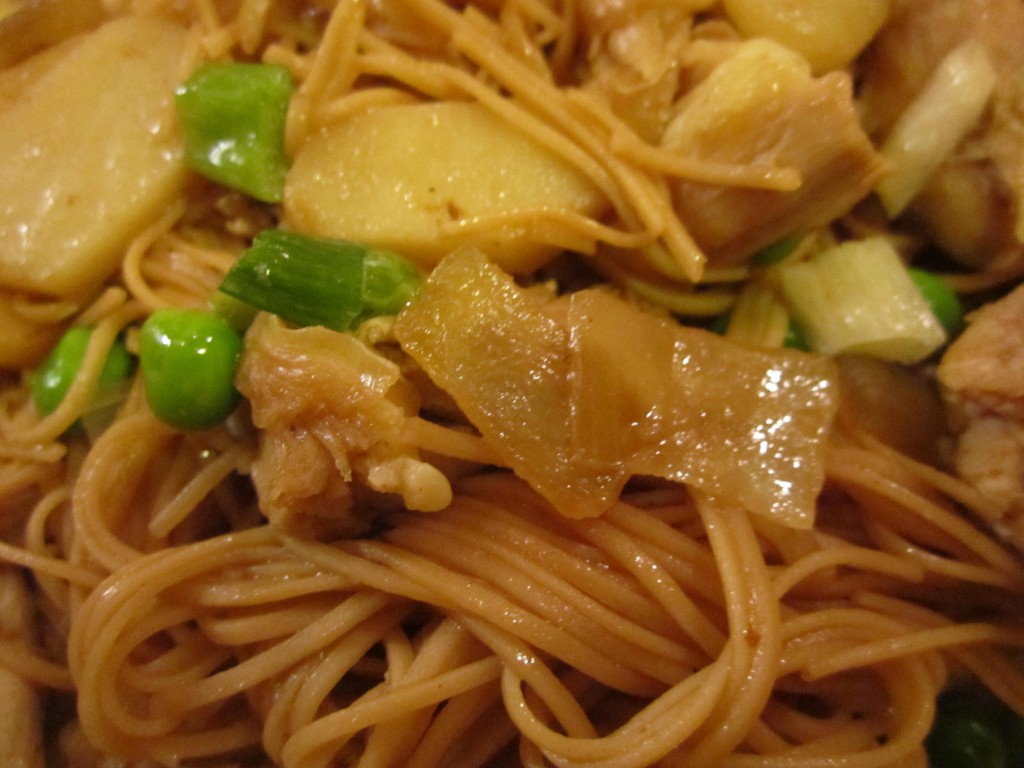
Just thought I’d share another recipe for cooked pork. Seems like a lot of us have leftovers. This one uses pasta and Asian flavors for a simple dish that is ready in no time at all. Tastes pretty good, too.
Pork Lo Mein
1 onion, chopped
2 T. oil
1 can sliced water chestnuts, drained
1/2 c. green peas- you could also use green beans
2 c. diced cooked pork
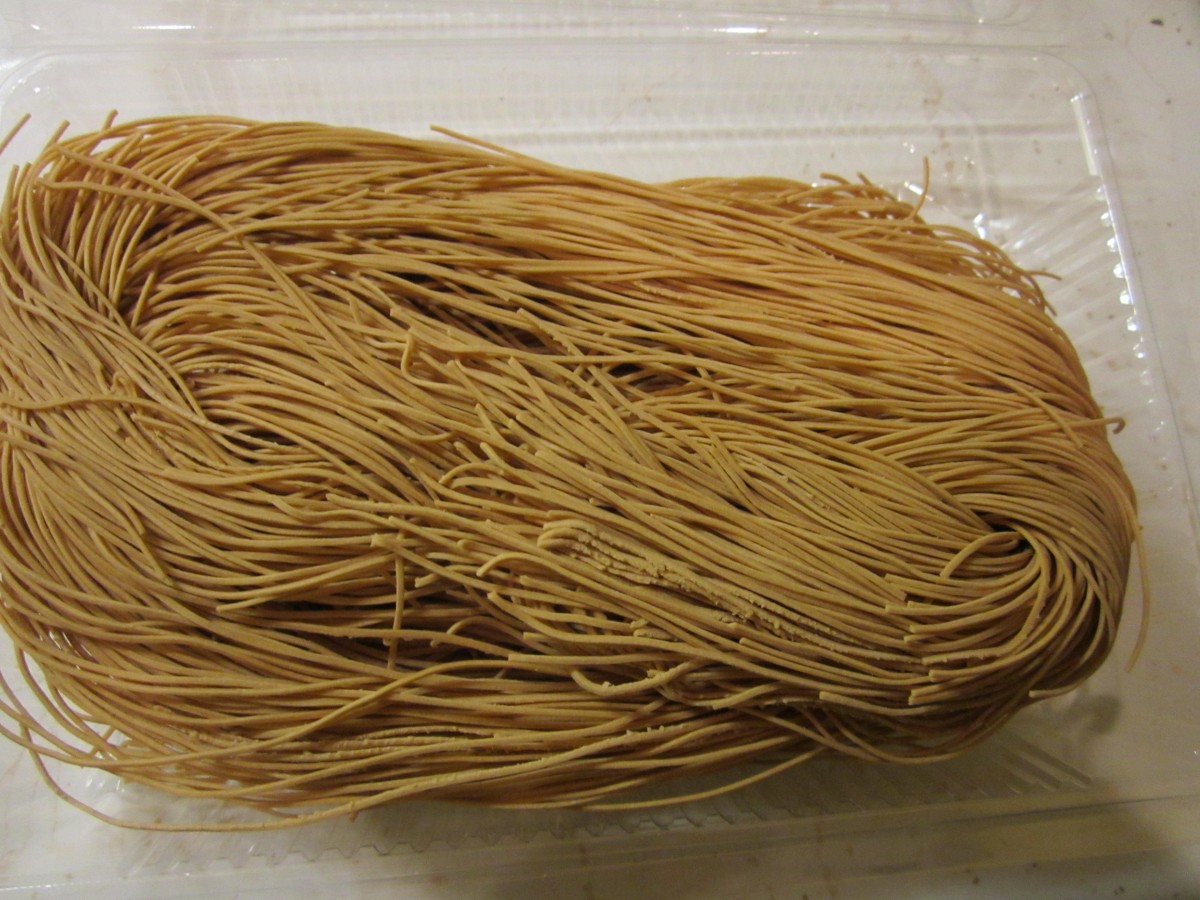
8 oz. angel hair pasta -I use a very fine noodle I get at the Asian market
soy sauce to taste
Hoisen sauce or oyster sauce to taste- you could also use stir-fry sauce
sesame oil
chopped green onions
Heat water for pasta. Heat oil in skillet and cook onion until browned. Add water chestnuts and cook 1 minute longer. While onion is cooking, cook pasta. Add peas to onion mixture and stir to combine. Add the pork and heat through. Drain pasta and toss into pork mixture. Season with soy sauce and what ever Asian sauce you have on hand. Drizzle with sesame oil and top with green onions. Serves 4.

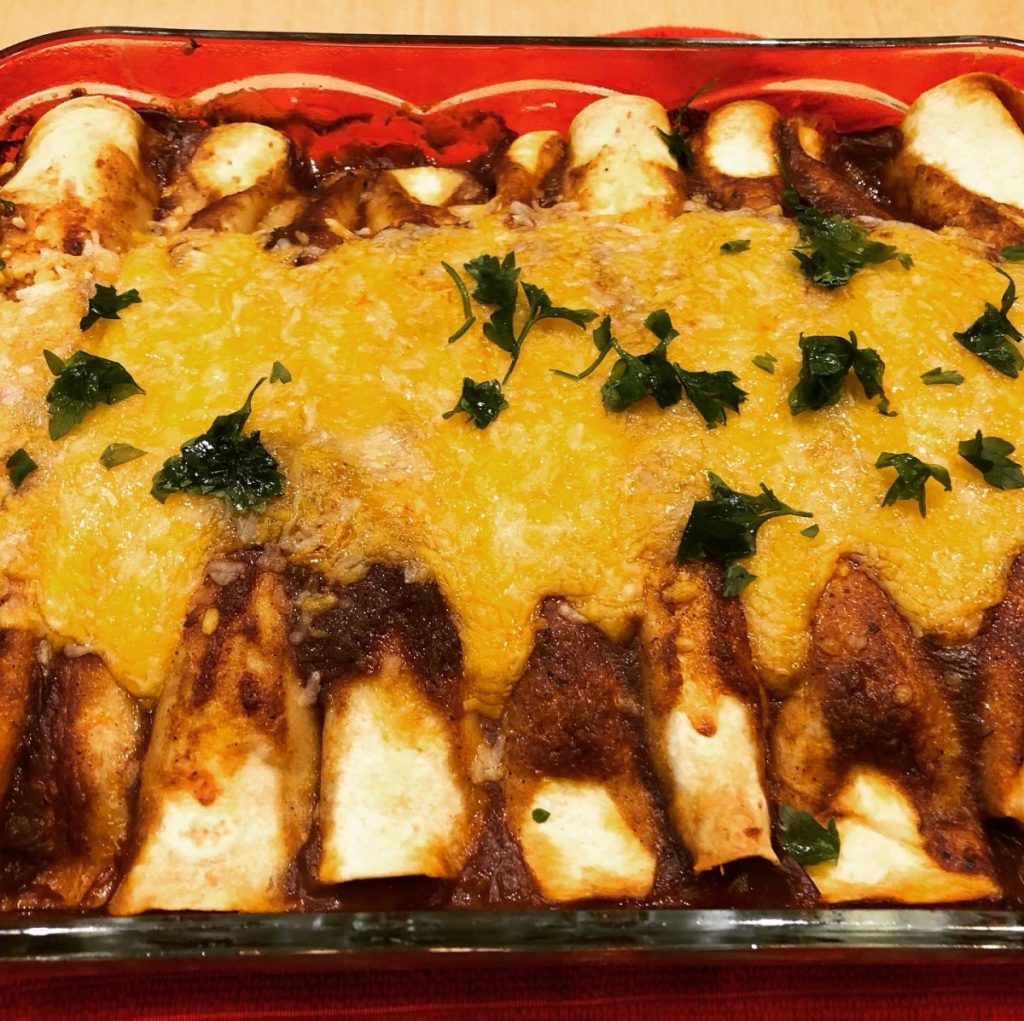
Pork Enchiladas


I love a good enchilada, all warm and cheesy. I really should make them more often.
These pork enchiladas are a great way to use up leftover pork roast.
Pork enchiladas are often made with a green enchilada sauce. I went with red, since I like red. I had a bottle of green enchilada sauce in my pantry, but opted to go with a homemade sauce. I love how simple the sauce is to make- and how good it tastes. Plus, when you make your own sauce, you can tweak it to suit your taste.
Same thing with the filling. I used what I had and what I like together. The pork, corn and beans are pretty traditional. I had planned on added canned green chilies, until I realized I was out. I did add some fine chopped onion and some sweet red pepper, just for flavor and texture.
That’s the nice thing about enchiladas. You can play around with fillings, based on your likes and what ingredients you have. You could just as easily make this recipe with chicken, beef or even turkey.
Just be sure to fill them up!! I used just about a cup of filling in each tortilla, when you factor in the pork mixture and the cheese. I had planned on using eight tortillas, but needed a ninth one to use up the last of the filling. Rolled them tight and crammed them in the pan. It worked out just fine.
After baking, when I went to cut them, I thought the bottom was a little tough. It tasted fine, though, just hard to cut into squares without using a knife. I thought, in hindsight, I should have put a little sauce on the bottom of the pan, before adding the rolled tortillas. I had plenty of sauce. So that is what I would suggest for you to do. Just 1/4 cup or so, to add a little moisture to the bottom of the dish. Other than that, I wouldn’t change much on this one.
So here is the recipe for my pork enchiladas. I also include the recipe for enchilada sauce. Hope you give them a try.
Pork Enchiladas
2-3 c. cubed or shredded cooked pork
1½ c. corn, cooked and drained well, I used frozen corn
1 can (15.5 oz.) black beans, rinsed and drained well
½ c. minced onion
1 c. diced sweet pepper
1 recipe enchilada sauce- recipe follows- or 2 c. bottled enchilada sauce
3 c. shredded cheese- I used a cheddar/Monterey Jack blend
8-9 (8-inch) flour tortillas
Non-stick spray or enough oil to grease the pan
Chopped parsley or cilantro, optional
Lightly grease or spray with cooking spray a 9×13-inch baking pan. You can put ¼ cup of the enchilada sauce in the bottom of the pan, if you like. Set aside. In mixing bowl, combine the meat with the veggies and ½ cup of the enchilada sauce. Stir to blend. Add salt, if needed. Place about ¾ of a cup of the mixture down the center of a tortilla. Add about 3 tablespoons of the cheese. Roll up tightly and place seam side down in the pan. Repeat with remaining ingredients until all the filling is used up. I was planning on using 8 tortillas, but had enough filling for an extra one. As the pan gets full, you have to kind of push them together to get them all in. You will have leftover cheese. Pour the remaining sauce down the center of the tortillas and cover with foil. Bake in a preheated 350 degree oven for 30 minutes. Remove foil and bake 15 minutes longer. Remove from oven, sprinkle the remaining cheese down the middle and return to the oven to melt the cheese. You can turn off the oven at this point. Just let the enchiladas sit in the oven for about 10 minutes. Remove from oven and let sit at least 10 minutes before serving. You can add a sprinkle of chopped parsley or cilantro just before serving. Serves 6-8.
Enchilada Sauce
3 T. oil
3 T. flour
1 T. chili powder, or a bit more to taste
1 t. paprika
1 t. cumin
1 t. garlic powder
½ t. oregano
½ t. salt, or more to taste
2 T. tomato paste
1 t. apple cider vinegar
Fresh crushed black pepper
2 c. stock- chicken, veggies, I used pork
Combine oil and flour in a small saucepan. Cook over medium low heat until mixture warms and thickens. Add spices, tomato paste and vinegar. Heat a few minutes, stirring constantly. This will add a toasted flavor to the spices. You should smell them more as they warm up. Slowly add the stock, whisking until smooth. Keep cooking, turning heat up to medium. Once mixture thickens and gets bubbly, turn down to low and simmer a few more minutes. Makes 2 cups.
My Best Ever Cauliflower Soup!!


My friend Kim and I used to laugh at the covers of all the December issues of women’s magazine. They were lined up by the check-out at every grocery store. They always declared it was “The Best Christmas Issue Ever!!!” It was just something that struck us both funny.
When I made this soup, I knew it was extra good. A friend was over and I gave him a bowl to taste. He looked at me and said, wait for it…”This is the best cauliflower soup you ever made.”
I didn’t have a name for the soup yet, so I decided to call it My Best Ever Cauliflower Soup. I thought it was funny- I hope you do, too. It is also a nod to my sweet friend. Kim would have gotten the joke.
The soup lives up to its name. It has plenty of flavor, even without the toppings. With the toppings, it becomes something very special.
If you are looking for a really good and easy soup recipe- I suggest you give this one a try.
My Best Ever Cauliflower Soup
3 T. oil
1 large onion, chopped
1 small head cauliflower, chopped- about 6 cups
1 qt. chicken stock, but you could use beef or vegetable stock instead
1 qt. canned tomatoes, I had home canned, you could use a 28 oz. can of tomatoes
4 ribs celery, chopped
2 potatoes, peeled and diced
2 T. curry powder, I used my homemade curry powder
2 t. turmeric
1 t. cumin
Salt and pepper to taste
Mushroom topping:
2 T. oil
1 onion, diced
1 lb. baby Portobello mushrooms, sliced
3 T. chopped parsley
Salt and pepper to taste
Additional toppings:
Green onions, sliced
Cashews, you could also use peanuts
Sesame oil
Heat oil in soup pot and cook onion until tender. Add cauliflower and cook about 5 minutes longer. Add remaining ingredients and cook, uncovered, until vegetables are very tender, about 30 minutes. While soup is cooking, make mushroom topping. Heat oil in medium skillet and cook onion until golden. Add mushrooms and cook until mushrooms are almost caramelized, about 10 minutes. Add parsley and cook a few more minutes. Set aside until ready to use.
Once soup veggies are tender, puree until smooth. To serve soup, ladle some hot soup into a bowl. Top with some of the mushrooms and add a few green onions, cashews and a drizzle of sesame oil. Serves 6.
Tequila and Wine Punch


I would never have thought that combining tequila and wine would taste so good, but it really is a great drink for parties. I had a request for this recipe, and I am going to share it with you, the best that I can.
I normally am pretty good about measuring ingredients and writing things down, but a friend actually made it.
My friend Sue, is a very good cook. She has great instincts when it comes to flavors. She is also lovingly known as the Queen of Substitutions. She will start with a recipe and then just add what she has on hand. Often things work out, sometimes, not.
This is one of those times when things worked out very well, indeed. She was watching TV and saw a recipe for a tequila and wine punch. She had the tequila and wine, but not quite all of the other ingredients, so she kind of made it up as she went along. The end result was a drink that was not too sweet and very refreshing. She used bottle margarita mix, but I included a recipe to make your own.
So here is the recipe.
Wine and Tequila Punch
1 1/2 c. tequila
1/2 bottle of wine, use what you have on hand, Sue did
1 c. margarita mix*
1 c. orange juice
1 or 2 oranges, sliced thin
ice
In pitcher, combine tequila with wine, mix, juice and oranges. Add lots of ice, stir and serve.
You can make your own margarita mix. Combine 1 cup of water and one cup of sugar. Bring to a boil, stirring to help dissolve the sugar. Add 2/3 cup each of lemon juice and lime juice- fresh squeezed preferred. Store in fridge until ready to use.
Coffee and Spice Rubbed Pork Roast

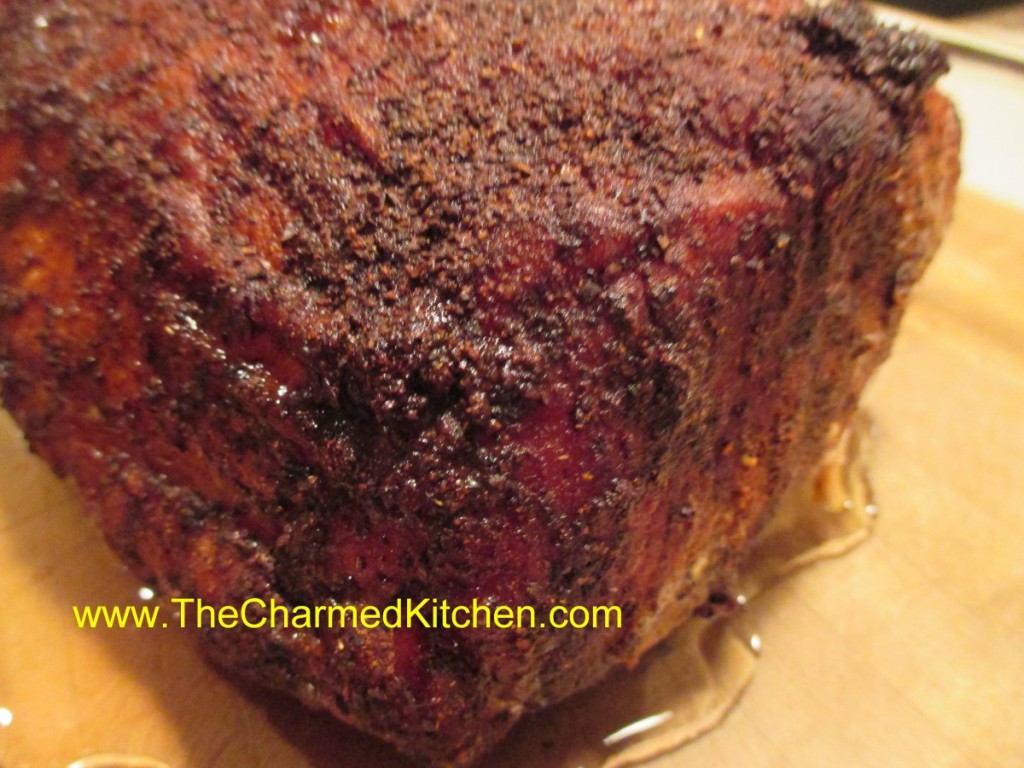
Since so many people are making a pork roast of some sort for the New Year, I thought I would re-post this recipe. I’ve had several requests for it in the last few days.
It is really good- with a rich blend of spices and coffee. The spice rub would be great on lamb or beef. The rub can also be used on pork chops or ribs.
I am thinking of trying it on duck soon. Enjoy and Happy New Year!!
Coffee and Spice Rub
¼ c. ground coffee
¼ c. brown sugar
2 T. paprika
2 t. each cayenne pepper, cumin, garlic powder, salt and ginger
1 t. allspice
½ t. cinnamon
Combine all ingredients and stir to mix well. Store in a cool place, preferably in the refrigerator. Rub can be used on roasts or on chops, steaks and smaller cuts of meat. If using on chops that are being pan fried watch carefully as the sugar in the recipe could burn.
To use the rub: several hours before cooking, or even the day before, place the roast in a shallow pan and sprinkle heavily with the rub. Use your hands to spread it evenly and cover completely. Place plastic wrap on clean surface and transfer roast to the wrap. Fold plastic wrap to cover roast , using more plastic wrap as needed so meat is sealed well. Return to fridge for at least a couple of hours, or overnight. When ready to cook, bring roast out and allow to stand 30 minutes. Remove plastic wrap and place roast in a roasting pan on a wire rack.
For the pork roast allow about 20 minutes per pound. Larger roasts need a little less time per pound. You want an internal temp of 145. Check with a thermometer, to be sure. You don’t want to overcook the pork. When the roast is finished- remove from oven and let stand 10 minutes, or a little longer, before slicing.