Apple Cider Sorbet

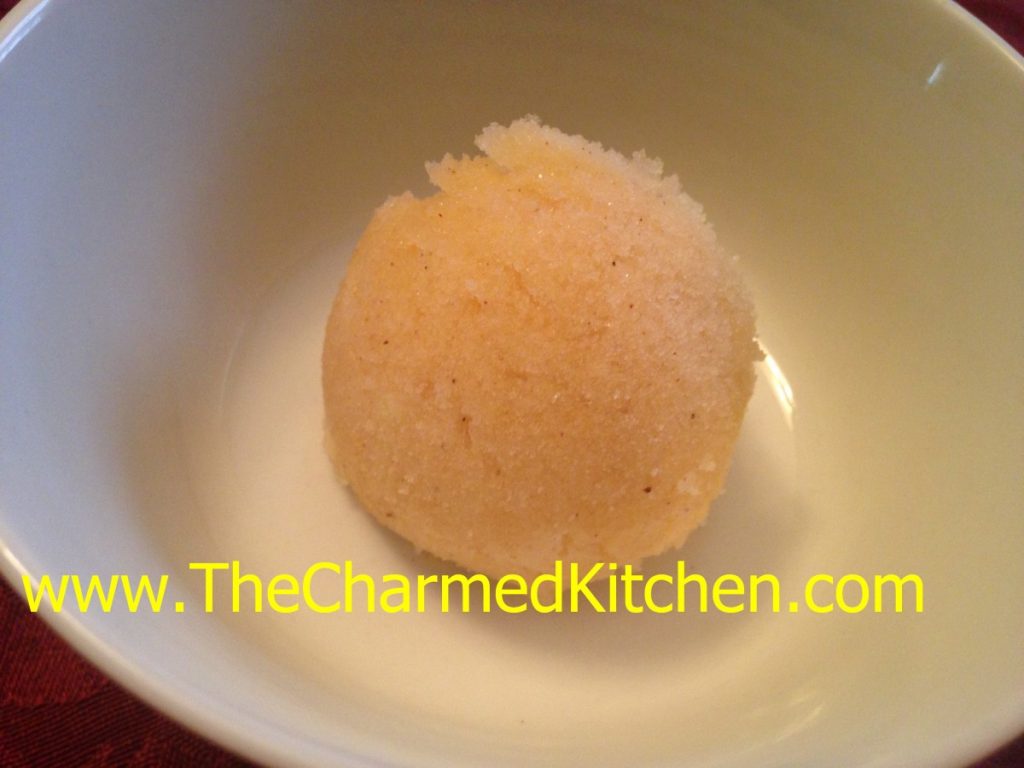
I’ve had my share of warm apple cider, but I never froze it before. This sorbet is such a nice dessert option. Light and naturally sweet, it is the perfect finish for any meal.
The cider is boiled down, to concentrate the sweetness. Then fresh apples are added and pureed. The mixture gets frozen, then pureed one more time- to really smooth out the texture. Cinnamon sticks impart their flavor when boiled in the cider. You could certainly used ground cinnamon, if you don’t have cinnamon sticks. Feel free to add other spices, too, like allspice, cloves or ginger.
Over the years, I have made all sorts of sorbets. I love the light, creamy texture. I am not sure why I never tried to make an apple sorbet before. I am so glad I finally did. This is a nice, lighter option for dessert. It is also a dairy-free option, for those who can’t have ice cream.
Apple Cider Sorbet
6 c. apple cider
2 (4-inch) cinnamon sticks
3 apples, peeled, cored and diced
In saucepan place cider and cinnamon sticks. Cook over medium high heat, uncovered, until cider has cooked down to 2 cups. Remove cinnamon sticks and discard them. Cool cider and combine in food processor with the apples. Puree until smooth. Transfer mixture to a container with a lid. Freeze until solid. Remove from freezer and allow to soften for a few minutes. Break into chunks and puree in processor, until smooth and creamy in texture. You can serve it right away, or return to freezer to enjoy later. Makes 1 quart of sorbet.
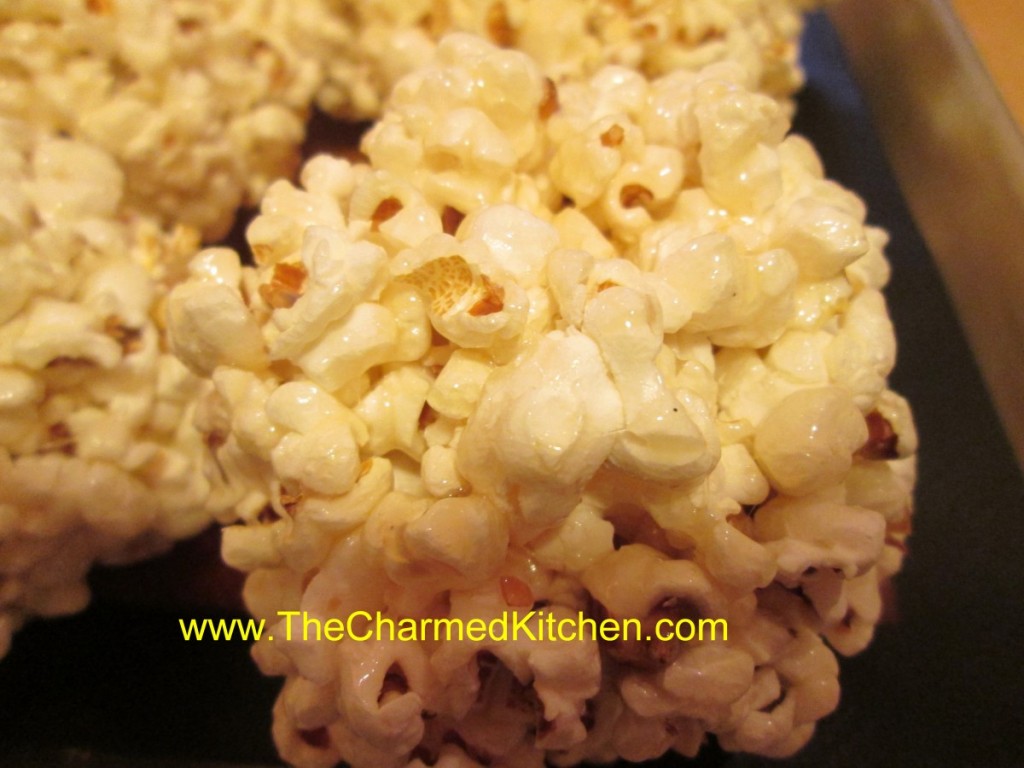
Homemade Popcorn Balls

I have fond memories of eating popcorn balls when I was a kid. One memory was during the summer. An amusement park near my home was famous for their popcorn balls. Every time we went there, we would end the day with popcorn balls.
The other memory was making our own, around Halloween. They seem to be a part of more than a few Halloween parties when I was younger.
I don’t make them often, but popcorn balls are always a special treat for friends and family. This recipe is pretty easy. Kids, supervised, could help make them. You just have to make sure the mix cools down enough before you let them form the popcorn into balls.
I am a bit of a purist and enjoy them plain, but you can add Halloween themed candies to the mix, to dress them up for a party. Candy corn or black and orange M&M’s would both work.
The recipe calls for corn syrup. If you don’t want to use corn syrup, my recipe for a corn syrup substitute, (sugar syrup) is listed below.
Homemade Popcorn Balls
9 c. popped popcorn
1 c. sugar
1 T. butter
1 T. vanilla
1 c. corn syrup*
Place popcorn in large bowl and set aside. Combine sugar, butter, vanilla and corn syrup in a saucepan. Heat and boil until thick, about 4 minutes. Pour over popcorn. Stir until well coated. Let cool until safe enough to handle. With buttered hands form mixture into balls. Store wrapped tightly in plastic wrap until ready to eat. Best eaten within a few days of making. Makes about 8.
*If you don’t have corn syrup- or don’t want to use it here is a way to make a substitute for it.
Sugar Syrup- corn syrup substitute
3 cups granulated sugar
1 cup Water
1/2 tsp. Cream of Tartar
1/4 t. salt
Combine ingredients in a large saucepan. Bring to a boil and cover the pot. Reduce to a simmer and cook covered for 5 minutes. Uncover and cook to soft-ball stage. Stir frequently.
Soft ball stage occurs at 235-245 degrees. This stage can be determined by dropping a spoonful of hot syrup into a bowl of very cold water. In the water, use your fingers to gather the cooled syrup into a ball. If it has reached soft-ball stage, the syrup easily forms a ball while in the cold water, but flattens once removed from the water.
Remove from heat. Cool and store at room temperature. It will keep well for a month or two.
Halloween Quesadillas


OK, maybe I’m taking the whole Halloween theme too far. I was making quesadillas the other day, and realized that the ingredients were black, orange and green. Thought the combination would be perfect for a Halloween party.
Quesadillas are a fun party food already, and by using black olives, orange sweet peppers, green chilies, onions and cheddar cheese, they fit in well with the color scheme for Halloween. They taste great, too, which is always the most important thing in the end.
Of course other ingredients can be used. I have used nopales and green enchilada sauce.
I pan fried these, but you can also bake them in the oven. They can be made ahead, and warmed up before serving. Serve with a nice blood- red salsa. Ok, I’ll stop now.
Halloween Quesadillas
Large flour tortillas
oil
sliced or shredded cheese
sliced black olives
chopped orange sweet peppers
chopped sweet onion
diced green chilies, fresh or canned
Mix olives with veggies and set aside. Place tortilla on work surface and spread one half with some of the veggie mixture. Top with some of the cheese and fold over. Press slightly. Repeat with remaining ingredients. Heat oil in skillet and cook quesadillas over medium heat until golden on both sides and heated through. Remove to cutting board and cut into wedges before serving. Serve on a platter with sour cream and salsa, if desired.
Note: If you would rather bake the quesadillas assemble as directed above. Place on a baking sheet and brush with a little oil. Bake in a preheated 425 degree oven until golden, about 15 minutes
“Bat” Wings

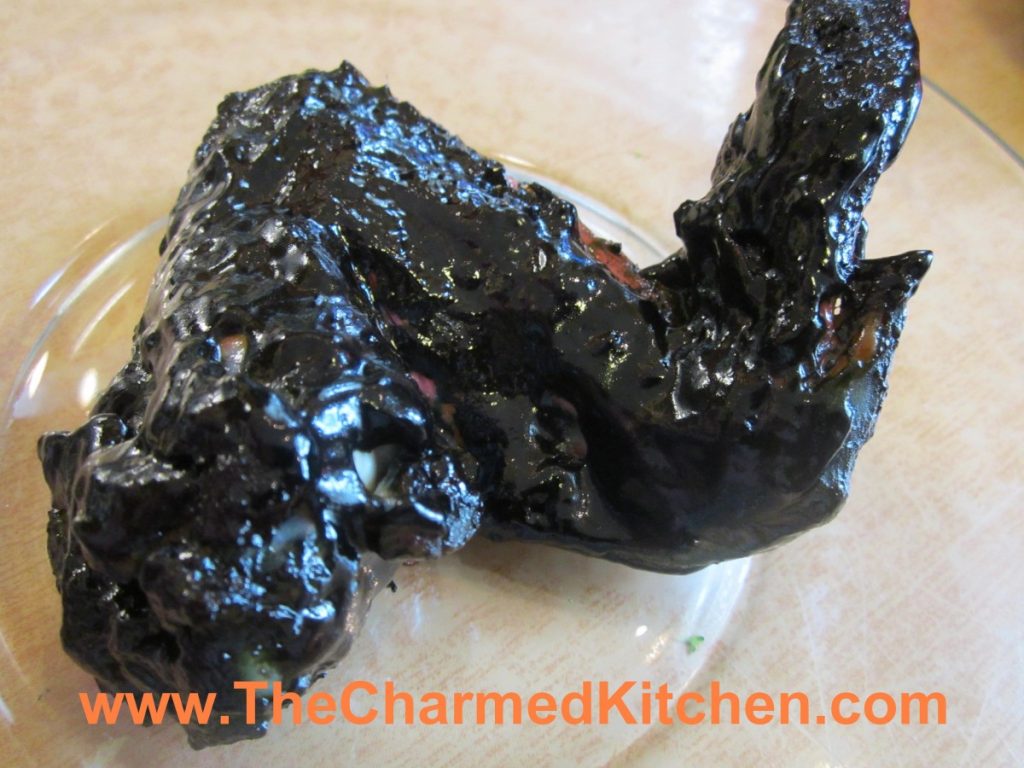
With Halloween fast approaching I thought I’d share this recipe for bat wings. OK, not really bat wings, but you already knew that. I just add black food coloring to barbecue sauce and use it to color chicken wings. Because the barbecue sauce is already pretty dark, you don’t need much food coloring.
I made a batch for a Halloween party a few years ago and someone actually asked if they were real bat wings.
A word of warning- when you use black food coloring it will transfer to you. No matter how careful you are when you eat the wings, you’ll end up with purple fingers. Also, for the best effect, keep the wings intact- no trimming off of the tips. You can separate the drums before serving, if you like. Makes eating a little easier. They look pretty cool when set out on the table. Creepy- but very tasty.
Bat Wings
2-3 lbs. whole chicken wings
salt and pepper
1 c. barbecue sauce- store bought or home made
black food coloring- handle carefully- it stains
Place chicken wings in a roasting pan, season with salt and pepper and bake in a preheated 400 degree oven for 30 minutes. Meanwhile in medium bowl combine sauce with food coloring. Add just a little black food coloring at a time. Too much will alter the flavor of the food. Remove wings from the oven and dip them in the bowl of sauce. Turn to coat. Place wings on a clean baking sheet and return to the oven. Bake an addition 45 minutes. You can baste them with additional sauce during the baking, if you like. Place on a serving platter and provide plenty of napkins.
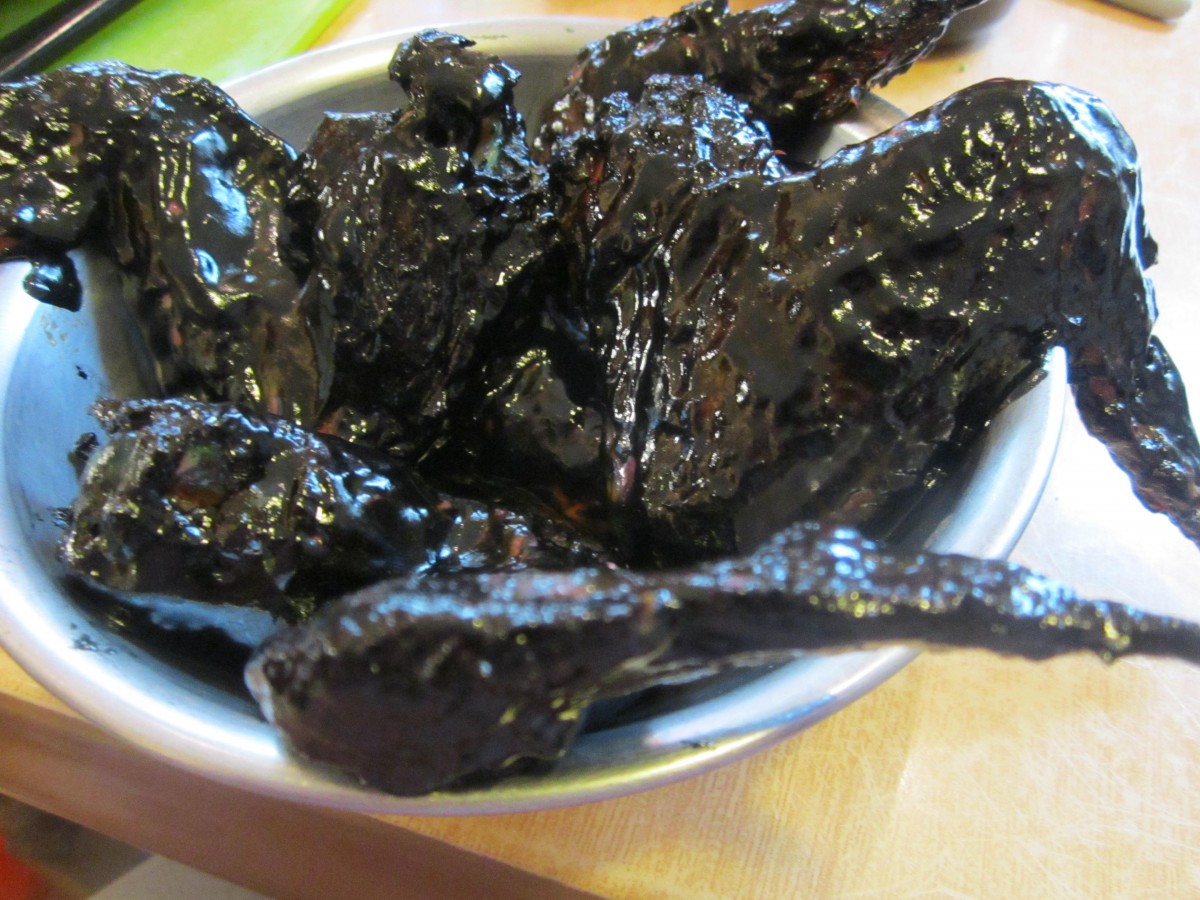
A pile of “bat” wings
Sweet Potato Pancakes


I am a big fan of sweet potatoes. They are so versatile to cook with. For me, just roasting or steaming a sweet potato, and enjoying with salt, butter and a sprinkle of nutmeg is fine. This time of year, I find myself cooking with sweet potatoes all the time.
I was looking for something different to do with sweet potatoes. I didn’t want to just roast or steam them. I ended up shredded them and making sweet potato pancakes. I had duck fat so that is what we used to fry them in.
They were amazing. Crispy on the outside and tender in the middle. I am definitely going to make them again. I could see making smaller pancakes and serving as an appetizer. Here is the recipe.
Sweet Potato Pancakes
2 small sweet potatoes, peeled and shredded- you want to end up with 3-4 cups of shredded sweet potatoes- 1 medium /large one would also work
2 eggs
½ c. panko bread crumbs
1 T. parsley flakes
1 t. hot pepper sauce, or to taste
½ t. garlic powder
½ t. onion powder
Salt and pepper to taste
Oil for frying- we used duck fat and it was wonderful
Combine all ingredients in a mixing bowl and stir until well mixed. Heat oil or fat in large skillet to 350 degrees.* Spoon batter into skillet in 4-5 pancakes, depending on the size you prefer. Cook until golden on one side- and starting to firm up- about 5 minutes. You might have to cook them in two batches – depending on the size of your pan. Don’t over crowd. They are tricky to turn over. Turn over carefully and cook at least another 5 minutes or until both sides are golden brown and crispy. Makes 4-5
* A little trick to know when your oil is hot enough. Place an un-popped kernel of popcorn in your pan with the oil when you are heating it up. Popcorn pops at 350 degrees. When the popcorn pops – it is time to add the batter.
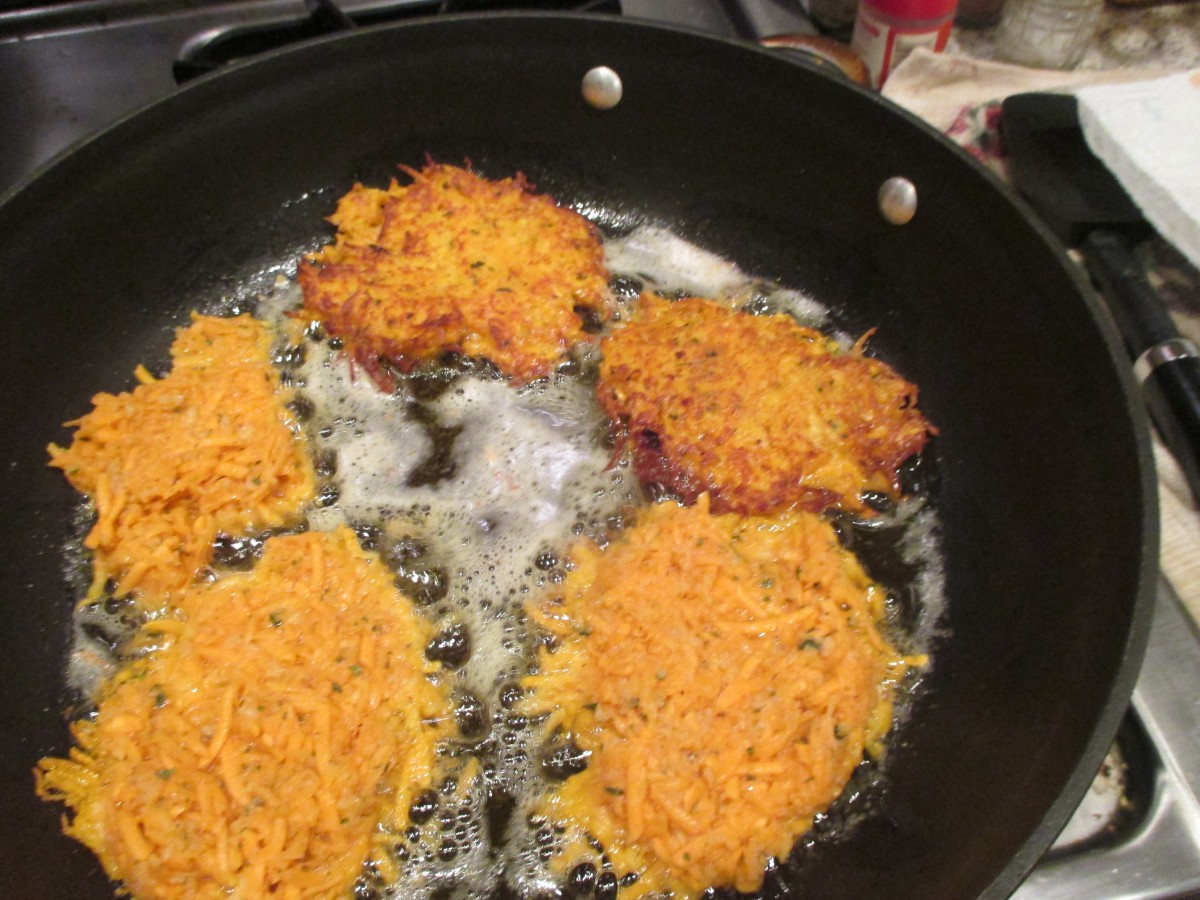
Sweet potato pancakes cooking
Jack O’ Lantern Cinnamon Sugar Cookie


This is a fun treat for kids to make for Halloween. It is a giant cinnamon sugar cookie, baked in a pizza pan, and decorated to look like a Jack o Lantern. They are fun to make for a Halloween party, but can also be made by kids at the party. If you get aluminum (disposable) pizza pans, you can have each kid bake and decorate their own cookie to take home. Once the cookie dough is made, it is spread in a pizza pan, then baked. When the cookie is cooled, spread with orange-tinted buttercream and let the kids make a face on it with assorted candies or frosting, tinted different colors.
Jack O Lantern Cinnamon Sugar Cookie
½ c. butter, softened
½ c. packed brown sugar
1/3 c. granulated sugar
1 egg
1 t. vanilla
1 c. flour
2 t. cinnamon
Orange tinted buttercream- recipe follows
Peanuts, M&M’s or candy corn
Beat together butter and sugars until smooth. Beat in egg and vanilla. Stir in flour and cinnamon then press into ungreased 12-13-inch pizza pan. Bake in a 350-degree oven for 15-18 minutes. Remove from oven and cool down before frosting. Use remaining ingredients to make a Jack-o-lantern face on the pumpkin. Makes 12 servings.
Classic Butter Cream
1/3 cup butter
4 1/2 cups sifted confectioners’ sugar
1/4 cup milk
1 1/2 teaspoons vanilla extract
In a bowl beat butter or margarine until fluffy. Gradually add 2 cups of the confectioners’ sugar, beating well. Slowly beat in the 1/4 milk and vanilla. Slowly beat in remaining sugar. Beat in additional milk, if needed, to make of spreading consistency. Tint with food color, if desired.
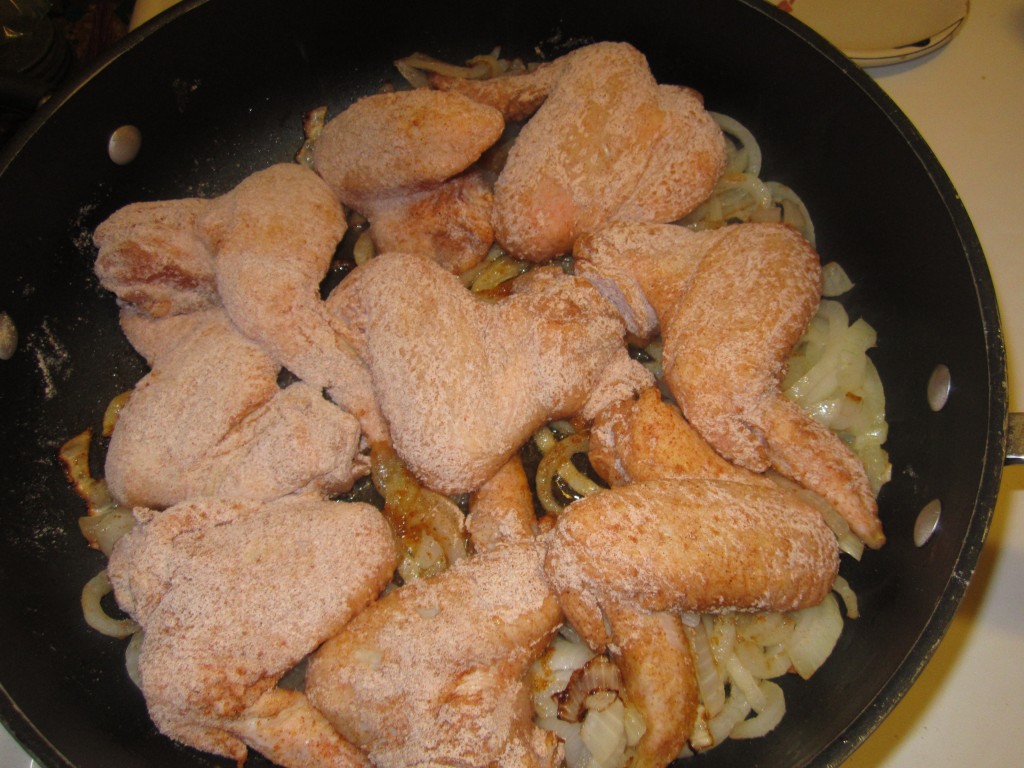
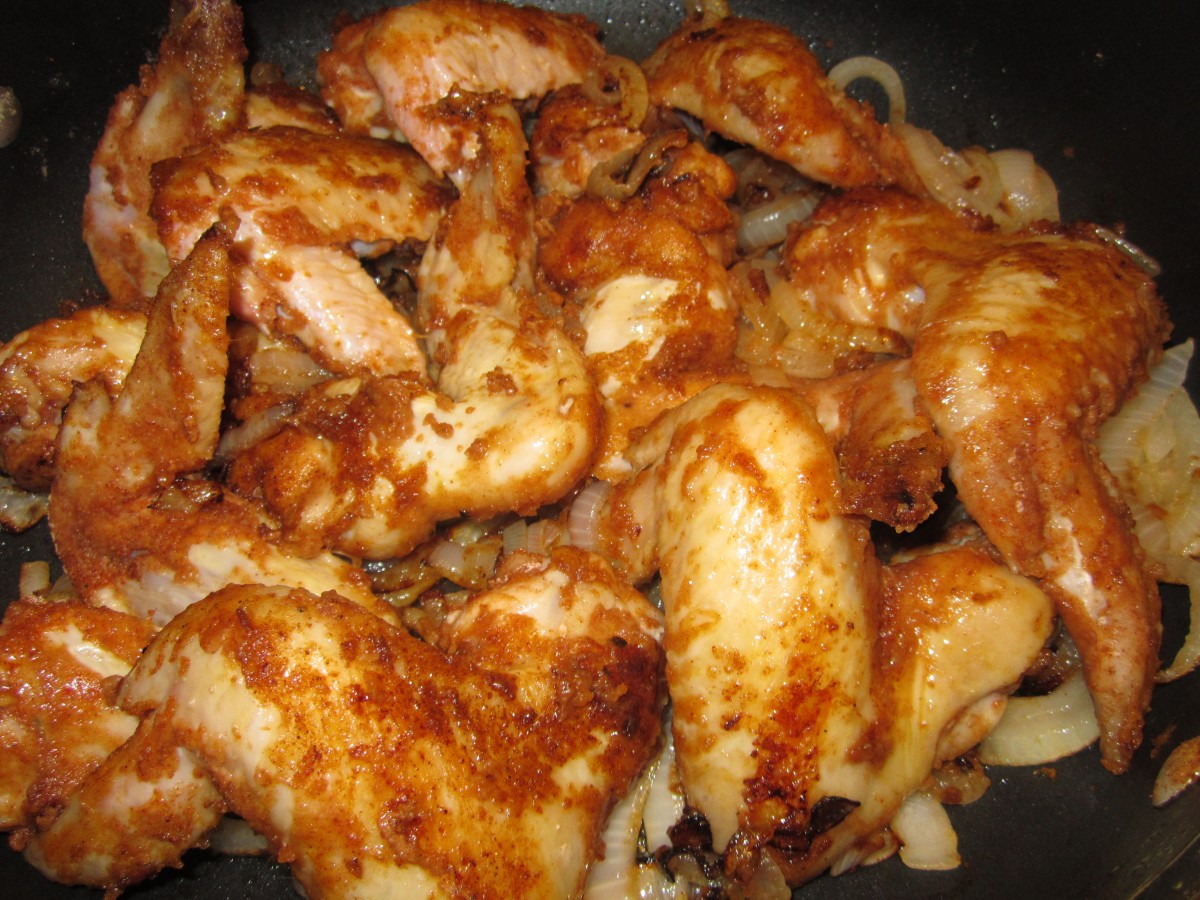
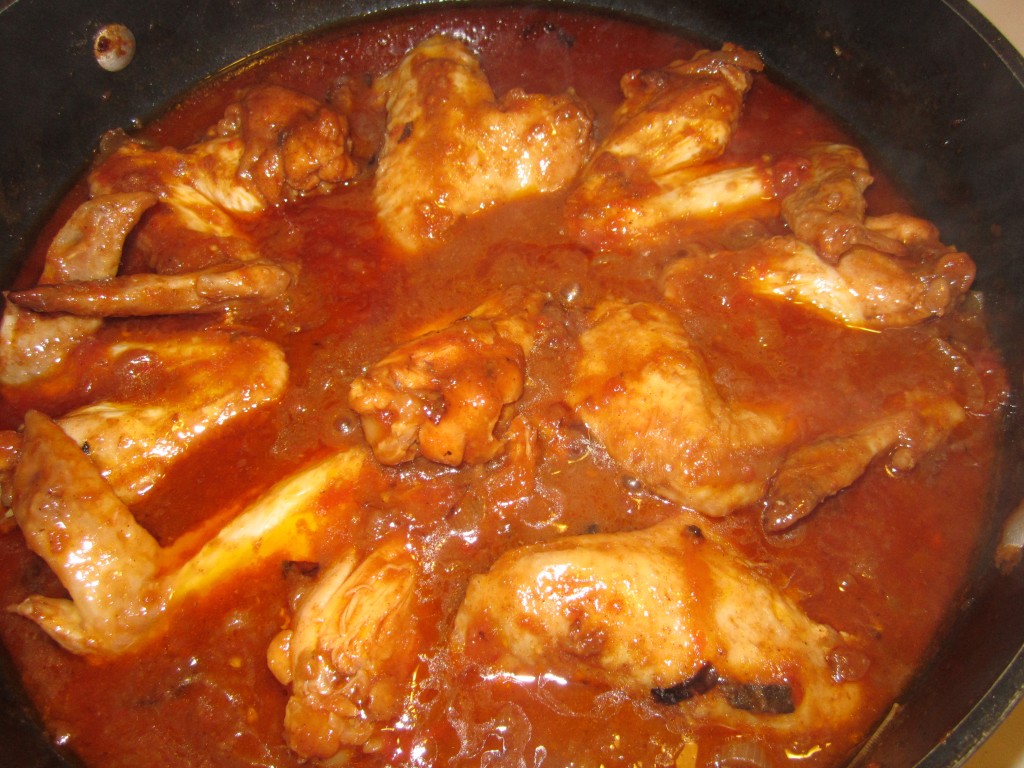
Ethiopian Chicken

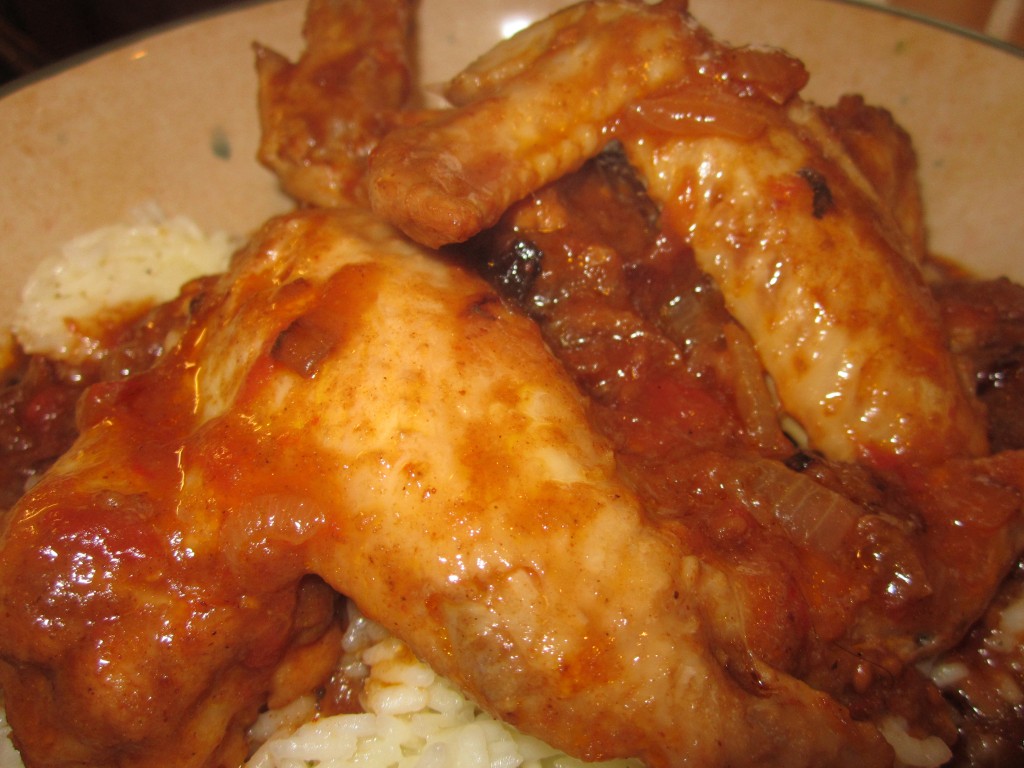
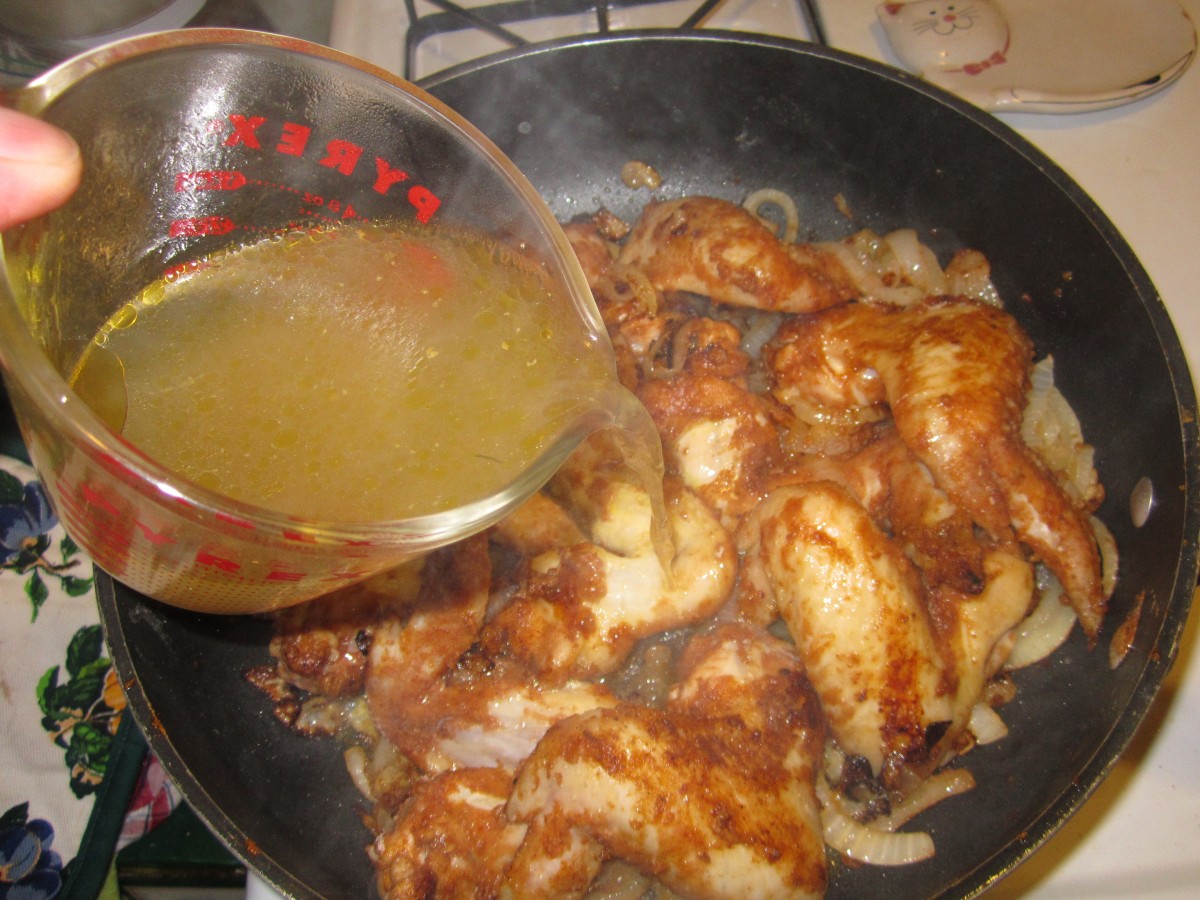
With a mix of warm and sweet spices Ethiopian Chicken is full of rich flavor. Easy to make, too. You can make it with any cut of chicken. I used wings in this batch. Traditionally the chicken should be on the bone, but feel free to swap out boneless chicken, if you prefer. Just reduce the cooking time by 15 minutes.
Ethiopian Chicken
1 chicken, cut into pieces or 3-4 lbs. chicken pieces like wings, thighs or drumsticks
1 T. paprika
1 t. each cayenne pepper, cumin, garlic powder, salt and ginger
1/2 t. allspice
1/4 t. cinnamon
1/2 c. flour
3 T. oil
2 large onions, sliced thin
1 c. tomato sauce or 2 c. stewed tomatoes
1 c. chicken stock
Combine spices with flour in a plastic bag. Add the chicken a few pieces at a time and shake to coat. Set aside. Add onion to hot oil in large skillet and cook until onions are browned. Add chicken pieces and brown on all sides. Add sauce and stock. Cover and simmer 35 minutes, adding water if sauce gets too thick. Serve with a cooked grain such as rice, millet, quinoa, wheat berries etc. This dish is also good served with lentils and cooked greens. Serves 4.
Spiced Cauliflower and Carrot Soup


I love to cook with what I have on hand. Some of my best meals have come out of a forage in my fridge, freezer and pantry. This is one of those recipes.
I had been to a favorite produce market and they had the most beautiful fresh cauliflower. I couldn’t resist. I had also picked up some other produce. I had picked up a lot of other produce.
I can’t help myself. I see the bounty of fruits and veggies and I buy more than I should. Not a surprise, the cauliflower got pushed to the back of the fridge.
A few days later, I was looking for inspiration- and there it was- this lovely head of cauliflower.
I thought of soup right away. I often use cauliflower in soup. I also had a bunch of carrots, so I decided to use them together. The combination, paired up with some of my favorite seasonings, made for an excellent meal.
I served it with a drizzle of hot sauce, and a little fresh parsley from the garden. This soup freezes well, so I may save some for another day.
While I ate it hot, this soup could be served cold.
Spiced Cauliflower and Carrot Soup
3 T. oil
1 large onion, chopped
3 cloves garlic, minced
1 small to medium head of cauliflower, cut into florets
1 lb. carrots, peeled and chopped
1 sweet potato, peeled and sliced
2 c. diced fresh tomatoes or canned tomatoes, I used a pint of home canned tomatoes.
4 c. chicken or veggie stock*
2 T. curry powder
1 T. ground cumin
2 t. smoked paprika
2 t. ginger
Hot pepper sauce, to taste, plus extra for topping the soup
Salt and pepper to taste
Fresh chopped basil, cilantro or parsley for garnish, optional
Heat oil in soup pot and cook onions until golden brown. Add garlic and cauliflower and cook another couple of minutes, being careful not to burn the garlic. Add the rest of the veggies, the stock and spices and bring to a boil. Reduce heat to a simmer and cook soup, covered, until veggies are tender. I like the soup to cook at least an hour so the veggies are really tender. Puree soup until smooth. I use an immersion blender. If you are using a standard blender, and the soup is hot, puree in small batches and remove the middle piece from the blender lid. Place the lid on the blender and cover with a towel. Hot soup will splash up, and you need to be careful not to get burned. Adjust seasonings. Can be served hot or cold and freezes well. Drizzle some hot sauce on soup when serving and some chopped fresh herbs, if you like.
* You might need a little more stock, depending on how thick you like your soup. I often add extra stock at the end.
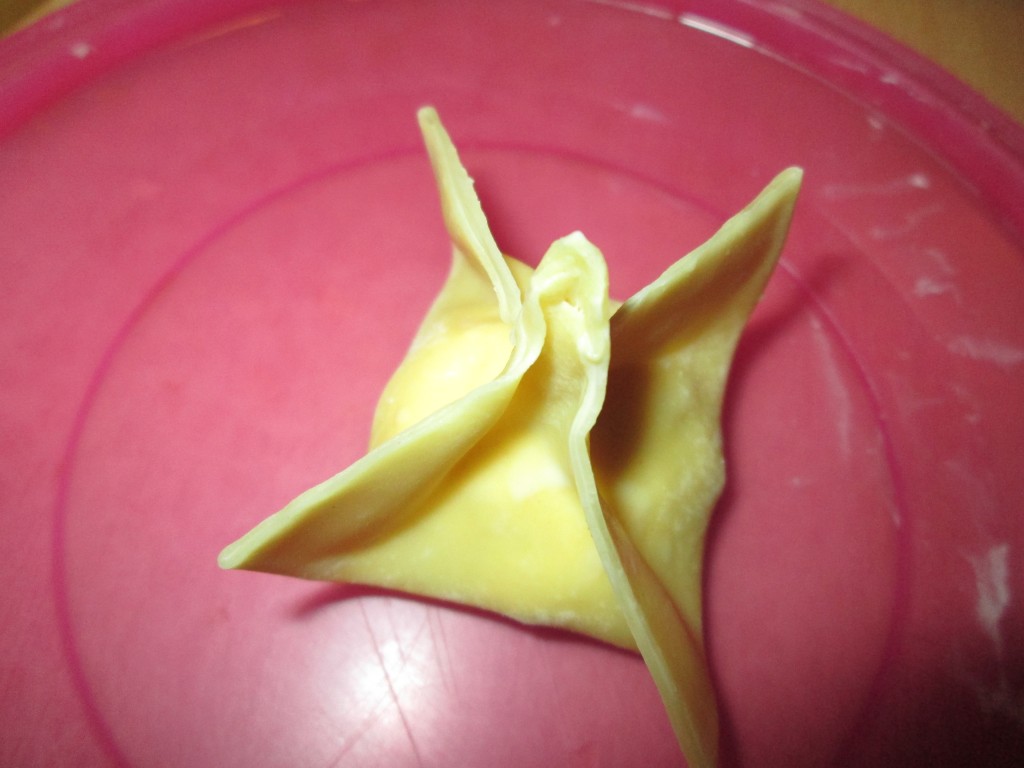
Crab Rangoons


These tasty bundles of crabby/ cheesy goodness are so simple to make. Because they are small- I don’t use a lot of oil to deep fry them. Just a couple of cups of oil in a small saucepan- fry a few at a time and you are done in no time at all. Of course, if you have a big crowd over, you might want to use a bigger pot, with more oil. A wok works well for frying them, too.
There are two ways you can go with the filling- real crab or surimi, the faux crab. That is not my call to make. It is up to you. For class last week, I used real crab meat. Several people remarked on how much they liked the flavor. I explained that most crab rangoons you get at restaurants use surimi.
I have baked them. We fried them.
You have some options with folding them. We used pre-made wrappers I bought at the local Asian market. You can fold them into triangles, like the picture above, or into little bundles like the picture at the end of this post. They taste wonderful no matter how you shape them.
So here is the recipe I like to use
Crab Rangoons
1 can (6 oz.) crab meat, drained well
1 (8 oz.) package cream cheese
1 t. horseradish
dash of hot sauce
wonton wrappers
oil for frying
Combine crab meat with cream cheese, horseradish and hot sauce. Place a wonton wrapper on work surface and place a teaspoonful of the crab filling in the middle. You have several option for how to fold them. You can do a simple fold by dampening the edges with a small amount of water, adding some of the crab mixture to the middle and folding in half, press edges to seal or crimp edges. This works great with round wrappers, but square wrappers can also be used. For the classic bundle shape, dampen the edges with a little water. Bring 2 corners together and press so they stick. Bring the other two corners up and do the same thing. Press any gaps together. See picture below. You will have a little bundle. You can also make them into tiny rolls, like a mini spring rolls. To do that fold 2 corners in to just touch. Take one of the remaining corners and roll up into a tiny roll. Dampen edge with a little water to affix. Repeat with remaining filling. You should get a several dozen. Pour 1-inch of oil into a small saucepan and heat to 350 degrees. Fry rangoons a few at a time until golden and drain on paper toweling. Keep warm in 300-degree oven until ready to serve- but best served right after you make them. Serve with Sweet and Sour Sauce.
Note: If you don’t want to fry them, you can also bake the rangoons until crisp, about 8 minutes at 425 degrees.
Halloween Sushi

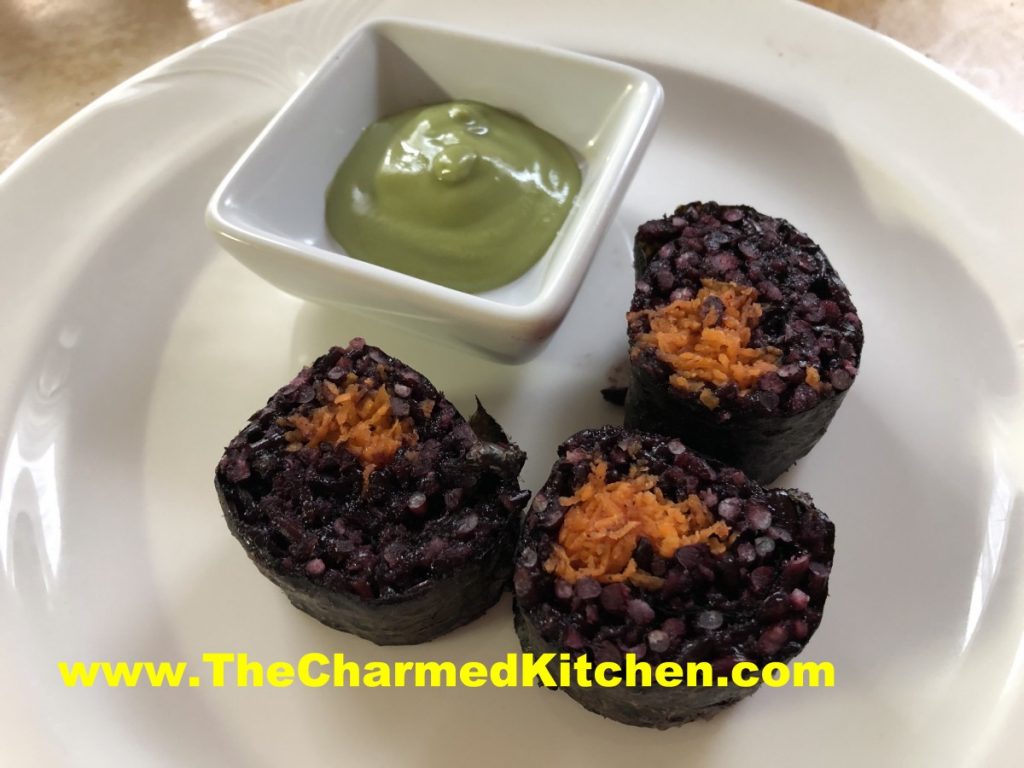
When I make sushi, I often use brown or black sticky (sweet) rice. I actually prefer the texture over the white rice. It occurred to me that the black sticky rice might make fun sushi for Halloween. I find black sweet rice at my local Asian grocery store. That is also where I get nori, rolling mats and wasabi.
To add a pop of color, I finely shredded carrots and added them to the sushi roll, too. The black rice actually cooks to a dark purple color. The color combination is fun for Halloween.
You’ll need a rolling mat, but beyond that, not a lot of special equipment is needed. I served my sushi with wasabi. You could serve with pickled ginger, too. Here is the recipe and directions.
“Spooky” Sushi
To make the rice:
4 c. black sweet rice, uncooked
4 c. water, or a little more
1 recipe Sushi Su, recipe follows
finely shredded carrots
In strainer, rinse the rice repeatedly with cold water until the water runs clear. Place rice in microwave safe container with the 4 cups of cold water. Cover container with a lid and place in microwave. I use a large Pyrex casserole dish that has a lid. Cook 20 minutes. Check for doneness and add a little more water, if needed. Cook another 10-15 minutes. Don’t stir the rice. Black rice takes longer to cook than white sushi rice. You want it to be cooked, but not mushy. Cooking times vary by microwave. Remove from the microwave once cooked and let stand, covered, for 10 minutes. Place rice in a large, cool bowl and pour on the Sushi Su, tossing in. Fan rice while tossing to give it a shiny look. Makes enough for 8 rolls.
Sushi Su:
1/2 cup rice vinegar
4 T. sugar
1/2 t. salt
msg, optional
Combine all and set aside until ready to use. You can also buy a dry powder of Sushi Su and you can use that instead. It is a 2.65 oz. packet.
Assembling Sushi
Place a sheet of nori ( dried seaweed sheets) on mat and spread about 1 cup of the rice over the nori, leaving about 1-2 inches empty on the far side. Place fillings in a strip a little off center away from the side with no rice. Start rolling up the mat using it to press the sushi roll and keeping the fillings in the nori. Once rolled, press the mat once more to seal and make the fillings stick together. Wetting the edge of the nori with a little water can also make the sushi stick better. Slice each piece using a sharp knife dipped in water.
Wrapping the sushi takes practice. Don’t be discouraged if the first few are a little less that perfect, Still, with a little practice it gets pretty easy. Just be careful not to overfill the rolls as it makes the job harder


