Easter Cupcakes

These cupcakes would make a great dessert for Easter- or any time. They are also a fun dessert for kids to make.
I started out by making a double batch of my classic white cupcakes- recipe follows.
I also made a double batch of white chocolate frosting. You could certainly make a vanilla buttercream, if you prefer.
To add a little color to the cupcakes, I divided the batter into three bowls and tinted each of them a different pastel color.
As I filled the pans, I just added a spoonful of each of the tinted batters in them. They came out really nice. I made three different cupcakes: bunnies, chicks and nests.
Details on how to make each of them are listed below.
Classic White (Vanilla) Cupcakes
1 cup sugar
1/2 cup butter
2 eggs
2 teaspoons vanilla extract
1 1/2 cups all-purpose flour
1 3/4 teaspoons baking powder
1/2 cup milk
Preheat oven to 350 degrees. Line a muffin pan with 12 paper liners. In a
medium bowl, cream together the sugar and butter. Beat in the eggs, one
at a time, then stir in the vanilla. Combine flour and baking powder,
add to the creamed mixture and mix well. Finally stir in the milk until
batter is smooth. Pour or spoon batter into the prepared pan. Bake 20 to
25 minutes. Cupcakes are done when they springs back to the touch.
Makes 12.
White Chocolate Frosting
6 oz. white chocolate – if using bars, chop before melting
1 stick (4 oz.) cold butter, cut into cubes
1-2 c. powdered sugar
1 t. vanilla
Melt chocolate. I just melt mine in a microwave safe dish, but you can use a double boiler. Let chocolate cool down a little. Beat butter into the melted chocolate. Beat until smooth and then beat in the powdered sugar and vanilla. Whip until frosting is smooth and fluffy. I normally beat for 5 minutes or longer. If too thick, add a few drops of water or milk. For this recipe, I made a double batch of frosting.
Bunnies
extra white chocolate
food coloring- pink or red
chocolate chips
pastel ( pink) M&M’s
Make bunny ears by melting some white chocolate and putting it in a piping bag or bottle. On wax paper, make outline of the ears in white chocolate and allow to cool/harden. Place a drop or two of pink or red food coloring in a microwave safe bowl and add some white chocolate. Melt in microwave, being careful not to burn the chocolate and stir until it turns pink. Pipe the pink chocolate into the middle of the ears. Allow to harden before peeling off of the was paper. Using a star tip, pipe frosting on cupcake. I made three layers – to add height to the cupcake. place ears on cupcake and add chips/candy for eyes and mouth.
Chicks
Frosting tinted yellow and green
mini chocolate chips
fruit roll up
Using star tip, pipe the chick’s body onto the cupcake in yellow frosting. Pipe on head and wings. Pipe green frosting around chick to form a nest. Use mini chips for eyes and cut fruit roll up for beak.
Nests
Frosting tinted green
egg shapes malted milk balls- or you could use jelly beans
Pipe green frosting on cupcakes to make nests. Add three, or more, candies in the middle for eggs.
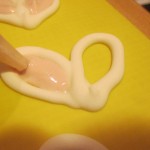
Piping pink filling in ears
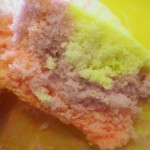
rainbow cupcake

bunnies
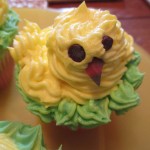
Chick cupcake
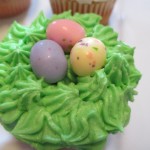
The nest cupcake
Nest Egg
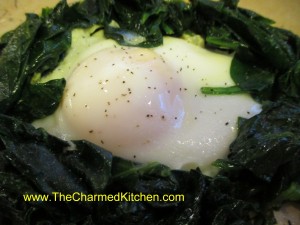
One of the things I resolved to do this year is eat more vegetables. I love most veggies so that isn’t the problem. I am just not eating enough of them. I know I could do better. So I have been looking for any new place I might add some vegetables to a meal. Adding veggies to breakfast is the most challenging, at least for me. For breakfast this morning I decided to have an egg and some toast. When I went to get out the egg and butter I saw a bag of fresh spinach. Why not?
I heated up a little butter in the pan and then added the spinach- probably a good 3 or 4 cups of fresh leaves. They cook down a lot. I also sprinkled the leaves with a little salt and pepper. I stirred them around until they had wilted then made a sort of nest out of them by pushing them away from the center. I poured my egg in the middle so it looked a little like a nest. I put the lid on the skillet and in a few minutes my egg was cooked and the yolk still runny. A little salt and pepper to finish off and the dish was complete. I slid it gently out of the pan onto a serving plate. I really liked it. Plan on making this again soon.
