Tag Archives: recipe

Strawberry Ice Cream Cake Roll

Strawberry Ice Cream Cake Roll

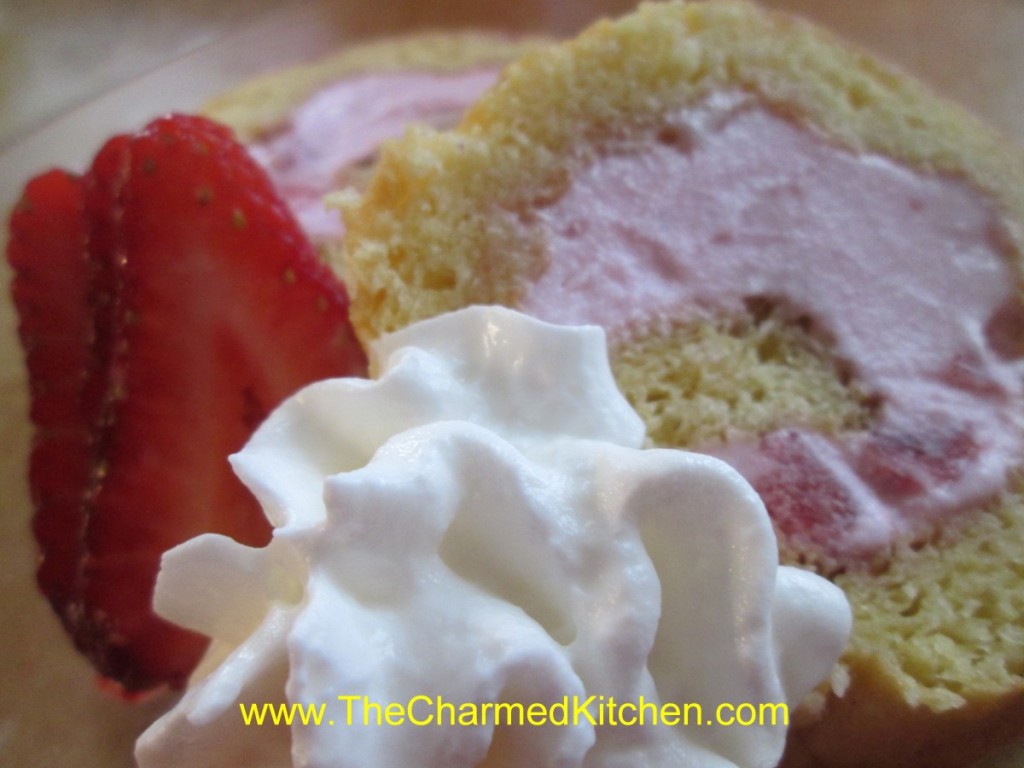
This is the perfect summer dessert. Fresh berries, a light, citrus-scented cake and ice cream. What more could you want?

When you say cake roll, I think a lot of people first think of a pumpkin roll or perhaps a Buche de Noel (yule log). There are so many more desserts you can make with them. Cake rolls can be made in many flavors and they can be filled with custard, frosting, fruit, ice cream and more.

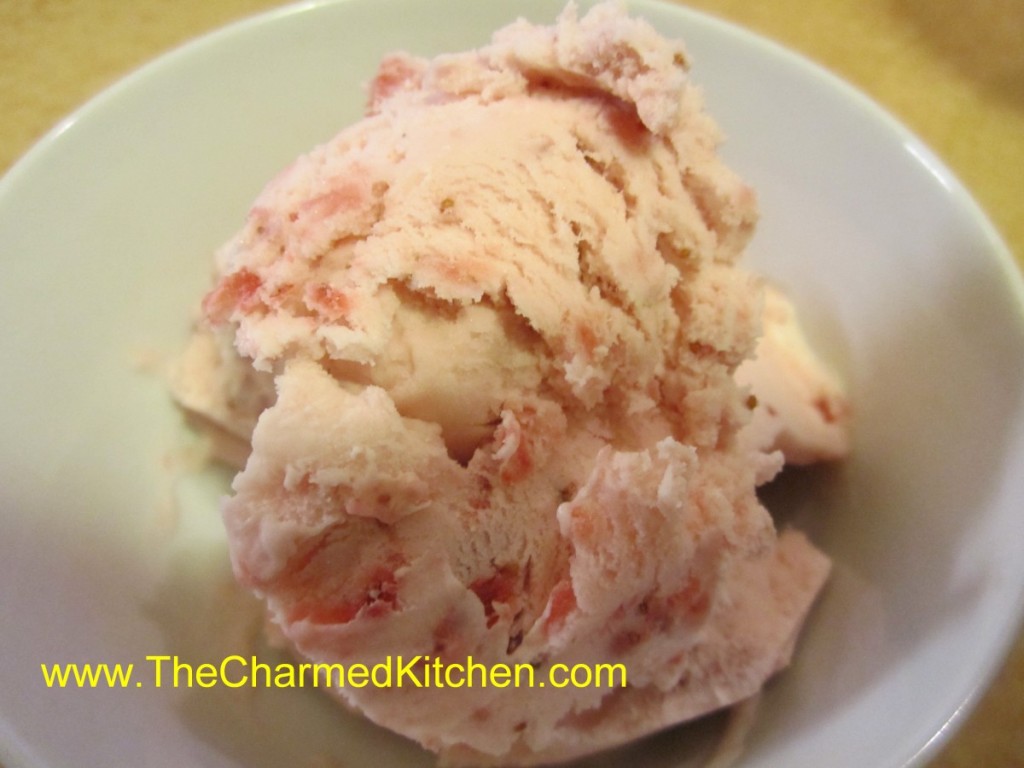
For this sponge cake roll, I used homemade strawberry ice cream to fill it, recipe follows. You could use store bought ice cream, if you prefer.

Start with the sponge cake roll recipe below, and use whatever flavor ice cream you like. You’ll need about a quart of ice cream- or a little more.

Once finished, you just wrap it up and pop the cake in the freezer until needed. Great to have on hand for summer parties and cook outs. Perhaps a nice dessert for Father’s Day? You can decorate with fresh berries when serving. Blueberries would make this a fun red, white and blue dessert for Memorial Day or the 4th of July.

Sponge Cake Roll

This sponge cake roll can be filled with whipped cream or ice cream, or use your favorite filling.
5 eggs, separated
2/3 cup granulated sugar
1 teaspoon lemon juice
1/2 teaspoon finely grated lemon zest
2/3 cup cake flour*
1/4 teaspoon salt
1 teaspoon baking soda
3 tablespoons melted butter
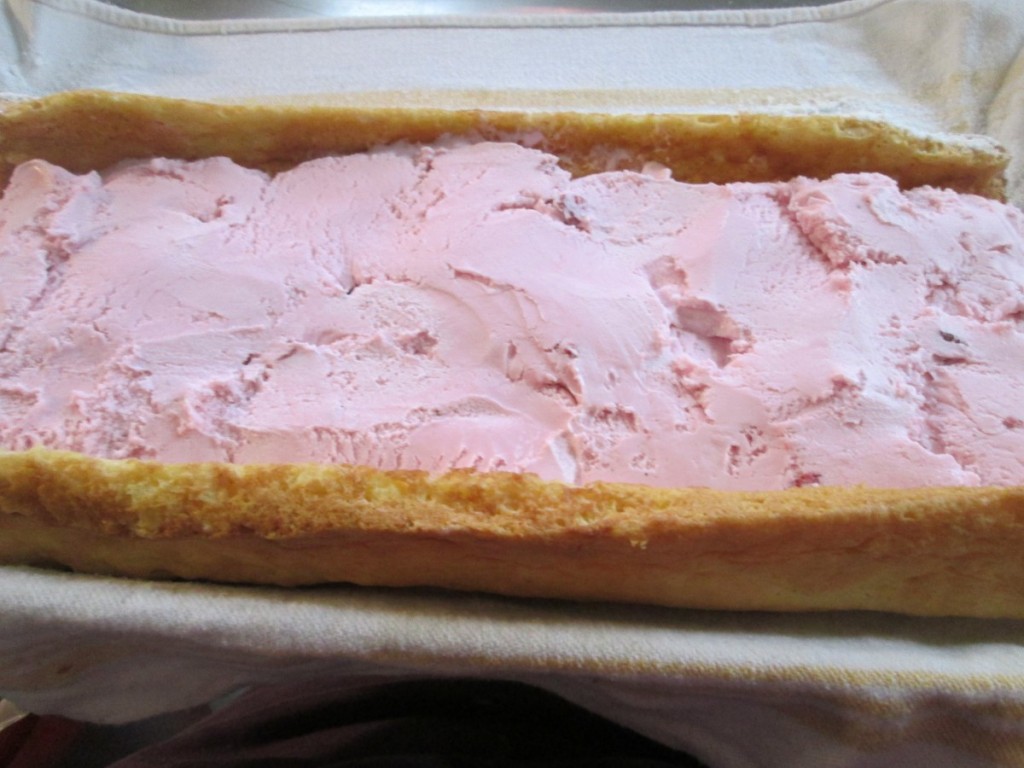
Beat egg yolks until thicken and lemon colored; gradually add 1/3 cup of the granulated sugar, the lemon juice and the lemon zest. Beat egg whites until almost stiff then gradually beat in the remaining 1/3 cup sugar. Beat until stiff peaks form. Fold yolk mixture into whites. Sift dry ingredients into a separate container; add to egg mixture, folding in carefully. Fold in melted butter. Pour batter into waxed paper-lined 10x15x1-inch jelly roll pan. Bake at 375° for 12 minutes. Sprinkle with confectioners’ sugar. Turn onto a clean kitchen towel which has been generously dusted with confectioners’ sugar. Trim edges, if necessary; roll cake up, towel and all, while still warm. Let cool completely. Unroll and fill with whipped cream or ice cream then re-roll cake. The trick is to let the ice cream soften up a few minutes before spreading it on the cake. But don’t wait too long. Rather than trying to let the ice cream get soft enough to spread I used a spatula to sort of cut slices of ice cream and place them on the cake.  Store ice cream cake roll in freezer until ready to slice and serve.

*If you don’t have cake flour you can make your own. Measure out a cup of all purpose flour, remove 2 tablespoons of flour and replace them with 2 tablespoons of cornstarch. For larger amounts place 7 cups of flour in a bowl and combine with 1 cup of cornstarch. Mix well or even sift together. Store in an airtight container.

Strawberry Ice Cream

2 c. chopped strawberries

1 c. sugar

1 T. vanilla

2 c. cream or  half and half or a combination. You can also use some milk or even almond or rice milk.

Additional sugar to taste

Place strawberries, vanilla  and sugar in saucepan and bring to a simmer, stirring occasionally. Remove from heat and chill. Combine chilled berry mixture with cream. Add additional sugar if you like. Remember that once it is frozen the ice cream will not taste as sweet so make this mixture a little sweeter than you want the final product to be. How much sugar you add varies with personal taste, and how sweet the berries are. Place in an ice cream maker and process according to manufacturer’s directions. Once finished put in an air- tight container and place in freezer. Makes about 1 quart.

Spread softened ice cream over cake and roll up the cake

Strawberry Ice Cream

Strawberry Ice Cream

It is strawberry season around here, and I am loving it. Since the weather is warming up, I decided to make ice cream with some of the berries. Homemade ice cream is easy to make. When you make your own, you can adjust flavorings and sweetness level, too.

Studded with plenty of berries, this ice cream will put anything store-bought to shame. Feel free to add blueberries or raspberries, too. Sometimes I add other flavors, like lavender or mint.

Strawberry Ice Cream

2 c. chopped strawberries

1 c. sugar

1 T. vanilla

2 c. cream or  half and half or a combination. You can also use some milk or even almond or rice milk.

Additional sugar to taste

Place strawberries, vanilla  and sugar in saucepan and bring to a simmer, stirring occasionally. Remove from heat and chill. Combine chilled berry mixture with cream. Add additional sugar if you like. Remember that once it is frozen, the ice cream will not taste as sweet, so make this mixture a little sweeter than you want the final product to be. How much sugar you add varies with personal taste and how sweet the berries are. Place in an ice cream maker and process according to manufacturer’s directions. Once finished put in an air- tight container and place in freezer. Makes about 1 quart.

Homemade Strawberry Liqueur

Strawberry Liqueur

This strawberry liqueur is like summer in a bottle. I make a lot of different liqueurs and strawberry is one of my absolute favorites. It is wonderful for sipping or over ice. It is also a fun addition to any number of cocktails. A friend adds it to ice cream with extra berries and blends it up for an adult strawberry milkshake.

With strawberries in season, this is the time of year to enjoy them. I want to preserve some for later, too. I will be making strawberry jam and I will freeze some.

Another way to preserve strawberries, is by making a liqueur with them.  It is pretty simple. Just combine berries with vodka and a small amount of powdered sugar. I use half gallon canning jars for this, but you could use any food safe container with a tight fitting lid.

Let the mixture steep long enough for the berries to infuse the alcohol with their flavor. You can sweeten it later on, or even leave it unsweetened, if you prefer. I like to sip the liqueur as is, or serve on the rocks with a splash of club soda.

Strawberry Liqueur

3 cups fresh or frozen strawberries, sliced

3 T. powdered sugar

3 c. vodka

1 c. simple syrup*

Sprinkle powdered sugar over berries and let dissolve. Pour over vodka and let steep 2 weeks. Crush berries and strain then filter through cheesecloth or coffee filters. Add sugar syrup and mature 1 week. Makes 5 cups.

*Simple syrup is made from 1 cup of sugar and ½ cup of water. Bring to a boil, then cool. You will have 1 cup of syrup. You can sweeten your liqueur with honey, if you prefer. Watch when you substitute honey for sugar, as it is sweeter and stronger flavored. Better to use orange or clover honey. Add to suit your taste.

Green Beans in Herb Butter Sauce

Green Beans in Herb Butter Sauce

If you are looking for a nice green bean side dish- I think you will really like this one. The sauce, made from a mix of herbs, onions (or shallots), sesame seeds and butter make these special. With green bean season right around the corner you might be harvesting from your garden soon. My local produce market has beautiful beans right now. This is one of my favorite recipes for fresh green beans. I hope you give it a try,

Green Beans in Herb Butter Sauce

1 lb. Green beans, washed and trimmed
¼ c. butter
¾ c. minced onion or shallots
1 clove garlic, minced
¼ c. minced celery
2 T. sesame seeds
2 T. chopped parsley
¾ t. salt
¼ t. each rosemary and basil

Boil or steam beans until tender, about 8 minutes. Drain and set aside. Meanwhile, start sauce. Heat butter in skillet and add onion, garlic, celery and sesame seeds. Cook 5 minutes then add seasonings and cook, covered, 5 minutes more. Toss beans with sauce. Serves 4-6.

Note: If you want to make these the day ahead, make the sauce and cook beans until almost tender. Combine beans and sauce and place in casserole dish. Chill until ready to use. When ready to serve, just place bean mixture in oven or microwave and cook until heated through and beans are tender.

English Muffins

English Muffins

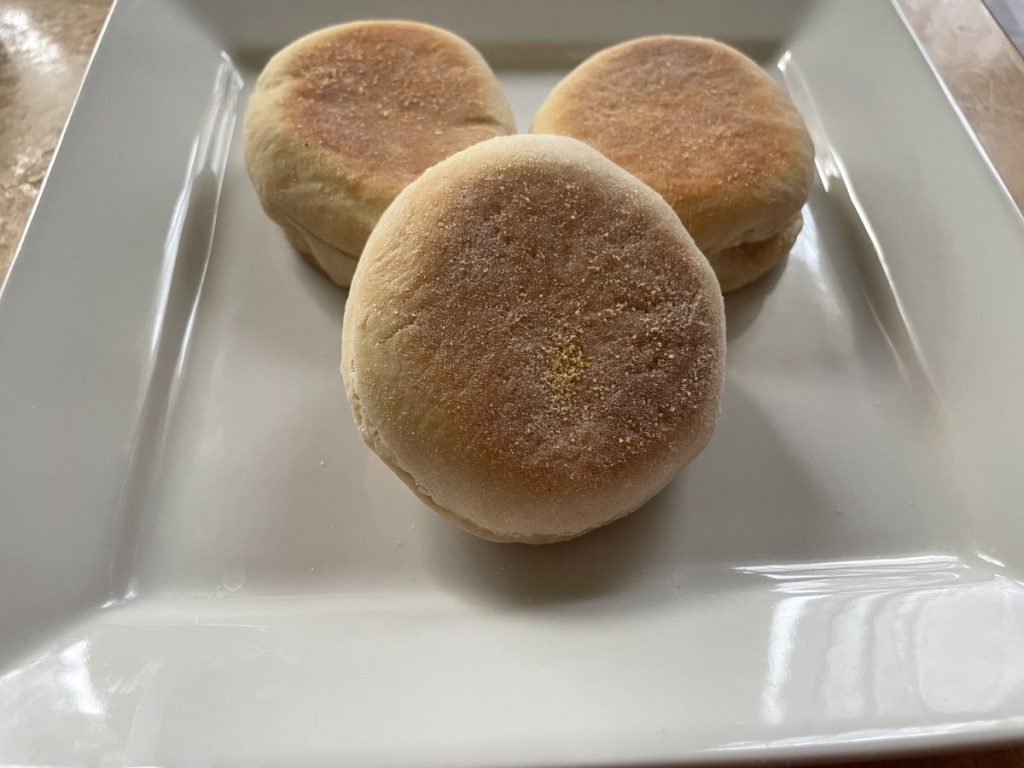
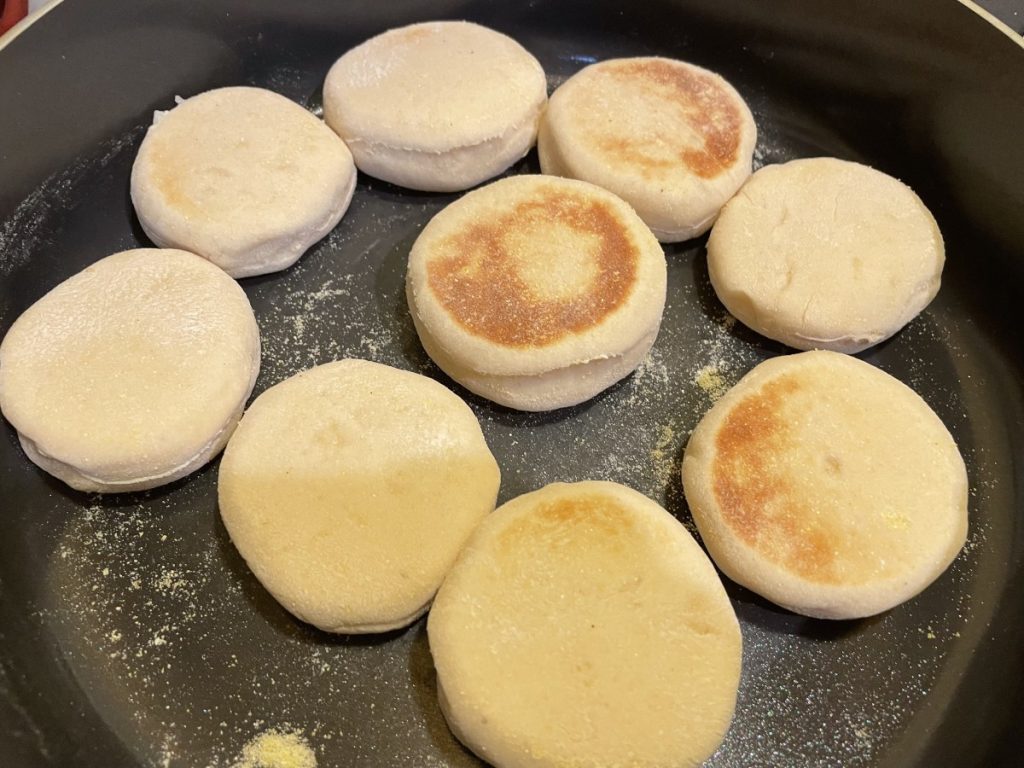
English Muffins are fun and easy to make. They also taste so much better than store bought. What you might not know, if you never made them, is that English muffins are not baked. They are actually cooked in a skillet, over medium low heat, until done.

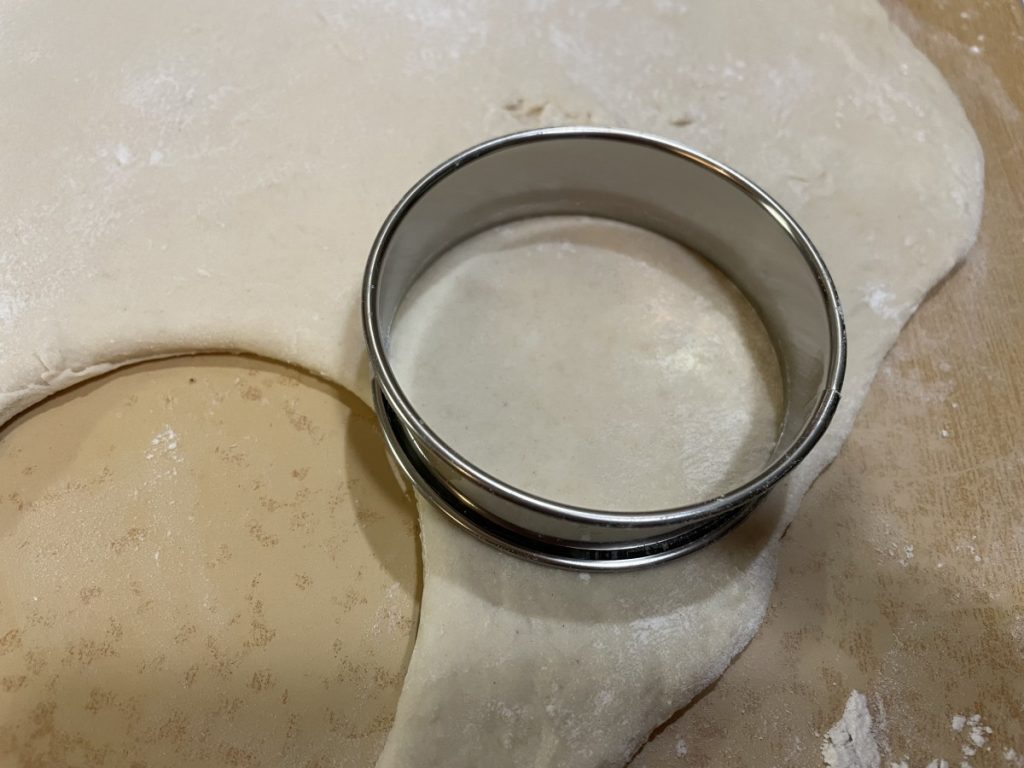
The dough is pretty much a bread dough. Once they have gone through their first rise, you roll them out and cut them out in circles. They rise another 30 minutes, then are cooked in the skillet. You can use a 4-inch cutter for full sized muffins. I used a 3-inch cutter and got a few more out of the recipe.

The recipe is correct when it says to roll them a bit under 1/2-inch thick. They rise and then get thicker when cooked.

English Muffins

2 packages yeast

5-6 cups bread flour

2 T. sugar

2 t. salt

2 c. milk

¼ c. butter

Cornmeal

In large bowl combine yeast, 4 cups of the bread flour. Warm milk and butter and add to flour mixture and beat 3-4 minutes. By hand stir in enough flour to make a moderately stiff dough. Turn onto floured surface and knead until dough is smooth and elastic, about 8-10 minutes.  

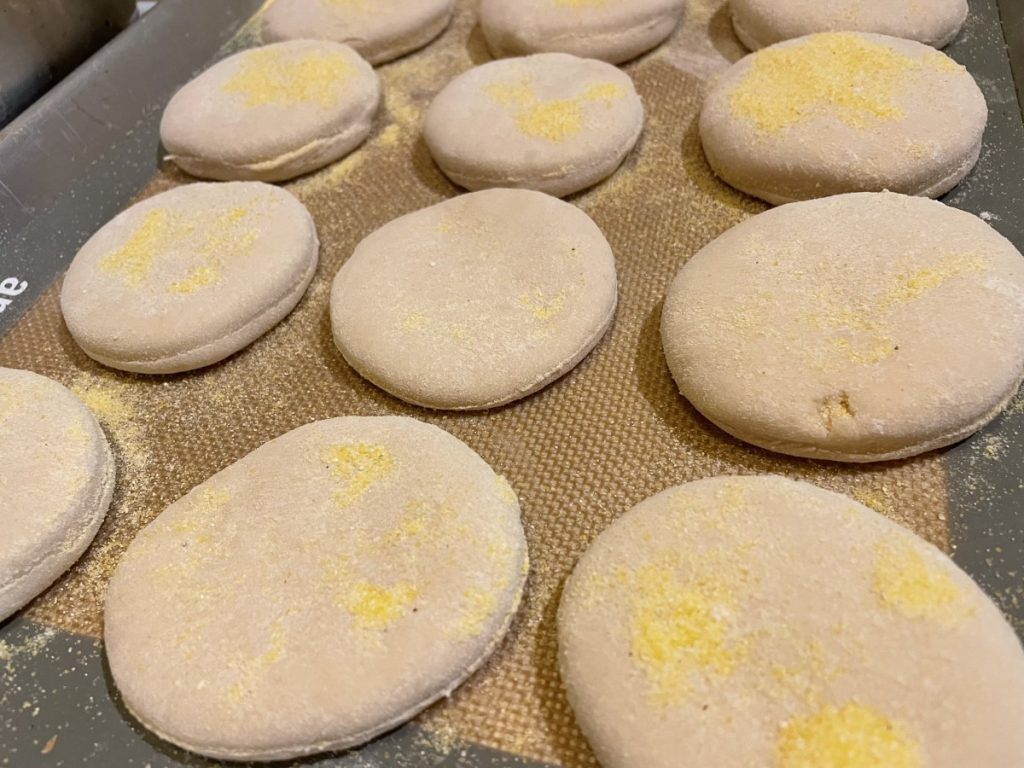
Place dough in greased bowl and turn to grease top. Cover and allow to rise until doubled, about 1 ¼ hour. Punch dough down and allow to rest 10 minutes. On lightly floured surface roll dough to just under ½-inch thick. With 4-inch biscuit cutter cut out rounds of dough, re-rolling and cutting scraps. Dip both sides in cornmeal and cover, allowing to rise about 30 minutes. In ungreased griddle pan or skillet cook muffins over medium-low heat, turning frequently, until they are golden on both sides and cooked through. This will take about 20-25 minutes. If they are browning too quickly, turn down the heat a little. To serve, split and toast. Makes 12-18, depending on the size you cut them.

cutting out
rising
“baking” in the skillet

Russian Tea Biscuits

Russian Tea Biscuits

Russian tea biscuits are like a kind of cookie. A magical cookie, filled with jam and raisins and nuts. The are crispy, tender and rich. They also are not all that sweet, which appeals to me. You can serve them as a dessert, but also serve them with breakfast or brunch. And of course, with your tea or coffee.

I can remember the first time I ever had a Russian tea biscuit. It was at the Cedar-Lee theater. I guess you could say I got my love for foreign films and Russian pastry at the same place. I found a recipe in my mother’s recipe collection. I tried them and they were pretty close to the ones at the Cedar-Lee. I did tweak that recipe a bit.

My only regret was not having raspberry jam. That is my favorite. The swirl of red in the biscuits is very pretty. I used what I had- peach- and am happy with them. Not as colorful, but very tasty, all the same.

Here is the recipe. I think you might want to try these with that next cup of tea.

Russian Tea Biscuits

3½ c. flour

½ c. sugar

1 t. baking powder

1 t. baking soda

¼ t. salt

1 c. butter, softened

2 eggs, separated

½ c. orange juice

1 1/3 c. preserves, (strawberry, raspberry, plum or apricot are favorites)

1 c. chopped walnuts

1 c. raisins, dark or golden

1 t. cinnamon

3 T. sugar

Combine dry ingredients in a mixing bowl and cut in butter until mixture is the size of peas. Stir in egg yolks and orange juice. Knead until dough is well blended. Divide dough into 4 equal pieces. Roll out a piece of dough 1/4 -inch thick into an 8×10-inch rectangle. Spread with 1/3 c. of the preserves and sprinkle with 1/4 c. each of the raisins and nuts. Roll up jelly roll fashion and set, seam side down, on ungreased baking sheet. Repeat with remaining dough. Beat egg whites until foamy and brush on dough. Combine cinnamon and sugar and sprinkle on dough. Bake in a 350-degee oven for 25-35 minutes, or until golden. Use a toothpick to test for doneness. They can be golden, but a little under baked in the middle. Slice while warm into 6 pieces for each roll. Makes 24.

Biscuits right out of the oven. You want to get them a nice golden brown. The cracks on top are normal and not a problem.
Slice while still warm

Mint Chocolate Chip Ice Cream

Mint Chocolate Chip Ice Cream

Mint chocolate chip ice cream is a favorite of mine. I have tried a lot of mint chocolate chip ice creams, but was not always happy. I wanted to make my own and see how that turned out.

The tricky part is getting chips that aren’t hard chunks, but rather, little flecks of chocolate, that melt on your tongue when you eat the ice cream. In the past, for chocolate chip ice cream, I have brushed melted chocolate in thin sheets, chilled it, and then broken it into tiny pieces. It worked, but kind of a pain to do.

I tried something different this time, and with a few adjustments, it worked out great. In the past, I posted a recipe for homemade chocolate magic shell. You remember magic shell, the chocolate syrup that hardens when you drizzle it on ice cream. The recipe is quite simple. Chocolate, coconut oil and powdered sugar, melted together. It remains a liquid at room temperature.  So, to create the “chips”, I just added some of the magic shell to the ice cream as it froze in the ice cream maker.

After a little playing around, I got the knack of drizzling it slowly. The end result, little flecks of chocolate through the ice cream that were tender and melted as you ate the ice cream.  We had the ice cream served on a homemade brownie, then topped with more magic shell and some whipped cream. You will note that my “mint” ice cream is not green. I opted to omit food coloring, but feel free to add some, if you prefer. And, if you just want chocolate chip ice cream, don’t add the mint extract.

Mint  Chocolate Chip Ice Cream

2 c. half and half

1 c. whipping cream, or 1 more cup of half and half

½ c. sugar, or to taste*

2 t. mint extract

1 t. vanilla extract

About ½ c. magic shell- recipe follows

Combine half and half, cream, sugar and flavorings. Stir until sugar dissolves. Add more sugar, if needed, to suit your taste. Place mixture in an ice cream maker and start freezing it. Once it starts to thicken, drizzle the magic shell in slowly as the machine is running, to create little flecks of chocolate throughout the ice cream. I have to guess that I used about ½ a cup. Add until you have the amount of chips you like.  Once ice cream forms, place in freezer until ready to serve. Makes about a quart.

*The mixture might taste a little sweet to you, but when you freeze it, it will taste less sweet. When making ice cream, the base should be a little”too” sweet to allow for the taste change after freezing.

Homemade Magic Shell

1 c. chocolate chips- I used dark chocolate chips

3/4 c. coconut oil- I used the unrefined

1/2 c. powdered sugar

Heat all together until melted. I melted mine in a microwave for 1 minute, but you could also melt over a double boiler. Stir until smooth. Store at room temp. To use, drizzle over ice cream, wait about 10-20 seconds- and it will harden.

Coffee Cake Muffins

Coffee Cake Muffins

These came about when I was playing around with an old family recipe. The original recipe was for a coffee cake that my Busha ( Polish grandmother) taught me to make when I was about 12. I wanted to make something more portable, so the muffins seemed like a logical option. The recipe was changed a bit from the original, but I was very happy with the end result.

The dough is rich, but not heavy or too sweet. Sour cream is the magic here. It makes for a moist, tender muffin. Then they are topped with a nutty crumble. I added a drizzle at the end which worked well. Your family and friends will love them!!

So here is the recipe.

Coffee Cake Muffins

Topping

½ c. light brown sugar

3 T. butter, softened

2 t. cinnamon

½ – ¾ c. chopped nuts

Batter

3/4 c. sugar

1/2 c. butter, softened

1½ t. vanilla

3 eggs, room temperature

1 c. sour cream

2 c. flour

1 t. baking powder

1 t. baking soda

Drizzle

1½ c. powdered sugar

1/2 t. cinnamon

1 T. milk

1 T. lemon juice

Preheat oven to 350 degrees. Line 24 cupcake tins with paper or foil liners. Set aside.  Mix first 4 ingredients together and set aside. Beat together sugar and butter until fluffy. Add vanilla and beat well. Beat in eggs, one at a time. Stir in sour cream. Combine dry ingredients and add to egg mixture. Stir until just combined. Divide batter in the cupcake pans. They will be half full, or a bit under. Top with the topping, crumbling to spread evenly. Bake for 15-18 minutes, or until toothpick inserted comes out clean. Once cooled down, combine drizzle ingredients and pour over the muffins. Makes 24.

e

Creamy Spinach Pasta Sauce

Pasta with Creamy Spinach Sauce

The sauce reminds me of creamed spinach, a favorite childhood dish of mine. The recipe makes enough to generously sauce a pound of pasta. It is very tasty and easy to make. Great when you need a home made meal, but don’t have a lot of time. You can also use this sauce on hot cooked rice or baked potatoes. I could see adding chicken to the pasta, too.

The recipe uses frozen spinach, but you can use fresh spinach , if you prefer. Just cook down 12-16 oz. of fresh spinach and use like the frozen spinach.

There is Parmesan cheese in the sauce. I like to serve extra on the side.

Creamy Spinach Sauce

1/4 c. butter

1 (10 oz.) package frozen spinach, thawed and drained

1 t. salt

1 c. ricotta cheese

1/4 c. grated Parmesan cheese

1/4 c. milk

Heat spinach in butter for 5 minutes. Add remaining ingredients and heat gently until warmed through. Do not boil sauce. Toss sauce over hot, cooked pasta. Makes 2 1/2 cups, enough for about a pound of pasta.

Mom’s Jelly Doughnuts

Jelly Doughnuts

I thought for Mother’s Day I would share one of my mother’s favorite recipes. They were a real treat. I remember how fun it was to watch my parents making doughnuts. The making of the dough, then cutting the dough into circles. The dough circles would then rise on the counter, under linen towels until puffed up. Gently they would be fried, then set on paper towels to drain. Once cooled, the filling would be piped into them through a pastry bag filled with some wonderful jelly or jam.

I also remember learning to fill them. Squeezing the jelly from the pastry bag into the doughnut was tricky. You wanted to make sure there was enough filling, but not so much that they split open. After a couple of tries,  I realized you could figure it out by the weight of the filled doughnut in your hand.

My parents were both excellent bakers. My father had even been a professional baker at one time. I thought it was normal to have parents who made doughnuts. It was the norm in my family.

My folks only made them for special occasions. Unless my Mom got a taste for homemade jelly doughnuts. Then, my dad would make them for her. She loved jelly doughnuts. More than pretty much anyone else I knew.

You can fill them with any number of jellies, jams and cream fillings. I had fresh strawberries and dried apricots so I used them to make both a strawberry filing and an apricot filling. Once fried and filled, the doughnuts can be eaten plain or topped with a drizzle of powdered sugar glaze or just rolled in powdered sugar. They are a bit of work, but well worth the effort.

Jelly Doughnuts

Dough:
4 c. flour
2 T. sugar
1 t. salt
½ c. butter
1 packet yeast
¼ c. warm water
2 t. sugar
1 c. evaporated milk
2 eggs, beaten
Combine flour with sugar and salt. Cut in butter and set aside. Dissolve yeast in warm water and 2 t. sugar and set aside. Combine milk with eggs. Stir in yeast mixture and add to flour mixture stirring well. On lightly floured surface knead dough until dough is smooth, about 5 minutes. Dough will be very sticky. Cover and let rise until doubled, about 1½ hours. Remove dough from bowl and punch down. Using about a third of the dough at a time roll dough out to about an ½ -inch thickness and cut out with a 2½ -inch biscuit cutter. Re-roll scraps and cut out. You should get about 2 dozen. Place dough circles on a floured surface and cover with a towel until doubled, about an hour. Heat oil in a deep pan until it reaches 375 degrees. Cook doughnuts a few at a time until golden on both sides, about 1 minute per side. Drain on paper towels and cool before filling.

Note: You can also refrigerate the dough after kneading it if you would prefer. Just place dough in an oiled bowl, cover with plastic wrap and chill overnight. Roll and cut dough into doughnuts when cold from the fridge. Allow to rise, covered, until doubled in bulk, about 2-3 hours. Fry as directed.

To fill doughnuts use a pastry bag fitted with a long tube tip for filling. I have these handy plastic syringes which are easy to use. Insert tube tip into doughnut and squeeze gently until doughnut is filled with jam. Be careful not to overfill or doughnut will split. Once filled doughnuts are topped with a powdered sugar glaze or rolled in powdered sugar.

Apricot Filling

12 oz. dried apricots, chopped up
2 c. water
2 c. sugar, or to taste

Combine apricots with water in saucepan and simmer, covered until apricots are really tender. This will take at least an hour- add more water, if needed. Add sugar to taste and cook until thickened. Puree mixture in a blender.

Strawberry Filling

1 lb. strawberries
1½ c. sugar
½ c. water
3 T. cornstarch

Crush berries and place in saucepan with the sugar. Cook until berries are tender, about 10 minutes. Combine water with cornstarch and add to strawberries. Cook until thickened and bubbly. Cool. , Puree. Makes 2 cups.