Hot Cross Bun Bread Pudding
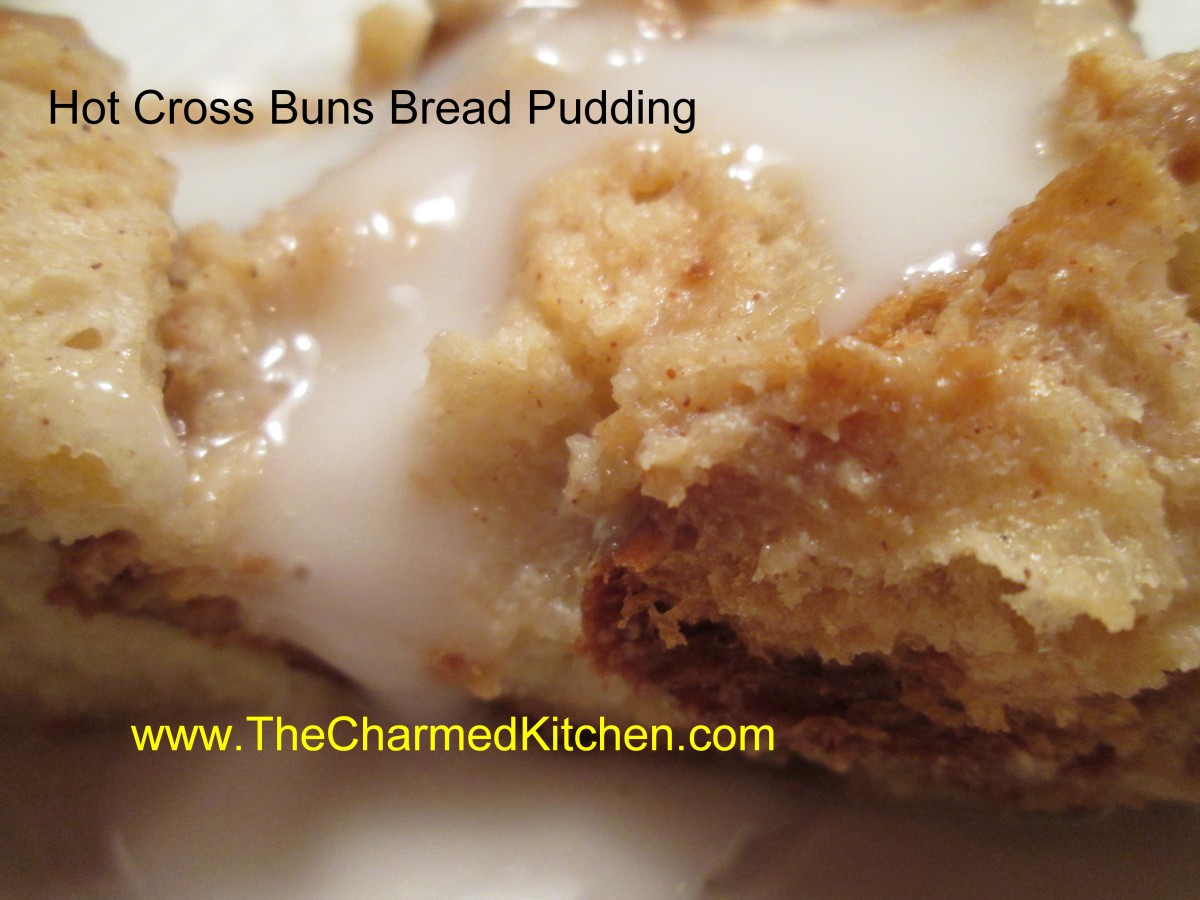
Hot Cross Bun Bread Pudding
The first time I made this dish, it was sort of an accident. It was right after Easter, a few years ago. I was having dinner with friends, and I was in charge of making dessert. I had leftover hot cross buns, so I decided to re-purpose them into bread pudding.
The end result was really good. So good, that my friend Amy said it was one of the best desserts I had ever made.
I now bake extra hot cross buns, just so I can make bread pudding from them.
I posted my recipe for hot cross buns yesterday. That inspired one of my friends to remind me about this recipe for bread pudding, so I am posting this recipe today.
You could use home made, or store bought buns for this recipe. Whatever works for you.
Hot Cross Buns Bread Pudding
12 c. torn up hot cross buns- I used 8 buns
2 c. half and half
1 c. milk – I used almond milk
1 c. sugar- or less if you are using frosted buns
5 eggs
1 T. vanilla
1 T. cinnamon
Frosting:
1 c. powdered sugar
4 t. milk
In large mixing bowl place the torn up buns. Mix remaining ingredients and pour over the buns. Stir to moisten evenly. Spoon mixture into a buttered 9×13-inch pan. Bake in a preheated 350 degree oven for 35-40 minutes or until bread pudding is set and a little golden on top. While the bread pudding is baking combine powdered sugar with milk to make a frosting thin enough to drizzle. Let bread pudding cool 10 minutes and drizzle with frosting. Serves 8-10.
Hot Cross Buns
Hot Cross Buns
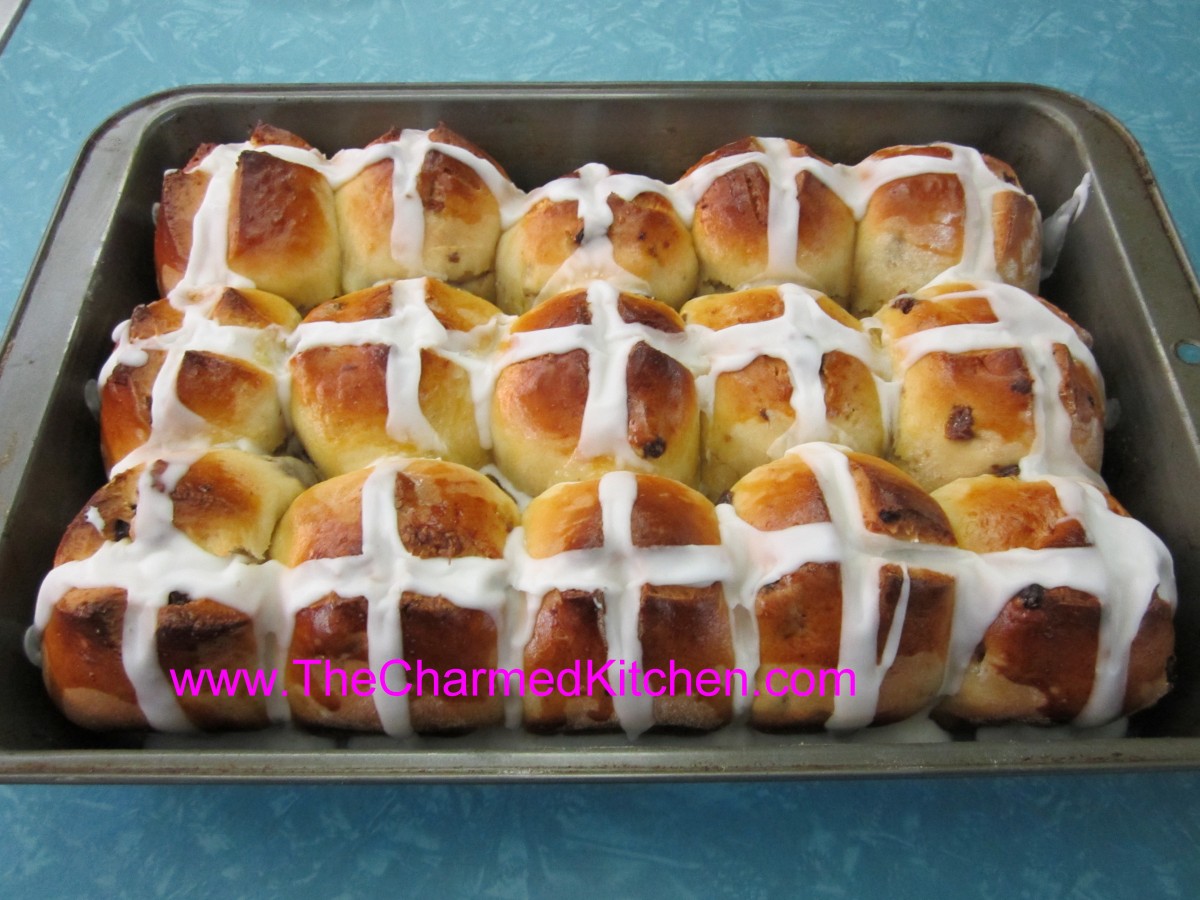
These rich rolls are a traditional at Easter. At least they are in my house. The dough is rich and slightly sweet. The frosting on top adds to their sweetness.
Hot cross buns can be served at breakfast, brunch or even as a dinner roll. I have served them with coffee, after dinner. So I guess they can be a dessert, too. I used leftover buns to make bread pudding one year.
Because the dough is rich, they are slow to rise. If they aren’t jumping out of the pan after an hour or so, don’t worry. They do rise quite a bit in the oven.
After they cool a bit- pipe on the icing in the crisscross pattern that gives these rolls their name.
Hot Cross Buns
2/3 c. sugar
1 t. salt
2 packages active dry yeast
About 5 cups bread flour
1 ½ c. milk
½ c. butter
2 eggs
1 c. raisins
Icing
¾ c. powdered sugar
1 T. milk
In bowl combine sugar, salt, yeast and about 1 ½ c. flour. Heat together milk and butter until very warm. Beat milk mixture into to flour mixture and beat 2 minutes with electric mixer. Beat in 1 egg and 1 cup flour and beat 2 more minutes until batter thickens. Stir in raisins and enough additional flour to make a soft dough. Turn dough onto a floured surface and knead until smooth, about 10 minutes. Place dough in greased bowl, turning to grease top, cover with a towel and allow to rise in a draft free place until doubled in bulk, about 1 hour.
Place dough on floured surface and divide into 15 equal pieces. Cover with towel and lest rest 15 minutes. Meanwhile grease a 9×13 inch pan. Form dough into smooth balls and place in prepared pan. Cover and let rise until doubled, about an hour. Preheat oven to 350 degrees. Beat remaining egg. Cut a cross in each bun and brush with the egg. Bake for 25 minutes or until buns are golden. Remove buns to wire rack to cool 15 minutes. Make frosting, place in decorating bag and pipe onto buns. Makes 15.
Rainbow Ravioli
Rainbow Ravioli
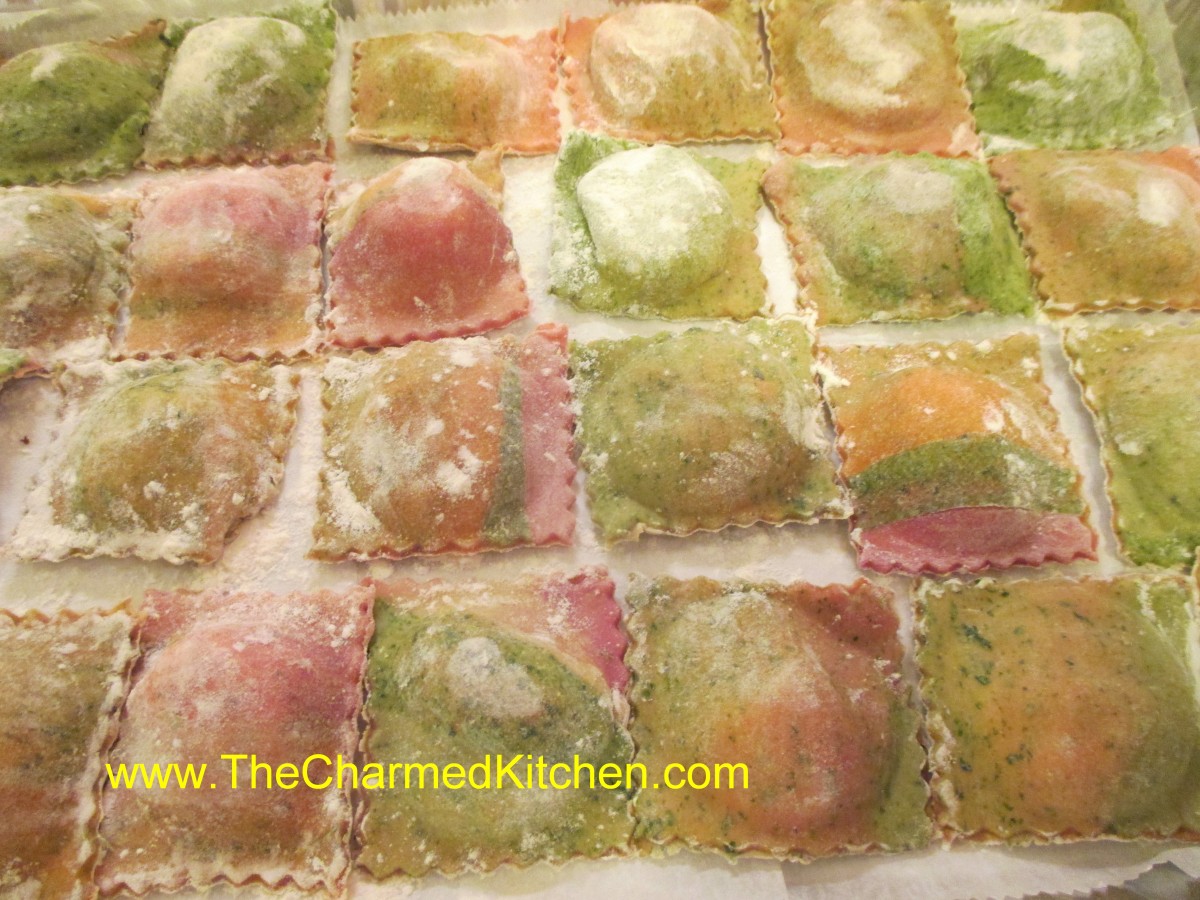
You are sure to get a smile when you serve rainbow ravioli. These colorful ravioli are made with vegetable-based dough. Recipes for all the pastas and the filling follow below. Unused dough can be frozen and used later. Extra ravioli can also be frozen, so you can make a big batch and enjoy them for several meals. These would be fun to serve for Easter or any Spring dinner.
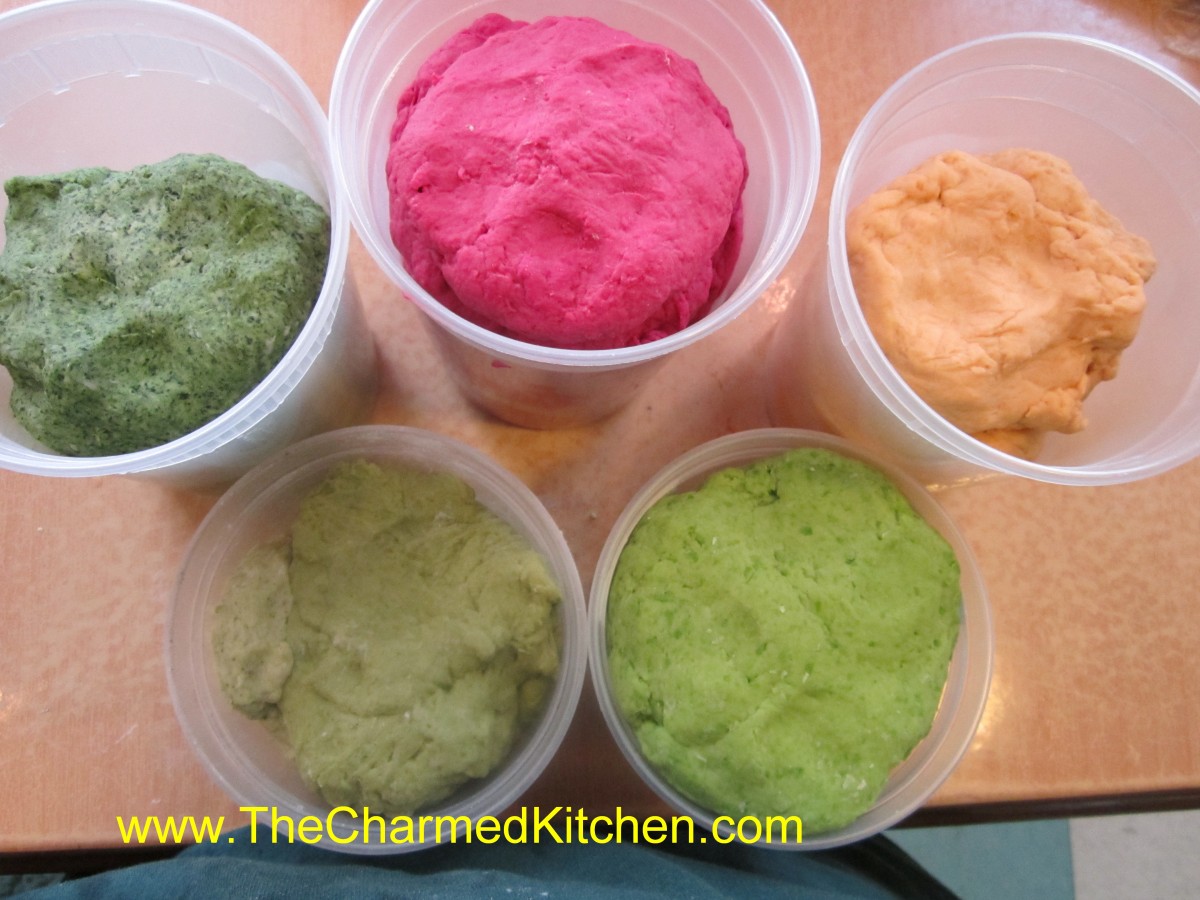
To make the rainbow effect just grab a piece of the plain dough and add a few pieces of each of the veggie pastas. As you roll out the dough the colors will begin to spread out and blend. I fold and re-roll the dough a few times to get the colors to blend a little more. Every batch is a little different.
I often use a food processor to make pasta dough, especially the vegetable pastas because I use vegetables that need to be pureed. I have a small processor which is perfect for small batches using no more than 1 cup of flour. I often use my stand mixer for larger batches and for plain dough. Always best to make pasta dough at least 30 minutes ahead and let it rest. You can even make it the day before and chill until ready to use.
Assorted pastas
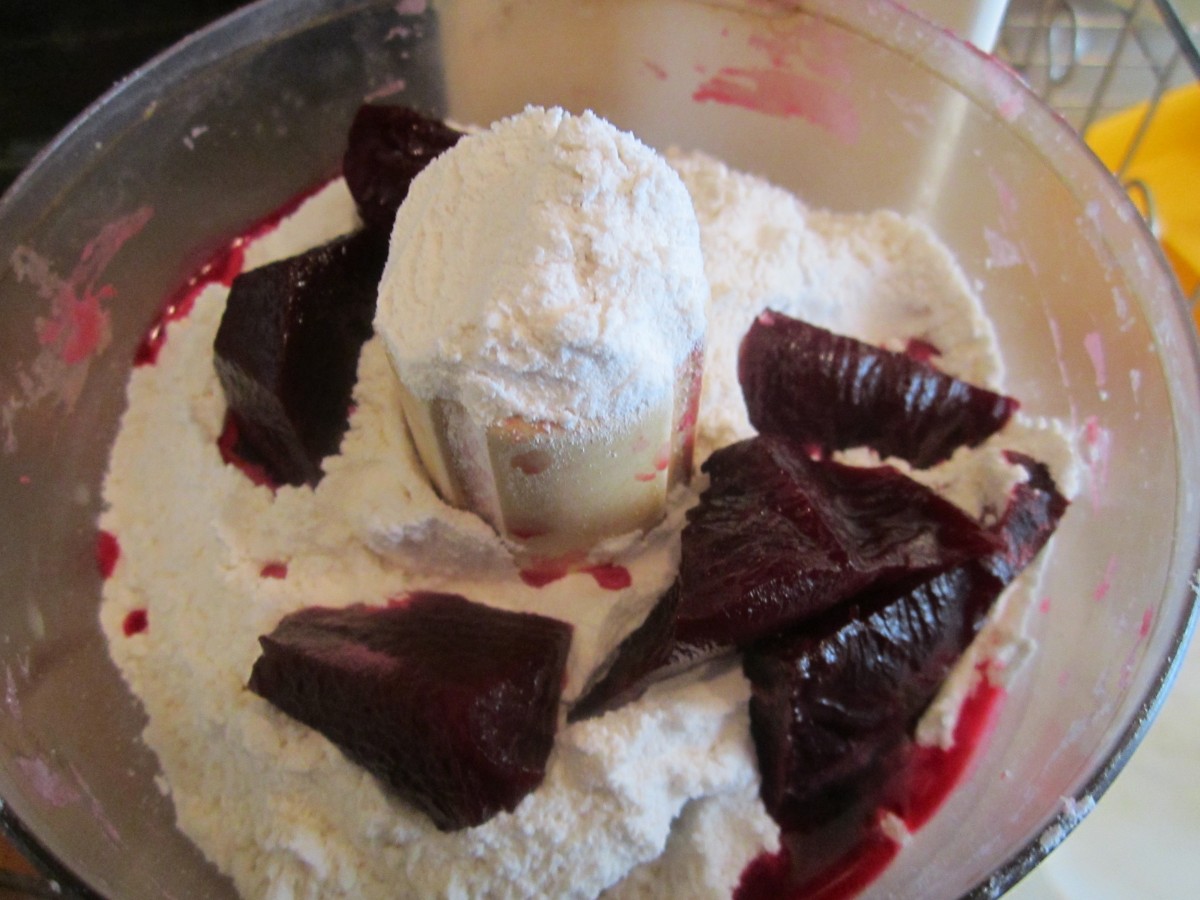
Cooked beets and flour
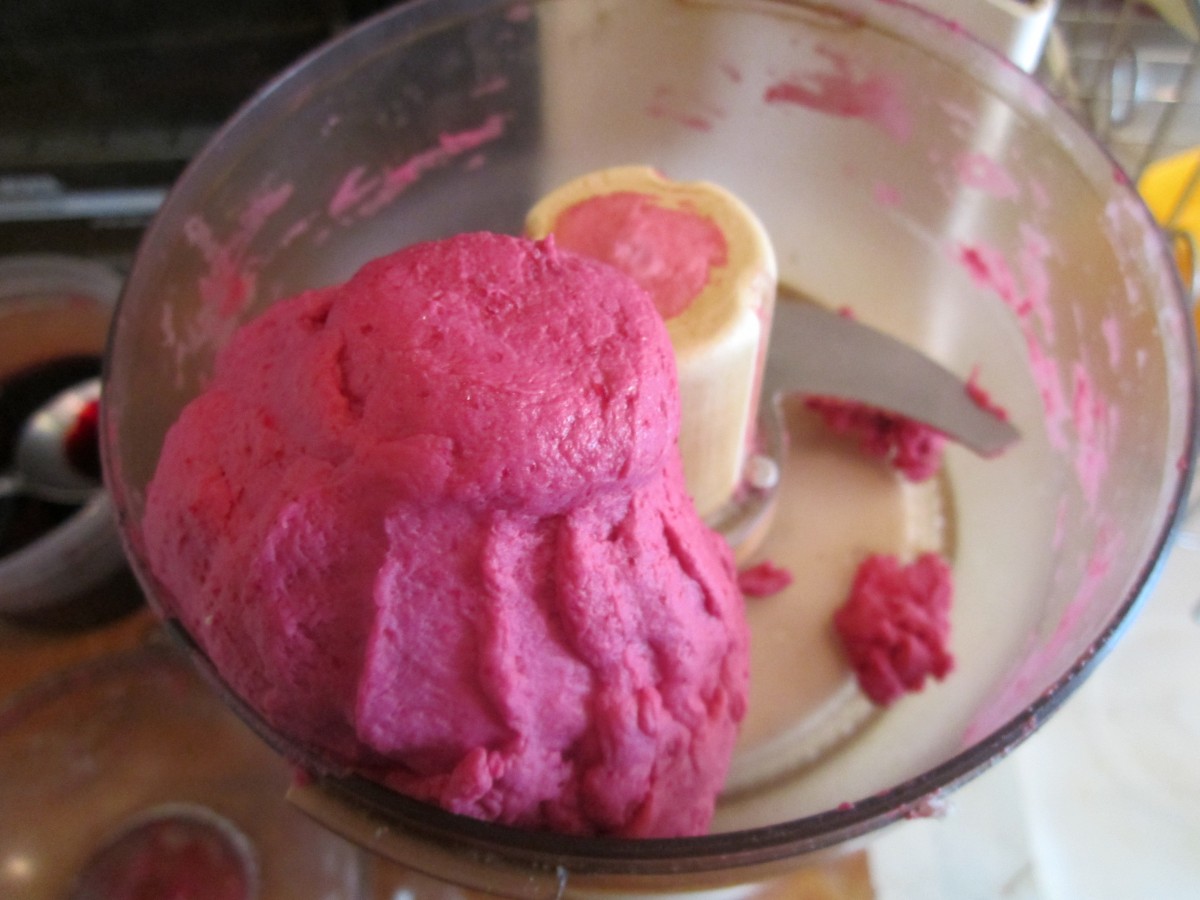
Process until dough forms

Freshly rolled sheets of dough
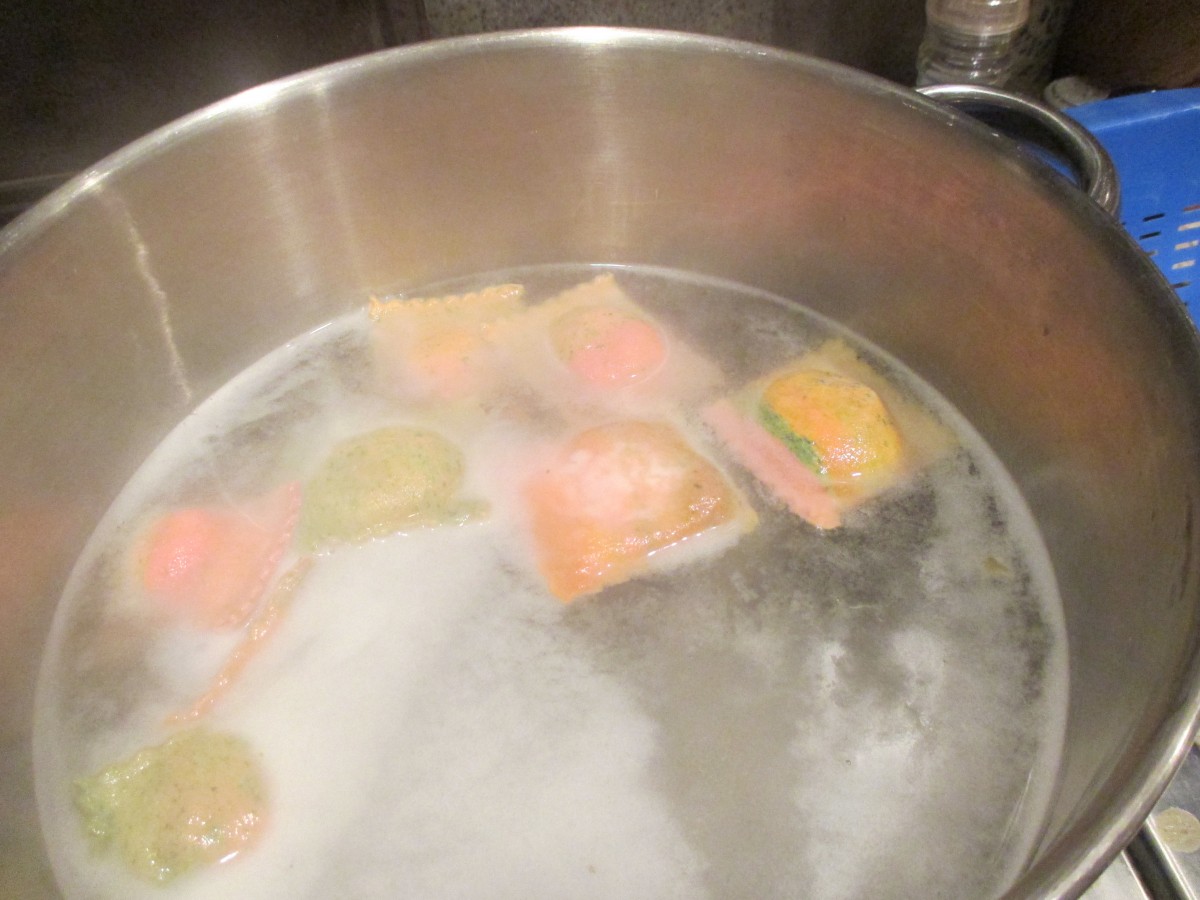
Simmer ravioli 3-5 minutes
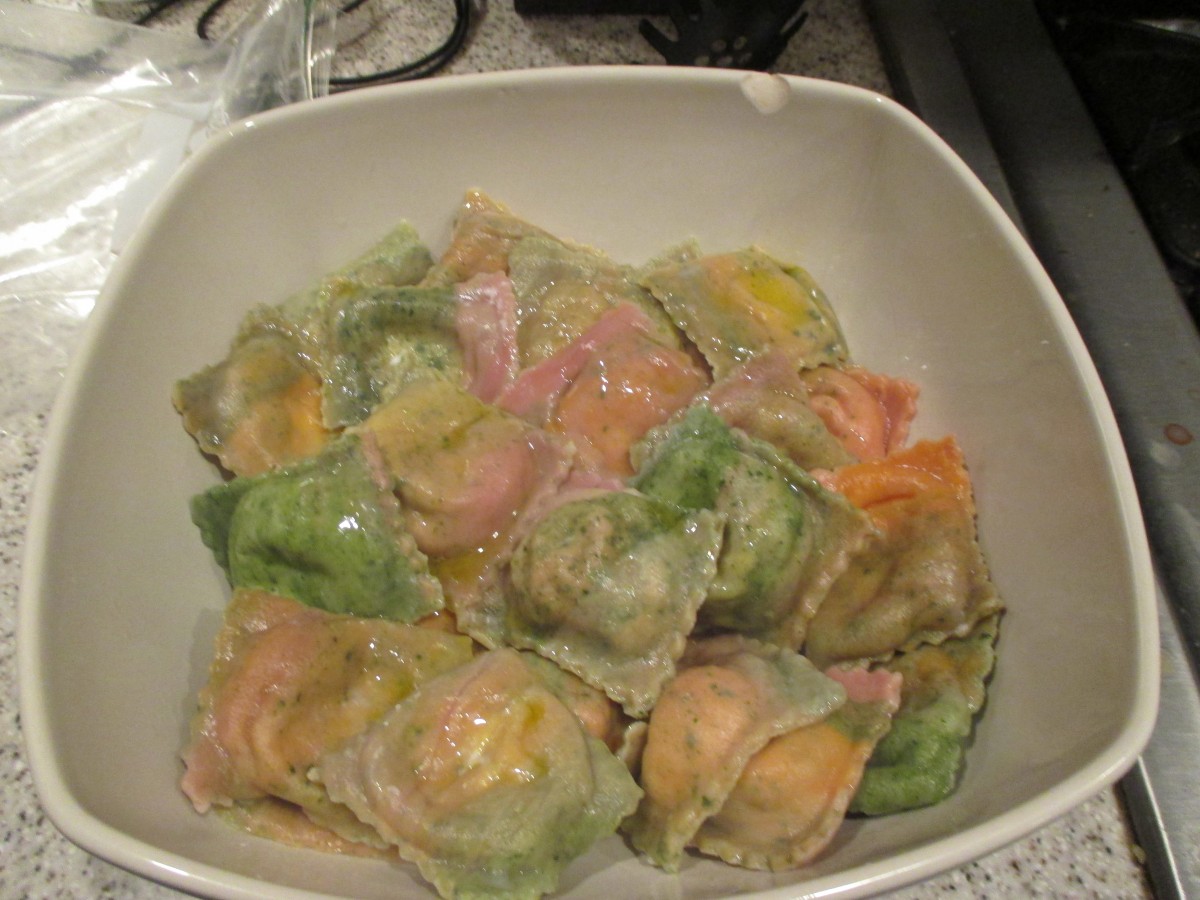
Ready to enjoy
Basic Homemade Pasta
3 c. flour
1 1/2 t. salt
4 eggs
Water, if needed
Mix flour and salt and stir in eggs, kneading until dough is smooth and elastic. Dough will be very stiff. Add a little water if needed to hold dough together. You may wish to mix the dough in a mixer or food processor. Cover dough and let rest 15-20 minutes before rolling. Under kneading your dough will result in coarse, crumbly pasta. This batch makes about 1 pound. Serves 4-6.
Roll dough out on well floured board or in pasta machine (non-electric) until desired thickness in reached. Add flour as needed to prevent sticking. Cut into strips or whatever shapes are desired. You might want to let the noodles dry 1-hour or more before cooking, but this is not necessary. Pasta can be hung to dry or separated and allowed to dry flat on a table. When pasta is not hanging to dry it must be turned occasionally to dry evenly. Although you may hear otherwise, homemade pasta, even when dried, should be frozen for long term storage. Storing at room temperature can lead to spoilage. Fresh pasta can also be stored in the refrigerator for a day or two.
These are smaller batches which can be mixed in a processor or by hand. If you want to mix a vegetable based pasta by hand, puree the vegetables first.
Carrot Pasta
1 c. flour
1/2 t. dried dill
1/3 c. carrot puree
1-2 T. water, if needed
Beet Pasta
1 c. flour
1/2 t. dill
1/3 c. beet puree
1-2 T. water, if needed
Spinach Pasta
2 c. flour
1 10 oz. package frozen spinach, cooked, drained, reserving some of the liquid
Mix this dough as for other pastas, but don’t be too quick to add reserved liquid. While kneading you’ll get water out of the spinach. May require more kneading and rolling than other pasta doughs. Be patient, it’s worth the work.
Broccoli Pasta
1 c. flour
1/2 c. broccoli puree
Ravioli Filling
4 oz. cream cheese, softened
2/3 c. shredded mozzarella cheese
2/3 c. ricotta cheese
1/3 c. grated Parmesan or Romano cheese
Combine all ingredients well and chill until needed.
Roll a batch of dough into a rectangle, 18×12 inches and 1/16 inch thick. Arrange well rounded teaspoonfuls of the cheese filling two inches apart on the pasta sheet. Roll out additional dough into an 18×12 inch rectangle. With a pastry brush moisten bottom sheet of pasta around edges with water. Place second sheet of pasta on top, using fingers to seal the dough around the edges of the filling. With a pastry wheel or sharp knife, cut between the ravioli to separate them. You should have 24 ravioli.
To cook the ravioli- just drop them into simmering water and cook 3-5 minutes. If using frozen ravioli increase cooking time by about 2 minutes. Time will differ depending on how thick you rolled the dough and how many you are cooking at one time.
Easter Bread Wreath
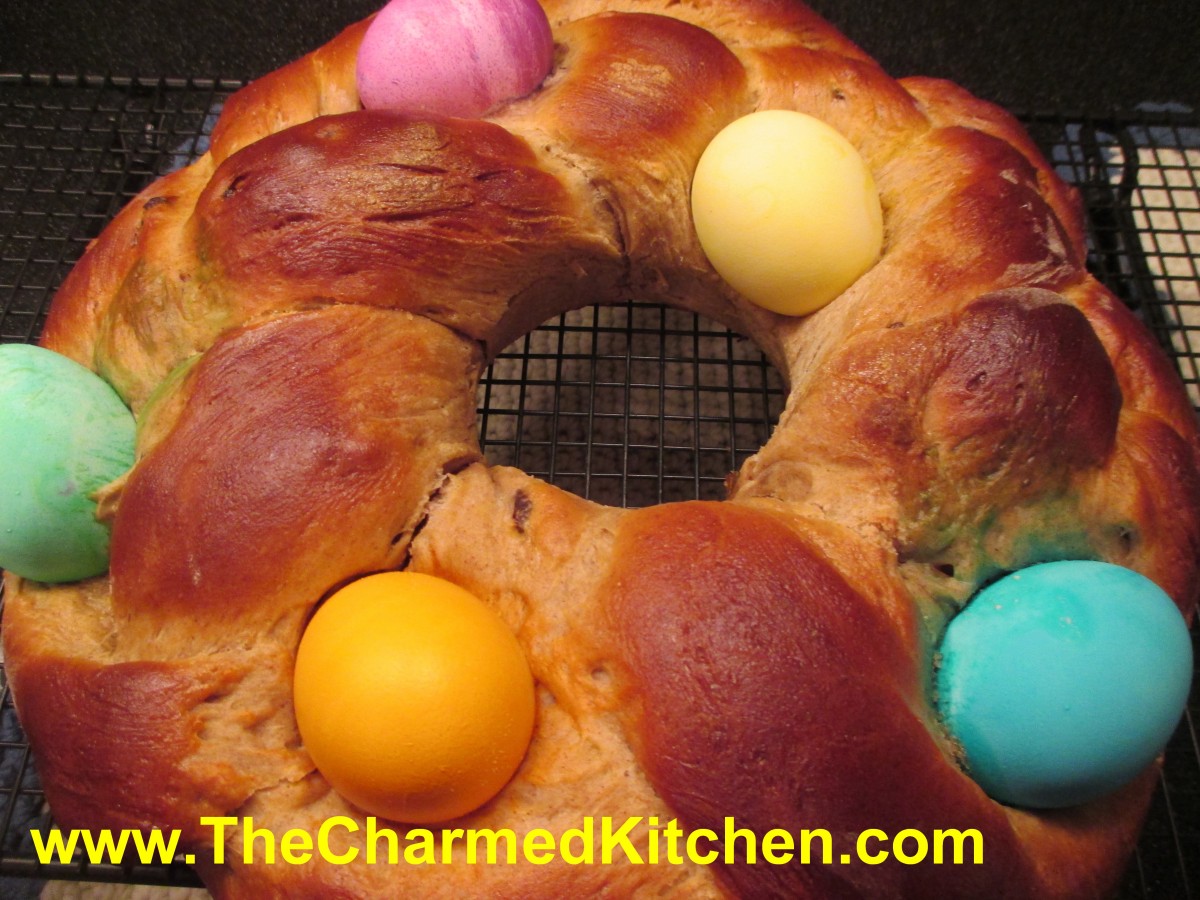
Easter Bread Wreath
This Easter bread wreath, with eggs baked on top, is a favorite of mine. I hadn’t made one in a long time, and when I went to find my recipe, I couldn’t locate it. So I decided to make a new recipe.
I wanted it to have a lot of flavor- something that would be fun served at a breakfast or brunch, but not too sweet. I added spices and raisins, but I could see using other dried fruits.
I left it plain on top – but you could easily add a powdered sugar glaze. No, I did not hard cook the eggs first. They cook while the bread is baking. Saves a step, for sure.
I tested the bread out with friends. Almost half was eaten before dinner, so I am confident to say, that this recipe is a winner. The texture of the bread is really nice and the dough is richly spiced.
I added mace, but if you don’t have any mace, add a little more nutmeg or allspice. Mace is a spice I would encourage you to try sometime. So here is the recipe. Hope you like it as much as we did.
Cinnamon Raisin Easter Wreath Bread
4½ -5 c. flour
1 pkt. yeast
½ c. brown sugar
2 t. cinnamon
1 t. salt
½ t. allspice
½ t. nutmeg
½ t. mace
1 c. warm water
½ c. butter, melted
2 eggs
½ c. raisins
5-6 uncooked eggs, dyed if you like
Combine 2 cups flour, yeast, sugar, seasonings and salt in large bowl. Heat together water and butter until warm and add to flour mixture. Beat 2-3 minutes. Beat eggs and reserve 1 tablespoon of the eggs for brushing the top of the bread later. Add remaining eggs and another cup of flour to the bowl. Beat 4 minutes. Add the raisins and enough of the remaining flour to make a soft dough. Knead on a floured surface until smooth and elastic, but still soft. Place in oiled bowl turning to oil top. Note: I actually used my stand mixer, and just left the dough in the bowl to knead, and then covered it to rise. I was able to leave the dough a little sticky this way, using less flour. Cover and let rise until doubled, about 45 minutes. While dough is rising, prepare a pan. Grease a large baking sheet- or use a silicone baking mat. Grease a one cup oven-proof custard cup and place it upside down on the middle of the baking sheet. This will keep a “hole” in the middle of your wreath. If you don’t have a custard cup, you can use a metal one-cup measure instead. Punch dough down and divide in three pieces. Roll each piece into a 20-inch long rope. Braid the ropes together. Wrap the braid around the custard cup on the baking sheet and pinch ends together to keep the braid from coming apart. Cover and allow to rise until doubled (50-60 minutes). Just before baking, combine reserved egg with a little water and brush the wreath with the egg wash. Place 5 or 6 eggs on the top of the braid- being careful not to press down too hard. Bake in preheated 350-degree oven for 25 minutes. Cover bread with foil and bake 10-15 minutes longer, or until bread sounds hollow when tapped lightly. Here is the only tricky part. You have to remove the wreath, but not drop the glass custard cup in the middle. You can let the bread cool a few minutes before moving. I use a silicone baking sheet so I slide the whole thing off the baking sheet and onto a cooling rack. I use two large spatulas to lift the wreath up and leave the custard cup behind. If it doesn’t come right out, use a knife to loosen. Just lift the wreath up enough to slide the custard cup out. Let cool before serving- store leftovers in fridge – because of the eggs on top. Makes 1.
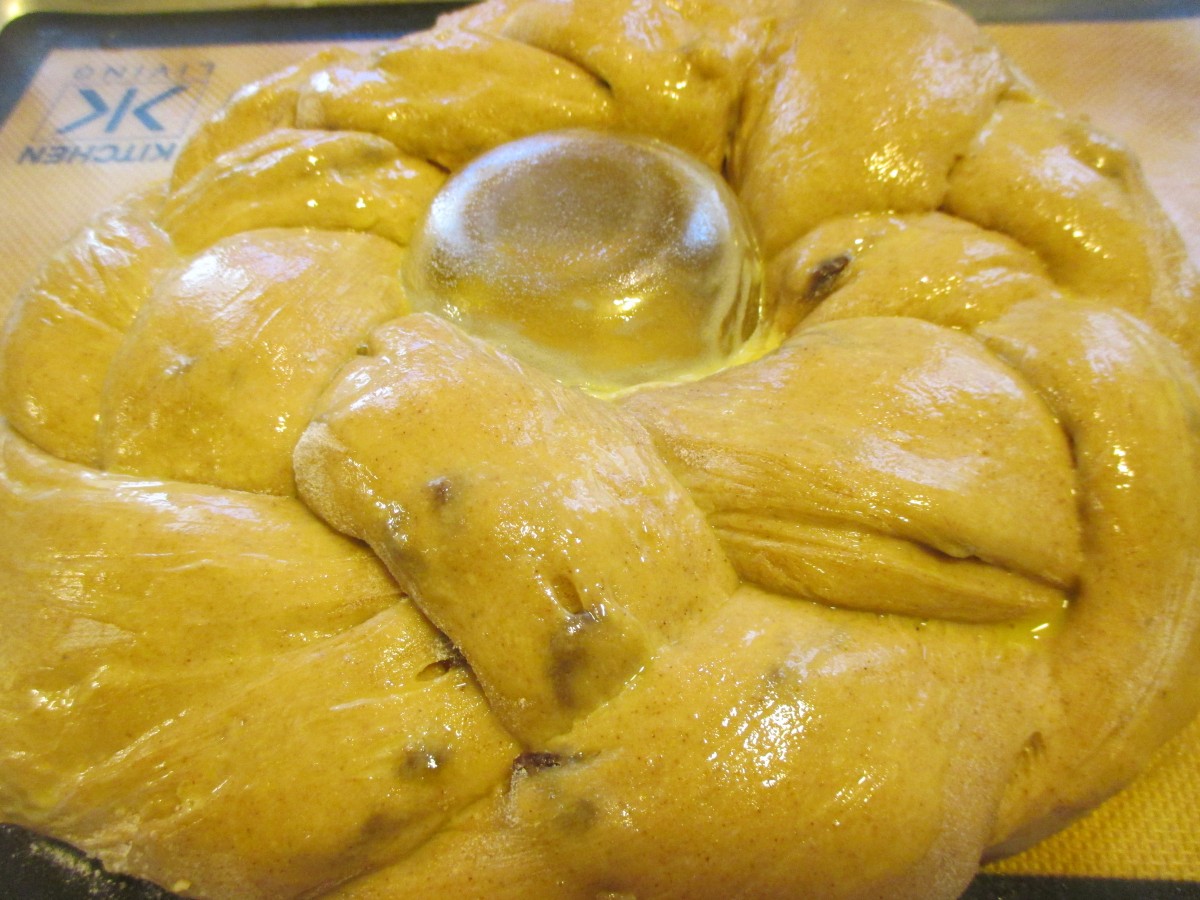
Ready for the oven
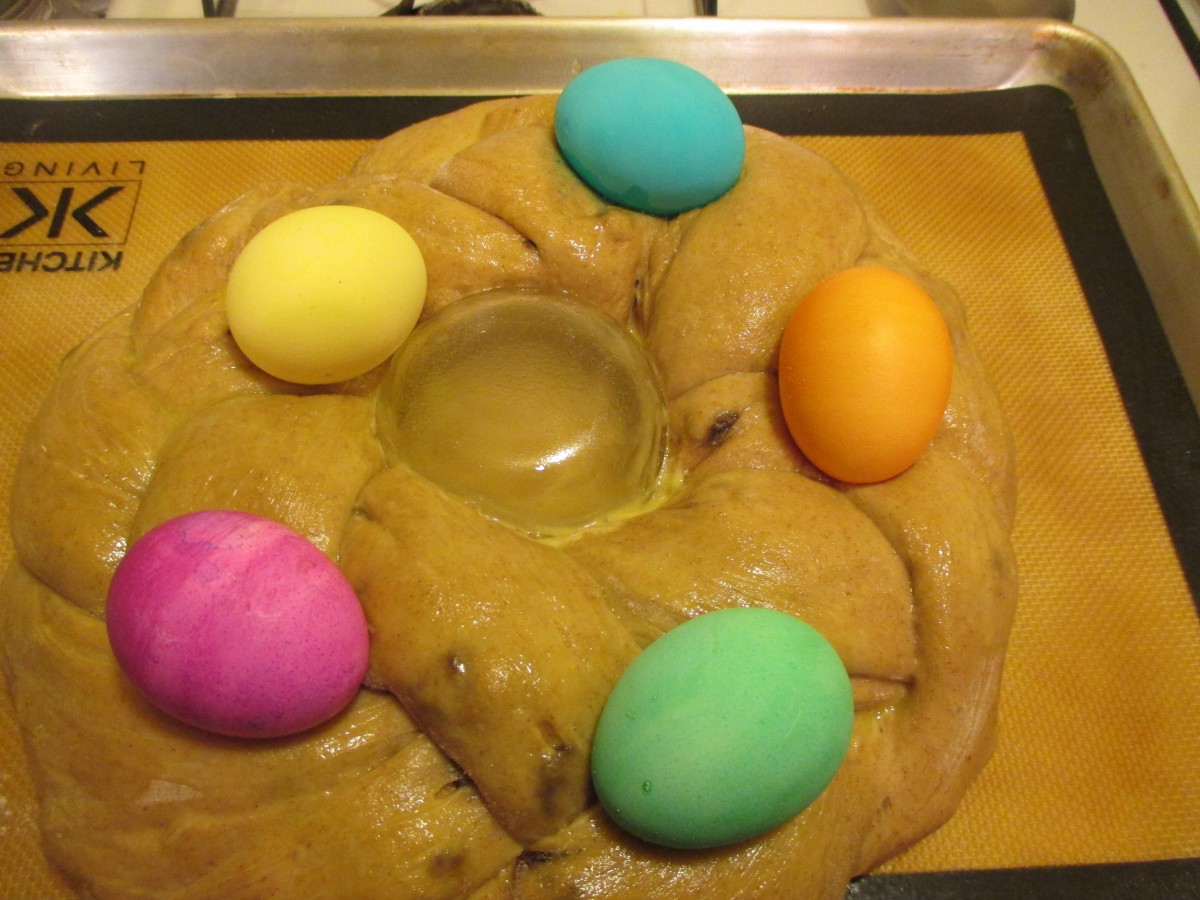
Place eggs on top before baking
Cream Cheese Sweet Bread
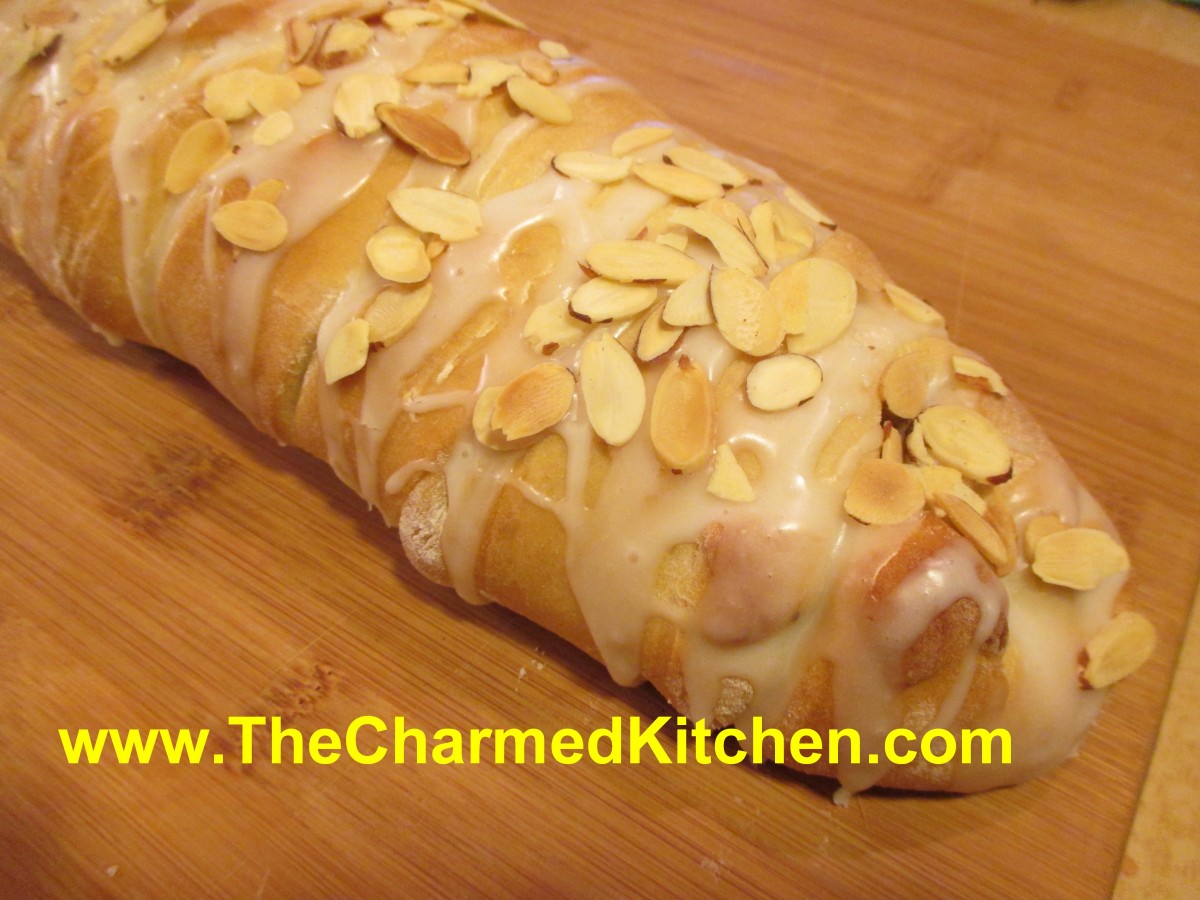
Cream Cheese Sweet Bread
For some reason, I had real trouble naming this recipe. It’s a sweet bread, with a cream cheese and chocolate chip filling. The filling reminded me of cheese cake, cheese Danish and cannoli, all rolled into one.
Whatever you call it- it is really good. This would be a great brunch or breakfast dish for Easter morning. You could also serve it for dessert.
It can be baked a head of time, and it even freezes well. It is sweet, but not too sweet. When I mixed up the filling ingredients, it was kind of runny. I decided to precook the filling, which worked out great.
I used a powder sugar glaze for the top, then added sliced almonds. I could see adding a drizzle of melted chocolate, too. Well, maybe the next time.
Cream Cheese Sweet Bread
3 ¼ c. flour
¾ c. sugar
2 t. cinnamon
1 t. salt
1 package quick-rising yeast
1 c. hot water
1 T. oil
Filling
1 (8 oz.) package cream cheese, softened
½ c. sugar
2 eggs
2 t. vanilla
1 c. mini chocolate chips, optional
Topping
2 c. powdered sugar
Milk, water or lemon juice
Toasted sliced almonds*
Set aside 1 cup of the flour. Combine remaining flour with the other dry ingredients in a medium bowl. Stir in water and oil and gradually stir in enough flour to make a soft dough. Turn onto lightly floured surface and knead until dough is smooth and elastic, about 5 minutes. Cover and allow dough to double, about 30 minutes. Meanwhile, combine cream cheese with sugar and beat until smooth. Add eggs and vanilla and mix well. Mixture will be soupy. Place cream cheese mixture in a microwave safe bowl and cook, in microwave, on high, for 3-4 minutes, or until cheese mixture firms up. Let it cool down 10 minutes and then stir it. Stir in chips, if using. Roll dough into a rectangle about 16 x 8. Spread cheese filling down center middle of dough. Cut one-inch wide strips of dough from filling to edge on both sides. It will sort of look like fringe. Alternating sides, fold strips up and over the filling at an angle. Carefully lift loaf onto greased baking sheet and place at an angle. Cover with a towel and set in a warm place to double in bulk, about 30 minutes. Bake in a preheated 375-degree for 20-25 minutes or until golden brown. Remove from oven and place bread on a rack to cool. Make the topping by combining powdered sugar with just enough liquid so you can drizzle it over the bread. Once the bread is cooled down, drizzle with the glaze. Sprinkle with the sliced almonds. Refrigerate leftovers.
If you use regular yeast, use warm, rather than hot water. Also, it will take a little longer for dough to rise.
*To toast the almonds, just place them in a skillet, over medium heat, and cook until lightly browned. Stir or toss often and watch closely so they don’t burn.
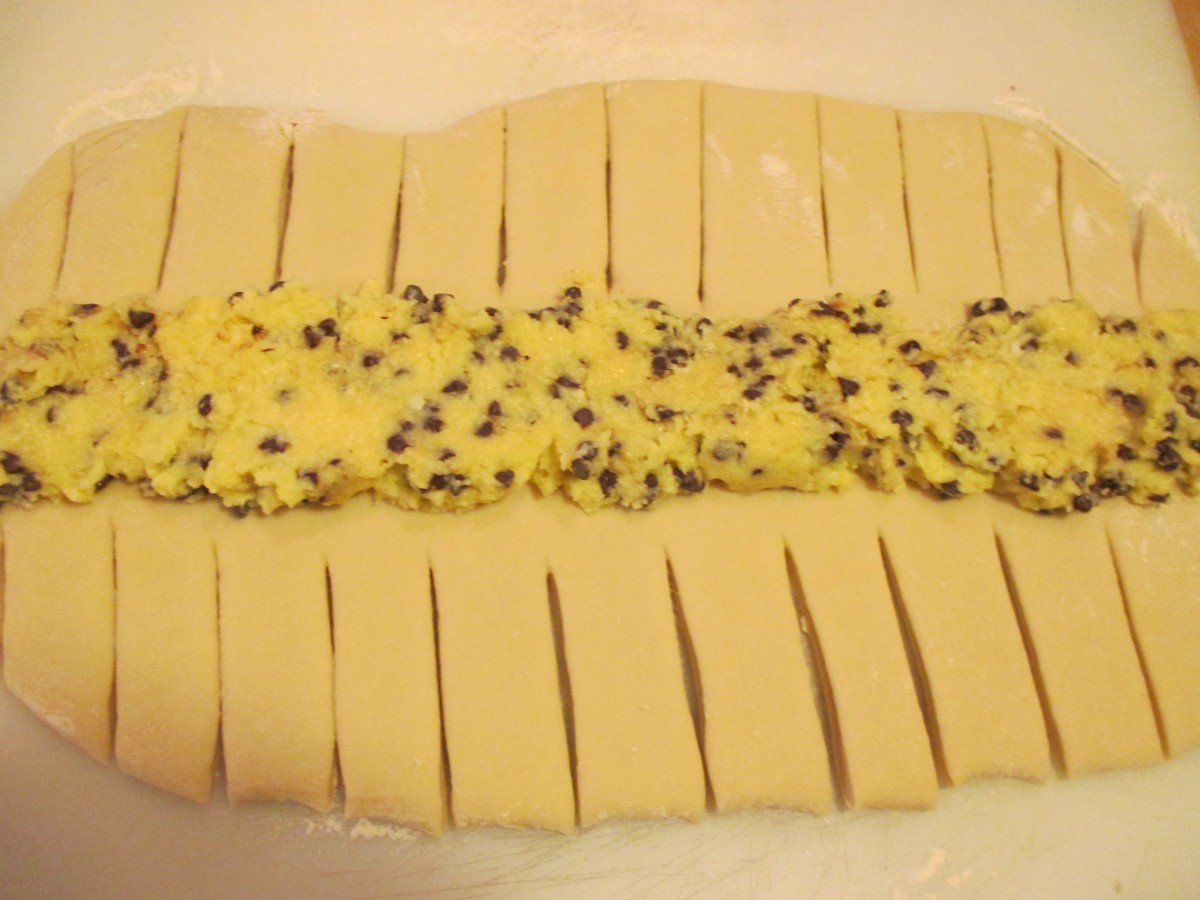
spread filling and cut dough into 1-inch strips

fold dough over filling
Chocolate and Orange Mini Cheesecakes
Chocolate and Orange Mini Cheesecakes
These cheesecakes might be small, but they are loaded with flavor. Chocolate graham crackers are used to make the crust. If you don’t have chocolate graham crackers, chocolate cookie crumbs would work, too.
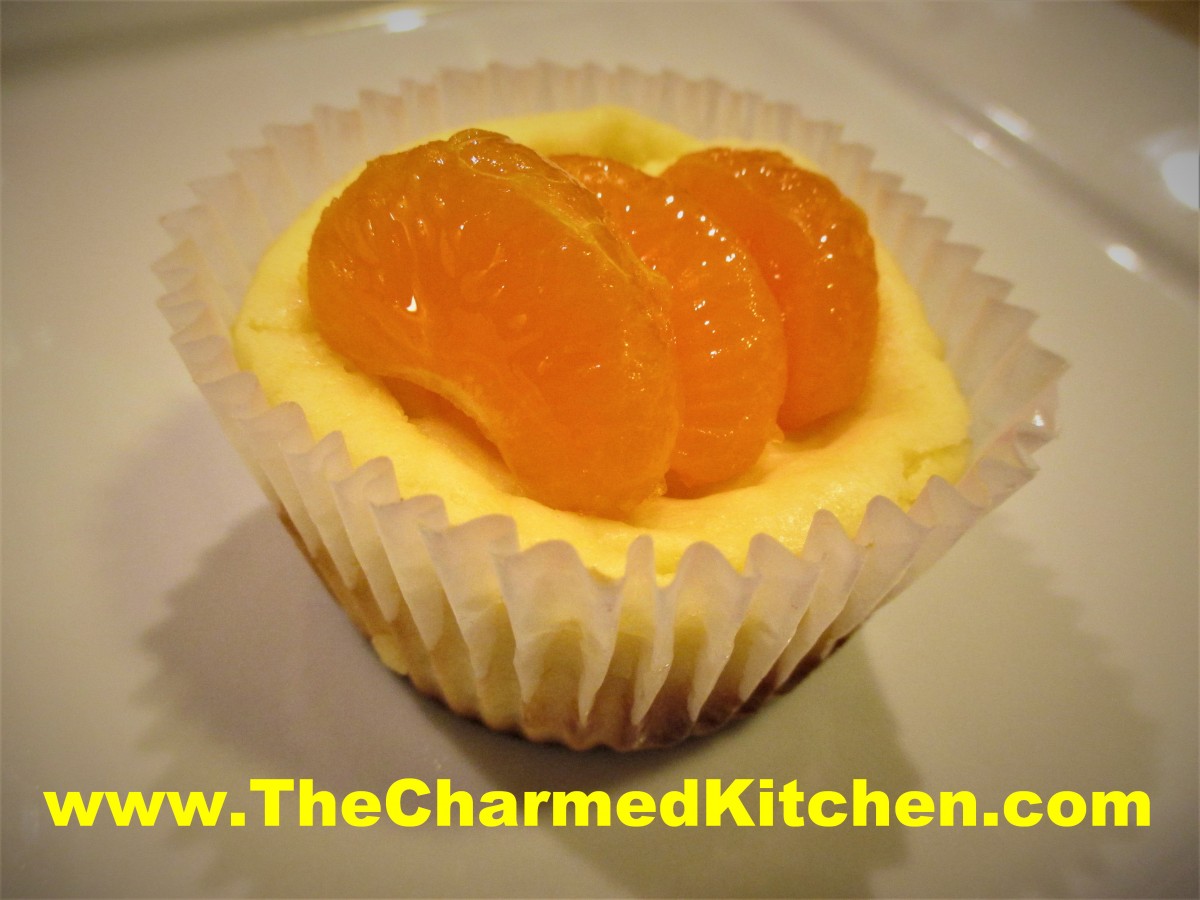
The cheesecake filling is flavored with both vanilla and orange zest. I topped them with fresh mandarin oranges, tossed in a light sugar syrup.
These mini cheesecakes are a wonderful dessert for any time. An added bonus, they are pretty easy to make. You can whip up a batch in no time at all.
They puff up when they are in the oven. Once the cheesecakes cool down, they will sink in the middle a little. That is normal. I look at the little indent as the place to put the toppings.
You can top with other fruit, too. I made these for friends recently and topped with both oranges and strawberries. You could also top with whipped cream, if you like.
They also freeze well.
Orange and Chocolate Mini Cheesecakes
8 chocolate graham crackers
3 T. butter, melted
2 (8 oz.) cream cheese, softened
½ c. sugar
2 t. orange zest
2 t. vanilla
2 eggs
4 or 5 mandarin oranges
4 T. sugar
3 T. water
Line 12 muffin tins with paper liners. Set aside. Crush graham crackers into crumbs- you should end up with about a cup of crumbs, or a bit more. Place crumbs in small mixing bowl. Drizzle the melted butter over the crumbs, and toss to distribute the butter evenly. Spoon a rounded tablespoon of the crumb mixture into each of the paper lined muffin tins. Press firmly on the crumb mixture. I used the bottom of a small glass to press the crumb mixture down. Set aside. Beat together the cream cheese, sugar, zest and vanilla for 1 minute with electric mixer. Beat in the eggs until just mixed in. Divide this mixture in the muffin tins, filling each 3/4 full. Bake 25 minutes at 325 degrees. While cheesecakes are baking, prepare oranges. Peel oranges and break apart into segments (sections). You will need 36 segments in all. In small pan, boil together sugar and water for two minutes. Place orange segments in a small bowl and pour the sugar syrup over them, tossing gently to coat. Set aside to cool down. Place three orange segments on top of each cooled down cheesecake. Makes 12. Serves 6.
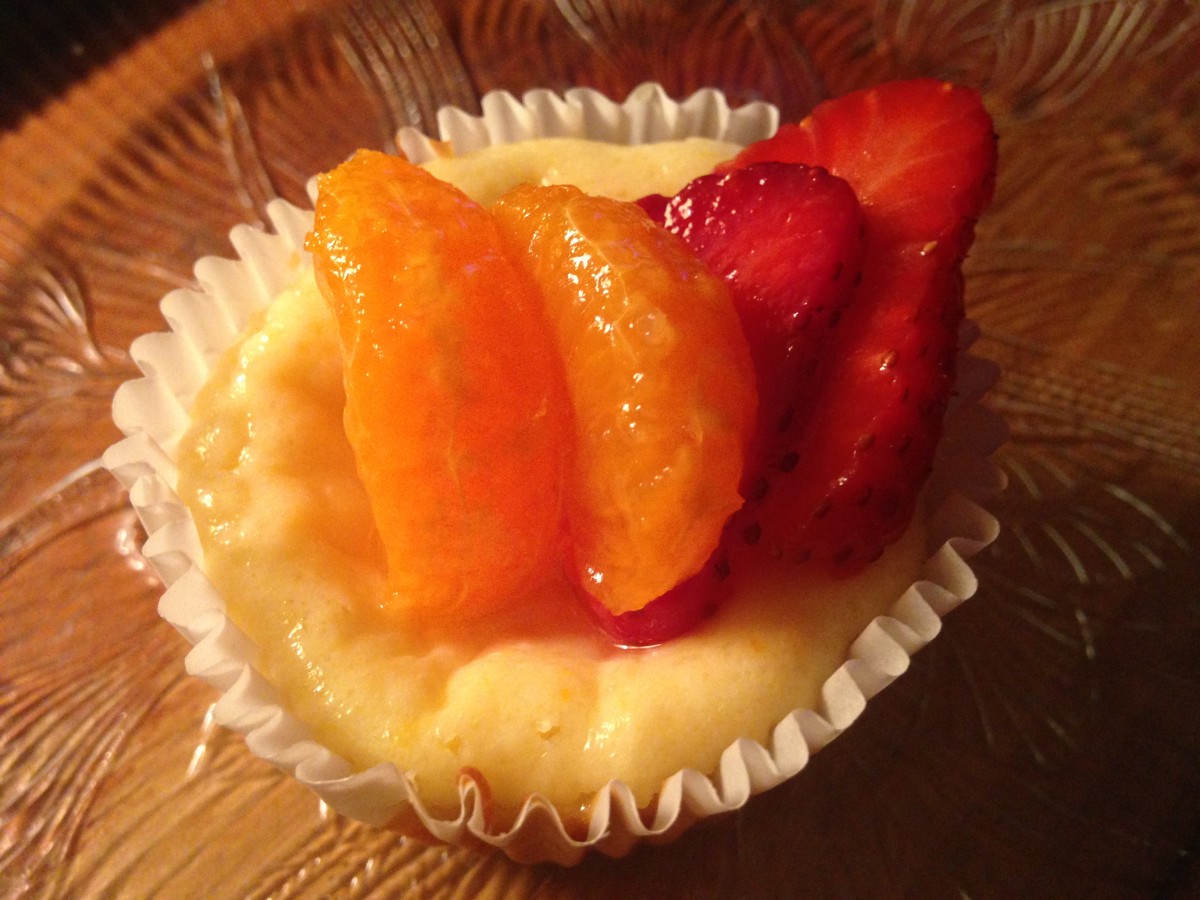
Topped with oranges and strawberries
Easter Cupcakes

Trio of Easter Cupcakes
These cupcakes would make a great dessert for Easter- or any spring time party. They are also a fun dessert for kids to make.
I started out by making a double batch of my classic white cupcakes- recipe follows.
I also made a double batch of white chocolate frosting. You could certainly make a vanilla buttercream, if you prefer.
To add a little color to the cupcakes, I divided the batter into three bowls and tinted each of them a different pastel color.
As I filled the pans, I just added a spoonful of each of the tinted batters in them. They came out really nice. I made three different cupcakes: bunnies, chicks and nests.
Details on how to make each of them are listed below.
Classic White (Vanilla) Cupcakes
1 cup sugar
1/2 cup butter
2 eggs
2 teaspoons vanilla extract
1 1/2 cups all-purpose flour
1 3/4 teaspoons baking powder
1/2 cup milk
Preheat oven to 350 degrees. Line a muffin pan with 12 paper liners. In a medium bowl, cream together the sugar and butter. Beat in the eggs, one at a time, then stir in the vanilla. Combine flour and baking powder, add to the creamed mixture and mix well. Finally stir in the milk until batter is smooth. Pour or spoon batter into the prepared pan. Bake 20 to 25 minutes. Cupcakes are done when they springs back to the touch. Makes 12.
White Chocolate Frosting
6 oz. white chocolate – if using bars, chop before melting
1 stick (4 oz.) cold butter, cut into cubes
1-2 c. powdered sugar
1 t. vanilla
Melt chocolate. I just melt mine in a microwave safe dish, but you can use a double boiler. Let chocolate cool down a little. Beat butter into the melted chocolate. Beat until smooth and then beat in the powdered sugar and vanilla. Whip until frosting is smooth and fluffy. I normally beat for 5 minutes or longer. If too thick, add a few drops of water or milk. For this recipe, I made a double batch of frosting.
Bunnies
extra white chocolate
food coloring- pink or red
chocolate chips
pastel ( pink) M&M’s
Make bunny ears by melting some white chocolate and putting it in a piping bag or bottle. On wax paper, make outline of the ears in white chocolate and allow to cool/harden. Place a drop or two of pink or red food coloring in a microwave safe bowl and add some white chocolate. Melt in microwave, being careful not to burn the chocolate and stir until it turns pink. Pipe the pink chocolate into the middle of the ears. Allow to harden before peeling off of the was paper. Using a star tip, pipe frosting on cupcake. I made three layers – to add height to the cupcake. place ears on cupcake and add chips/candy for eyes and mouth.
Chicks
Frosting tinted yellow and green
mini chocolate chips
fruit roll up
Using star tip, pipe the chick’s body onto the cupcake in yellow frosting. Pipe on head and wings. Pipe green frosting around chick to form a nest. Use mini chips for eyes and cut fruit roll up for beak.
Nests
Frosting tinted green
egg shapes malted milk balls- or you could use jelly beans
Pipe green frosting on cupcakes to make nests. Add three, or more, candies in the middle for eggs.

Piping pink filling in ears
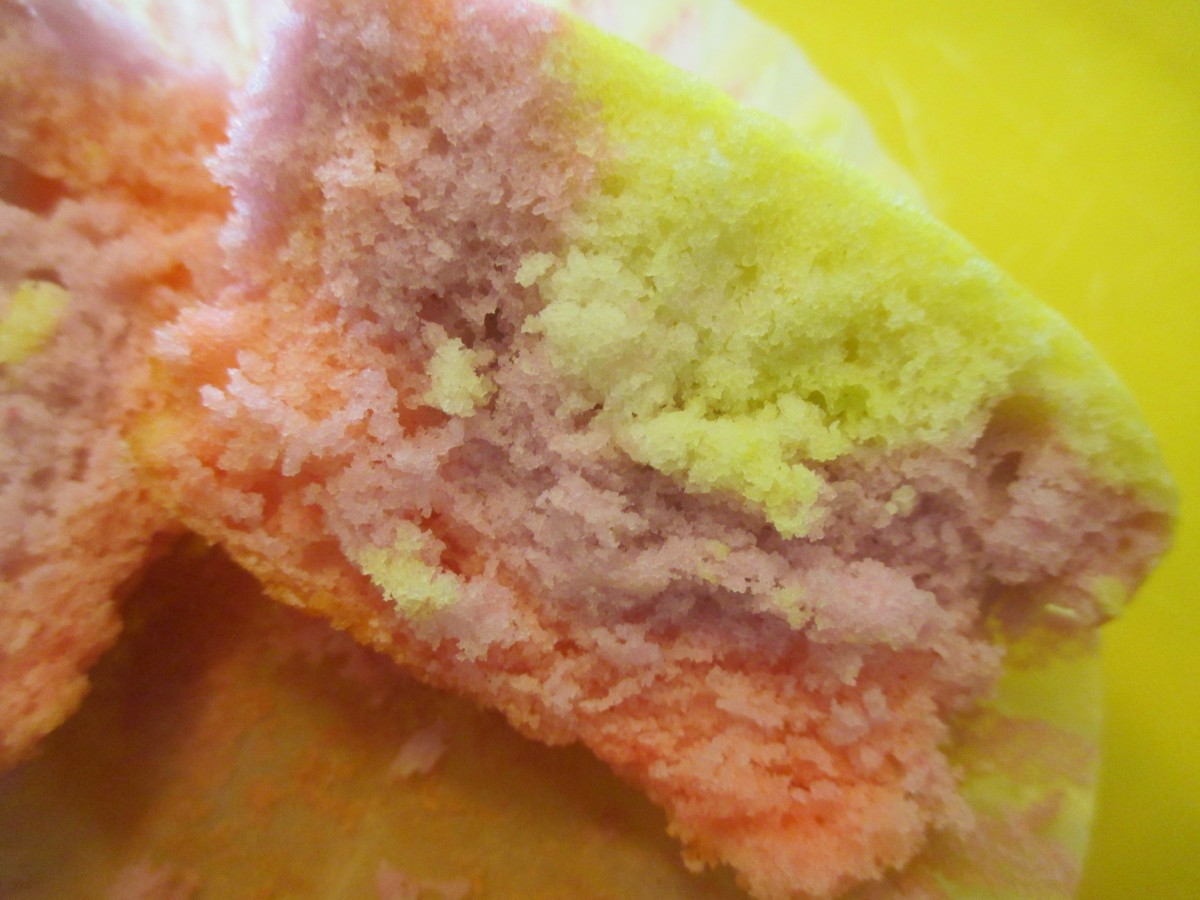
rainbow cupcake
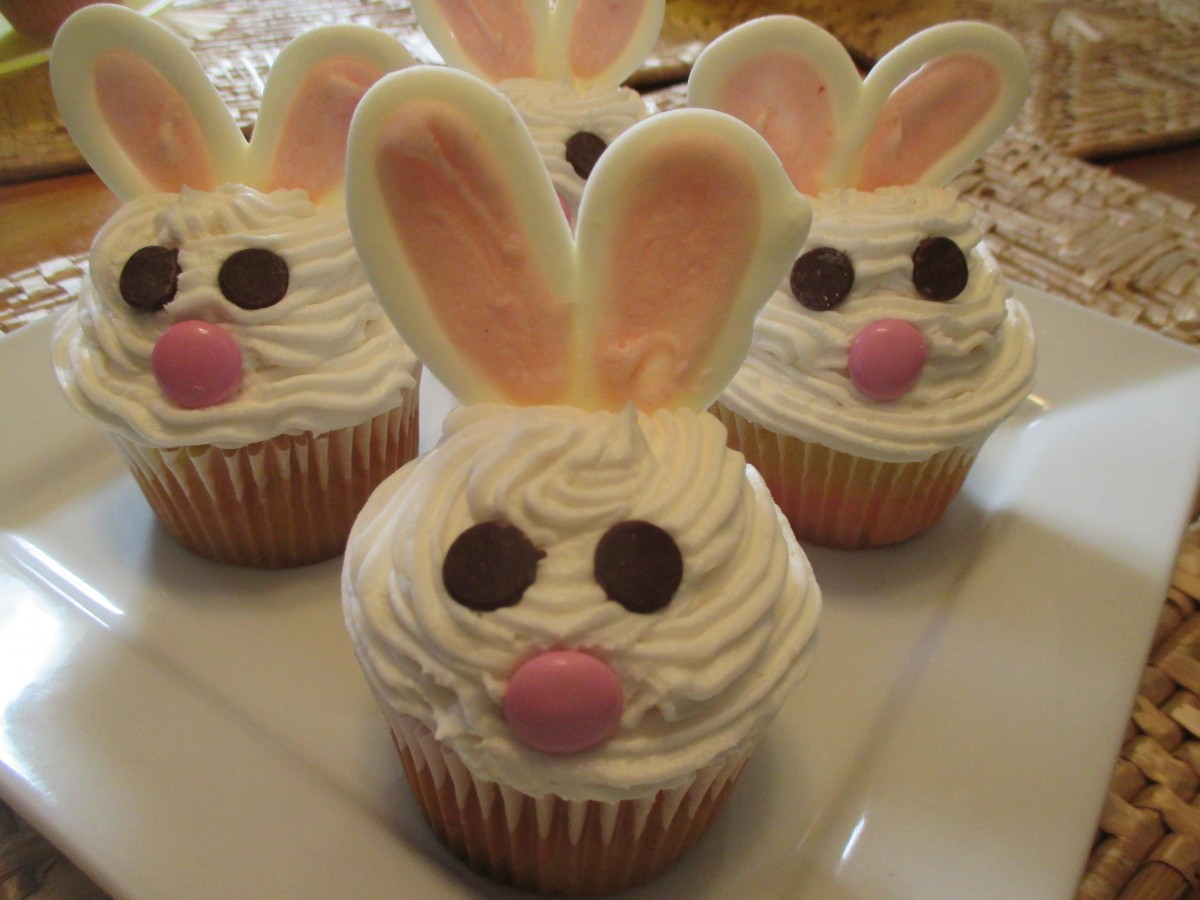
bunnies
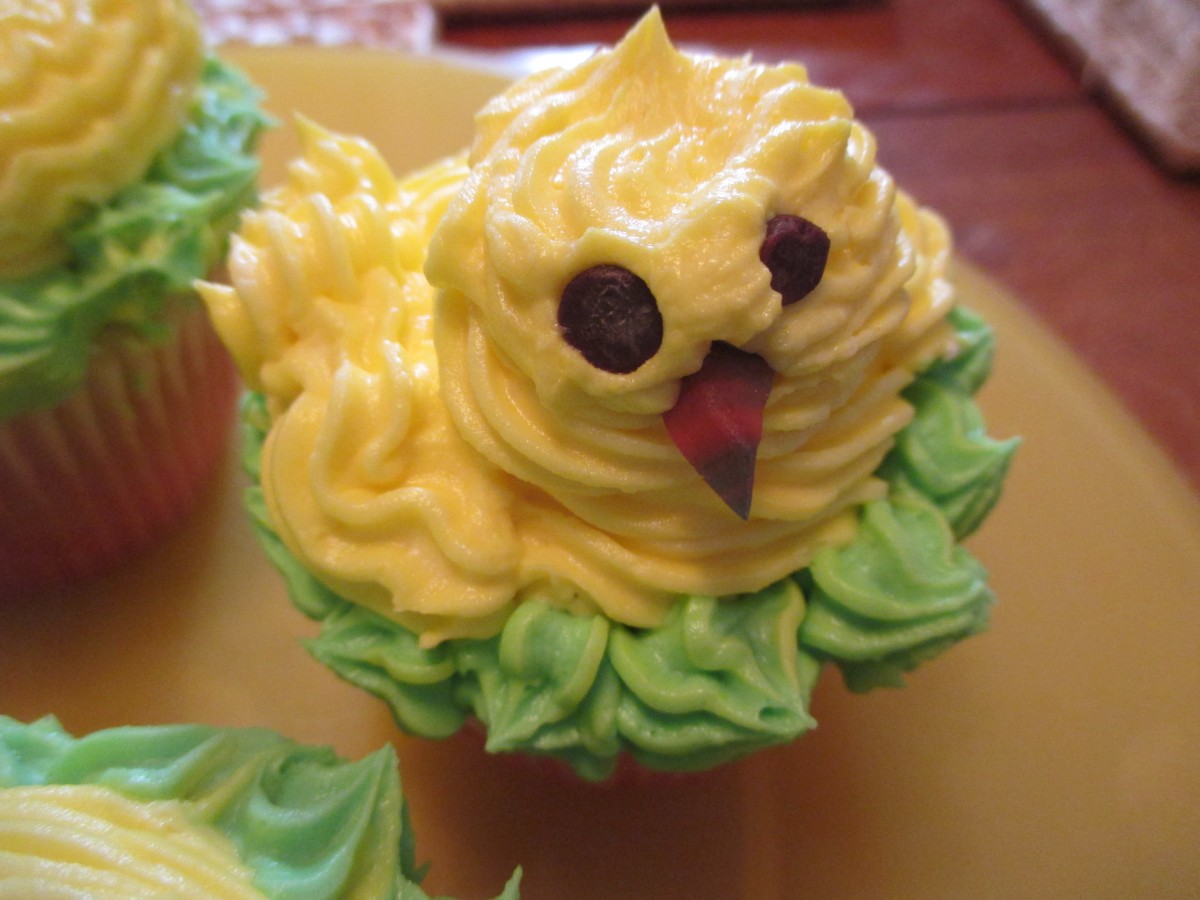
Chick cupcake
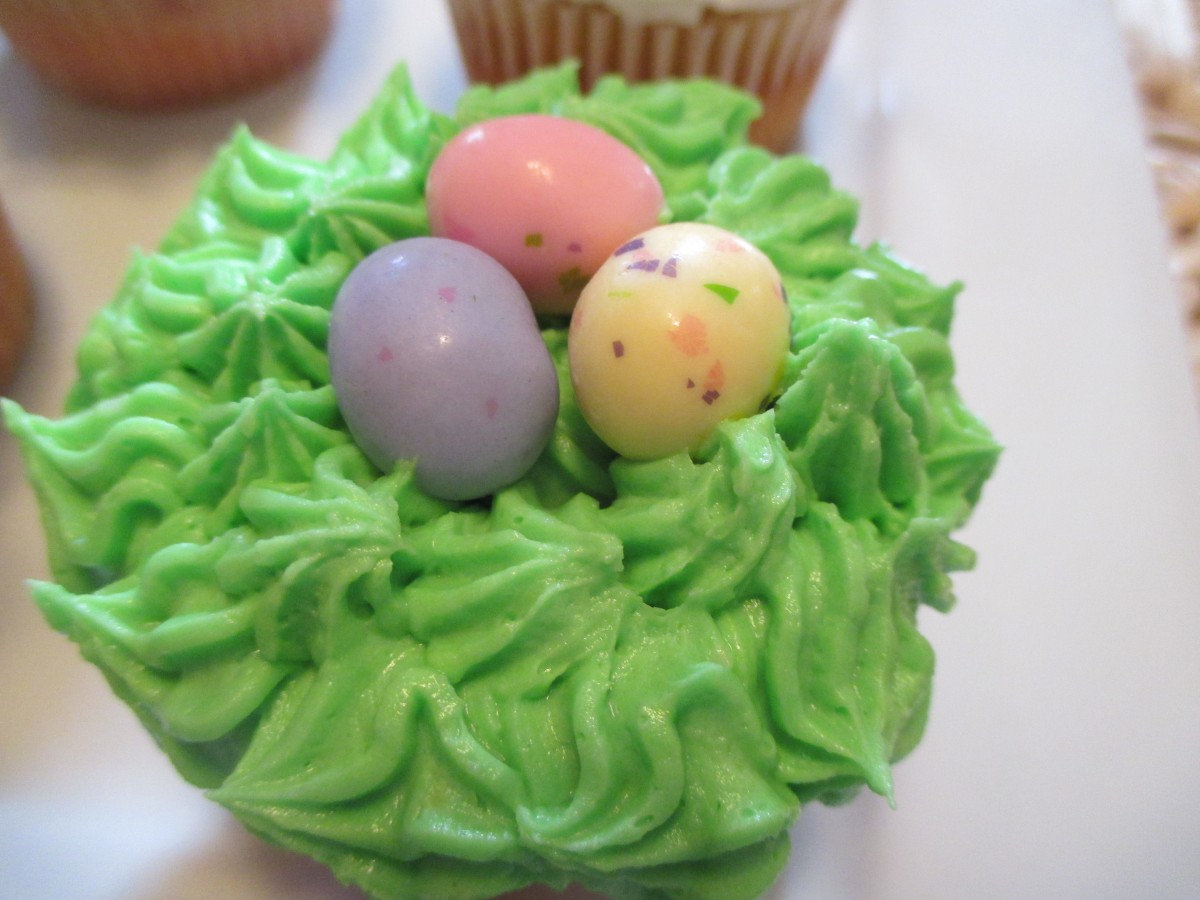
The nest cupcake
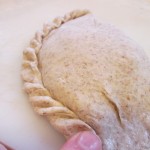
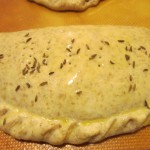
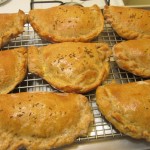
Corned Beef Calzones
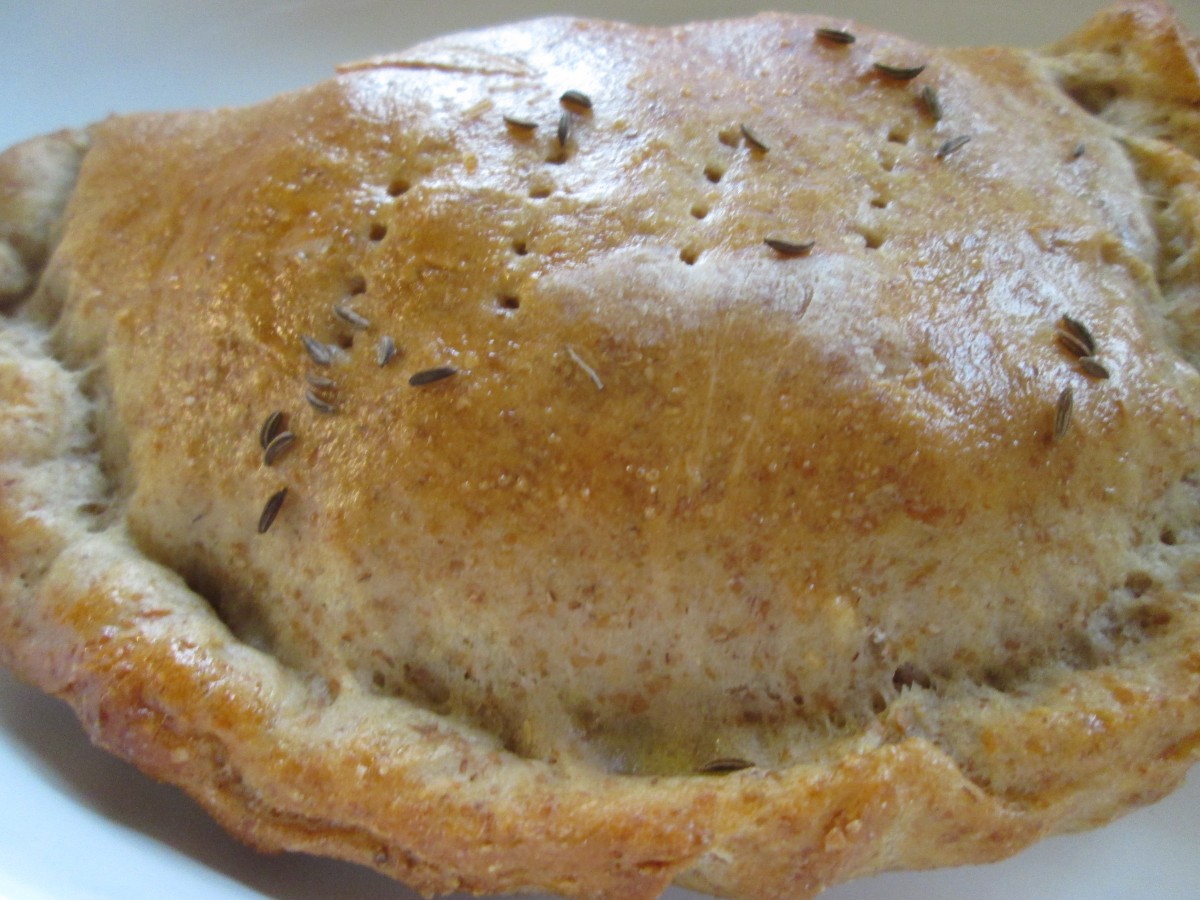
Corned Beef Calzones
I thought this might be a nice time to share this recipe. Seems like an awful lot of people are cooking with corned beef today. If you have leftover corned beef, you can use it in these tasty calzones. You can also used deli slice corned beef.
I made these for a friend a while back and we were talking about them the other day. I decided to make them again.
They are almost a Reuben, but I didn’t include the sauerkraut. You could, if you liked. I sometimes make these with thousand island dressing inside them as well, but I decided to leave it out and serve it on the side instead. I thought I would share the recipe with you.
Corned Beef Calzones
3 ¼ c. flour
1 c. rye flour
1 T. sugar
1 t. salt
1 package quick-rising yeast
1⅓ c. hot water
1 T. oil
1 lb. thin sliced corned beef
8 oz. shredded Swiss cheese
1 egg , beaten
Caraway seeds, optional
Set aside 1 cup of the all-purpose flour. Combine remaining flour with the other dry ingredients in a medium bowl. Stir in water and oil and gradually stir in enough flour to make a soft dough. Turn onto lightly floured surface and knead until dough is smooth and elastic, about 5 minutes. Cover dough and let rest 20 minutes. Divide dough into 8 pieces and roll one piece into a 6-8 -inch circle. In the middle of the dough place 1 ounce of the Swiss cheese and 2 ounces of the corned beef. Brush the edge of the dough with water. Fold over the dough in half and press the edges to seal. Brush the edge again with water and roll the edge over again. It will give you a prettier look and seal the calzone better. Repeat with remaining dough and fillings. Place calzones on greased baking sheets- or on a baking sheet with a silicone liner or parchment paper liner. You will end up with 8 calzones in all. Only put 4 on one baking sheet. Cover and let rest 15 minutes while preheating the oven to 400 degrees. Before placing calzones in the oven brush with beaten egg and sprinkle with the caraway seeds, if you like. Also poke a few holes in the tops with a fork to help steam to escape while baking. I put both baking sheets in the oven at the same time and switch them halfway through baking. Bake in a preheated 400-degree for 20-25 minutes or until golden brown. If baking both at once switch them after 10 minutes or so. Cool slightly before eating. Serve warm and refrigerate leftovers.
If you want to use regular yeast use warm, rather than hot water. Also, allow a little more time for the dough to rise the first time, about 40 minutes. Everything else will work the same.
If you want to make your own Thousand Island Dressing, just combine equal amounts of sweet pickle relish, mayo and catsup.
Shepherd’s Pie
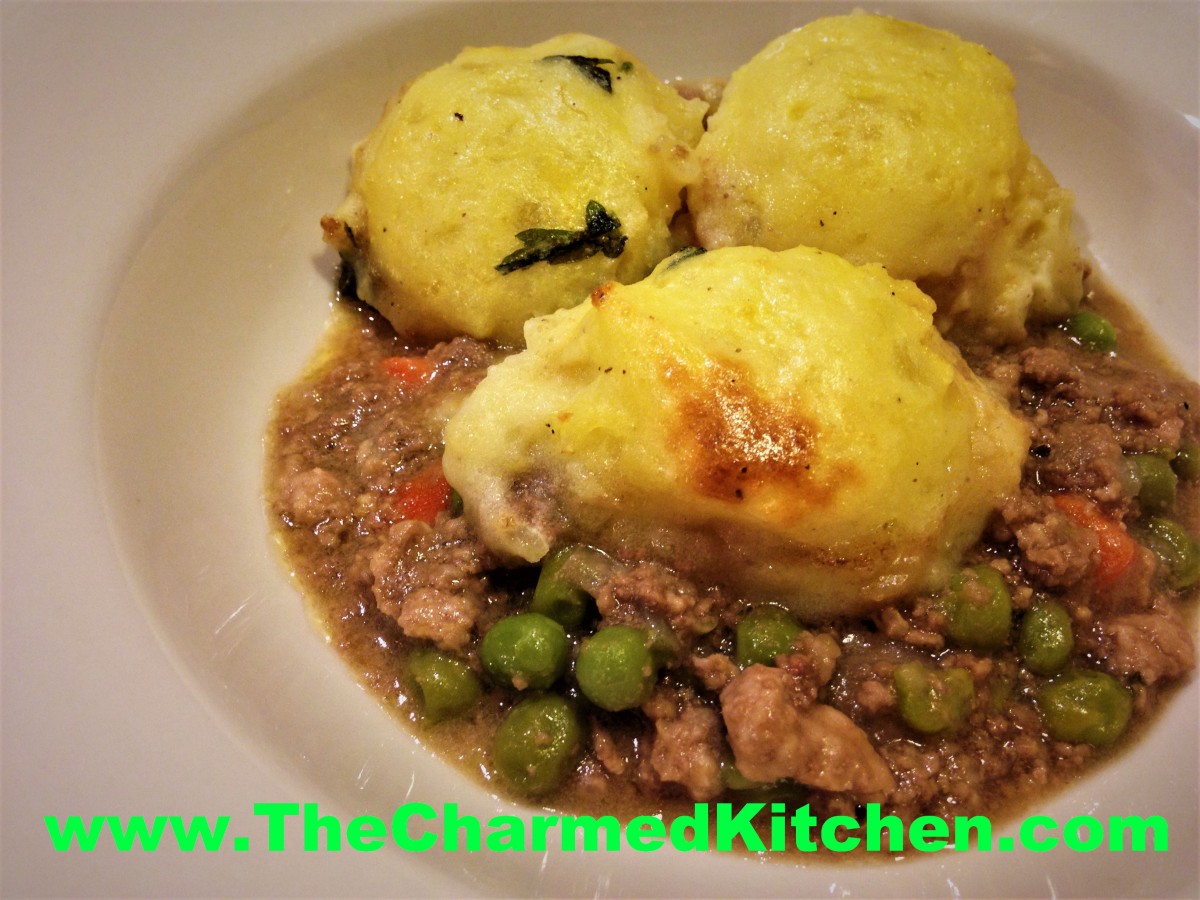
Shepherd’s Pie
If you are looking for a traditional dish for St. Patrick’s Day, you might want to make a Shepherd’s Pie. Shepherd’s pie is a mix of ground lamb and veggies, in a gravy, that are topped with mashed potatoes. Then it is baked until the mixture is heated through and potatoes brown a little.
It’s a lovely dish anytime, not just for a holiday. There are a lot of variations for shepherd’s pie, but is most often made with ground lamb. You can use other ground meat. It will still be tasty, just less traditional.
The potatoes are mashed, then spread over the meat mixture. You can pipe the potatoes on top, for a pretty presentation. I used a small ice cream scoop to place my potatoes on top. It looked pretty good.
I brushed the potatoes with some beaten egg, to give them a nice shine. You can sprinkle with some Parmesan cheese, if you like. For even more color on the potatoes, you can place under the broiler for a few minutes.
I used sherry in my gravy. Red wine would also be nice. I also added some parsley to my mashed potatoes.
Shepherd’s Pie
2 T. oil
2 onions, chopped
2 carrots, peeled and diced
2 lbs. ground lamb
2 c. peas
5 T. flour
1 c. chicken stock- or a bit more
½ c. sherry
2 t. thyme
Salt and pepper to taste
2-3 lbs. potatoes
1 c. sour cream
3 T. butter
Salt and pepper to taste
¼ c. chopped parsley
1 egg
Heat oil in large skillet. Sauté onions until tender. Add carrots and cook until carrots are tender. Add lamb and cook until lamb is no longer pink. Add peas and flour, then stir until flour is mixed in. Add stock, sherry and thyme. Cook until thickened and bubbly. Season to taste with salt and pepper. While cooking the meat mixture, peel, dice and boil potatoes until tender. Drain potatoes and mash until smooth. Add sour cream, butter and seasonings. Place meat mixture in a 9×13 inch baking dish. Top with the mashed potatoes. You can spread them, pipe them on or, as I did, use an ice cream scoop. Beat the egg and brush the potatoes with the egg. Bake in a 400 degree oven for about 20 minutes, or until potatoes start to brown and mixture is heated through. You can place under the broiler, if you like, for more color. Serves 6-8.
Blueberry and Cheese Coffee Cake
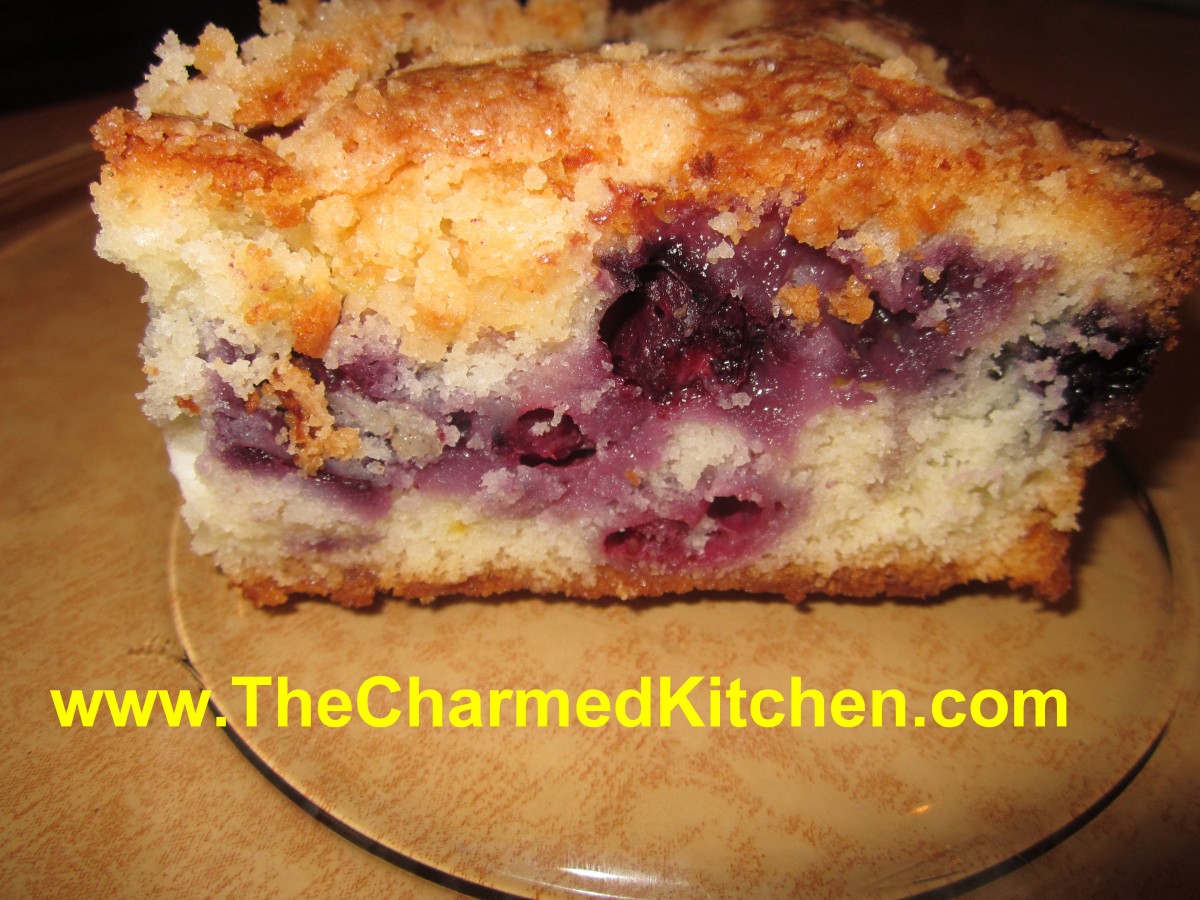
Blueberry and Cheese Coffee Cake
One of the perks of defrosting the freezer, is finding stuff you forgot about. Apparently, I froze more blueberries than I thought. Seemed like the perfect time to make this wonderful coffee cake, and share the recipe with you.
Even though I love eating fresh berries when they are in season, there is something special about baking with berries as snow flies outside. Makes me think about warm, summer days.
This blueberry cake is not too sweet, and the combination of cream cheese, with the blueberries reminds me of a blueberry blintz. It is a wonderful dessert, but can also be served as a breakfast or brunch dish.
You can also freeze leftovers, to be discovered and enjoyed another day.
Blueberry and Cheese Coffee Cake
1 1/4 c. sugar
1/2 c. butter
2 eggs
2 1/4 c. flour
1 T. baking powder
1 t. salt
1 c. milk
2 c. fresh or frozen blueberries
8 oz. cream cheese, cubed
1 t. grated lemon peel
Topping:
1/4 c. sugar
1/4 c. flour
1 t. grated lemon peel
2 T. butter
Preheat oven to 375. Grease and flour a 13×9 inch baking dish. Cream together sugar and butter until fluffy. Beat in eggs. Combine 2 cups of the flour with baking powder and salt and beat into batter alternately with the milk. Toss berries with the remaining flour and fold into the batter along with the cheese and lemon rind. Pour batter into prepared pan. Combine sugar, flour and lemon peel for topping and cut in butter to resemble coarse crumbs. Sprinkle over batter and bake for about 45 minutes. Use toothpick to test for doneness. Serves 12.


