Chocolate Waffles
Chocolate Waffles
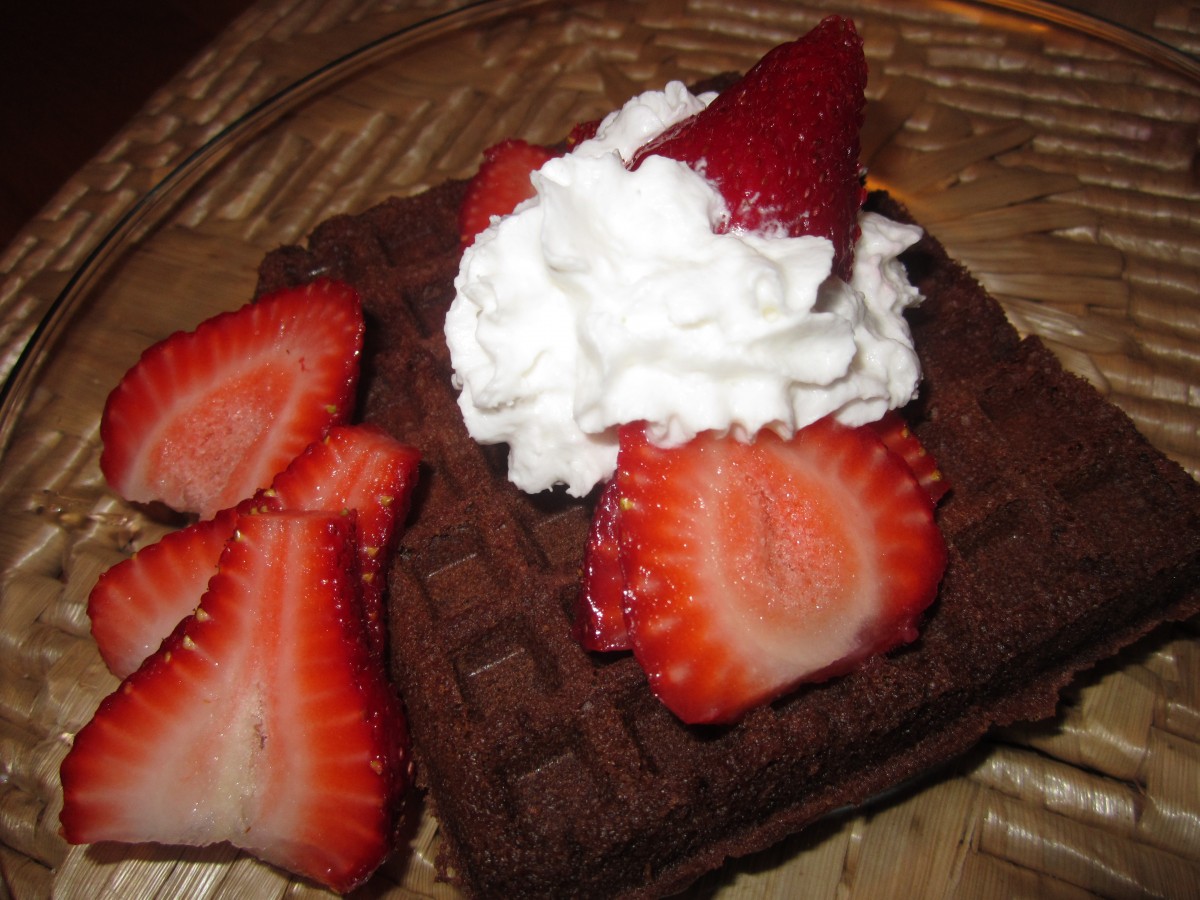
These waffles can make a great start to Valentine’s Day. Chocolate for breakfast? Why not? They also make a wonderful dessert.
The waffle batter has cocoa in it, for the chocolate flavor, but I added some cinnamon and nutmeg for a little spice. The flavor is wonderful.
Top them with whatever you like. For breakfast, warm maple syrup or a dusting of powdered sugar work well.
I enjoy topping them with whipped cream and berries. You can also top with a scoop of ice cream and hot fudge. If you like, you can even add some chocolate chips to the batter for a stronger chocolate taste.
Chocolate Waffles
2 eggs, room temperature
1/2 stick butter, melted and cooled
1 t. vanilla
1 c. buttermilk
1 c. flour
3/4 c. sugar
1/2 c. cocoa
1 t. cinnamon
1/2 t. each baking powder and baking soda
1/4 t. salt
1/4 t. nutmeg
Beat first three ingredients until light and foamy, about 2 minutes. Stir in milk. Beat in dry ingredients just until blended. Bake until waffles are cooked through. Makes 4 cups batter. Serve with whipped butter or sour cream and fresh fruit. I like them just dusted with powdered sugar, too.
Flourless Chocolate Mousse Cake
Flourless Chocolate Cake
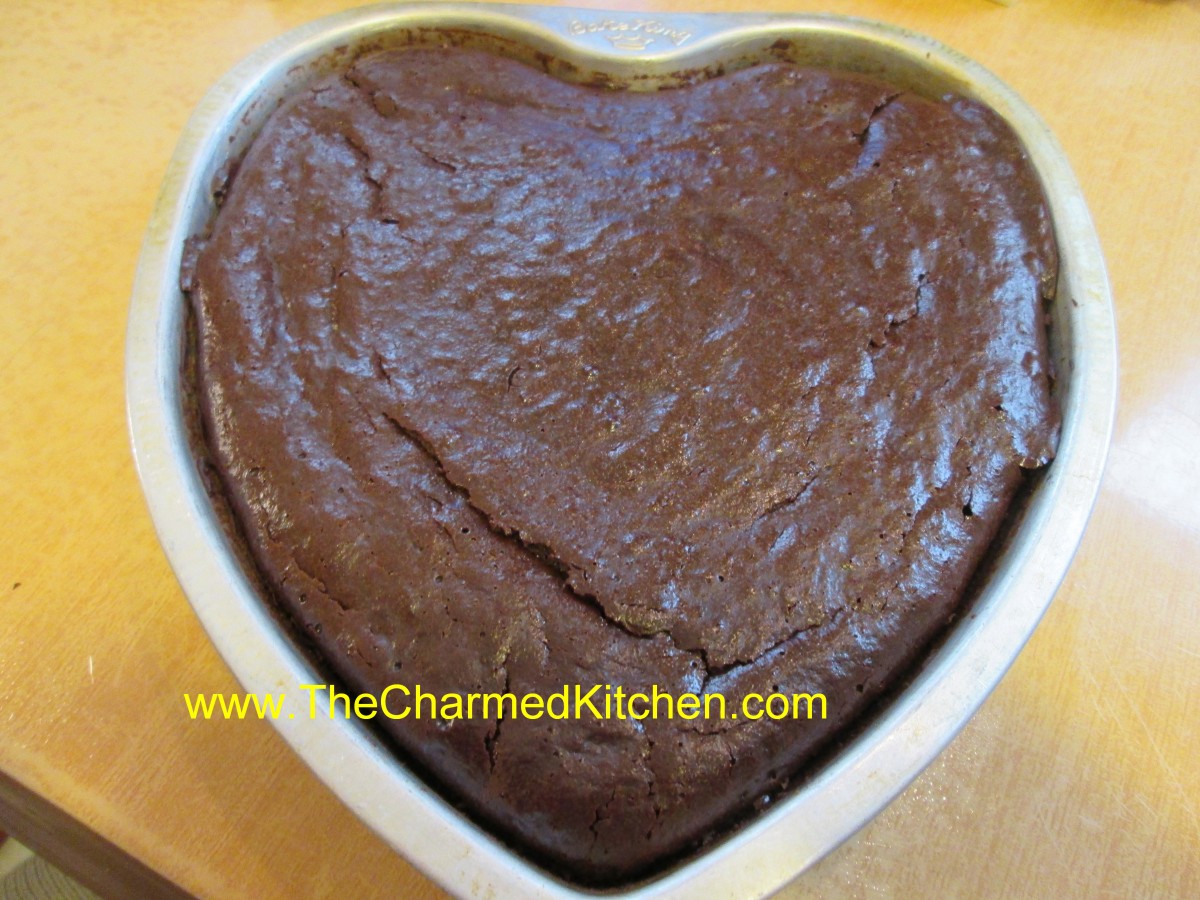
If you are looking for a dessert for your Valentine, you might want to make this cake. The cake is made without any flour and trust me, you will never miss it.
This is a dessert everyone seems to love whenever I make it. This is also a great dessert option for those who can’t tolerate gluten. The texture is dense, but not heavy. With only 5 ingredients, it is also pretty simple to make. While it can be baked in any cake pan, I chose a heart shaped pan this time.
Once baked and cooled, the cake can be served as is, or garnished with any number of things. Fresh berries are always a nice touch, or a light dusting of powdered sugar. Sometimes I’ll pipe some whipped cream around the edges.
Flourless Chocolate Mousse Cake
½ c. each sugar and water
1 stick butter
12 oz. semi sweet chocolate
6 eggs
¼ dark rum or other liqueur
Butter an eight inch cake pan and line with parchment. In saucepan heat together water and sugar until they boil. Stir in butter and bring to boil. Remove from heat and stir in chocolate until melted. Beat in eggs until smooth and stir in rum. Pour batter into prepared pan and place pan in a roasting pan. Pour boiling water into roaster to come up sides of pan 1 inch. Bake in a preheated 325 degree oven for 45 minutes. Cool, invert onto plate.
Serve cake topped with whipped cream and decorate with raspberries, other fresh fruit or even toasted nuts. Dense and rich this cake serves 8-10.

Finished with powdered sugar and chocolate whipped cream
King Cake
King Cake
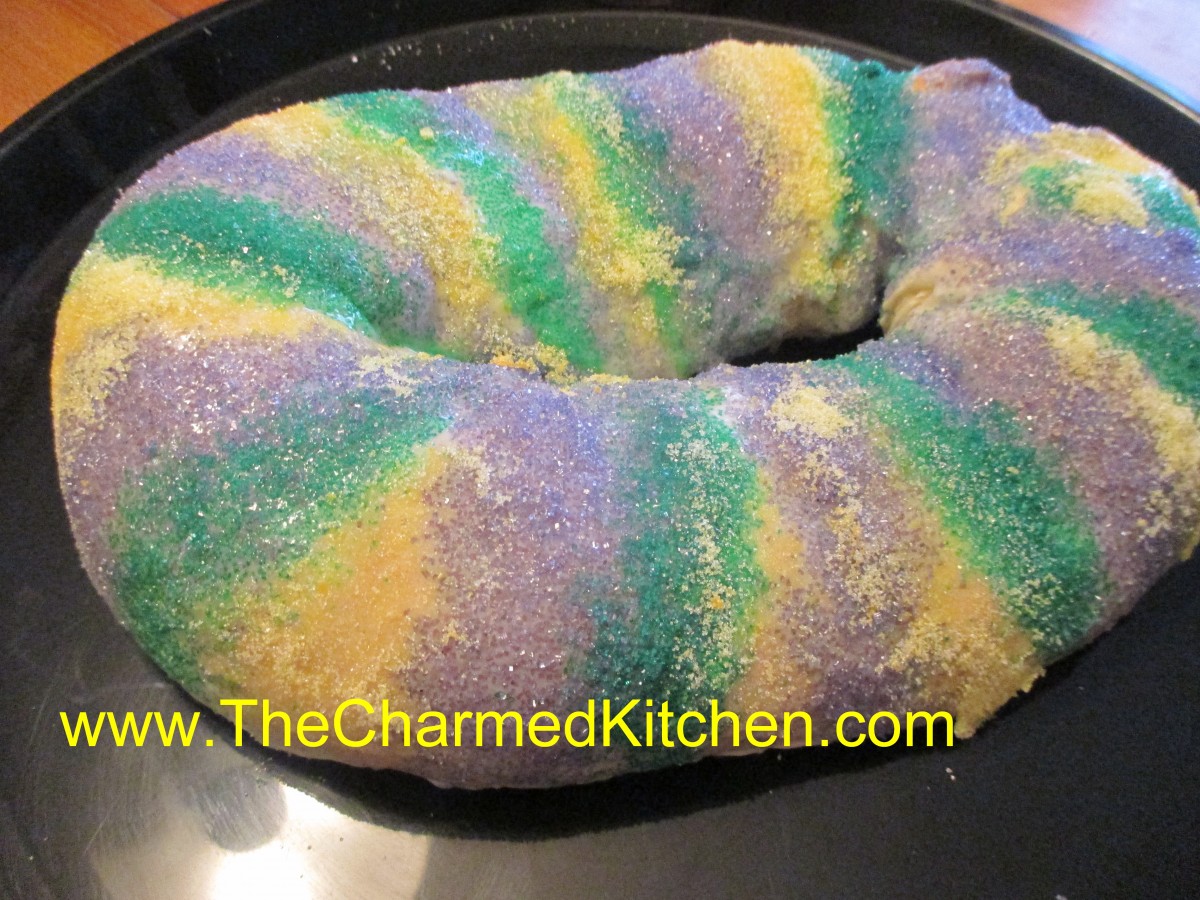
If you are planning a Mardi Gras party, you will want a King Cake. King Cakes are a long-standing tradition in New Orleans at Mardi Gras. A small plastic baby is often hidden in the cake, although you can use a bean or even a whole pecan or almond.
Tradition has it that the guest who finds the “surprise” in their piece will host next year’s party. Be careful to warn guest so they don’t break a tooth or swallow the “prize”. You can also use the whole nuts inside the cake and just set the baby on top of the cake when serving.
The “cake” is really a sweet cinnamon swirl bread. The yeast dough is rolled out, spread with butter and cinnamon sugar, and rolled up. Then the dough is shaped into an oval shape.
After it is baked, the king cake is decorated with colorful frostings, sugars or both. Traditionally the colors used are yellow, green and purple, but, hey it’s your cake have fun with it.
If you want just the sugars, and no frosting, then brush the king cake with a beaten egg before baking and sprinkle with the sugar then. Otherwise, you’ll decorate the cake once baked and cooled.
King Cake
1/4 c. butter
16 oz. container sour cream
1/3 c. sugar
1 t. salt
2 packages active dry yeast
1 T. sugar
1/2 c. warm water
2 eggs
6 /2 c. flour
1/2 c. white sugar
1 1/2 t. cinnamon
1/3 c. butter, softened
Colored sugars and frostings (recipes follow)
Heat together the first 4 ingredient to about 100 degrees. Dissolve yeast and sugar in warm water in large bowl and let stand 5 minutes. Add butter mixture, eggs and 2 cups of the flour. Beat 2 minutes at medium speed and gradually work in enough flour to form a soft dough. Knead until smooth and elastic, about ten minutes. Place dough in a greased bowl, turning to grease top and cover. Allow to rise in a warm place until doubled, about 1 hour. Stir together 1/2 c. sugar with cinnamon and set aside. Punch dough down and divide in half. Roll out one piece of dough into a 28×10-inch rectangle. Spread dough with half of the butter and sprinkle with half of the sugar mixture. Starting at long end roll up jelly roll fashion and pinch seam to seal. Shape dough into an oval shape and pinch ends together. Place seam side down on a greased baking sheet. Repeat with remaining piece of dough except remember to add the toy baby, nut or bean if you want the “surprise”. Cover and let rise about 20 minutes. Bake in a preheated 375-degree oven for 15-20 minutes, or until golden brown. Cool before decorating with tinted frostings and colored sugars. Makes 2, serving 24.
Frostings
3 c. powdered sugar
3 T. melted butter
3 t. milk
1/2 t. vanilla
Green, yellow, red and blue food coloring
Combine sugar and butter and add enough milk to make the glaze a drizzling consistency. Add vanilla and divide mixture in three small bowls. Tint one bowl yellow, one green and one purple, using both the red and blue food coloring. I often don’t bother to tint the frostings, but rely on the tinted sugars for color.
Tinted sugars
1 1/2 c. granulated sugar
Food coloring
Place 1/2 c. sugar in each of three small bags and add a couple of drops of food coloring to each. One use yellow, one green and one both the red and blue for purple. Shake the bags to distribute the color. You should only need a couple of drops of each.
Decorate the cake by making bands of the colored frostings and then sprinkling on the sugars.
Giant Peanut Butter Cup
Giant Peanut Butter Cup
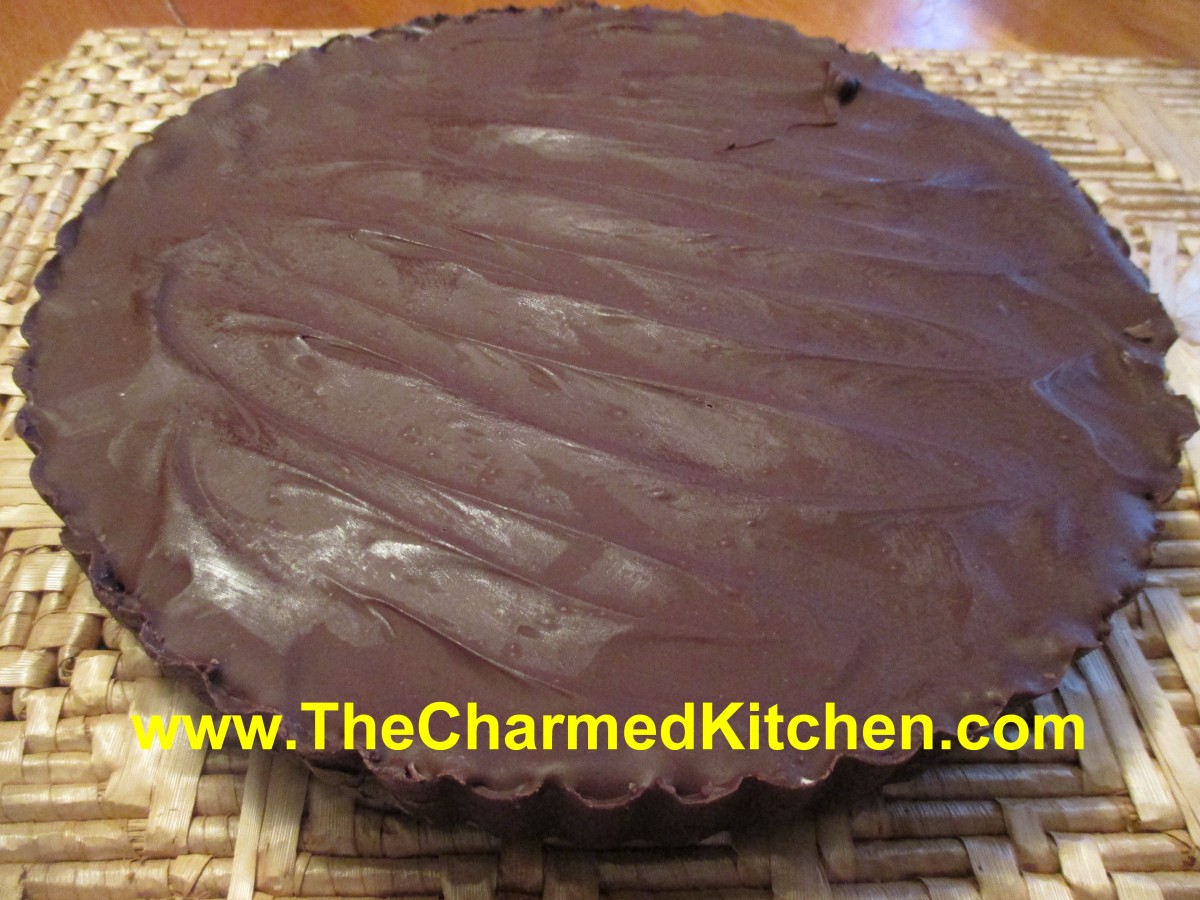
If you are looking to make something special for Valentine’s Day this year, you might want to try your hand at making a giant peanut butter cup. It takes a bit of effort, but is not really hard to make.
I’ve made small ones in the past, so I knew the basic structure. Using a 10-inch tart pan offered different challenges, but I went ahead and gave it a try. I wasn’t worried about the components. I had good quality dark chocolate and peanut butter. I knew it would taste good. I wasn’t sure it would stay in one piece.
It worked, and here is the result. I used a pretty good amount of chocolate. You could probably use less, but I wanted the chocolate thick enough on the bottom the make it sturdy. I also used a slightly altered version of the filling I use when I make buckeyes. I am pleased with how it came out.
Here is how I did it.
Giant Peanut Butter Cup
1- 1½ lbs. chocolate – I used a nice quality dark chocolate
1½ c. peanut butter
1 stick (½ cup ) butter, softened
2 ½ c. powdered sugar
2 t. vanilla
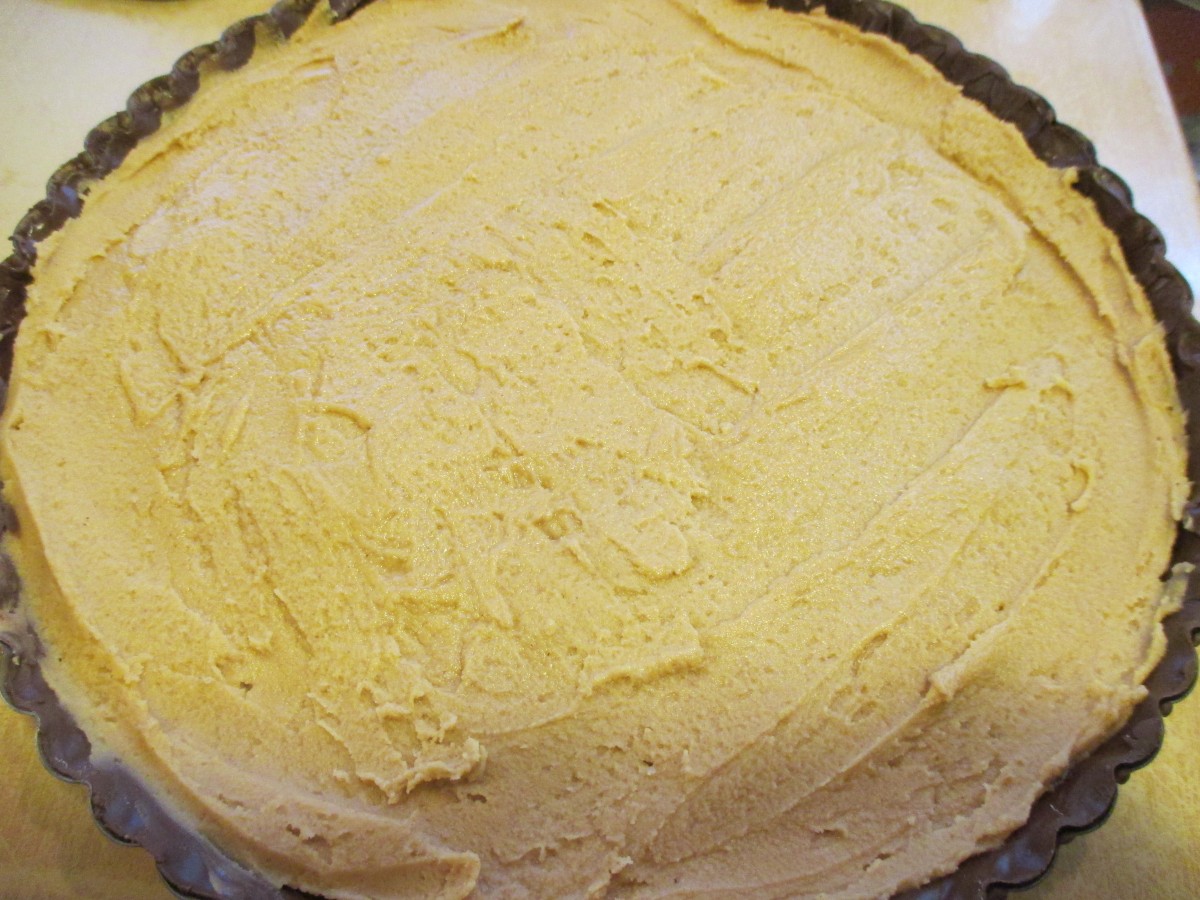
You will need a tart pan with a removable bottom. I used a 10-inch pan, but a 9- inch pan would work, too. Cover the removable bottom of the tart pan with wax paper. It will make it easier to get the thing out in one piece later. I cut out a square and just folded the extra wax paper under the pan and taped it down. Melt the chocolate and pour enough of it into the bottom of the tart pan that you can cover the bottom generously. Use a small spoon to push chocolate up the sides of the pan.
Now at this point you could just keep tipping the pan to get the chocolate evenly coated inside. I know my limitations. I just pictured myself dropping the pan of melted chocolate, so I used the spoon method instead. The important thing is that the entire inside gets a coating of chocolate. Place pan in fridge to cool and chocolate to set up. Meanwhile, in medium bowl mix peanut butter and butter together until well mixed. Stir in sugar and vanilla and mix until smooth. Spread this mixture over the chocolate shell. Don’t press too hard. You don’t want to break the shell. I will confess that before I added the peanut butter, I played around with loosening the chocolate shell. I was worried it would not come out later. After I added the peanut butter mixture, I put it back in the fridge to firm up. Once the peanut butter mixture was chilled, I melted the rest of the chocolate and poured it over the top.
I used a lot of chocolate in the base and needed to melt more chocolate than I originally planned on. I do think the thicker shell helped when it came time to get it out of the tart pan.
To remove the peanut butter cup- make sure it is completely hardened. I gently pulled at the sides all around the edges of the tart pan, to loosen it. Then I pushed up on the removable bottom of the pan. After a few gentle pushes, it came out. I had to trim a little chocolate off the bottom when removing the wax paper, but it helped in getting the peanut butter cup out in one piece.
Spread peanut butter mixture over chocolate shell
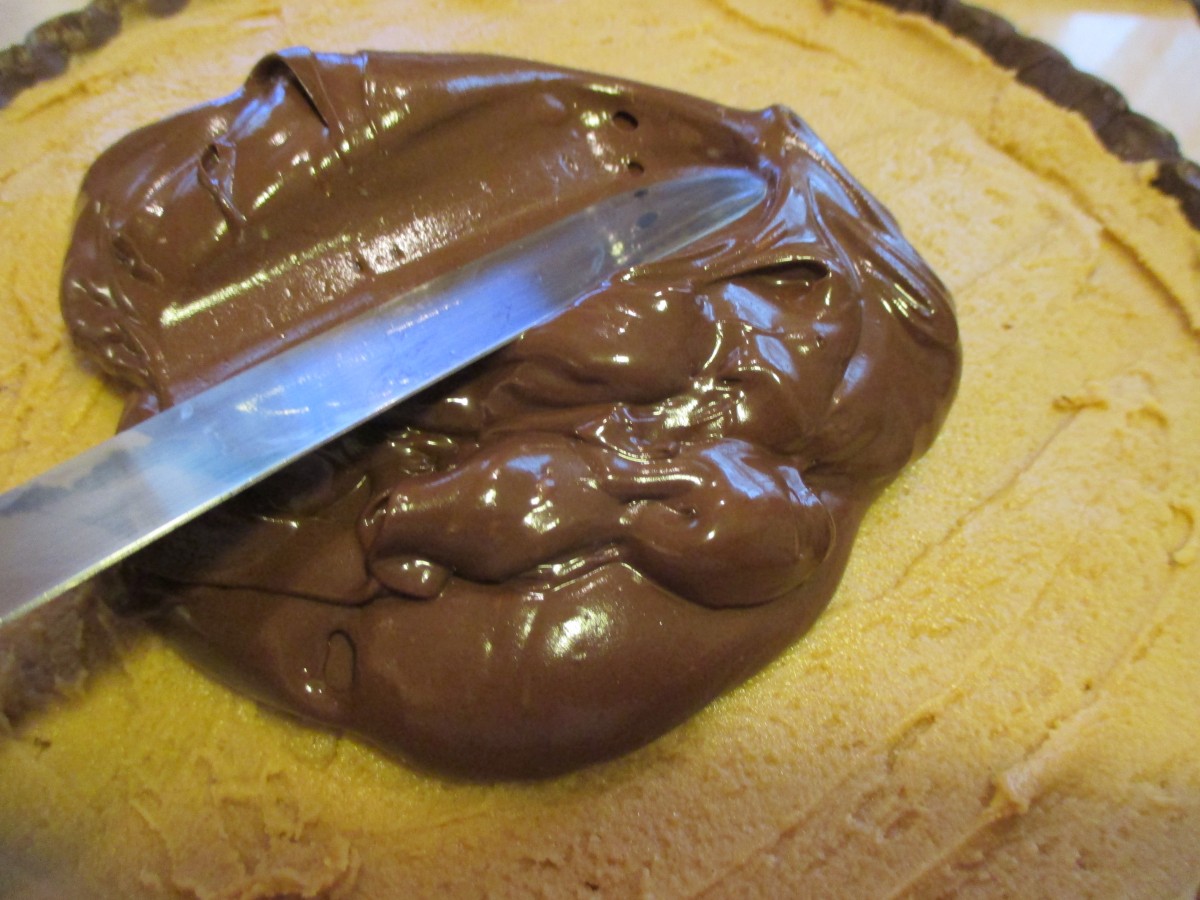
Spread melted chocolate over peanut butter filling
Busha’s Pierogi
Pierogi
Whenever I make pierogi it makes me think of making them with my mom. They were also a favorite of my Polish Grandmother, or Busha.
Pierogi, if you don’t know, are pasta filled with different fillings, often potato based. They are also sometimes stuffed with prune filling or sauerkraut. The potato and cheese filled make a great meat-free meal.
Today you can find pierogi filled with all sorts of fillings. There are variations in the dough, too. Some use just eggs, flour, water and salt. Others add some dairy in the form of milk or sour cream.
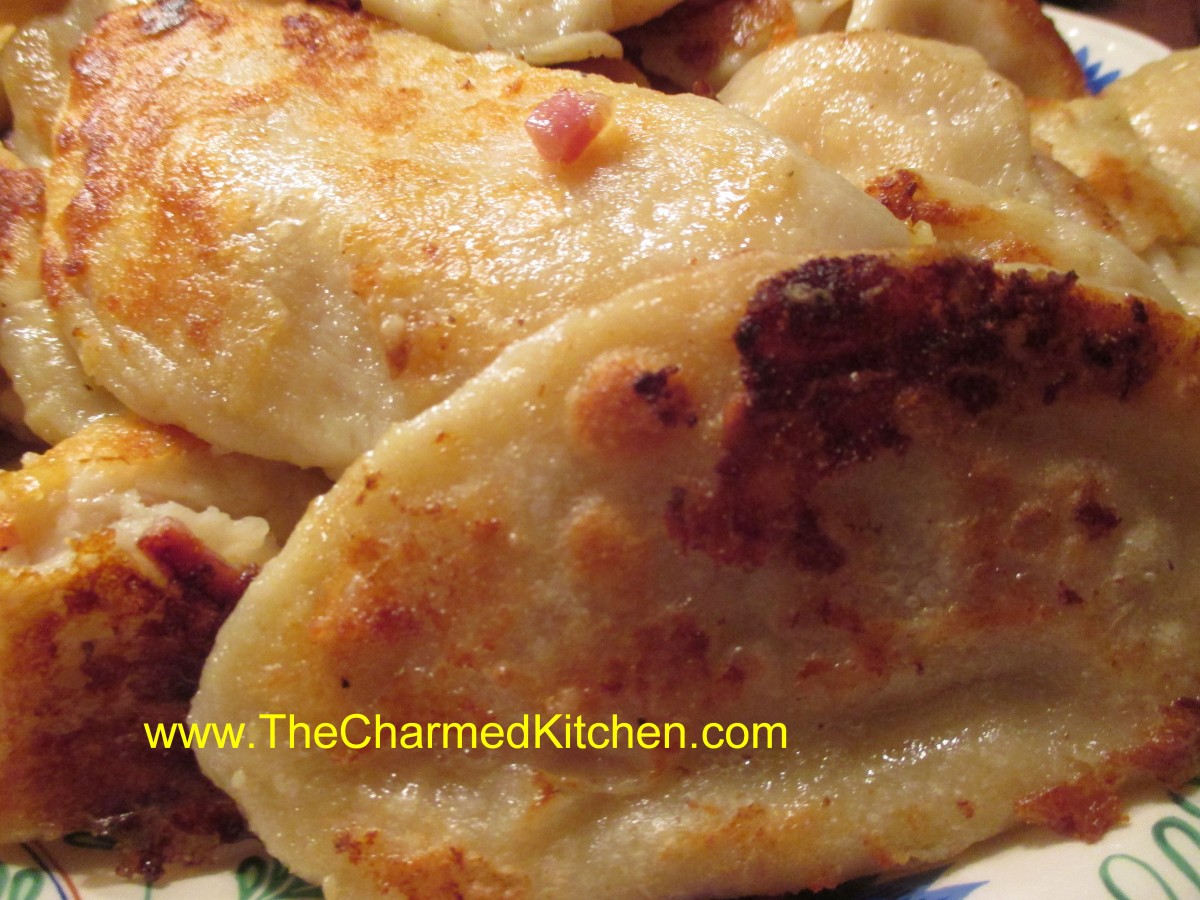
Once the pierogi are made, you boil them and you can just serve them that way. I prefer to brown the boiled pierogi in butter, then serve with caramelized onions and sour cream. My mother used to make sweet and sour cabbage and serve it with the pierogi, or sometimes even use it as a filling.
Pierogi
Dough:
2 c. flour
1 t. salt
½ c. water (you can also use half milk and half water)
1 egg
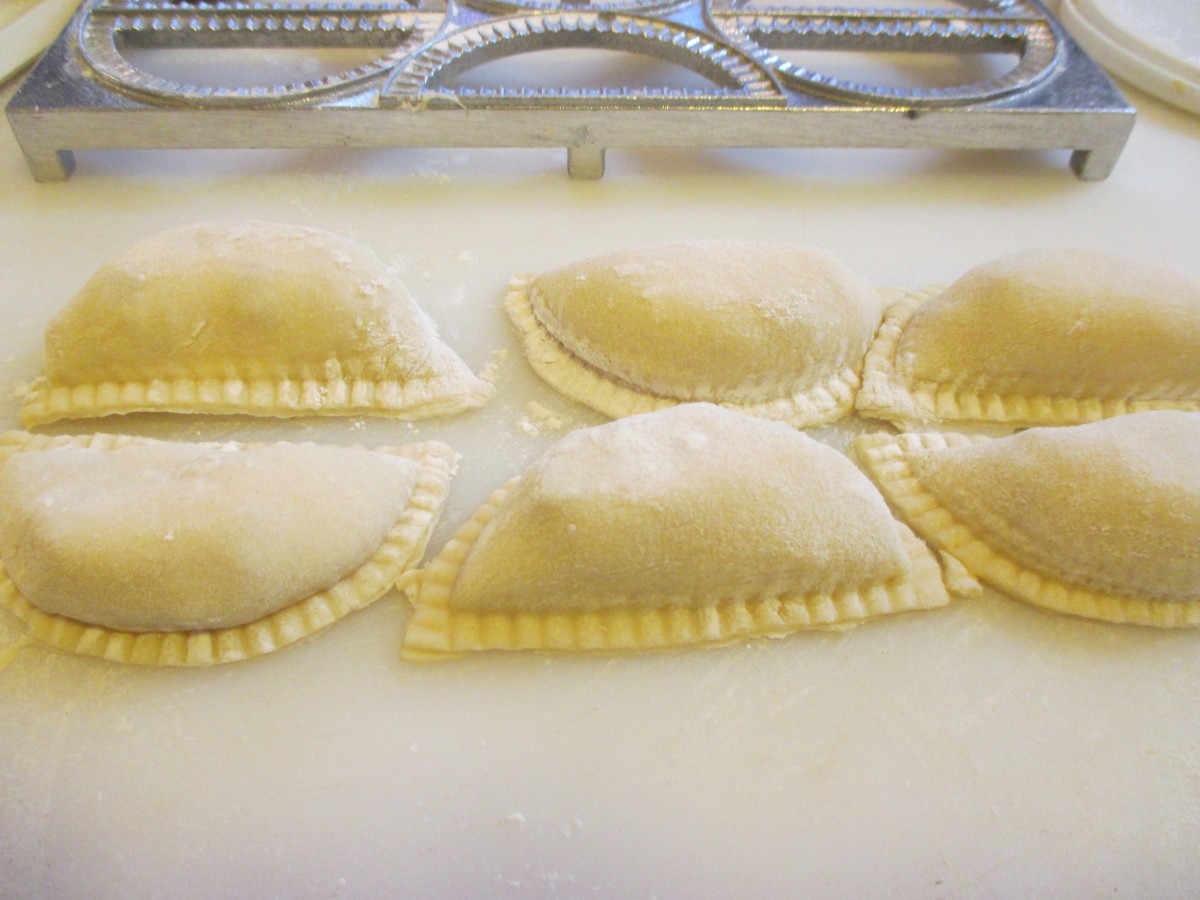
Mix all ingredients together and knead on floured surface until smooth. Cover and let rest at least 15 minutes. Roll out thin and cut into circles. Re-roll scraps. You should get between 20-30. Spoon filling of your choice on center of dough circle. Fold dough in half over filling and press edge with fork to seal. Wetting the edge of the dough will help the dough to stick. Don’t overfill or the pierogi will split. Test a couple first to get the hang of it. Place a few at a time into salted boiling water and cook until they float. You can eat them as is or brown cooked pierogi in butter in a skillet. Serve with grilled onions and/or sour cream. We would often make a larger batch and then freeze them, uncooked on wax paper-lined baking sheets. When frozen they would be transferred to a freezer bag or container. Place right from the freezer into boiling water when ready to use.
Potato filling:
2 lbs. Potatoes, peeled and boiled
½ onion, minced
2-3 T. cottage cheese or farmer’s cheese, optional
salt and pepper to taste
Mash potatoes with other ingredients and season to taste.
Note: you can also add cheddar cheese if you like. Sometimes I even add fine diced ham or crumbled bacon.
Fresh made pierogi
Cheesy Chocolate Hamantaschen
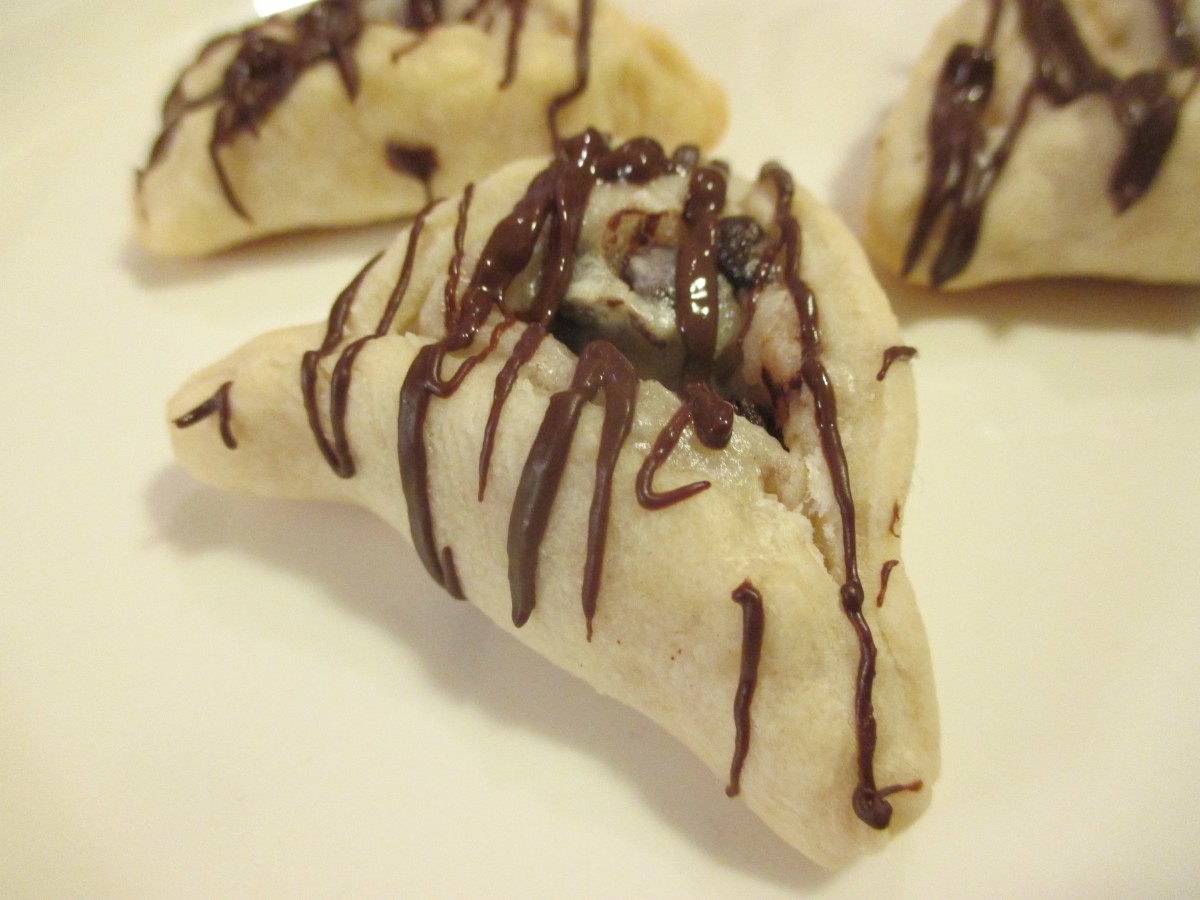
Cheesy Chocolate Hamantaschen
A friend shared this recipe recently, and I was intrigued. I had to try these cookies. The filling for these traditional Jewish cookies, is inspired by the filling used in cannoli.
I made a few changes from the recipe he shared, and was very happy with how they turned out.
The dough, which contains no sugar, has a wonderful, pastry-like texture. It pairs up well with the filling. The drizzle of chocolate is a perfect finish for them.
They aren’t a gooey, overly sweet cookie, which I really like.
They pair up nicely with tea or coffee. I confess, I had a couple for breakfast with my morning tea. I would definitely make these again.
Thanks, Jared, for sharing this recipe.
.
Cheesy Chocolate Hamantaschen
Filling:
¼ c. ricotta cheese
5 oz. cream cheese
½ c. powdered sugar
1 t. cinnamon
½ c. mini chocolate chips
Dough:
½ c. (1 stick) butter, softened
3 oz. cream cheese
½ c. half and half or milk
1 t. vanilla
½ t. salt
2½c. flour
Topping:
1 egg white
2 T. water
½ c. chocolate chips
Powdered sugar, optional
Prepare the filling. Beat together the ricotta and cream cheese until smooth. Mix in the milk and cinnamon, then stir in the chips. Chill until ready to use. Make the dough by mixing the cream cheese and butter together. Add the milk, vanilla and salt and mix until smooth. Stir in the flour until a stiff dough forms. Wrap the dough in plastic wrap, or put in a bag and chill at least an hour – or up to a couple of days – before proceeding. On lightly floured surface, roll the dough to a little less than ¼ – inch thickness. Cut dough out into 2-3 inch circles. Place a scant teaspoon of filling in middle of each dough circle. Combine the egg white with water and beat together. Brush a little of the egg white mixture over the edges of the dough circle. Fold the dough up in thirds towards the center, pinching the edges to seal. They should look like little three-corner hats. Repeat with remaining dough, re-rolling the scraps. Brush folded cookies with a little more of the egg white mixture. Place on lightly greased cookie sheets and bake in a 375-degree- oven for 15 minutes, or until golden on the bottom. Remove to cooling rack. Once cooled, melt the chocolate chips and drizzle over the cookies. You can top with some powdered sugar, if you like. Makes 2½-3 dozen.
Canning Chickpeas
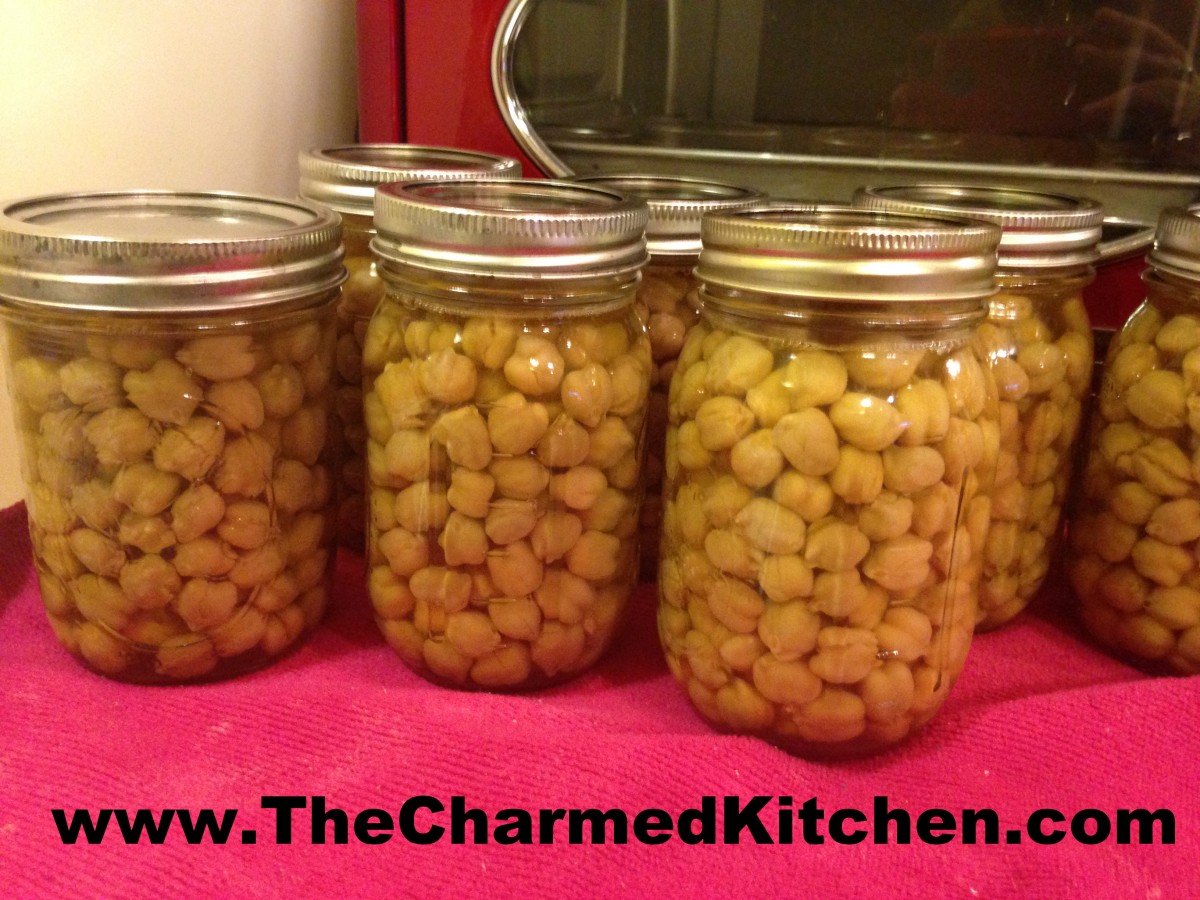
Chickpeas Cooling Down
I always get a lot of questions when I tell people I can dry beans. They ask if it is worth the effort. I find I like the flavor better than canned beans. Plus, I don’t have to cook from dry every time I want some. So for me, it is worth the effort.
It isn’t hard to do, but there are rules.
Because beans are a low acid food, they must be pressure canned. They also are precooked a little before they are canned. They don’t overcook when you do that. It just helps them to cook evenly and to get proper heat penetration.
Salt is optional, so you can leave it out, if you like.
Make sure you pick over the beans and toss any that are discolored.
They expand a lot when cooking. I started out with 2 quarts of dry garbanzo beans and ended up with 12 pints!!! Always use a bigger pot than you think you will need.
Canning Dry Beans- Chickpeas, kidney, black beans etc.
Rinse beans and place in a large pot. Cover with plenty of cold water and bring to a boil. Boil two minutes. Let stand 1 hour. Drain beans and return to pot. Cover with cold water- at least two inches over the beans. Bring to a simmer and simmer 30 minutes. Meanwhile, wash jars and get the pressure canner ready. Follow your manufacturer’s recommendations for how much water to place in your canner. Some say 2 or 3 inches of water. Mine says to add three quarts of water. I also add a little vinegar to my water to reduce mineral build up inside my canner. Not a safety issue, more cosmetic. A few tablespoons is plenty.
Ladle beans and water into canning jars, leaving 1 inch of headspace. Add non-iodized salt, if you like. 1/2 teaspoon per pint and 1 teaspoon per quart. Beans will still expand, so make sure the water covers them. Tighten lids to fingertip tight. Place jars in canner, on a rack, where water should just be simmering. Secure lid and turn up the heat. Once a steady stream of heat comes out of the vent, start timing it. Steam must vent for ten minutes. Place weighted or dial gauge over the vent and watch while canner comes up to pressure. Once canner reaches 10 pounds pressure, start timing. You will gradually be able to turn the heat down, but do it slowly, so you don’t go below 10 pounds pressure. Pints are processed for 75 minutes, quarts for 90 minutes.
Once the time is up- turn off the heat and allow the canner to go down to zero pounds pressure. Don’t rush this step by trying to cool the canner. The cooling down time is part of the process. Remove the gauge carefully at this point. Wait another 10 minutes before removing the lid of the canner. Remove lid, facing away from you- there is still plenty of hot steam in the canner. Remove jars to a counter covered with a towel or cooling rack. Allow jars to cool before checking seals.
Sources NCHFP, Ball
Tiramisu Doughnuts

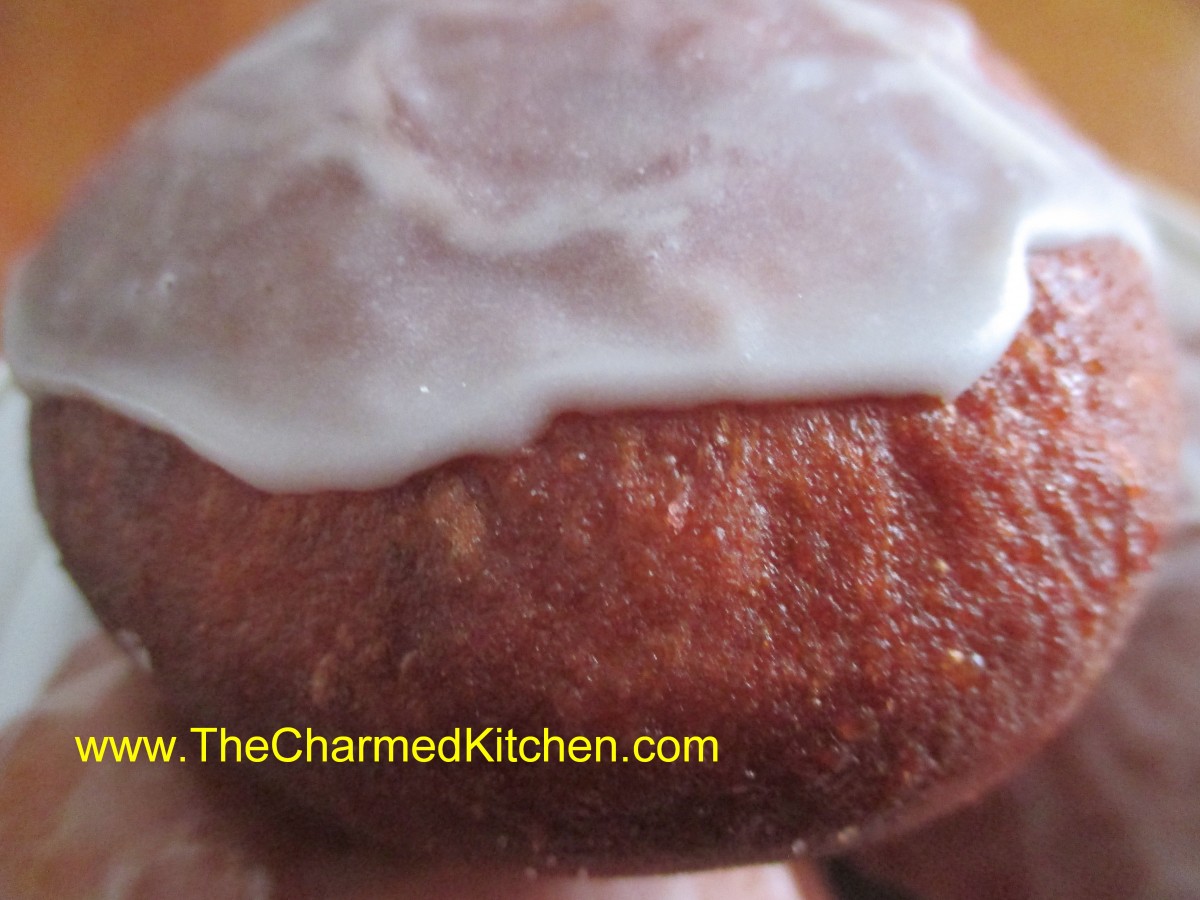
Tiramisu Doughnut
These doughnuts are inspired by the flavors of tiramisu, a traditional Italian dessert. They are a filled doughnut, like jelly doughnuts. I used the filling that I would normally use for making tiramisu. It is an egg custard, combined with mascarpone cheese and whipped cream. After the doughnuts are filled, they are topped with a mocha ganache. The end result is sublime.
I started making these doughnuts a few years ago. It was Fat Tuesday and I was making jelly doughnuts, a family tradition. Not everybody likes jelly doughnuts and I wanted to switch things up. As a kid, I loved the cream filled doughnuts my folks would make. I decided to use the filling recipe I used for tiramisu. To finish it off, a little coffee is added to the ganache to give it the flavors of classic tiramisu.
You do need to store finished doughnuts in the fridge, assuming any are leftover.
I won’t lie, these doughnuts are a bit of work, but worth the effort. Here is the recipe.
Tiramisu Doughnuts
Filling:
5 egg yolks
1/4 c. sugar
1/2 c. Marsala wine (not cooking wine)
2 c. whipping cream
4 T. sugar
1 lb. mascarpone cheese
Make zabaglione (egg custard). In double boiler, over simmering water, beat together egg yolks and sugar until lemon colored. Stir in Marsala and continue cooking, stirring constantly until mixture thickens and will mound on a spoon. This will take about 10 minutes. Remove from heat and cool down. You can place in bowl in fridge 30 minutes or so. Beat together whipping cream and sugar until stiff peaks form. Beat in mascarpone and chilled zabaglione. Chill 1 hour.
Dough:
4 c. flour
2 T. sugar
1 t. salt
½ c. butter
1 packet yeast
¼ c. warm water
2 t. sugar
1 c. evaporated milk
2 eggs, beaten
Combine flour with sugar and salt. Cut in butter and set aside. Dissolve yeast in warm water and 2 t. sugar and set aside. Combine milk with eggs. Stir in yeast mixture and add to flour mixture stirring well. On lightly floured surface knead dough until dough is smooth, about 5 minutes. Dough will be very sticky. Cover and let rise until doubled, about 1½ hours. Remove dough from bowl and punch down. Using about a third of the dough at a time roll dough out to about an ½ -inch thickness and cut out with a 2½ -inch biscuit cutter. Re-roll scraps and cut out. You should get about 2 dozen. Place dough circles on a floured surface and cover with a towel until doubled, about an hour. Heat oil in a deep pan until it reaches 375 degrees. Cook doughnuts a few at a time until golden on both sides, about 1 minute per side. Drain on paper towels and cool before filling.
Note: You can also refrigerate the dough after kneading it if you would prefer. Just place dough in an oiled bowl, cover with plastic wrap and chill overnight. Roll and cut dough into doughnuts when cold from the fridge. Allow to rise, covered, until doubled in bulk, about 2-3 hours. Fry as directed.
To fill doughnuts use a pastry bag fitted with a long tube tip for filling. I have these handy plastic syringes which are easy to use. Insert tube tip into doughnut and squeeze gently until doughnut is filled with cream (or jelly). Be careful not to overfill or doughnut will split. Once filled doughnuts can be frosted or topped with a sugar glaze. For the Tiramisu Doughnuts I made a mocha ganache.
Mocha Ganache
2 c. chocolate chips
1 c. whipping cream
1 T. instant coffee powder
Combine all ingredients in a microwave safe dish and heat in microwave for 2 minutes. Stir mixture until smooth and return to microwave if chocolate is not fully melted. Heat in microwave for 30 seconds more at a time, stirring after each time until mixture is smooth. For extra smooth mixture strain before using. Dip the top of the filled doughnuts in ganache.
Mom’s Jelly Doughnuts
Jelly Doughnuts
I remember how fun it was to watch my parents making doughnuts. The making of the dough, then cutting the dough into circles. The dough circles would then rise on the counter, under linen towels, until puffed up. Gently they would be fried, then set on paper towels to drain. Once cooled, the filling would be piped into them through a pastry bag filled with some wonderful jelly or jam.
I also remember learning to fill them. Squeezing the jelly from the pastry bag into the doughnut was tricky. You wanted to make sure there was enough filling, but not so much that they split open. After a couple of tries, I realized you could figure it out by the weight of the filled doughnut in your hand.
My parents were both excellent bakers. My father had even been a professional baker at one time. I thought it was normal to have parents who made doughnuts. It was the norm in my family.
My folks only made them for special occasions. Unless my Mom got a taste for homemade jelly doughnuts. Then, my dad would make them for her. She loved jelly doughnuts. More than pretty much anyone else I knew.
You can fill them with any number of jellies, jams and cream fillings. I had fresh strawberries and dried apricots so I used them to make both a strawberry filing and an apricot filling. Once fried and filled, the doughnuts can be eaten plain or topped with a drizzle of powdered sugar glaze or just rolled in powdered sugar. They are a bit of work, but well worth the effort.
Jelly Doughnuts
Dough:
4 c. flour
2 T. sugar
1 t. salt
½ c. butter
1 packet yeast
¼ c. warm water
2 t. sugar
1 c. evaporated milk
2 eggs, beaten
Combine flour with sugar and salt. Cut in butter and set aside. Dissolve yeast in warm water and 2 t. sugar and set aside. Combine milk with eggs. Stir in yeast mixture and add to flour mixture stirring well. On lightly floured surface knead dough until dough is smooth, about 5 minutes. Dough will be very sticky. Cover and let rise until doubled, about 1½ hours. Remove dough from bowl and punch down. Using about a third of the dough at a time roll dough out to about an ½ -inch thickness and cut out with a 2½ -inch biscuit cutter. Re-roll scraps and cut out. You should get about 2 dozen. Place dough circles on a floured surface and cover with a towel until doubled, about an hour. Heat oil in a deep pan until it reaches 375 degrees. Cook doughnuts a few at a time until golden on both sides, about 1 minute per side. Drain on paper towels and cool before filling.
Note: You can also refrigerate the dough after kneading it if you would prefer. Just place dough in an oiled bowl, cover with plastic wrap and chill overnight. Roll and cut dough into doughnuts when cold from the fridge. Allow to rise, covered, until doubled in bulk, about 2-3 hours. Fry as directed.
To fill doughnuts use a pastry bag fitted with a long tube tip for filling. I have these handy plastic syringes which are easy to use. Insert tube tip into doughnut and squeeze gently until doughnut is filled with jam. Be careful not to overfill or doughnut will split. Once filled doughnuts are topped with a powdered sugar glaze or rolled in powdered sugar.
Apricot Filling
12 oz. dried apricots, chopped up
2 c. water
2 c. sugar, or to taste
Combine apricots with water in saucepan and simmer, covered until apricots are really tender. This will take at least an hour- add more water, if needed. Add sugar to taste and cook until thickened. Puree mixture in a blender.
Strawberry Filling
1 lb. strawberries
1½ c. sugar
½ c. water
3 T. cornstarch
Crush berries and place in saucepan with the sugar. Cook until berries are tender, about 10 minutes. Combine water with cornstarch and add to strawberries. Cook until thickened and bubbly. Cool. , Puree. Makes 2 cups.
Reuben Bread
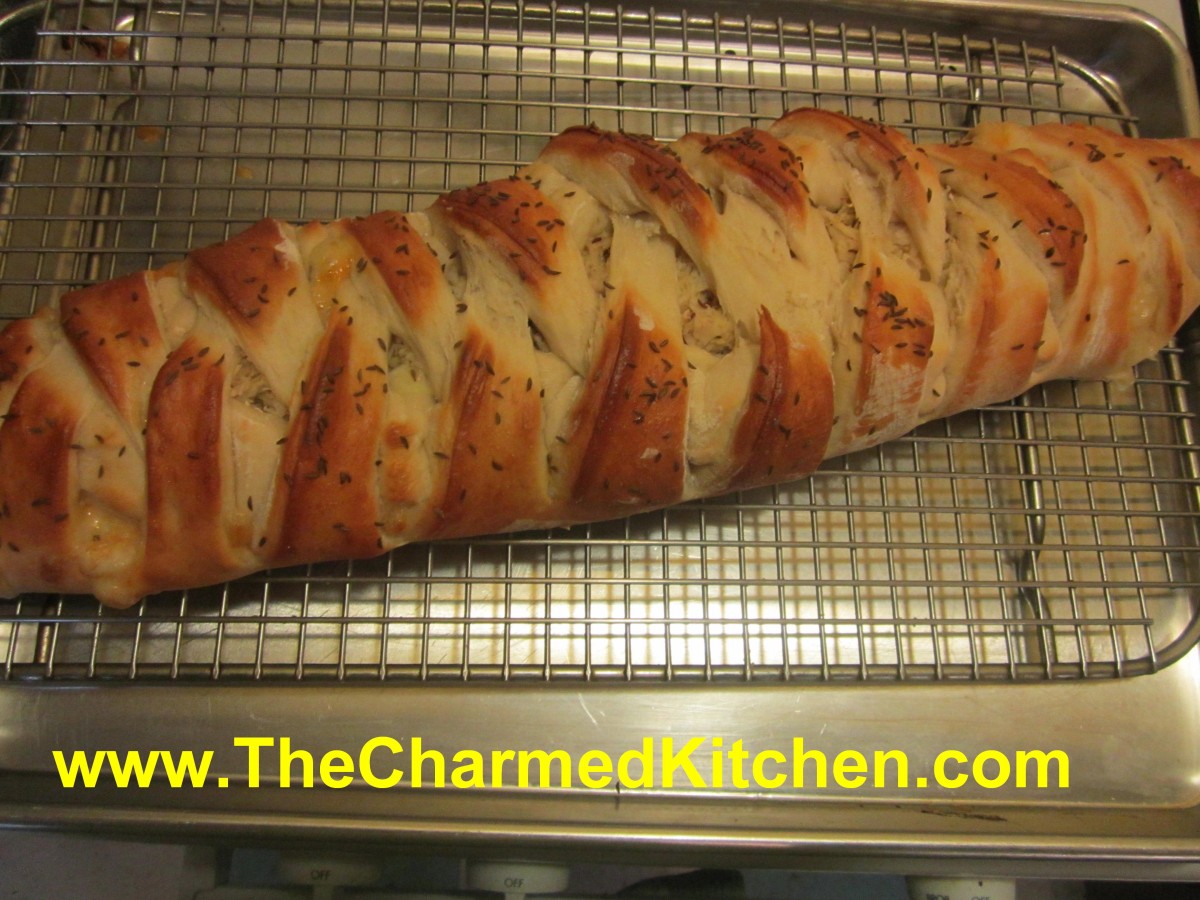
Turkey Reuben
I had a fun time yesterday teaching a friend how to make this bread. We made the Reuben bread, but also made three more breads, switching up the fillings. We ended up with a roast beef/provolone, ham with cheddar and a spinach artichoke bread.
This would make a great bread to serve for your Super Bowl party. If you are looking for a twist on a Reuben sandwich, try baking all the traditional ingredients into a loaf of bread.
By using quick rising yeast, this bread can be ready to eat in right around an hour. It tastes amazing, and looks pretty impressive, too.
Easier than you think, it will look like you spent all day making it. Plus, you can switch out the ingredients in all sorts of fun combinations.
Rueben Bread
3 ¼ c. all purpose or bread flour, you can use a little rye flour, too
1 T. sugar
1 t. salt
1 package quick-rising yeast
1 c. hot water
1 T. oil
¼ c. thousand island dressing*
6-8 oz. thin sliced corned beef
4 oz. sliced Swiss cheese
1 c. sauerkraut, rinsed and squeezed dry
1 egg white, beaten
Caraway seeds
Set aside 1 cup of the flour. Combine remaining flour with the other dry ingredients in a medium bowl. Stir in water and oil and gradually stir in enough flour to make a soft dough. Turn onto lightly floured surface and knead until dough is smooth and elastic, about 5 minutes. Roll dough into a rectangle about 16 x 8. Spread dressing down center middle of dough. Top with meat slices, cheese and sauerkraut. Cut one-inch wide strips of dough from filling to edge on both sides. It will sort of look like fringe. Alternating sides, fold strips up and over the filling at an angle. Carefully lift loaf onto greased baking sheet and place at an angle. Cover with a towel and place sheet on top of a roasting pan half-filled with simmering water for 15 minutes. Brush with egg white and top with seeds. Bake in a preheated 400-degree for 20-25 minutes or until golden brown. Cool slightly before slicing. Serve warm and refrigerate leftovers.
* You can make your own Thousand Island Dressing by combining equal parts of ketchup, mayo and sweet pickle relish.
Note: The variations for this bread are almost endless. Some favorite combinations are ham and Swiss with mustard, roast beef and cheddar, chicken, broccoli and cheese, Spinach with ricotta or feta and onions, pizza, assorted fillings. You get the idea. Use your imagination and have fun. Just be careful not to overfill, or the bread will be hard to move, use fillings that aren’t too runny and always use cold fillings.
If you want to use regular yeast use warm, rather than hot water. Also, don’t let dough rise over boiling water. After kneading cover dough and let rise 45 minutes. Punch down and assemble as in original recipe. Cover with a towel and let rise until dough looks puffy, about 40 minutes. Bake as directed above. These breads can also be frozen.
Here are more pics from yesterday. Great job, Courtney!!!
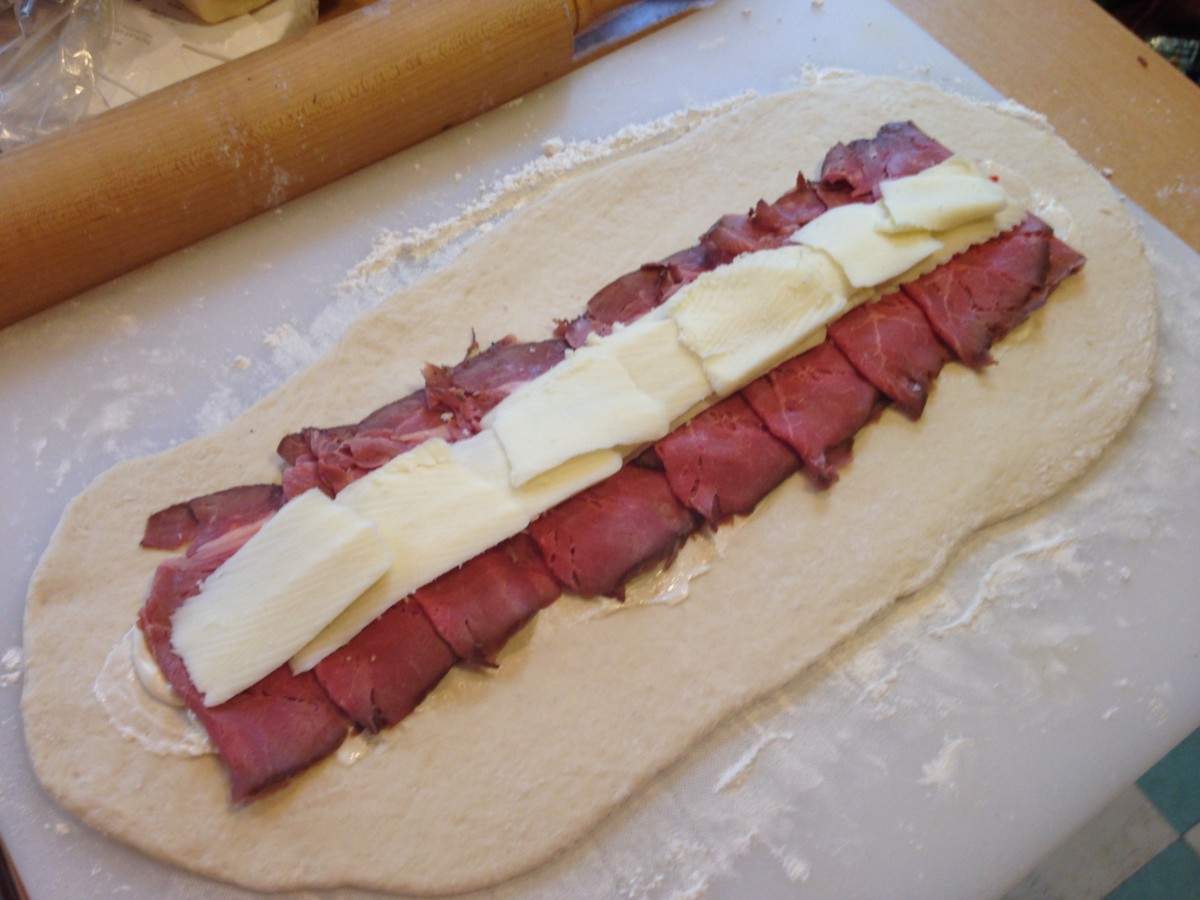
Roast beef and provolone
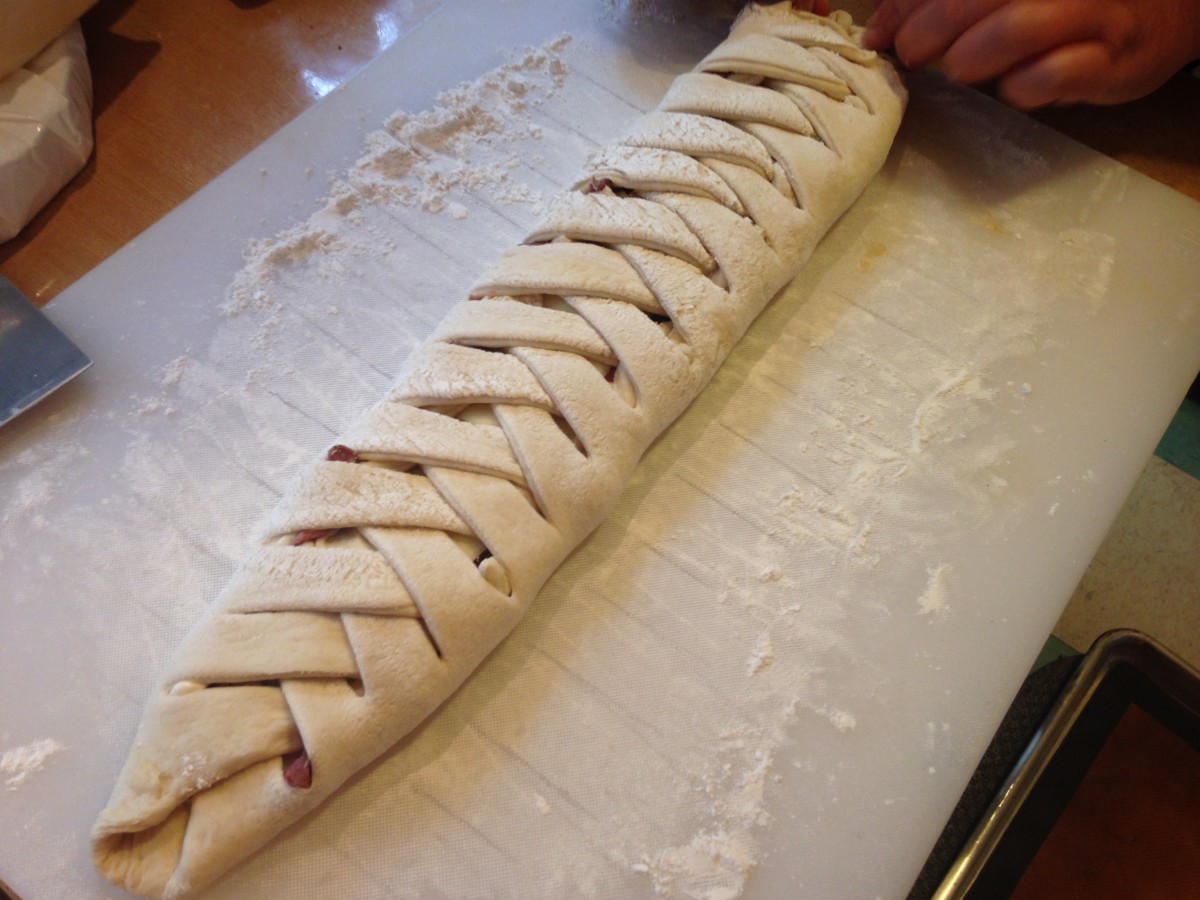
Ready to rise
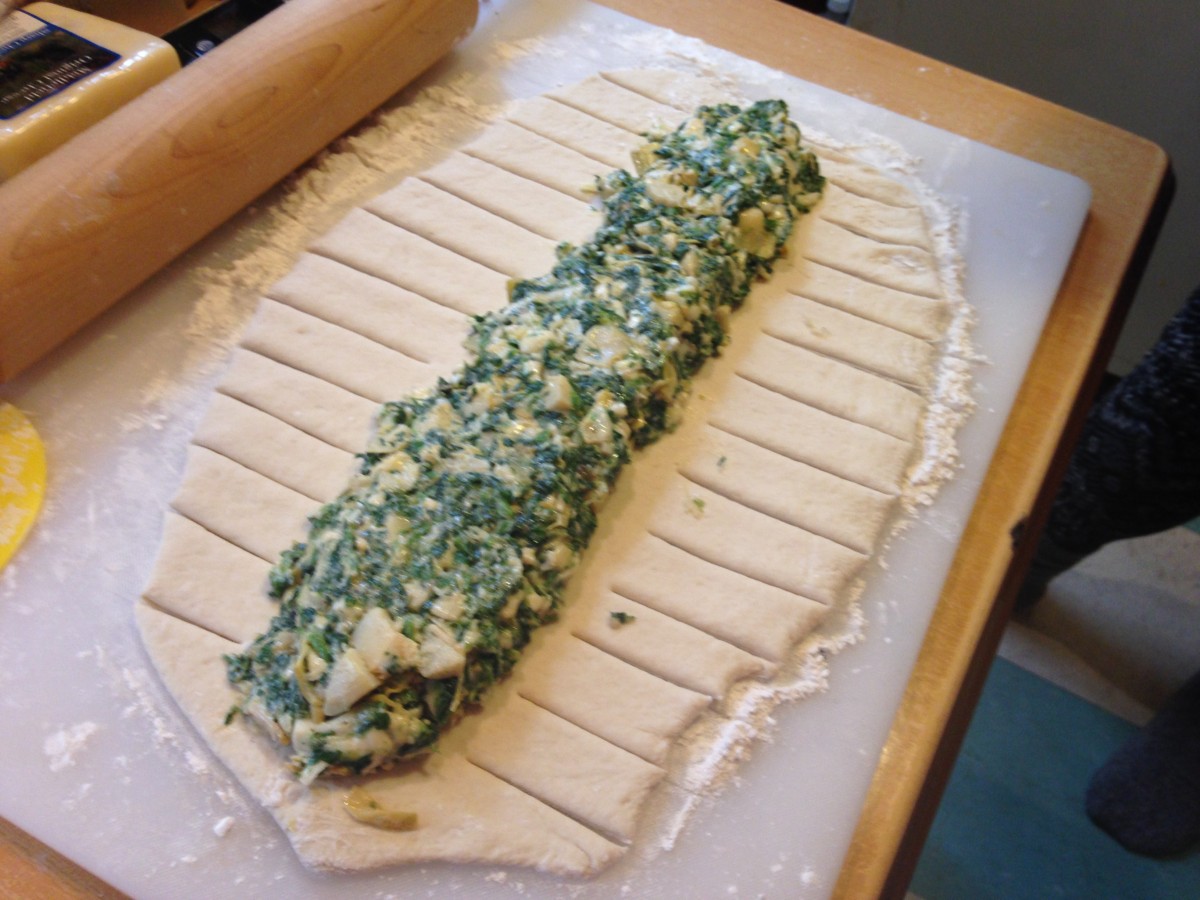
Spinach and Artichoke
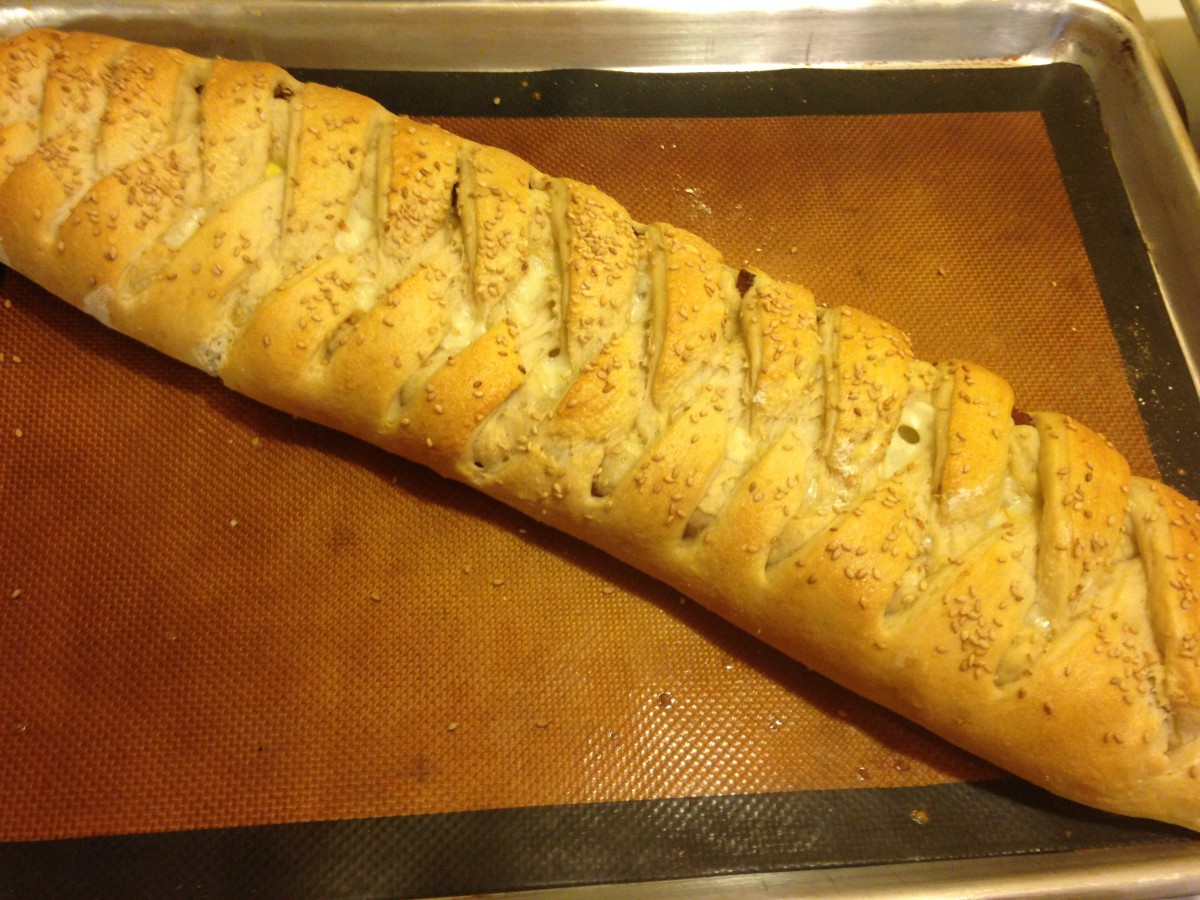
All Done!!


