Mom, Dinah Shore and the Upside Down Turkey
I thought I’d share how I came to roast my turkey breast side down. I must say, there are a number of ways to roast a turkey and have it come out nice and juicy.
I have no objection to any way you like to cook your bird including, but not limited to: frying, wrapped in bacon, cheesecloth wrapped, spatchcocked, sous vide etc. Stuffed, un-stuffed, brined are all OK by me, if that works for you. I have found over the years that cooking a turkey is a very personal decision, and folks get pretty passionate about how they cook their bird.
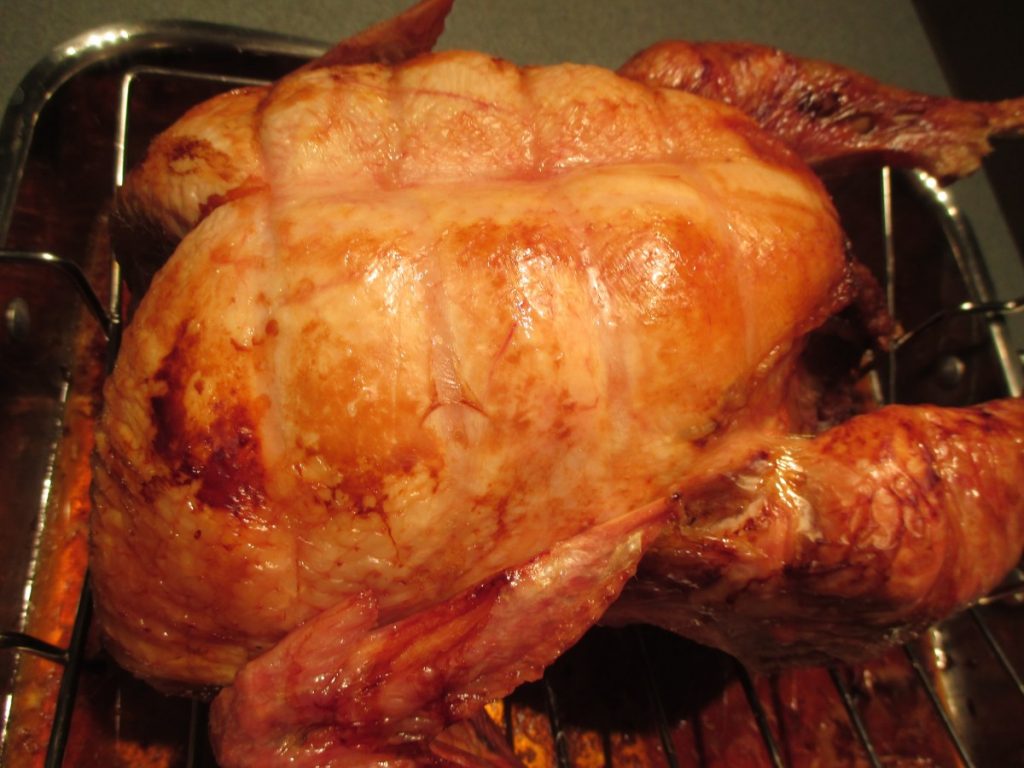
Many years ago a singer named Dinah Shore had a TV show, which my Mother really liked. Dinah, besides being a singer, liked to cook. She gave her turkey cooking tip one time on her show. She said she roasted her turkey breast side down for most of the time. The theory is that if the bird is breast side down the juices will flow into the breast- which eliminates the need to baste. It also slows down the cooking time for the breast- so it comes out cooked at the same time as the dark meat.
My Mother was intrigued, to say the least. She talked about it, a lot, leading up to Thanksgiving. We used to get a really big turkey and my Dad has his doubts about how easy turning over a hot, partially cooked turkey, would be. Mom was adamant. So it was that that Thanksgiving my Mom put her bird in the pan, on the rack, breast side down. She was excited and nervous at the same time.
Let’s face it- the turkey is the star of the meal and if it didn’t work it would be a disaster. But Mom trusted Dinah and they went ahead with this radical new plan. After about 3 hours of cooking, maybe a bit less, they managed to get the turkey turned over and returned it to the oven. Mom would look pensively through he oven window. I think giving birth was easier on her.
Well, in the end it worked out great. The bird was juicy and evenly cooked. No basting, so less work. She was delighted that she had held to her plan and had not been persuaded to cook it like before.
So every time I cook a turkey I cook it breast side down. How long I roast it that way depends on the size of the bird. Normally about 2 hours- because I am roasting a smaller turkey. I always remember my Mother when I cook it that way. I remember that first breast side down Thanksgiving and every one after that. Mom always was delighted- like the first time- and she always mentioned Dinah Shore.
Happy Thanksgiving to you all. May your turkey be juicy and most importantly, may you get to spend time with the people you love. I’ll be with family and I’ll think about my Mother and Father – and Dinah.
Recipes for Leftover Turkey
It is that time of year, when we find ourselves waking up to leftover turkey. Sometimes quite a lot of leftover turkey.
Of course, be sure to make stock from the carcass. Turkey sandwiches are always a favorite in my family.
There is a lot more you can make with the rest of the bird, though. Here are 10 fun and tasty ways to make the most of all that turkey.
I never get tired of turkey, but if your family does not feel the same way, these recipes could come in handy. Enjoy!!
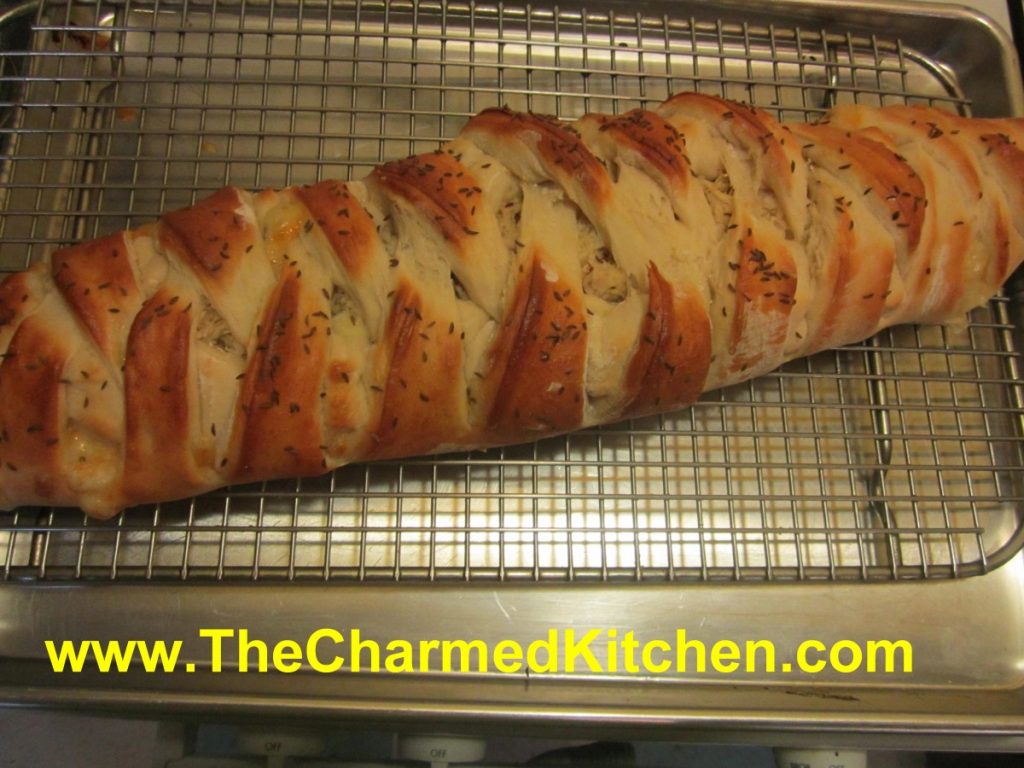
Turkey Reuben Loaf
3 ¼ c. flour
1 T. sugar
1 t. salt
1 package quick-rising yeast
1 c. hot water
1 T. oil
¼ c. thousand island dressing*
8-10 oz. thin sliced turkey
4 oz. sliced Swiss cheese
1 c. sauerkraut, rinsed and squeezed dry
1 egg white, beaten
Caraway seeds
Set aside 1 cup of the flour. Combine remaining flour with the other dry ingredients in a medium bowl. Stir in water and oil and gradually stir in enough flour to make a soft dough. Turn onto lightly floured surface and knead until dough is smooth and elastic, about 5 minutes. Roll dough into a rectangle about 16 x 8. Spread dressing down center middle of dough. Top with meat slices, cheese and sauerkraut. Cut one-inch wide strips of dough from filling to edge on both sides. It will sort of look like fringe. Alternating sides, fold strips up and over the filling at an angle. Carefully lift loaf onto greased baking sheet and place at an angle. Cover with a towel and place sheet on top of a roasting pan half-filled with simmering water for 15 minutes. Brush with egg white and top with seeds. Bake in a preheated 400-degree for 20-25 minutes or until golden brown. Cool slightly before slicing. Serve warm and refrigerate leftovers.
* You can make your own Thousand Island Dressing by combining equal parts of ketchup, mayo and sweet pickle relish.
Note: The variations for this bread are almost endless. Some favorite combinations are ham and Swiss with mustard, roast beef and cheddar, chicken, broccoli and cheese, Spinach with ricotta or feta and onions, pizza, assorted fillings. You get the idea. Use your imagination and have fun. Just be careful not to overfill, or the bread will be hard to move, use fillings that aren’t too runny and always use cold fillings.
If you want to use regular yeast use warm, rather than hot water. Also, don’t let dough rise over boiling water. After kneading cover dough and let rise 45 minutes. Punch down and assemble as in original recipe. Cover with a towel and let rise until dough looks puffy, about 40 minutes. Bake as directed above. These breads can also be frozen.
Turkey Tetrazzini
2 T. butter or oil
1 c. chopped celery
4 oz. sliced mushrooms
4 T. flour
1 1/2 c. chicken or turkey stock
1 c. half and half or milk
1/4 c. sherry
2 c. cooked turkey, cubed
4-6 oz. broken spaghetti, cooked
salt and pepper to taste
bread crumbs
butter
Parmesan cheese- optional
Heat butter or oil in pot and add celery and cook 3 minutes. Add mushrooms and cook 3 minutes more. Stir in flour and mix well. Add stock, half and half and sherry bring to a simmer- stirring often. Stir in turkey and pasta. Adjust seasonings. Place mixture in oiled casserole and sprinkle the top with bread crumbs and drizzle a little melted butter over the top. Add Parmesan cheese, if you like. Place in a 350 degree oven and bake until bubbly- about 25 minutes. Serves 4.
Turkey Noodle Soup
Oil*
2 onions, sliced
4 carrots, peeled and sliced
4 ribs celery, sliced
4 qts. Turkey stock
4-5 c. turkey meat, cubed
1 c. chopped fresh parsley
Salt and pepper to taste
Hot pepper sauce to taste
1 lb. wide egg noodles, cooked
Heat oil in soup pot and cook onions until starting to brown. Add carrots and celery and cook a few minutes more. Add stock and meat and simmer, covered, until veggies are tender. Add parsley and simmer 15 minutes longer. Adjust seasonings. Warm noodles and serve on the side so everyone can add as many noodles to their soup as they like. Serves 8.
* Since I had freshly made stock I used a little fat from the stock to cook the onions.
Turkey Won Ton Soup
1½ lbs. cooked turkey, about
1 head bok choy
3 T. hoisin sauce
1 clove garlic, minced
24 won ton wrappers
2 qts. Turkey stock
1 t. ginger
1 t. hot pepper sauce
Chopped green onions
Sesame oil
I used dark meat from the turkey, mostly. I minced enough to give me a cup of meat. The rest I cut into thin strips. I then took stems from the bok choy and minced enough of them to make 1 cup. Combine the minced turkey with minced bok choy, the hoisin and the garlic. This is the filling for your won tons. Slice more of the bok choy- using mainly the leaves, into thin shreds. This will go into the soup later, along with the strips of turkey. You should have at least a couple of cups of the shredded bok choy, but more is OK, too. To make the won tons place one on your work surface and spoon a rounded teaspoon of the filling into the middle of it. Moisten edge with water, fold in half and press to seal. I used round wrappers, but square wrappers are fine, too. I like the round ones, labelled for dumplings, because they are a little thicker. I get them at a local Asian grocery store. Repeat with remaining won tons and fillings until done. Bring stock to a boil and add the ginger and hot sauce. Add the won tons to the simmering stock. Simmer gently for 3-4 minutes, stirring occasionally, then add the strips of turkey and the shredded bok choy greens. Cook about 5-6 minutes longer. Finish soup with chopped green onions and a drizzle of sesame oil. Serves 6-8.
Turkey Chili
1 large onion, chopped
2 T. oil
2 ribs celery, sliced
1 sweet pepper, seeded and chopped
2 cans cannellini beans, drained and rinsed
2 cans lima beans, drained and rinsed
1 can ( 4 oz.) chopped green chilies
3-4 c. cubed turkey
2-3 c. stock- turkey or chicken
3 T. chili powder, or to taste
1 T. cumin, or to taste
Generous dash of hot sauce
Salt and pepper to taste
Fresh chopped cilantro
Toppings: Pick what you like. Some good toppers are shredded cheese, chopped green onions, salsa, sour cream or tortilla chips
.
In soup pot cook onion in oil until golden brown. Add the celery, peppers and chilies and cook 5 more minutes. Add the rest of the ingredients, except cilantro and bring to a boil. Turn heat down to medium and simmer until flavors blend, about 30 minutes but longer is fine. I usually cook it covered for 15 to 20 minutes and then remove the lid so it can thicken. Add the cilantro right before serving. Ladle into soup bowls add add toppings of your choice. Serves 6.
Turkey Florentine
2 T. oil or butter
1 large leek, cleaned, trimmed and chopped
4 T. flour
1½ c. stock – turkey or chicken
24 oz. fresh spinach, washed
¾ c. half and half- you could use milk instead
3 c. cubed cooked turkey
Salt and pepper to taste
2 t. hot sauce- or to taste
1 c. shredded Pecorino/ Romano cheese, plus extra for sprinkling on top
Hot cooked pasta
In large skillet cook leeks in oil or butter over medium heat until tender. Stir in flour and cook until smooth, but not brown. Add the stock and cook until mixture starts to thicken. Add the spinach and continue cooking, stirring often until the spinach is wilted. The spinach cooks down a lot- you might have to add it a little at a time to have room in the pan for all of it. As soon as the spinach is wilted add the half and half and the turkey and cook until heated through and bubbly. You might need a little more stock or half and half if the sauce is too thick for your taste. Season with the salt and pepper and the hot sauce. Stir in the cheese. Serve over hot pasta. Serves 4-6.
Turkey with Herb Dumplings
1 turkey thigh, cut off the bone and cubed
1 large onion, chopped
2 ribs celery, chopped
4 carrots, peeled and chopped
3 potatoes, peeled and cut into chunks
4 c. turkey stock
4 T. flour
salt and pepper to taste
1 c. baking mix- like Bisquick- I make my own
1/2 c. milk
2 T. chopped green onion
1 T. chopped parsley
1 t. dried basil
In Dutch oven or large pot, brown turkey thigh. Add the vegetables and brown them, too, turning to prevent burning. Add stock, cover pot, and simmer until veggies are tender, about 20 minutes. Season with salt and pepper to taste. Combine flour with some cold water or more stock until smooth. Add to the pot and stir well. Mixture will thicken. Meanwhile combine baking mix with milk and herbs. Drop dumpling batter by tablespoonfuls over the turkey mixture in pot. Reduce heat to low, cover pot and cook until dumplings are cooked, about 20 minutes. To serve place some of the turkey and vegetables with sauce in serving bowls and top with dumplings. Serves 6.
Turkey Vegetable Soup
1 onion, chopped
oil
3 carrots, peeled and sliced
3 small potatoes. peeled and cubed
1 c. corn- cut from 1-2 ears
1 medium tomato, peeled and chopped
2 c. shredded cooked turkey *
3-4 cups turkey stock- or whatever you have and like
Fresh parsley and basil
salt and pepper to taste
dash of hot sauce
Heat oil in pot and cook onion until golden. Add carrots and cook a few more minutes. Add remaining vegetables, turkey and stock and simmer, covered, for 10 minutes- or until veggies are tender. Add herbs and simmer a few more minutes. Adjust seasoning and add hot sauce. Serves 2-3 for dinner.
*If you want to turn this into a vegetarian soup add vegetable stock and add a couple of cups of cooked beans. Kidney beans would work well.
Turkey Lo Mein
1 onion, chopped
2 T. oil
1 can sliced water chestnuts, drained
1/2 c. green peas- you could also use green beans
2 c. diced cooked turkey
8 oz. angel hair pasta -I use a very fine noodle I get at the Asian market
soy sauce to taste
Hoisen sauce or oyster sauce to taste- you could also use stir-fry sauce
sesame oil
chopped green onions
Heat water for pasta. Heat oil in skillet and cook onion until browned. Add water chestnuts and cook 1 minute longer. While onion is cooking cook pasta. Add peas to onion mixture and stir to combine. Add the turkey and heat through. Drain pasta and toss into turkey mixture. Season with soy sauce and what ever Asian sauce you have on hand. Drizzle with sesame oil and top with green onions. Serves 4.
Turkey With Tortellini
1 lb. cheese tortellini, cooked and drained
2-3 c. cubed cooked turkey
2-3 c. cooked broccoli, chopped
2 T. butter or oil
2 T. flour
1 c. half and half or milk, warmed
2 c. stewed tomatoes- I used my canned tomatoes- you could substitute a 14 oz. can of tomatoes
salt and pepper to taste
fresh chopped parsley
In bowl combine tortellini with turkey and broccoli and place and a lightly greased casserole. In saucepan melt butter and add flour whisking until smooth. If using oil just combine oil and flour in pan and whisk until smooth. Add half and half and cook, stirring often until thickened and bubbly. Add tomatoes and heat through. Season to taste. Puree sauce and pour over the turkey mixture. Sprinkle with the parsley. Bake in a 350 degree oven until heated through and lightly browned around the edges- about 40 minutes.
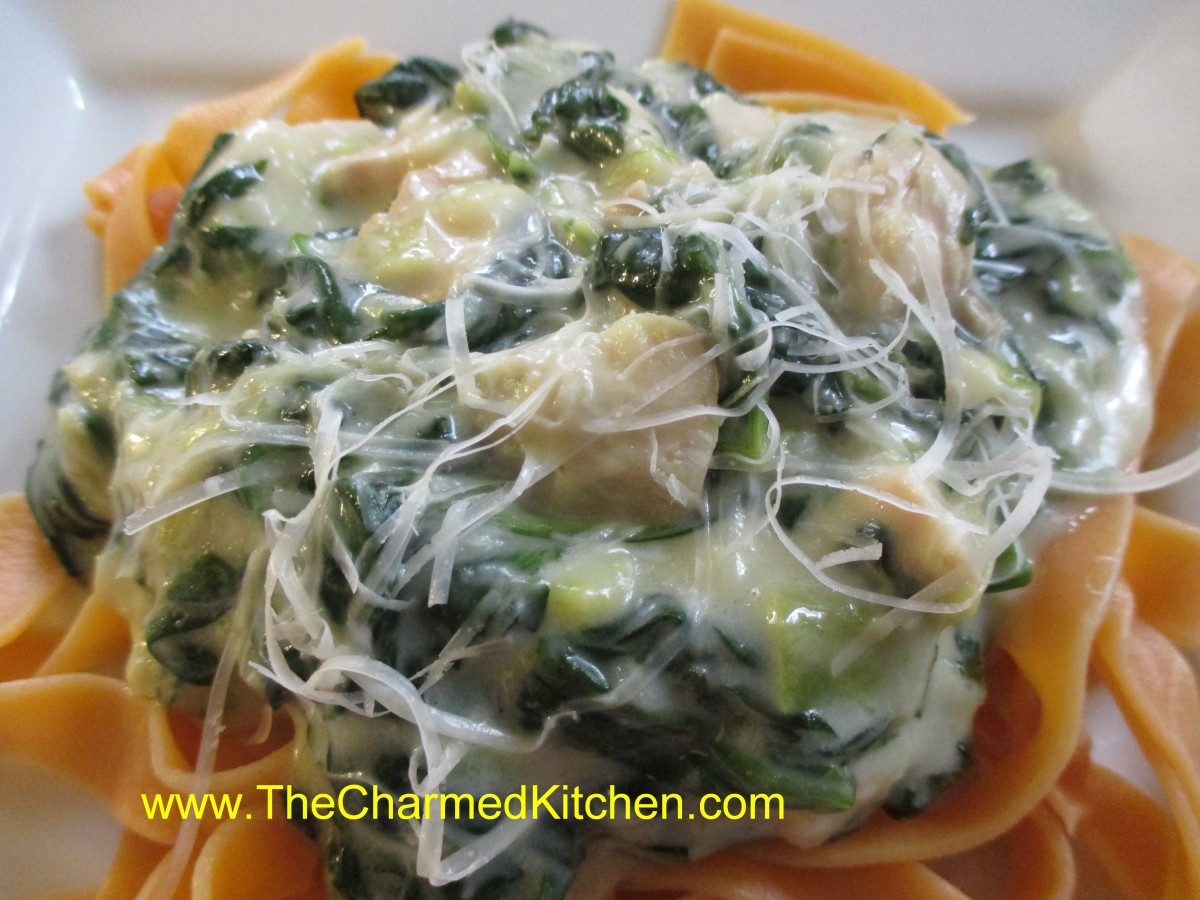
Turkey Florentine

Turkey with Herb Dumplings

Turkey Lo Mein

Turkey with Tortellini
Mushroom Dressing and Gravy – Vegan

Not everyone at the Thanksgiving table will be eating turkey. If you are like me, you have friends and family who are vegetarians. That was the inspiration for this dish. Just because a person doesn’t eat meat, does not mean they can’t enjoy the other traditional foods of the holiday.
I’m not a fan of “fake meats”, so a simulation of turkey was not what I was going for. I wanted to make a dish that was normally part of the regular menu, but minus the meat.
This is a dish everyone can enjoy together. Thanksgiving is about bringing us together, after all. I used mushrooms as the base for both the dressing and the gravy. The end result is rich and very tasty.
Mushroom Dressing and Gravy – Vegan
The Gravy:
3 T. oil
2 onions, diced
1 lb. mushrooms, cleaned and chopped- try to use a couple of different types
¾ c. diced celery
¼ c. chopped parsley
1 t. oregano
½ t. thyme
4 T. flour
2 c. vegetable broth
2 T. balsamic vinegar
Hot sauce to taste
Salt and pepper to taste
In skillet, heat oil and cook onions until golden. Add mushrooms and celery and continue cooking until mushrooms also start to turn golden. Toss in the parsley and herbs. Remove about ¾ of the onion mixture and set aside- it will go in the dressing. In skillet, with the remaining onion mixture, add the flour and stir in. Cook over medium heat for a minute or two. Add the broth and bring to a low boil, stirring often, until thickened and bubbly. Add vinegar and hot sauce and season to taste with salt and pepper. You can let it simmer a few minutes longer, if you like it thicker. It cooks down quickly. Makes 2 cups.
The Dressing:
6 c. bread cubes, toasted
Reserved veggies from the gravy
½- 1 cup vegetable broth
2 T. oil
Extra parsley, if desired
Salt and pepper to taste
½ t. crumbled sage, optional
In medium bowl, combine the bread cubes with the veggies and stir to mix well. Pour the broth over the bread cubes, tossing to coat. Use more or less broth, depending on how moist you like the dressing. Drizzle in the oil and season to taste. Place in a casserole dish, cover and bake until heated through- about 30 minutes. Remove cover after 20 minutes if you like a crisper dressing.
Reuben Dip

Recently I was reminded about this recipe. My niece was asking about it because her husband remembered me making it for Thanksgiving some years ago. It’s funny sometimes how recipes go in and out of rotation. There is always something new to try. I am glad he asked about it. It was always a favorite and I am sure to make it during the holiday season this year.
It’s an easy recipe to put together and very tasty. Always a crowd pleaser. Corned beef, Swiss cheese, cream cheese and a few additional ingredients are combined and baked until bubbly. I did find myself making changes from the original recipe. I added horseradish and some hot sauce. I liked what both ingredients added to the dish. It can be made ahead of time and just warmed up before serving. And, of course, you can tweak it to your own preferences.
Rueben Dip
8 oz. cream cheese, chopped
½ c. sour cream
½ lb. lean corned beef, chopped
¼ c. fine chopped onions, sweet preferred
1 T. horseradish
1 T. ketchup
2 t. spicy mustard
1 t. hot sauce
1 c. chopped Swiss cheese
Mix all ingredients and place in a covered casserole dish. Bake in a 375-degree oven for 30 minutes, stirring about 15 minutes into the cooking. Uncover casserole and bake 5 minutes more. Serve warm with crackers or bread, preferably rye.
Note: You can also heat this dish up in a microwave oven for 7-10 minutes, or until bubbly. If you want it browned on the top just place under broiler (in broiler-safe dish), for a minute or 2.
Green Beans with Shallots
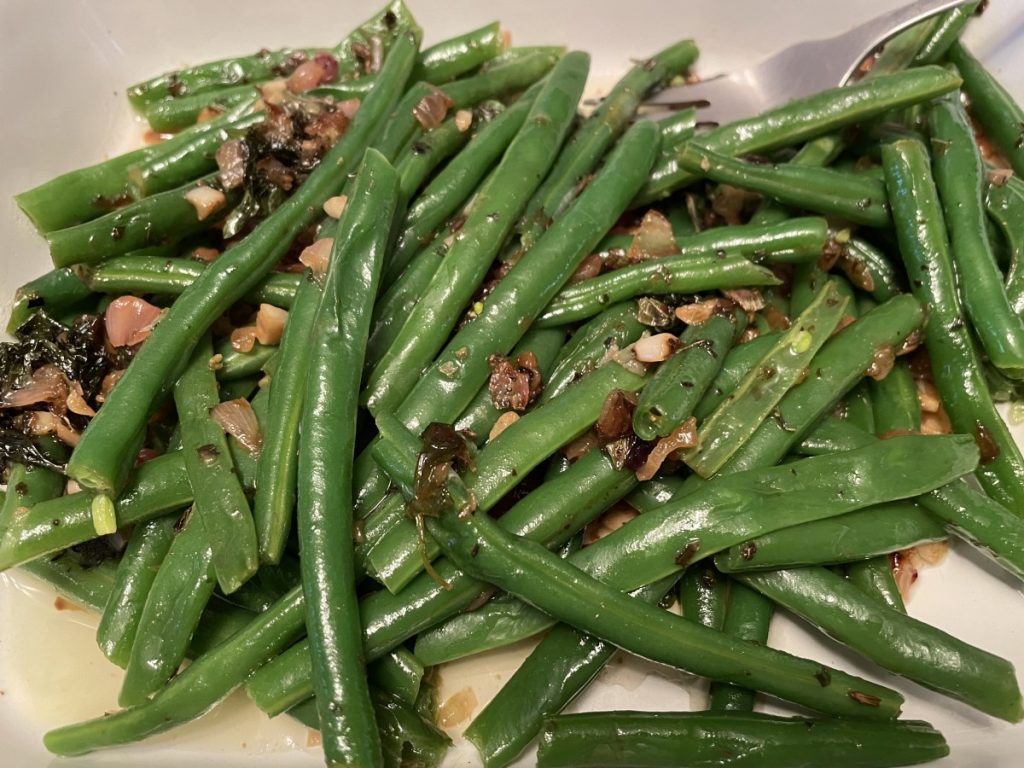
If you are looking for a different green bean side dish- I think you will really like this one. The sauce, made from a mix of herbs, shallots and garlic make these special. This is one of my favorite recipes for fresh green beans. I hope you give it a try. We had them with dinner the other night and ate them all. These might be a nice addition to your Thanksgiving table.
Green Beans with Shallots
1 lb. Green beans, washed and trimmed
4 T. olive oil
¾ c. minced shallots
4 cloves garlic, minced
2 T. chopped parsley
¾ t. salt
¼ t. each thyme, marjoram and basil
Boil or steam beans until tender, about 6 minutes. Drain and set aside. Meanwhile, start sauce. Heat oil in skillet and add shallots. Cook, over medium heat, until shallots start to turn golden brown. Add garlic and seasonings. Cook 5 minutes then add beans. Toss to coat beans. Serves 4-6.
Note: If you want to make these the day ahead, make the sauce and cook beans until almost tender. Combine beans and sauce and place in casserole dish. Chill until ready to use. When ready to serve, just place bean mixture in oven or microwave and cook until heated through and beans are tender.
Sweet Potato and Herb Biscuits

These biscuits are a favorite of mine. They go great with a bowl of chili. They also make a nice side for chowders. They could also be a nice addition to your Thanksgiving table.
I like sweet potatoes cooked any number of ways. Steamed, roasted, mashed. In this biscuit recipe, raw sweet potatoes are grated and added to the dough, along with some herbs. The biscuits come out tender, with great flavor and texture.
I enjoy them with a bit of butter, warm from the oven.
When you mix the dough, don’t be worried if it seems too dry. It takes a little bit of kneading to get the moisture out of the potatoes. The extra effort is worth it.
I cut them into triangles, but you can also just form the dough into a log shape. Then, slice the dough for round biscuits. They taste wonderful, no matter the shape.
Sweet Potato and Herb Biscuits
2 1/4 c. flour
1 T. baking powder
1/2 t. grated lemon peel
1/4 t. each baking soda, dried basil and dried thyme
1 egg, beaten
1 1/2 c. shredded sweet potato, about 1 large
1/2 c. fine chopped green onions
1/2 c. sour cream
2T. butter, melted or olive oil
Stir together dry ingredients in large bowl and set aside. Combine remaining ingredients and add to flour mixture mixing until just blended. Turn onto lightly floured surface and knead a few times until dough just stays together. Dough will look too dry- but it will come together after you knead it. Press into an 8-inch square and cut into four squares.* Cross cut each square into four triangles. Place on greased baking sheet and bake in a preheated 425 degree oven for 20 minutes. Makes 16.
* I press the dough into a lightly floured 8×8-inch baking pan and then flip it out onto the work surface, before cutting. That way you’ll get nice, even edges.
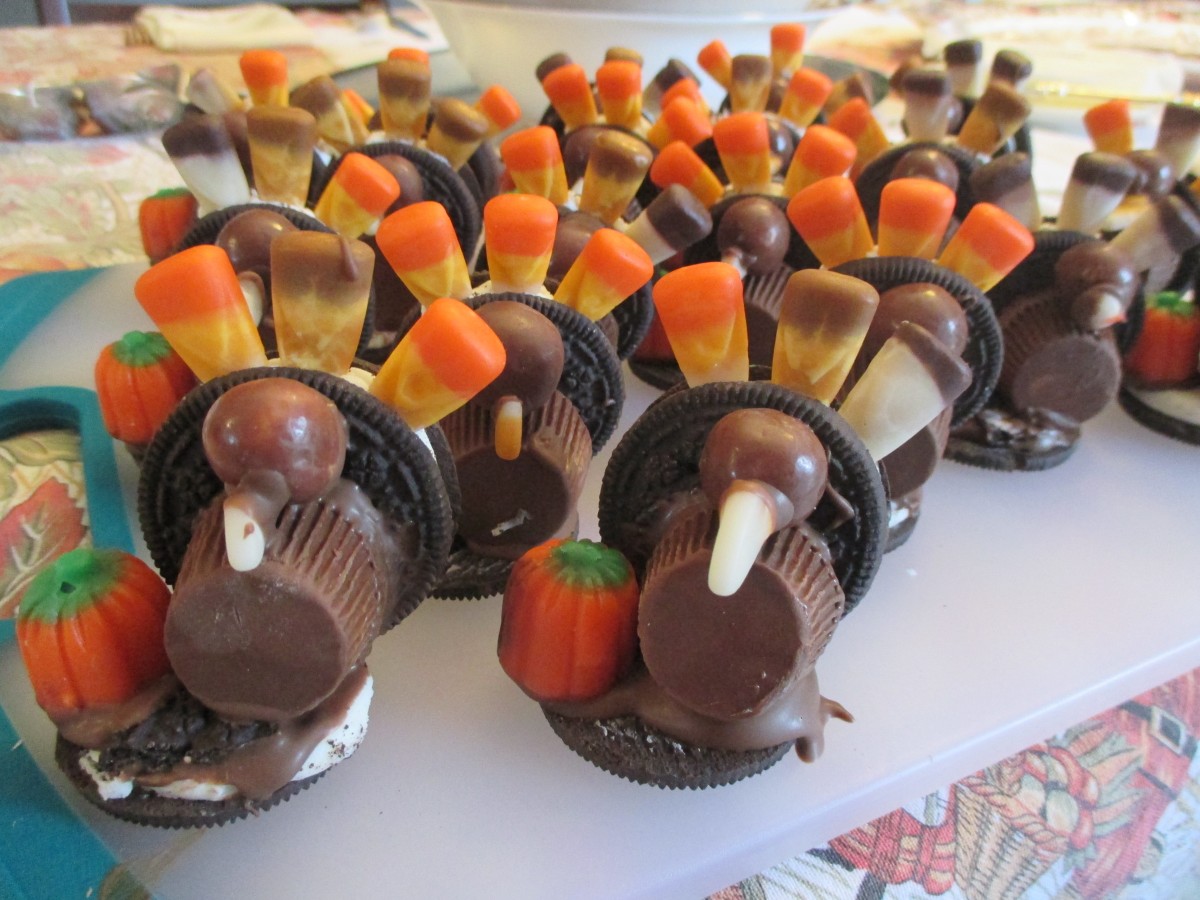
Candy Turkeys

Every year, I spend the day before Thanksgiving making some special treat or craft with my niece, Elia. One year we made these cookie “turkeys”. She liked making them so much we are making them again this year. They are really easy to make, and since there is no baking involved, you don’t tie up the oven if you need it for other things, like maybe a real turkey. Here are the ingredients you will need. We did them sort of assembly line fashion, because Elia wanted one for each person’s place at the table.
Candy Turkeys
chocolate sandwich cookies
candy corn
mini peanut butter cup
malted milk balls
candy pumpkins
melted chocolate
To start, place a cookie on your work surface. Affix a peanut butter cup, for the body. with a little melted chocolate. Place a malted milk ball on top of the peanut butter cup, using a little more melted chocolate to make the head. Once the chocolate hardens a little break off the tip of a candy corn and affix with chocolate to make the beak. Stick a few candy corn between the cookies- into the frosting layer- for the tail. Open up a cookie and use a little more chocolate to stand up your turkey on the frosting surface- Elia wanted them to be standing on snow. Or you can use a whole cookie, if you prefer. Place it off center, so you have room for your pumpkin. Let it harden for a minute, then add a candy pumpkin, using another drop of melted chocolate.

Elia hard at work
She made quite a few
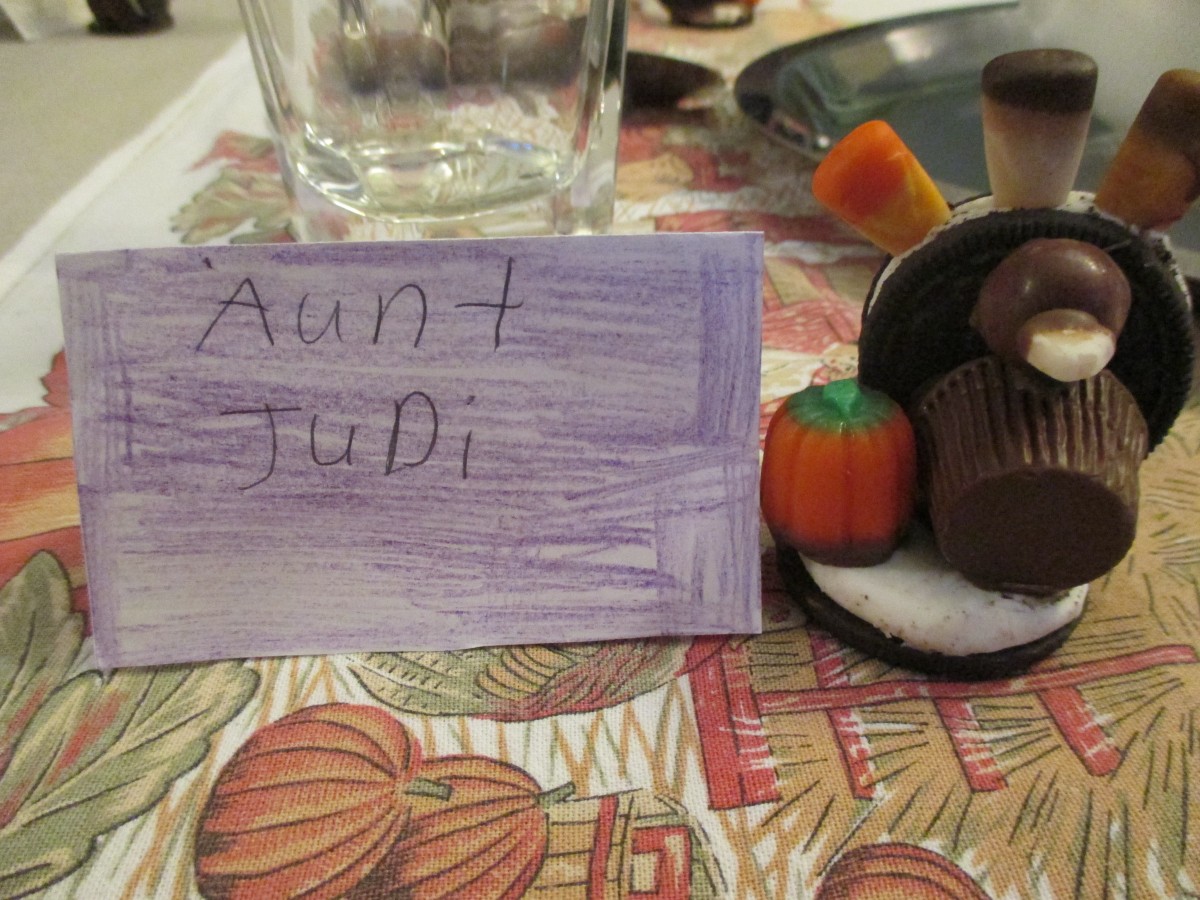
My place at the table
Cranberry Raspberry Salad

If you are looking for a fun and tasty variation for the usual cranberry sauce this Thanksgiving, I might suggest this cranberry and raspberry version. The raspberries add a great flavor to the dish along with the cranberries and orange juice. My family has enjoyed versions of this dish every Thanksgiving for as long as I can remember. Yes, it it a Jell-o salad. I know, there are some of you who are already skeptical. I promise you, it is really good. Of course, if you hate the idea of a Jell-o salad, just leave the gelatin out and serve it as a relish instead. The non Jell-o version of the recipe follows, but be sure to still serve it with the dressing.
The real secret however, is the dressing. It is a creamy, slightly sweet topping, made with a fruit juice custard and whipped cream. It really changes the whole dish into something special.
This might be the first time people ask for seconds on cranberry sauce.
Cranberry Raspberry Salad
1 large box raspberry or cranberry gelatin or 2 small boxes
1 c. hot water
3-4 cups raspberries fresh or frozen, thawed, if frozen
1 container cranberry-orange relish*
½ c. ginger ale
Dissolve gelatin in hot water. Gently fold in berries to avoid breaking them up. Fold in relish, but mix thoroughly. Stir in ginger ale and place salad in decorative mold and chill several hours or overnight. Make dressing. To serve, dip mold in warm water to loosen it, then invert on a serving platter. Be careful not to get water in it. Serve with the dressing on the side.
*You can make your own Cranberry orange relish if you don’t want to buy pre-made. I can’t always find it and making it is pretty simple. Recipe follows.
Note: I haven’t had any big problems un-molding this dish, but you can lightly oil or spray the mold with non-stick spray before filling it.
Dressing
2 eggs
½ c. sugar
½ c. orange juice
½ c. pineapple juice
2 T. flour
juice of half a lemon
1 c. whipping cream, whipped
Combine all ingredients, except whipped cream, in a saucepan and cook, stirring constantly, until thickened. Mixture should coat a spoon. Cool and chill. Fold cooled mixture into whipped cream.
Cranberry-Orange Relish
12 oz. cranberries, rinsed and picked over
1 c. orange juice
1 T. grated orange peel
½ c. sugar, or to taste
Combine all ingredients, in a saucepan and cook, stirring often, over medium heat. Cook until the cranberries burst and mixture thickens, about 20 minutes, stirring more often as mixture thickens. Reduce heat as mixture thickens, to prevent scorching. Cool and chill. Makes about 2 cups.
Cranberry-Raspberry Sauce non Jell-o Version
12 oz. cranberries, rinsed and picked over
1 c. orange juice
1 T. grated orange peel
½ c. sugar, or to taste
12 oz. raspberries, fresh or frozen ( thawed, if frozen)
Combine all ingredients, (except the raspberries) in a saucepan and cook, stirring often, over medium heat. Cook until the cranberries burst and mixture thickens, about 25 minutes, stirring more often as mixture thickens. Reduce heat as mixture thickens, to prevent scorching. Stir in the raspberries. Cool and chill. Makes about 3 cups. Serve with the dressing on the side.
Cindy’s Rich Squash Rolls

I love these dinner rolls. I think you will, too. The addition of squash is what makes them so special. The squash adds beautiful color to the rolls. It also creates a soft texture and an earthy sweetness.
These rolls are wonderful for any fall or winter dinner or holiday. They are especially nice for Thanksgiving.
We have them every Thanksgiving. My sister Cindy always makes them, and has been making them for years. They are rich, soft and sweet and make a perfect addition to the dinner table. Even with all the other foods at Thanksgiving dinner- you always save room for these dinner rolls.
While I use cooked butternut squash in mine, pumpkin could be used, as well as other winter squashes.
The recipe makes a pretty big batch. You can bake them, then freeze some for later use.
I love slicing them in half, and making mini turkey sandwiches with them the day after Thanksgiving.
Cindy’s Rich Squash Rolls
1 c. milk
4 T. butter
½ c. sugar
¼ c. brown sugar
1 t. salt
1 pkt. Yeast
4-5 c. flour
1 ½ c. cooked butternut squash, strained, or 1 (16oz.) can squash or pumpkin
2 eggs, room temperature
Scald milk and butter. Place sugar and salt in large bowl and pour in milk mixture. Cool to lukewarm. Add yeast and 2 cups of flour. Beat at medium speed with mixer for 2 minutes. Add squash and eggs and mix until smooth. Add flour gradually to form a stiff dough. Knead on floured board for 7-8 minutes. Place in a greased bowl, turning dough to coat evenly. Cover with a towel and allow to rise until doubled. Punch dough down and shape into rolls. Dough can be placed in a greased cake pan where they will touch each other as they rise making softer rolls. You can also place them in muffin tins, or shape into rolls and place on greased baking sheet for crispier rolls. Cover and let rise until doubled. Bake at 375 degrees for about 25 minutes. Butter tops while warm. Makes 2 ½ -3 dozen.
Variation: you can also add ½ t. ground nutmeg, 1-2 T. chopped chives, or 1T. parsley flakes for a little different flavor.
Pink Applesauce
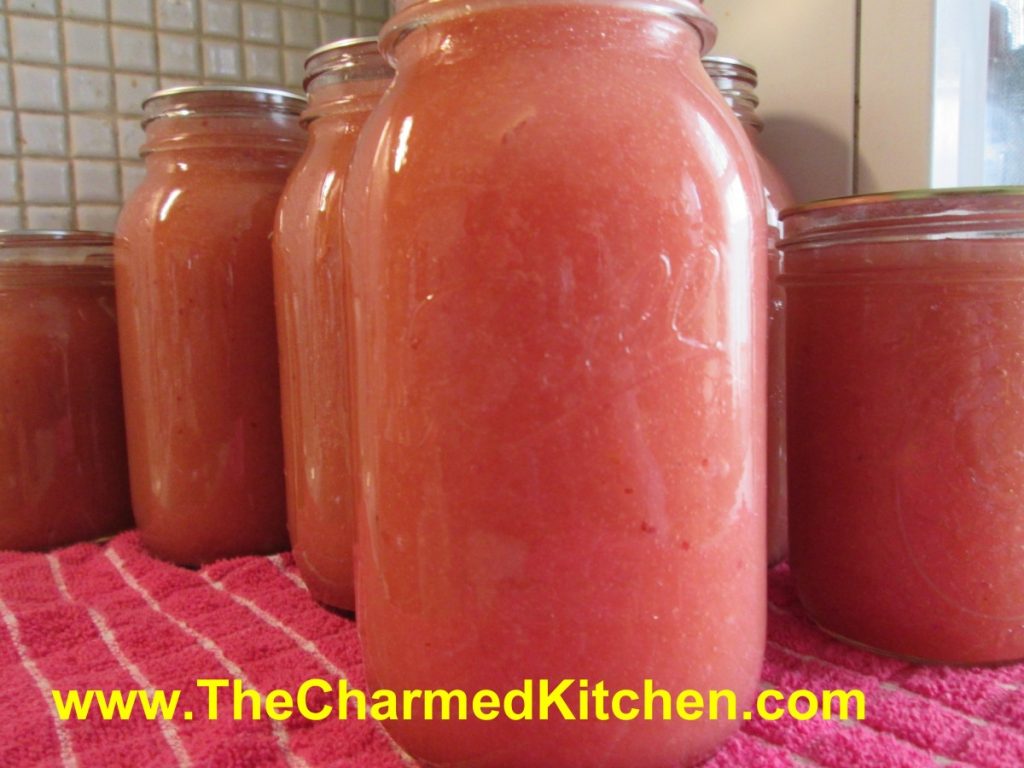
I really enjoy the flavor of homemade applesauce. I try to can at least a few batches this time of year.
I decided to mix things up a little by making a batch of applesauce with cranberries. It came out a pretty shade of pink. The cranberries also added a nice tartness to the mix.
You don’t have to add sugar, if you don’t want to. You add the amount of sugar you like, or leave it out completely. I like to mix different varieties of apples, for different flavor in your sauce.
You can also freeze the mixture if you don’t want to can it.
Pink Applesauce
60 medium apples, I used mostly Melrose and some Jonathans
12 oz. cranberries
water*
1 c. lemon juice
sugar to taste
Peel and core apples. Put in water with some ascorbic acid, citric acid or lemon juice to prevent discoloration. Place apples in a pot with enough water* to prevent sticking and add the cranberries and lemon juice. Cook over medium high heat until soft. I wanted smooth applesauce, so I ran the cooked apple mixture through a food mill on the medium blade. Return apple mixture to pan and bring to a boil. Sweeten with sugar, if you like, or leave unsweetened. Have water bath full of boiling water and have hot, clean canning jars and lids and rings ready. Ladle hot applesauce into hot jars, leaving 1/2 inch of headspace. Wipe rims and apply lids. Process in a boiling water bath for 20 minutes for pints or quarts. Turn off heat and let jars stand in water bath 5 minutes before removing. Set in a draft free area to cool down. Yield: 8 quarts or 16 pints.
*rather than add water, to prevent the apples from sticking, you can use cider or apple juice instead.


