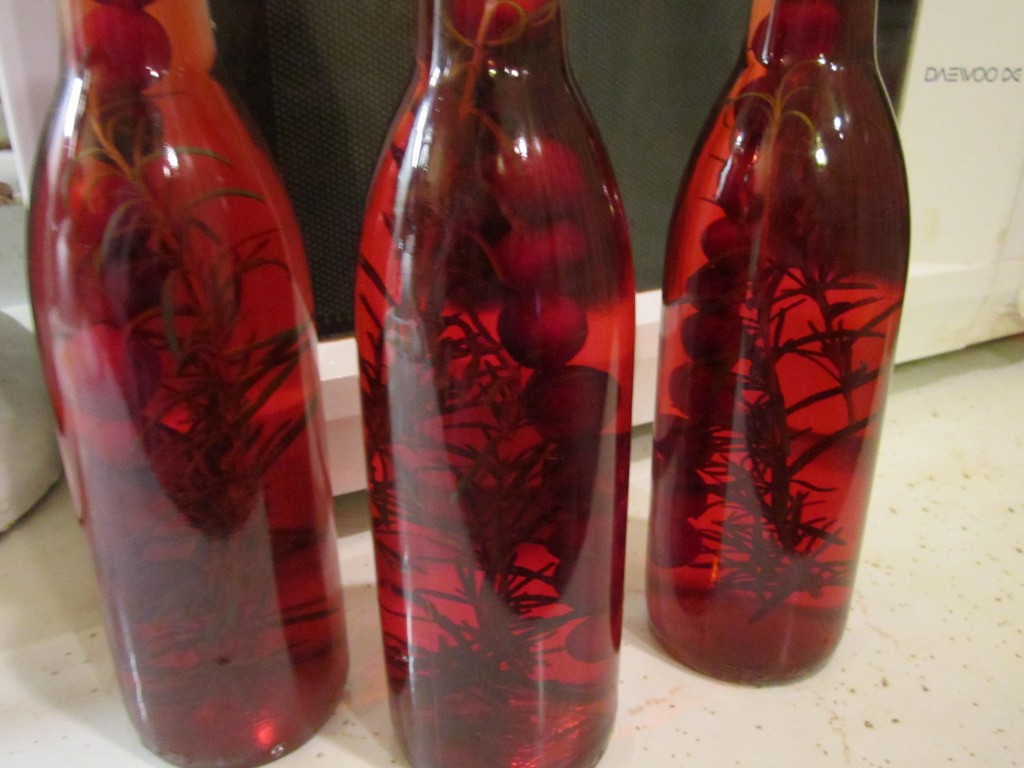
Cranberry Rosemary Vinegar
This is a favorite food gift of mine. It is so festive and it tastes good, too.
I happen to love cranberries. I buy a lot of them this time of year. They are in season, so the price is good. I buy extra, and throw a few bags in the freezer to enjoy all year long
I also preserve some by using cranberries to flavor vinegar. By adding rosemary, the end result is a great tasting vinegar that is perfect for winter salads. It is also a lovely gift.
I love to give homemade gifts. Time isn’t always on my side, though. I doubt my niece will be getting that scarf I was going to crochet for her. But I can get several bottles of this vinegar made in no time.
All you need are bottles with corks or screw top lids. If using corks, be sure they are food grade. You’ll also need cranberries, bamboo skewers, fresh rosemary and vinegar- 5% acidity. I use red wine vinegar. Other vinegar will work, too. If you use white vinegar or cider vinegar they will pick up color from the cranberries and turn a pretty reddish shade. Not as red as with the wine vinegar, but still very pretty.
Since I bring my rosemary plants inside for the winter, I have access to fresh rosemary. Your local grocery store probably has some in the produce department. You can use other herbs, if you can’t find rosemary.
Make sure the skewers will fit in the bottles. Cut them down to fit, if needed. Skewer the berries on the skewers leaving a little room on the top of the skewer. If your cranberries are really big, test to make sure they will fit the neck of the bottle. The skewers keep the berries from floating around.
Place a few sprigs of rosemary in each bottle and then add the berry- filled skewers. Pour in the vinegar, leaving a little room for the cork. Sometimes you need to add a little more vinegar the next day as some will absorb into the cranberries and the skewers. I make decorative labels and give them as gifts. Ready to use in a week.
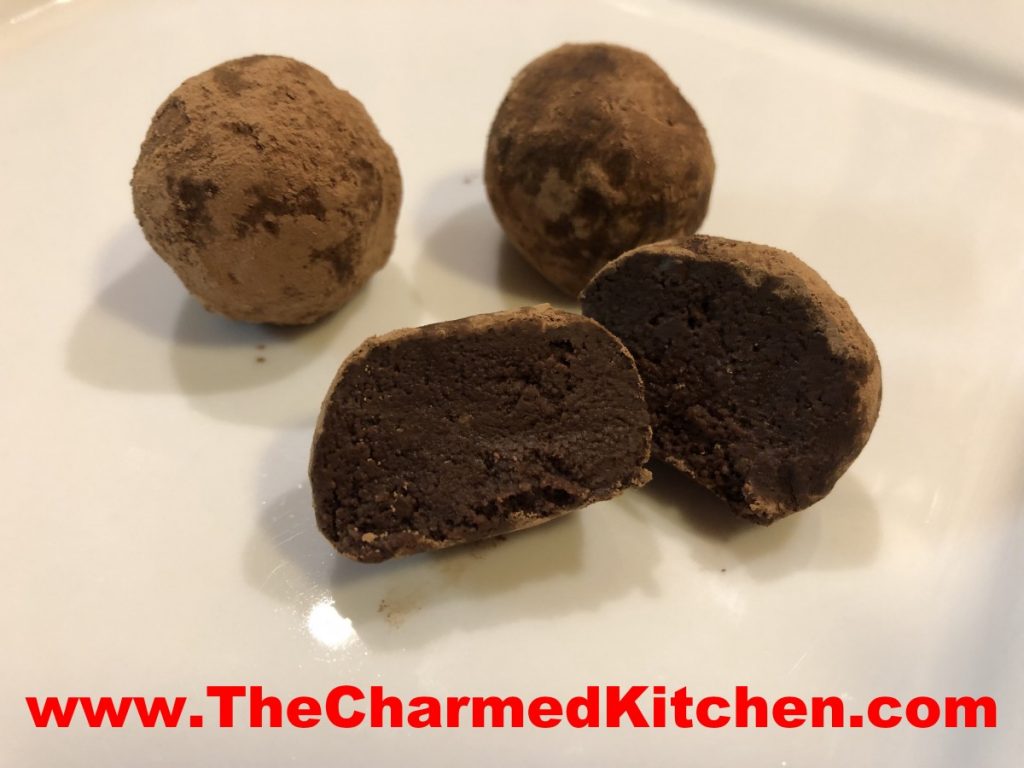
Homemade Chocolate Truffles

In keeping with my homemade gift theme this week, I wanted to share this simple, yet very tasty recipe, for Chocolate Truffles. These melt in your mouth, with a smooth, creamy texture and rich, chocolate flavor.
They can be a lovely hostess gift. Kids can make them, too.
The secret for making really good truffles is using the best quality chocolate you can. You can use chocolate chips, but get good quality chips.
They are very soft, and melt quickly when handled. When rolling them out, I prefer to wear plastic gloves. Make them without gloves, and you will understand why.
At candy making stores, you can get small papers cups and small boxes or tins for wrapping up your truffles.
Chocolate Truffles
1/3 c. Whipping cream
6 T. butter, cut into small pieces
2 c. chocolate chips- or 12 oz. dark chocolate, grated or chopped coarsely
Unsweetened cocoa
Heat cream to boiling in small saucepan. Stir in butter and cook until melted. Remove from heat and stir in chocolate until melted. Place in shallow bowl and chill until firm, at least a couple of hours. Roll mixture into 1-inch balls and roll in cocoa. Sometimes the mixture is quite firm and hard to roll into perfectly smooth balls. You can roll them out as smooth as you can, roll in cocoa and then roll again to smooth out. You might want to give them another roll in the cocoa after that. Makes about 30.
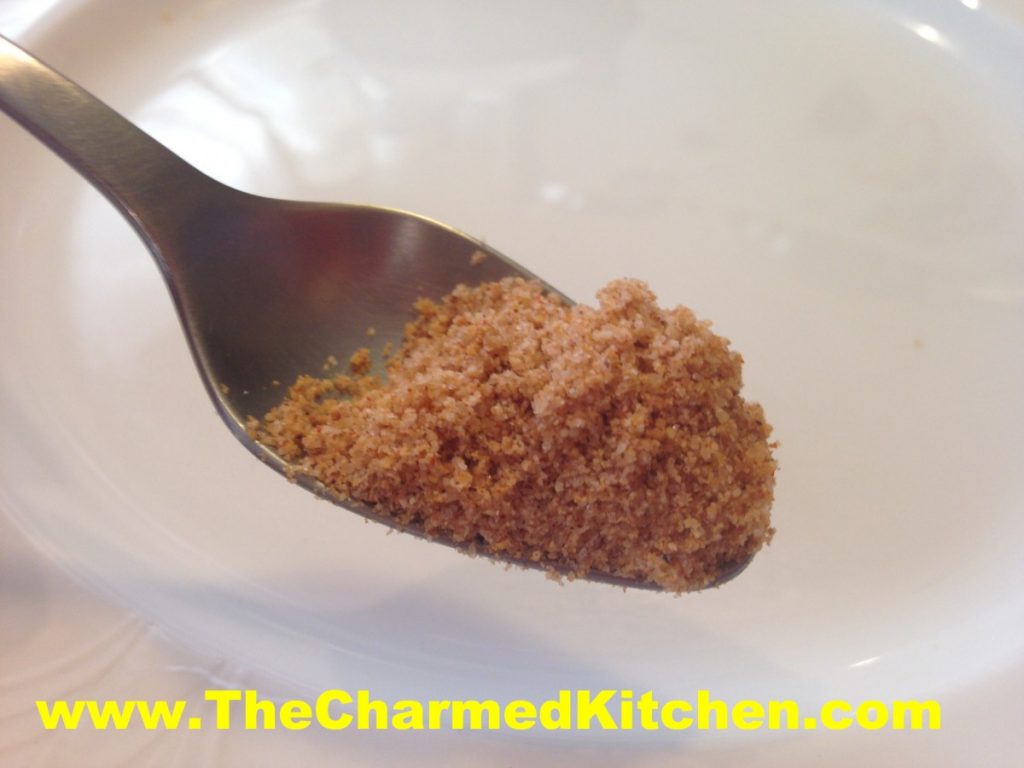
Sesame Salt
During the holidays, homemade gifts are always nice. Not every gift has to be a dessert or something sweet. This sesame salt is a lovely gift for almost anyone.
Once you taste sesame salt, I think you will love it as much as I do. I use it on all sorts of veggies, meats, pasta, potatoes and more. I love it on popcorn!!!
It is a nice alternative to regular table salt. Sesame salt adds great flavor to all sorts of foods. It is also is lower in sodium than plain salt.
You start by toasting sesame seeds. I just place the sesame seeds in a skillet and toast, on top of the stove, over medium heat, until golden brown. You can also toast them in the oven, but they burn easily. You do want to watch them carefully. As soon as they start to change color, turn down the heat or remove them from the heat.
Once the seeds are toasted, you add salt and a few other ingredients (onion, garlic, paprika, pepper). Use whatever salt you like. I use sea salt. Feel free to play around with flavors you add your sesame salt. I add a little smoked paprika, which gives the sesame salt a nice, smoky flavor.
I powder the mixture in a spice mill/coffee grinder. You can also use a blender to grind it up.
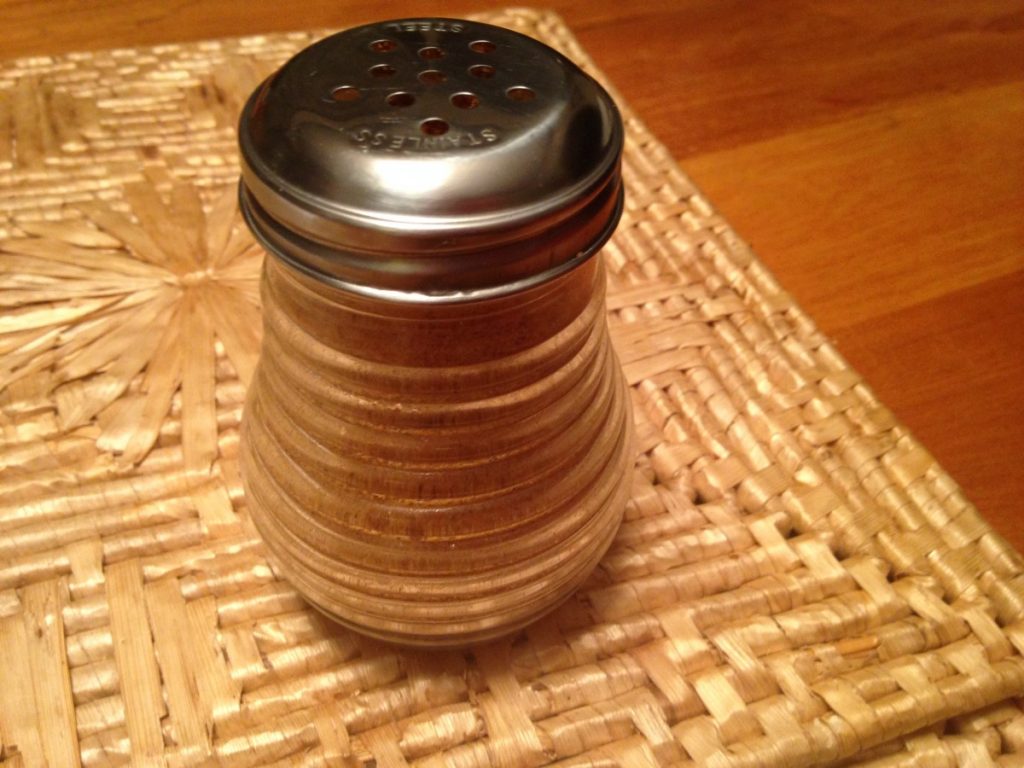
Sesame salt can be kept on the table in a shaker, just like salt. I use a shaker with slightly larger holes- I have one of those cheese shaker jars that works well. I often include a shaker when I give someone sesame salt.
Sesame Salt
1 c. sesame seeds
1/4 c. salt – I like sea salt- use the salt you like
1 t. each paprika and smoked paprika
1 t. onion powder
1/4 t. pepper
1/4 t. garlic powder
In a skillet, over medium heat, toast sesame seeds, stirring or tossing to cook evenly until seeds are light brown. Stir in salt and cook 5 minutes more. Cool mixture completely and add remaining ingredients. Process in blender or spice grinder until mixture in powdered. Makes 3/4 c. Excellent with vegetables, stir-fries, salad dressings etc.
Homemade Hot Cocoa Mix
I am always looking for homemade gift ideas for the holidays. I really like gifts that both adults and kids can make. This one is just a simple way to package homemade hot cocoa mix to make it special.
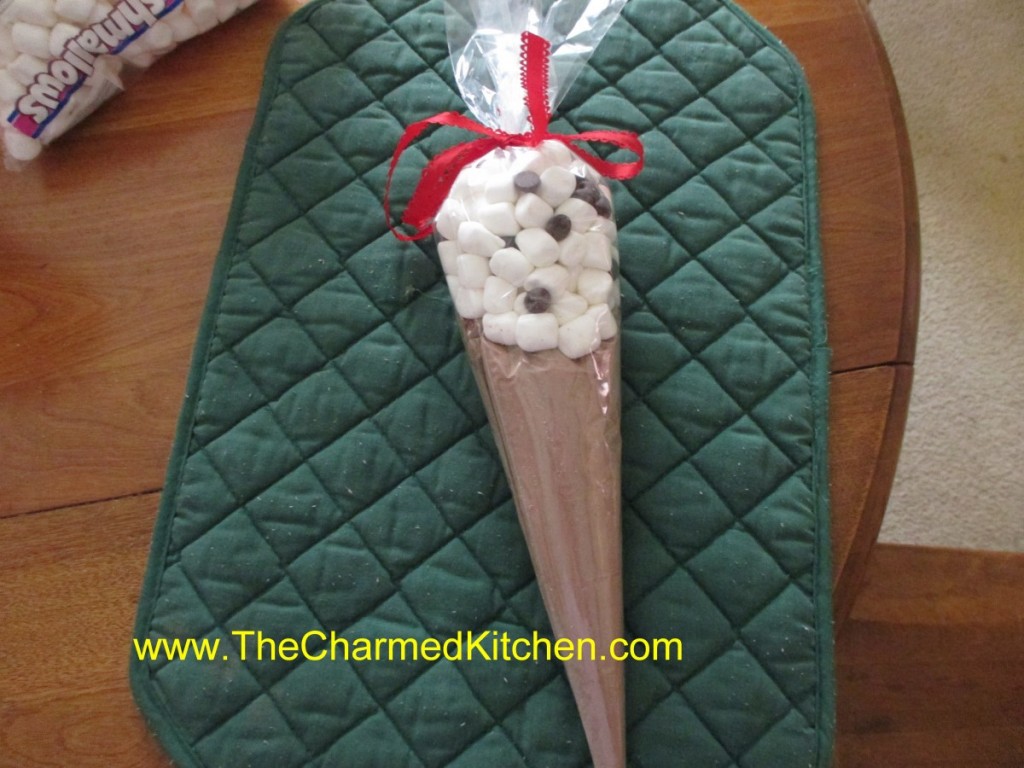
You start with hot cocoa mix- recipe follows. Then you get these cone-shaped bags. I use a 12-inch size and a 17-inch size. I buy my online, but they are available in some craft and candy making stores. Put about 1 cup of the hot cocoa mix in the smaller cone-shaped bag. Fold the top down and tape it shut. Now place the smaller bag inside the larger bag. Top with about a cup of mini marshmallows mixed with some chocolate chips. The chips are optional. Tie shut with a ribbon. It ends up looking (sort of) like an ice cream cone. I add a label that says “Hot Cocoa for Two” with directions that say, “Divide hot cocoa mix between two large mugs. Fill with a cup of boiling water in each. Stir and top with the marshmallows”. You can make whatever label you like. A quick and simple gift. You could also include mugs with the gift. This is a great idea for kids to make for grandparents, teachers, etc.
Here is the recipe for the hot cocoa mix.
Hot Cocoa Mix
3 c. nonfat dry milk
1 c. cocoa
1 c. sugar
1/4 t. salt
1 c. mini marshmallows (optional)
In large bowl, mix all ingredients well. I like to sift the ingredients in because it powders the milk even finer than the way it comes. Store in an airtight jar and use within 6 months. To use add 5 tablespoonfuls to 8 ounces boiling water. Variation, flavor with cinnamon, instant coffee, cayenne pepper or even dried orange peel.
Candied Orange Peels

During the winter months, when citrus is in season, I find myself eating a lot of oranges. I also find myself with a lot of orange peels. I dry some and powder them up for use in baking and cooking. But there are always more.
Candied orange peels are pretty easy to make and a nifty way of turning something that might otherwise be discarded into something tasty. You can also candy other citrus peel this way like grapefruit and lemons. The same process can be used to make candied ginger. Best to use organic oranges, since you are eating the peels.
Once finished, the candied peels can also be dipped in dark chocolate for a special treat.
They make a nice gift, too.
Candied Orange Peel
2 large oranges ( you can also use 1 grapefruit or 3 lemons)
or 1 lb. of ginger root*
¾ c. water
¾ c. sugar, plus extra for rolling
3 T. light corn syrup, optional
Remove peel from fruit using a sharp knife. Try to get the peel off in 4 pieces. Cut the peel into ¼-inch wide strips. Place peel in a pot with cold water and bring to a boil. Boil 1 minute, drain and rinse under cold water. Repeat process 2 more times. Return to pan with fresh water and boil 15 minutes. Drain and pat dry. Bring ¾ c. water and ¾ c. sugar to boil in sauce pan with the corn syrup. Boil 2-3 minutes and then add the peel. Simmer, stirring occasionally until all but a spoonful of the syrup is left. This should take about 10 minutes. On a wax-paper lined baking sheet sprinkle 1 cup of sugar and arrange the peels on top of the sugar. Toss the peels around until cooled adding more sugar if needed. Place peels on a drying rack for 24 hours before storing. Once dried you can also dip one end of the peels in dark chocolate. Makes ½ pound.
* If making the candied ginger root, peel and cut into 1/4- inch slices. Then cut the slices into 1/4-inch thick strips
Homemade Cashew Brittle
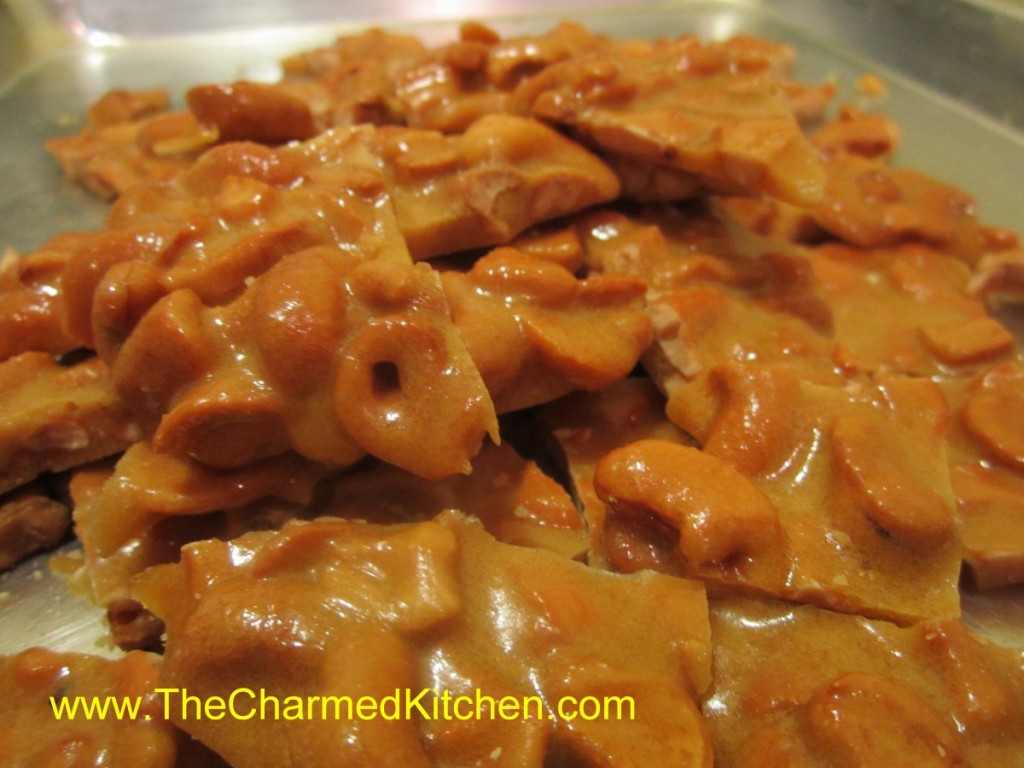
If you need a great food gift, this brittle might just be the answer. It is fast and easy to make.
I was given this recipe at a craft show a few years ago. The brittle is cooked in the microwave. No special thermometers or equipment required. Just a glass bowl and a few minutes of your time. It could not be simpler. It is really good, too.
You can use other nuts, if you prefer, or peanuts. You can add a little cayenne pepper, if you want a spicy version. You can also dress it up with a drizzle of chocolate, once cooled. So many ways to enjoy it.
Stored in a covered container, in a cool, dry place, the brittle will stay crunchy for weeks.
Homemade Cashew Brittle
2 c. cashews*
1 c. sugar
1/2 c. corn syrup
1/8 t. salt
1 t. butter
1 t. vanilla
1 t. baking soda
Butter or oil a large baking sheet and set aside. In a 3-4 quart glass bowl combine the nuts, sugar, corn syrup and salt. Microwave on high for 3 minutes. Remove from microwave, stir well and return to microwave. Cook 3 more minutes in microwave. Remove and stir in butter and vanilla, stirring until butter has melted. Return to microwave and cook for 2 more minutes. Remove from microwave and stir in baking soda. Stir until well blended and pour mixture onto prepared baking sheet. Spread out quickly, then allow to cool. Once cool, break into pieces. Store in a cool, dry place. I normally store it in a tin or plastic container with a tight-fitting lid.
* I used salted cashews but feel free to experiment with other nuts
Note: Use high power setting on microwave.
Homemade Cranberry Liqueur

You can do more with cranberries than make sauce. Not that I don’t like cranberry sauce, I do. I love cranberry season and find myself using them in all sorts of recipes.
In the next couple of weeks, I will be posting homemade gift ideas. This is one of my favorites!!
I got the recipe from my sister Cindy, many years ago. It is also called Cranberry Bounce. If you start a batch now, it will be ready to drink, and for gifting, in just a couple of weeks.
Cranberries, sugar and vodka. What a great combination. It’s simple to make and it makes a nice gift, too.
The color is absolutely beautiful. The sweet/tart finished product can be enjoyed by just sipping, on the rocks, or mixed with club soda. It can also be a nice addition to all sorts of cocktails.
Often after Thanksgiving, the price of cranberries goes down. I stock up on them, freeze some and make a batch, or two of cranberry liqueur. This year, even before Thanksgiving, prices have been good.
I hope you give it a try. I am sure you will be pleased with the results.
Cranberry Liqueur
1 lb. fresh cranberries (most bags are 12 oz.)
2 c. sugar
4 c. vodka- at least 80 proof
Grind berries fine in food mill or food processor. Place in large jar and combine with the sugar. Let stand, covered until sugar is dissolved completely, several hours or overnight. Add vodka and let steep 1-3 weeks, stirring occasionally. Strain and filter. Makes 5 cups.
Note: Drained cranberries can be saved in fridge and used, sparingly, in desserts, fruit salads and on cake or ice cream. They do pack a punch.
Root Vegetable Soup
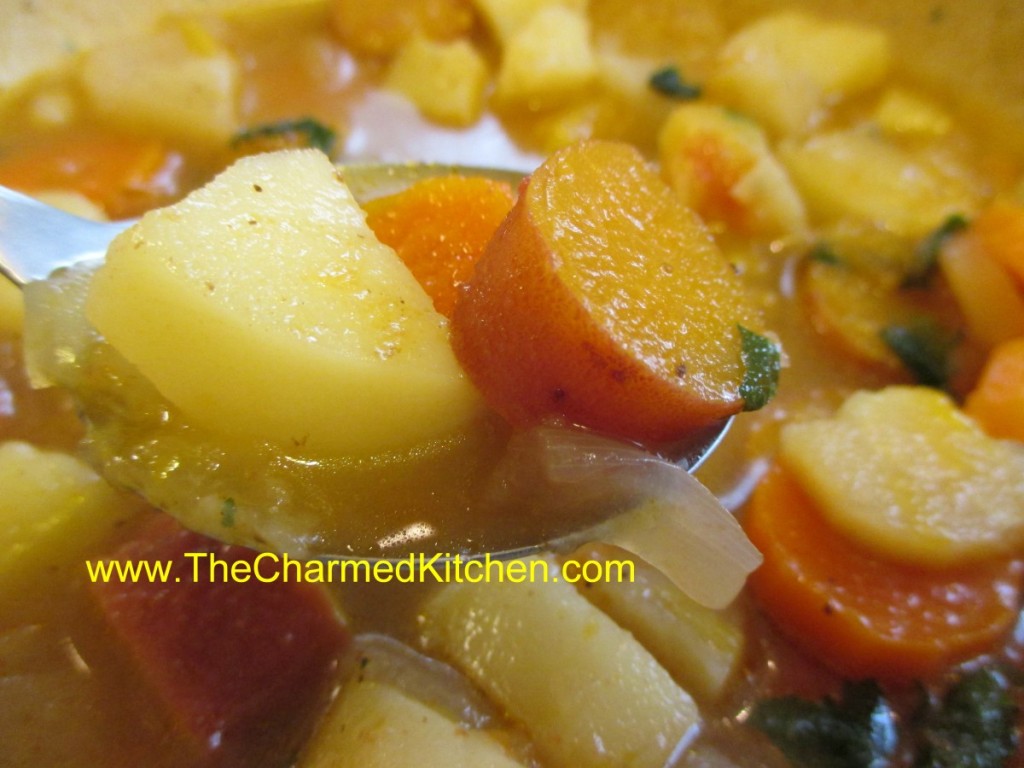
When the air is chilly, I am always in the mood for a nice hot bowl of homemade soup. This soup came about as I rummaged through the veggie bin. I had a number of root vegetables, so I decided to make them the focal point. I happened to have homemade chicken stock, but you could easily swap it out for beef, turkey or vegetable stock.
Root vegetables are often associated with fall and winter cooking. Before produce came from around the world, people lived off what they grew locally. In cold climates, that meant in the winter you ate the veggies that you preserved, or that stored well. Root vegetables store well, so they would be a staple.
Most root vegetables take a fair amount of cooking to get tender and add flavor and richness to soups, stews, chowders and more. That is kind of a bonus on a chilly day, when a long cooking dish warms the house, as well.
So here it it- the recipe that was created based on what I happened to have on hand. The end result was really good.
Root Vegetable Soup
3 T. oil
1 onion, chopped
2 large carrots, peeled and sliced
2 small parsnips, peeled and sliced
6 c. stock, I used chicken
2 c. peeled and diced turnips, about 2 medium
2 c. diced potatoes, about 2 medium
1 pint home canned tomatoes, or a (14 oz.) can of diced tomatoes, un-drained
1 medium sweet potato, diced
1/4 c. chopped parsley
2 T. apple cider vinegar
1 T. hot sauce, or to taste
salt and pepper to taste
In soup pot heat the oil and cook the onion until light golden. Add the carrots and parsnips and cook until they are light golden, too. Add the stock, turnips, potatoes and tomatoes and bring to a boil. reduce heat and simmer, covered, until veggies are tender, about 20-30 minutes. Add sweet potatoes and remaining ingredients and cook until sweet potatoes are tender, about 10-15 minutes. Adjust seasonings and serve. Serves 6-8.
Cranberry Orange Scones
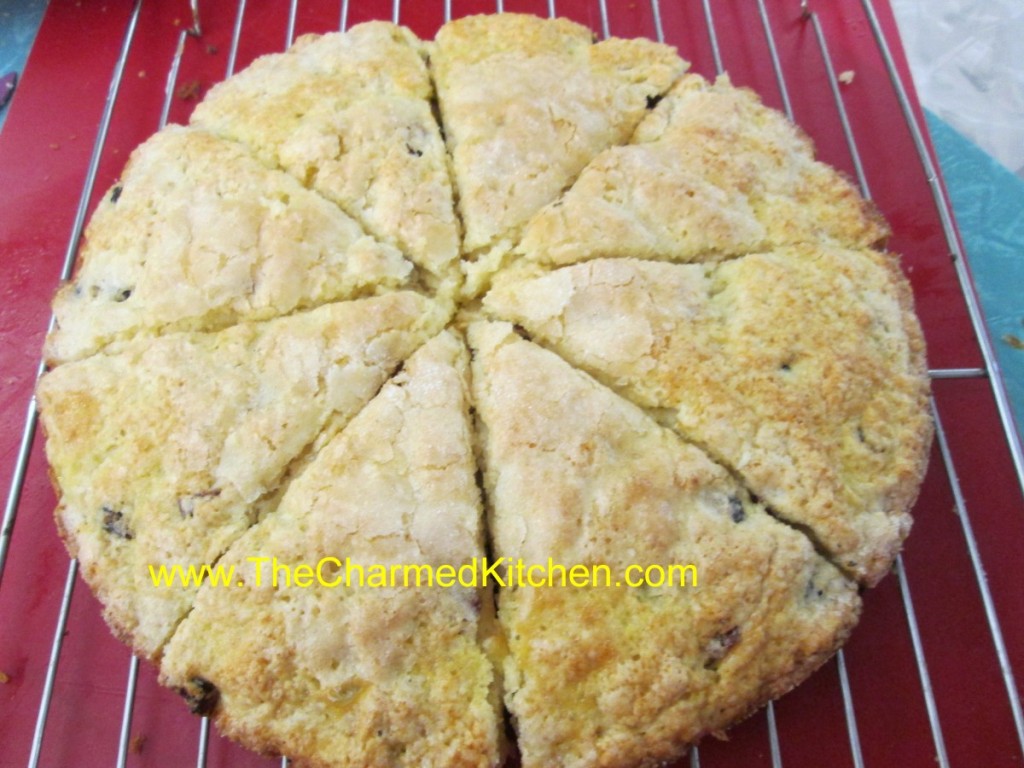
I make scones pretty often. There is nothing quite like the taste of fresh-baked scones. Plus, baking them makes the house smell wonderful.
These scones are shaped by pressing the dough in a round cake pan, then cutting into wedges before baking.
They come out looking great and tasting great, too. If you don’t have buttermilk just add a little lemon juice to regular milk. I actually used half and half instead of milk, and added 1 tablespoon of lemon juice to the half and half. It worked great.
Perfect breakfast for this weekend. Serve warm with butter and jam.
Cranberry-Orange Scones
2 c. flour
4 T. sugar
2 t. baking powder
1 t. baking soda
1 t. grated orange peel
½ t. salt
¼ c. butter
1 c. dried cranberries
2/3 c. buttermilk
1 egg
Extra milk and sugar, for topping
Preheat oven to 425 degrees and lightly grease a baking sheet. Combine dry ingredients in medium bowl and cut in butter to resemble coarse crumbs. Stir in cranberries. Beat together milk and egg and add to flour mixture, stirring with fork until just coming together. Turn onto floured surface and knead 5-6 strokes or until ball of dough holds together. Transfer dough to prepared sheet and with floured hands, press dough into an eight-inch circle. I place dough in floured 8-inch cake pan, then invert onto the baking sheet- for a nice, even circle. With a sharp, floured knife cut dough into 8 wedges. Brush top of dough with a little extra milk, then sprinkle tops with a bit of sugar. Bake 14-16 minutes. Makes 8.
Dough can also be patted out on work surface and cut into circles or pressed into a square and cut into smaller squares.
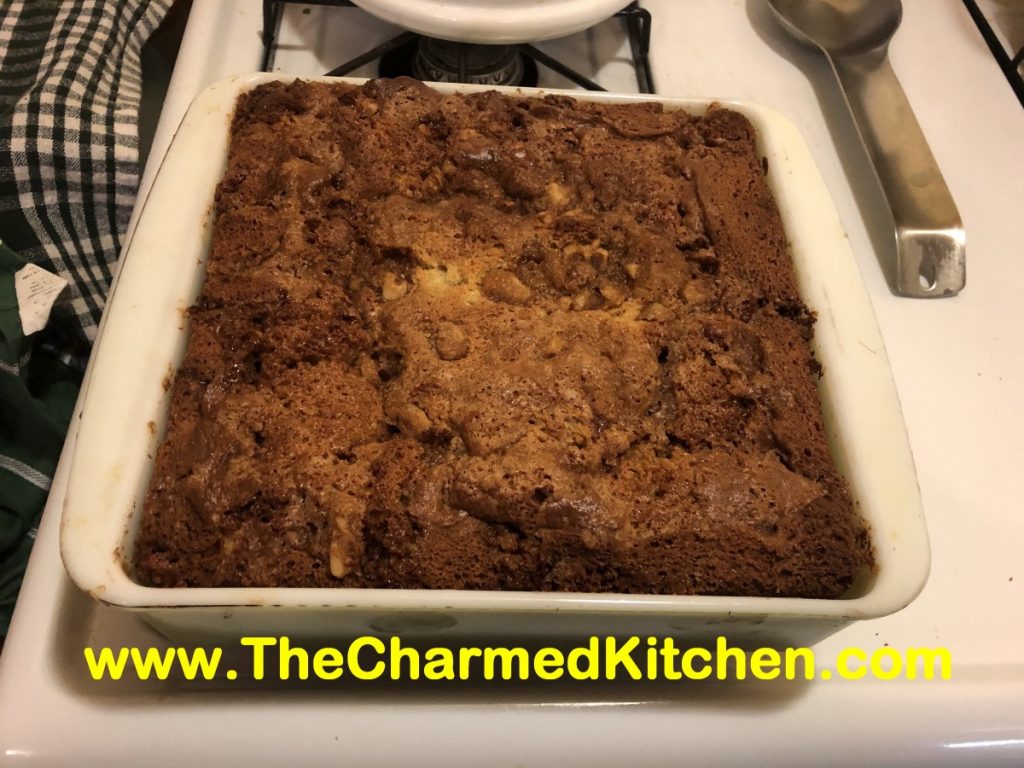
Busha’s Sour Cream Coffee Cake
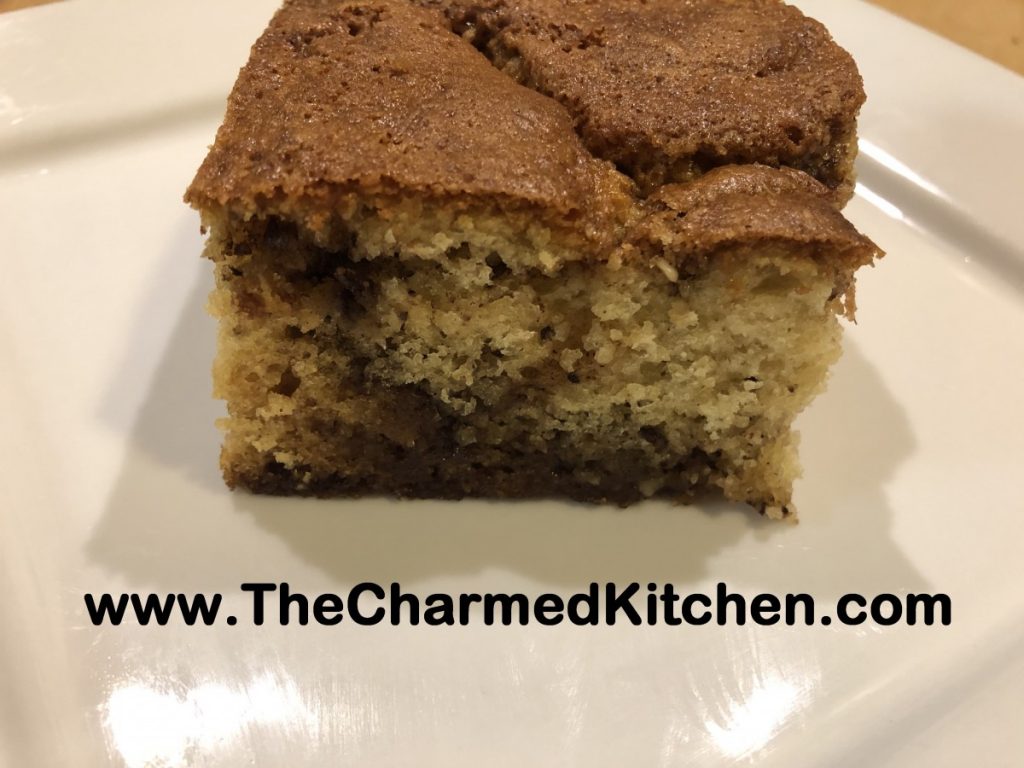
This is a rich, flavorful coffee cake. Sour cream helps to make the batter tender. Nuts, butter, brown sugar and cinnamon create a lovely filling that takes this cake to a whole different level. It is great with that morning cup of coffee or as dessert to end a lovely meal.
This was the first cake I can remember making from scratch with my Polish grandmother, my Busha. I was about 10 and I was spending the weekend with her. She didn’t have the recipe written down, so I wrote down the measurements and directions as we went. I still have that index card where I carefully wrote down everything. It will always be a sentimental favorite of mine.
She did use shortening in the batter. I use butter or coconut oil as a substitute. Use what suits you- the cake comes out just fine with any of those ingredients.
The filling always sinks to the bottom. That is why the pan is greased, then lined with wax paper. Makes it easier to get the cake out of the pan later.
So here is the recipe. Enjoy.
Busha’s Coffee Cake
1 c. light brown sugar
6 T. butter, softened
2 t. cinnamon
1 c. chopped nuts
3/4 c. sugar
1/2 c. butter, coconut oil or shortening
1 1/2 t. vanilla
3 eggs, room temperature
1 c. sour cream
2 c. flour
1 t. baking powder
1 t. baking soda
Mix first 4 ingredients together and set aside. Combine sugar and shortening until fluffy. Add vanilla and beat well. Beat in eggs one at a time. Stir in sour cream. Combine dry ingredients and add to egg mixture. Grease a tube pan or 9×9 inch square pan. Line bottom with wax paper. Pour half of batter in pan. Top with half of nut mixture, crumbling to spread evenly. Add remaining batter, spreading to smooth. Add remaining nut mixture and bake in a 350 degree oven for 45-50 minutes (tube pan), or 35-40 minutes (9×9 inch pan). Serves 10.