Blueberry Cinnamon-Vanilla Jam
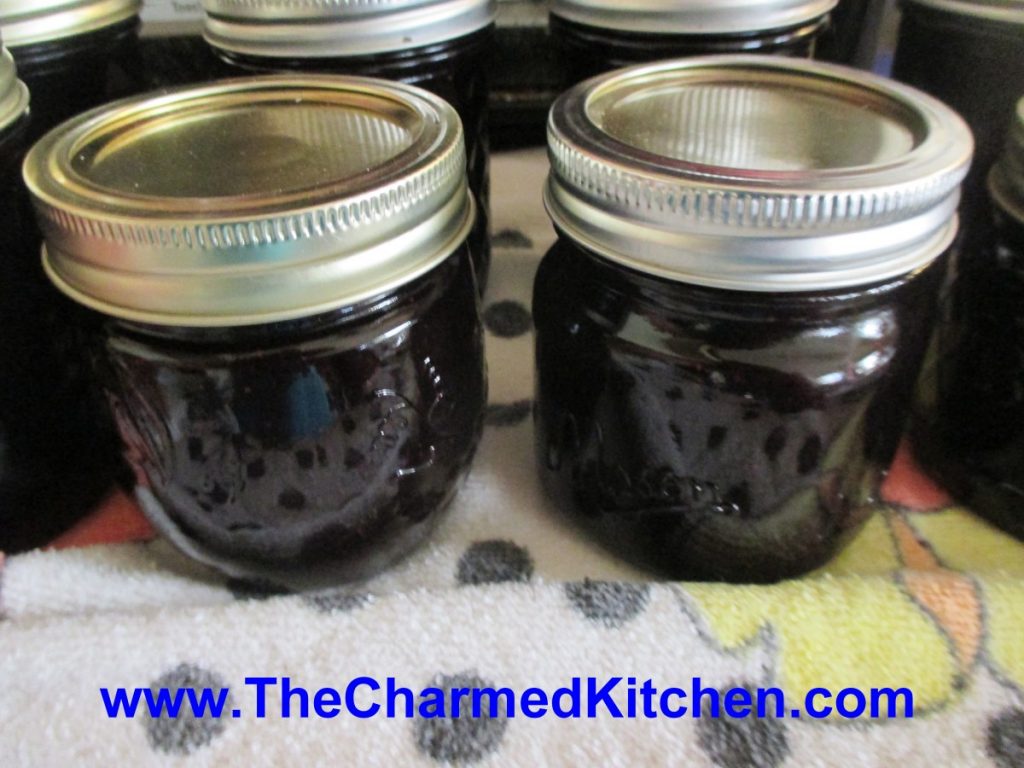
I often make blueberry jam with a little added vanilla, but decided to add cinnamon this time, as well. The result was so tasty.
I used the basic berry jam recipe from the Ball Blue Book, but I added both vanilla and a cinnamon in this batch. The flavors worked really well together. I am making more of this one, for sure. Enjoy.
Cinnamon- Vanilla Blueberry Jam
9 c. crushed blueberries
6 c. sugar
1 T. ground cinnamon
1 T. vanilla
Pick over berries getting any stems. Rinse , drain and crush. Place berries, sugar, cinnamon and vanilla in a large saucepan and heat slowly until sugar has melted. Bring up heat and cook over high heat, stirring often. Stir more as mixture thickens. It will take 20-30 minutes to get to the gel stage. To check for gel stage dip a metal spoon in blueberry mixture and hold it up sideways. Allow mixture to drip off and when two drops come together to form one larger drop- you are at gel stage. You can also use a candy thermometer. When the jam reaches 220 degrees- or 8 degrees over the temp of boiling water- you are at gel stage. Ladle hot jam into clean, hot jelly jars. Fill to within 1/4 inch of the top. Wipe rims and place on lids prepared according to directions on box. Screw lids comfortably tight. Place jars in boiling water bath with water at least 1-2 inches over the tops of the jars. Cover pot and start timing when water returns to the boil. Process 15 minutes. Remove jars to towel, cutting board or cooling rack in a draft-free location. Check seals once jars are cooled. Makes 8-10 jelly jars.
Source: Adapted from Ball Blue Book
Cream of Fresh Tomato Soup

Tomatoes are in season and I am loving it. I have been enjoying tomato sandwiches, tomato salad and fresh tomato sauce.
This is a great recipe for some of those tomatoes. A simple soup, with lots of flavor, it is a favorite of mine. So much better than the canned tomato soup of my childhood.
I enjoy it served hot, but this soup can also be served cold. On a hot day, this soup, served chilled, is a wonderful change from a salad with dinner.
I prefer to use fresh tomatoes, but I have used my home canned tomatoes, in a pinch.
If you want a stronger tomato flavor- use a couple extra tomatoes.
Cream of Fresh Tomato Soup
3 medium-sized ripe tomatoes
1 small onion, chopped fine
1 rib celery, chopped fine
3 whole cloves
1 small bay leaf
3 T. butter
3 T. flour
1 t. salt
3 c. milk or half and half
Peel and chop tomatoes. Place tomatoes in saucepan with onion, celery, cloves and bay leaf. Bring mixture to a boil; reduce heat and cover, simmering 15 minutes. Melt butter in a large saucepan then stir in flour and salt. Cook mixture until bubbly. Add milk and cook until thickened, stirring constantly. Puree tomato mixture through a strainer, food mill or in a blender or processor. Add to milk mixture and heat through. Serves 6.
Zucchini Bread Pudding
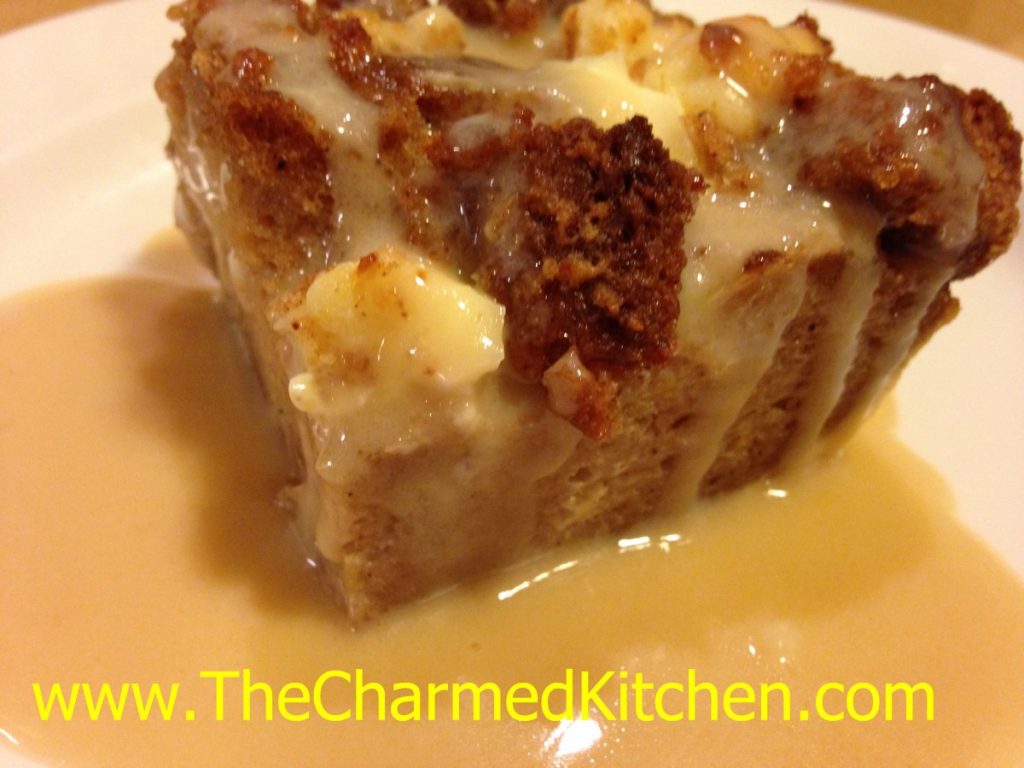
I had some extra zucchini bread and wanted to do something different with it. I ended up making this zucchini bread pudding. It came out even better than I thought it would. Rich, not too sweet. A simple, classic dessert.
I felt it needed some sort of topping or sauce. I made a vanilla caramel sauce to dress it up a little. It worked great. Ice cream or whipped cream would have worked, too.
I guess I should really call it a zucchini bread bread pudding. After all, it is bread pudding made from zucchini bread. My spell check hates it when I type the same word twice, so zucchini bread pudding it is.
I know this would also work with other quick breads, like pumpkin or banana bread.
So here is the recipe- for the bread pudding, the zucchini bread and the caramel sauce.
Zucchini Bread Bread Pudding
6-8 cups cubed zucchini bread- recipe follows
8 oz. cream cheese- cubed
2 c. half and half
3 eggs
1 T. vanilla
1 t. cinnamon
Vanilla Caramel sauce- recipe follows
Butter a 2-quart casserole. Preheat oven to 350 degrees. Place half the cubed zucchini bread in the prepared pan. Add half the cubed cream cheese, scattering over the bread. Repeat with remaining bread and cheese. In bowl, combine the remaining ingredients, beating until well mixed. Pour over the zucchini bread mixture. Place casserole in oven and bake for 30 minutes, or until bread pudding is set. Allow bread pudding to cool a little before serving. Serve with the vanilla caramel sauce or top with ice cream or whipped cream. Serves 8.
While often served warm, this bread pudding is tasty served chilled, too. Heck, I just had some for breakfast.
Zucchini Bread
3 c. flour
3 eggs
2 c. sugar
2 c. shredded zucchini
1 c. oil
1 c. chopped nuts or raisins
½ c. sour cream or strained yogurt
1 t. each vanilla, cinnamon, baking powder, salt and baking soda
Preheat oven to 350 degrees and grease 2 (9×5 inch) loaf pans. Set aside. Place flour in large bowl. Beat eggs and add with remaining ingredients to flour, mixing well and scraping bowl. Pour batter into prepared pans and bake 1 hour and 20 minutes, or until browned and toothpick in center emerges clean. Cool in pans on wire rack. Freezes well. Makes 2.
Vanilla Caramel Sauce
1 c. sugar
¼ c. water
4 T. butter
2 t. vanilla
¼ c. half and half
Pinch of salt
Combine sugar and water in a small saucepan. Bring to a boil and cook for about 3 minutes. Remove from the heat and add the remaining ingredients. Stir until smooth.
Giant Zucchini Bread
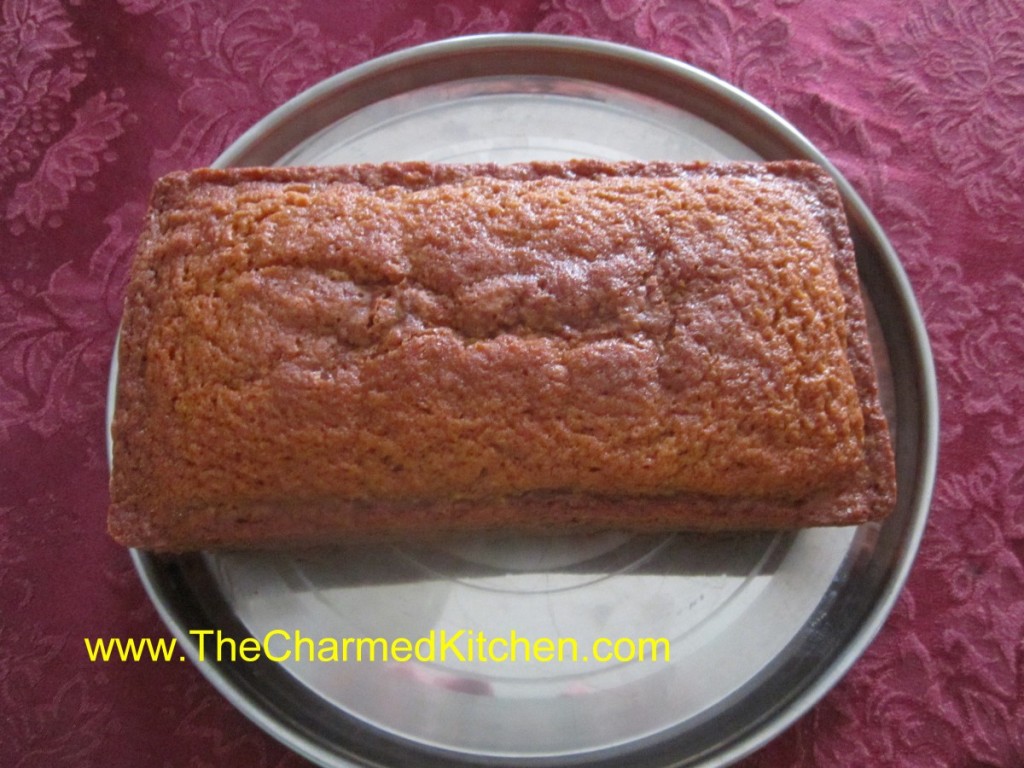
Let me be clear. The bread is normal size- the zucchini are giant. Even the most diligent of gardeners will have a few zucchini get away from them.
Zucchini seem to go from too small to gigantic in the blink of an eye. A friend just brought me a really big zucchini. I knew it would make nice zucchini bread.
This time of year I get a lot of questions about overgrown zucchini. People seem to think there is nothing you can do with them. That’s not true. Even older squash can be eaten in all sorts of ways.
You can determine if the skin is too tough to eat by trying to pierce it with a fingernail. If you can easily poke the skin- it is tender enough to eat. If it isn’t, just peel before using.
Cut the zucchini in half lengthwise and look at the seed cavity. If the middle looks spongy, hollow or if the seeds are developing scoop out the middle and discard. The remaining zucchini can be cubed or sliced and added to stews, soups, stir fries and all sorts of dishes.
One of my favorite things to make with the bigger zucchini, is zucchini bread. I shred up a whole zucchini and portion it out in amounts I will need for my bread. I freeze what I won’t be using that day. It is really nice in the dead of winter to be able to make zucchini bread. Here is the recipe I use. It is a favorite and makes 2 loaves, which is a bonus.
Zucchini Bread
3 c. flour
3 eggs
2 c. sugar, I use less
2 c. shredded zucchini
1 c. oil
1 c. chopped nuts or raisins, optional
½ c. sour cream or Greek yogurt
1 t. each vanilla, cinnamon, salt and baking soda
Preheat oven to 350 degrees and grease 2 (9×5 inch) loaf pans. Set aside. Place flour in large bowl. Beat eggs and add with remaining ingredients to flour, mixing well and scraping bowl. Pour batter into prepared pans and bake 1 hour , or until browned and toothpick in center emerges clean. Cool in pans on wire rack. Freezes well. Makes 2 .
Zucchini Brownies- Gluten Free!!!
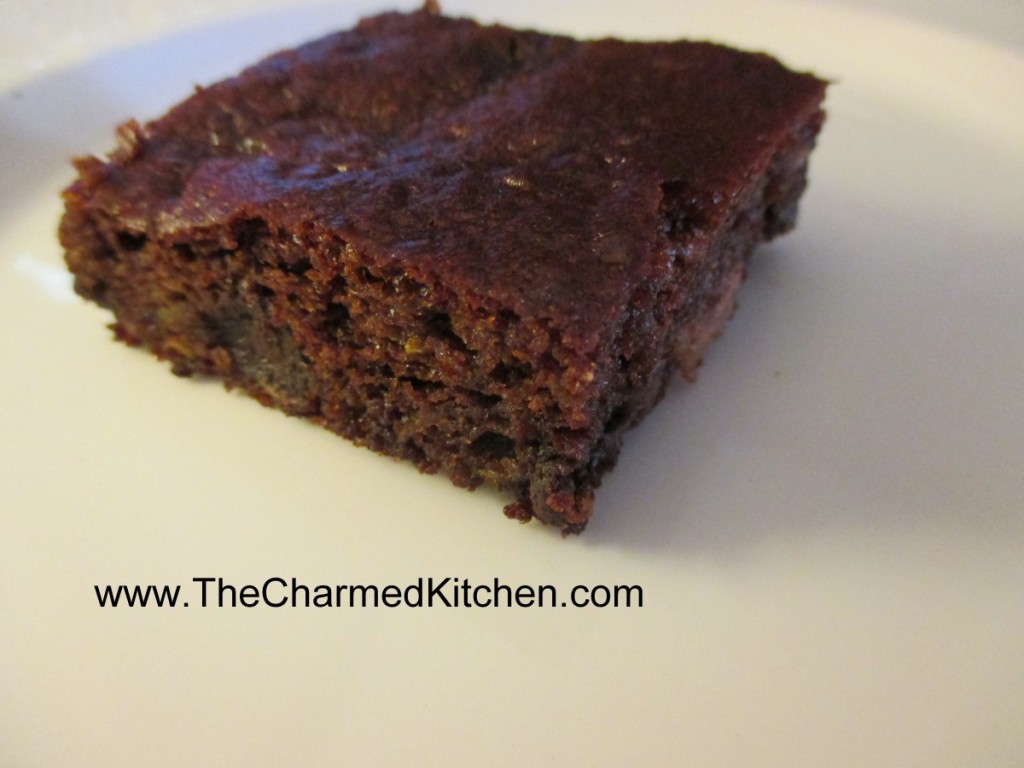
These brownies are everything you want in a brownie. Sweet, moist and very tender. The fact they are also flour and gluten-free is a nice bonus for those who can’t have gluten.
You might think, when you read the ingredients, that I left something out. I didn’t. They baked up beautifully and had a wonderful texture. I think the next time I make them, I might also add some chopped nuts.
Gluten-Free Zucchini Brownies
1½ c. shredded zucchini
1 c. almond butter- but you could use peanut butter instead
1 c. chocolate chips
1/3 c. honey – but you can use 1/2 cup if you want a sweeter brownie
¼ c. unsweetened cocoa powder
1 egg
1 t. vanilla
1 t. baking soda
1 t. cinnamon
½ t. allspice
Preheat oven to 350 degrees. Grease a 9×9 inch pan, set aside. Combine all ingredients in a medium bowl and stir until well blended. Pour batter into pan and spread evenly. Bake 25-30 minutes, or until toothpick inserted comes out clean. Cool before cutting. Makes 16.
Hot or Cold- Creamy Zucchini Soup

You can never have enough recipes for zucchini. If you have ever planted zucchini, you know what I mean.
This is a recipe I’ve had for ages, but had not made in a while. I forgot how much I liked it. As an added bonus, it can be served hot or cold.
I leave the skins on my zucchini, I like the way the little green flecks look in the soup, but you can peel, if you prefer. You can also use a combo of green and yellow summer squash.
Here is the recipe.
Creamy Zucchini Soup
1 medium onion, chopped
2 T. butter
4-6 medium zucchini, sliced
1 large potato, peeled and diced
1 T. chopped parsley
½ t. each basil, marjoram and thyme
1 t. hot sauce, or to taste
salt and pepper to taste
6 c. chicken or veggie broth
1 c. milk or half and half- I prefer the half and half
In Dutch oven cook onions in butter until tender. Add vegetables and seasonings and cook until hot. Add broth, heat to a simmer and cook 15 minutes. Puree mixture in blender in batches and return to pot. Add milk and heat through. Adjust seasonings. Serve hot or cold. I topped mine with some fresh chopped parsley and a little hot sauce. Serves 6-8.
Blueberry Kolachy

I have fond memories of making these delicate cookies with my Mother. I think of her every time I make them. We will be baking these in cooking camp today. I think the kids are really going to love them.
I made my own blueberry pie filling, but you could use store-bought, if you prefer. I have also used cherry, fig, apple, cheese, and nut fillings. Finish off the cookies with a light dusting of powdered sugar, if you like.
One problem people sometimes have, when making kolachy, is having them open when baking. When you fold the dough over the filling, give it a good pinch. Then fold it over and pinch it again. Also, don’t leave too much flour on the dough. It will prevent the dough from sticking to itself and will cause it to pop open. Some people like to moisten the dough a little, before sealing. That works, too. I just find the double pinch method works fine for me. Important to know- even the ones that pop open will taste amazing!!
Blueberry Kolachy
Dough
3 sticks butter
8 oz. cream cheese, softened
3 cups flour
Blueberry Filling– recipe follows
Powdered sugar, optional
Mix dough ingredients together and chill well before using.
Roll out chilled dough into squares or circles. Spoon a little blueberry filling into the center and pinch 2 ends or corners together. Bake in 350-degree oven for about 12 minutes, or until golden on edges. Cool and dust with powdered sugar. Makes 4-5 dozen.
Blueberry Pie Filling
3 1/2 c. blueberries
3/4 c. sugar, or to taste
1/4 c. Clear Gel*
1 c. water
1 T. lemon juice
In saucepan, bring blueberries and sugar to a boil, stirring often. Combine clear gel with water and lemon juice and add to the blueberry mixture. Return to the boil and cook until thickened and bubbly. Makes 4 cups. You might not need the whole batch for the cookies.
*Clear gel is a modified cornstarch. It is used in commercial pie fillings and in homemade pie fillings, as well. Unlike regular cornstarch, Clear Gel retains it’s thickness, even if you reheat it. You can find it online or in some specialty food stores. You can use cornstarch, if you can’t find Clear Gel.
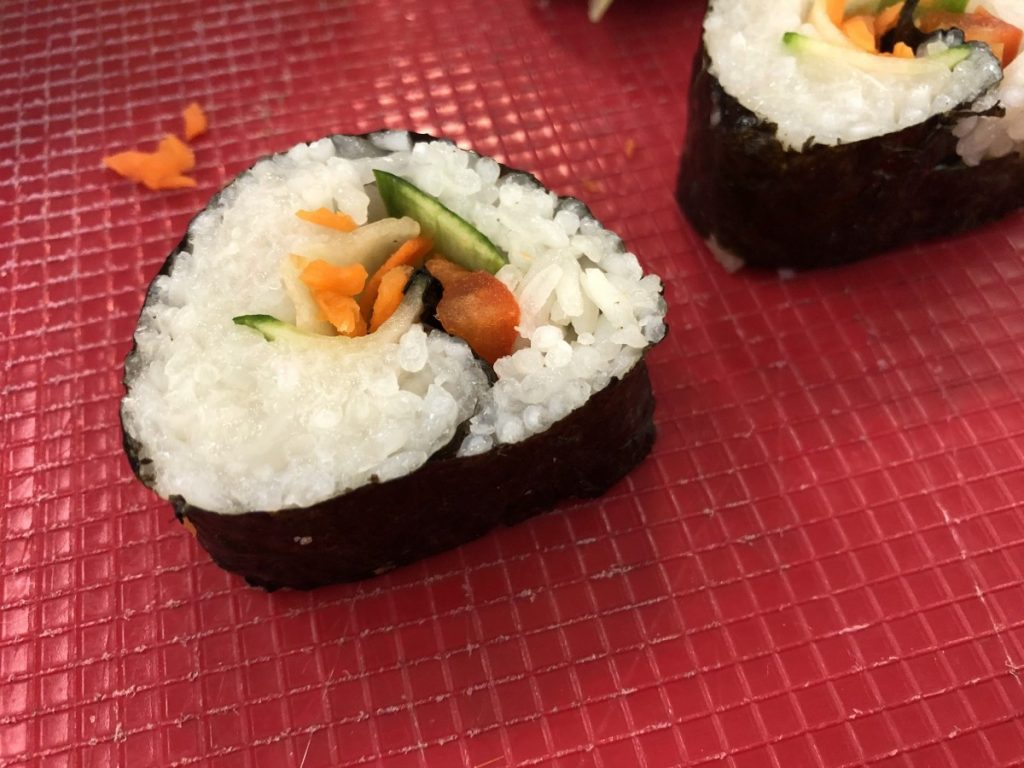
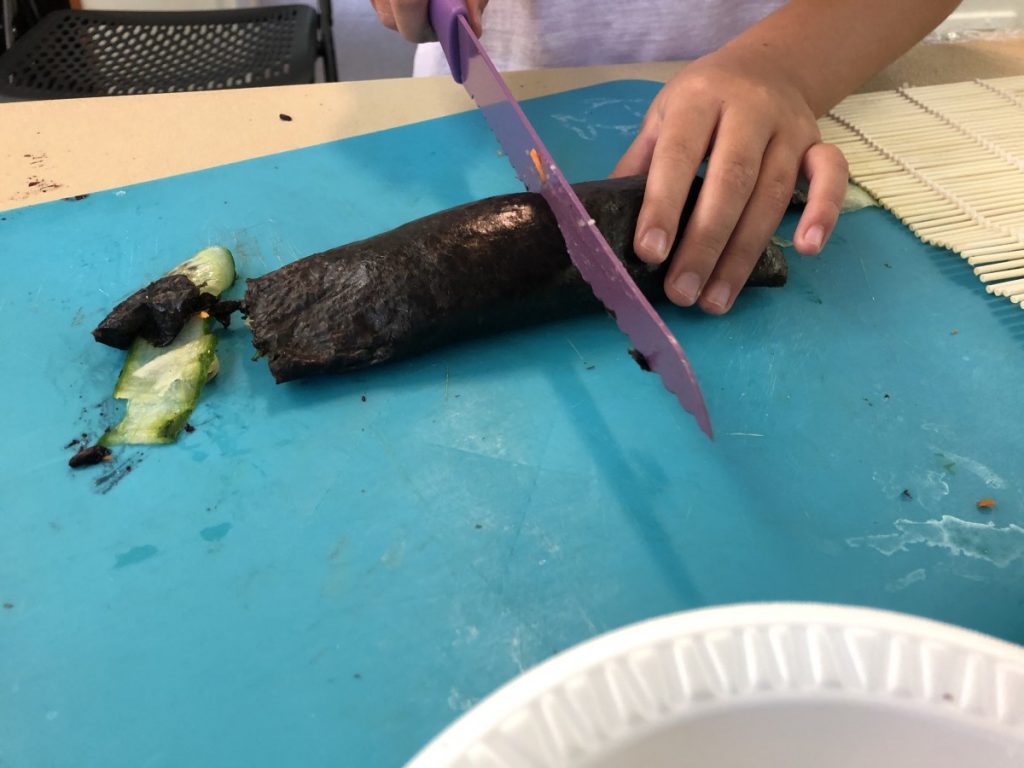
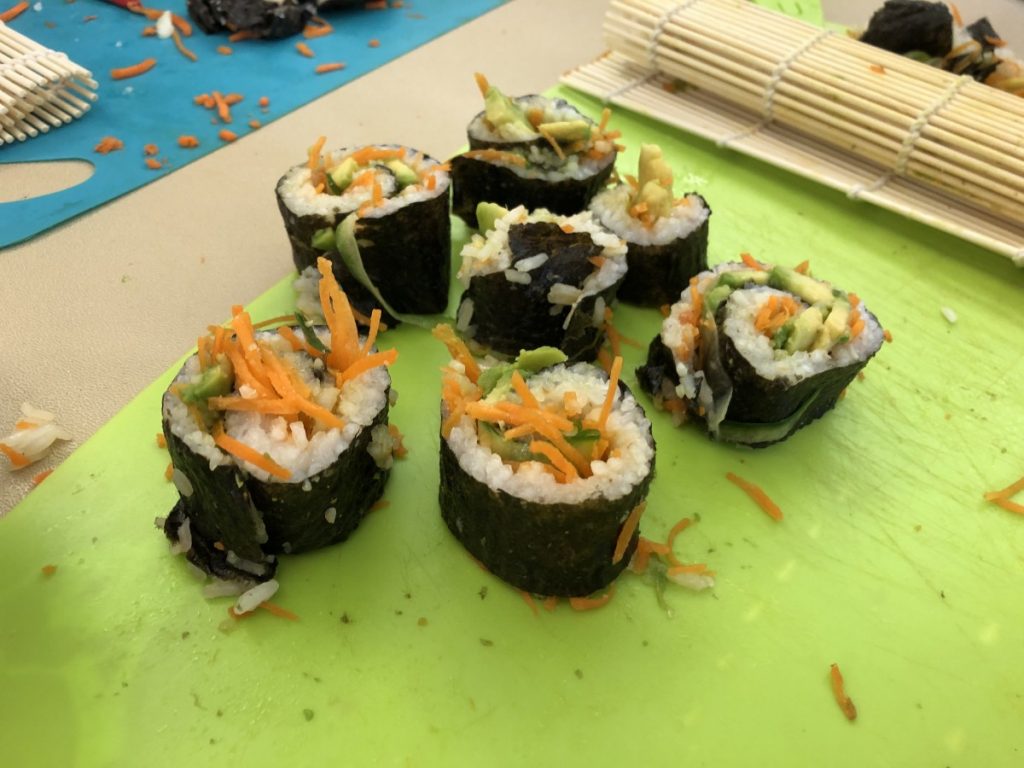
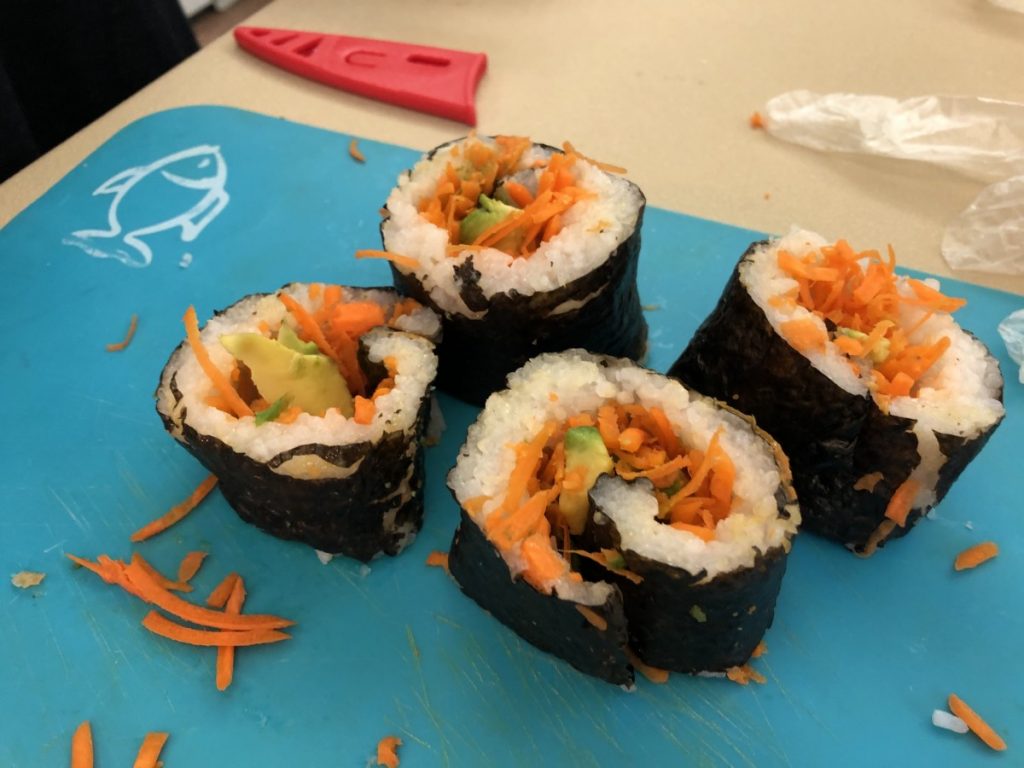
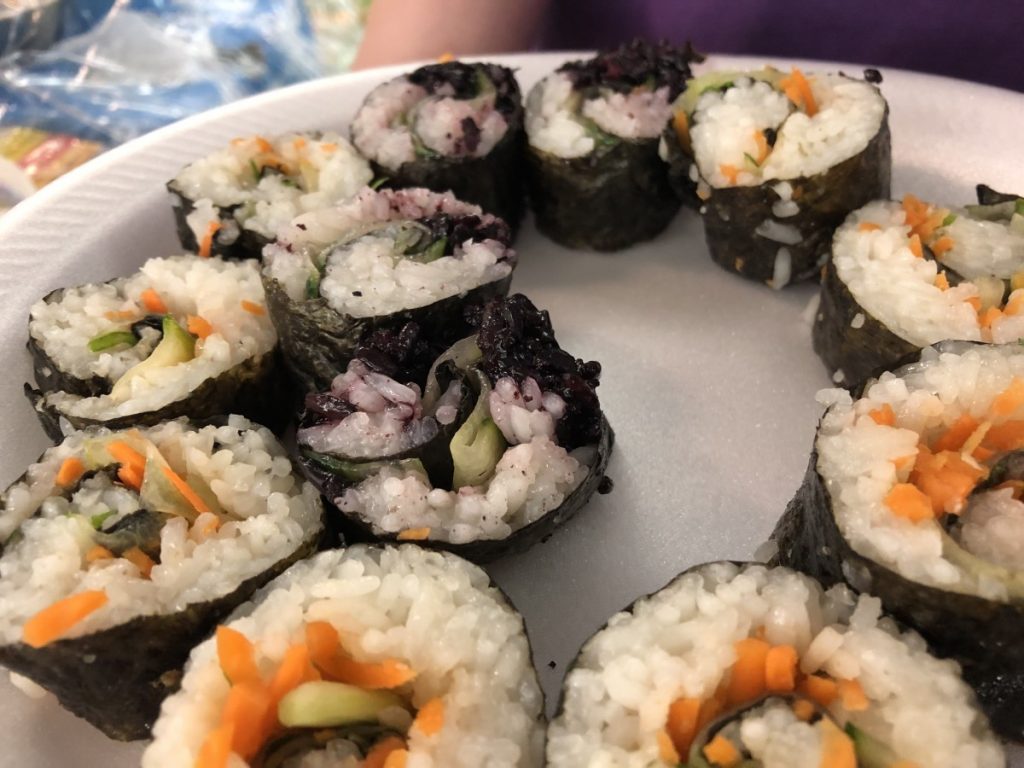
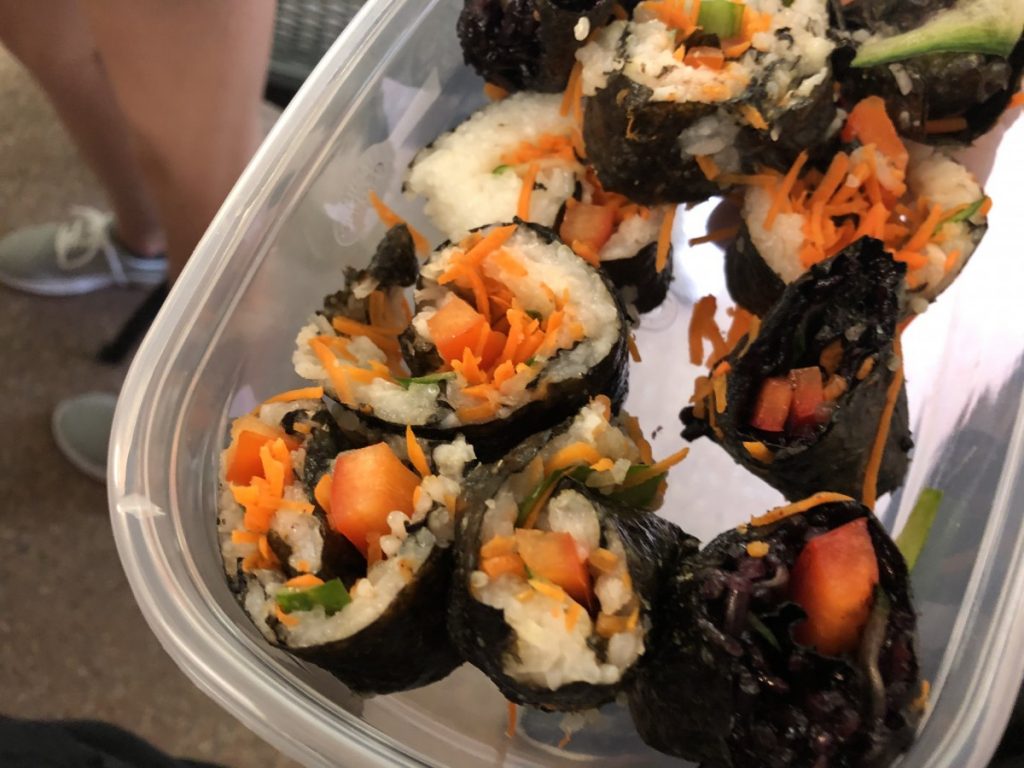
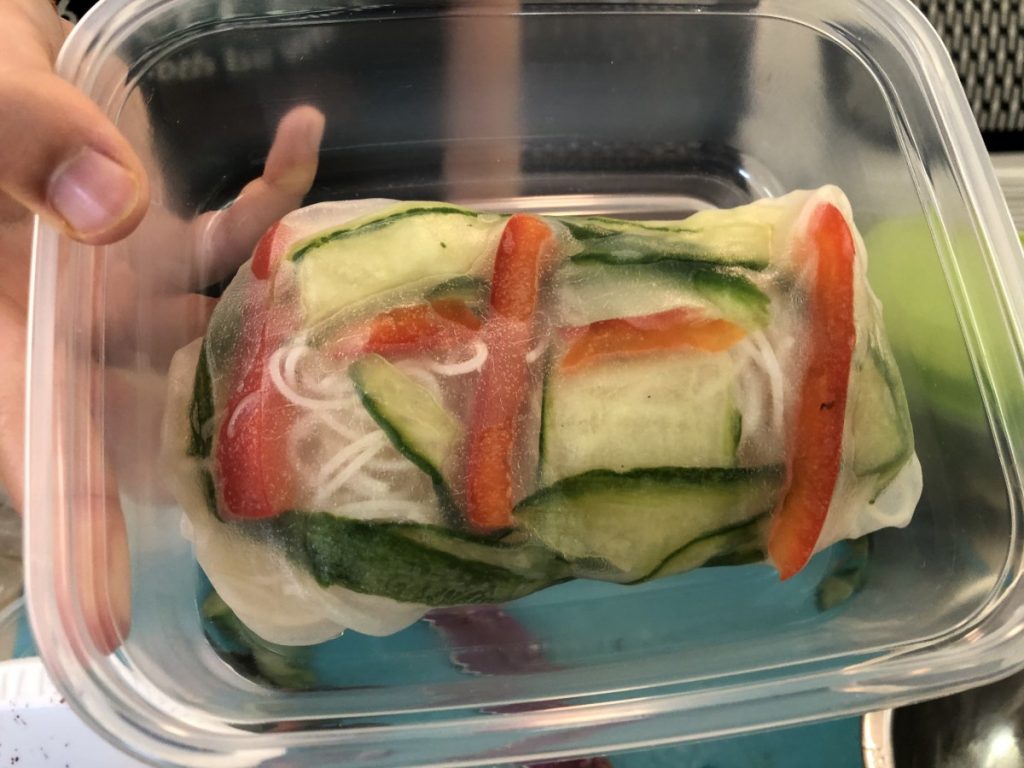
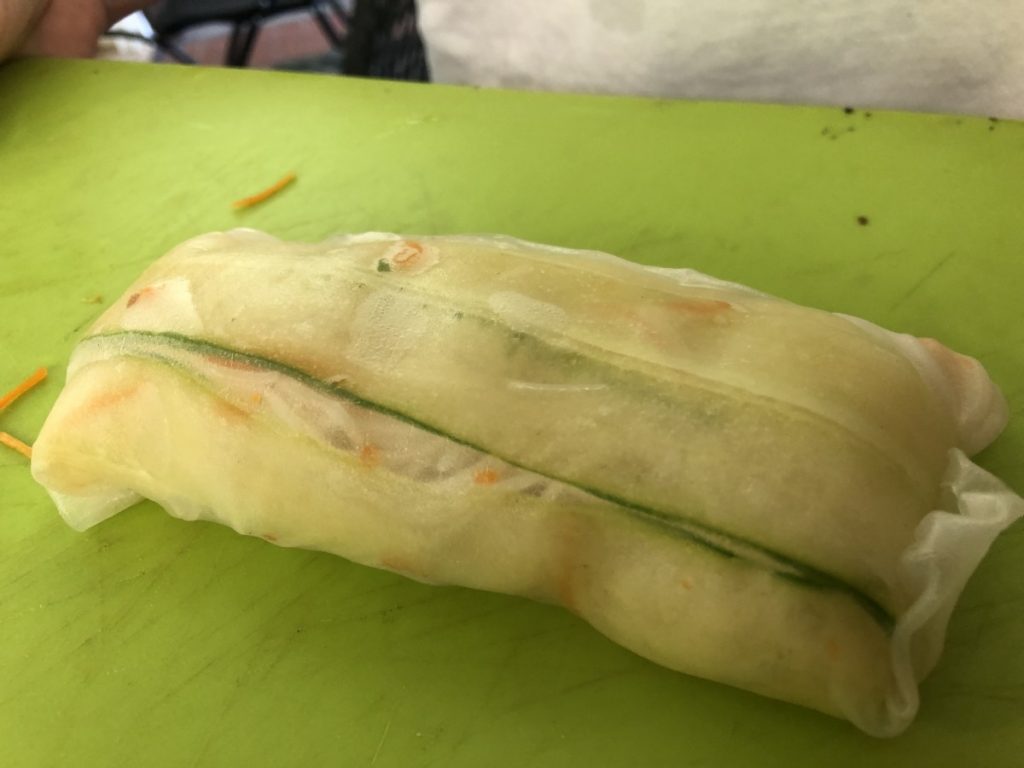
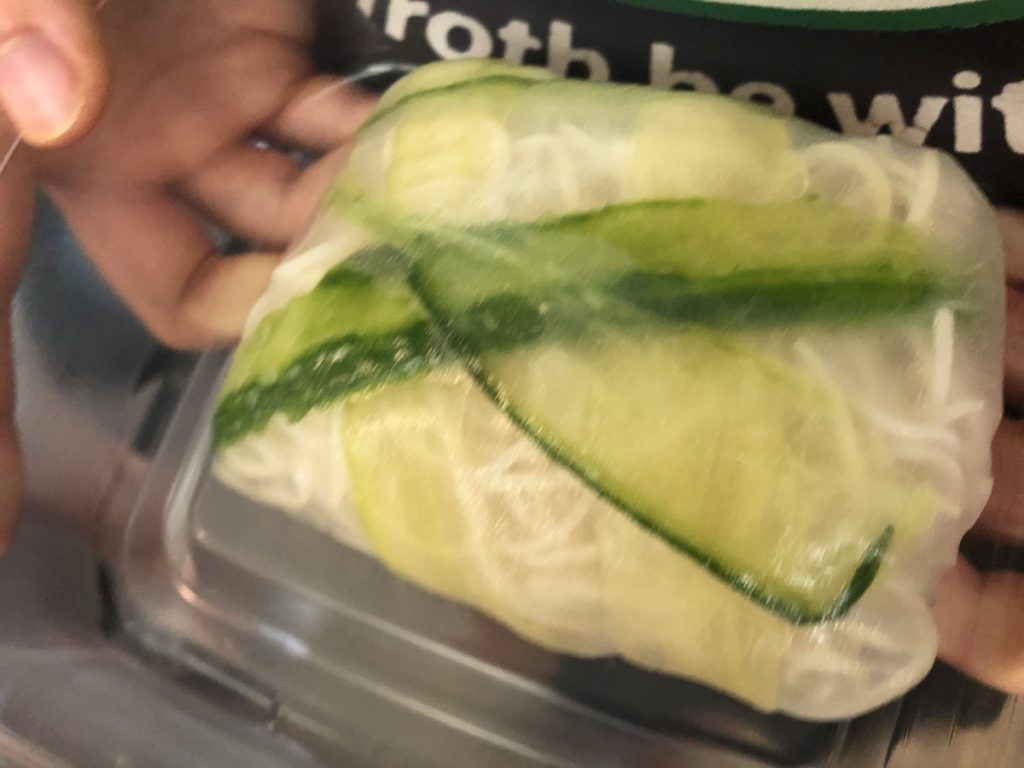
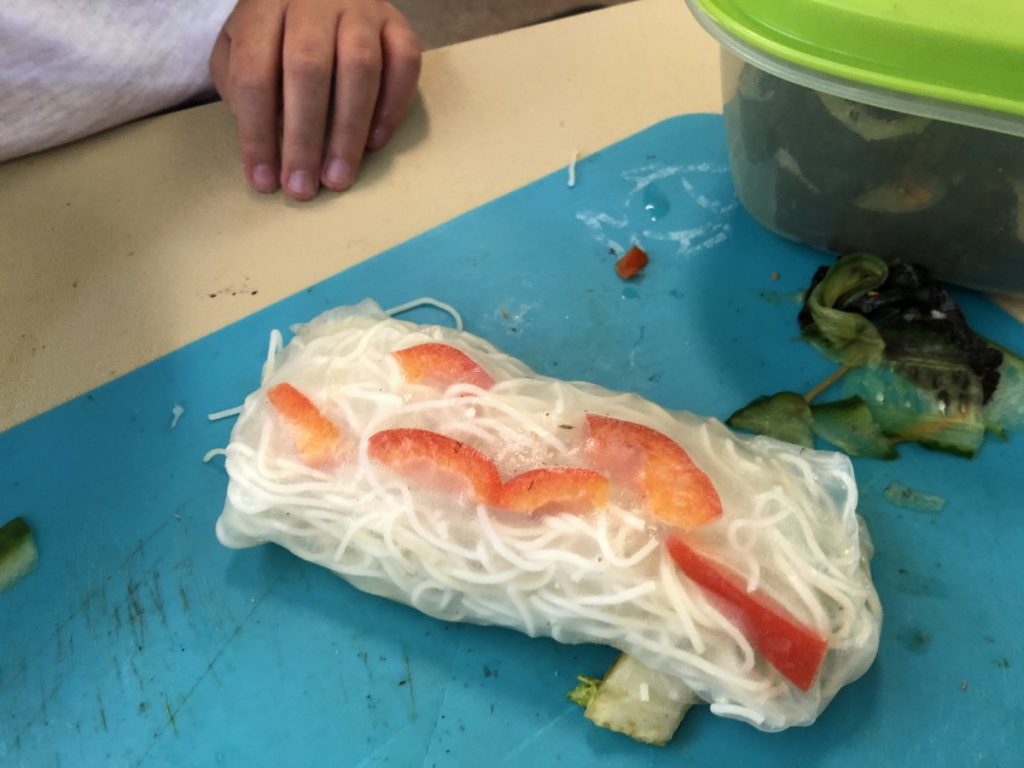
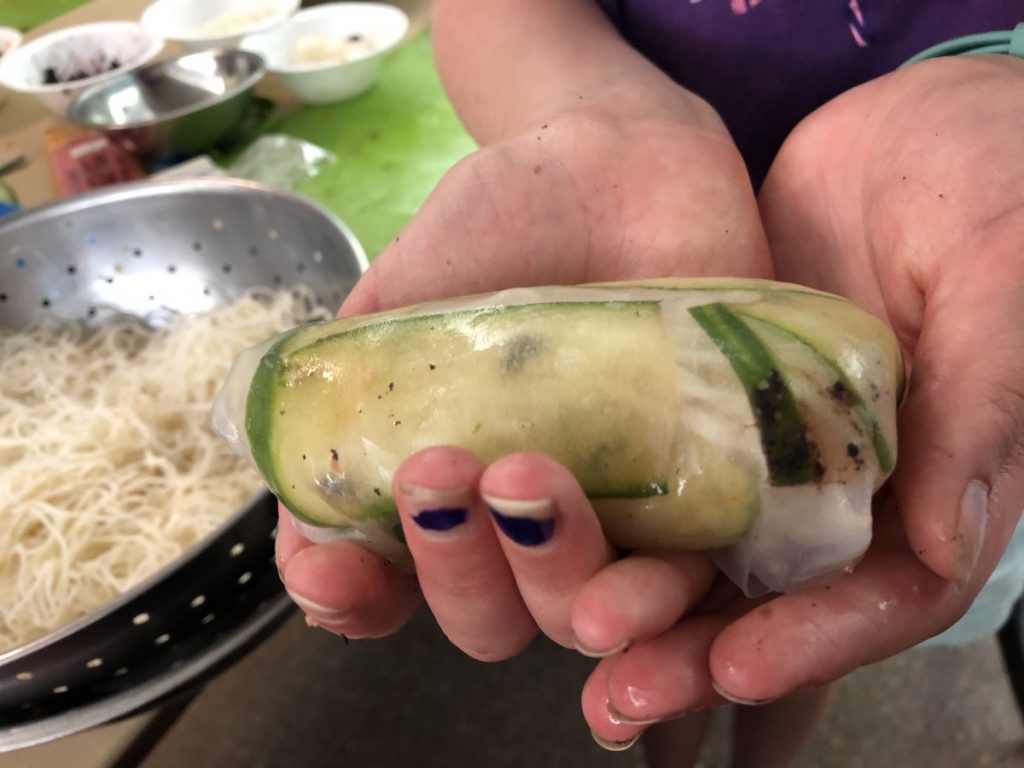
Sushi and Summer Rolls- Camp Day 4
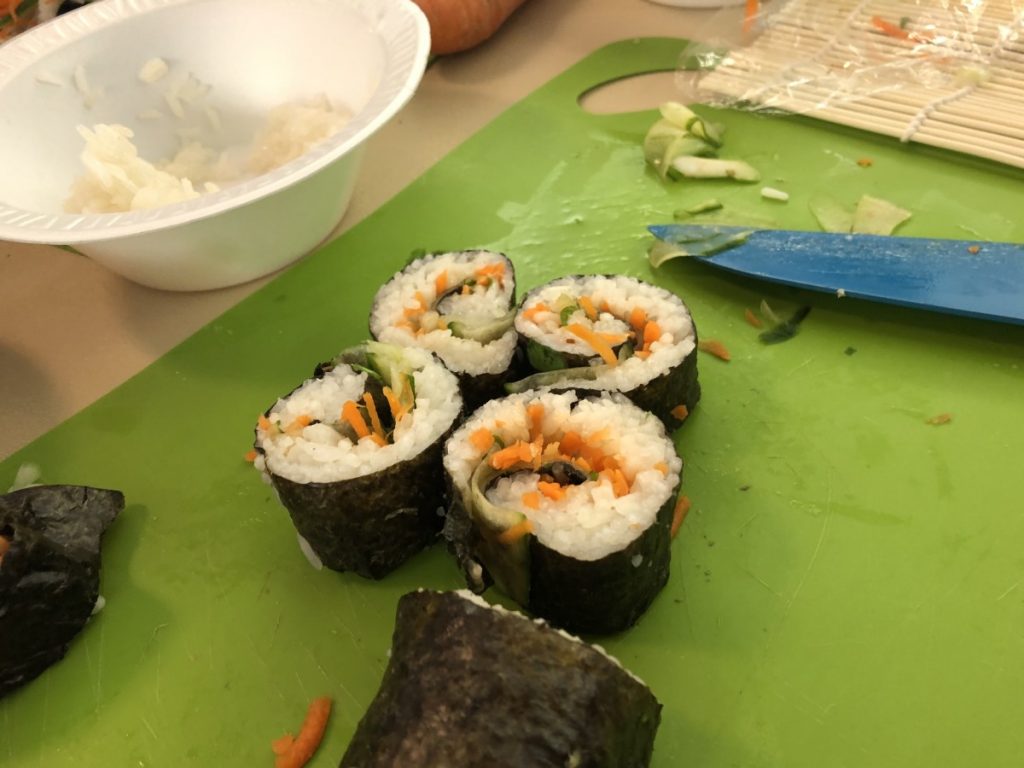
The kids really wanted to learn how to make sushi, so that is what we did today. I wanted them to learn to make summer rolls. They really enjoyed both activities. They were really enjoying placing rice paper in water to soften, then filling and making their first ever summer rolls. For the summer rolls we had shredded napa cabbage, assorted veggies and rice noddles for filling. We had soy sauce for dipping along with homemade sweet and sour sauce.
They really did a super job on the sushi. We had both traditional white sticky rice and black sticky rice, which is more of a very dark purple. We also used cucumbers, carrots, red sweet peppers, avocado and baby bok choy. I didn’t bring wasabi or pickled ginger, at the kids’ request.
Here are some pics from our day.


Corn and Black Bean Salad
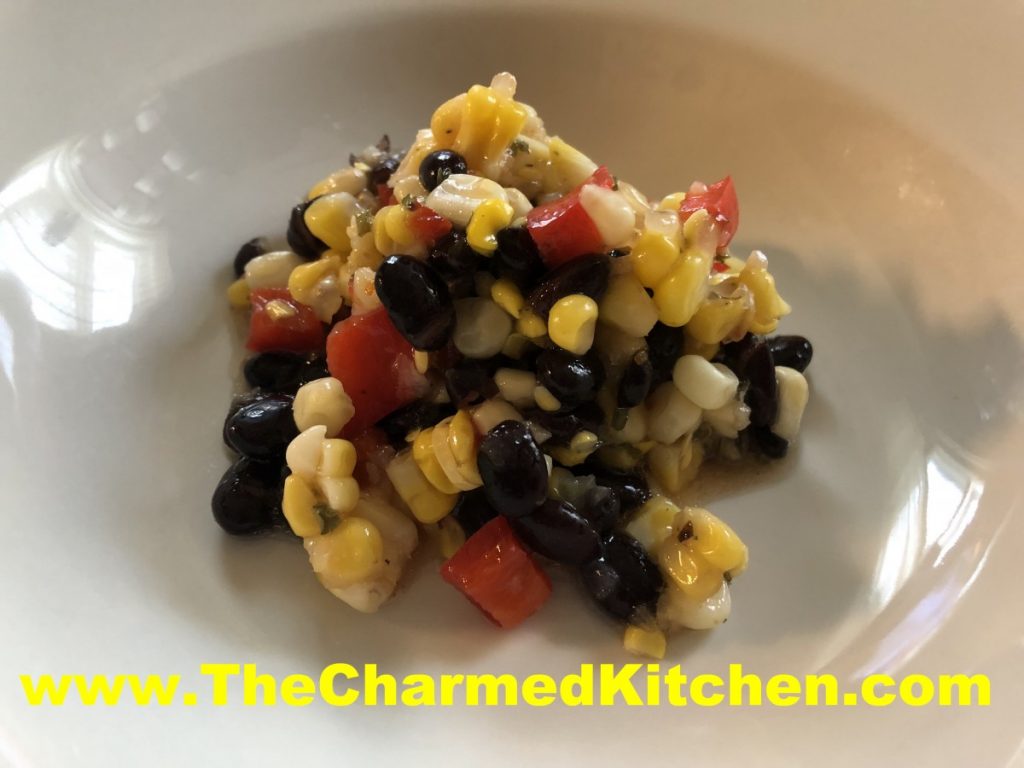
This salad was inspired by ingredients I had on hand. I had picked up some beautiful local sweet corn the other day. I also had some sweet peppers and home canned black beans. I knew the trio would work well together.
I used fresh corn in this dish. You could use frozen corn, if that was all you had. Fresh corn season is too short around here. I always buy extra corn for freezing. I just blanch the shucked corn for a few minutes in boiling water, then drop into ice water. Once the corn is cool enough to handle, I cut the corn off the ears. Then I package up the corn and freeze it.
You could also grill corn and cut it off the cob to freeze.
I like to boil the cobs after the corn is cut off, for a corn stock, which I also freeze. The cobs have a lot of flavor.
If using the frozen corn in a salad, you’ll want to drain it after thawing.
So here is the recipe. Pretty simple. You could add some sweet onion, if you like, too.
Corn and Black Bean Salad
4 c. cooked corn
1 can black beans, rinsed and drained
1 sweet pepper, seeded and chopped
¼ c. olive oil
3 T. red wine vinegar
1 T. Balsamic vinegar
2 t. Italian seasoning- I used my Tuscan blend
Salt and pepper to taste
Hot sauce to taste, optional
Combine all ingredients in medium bowl. Stir to combine well. Chill before serving. Serves 6-8.
Fresh Blackberry Muffins
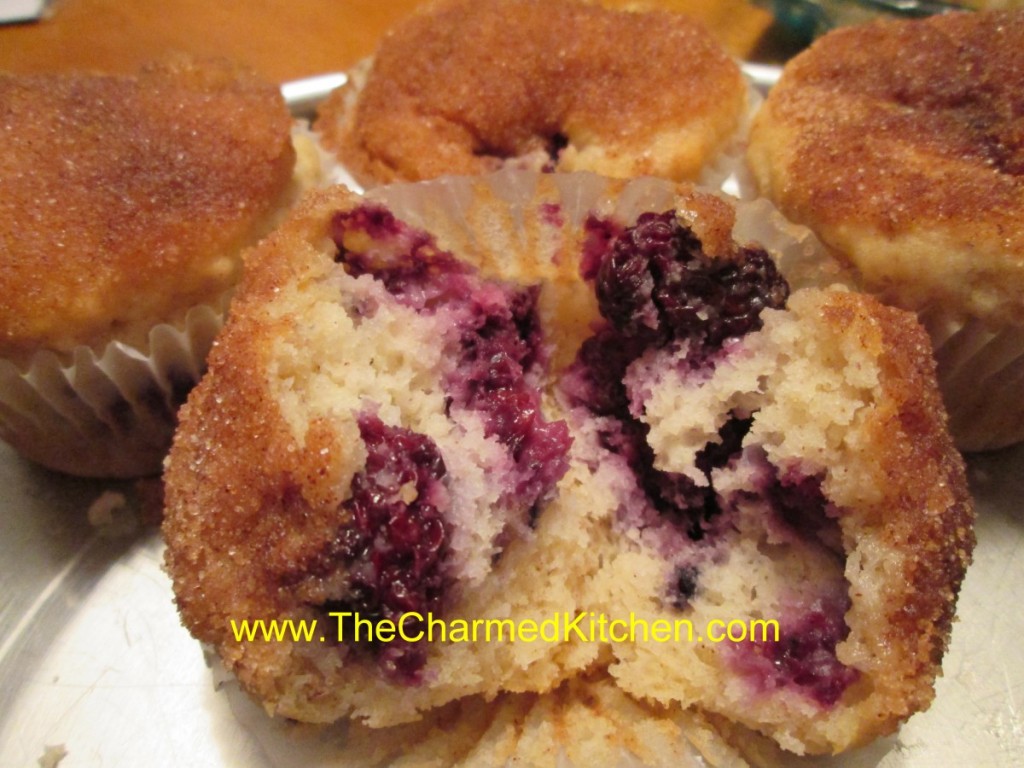
Sometimes, little things can just improve your day. For me, it was starting the day with a mug of raspberry/hibiscus tea and a warm blackberry muffin. I had some beautiful fresh blackberries, and decided to make muffins with some of them. So happy that I did.
I used a recipe I had made before, but decided to add cinnamon and nutmeg to the batter. I also dipped the tops of the warm muffins in melted butter and a spiced sugar mixture to finish them off. So good. So very, very good.
I used fresh blackberries, but frozen would work, too. Don’t thaw frozen berries before adding them to the batter- and give the muffins a few extra minutes in the oven.
Blackberry Muffins
1 c. milk
1 egg
¼ c. oil
2 c. flour
1/3 c. sugar
1 T. Baking powder
¾ t. salt
½ t. each cinnamon and nutmeg
1 c. blackberries, I used fresh but frozen would work, too.
Topping:
1/2 c. sugar
1 t. each cinnamon and nutmeg
4 T. butter, melted
Beat together milk, egg and oil. Combine dry ingredients and add to milk mixture, stirring to just moisten flour. Fold in blackberries. Fill 12 paper lined muffin cups to 3/4 full. Bake in preheated 400-degree oven for 20 minutes or until golden brown. Combine sugar and spices in a small bowl. Place melted butter in another bowl. When muffins are removed from the oven carefully dip the top of a muffin in the melted butter and then in the spiced sugar. If muffins are too hot to hold wait a few minutes before dipping. Repeat with remaining muffins. Serve warm. Makes 12.


