Beautiful Blackberries
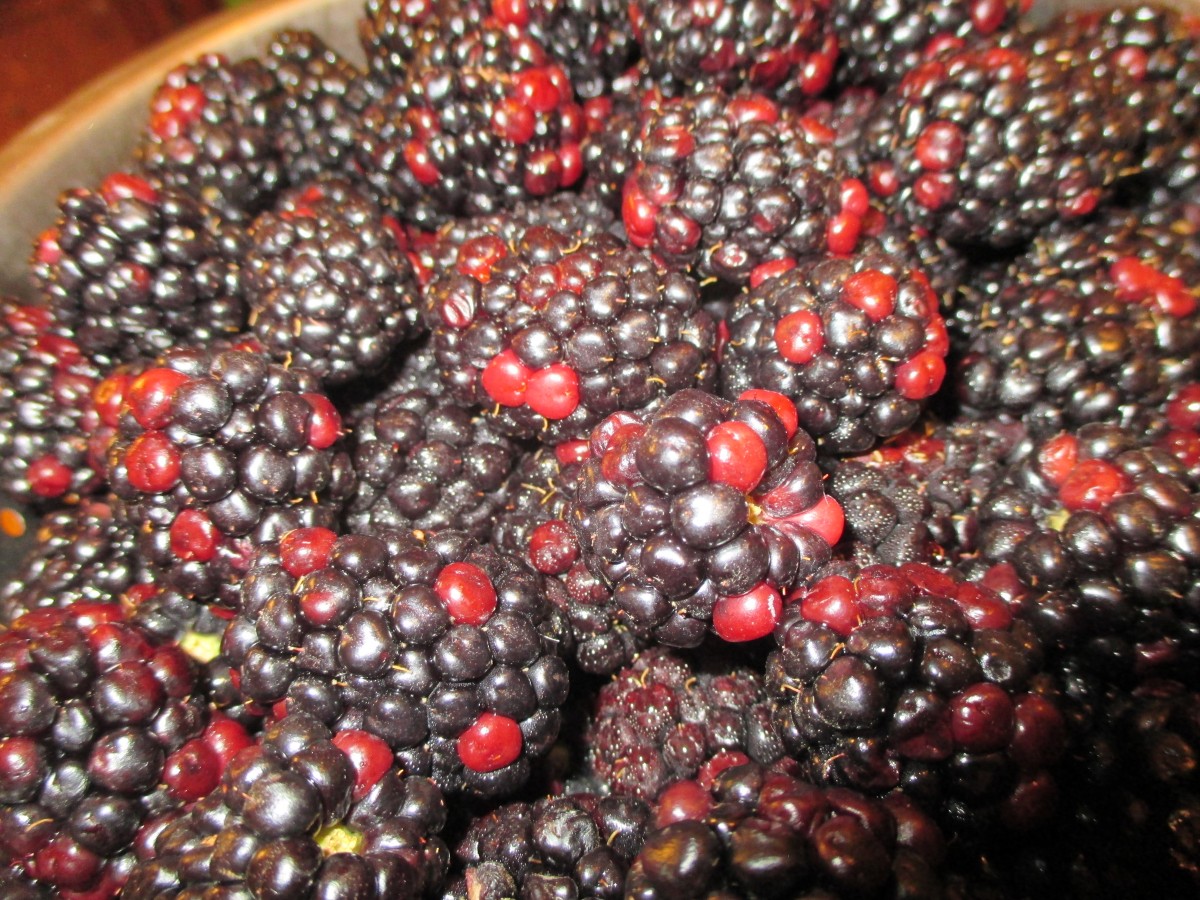
Blackberries!!
I was lucky to get almost 4 pounds of blackberries today. Now I have to decide what to do with them. Baking? Jam? Sorbet? What would you do with them?
Here are some things I have done with blackberries before.
Blackberry Jelly
3 quarts blackberries*
1/2 c. water
1 box powdered pectin
5 c. sugar
Place the berries in a pot and use a potato masher to crush the berries. Add the water and simmer until the berries are soft. Strain out the solids and then pour the juice through several layers of cheesecloth to clarify. You should end up with about 4-5 cups of juice. Place juice in a pot and add the pectin. Bring mixture to a boil stirring constantly. Add the sugar and return mixture to the boil, again stirring constantly. Boil for 1 minute. Remove from heat and skim off any foam. Ladle mixture into clean, hot jelly jars and fill to 1/4 inch from the top. Seal and repeat with remaining jelly. Place in a boiling water bath and process 10 minutes. Makes 6-7 half pints.
* Best if some of the berries are a little under ripe. Higher in natural pectin.
Note: I decided to take the solids and seeds and place them in a large jar and cover them with vodka so I can make liqueur later. We’ll see how that works out in a few weeks. I’ll sweeten that mixture later after filtering out the solids.
Blackberry Scones
2 c. flour
1/3 c. sugar
1 T. baking powder
¾ t. salt
6 T. chilled butter
2 c. blackberries -do not defrost if using frozen
1 t. orange zest
2 large eggs
1/3 c. heavy cream or half and half
Mix dry ingredients together in bowl and cut in butter to resemble coarse crumbs. Toss in berries and zest. Beat together eggs and cream and stir into flour mixture. Mix very gently to avoid bruising berries. Use 1/2 cup ice cream scoop to scoop batter onto a baking sheet. Sprinkle with a little extra sugar, if you like. Bake in a preheated 375-degree oven for 22-24 minutes. Makes 10-12.
Blackberry Cinnamon Muffins
1 c. milk
1 egg
¼ c. oil
2 c. flour
1/3 c. sugar
1T. Baking powder
¾ t. salt
½ t. cinnamon
1 c. blackberries, I used fresh but frozen would work, too.
Topping:
1/2 c. sugar
1 t. cinnamon
4 T. butter, melted
Beat together milk, egg and oil. Combine dry ingredients and add to milk mixture, stirring to just moisten flour. Fold in blackberries. Fill 12 paper lined muffin cups to 3/4 full. Bake in preheated 400-degree oven for 20 minutes or until golden brown. Combine sugar and cinnamon in a small bowl. Place melted butter in another bowl. When muffins are removed from the oven carefully dip the top of a muffin in the melted butter and then in the cinnamon sugar. If muffins are too hot to hold wait a few minutes before dipping. Repeat with remaining muffins. Serve warm. Makes 12.
Cheesy Onion Garlic Bread

Cheesy Onion Garlic Bread
We were having steaks on the grill and wanted some sort of a bread dish. I love garlic bread and make it a lot but decided to go all out and make this version instead. A mixture of garlic and onions are cooked in butter and then spread over the bread slices. That would be plenty for most garlic bread- but I took it up a notch with a cheesy/ mayo mix on top. Baked for just a few minutes- these were really a hit. They can also be served as an appetizer.
Cheesy Onion Garlic Bread
1 French baguette, cut into 3/4 inch diagonal slices
1 large minced onion
8 cloves minced garlic
1/4 cup butter
2 cups shredded mozzarella cheese
1/2 cup grated Parmesan cheese
1 cup mayonnaise
Preheat the broiler. Slice the French baguettes diagonally into 3/4 inch slices.
In a medium skillet over medium heat, melt the butter. Combine the onions and garlic in the skillet. Cook and stir until tender. Set aside to cool. In a mixing bowl, combine the mozzarella cheese, Parmesan cheese and mayonnaise. On a cookie sheet, arrange the French bread slices in a single layer. Spread the onion and garlic mixture on the bread slices. Spread the cheese and mayonnaise mixture over the onion and garlic mixture on the bread slices. Bake in a 400 degree oven for 10 minutes or broil about 5 minutes, until the cheese is bubbly and slightly browned. Serve immediately.
Plum Glazed Wings
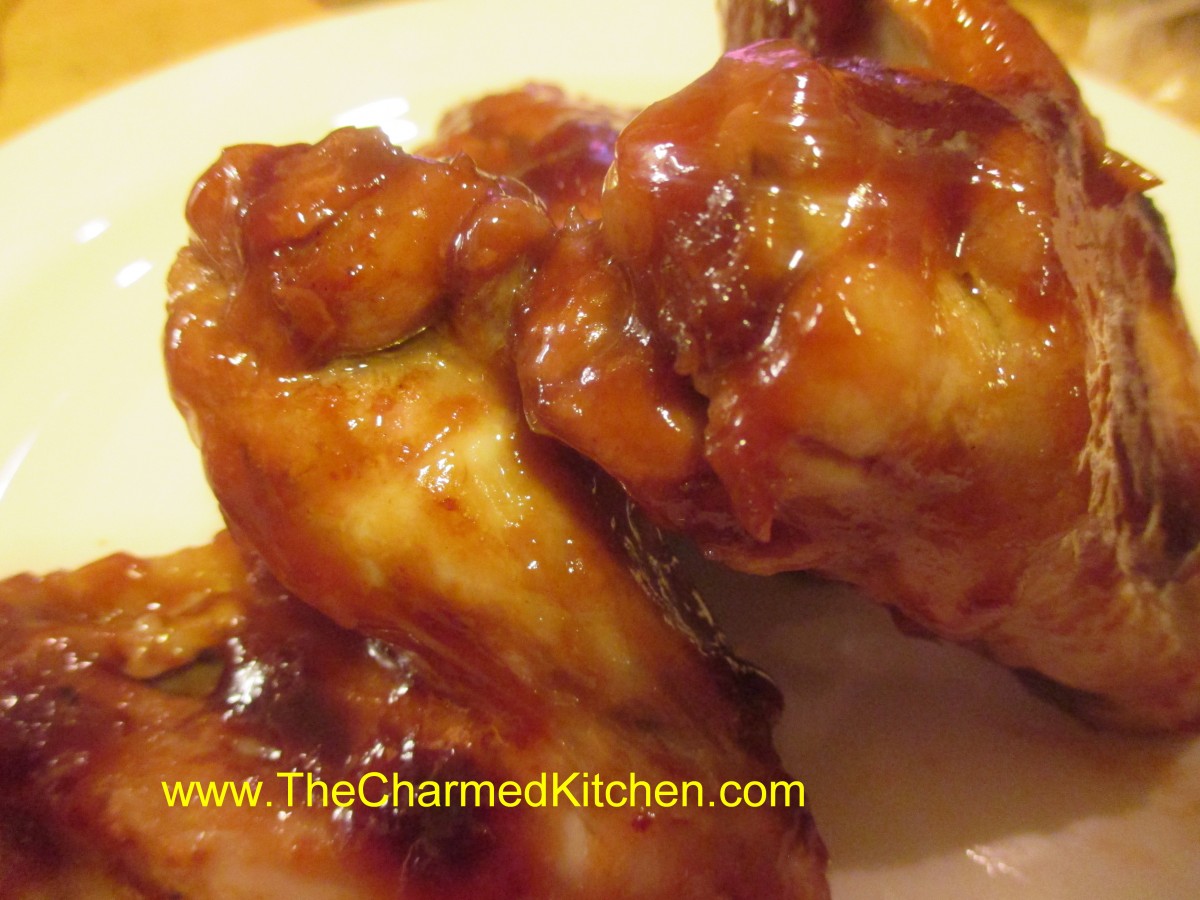
Plum Glazed Wings
I love when local fruit is in season. I found myself with lovely red plums and I decided to use some of them to make a sauce for chicken wings. I started by peeling the plums. You could leave the skins on, if you like, but I prefer them off. I put the plums in boiling water for a minute and then in cold water. The skins came right off. I removed the pits and pureed the plums- I ended up with a cup of fresh plum puree. From there it was a matter of creating the sauce. I minced an onion and cooked it in a little bacon fat- you could use butter or oil. I added a couple of cloves of minced garlic once the onions were tender. After that I added the plum puree, 1/4 cup of apple cider vinegar, a couple of tablespoons of honey, a tablespoon of hot sauce and salt. I let it cook for about 10 minutes to thicken and gave it a taste. It was pretty good, but needed something more. I added some fresh grated ginger and let it cook a few more minutes. It was wonderful. I decided to smooth the sauce out in the blender but it would be fine to leave it be.
To cook the wings I just pan fried them. I cooked them in a skillet, covered for about 20 minutes, turning a couple of times. I poured the sauce over them and turned the heat down to medium. I let them cook, covered, another 10 or 15 minutes. Once I was sure the wings were cooked through I uncovered them and let the sauce cook down and thicken a little. It created a nice glaze on the wings. Easy and very tasty. I ended up pureeing more plums and tossed them in the freezer so I can make this sauce again when the weather is chilly and no fresh plums are around.
Blueberry Ice Cream
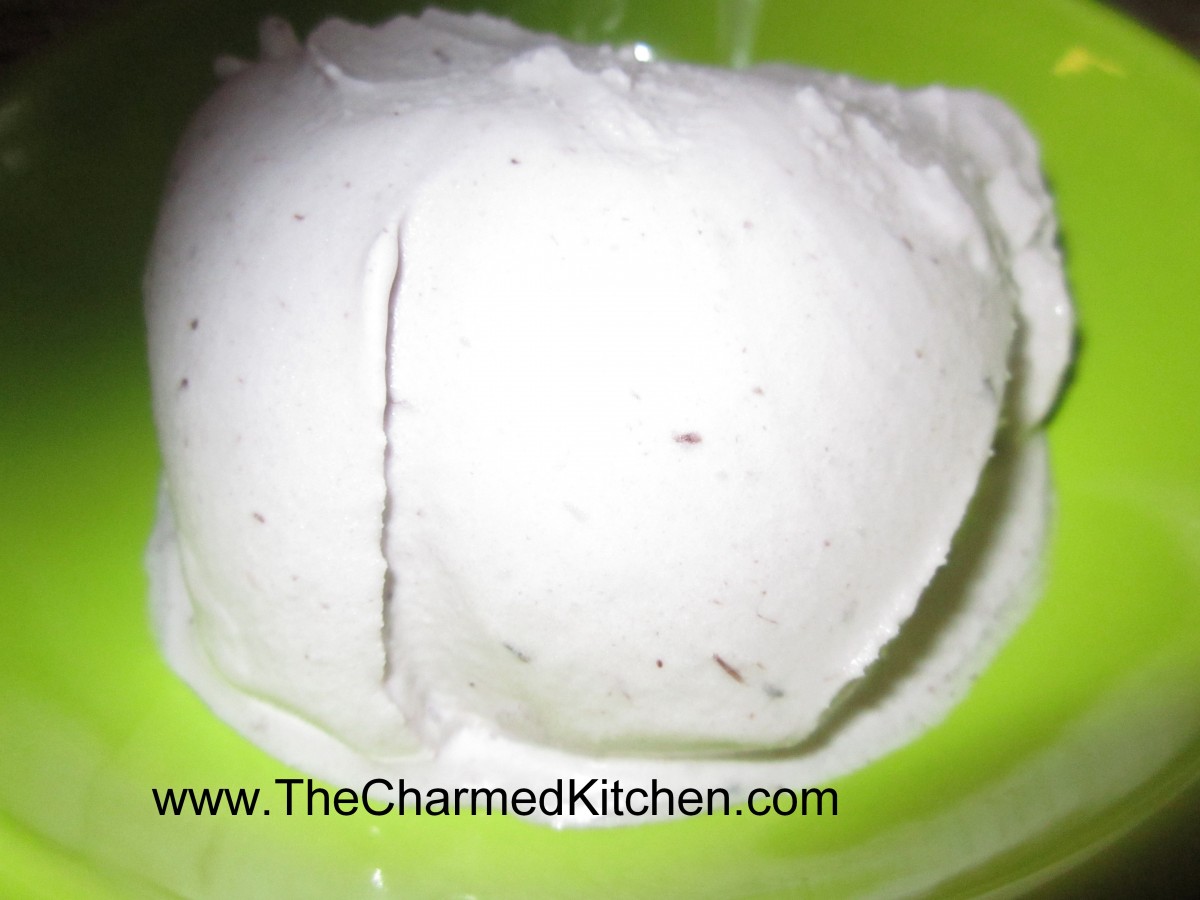
Blueberry Ice Cream
I planted some blueberry bushes last year. I won’t claim to have a bumper crop- but I’ve gotten enough to have a handful for breakfast a few times. The local birds have enjoyed them, too. With a warm day ahead I decided to make some blueberry ice cream. Whipped up a batch this morning. Super creamy and good. Note: If you are lactose intolerant you can use almond, rice or coconut milk in this recipe. Also feel free to add flavorings. I added some vanilla extract to mine. While it is easier to make with an ice cream maker- you don’t have to have one for this recipe. Enjoy!!
Blueberry Ice Cream
3 c. blueberries
1 c. sugar
1/4 c. water
2 T. fresh lemon juice
1 c. heavy whipping cream
1 c. half and half
Combine berries with sugar and water in saucepan and bring to a boil. Cook, stirring often, for 5 minutes. Puree mixture and stir in lemon juice. Refrigerate until completely cool. Stir in the whipping cream and half and half and freeze in an ice cream maker according to the manufacturer’s instructions. Makes 6 cups.
Note: If you don’t have an ice cream maker, freeze in shallow trays and thaw a little before whipping with a hand mixer. Better if you re-freeze and whip again later.
Relish and Pickle Making
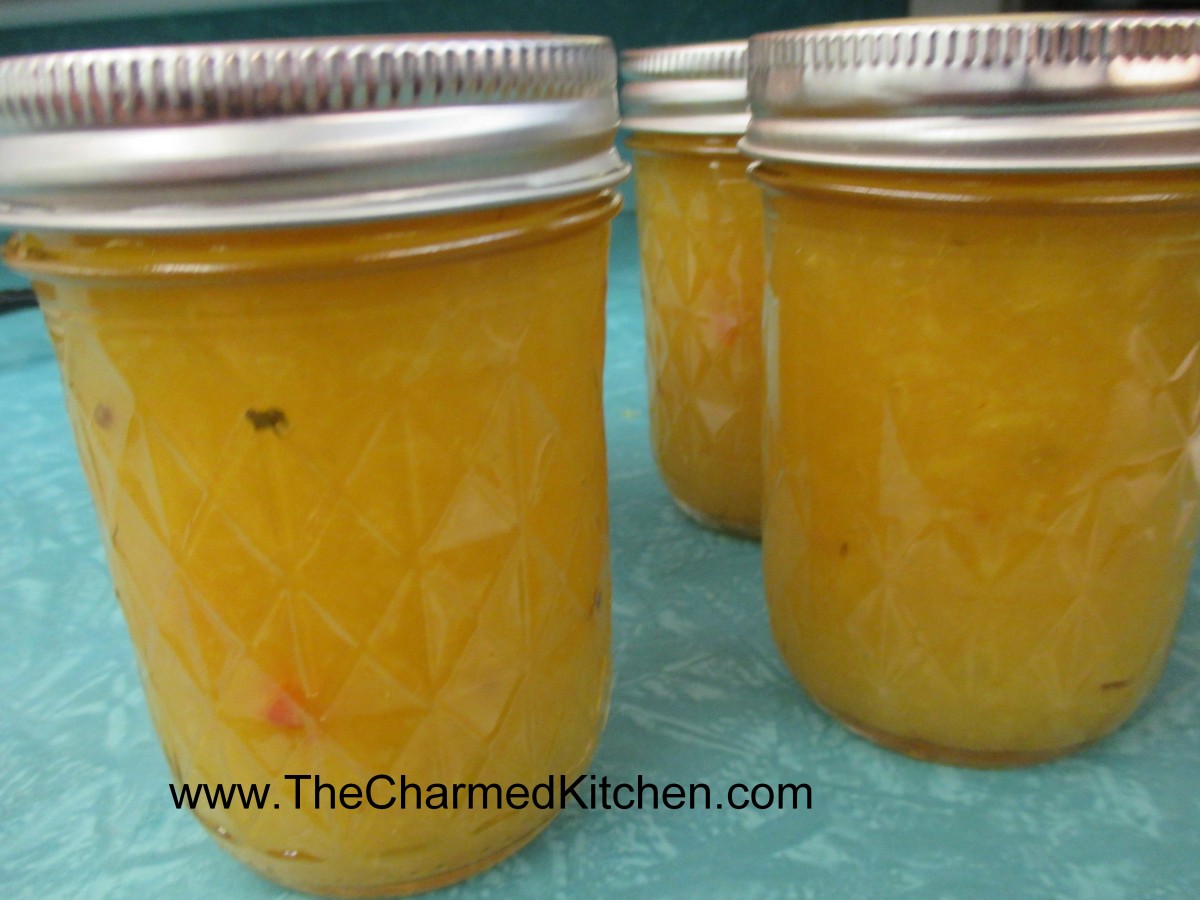
Vidalia Onion Relish
We had a great time making onion relish in class the other night and tasting several different pickles. This was the last of my canning series at Wildwood. We covered how to make sweet pickles, dill pickles and crock pickles. For the hands-on part of the program we made a batch of the Vidalia Onion Relish from So Easy To Preserve. We sampled some with bread and cheese. Here are a couple of pictures from the class – the recipe follows.
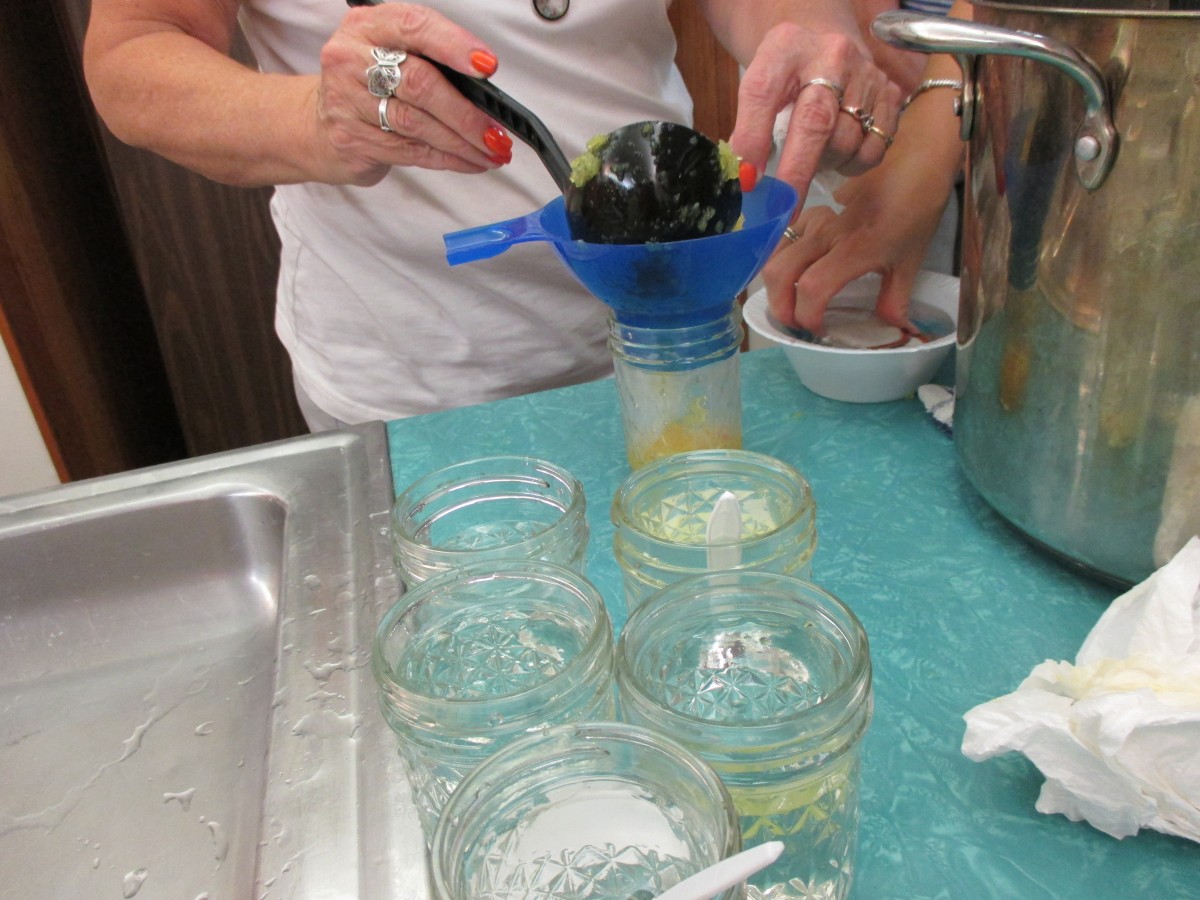
Filling the jars
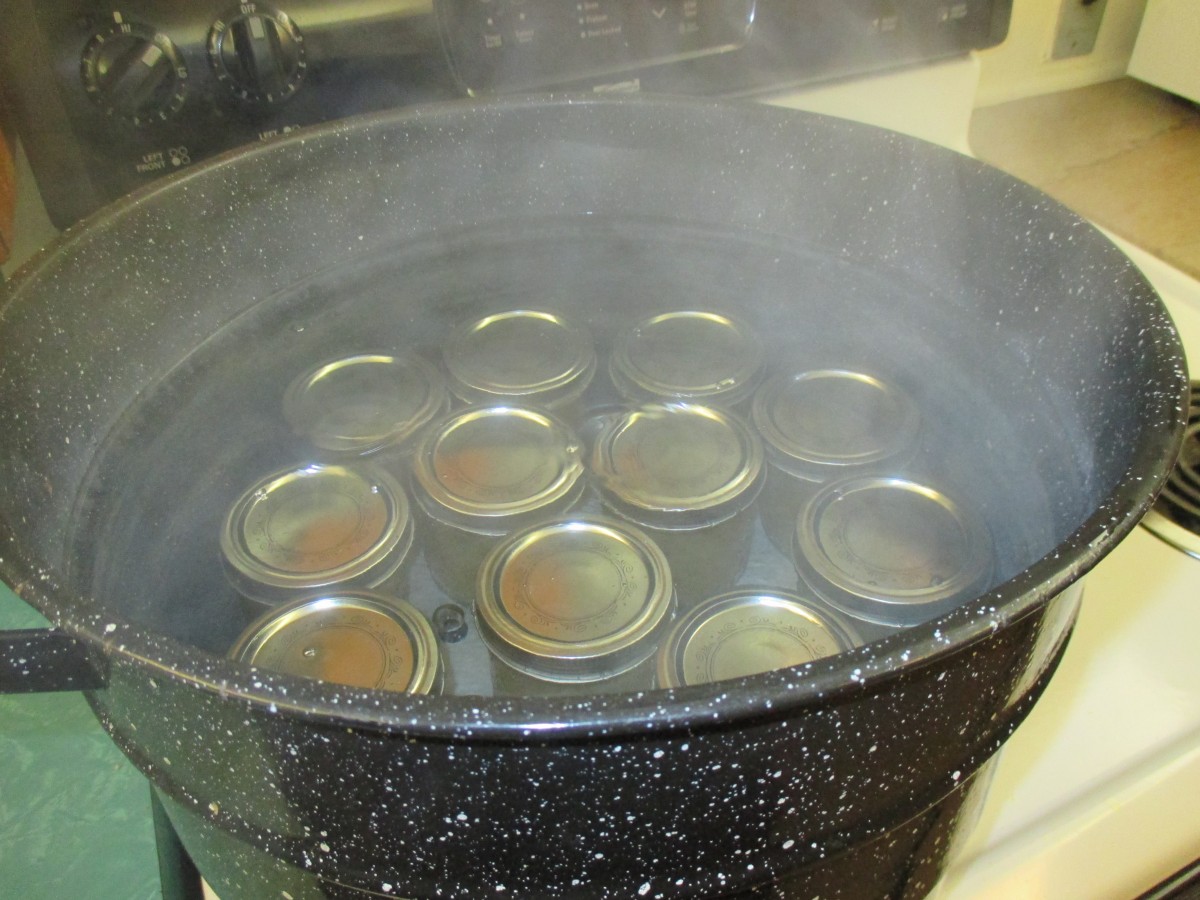
In the canner
Vidalia Onion Relish
6 qts. ground Vidalia sweet onions (14 to 16 med. onions)
½ c. canning salt
1 qt. cider vinegar
1 t. turmeric
1 t. pickling spice
1 t. pimento, chopped
4 ½ c. sugar
Grind enough Vidalia onions to yield 1 1/2 gallons. Add 1/2 c. salt and let stand thirty minutes. Squeeze juice from onion salt mixture and discard juice. Wash canning jars. To onions, add vinegar, sugar, spices, and pimento. Bring to boil and cook for thirty minutes, stirring often. Pack both onions and cooking liquid to cover in hot jars, leaving 1/2 inch head space. Remove air bubbles. Wipe jar rims. Adjust lids. Process 10 minutes in a boiling water bath. Yield: About 8 pints.
Source: So Easy To Preserve
Note: I always make this relish in half pint jars and process for 10 minutes. I will get about 16 jars that way.
Sweet Potato Salad

Sweet Potato Salad
Since the Labor Day weekend is almost here I thought I would post one of my favorite salad recipes. The sweet potato salad is always a hit. It goes so well with grilled foods, too. I always make a double batch – it goes fast. The tricky part is not to overcook the sweet potatoes. They cook fast. Keep an eye on them and get the potatoes into cold water to stop the cooking once they are tender.
Sweet Potato Salad
3 large sweet potatoes
2 c. corn kernels, fresh off the cob preferred but frozen is O.K.
2 ribs celery, sliced
1 sweet onion, diced
1 c. sweet pepper, seeded and chopped
2-3 T. fresh parsley
1/3 c. oil
1 t. Dijon mustard
3 T. apple cider vinegar
1 T. lemon juice
1 clove garlic, minced
Salt and pepper to taste
½ c. cashews
In medium saucepan boil or steam potatoes until tender, about 20-25 minutes. Remove with slotted spoon and place in a large bowl of ice water. Add corn to saucepan and cook until just tender about 2-3 minutes. Drain corn and add to ice water with the potatoes. Once the vegetables have cooled down drain them and peel and cut the potatoes into bite-sized pieces. Place potatoes and corn in a mixing bowl with remaining vegetables. Combine remaining ingredients, except cashews, in a jar with a tight-fitting lid and shake well before pouring over the sweet potato mixture. Toss to blend and chill until ready to serve. Add cashews just before serving. Serves 6.
Food Fight
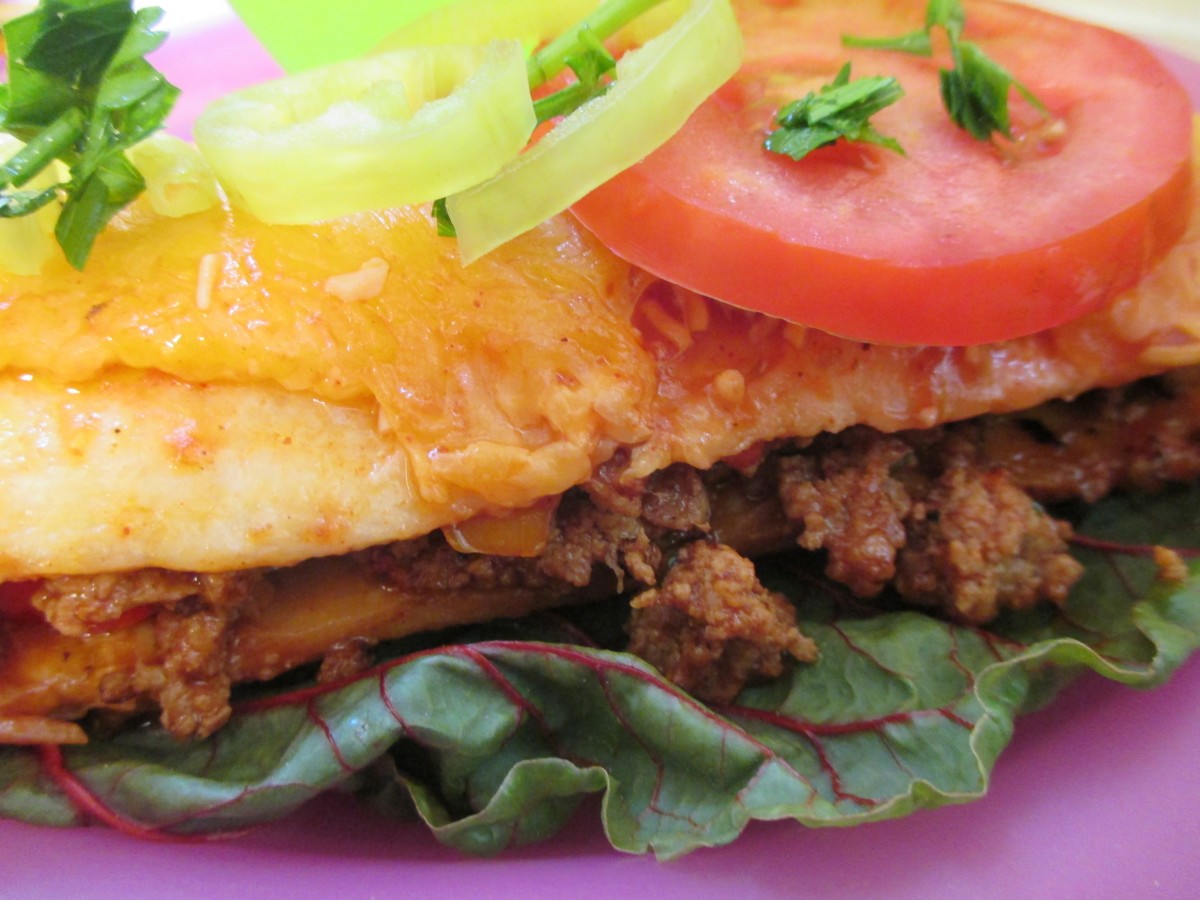
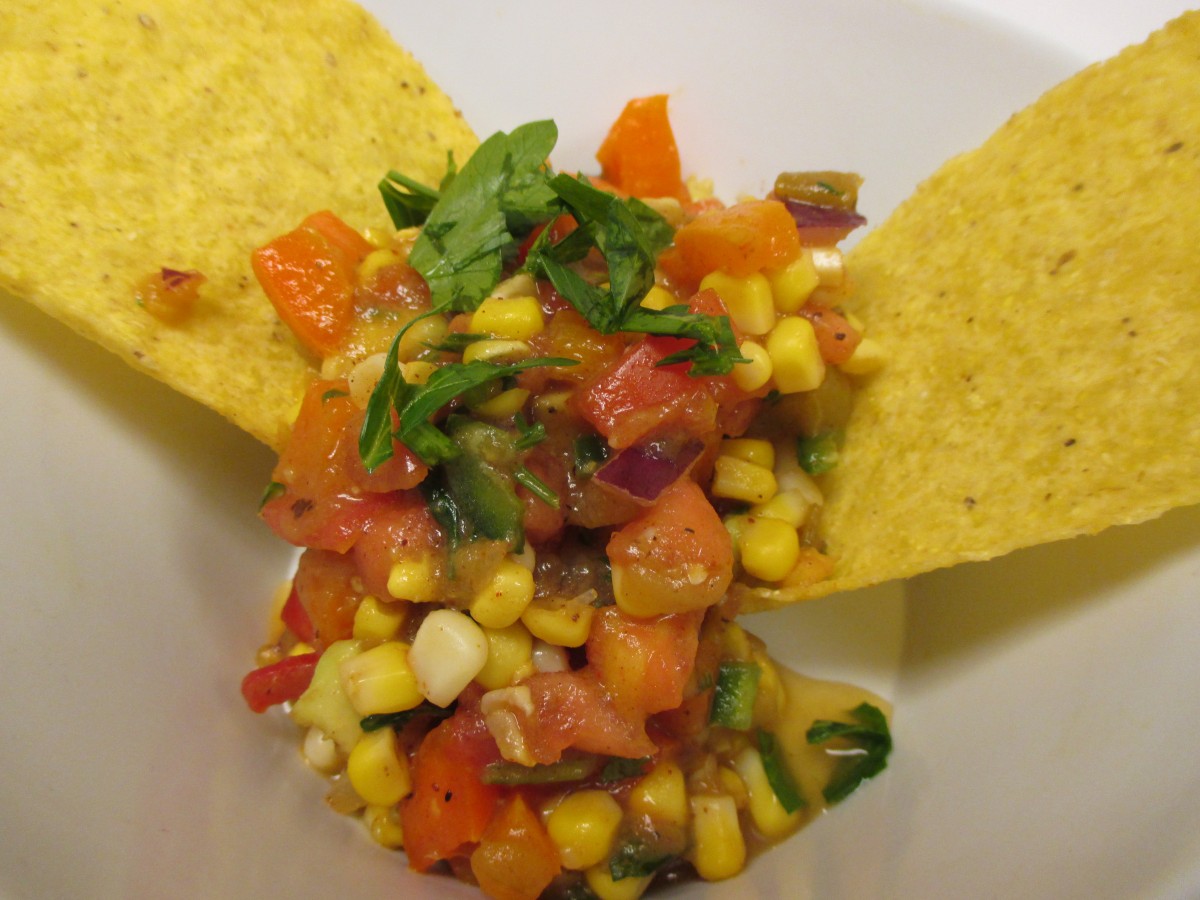
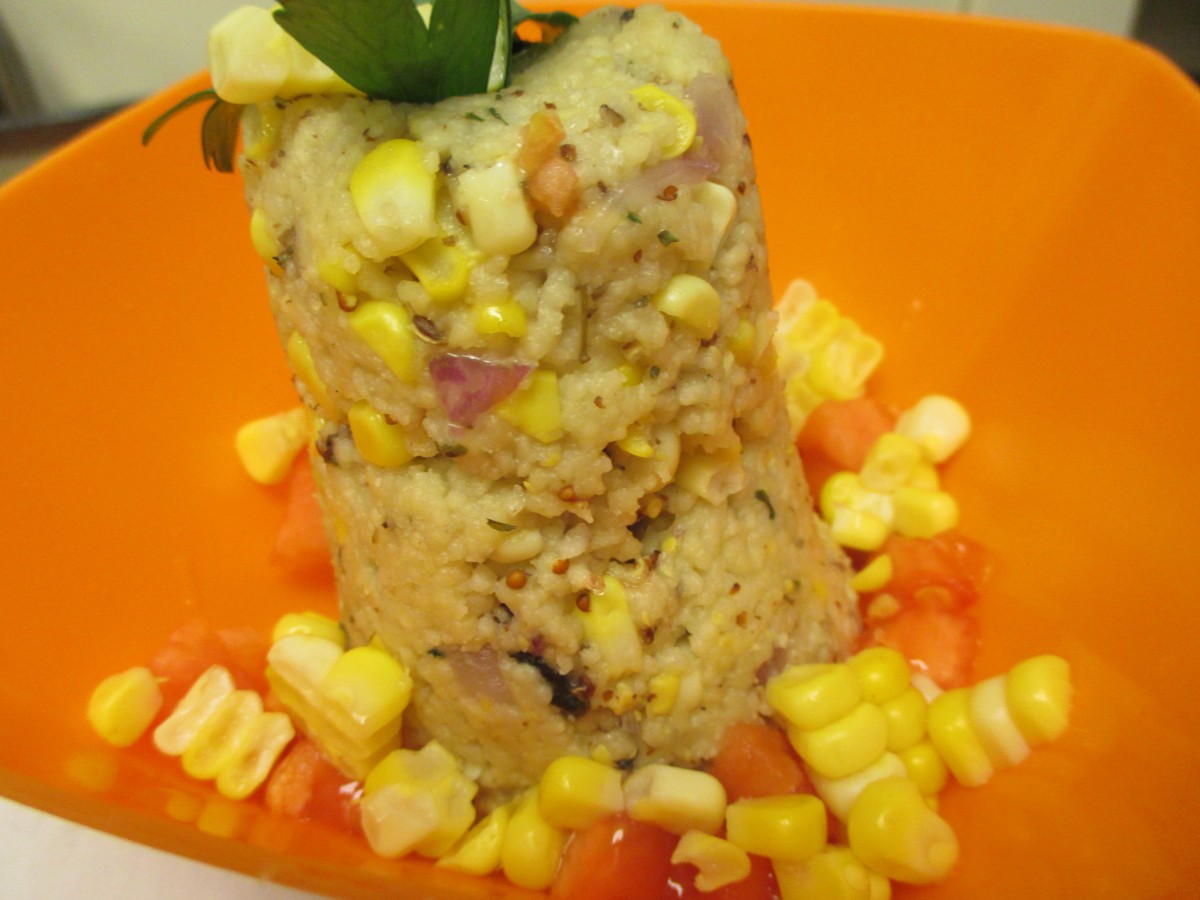
Enchiladas- one of the winning recipes
As part of a team building exercise I was asked to organize a cooking competition for a group of nurses from Fairview Hospital. We ended up doing an Iron Chef inspired event. Three teams in a very small kitchen all preparing dishes that had to include fresh sweet corn. They blew me away with their dishes. Beautiful quality and flavor. Congrats to all.
Here are some additional pictures from our day.
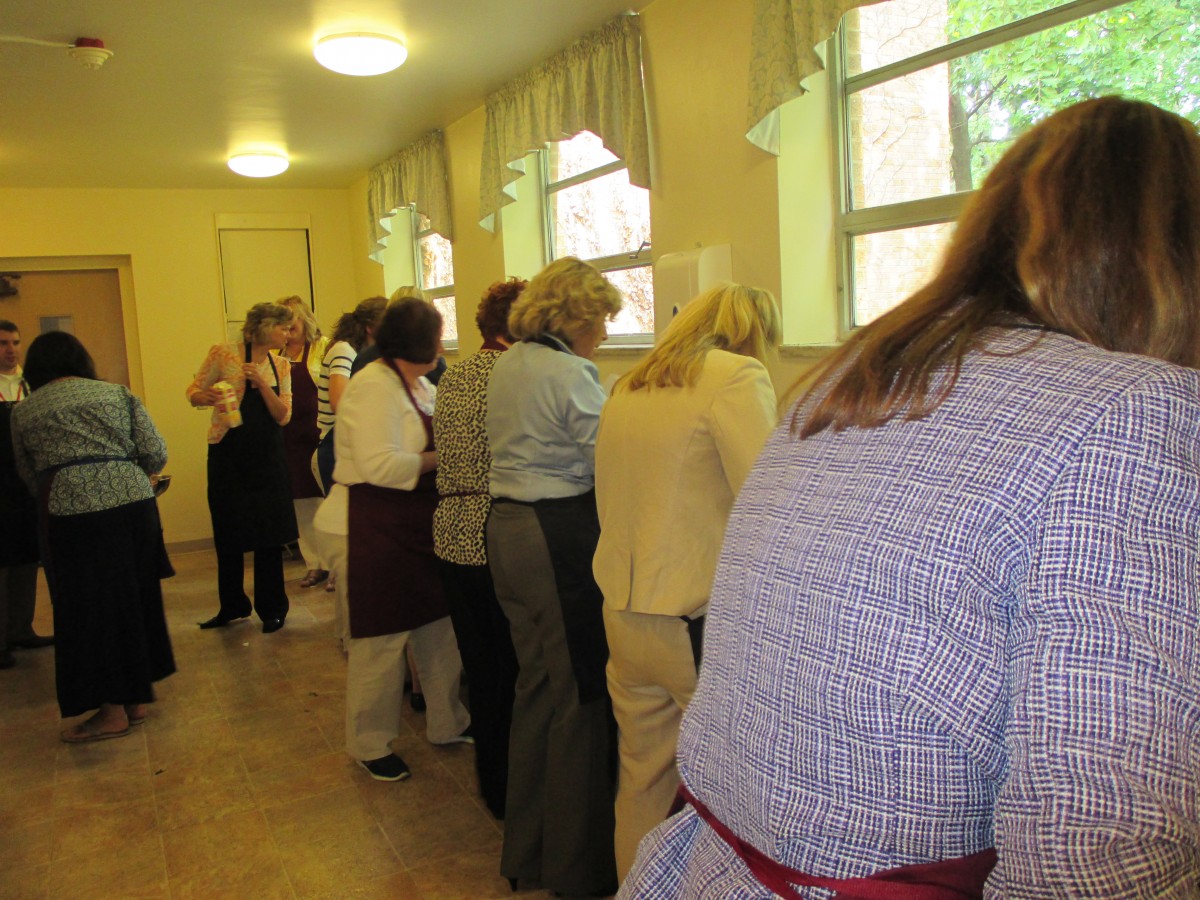
Prepping hard


The judges


The winning team
Farm Market Today
I will be at the Blue Pike Farm Market today from 4-7 pm. Stock up for your holiday weekend with baked goods, jellies, relishes, pickles and lots of fresh produce. As always there will be samples to try. Hope to see you there.
The Blue Pike Farm is located at 900 E. 72 Street- just 1/2 mile South of the Shoreway.
Fall Cooking Classes
Here is the updated list of my cooking classes. I have had several requests for this information lately and I finally got all the dates inputted. There will be both evening and daytime classes offered and even some classes for parents and preschoolers.
2014 Schedule
My classes are held in a number of different venues. It is important to register early so you won’t be shut out or so the class will not be canceled. Most classes are demonstrations with plenty of food for tasting and recipes to take home. Registration fees vary from one location to the next. Food fees are payable to me the night of the class. Unless otherwise noted all classes are from 7-9 pm.
This Fall I am happy to announce that there will be some daytime classes at both the Wellness Center and at Wildwood In Mentor. There will also be some Mommy and Me classes offered in Mentor.
Mentor
Mentor classes are held at Wildwood Center at 7645 Little Mountain Road. Unless otherwise noted all Mentor classes are held on Tuesdays. You can register online at CityofMentor.com/play or by phone at 440 974 5720 from Cleveland call 440 942 8796.
Classes in Mentor sell out quickly. Please be sure to ask to go on the waiting list if the class you want to attend is full. We do get openings and if there are enough people on the waiting list we can always schedule an additional session. Cost to residents is $14, non-resident fee is $17. That does not include the food fee paid to me the night of the class. Unless noted- all Mentor classes are on Tuesdays.
Fall 2014
Aug. 26: Pickle Barrel: From old-fashioned crock pickles to pickled peaches this class will teach all you need to know to make tasty pickled products for home and gifts. You’ll get to taste several pickled products and learn how to use them in cooking. You’ll get recipes for cucumbers and other pickles. You also learn how to make tasty relishes including one that uses up all those green tomatoes. There will also be recipes for home. Food Fee $8.00.
Sept. 16: Blueberries: Tasty, nutritious and low in fat these berries deserve to be in a lot more than muffins. In class you’ll see blueberries used in coffeecakes and other baked treats. The Blueberry Chef Salad is sure to become a family favorite. There will also be information on freezing. Plenty to sample in class and recipes to take home. Food Fee $9.00.
Sept. 23: Awash in Squash: Did you know that in August there are more zucchini than there are people in this country? Whether you grow your own or just know someone who does you know how prolific summer squash can be. This class will help take back your life and kitchen counters by giving you tons and tons of way to use both summer and winter squash. There will be plenty to try in class and recipes to take home. Food Fee $8.00.
Sept. 30: Edible Flowers: Eating flowers is one of the most fun trends in cooking today. Besides eating flowers when we consume broccoli or cauliflower, you probably don’t eat a lot of flowers. In this class you’ll learn how to cook with them, where to get them and what parts are edible. You’ll get to do some tasting in class and will get easy recipes for taking home. Food Fee $9.00
Oct. 7: Gifts from Herbs: If you are a lover (or grower) of herbs you have probably shared them with family and friends. In this class you’ll learn how to use herbs and spices to make flavorful and fragrant gifts. You’ll learn how to make herbal blends, teas, sachets, vinegars, jellies and more. Hands-on project in class and recipes for home. Materials Fee $8.00.
Oct. 14: Fruit for Dinner: Fruit is just not for snacking anymore. If you are looking for tasty ways to zip up your dinner why not try using fruits and fruit sauces? By adding fruit you can make dinner special any night of the week. You will get a chance to taste several foods in class and will receive recipes to take home. Food Fee $8.00.
Oct. 21: Trick or Treat: Halloween is one of the most popular holidays in America today. If you are planning a party don’t miss this class. You’ll learn how to make ghoulish goodies and boo-tiful decorations. For children and adults alike this class will give you plenty of ideas to make your Halloween party a howling success. Food Fee $8.00.
Oct. 28: Sauces for All Occasions: From pasta to meat and vegetable dishes this class will give you plenty of recipes for spicing up your food with sauces. From basics to the exotic you will get a chance to taste several easy to make sauces that are sure to please. If you are looking for ways to make dinner more interesting you might want to check out this class. Food Fee: $8.00
Nov. 4: Turkey 101: If making Thanksgiving dinner makes you nervous this could be the class for you. From making a timeline and cooking the perfect turkey to mouth-watering side dishes and desserts you will be taught how to make a dinner that would make a pilgrim proud. There will be plenty to taste and take home (come hungry) and recipes for all the dishes. Food Fee: $9.00
Nov. 18: Chowders and Stews: This class is all about the ultimate comfort foods. Learn how to make all kinds of warm, thick and creamy dishes for chilly nights You will get a chance to sample several dishes in class and will have plenty of recipes for home. You will also learn how to thicken chowders and stews without flour or cornstarch. Food Fee $9.00
Dec. 2: It’s Soy Wonderful: With all the news about soy being good for us it’s important to get it into our diets, but how? This class will show you how to incorporate more soy in your diet tastefully. From soymilk to soy flour, tofu to tempeh and more you will learn just how easy eating better can be. There will be several dishes to sample in class and recipes to take home. Food Fee $9.00.
Dec. 9: Cookies, Cookies, Cookies: What could be friendlier than a plate of fresh baked cookies? In class you’ll get hands-on experience making both traditional and innovative cookies including Holiday Fans, Ginger Cookies, Snow People and many more. Bring an apron and baking sheet and be prepared to have a sweet time. There will be cookies to take home and recipes, too. Food Fee $9.00
Dec. 16: Herbal Breads: If you are looking for a way to make any bread, muffin or scone a special occasion dish, look to herbs and spices. In class you will learn how to herbs and spices are used in baking. You will receive the instructor’s recipe for multi-grain herb braids and many others. You will get a chance to taste several breads in class and take home many recipes. Food Fee $8.00
Daytime Mentor Classes
*New Daytime Cooking for 1 or 2
If you are one of the millions of Americans who live in one or two person households you know the dilemma of cooking for a small family. Recipes are often written for 4-6 servings, or more. This class will help you to scale down recipes, will provide plenty of recipes geared for 1-2 servings and will give you help in freezing some for later. An $8 food fee is payable in cash to the instructor the day of class.
#32683 September 24 Wednesday 12-2 p.m.
*New Daytime Cooking with Herbs
Cooking with herbs (and spices) can enhance even the simplest of foods. It can also be a way to reduce the use of salt in cooking. In this class you’ll learn the basics of cooking with herbs, both fresh and dried. Buying, preserving and storing herbs will be discussed as well as extending their shelf life. Instructor’s cookbook will also be available. An $8 food fee is payable in cash to the instructor the day of class.
#32684 October 8 Wednesday 12-2 p.m.
*New Daytime Soup’s On
What could be nicer than a simmering pot of homemade soup? You’ll learn how to make wonderful soups starting with how to make stock from scratch. You’ll get to taste Tomato Bisque and Cabbage Soup along with Bean and Barley. A $9 food fee is payable in cash to the instructor the day of class.
#32685 October 29 Wednesday 12-2 p.m.
New! Goulish Snacks Youth 6-12
Your child, aged 6-12 years old, will get a chance to prepare fun foods for a boo-tiful Halloween party. From ‘finger’ sandwiches and giant Jack-o-lantern cookies to the always awesome flaming ghost cake. You will also get plenty of other ideas for Halloween. There will sampling in class and recipes to take home. Food fee $6.00 per child.
Instructor: Judi Strauss
Location: Wildwood Kitchen
#31942 October 17 Friday 11 a.m.-1p.m.
Resident: $14 / Nonresident: $17
New! Mommy & Me In the Kitchen
This parent-child class will give you and your child a chance to start cooking together. Class will involve you and your child in making tasty, nutritious snacks in a hands-on learning experience. From “ants on a log” to trail mix your child and you will work as a team to create dishes all ages will enjoy. This is a great way to introduce your young one to the joys of cooking. There will be food to make and eat in class, extra to take home and recipes, too. There is a food fee of $8 per child per class.
Instructor: Judi Strauss
Location: Wildwood Kitchen
Resident: $14 per child / Nonresident: $17 per child
Parent -Child Pizza
This class for preschoolers and parents gets both of you into the tasty world of pizza. You will work together to create a pizza from scratch as well as some quick and easy versions. There will be an assortment of toppings available so you will create the pizza you both want. Aprons suggested.
#31938 September 25 Thursday 11 a.m.-1 p.m.
Halloween Party
A parent and child class where you and your child will get a chance to prepare fun foods for a boo-tiful Halloween party. From “finger” sandwiches and giant Jack-o-lantern cookies to the always awesome “Flaming Ghost Cake.” You will also get plenty of other ideas for Halloween.
#31939 October 16 Thursday 11 a.m.-1 p.m.
Play With Your Food
This class is about creativity and imagination. It is also about having fun. In class your child will learn to make foods that are mini craft projects, a little odd, but still tasty. From marshmallow bunnies to kitty litter cake (don’t ask) your child will have a hands on experience that makes cooking really fun.
#31940 November 13 Thursday 11 a.m.-1 p.m.
Gifts for Grandma (and Grandpa, too)
In this parent/child class your preschooler will get a chance to learn the joy of giving. Food and simple craft-type projects will give your little one special gifts to share with their grandparents. Hands-on with several projects to take home with recipes and some sampling in class.
#31941 December 18 Thursday 11 a.m.-1 p.m.
Fairview Hospital Wellness Center
Located at 3035 Wooster Rd., in Rocky River, the Wellness Center is operated by Fairview Hospital, a Cleveland Clinic hospital. Unless otherwise noted classes here are on Mondays. For more information, or to register for classes, visit fairviewhospital.org/wellnesscenter or call 440-356-0670.
Fall 2014
Aug. 18: Marvelous Mushrooms: Mushrooms are available in a wide array these days and are very versatile. If you are unsure how to maximize them in cooking this class is for you. Learn how to cook with all sorts of mushrooms and get a chance to taste several dishes that focus on using them. You will also get recipes for home. Food Fee $8.00.
Aug. 25: Onions and Garlic: While these aromatic foods are a staple in most cuisines some people are hesitant to use them. Both onions and garlic are more than just tasty, they are good for you. In class you will learn how to roast, grill, caramelize and much more. Plenty to taste in class and to recipes to take home, too. Food Fee $8.00
Sept. 8: Apples and Pears: While available throughout the year these tasty fruits are certainly at there best in autumn. They are very versatile and can be used in desserts, baked goods and even in main dishes. In class you’ll learn about many of the varieties on the market and about many ways to use them. There will also be a section on freezing for later use. Plenty to sample in class and recipes for home. Food Fee $8.00
Sept. 15: Awash in Squash: Did you know that in August there are more zucchini than there are people in this country? Whether you grow your own or just know someone who does you know how prolific summer squash can be. This class will help take back your life and kitchen counters by giving you tons and tons of way to use both summer and winter squash. There will be plenty to try in class and recipes to take home. Food Fee $8.00.
Sept. 22: Root Vegetables: Tasty, but often overlooked, root vegetables are versatile and fun to cook with. From beets to rutabagas we will explore how to use root vegetables in all kinds of fun ways. Recipes will include roasted beets, parsnip cake, carrot pasta sauce and a whole lot more. Lots to sample in class and recipes for home. Food Fee $9.00
Sept. 29: Make Your Own Mixes: Are you tired of paying high prices for prepackaged mixes? Did you know that you can many of these mixes at home yourself? In class you’ll learn how to make cocoa mix, biscuit mix, cake mixes, salad dressings and much more. We’ll even make marshmallows! Plenty to sample in class and recipes to take home. Food Fee $8.00
Oct. 6: Cooking With Tortillas: If the only time you eat a tortilla is at a Mexican restaurant be prepared to be pleasantly surprised. The flour and corn tortillas in the dairy counter at your grocery store can be used for everything from appetizers to breakfast, sandwiches to desserts. You’ll learn how to make Mexican and non-Mexican dishes including a baked egg roll! Tortillas are easy to use and can make cooking easier. Recipes to take home and plenty of samples to taste in class. Food Fee $8.00
Oct. 13: Sushi for All: Sushi is fun to eat and is not hard to make, with a little practice. . In this class you’ll get a hands-on chance to roll your own using some typical and untypical ingredients. From the California Roll to Sweet and Sour Sushi (made with chicken!) you will get a chance to have some fun and see sushi in a whole new way. Food Fee: $10.00 Note: There is no raw fish served in this class.
Oct. 20: Trick or Treat: Halloween is one of the most popular holidays in America today. If you are planning a party don’t miss this class. You’ll learn how to make ghoulish goodies and boo-tiful decorations. For children and adults alike this class will give you plenty of ideas to make your Halloween party a howling success. Food Fee $8.00.
Oct. 27: Taste Of Asia: In this class you’ll get an introduction to Asian cooking from appetizers to desserts and everything in between. You’ll get to try several dishes in class and will get recipes to take home. Besides cooking techniques there will be a discussion of various Asian ingredients and where to find them. Food Fee $8.00
Nov. 3: My Mother’s Polish Kitchen: You don’t have to be Polish to love Polish food! This class will be a sharing of recipes and cooking tips from the instructor’s Polish Mother. You’ll get recipes for all the traditional favorites from Kielbasa to Pierogis as well as recipes for soups, salads, main dishes and desserts. There will be several dishes for tasting so come hungry. Food Fee: $9.00
Nov. 10: Your First Thanksgiving: If making Thanksgiving dinner makes you nervous this could be the class for you. From making a timeline and cooking the perfect turkey to mouth-watering side dishes and desserts you will be taught how to make a dinner that would make a pilgrim proud. There will be plenty to taste and take home (come hungry) and recipes for all the dishes. Food Fee: $9.00
Nov. 17: Appetizers, Fast and Easy: Entertaining can be fun, but can also wear us out. This class will give you plenty of recipes and ideas for simple, tasty appetizers. Many can be done ahead and frozen until you need them. Some of the recipes include Brie Truffles, Artichoke Dip, Empanadas and many more. So if you have more friends and family than you have time learn how to make your next party fun for you, too. Food Fee $9.00
Dec. 8: Gifts from the Kitchen: Homemade gifts are always appreciated. They are also more personal than store bought gifts. In class you’ll get lots and lots of ideas on easy homemade gifts from food. You will also work on a hands-on project and will have samples to taste in class. Lots of recipes to take home. Materials Fee $9.00
Dec. 15: Sauces for All Occasions: From pasta to meat and vegetable dishes this class will give you plenty of recipes for spicing up your food with sauces. From basics to the exotic you will get a chance to taste several easy to make sauces that are sure to please. If you are looking for ways to make dinner more interesting you might want to check out this class. Food Fee: $8.00
New for Fall 2014- Daytime Classes at The Wellness Center
All classes listed below are held from 11am-1 pm.
Oct. 9: Cooking for 1 or 2: If you are one of the millions of Americans who live in one or two person households you know the dilemma of cooking for a small family. Recipes are often written for 4-6 servings, or more. This class will help you to scale down recipes, will provide plenty of recipes geared for 1-2 servings and will give you help in freezing some for later. There will be plenty to taste in class and recipes for home. Food Fee 8.00.
Oct. 23: One Pot Meals: You can create tasty meals for your family without creating chaos in your kitchen. This class is all about making meals that cook in one dish for easy preparation and easy clean up. From casseroles to soups you’ll get to sample a wide array of dishes and you’ll get plenty of time saving tips as well as recipes to take home. Food Fee $9.00.
Nov. 6: Go Green, Cooking with Leafy Green Vegetables: We know we should eat them but many of us just aren’t sure what to do with leafy green vegetables. This class will give plenty of tasty recipes using all sorts of greens. From delicate salad greens to the hearty winter greens you will learn how to prepare them all. Collards, beet greens, kale, broccoli rabe, spinach, chard, dandelion greens and many more. There will recipes to sample in class and recipes for home. Food Fee: $8.00
Dec. 11: Hors d’oeuvres: Good appetizers can set the mood for the whole evening. They can be fast and easy or quite complex. In this class they will be generally easy to make. Recipes include Crab Mousse, Brie with Sun-dried Tomatoes and Pesto, Rueben Dip and more. You’ll also get party planning tips and plenty of samples to taste in class. There will also be recipes to take home. Food Fee $9.00
SELREC/ Adult
South Euclid/ Lyndhurst Recreation Department classes are held in the cooking room in Beachwood Middle School. To register for classes you can call 216 382 4300. You can also request a brochure for all SELREC classes when you call.
Fall 2014
Sept. 17: Apples and Pears: While available throughout the year these tasty fruits are certainly at there best in autumn. They are very versatile and can be used in desserts, baked goods and even in main dishes. In class you’ll learn about many of the varieties on the market and about many ways to use them. There will also be a section on freezing for later use. Plenty to sample in class and recipes for home. Food Fee $8.00
Oct. 15: Cooking with Bacon: There is almost no finer smell than that of bacon cooking. In this class you’ll learn how to add the flavor and crunch of bacon to all sorts of dishes. Recipes include Bacon Cornbread, Bacon Yorkshire Pudding, Bacon Buttermilk Waffles and many more. Bacon- it’s not just for Breakfast anymore. Plenty to taste in class and recipes for home. Food Fee $10.00
Oct. 22: Vegetarian Cooking: Watching your cholesterol? Looking for an alternative to meat and potatoes? In this class you will learn the basics of eating meatless meals including ‘protein pairing’ and how to make food the family will enjoy, too. Whether you are already a vegetarian or just want a change of pace this class will give you a lot of information and plenty of good food. There will recipes to take home and samples to taste in class. Food Fee $8.00.
Nov. 5: Bread Baking: Nothing beats the aroma of fresh baked bread. In this class you’ll learn how to bake a perfect loaf of bread every time. There will be a demonstration of braiding bread and shaping dinner rolls. You’ll also see a loaf of yeast bread that can be made in one hour! Plenty to taste in class and recipes to take home. Food Fee $8.00.
Nov. 19: Hors d’oeuvres: Good appetizers can set the mood for the whole evening. They can be fast and easy or quite complex. In this class they will be generally easy to make. Recipes include Crab Mousse, Brie with Sun-dried Tomatoes and Pesto, Rueben Dip and more. You’ll also get party planning tips and plenty of samples to taste in class. There will also be recipes to take home. Food Fee $9.00
Dec. 3: Cookies, Cookies, Cookies: What could be friendlier than a plate of fresh baked cookies? In class you’ll get hands-on experience making both traditional and innovative cookies including Holiday Fans, Ginger Cookies, Snow People and many more. Bring an apron and baking sheet and be prepared to have a sweet time. There will be cookies to take home and recipes, too. Food Fee $9.00
Dec. 10: Holiday Baking: Create that home for the holiday feeling by learning how to bake some traditional favorites. You’ll also learn how to bake some less-traditional foods, too. There will be several treats to sample in class including tree-shaped sweet rolls and cheese puffs. Use of these goodies as gifts will also be discussed. Many recipes to take home. Food Fee $9.00
Beachwood Recreation
Cooking classes for Beachwood Recreation are held at the Beachwood Middle School in the home ec room. The School is located on Richmond Road behind the library. You can register by calling 216 292 1970.
All classes listed in Selrec schedule can also be registered through Beachwood Rec.
Fall 2014
Sept. 17: Apples and Pears: While available throughout the year these tasty fruits are certainly at there best in autumn. They are very versatile and can be used in desserts, baked goods and even in main dishes. In class you’ll learn about many of the varieties on the market and about many ways to use them. There will also be a section on freezing for later use. Plenty to sample in class and recipes for home. Food Fee $8.00
Oct. 15: Cooking with Bacon: There is almost no finer smell than that of bacon cooking. In this class you’ll learn how to add the flavor and crunch of bacon to all sorts of dishes. Recipes include Bacon Cornbread, Bacon Yorkshire Pudding, Bacon Buttermilk Waffles and many more. Bacon- it’s not just for Breakfast anymore. Plenty to taste in class and recipes for home. Food Fee $10.00
Oct. 22: Vegetarian Cooking: Watching your cholesterol? Looking for an alternative to meat and potatoes? In this class you will learn the basics of eating meatless meals including ‘protein pairing’ and how to make food the family will enjoy, too. Whether you are already a vegetarian or just want a change of pace this class will give you a lot of information and plenty of good food. There will recipes to take home and samples to taste in class. Food Fee $8.00.
Nov. 5: Bread Baking: Nothing beats the aroma of fresh baked bread. In this class you’ll learn how to bake a perfect loaf of bread every time. There will be a demonstration of braiding bread and shaping dinner rolls. You’ll also see a loaf of yeast bread that can be made in one hour! Plenty to taste in class and recipes to take home. Food Fee $8.00.
Nov. 19: Hors d’oeuvres: Good appetizers can set the mood for the whole evening. They can be fast and easy or quite complex. In this class they will be generally easy to make. Recipes include Crab Mousse, Brie with Sun-dried Tomatoes and Pesto, Rueben Dip and more. You’ll also get party planning tips and plenty of samples to taste in class. There will also be recipes to take home. Food Fee $9.00
Dec. 3: Cookies, Cookies, Cookies: What could be friendlier than a plate of fresh baked cookies? In class you’ll get hands-on experience making both traditional and innovative cookies including Holiday Fans, Ginger Cookies, Snow People and many more. Bring an apron and baking sheet and be prepared to have a sweet time. There will be cookies to take home and recipes, too. Food Fee $9.00
Dec. 10: Holiday Baking: Create that home for the holiday feeling by learning how to bake some traditional favorites. You’ll also learn how to bake some less-traditional foods, too. There will be several treats to sample in class including tree-shaped sweet rolls and cheese puffs. Use of these goodies as gifts will also be discussed. Many recipes to take home. Food Fee $9.00
Portobellos with Hummus
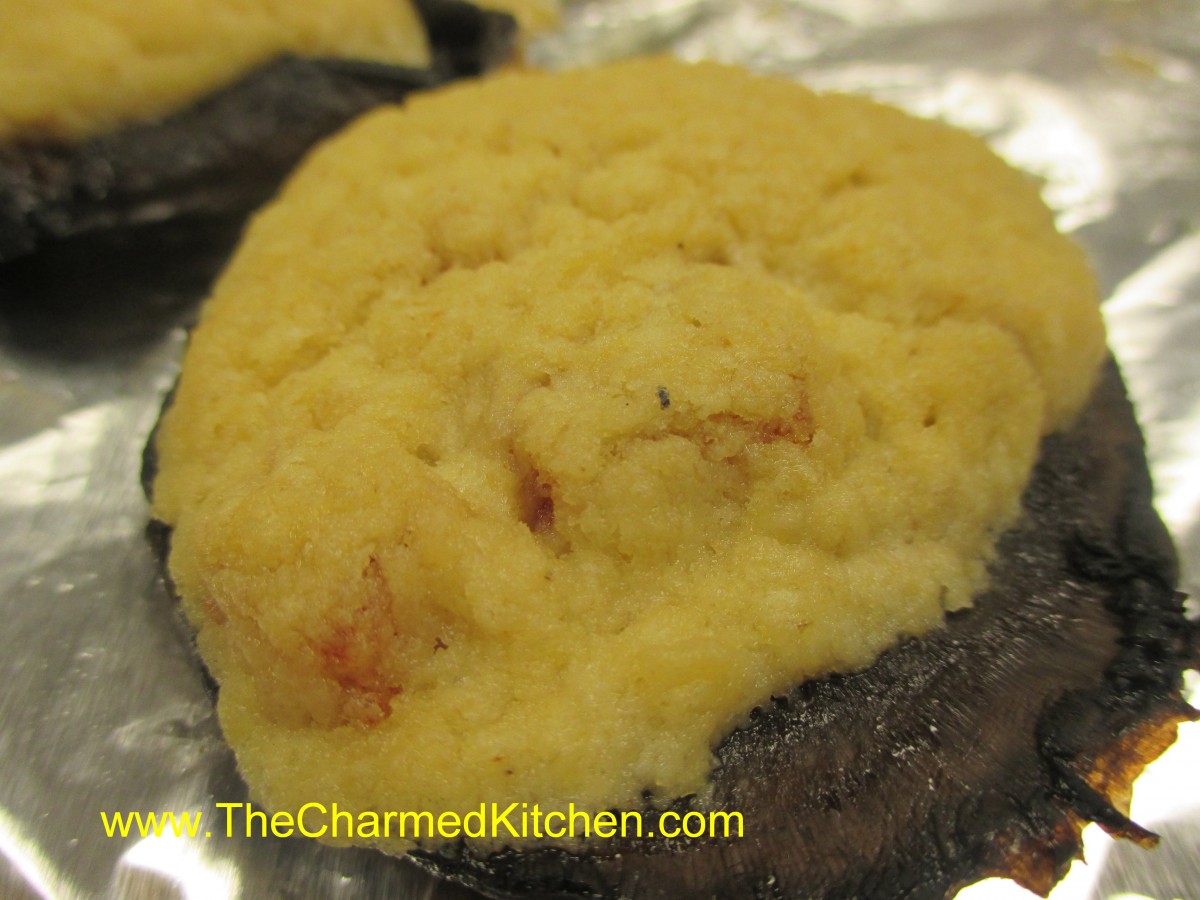
Portobellos with Hummus
If you are looking for a fun way to serve Portobello mushrooms you might want to give this a try. I love mushrooms and am always looking for a new way to serve them. All you do is take Portobello mushrooms caps, clean them up a bit, and saute them. Once the caps are cooked spoon in a mixture of hummus, cream cheese and roasted red pepper. At this point they go in the oven or under the broiler. You could even do this on the grill, but you won’t get the top browning. I made my own hummus and roasted a pepper but both of those ingredients could be purchased. Here is the recipe.
Portobellos with Hummus
2 tablespoons olive oil
6 small portobello mushroom caps, stems and ribs removed
1/2 cup cream cheese, softened
1 roasted red pepper, diced
3/4 cup hummus
Salt and pepper to taste
Preheat oven to 375 degrees. Heat olive oil in a large skillet over medium-high heat. Sear the portobello mushrooms for 3 minutes on each side until browned.
Stir together cream cheese, pepper, and hummus until evenly blended. Season the mushroom caps with salt and pepper on each side. Place the mushrooms onto a baking sheet, with the stem-side facing up. Then fill with hummus mixture. Bake in preheated oven for 15 minutes until the filling is hot.


