Toasted Pecan and Orange Waffles

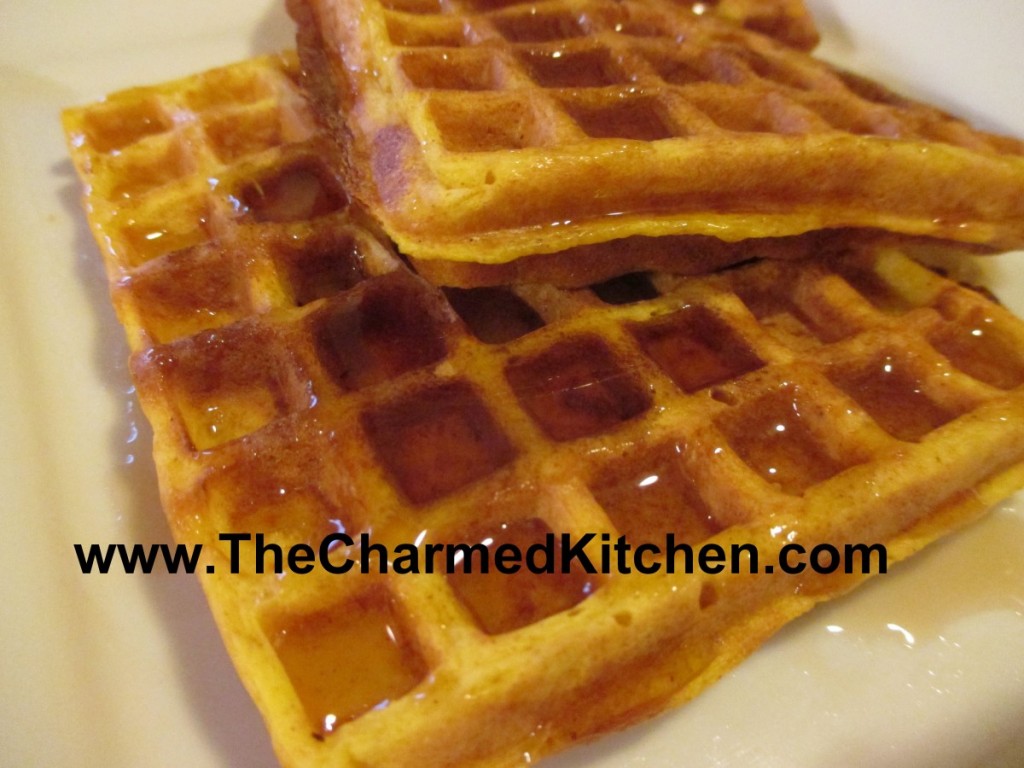
These orange- pecan waffles are sure to make anyone smile. They are really tasty. They aren’t hard to make, either. They would make a great breakfast for any holiday or special occasion.
You can serve them just on their own, or perhaps with a side of crispy bacon or some breakfast sausage and some fresh fruit.
I started with my basic vanilla waffle recipe and had some fun with it. I enjoyed the combination of pecans with orange juice. Since it is citrus season, I used fresh squeezed juice, but bottled juice is just fine. Serve them with warm maple syrup, powdered sugar or perhaps orange marmalade..
Here is the recipe.
Toasted Pecan and Orange Waffles
2 cups flour
4 teaspoons baking powder
2 tablespoons sugar
1 teaspoon salt
1 t. orange zest
2 eggs
1 cup orange juice
½ c. milk
½ c. melted butter
1 T. vanilla
¾ c. toasted pecans, chopped*
Whisk together dry ingredients and set aside. Beat together remaining ingredients and add to dry ingredients mixing until smooth. Cook in a waffle iron until crisp.
* To toast the pecans, place on a baking sheet and bake in a 350-degree oven for about 10 minutes. Toast them before you chop them- smaller pieces can burn easily.
Candied Orange Peels and Candied Ginger

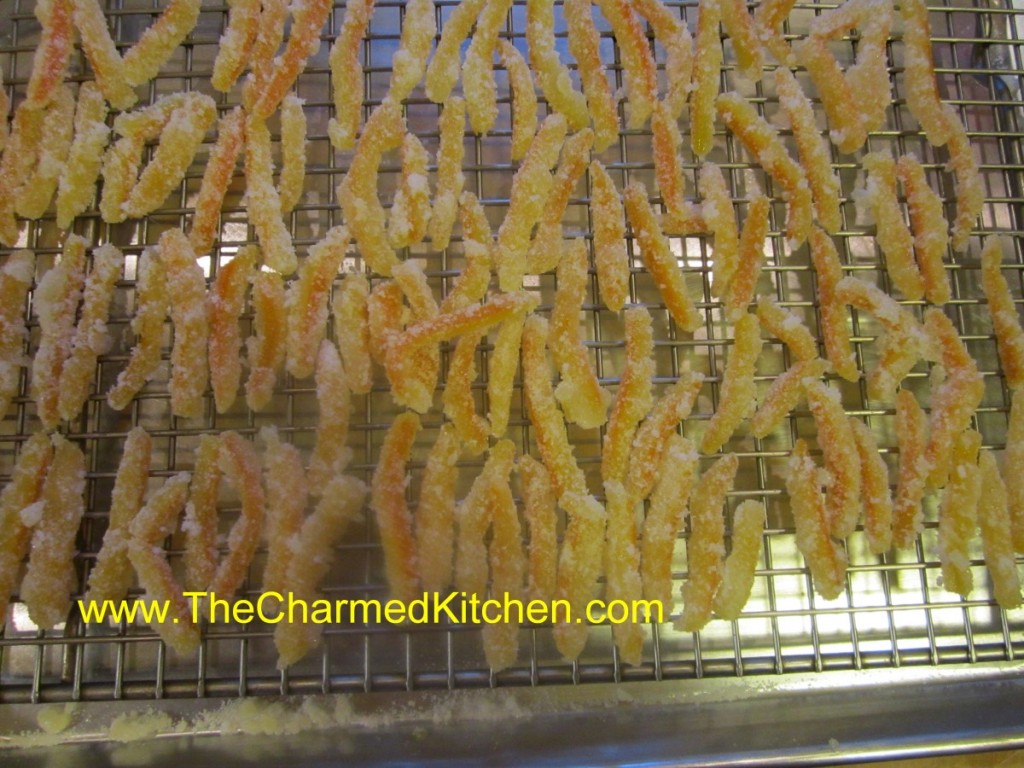
During the winter months, when citrus is in season, I find myself eating a lot of oranges. I also find myself with a lot of orange peels. I dry some and powder them up for use in baking and cooking. Another fun use for orange peels is to turn them into a candy. A friend reminded me yesterday how much she loves them. So I decided it was time to make some. Thanks, Fran.
Candied orange peels are pretty easy to make and a nifty way of turning something that might otherwise be discarded into something tasty. You can also candy other citrus peel this way, like grapefruit and lemons. The same process can be used to make candied ginger.
Once finished, the candied peels can also be dipped in dark chocolate for a special treat.
They make a nice gift, too.
Candied Orange Peel
2 large oranges ( you can also use 1 grapefruit or 3 lemons)
or 1 lb. of ginger root*
¾ c. water
¾ c. sugar, plus extra for rolling
3 T. light corn syrup, optional
Remove peel from fruit using a sharp knife. Try to get the peel off in 4 pieces. Cut the peel into ¼-inch wide strips. Place peel in a pot with cold water and bring to a boil. Boil 1 minute, drain and rinse under cold water. Repeat process 2 more times. Return to pan with fresh water and boil 15 minutes. Drain and pat dry. Bring ¾ c. water and ¾ c. sugar to boil in sauce pan with the corn syrup. Boil 2-3 minutes and then add the peel. Simmer, stirring occasionally until all but a spoonful of the syrup is left. This should take about 10 minutes. On a wax-paper lined baking sheet sprinkle 1 cup of sugar and arrange the peels on top of the sugar. Toss the peels around until cooled adding more sugar if needed. Place peels on a drying rack for 24 hours before storing. Once dried you can also dip one end of the peels in dark chocolate. Makes ½ pound.
* If making the candied ginger root, peel and cut into 1/4- inch slices. Then cut the slices into 1/4-inch thick strips
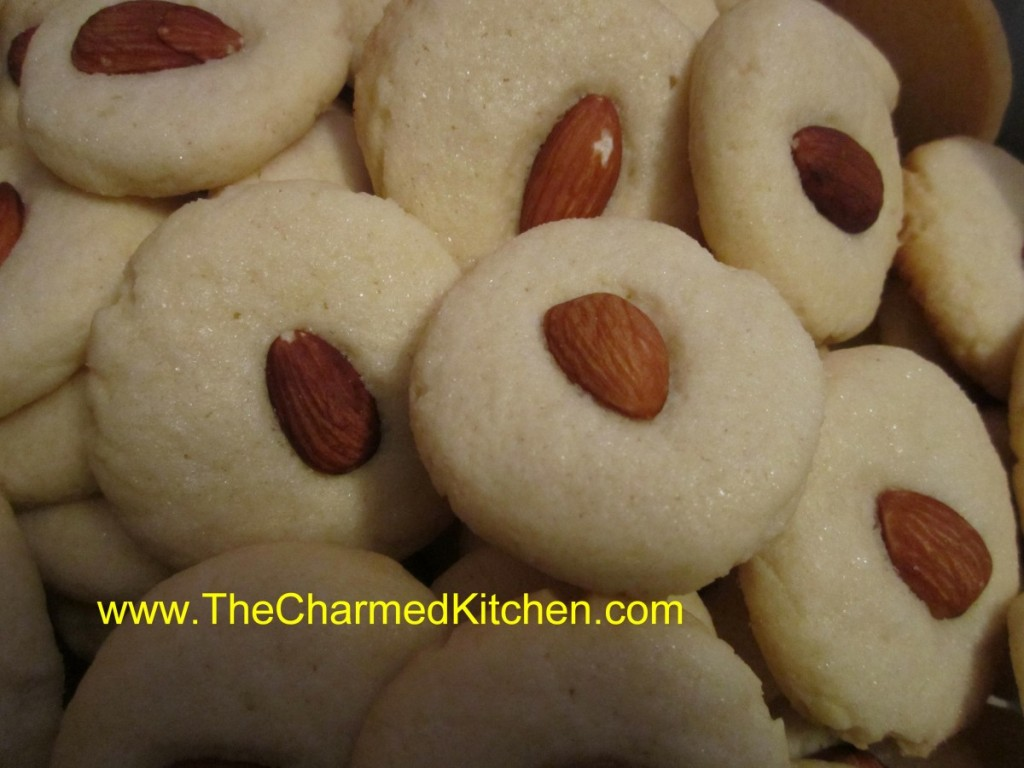
Almond Cookies

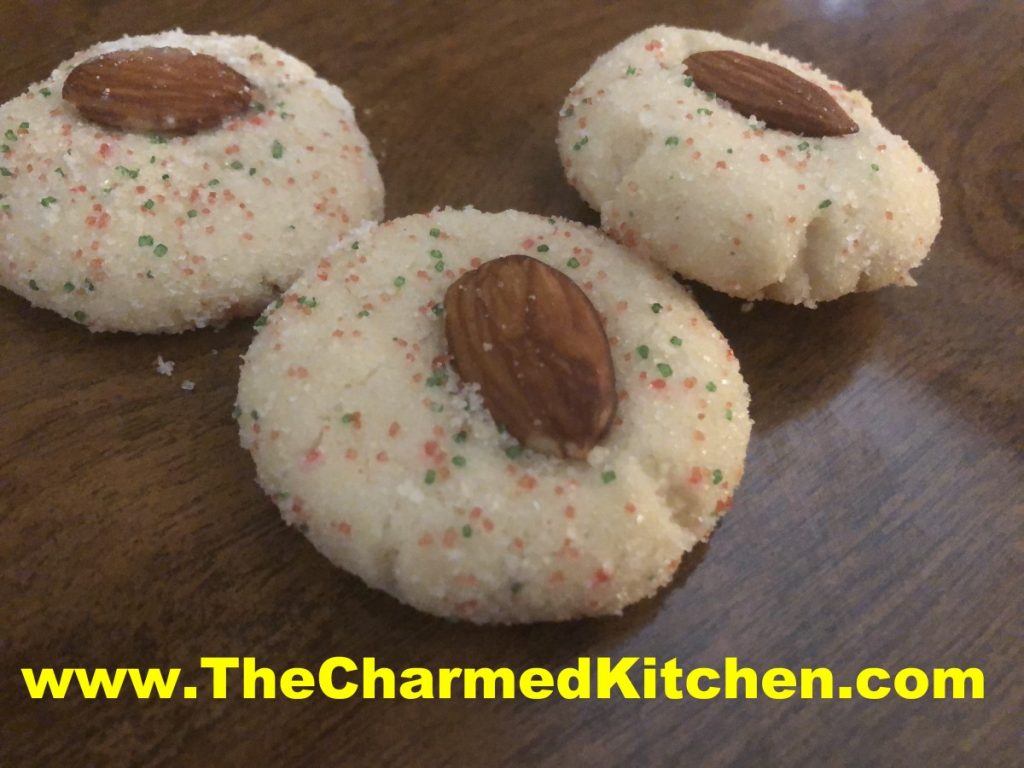
I do love these cookies. They are delicate and cake- like and the perfect finish for almost any meal. I always make them as part of my holiday cookie baking. The whole almonds toast nicely as the cookies bake. I also like that they are easy to make. If you haven’t tried them before you might want to. I think you’ll like them as much as I do.
I used a mix of white and colored sugar to top the cookies , but you can use white sugar alone.
Here is the recipe.
Almond Cookies
¾ c. sugar
¾ c. softened butter
1 egg
2 T. water
1 t. baking powder
1 t. almond extract
¼ t. salt
2 ½ c. flour
whole almonds, about 1/3 cup 3-4 T. extra sugar for topping
Combine all ingredients except flour and nuts and beat until smooth. Stir in flour. Shape dough into 1-inch balls and place 2” apart on lightly greased baking sheet. Dip bottom of buttered glass in sugar and use it to flatten cookies a little. Press an almond into the center of each. Bake in a 350-degree oven for 8-12 minutes. Cookies should be firm to the touch, but not brown. Makes 3-4 dozen.
Chocolate Chip Shortbread


It is the time of year when a lot of people are baking cookies. I thought I would share one of my favorite cookie recipes with you. It takes the chocolate chip cookie to another level. Kind of dressed up for the holidays.
These little cookies are delicate and full of flavor. I will admit to being a big fan of shortbread cookies. I make a lot of different shortbread cookies for Christmas. This one is always on my list.
These are enhanced with mini chocolate chips and just melt in your mouth. I leave them as is, but you could add a drizzle of melted chocolate if you like. The cornstarch in the dough makes them extra tender.
Other options could include using mint chocolate chips or adding mint extract, almond extract, or even orange zest. These cookies are very versatile.
Chocolate Chip Shortbread Cookies
1 c. butter (no substitutions), softened
½ c. brown sugar
1 t. vanilla extract
2 c. flour
¼ c. cornstarch
½ c. mini chocolate chips
2-3 T. granulated sugar
With electric mixer beat butter, brown sugar and vanilla until well mixed. Stir in flour and cornstarch and then stir in chips. Form into 1-inch balls and place on an ungreased baking sheet. Pour granulated sugar on a small plate and dip bottom of drinking glass into the sugar and use this to gently flatten down the cookies. Press small indent in each cookie with a teaspoon. Bake in a preheated 300-degree oven for 15-20 minutes or until the cookies start to brown on the bottom. Cool on sheets 5 minutes before removing to a cooling rack. Makes about 3 ½ dozen.
Gingersnap Cookies

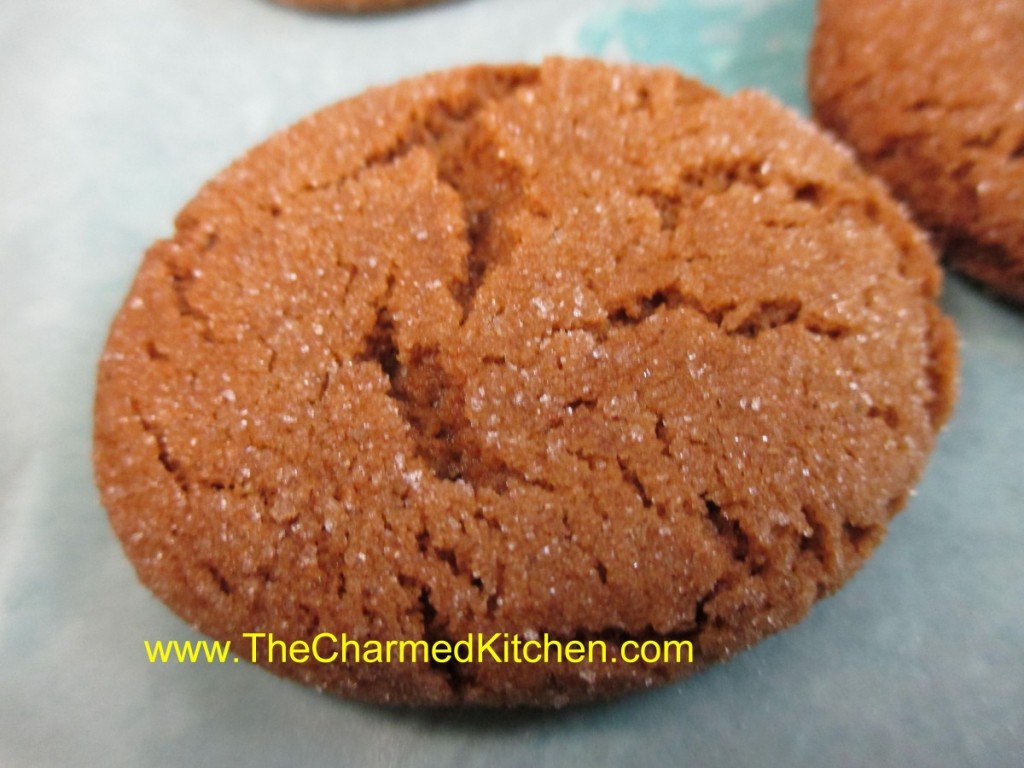
Gingersnaps are one of those cookies- the people that love them – REALLY love them. I will admit to being one of those people. The mixture of spices and crunchy texture just work together so well.
This richly spiced cookie is perfect with a cup of coffee or a cup of tea. They are not too sweet, which I also like.
You can use either dried or fresh grated ginger. I really prefer fresh. I keep a piece of ginger root in my freezer, then just grate what I want, whenever needed. The ginger lasts nearly forever that way.
The original recipe called for shortening. I use butter, but chill the dough at least an hour before baking. You can use shortening, if you prefer.
So here is the recipe. Enjoy!!
Gingersnap Cookies
2 c. flour
2 t. baking soda
1 t. cinnamon
¾ t. ginger (fresh grated preferred)
½ t. cloves
¼ t. salt
1 c. sugar, plus extra for rolling
¾ c. butter
¼ c. molasses
1 egg
Mix together dry ingredients and set aside. Beat together sugar with butter, molasses and egg until light. Stir in dry ingredients and chill dough at least an hour. When ready to bake, roll dough into 1-inch balls. Roll balls in additional sugar. Place 2 inches apart on ungreased baking sheet. Bake in a preheated 350-degree oven for 10-12 minutes. Edges should look dry. Cool on sheet for a few minutes and then move to rack. Makes about 36.
Eva’s Kolachy

Over the years, I have shared many of my family recipes. This is another family recipe- but not my family. Tia Houpt found this recipe when going through her Grandmother’s recipe collection. She was kind enough to share the recipe- and gave me permission to share it with you. Her grandmother was Eva Skero- so I have named the kolachy in Eva’s honor.
There is something special in having old family recipes. We find so many recipes online these days, we sometimes forget there was a time when recipes were handwritten. Often, they were stored in a drawer or in a shoe box. There is usually a mix of handwritten recipes and recipes cut out of newspapers and magazines.
Sometimes you just find a list of ingredients. Measurements aren’t always precise. A handful of this a pinch of that. The phrase moderately hot oven doesn’t real help, does it? And what exactly is a number 2 can? Still, there are some real gems in those collections.
This is one of those recipes. A real gem.
I have made kolachy for years and have used the recipe for the crust that my mom used. I love my mom’s recipe. I love this recipe even more.
I was intrigued that the dough contains both baking powder and yeast. I had to make it, just to see what it was like.
The dough is tender and very easy to work with. It doesn’t get chilled. You just make the dough, then roll it out and make the cookies. I did let my butter soften a little before cutting it into the flour. I could see using cold butter instead.
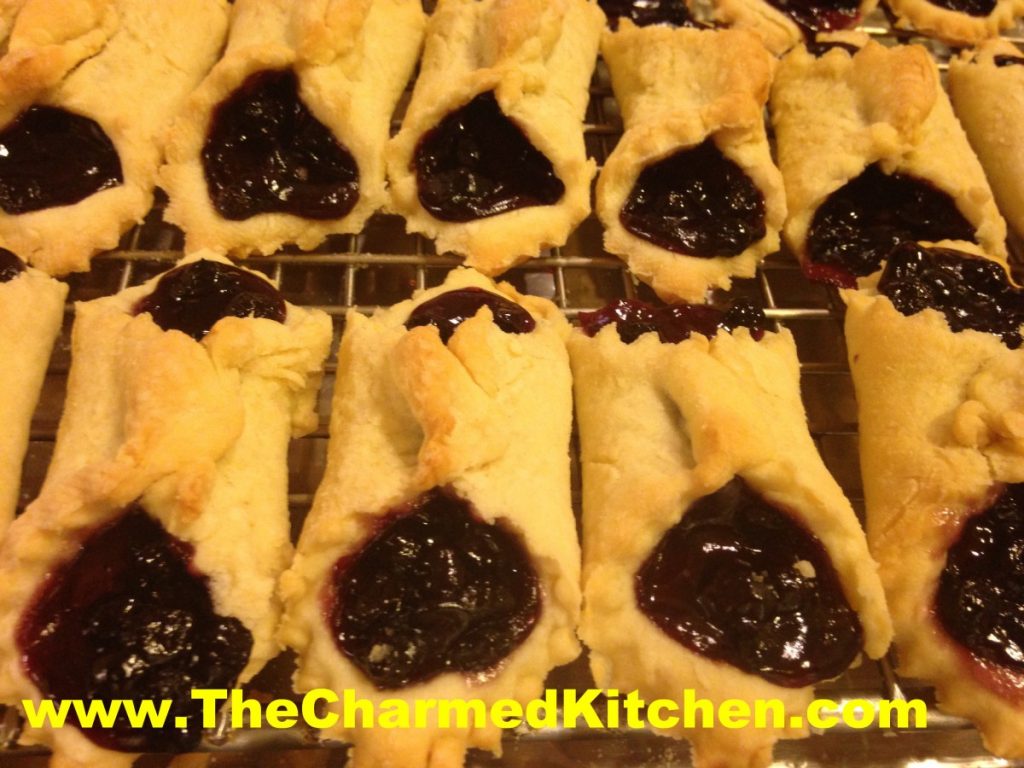
The dough rolled out beautifully and baked up a perfect golden brown. I had to let them cool a bit before I could taste one. I am not kidding- they were heavenly. Tender and so flaky. Tia and I both see this as a very nice tart or pie dough, too.
So here is Eva’s recipe. I hope you will give it a try. Thanks, Tia, for sharing it.
Eva’s Kolachy
Dough:
3 c. flour
1 t. baking powder
½ t. salt
1 c. butter*
3 eggs
2 pkts. Yeast
½ c. warm milk
Filling:
Assorted pie fillings, jams, sweetened cream cheese or ricotta cheese. You will need about three cups of filling.
In mixing bowl, combine flour with baking powder and salt. Cut butter into flour until mixture looks like coarse crumbs. Set aside. Place eggs in a small bowl and beat until smooth. In small bowl, dissolve yeast in warm milk. Add to egg mixture and stir to combine. Add egg mixture to flour mixture and stir until combined. If mixture is sticky add a small amount of flour. Roll dough out on floured board. Thinner the better, as this dough will puff some when baked. Cut into squares- or whatever shape you like. I did 2-inch squares. Place a spoonful of filling into center of each cookie. Fold up two of the corners and press firmly to seal. Fold over and press seam again. These like to pop open when baking, so the second fold over and pressing helps them to stay closed. Some people like to add a bit of egg wash or milk to the tops to help them seal better. I just squeeze together and fold twice. Place cookies on an ungreased baking sheet, about an inch apart. Bake in a preheated 350 degree oven for 20 minutes, or until golden brown. Cook on a rack. Dust cooled cookies with powdered sugar or with a powdered sugar glaze. Makes about 5-6 dozen.
*The original recipe called for shortening. Tia and I both decided butter was better!! That is the only change we made to Eva’s original recipe.
Blueberry Pie Filling
3 1/2 c. blueberries, fresh or frozen
3/4 c. sugar, or to taste
1/4 c. cornstarch
1 c. water
1 T. lemon juice
In saucepan, bring blueberries and sugar to a boil, stirring often. Combine cornstarch with water and lemon juice and add to the blueberry mixture. Return to the boil and cook until thickened and bubbly. Makes 4 cups. You might not need the whole batch for the cookies.
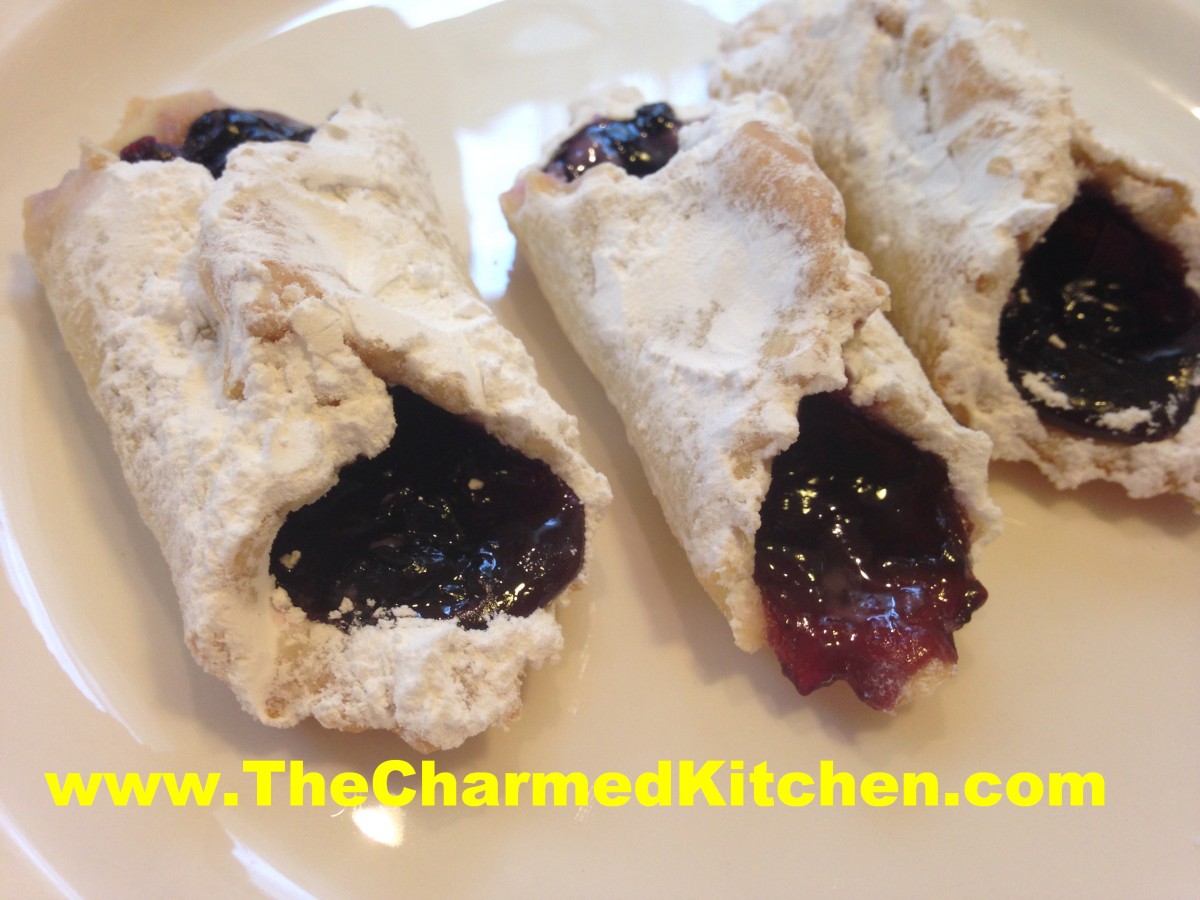
Cooled and dusted with powdered sugar
This post is dedicated to Eva Skero and all the home cooks out there who lovingly kept their recipes for us to find.
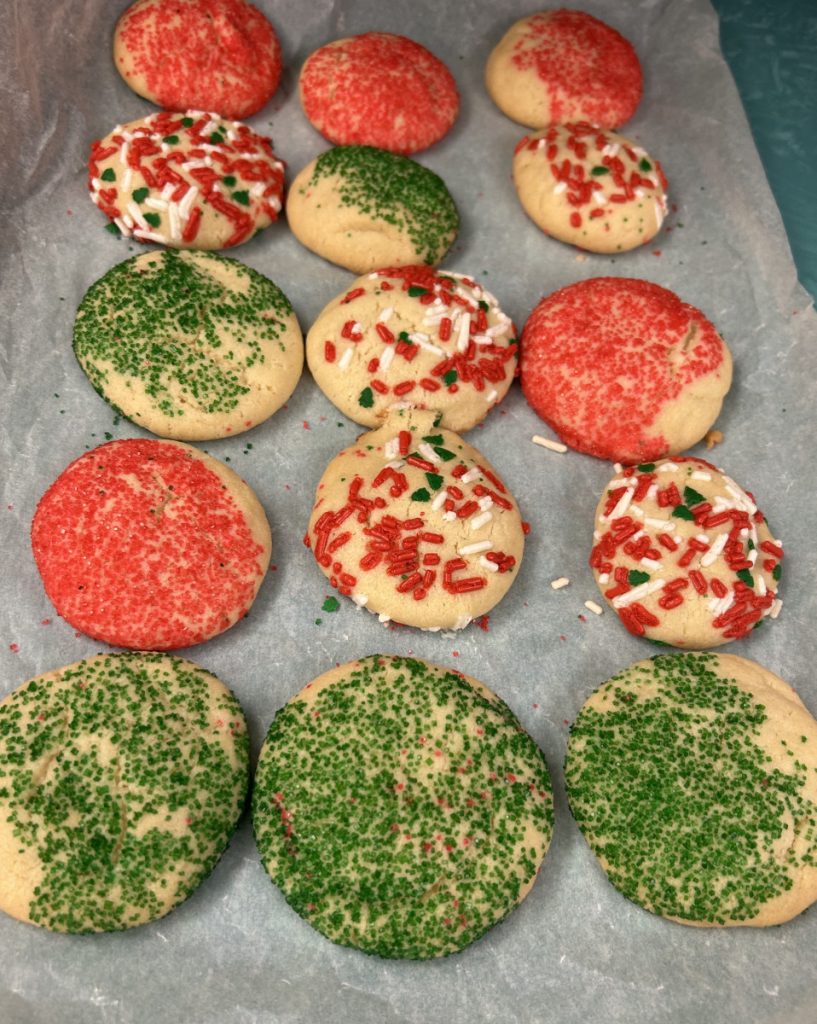
Soft Butter Cookies


If you are looking for a truly tender cookie, this may be it. These cookies are so delicate, they just melt in your mouth!! The secret ingredient might surprise you. It is oil. Yes, I know I said butter cookies – they also contain butter. But the combination of oil and butter makes them soft and delicate, even days after baking. They also contain both granulated and powdered sugar. Not your typical cookie recipe, for sure. This just may be my “go to” butter cookie recipe from now on.
You don’t have to chill the dough and they roll very easily, without sticking to your fingers. You could chill the dough, but let it warm up a little before rolling. The dough can also be made ahead and frozen- I tested it.
In class last week we pressed the tops in colored sugars, nonpareils or sprinkles before baking. You can also bake them plain, then dip in melted chocolate and sprinkles or nuts after baking,
Soft Butter Cookies
1 c. butter
1 c. oil, I used avocado oil
1 c. sugar
1 c. powdered sugar
2 eggs
1 T. vanilla
1 t. baking soda
1 t. cream of tartar
½ t. salt
4 ½ c. flour id f dough is too soft, you might need to add a little more flour.
In mixing bowl, beat together butter, oil, sugars and vanilla. Once well blended, beat in eggs. Stir in the baking soda, cream of tartar and salt, then add the flour, mixing until well combined. Heat oven to 350 degrees. Roll dough into one inch balls and press tops of cookies in sprinkles or colored sugar, if desired. Place one inch apart on ungreased baking sheets. Bake for 12 minutes, or until light golden on bottom. Leave cookies on baking sheets 3 minutes before placing on cooling rack. Makes about 6 dozen cookies.
Chocolate Sparkle Cookies


These cake-like cookies are always a favorite in my house. They are full of chocolate flavor and easy to make. They have an almost brownie like texture. The sparkle comes from the sugar they are roll in just before baking. So if you are looking for a chocolate cookie for your holiday cookie collection- you might want to try these.
Chocolate Sparkles
1 c. butter, softened
1 ¼ c. sugar
2 eggs
2 oz. unsweetened chocolate, melted
½ t. vanilla
2 2/3 c. flour
2 t. cream of tartar
1 t. baking soda
½ t. salt
¼ c. sugar
Cream together butter and sugar. Beat in eggs, chocolate and vanilla. Stir in next four ingredients. Chill dough. Shape dough into 1” balls and roll in ¼ cup sugar. Place about 2 inches apart on ungreased baking sheet. Bake in a preheated 375- degree oven for 8-10 minutes. Makes 5-6 dozen.
Lemon Meltaway Cookies

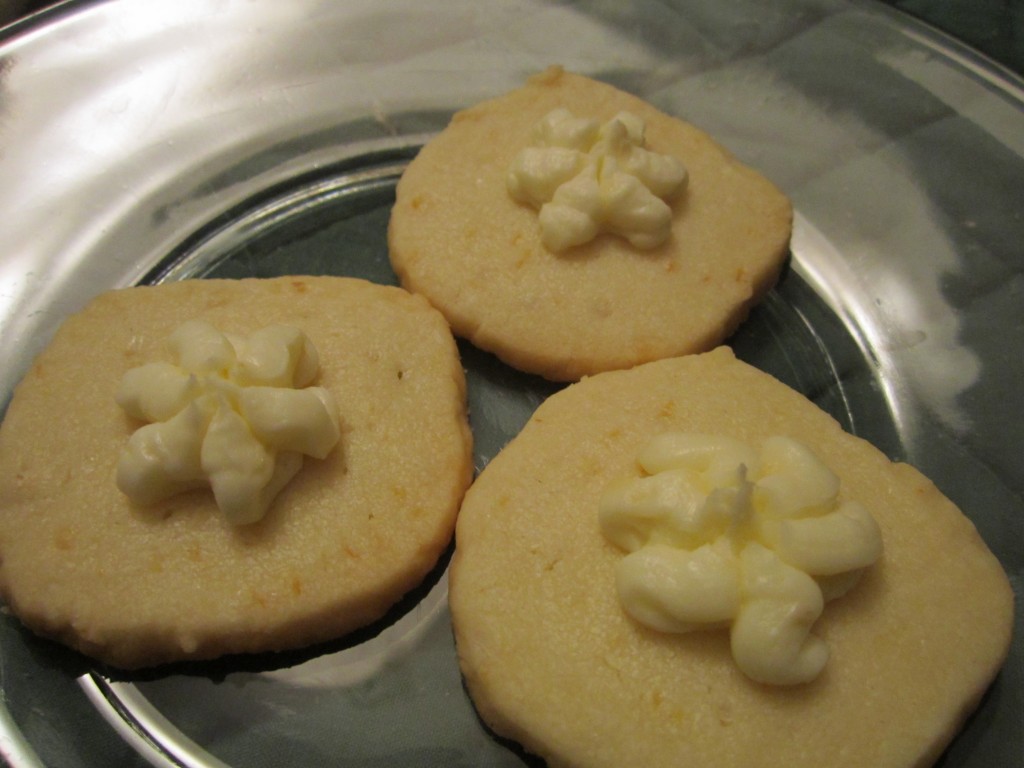
These cookies have a great lemon flavor and delicate texture. The cookie is so tender, in part, because there is cornstarch in the dough. I think you and your family and friends will love them as much as I do.
I will admit to adding a little more lemon zest to the dough and frosting, for even more lemon flavor. To make them easier for packing, I sometimes make a lemon glaze instead of the frosting. I just combine a cup of powdered sugar with enough lemon juice to make it a nice consistency to drizzle. I drizzle it over the cookies and let the glaze harden up before packing.
They are also easy to make. They are a slice and bake cookie. That means you make the dough, form into a roll, and chill. Now you can just slice and bake when you have the time. I sometimes make a batch and freeze them- so I can make fresh cookies whenever I like. In a season of heavy meals and rich desserts, these cookies are light and refreshing.
Lemon Meltaways
Dough:
1 ¼ c. flour
¾ c. butter, softened
½ c. cornstarch
1/3 c. powdered sugar
1 T. lemon juice
1 t. grated lemon peel
Frosting:
¾ c. powdered sugar
¼ c. butter, softened
1 t. lemon juice
1 t. grated lemon peel
In large bowl combine all dough ingredients and mix well. Divide dough in half and roll each half into an 8- inch roll. Wrap in plastic wrap and chill until firm, 1-2 hours. Slice chilled dough into ¼ inch slices and place 2 inches apart on a cookie sheet. Bake in a 350 degree oven for 8-12 minutes, or until cookies are set, but not brown. Cool completely on a rack. Combine frosting ingredients and beat until light and fluffy. Frost cooled cookies. Makes 4 dozen.
Cookie Candies

There are so many cookies I bake this time of year, I could never pick a favorite. There are some cookies that are a MUST bake, however.
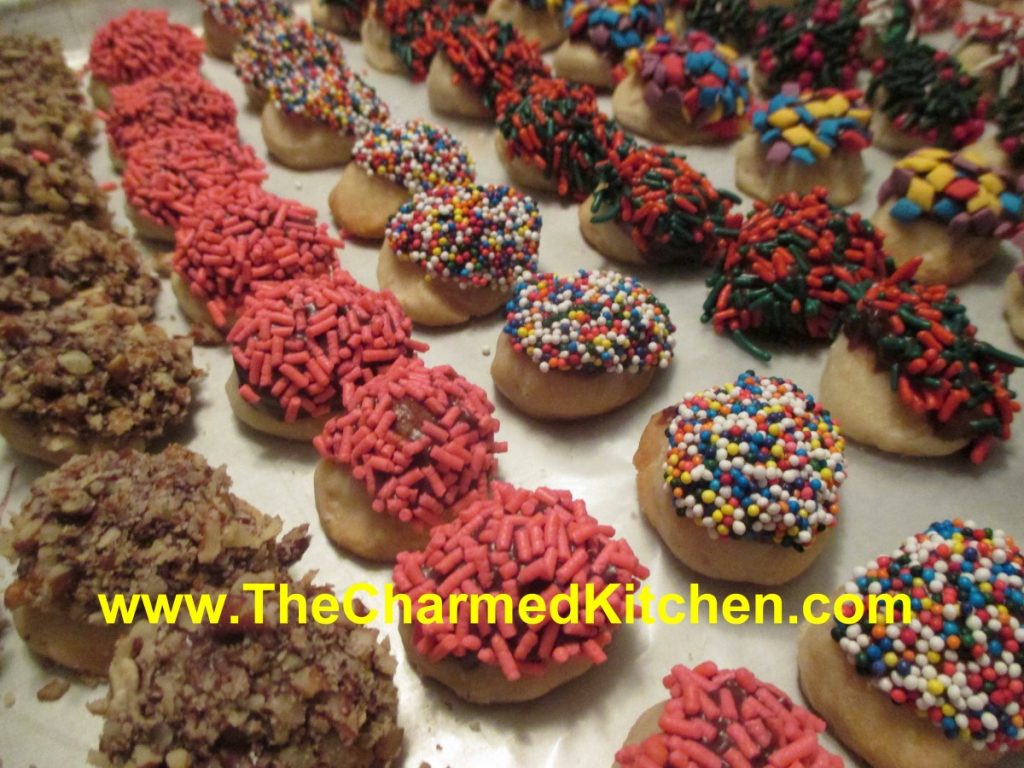
These cookie-candies are one of them. They get their name because, once decorated, they look like little pieces of candy.
Under the sprinkles are rich and tasty oatmeal shortbread cookies. Shortbread cookies are always a favorite of mine. I think I make half a dozen varieties of shortbread.
The dough is easy to handle. You just shape small amounts into shapes like circles, squares and ovals. They hold their shape. Like most shortbread, they bake at a lower temperature than other cookies. They also bake a bit longer. They should be a little golden on the bottom when done.
After they are baked and cooled, the cookies are dipped in melted chocolate and then in assorted toppings. You can dip them in sprinkles, finely chopped nuts or coconut. Pretty and tasty.
Cookie-Candies
1 c. butter
¾ c. powdered sugar
1 T. vanilla
2 c. flour
½ c. rolled oats
½ c. chocolate chips
¼ c. milk
finely chopped nuts
assorted sprinkles
shredded coconut
Cream together butter, sugar and vanilla. Stir in flour and oats. Shape teaspoonfuls of the dough into different shapes like rounds, ovals, cones cubes etc. Try to make them look like little candies. They will hold their shape very well while baking. Bake in a 325- degree oven for 20-25 minutes on an ungreased baking sheet. Cool. In microwave safe dish combine chocolate and milk and melt. Dip tops of cookies in chocolate mixture and then in one of the toppings you have. Chocolate topping will harden up after a while. Makes about 4 dozen.


