Dining on Dandelions

It’s funny when you think about it. People spend tons of money to eradicate dandelions from their lawns, but will go to an upscale restaurant and pay good money for a salad with mixed greens including dandelions. Dandelions were not always considered a weed. In fact, immigrants brought the seeds to America as a vegetable.
While the greens can be bitter, they can also be tamed when paired with certain ingredients. Combining dandelions with tomatoes, vinegar, cheese or other dairy products, and bread or cereal products will make them less bitter when eaten.
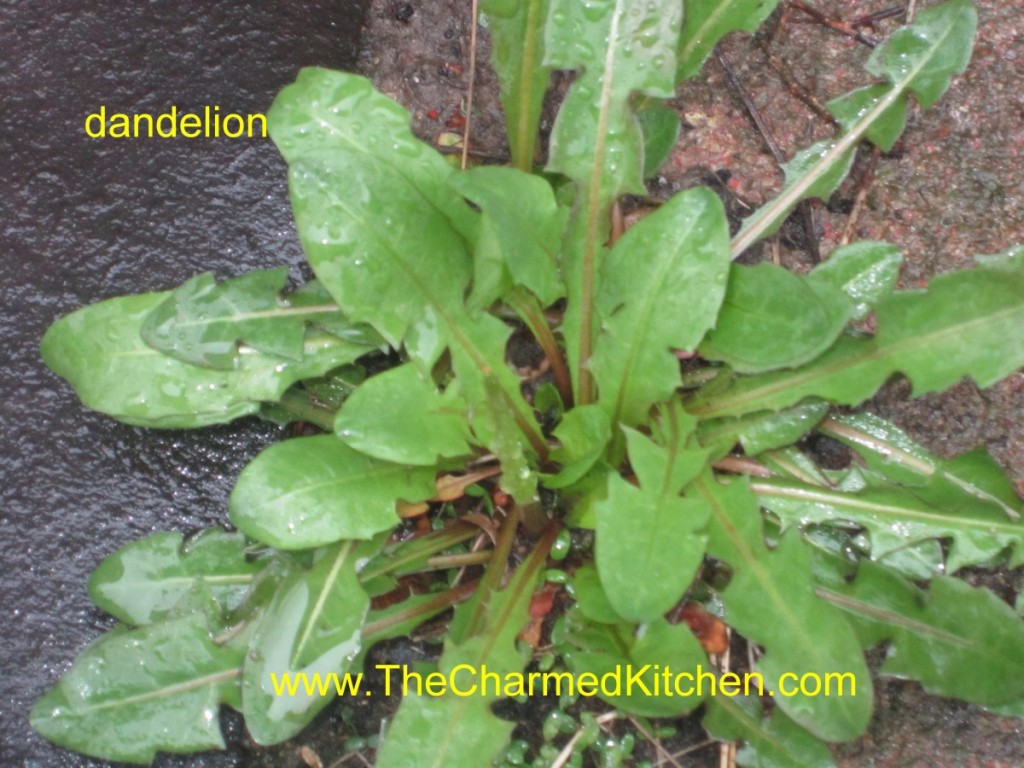
Dandelions are packed with nutrients, and if you don’t spray your yard with herbicides, you can likely find them under your own feet. Free, tasty and nutritious. Sounds like a win all around.
The plant is pretty much edible from top to bottom. The leaves for salads, soups and other dishes. The flowers are used for wine, jelly and the “burger” recipe at the bottom of this page. I recently baked dandelion flowers into muffins. The roots are roasted and used as a substitute for coffee. If you haven’t eaten dandelions before my only question is, what are you waiting for?
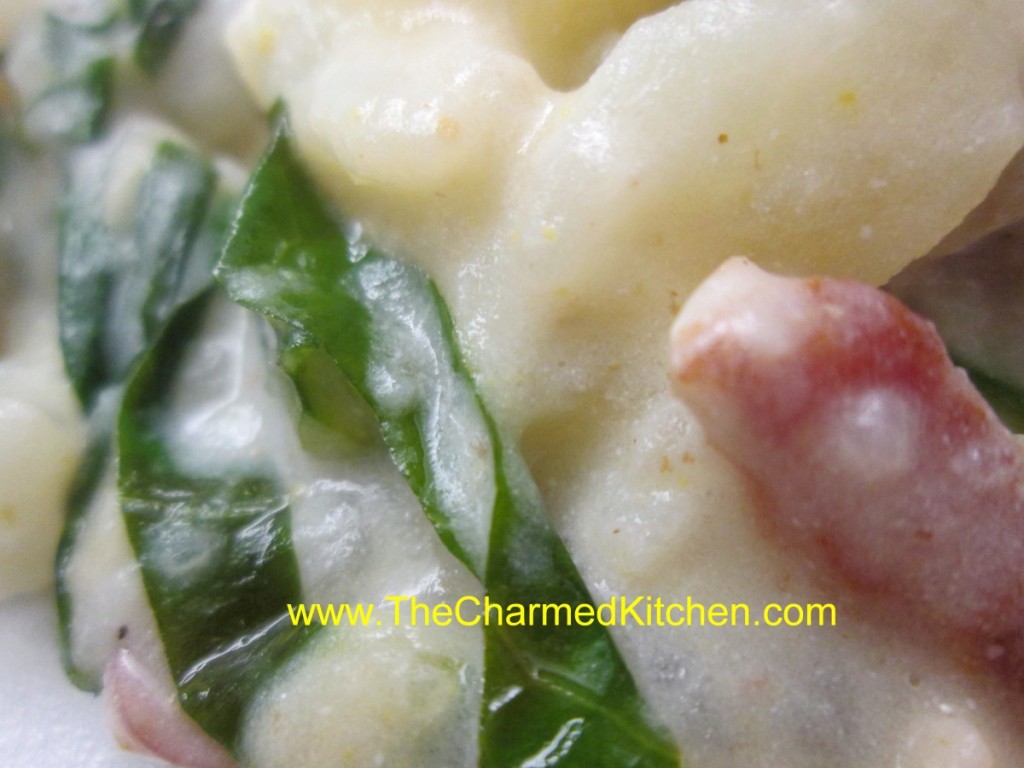
A classic dish using dandelions is dandelion gravy. Some versions use bacon, others not. This one uses bacon, sour cream and is served with boiled potatoes.
Dandelion Gravy
4 strips bacon
3 T. flour
1 c. water
1 lb. dandelion greens, washed and chopped
½ c. sour cream
1 T. sugar
1 T. vinegar
Salt and pepper to taste
Hot boiled or baked potatoes
Fresh chopped parsley, optional
Chop bacon and cook in skillet until crisp. Leave bacon in the pan. Remove all but 3 tablespoons of the bacon fat and stir in the flour until smooth. Add water and dandelion greens and cook over medium heat until greens are tender- about 5- 10 minutes. Add more water if mixture is too thick. Turn off heat. Combine sour cream with sugar and vinegar and stir into dandelion mixture. Adjust seasonings. Spoon gravy over potatoes.
Serves 4.
Note: If you want leave out the bacon instead add 3 tablespoons of oil to skillet along with the flour.
The next 2 recipes come from Dr. Peter Gail, my mentor and dearly loved friend. I will always remember Peter when I cook with dandelions.
Dandelion Pita Pizza
Pita bread, toasted English muffin, or toasted bread
Spaghetti or pizza sauce
Fresh dandelion greens of any age, chopped fine
Grated cheese (any kind)
Cover bread with sauce, add chopped greens, top with cheese, and toast in oven until cheese
melts. For a more sophisticated treat, chopped dandelion greens may be sauteed in olive oil with
onions, mushrooms and several cloves of crushed garlic, and then spread on the pizza and topped
with cheese.
Dandy Burgers
1 cup dandelion flowers, green removed
½ cup flour, any kind
1/4 cup onions, chopped fine
½ tsp salt
½ tsp garlic powder
1/4 tsp thyme
1/4 tsp basil
1/4 tsp rosemary
1/8 tsp pepper
enough milk to make thick batter.
Peel dandelion flowers and put in 4 quart mixing bowl. Add onions and mix together. Blend
flour and seasonings together, add to the flowers and onions, and blend thoroughly. Add milk
slowly, blending it in until you have a thick batter.
Heat olive oil in frying pan to cover bottom. Form batter into golf-ball-sized balls. Place in
oil, and squash down flat to make a 2″ diameter patty. Fry till brown on both sides. Remove and
serve on small rolls as you would hamburger sliders.
This post is dedicated in loving memory of Dr. Peter Gail
100 Flower Dandelion Muffins


The curious name for this recipe comes from my own curiosity. I wondered just how many blossoms I would need to get about a cup and a half of petals. I decided to make muffins with some of the dandelions blooming in my yard. I have a lot of dandelions, and I wanted to use a really decent amount in my muffins. I started counting as I trimmed them and stopped when I had a cup and a half. It turned out to be 100 flowers. So now, if you want to make this recipe, you will know when you can stop picking!!!
If you can’t beat them, eat them. I actually am a big fan of dandelions. I have organized dandelion cook-offs and edited a dandelion cookbook. I eat the leaves, and a tea made from the roasted roots. The flowers are a wonderful ingredient in cooking, too. They are used to make dandelion wine and I enjoy adding them to fritters, pancakes and other baked goods. So here is my recipe for dandelion muffins. They are pretty tasty, tender, light and not too sweet.
100 Flower Dandelion Muffins
2 c. flour
1 T. baking powder
½ t. salt
1 egg, beaten
1½ c. half and half
1/3 c. honey
¼ c. melted butter
1 t. vanilla
1 t. orange zest
1 ½ c. dandelion petals*
Preheat oven to 375 degrees. Line 12 muffin cups with paper liners or grease them, set aside. In medium bowl, combine flour with baking powder and salt and set aside. In another bowl, combine egg with half and half, honey, butter, vanilla and orange zest. Beat by hand until well mixed. Stir in dandelion blossoms, then stir in flour mixture. Do not over mix. Stir just until flour is mixed in. Spoon batter into prepared pans, filling them about ¾ full. Bake for 20 minutes or until lightly browned on top. Great served warm with butter and honey. Makes 12.
* To prepare the dandelion blossoms you want to trim of the tough base and just use the petals in the recipe. Some of the green sepals will get mixed in, and that is OK. Measure the petals after trimming. I picked 100 flowers and ended up with about 1½ cups of petals.
Green Beans with Shallots

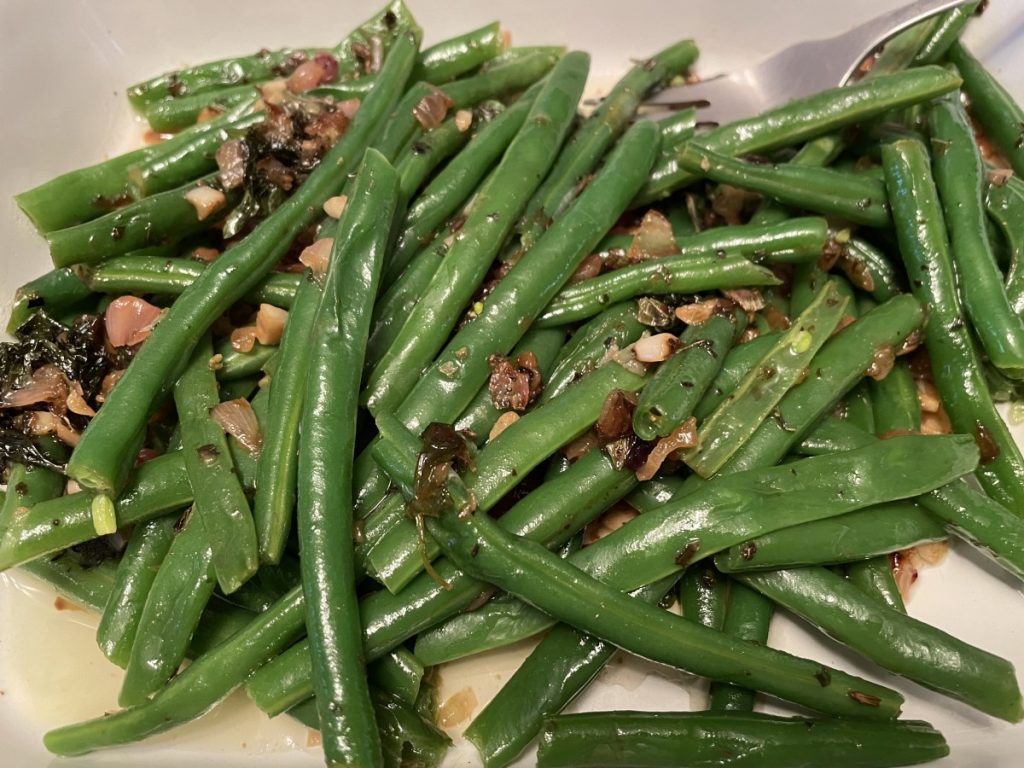
If you are looking for a nice green bean side dish- I think you will really like this one. The sauce, made from a mix of herbs, shallots and garlic make these special. This is one of my favorite recipes for fresh green beans. I hope you give it a try. We had them with dinner the other night and ate them all.
Green Beans with Shallots
1 lb. Green beans, washed and trimmed
4 T. olive oil
¾ c. minced shallots
4 cloves garlic, minced
2 T. chopped parsley
¾ t. salt
¼ t. each thyme, marjoram and basil
Boil or steam beans until tender, about 6 minutes. Drain and set aside. Meanwhile, start sauce. Heat oil in skillet and add shallots. Cook, over medium heat, until shallots start to turn golden brown. Add garlic and seasonings. Cook 5 minutes then add beans. Toss to coat beans. Serves 4-6.
Note: If you want to make these the day ahead, make the sauce and cook beans until almost tender. Combine beans and sauce and place in casserole dish. Chill until ready to use. When ready to serve, just place bean mixture in oven or microwave and cook until heated through and beans are tender.
Mushroom, Leek and Asparagus Quiche


This quiche is a nice combination of ingredients for any Spring gathering. Would be great for a brunch, too.
Mushroom, Leek and Asparagus Quiche
1 unbaked pie shell
2 T. oil or butter
1 c. sliced leek- white or light green part only
4 oz. sliced mushrooms- I used baby Portobello
8 oz. asparagus, trimmed and sliced
4 oz. shredded Swiss cheese
2 T. flour
3 eggs, beaten
¾ c. half and half
1 T. fresh dill or 1 teaspoon dried dill
Salt and pepper to taste
Hot sauce to taste
Roll out crust to fit a 9 or 10- inch tart pan. Place crust in pan and trim edges. Chill crust until ready to use. Preheat oven to 400 degrees. In skillet, heat oil or butter and cook leeks until tender. Add mushrooms and continue cooking until mushrooms are golden. Set aside. Steam asparagus for 3-4 minutes, or until just tender. Set aside. Combine flour with cheese and toss to coat. Spread cheese in prepared tart shell. Top with the mushroom and leek mixture. Season with salt and pepper. Combine the eggs with the half and half, dill and hot sauce. Pour over the mushrooms mixture in the tart shell. Add the asparagus. Place in preheated oven and bake at 400 for 30 minutes. Turn down heat to 350 and cook for 20-25 minutes longer, or until crust is golden and filling has set up. Serves 4-6.
* While I would normally use a more traditional pie crust, I ended up using the dough I normally use for my kolachy. It was leftover and seemed like a nice choice. The kolachy dough is 3 sticks of softened butter, 8 oz. of cream cheese and 3 cups of flour. Mix all ingredients until smooth and chill until ready to use. It was leftover, so hard to say how many crusts a full recipe would make. I would think you could easily get three crusts from one recipe. You can, of course, use your favorite pie crust recipe.
Almond Biscotti

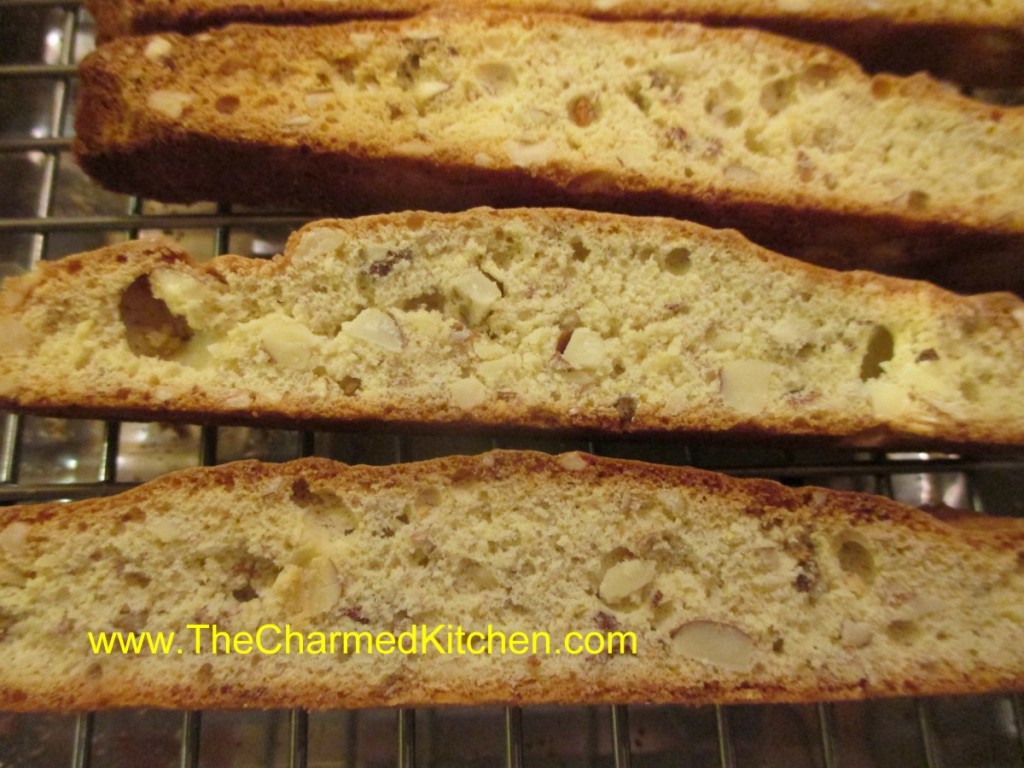
I love these biscotti. They are just the thing to dunk in a cup of hot coffee or tea. Besides chopped almonds, they are flavored with Amaretto, lemon zest and lemon juice. The almonds and lemon work really well together.
The hard texture of biscotti comes from twice baking them. First the dough is formed into a log and partially baked. Then the “log” of dough is sliced- and the slices are baked a second time. For the second baking, most recipes tell you to turn the biscotti halfway through the baking process. This is so they dry and crisp up on both sides evenly.
I have a much easier way to handle the second bake. Just place a cooling rack on your baking sheet. Then arrange the slices on top of the cooling rack. Now, when you bake the slices- the heat dries them out and crisps them up on both sides. No need for turning them over mid-bake.
Biscotti are so easy to make, I wonder why more people don’t make their own. The ones from the store are never as good.
So here is the recipe. I hope you try to make your own biscotti, if you haven’t before.
Almond Biscotti
2 c. flour
1 t. baking powder
1/4 t. salt
1 c. sugar
3 eggs
2 T. Amaretto liqueur
1 T. lemon juice
2 t. grated lemon peel
2 c. coarsely chopped almonds, about 9 oz.
Combine dry ingredients and set aside. Beat sugar and eggs together until light and lemon colored, about 3 minutes. Mix in liqueur, juice and peel. Beat in dry ingredients and stir in almonds. Mixture will be very sticky. Spray large baking sheet with non-stick coating. By spoonfuls transfer dough to baking sheet forming 2 14-inch long strips. Using floured hands shape each strip into 2 1/2 inch wide log. Bake in a 350-degree oven for about 30 minutes. Logs should be light golden and firm to touch. Transfer to cutting board and using a serrated knife, cut into 3/4-inch thick slices. Place a cooling rack on your baking sheet and arrange slices on top of the cooling rack, cut side down. Bake 11-12 minutes. Remove from oven and cool completely. Can be stored in airtight container for a week. Makes about 40.
Cooking with Ramps

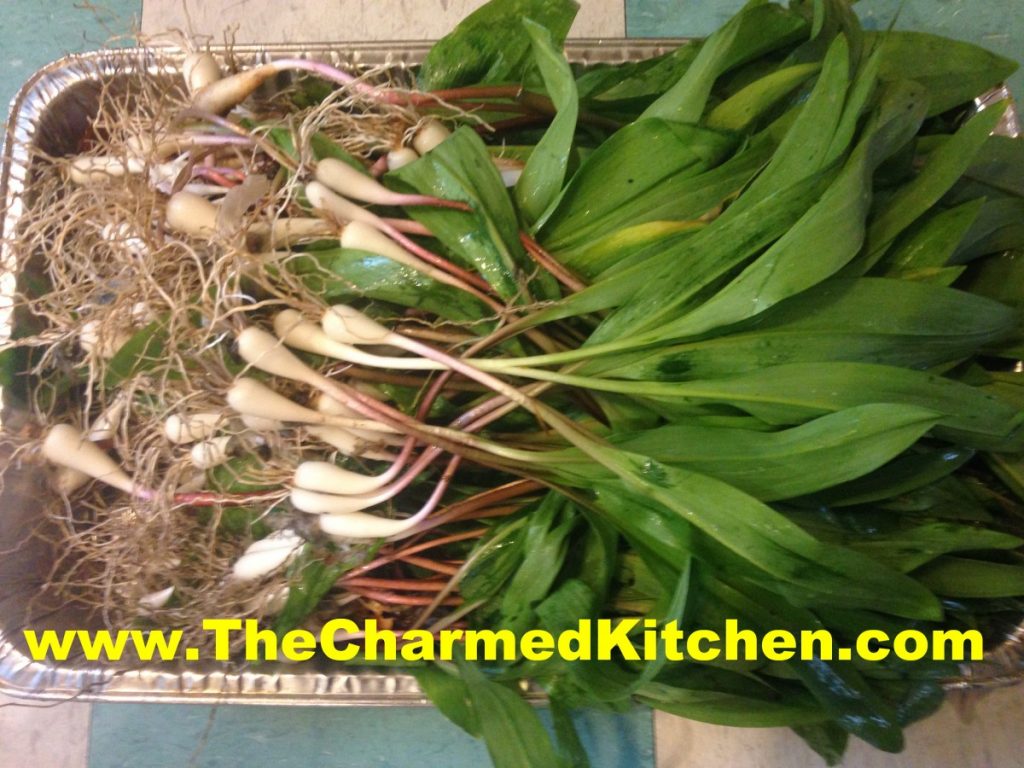
If you haven’t tried ramps, you really don’t know what you are missing. Ramps are a member of the onion/allium family. They grow wild in wooded areas and are only around for about a month, during the Spring. They are sometimes called wild leeks or wild onions. Their flavor might best be described as a garlicky leek.
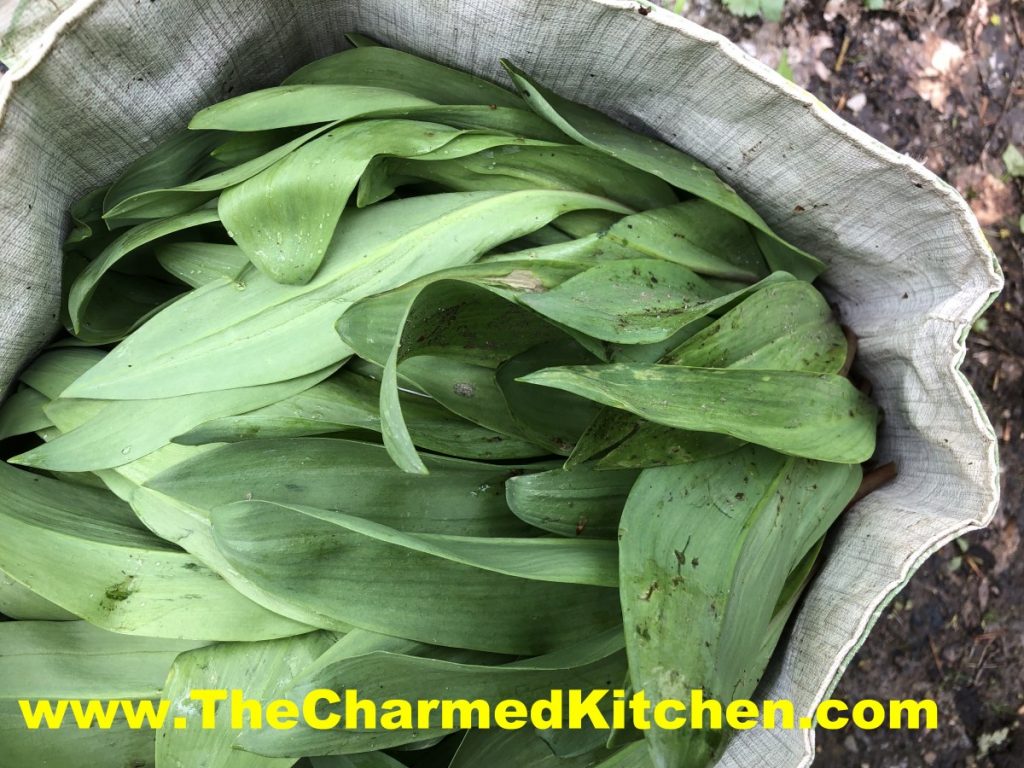
People have been foraging ramps forever. A recent increase in their popularity has put them at risk in some areas. Only pick ramps where it is legal to harvest them. Only purchase ramps from someone who you trust to harvest responsibly. While I love the bulbs, I often harvest just the leaves from them. That way the plants are not killed. I have also planted some of the harvested ramps and have had friends do the same, to start stands of them in new places.
I first had ramps when I was in college. We were on a weekend scavenger hunt for a biology class. One of my classmates came upon a stand of ramps. She explained to me what they were. We harvested a few and made soup out of them for dinner that night. Our professor, Dr. Peter Gail, was a forager and he showed us other wild edibles. This is where my love for foraging started.
So here are some of the ways I use my ramps.
Ramp Butter

Ramp butter is a wonderful way to preserve the ramps and a great way to prep them for use in all sorts of recipes. The recipe is pretty simple- ramps, mixed with softened butter, perhaps a little lemon zest and some salt, if desired. The butter is then put in small containers, or shaped into little logs and frozen. Whenever you want some ramp flavor in your cooking, you just spoon out or slice off a bit of ramp butter.
I don’t know that I have a hard and fast “recipe” for ramp butter. I can tell you how I make mine, though.
I like my ramp butter with lots of ramps in it. Ramp forward, if you will.
I mix equal parts of butter and ramps. You can add some salt to the mix, too. Use a food processor to get the mixture well mixed and to chop the ramps up. I divided the mixture into 6 or seven containers and threw all but one in my freezer. The last container is in my fridge, being used in all sorts of dishes.

Ramp Oil
The process is similar to making ramp butter, but you use oil instead of butter. I used a lemon infused olive oil and some avocado oil. I use those oils because I like the flavors, but also because they will freeze solid. For long term storage- ramp oil should be frozen. Any stored in the fridge should be used up in a week or two.
The uses are somewhat similar to ramp butter. You can use some of the ramp oil to make ramp pesto or ramp pasta. You can use it as a base for salad dressing. It is really good added to potato salads.
Prepare the ramps the same way you would for ramp butter. I placed the cleaned ramps in a food processor and added about a cup of oil to two cups of ramps. I ran the machine until the mixture was pretty smooth. Add a little more oil, if needed. The mixture should be thick, but pour-able. The flavor is intensely ramp. That is what I like. I can cut it down with other ingredients later on.
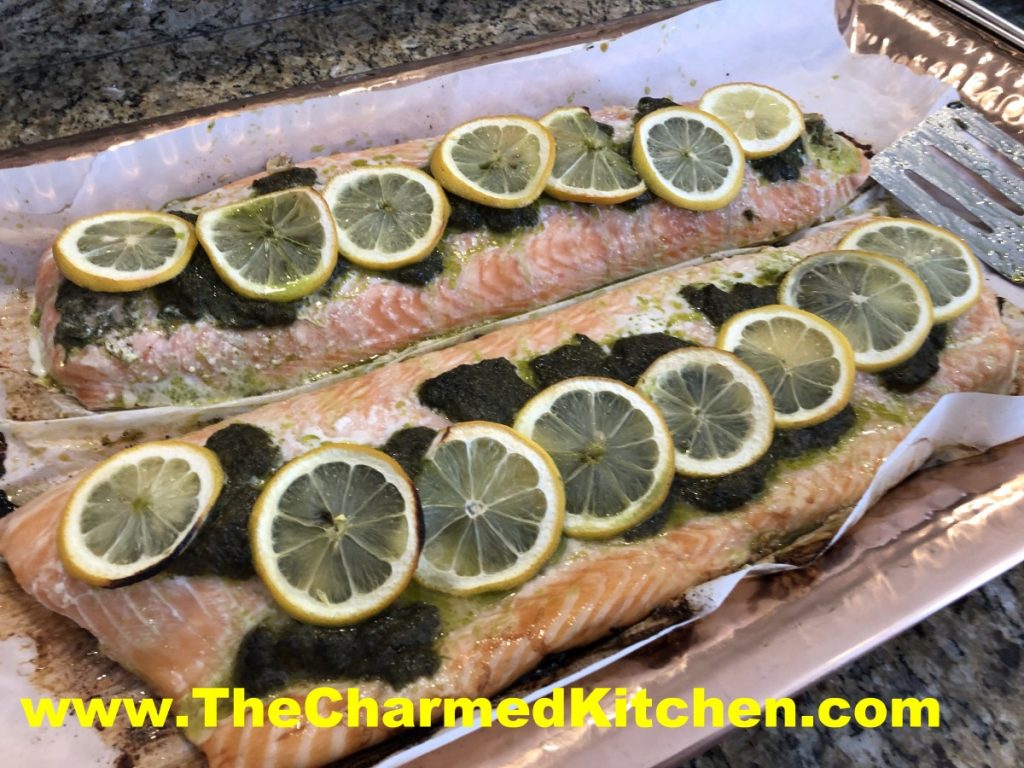
Salmon with Ramp Butter
2 salmon sides
salt
pepper
1 c. ramp butter
2 lemons, sliced thin
Place the salmon on parchment paper and season with salt and pepper. Spread ramp butter down the center of each salmon side. Use about 1/2 cup on each one. Place lemon slices on top of the ramp butter. Bake the salmon in a 375 degree oven for about 30 minutes. Rest 5 minutes before serving. Serves 16.

Pickled Ramps
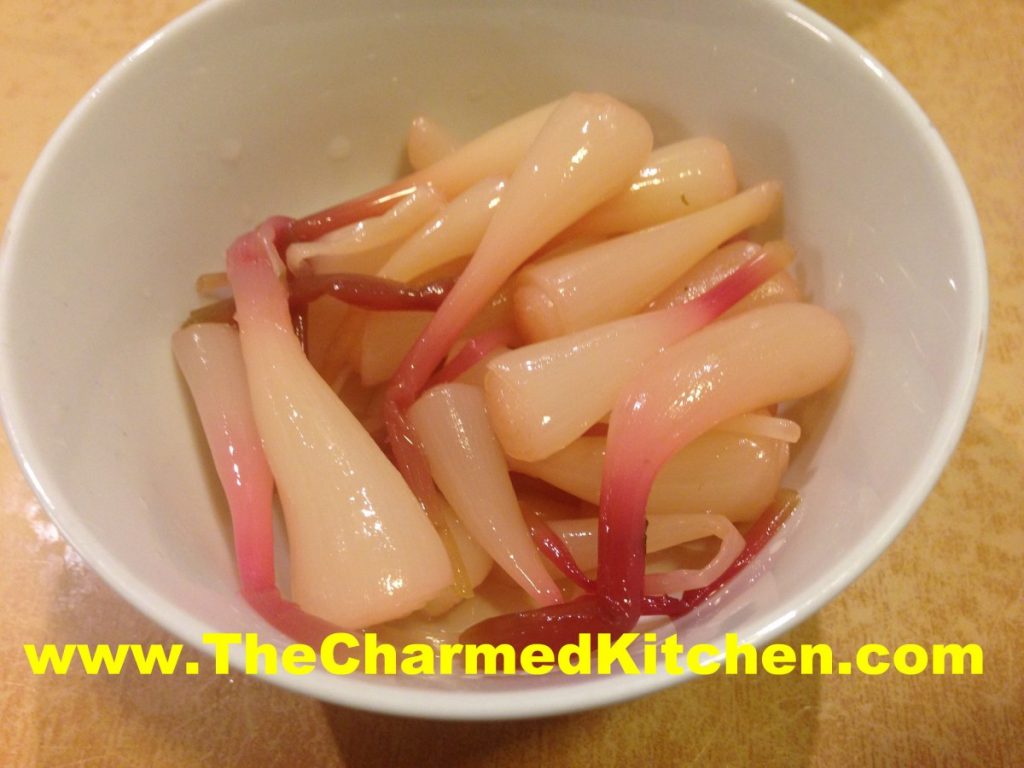
4-5 c. ramp bulbs, some stem attached, if you like
2 c. cider vinegar
1½ c. water
1 c. sugar
2 T. salt
1 T. Tuscan seasoning*
Wash ramp bulbs well and remove any roots. In pot, combine all ingredients and bring to a boil. Turn down heat to a simmer. Cover pot and simmer 10-15 minutes. Remove from heat. Pour into a heat-proof jar. Cool a little, cover and place in fridge. You can eat the ramp pickles right away, but they taste even better if you wait a few days. Will keep in the fridge for a few months.
*Tuscan Seasoning
½ c. dried basil
½ c. dried oregano
½ c. dried marjoram
3 T. dried minced onion
2 T. dried minced garlic
2 T. dried rosemary
2 T. dried parsley
1 t. crushed red pepper
Combine all. Store in a cool, dry place. Use for any number of recipes, from marinara sauce, to salad dressings.
Creamy Ramp Soup
1 lb. ramps
1/2 large sweet onion such as Vidalia or Walla Walla, thinly sliced
1/4 teaspoon white pepper
2 tablespoons oil
1/3 cup dry white wine
3 1/2 cups reduced-sodium chicken broth
1/4 cup grated Parmigiano-Reggiano
2 tablespoons unsalted butter
Garnish:extra-virgin olive oil
Trim roots from ramps and slip off outer skins if loose. Cut green tops from ramps and coarsely chop enough greens to measure 3 cups (reserve remainder for another use). Thinly slice ramp bulbs, including pink stems. Cook ramp bulbs, onion, white pepper, and 1/2 teaspoon salt in oil in a large heavy saucepan over medium heat, stirring occasionally, until softened, about 10 minutes. Add wine, then boil over high heat, stirring occasionally, until evaporated completely. Add broth and simmer, partially covered, stirring occasionally, until onions and ramps are very soft, about 20 minutes. Stir in ramp greens and boil 1 minute.Working in batches, purée soup in a blender until very smooth, about 1 minute per batch (use caution when blending hot liquids), then strain through a fine-mesh sieve into a large heatproof bowl, pressing hard on and then discarding solids. Return soup to cleaned pot and bring just to a boil. Whisk in cheese and butter until smooth. Season with salt. Serves 4.
Vanilla Cupcakes with White Chocolate Frosting


I must admit to being a sucker for the classics. This cupcake is certainly a classic.
I normally top them with a vanilla buttercream, but decided to make a white chocolate frosting instead. Yes, I know white “chocolate” is not really chocolate. But when I say white chocolate, everyone knows what I am talking about.
I used a white chocolate bar- and broke it into pieces, before melting, but you could you use white chocolate chips instead. The frosting has a really nice flavor and fluffy texture, without being too sweet. These cupcakes are always a hit.
Classic White (Vanilla) Cupcakes
1 cup sugar
1/2 cup butter
2 eggs
2 teaspoons vanilla extract
1 1/2 cups all-purpose flour
1 3/4 teaspoons baking powder
1/2 cup milk
Preheat oven to 350 degrees. Line a muffin pan with 12paper liners. In a medium bowl, cream together the sugar and butter. Beat in the eggs, one at a time, then stir in the vanilla. Combine flour and baking powder, add to the creamed mixture and mix well. Finally stir in the milk until batter is smooth. Pour or spoon batter into the prepared pan. Bake 20 to 25 minutes. Cupcakes are done when they springs back to the touch. Makes 12.
White Chocolate Frosting
6 oz. white chocolate – if using bars, chop before melting
1 stick (4 oz.) cold butter, cut into cubes
1-2 c. powdered sugar
1 t. vanilla
Melt chocolate. I just melt mine in a microwave safe dish, but you can use a double boiler. Let chocolate cool down a little. Beat butter into the melted chocolate. Beat until smooth and then beat in the powdered sugar and vanilla. Whip until frosting is smooth and fluffy. I normally beat for 5 minutes or longer. If too thick, add a few drops of water or milk.
Spelt Bread


There is just something about homemade bread. I love the way the house smells when bread is baking. I decided to bake some spelt bread last night. It is one of my favorites.
I always have at least a few people who ask me what spelt is.
Spelt flour is a close relative to wheat. I love cooking with it because it is so easy to work with. It doesn’t require much, if any, kneading when you make yeast bread out of it.
Spelt has a texture much closer to white flour in baking other things, like muffins or biscuits. It does contain gluten, so it’s not an answer for people with gluten issues.
For those who do cook with wheat, spelt provides whole grain nutrition in a delicate, less heavy package. The bread I baked was so easy to make and gives me all the taste and fiber of whole wheat bread with less work.
Spelt flour is still tricky to find. Some larger grocery stores carry it, but you might have to go to specialty markets. Bob’s Red Mill is my usual source, so if your store carries their products, you should be able to locate it.
Spelt Bread
3 ¼ c. spelt flour
1 pkt. Active dry yeast
1 c. water
1/3 c. honey
¼ c. oil
1 t. salt
1 egg
Place 2 c. flour, yeast and salt in a medium bowl. Heat together water, honey and oil until warm (120-130 degrees) Add water mixture to spelt mixture and beat on low speed of electric mixer for 30 seconds, or until moistened. Add egg and beat on high 3 minutes. Stir in enough spelt to make a soft dough. Cover bowl with towel and allow to rise until doubled, about 1 hour. Grease a 9×5 inch loaf pan and use a rubber scraper to transfer dough into prepared pan. Cover and let rise until doubled, another hour. Bake in a pre-heated 375 degree oven for 25-30 minutes. Cover top with foil during last 10 minutes of baking. Bread is done when it sounds hollow when lightly tapped. Remove from pan and cool on wire rack. Makes 1 loaf.
Sauerbraten

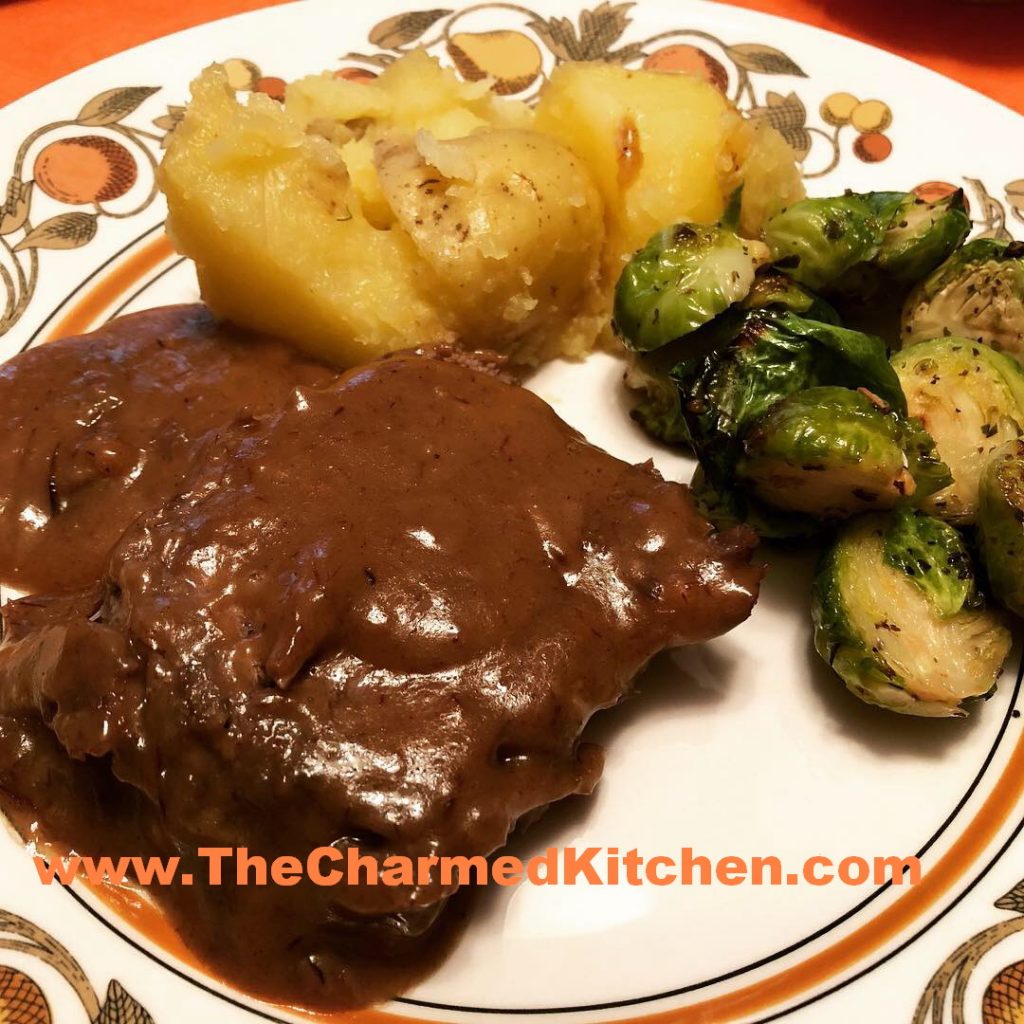
Sauerbraten is not a dish that you throw together on the spur of the moment. The first time I had sauerbraten was at my sister Cindy’s home. I was instantly in love with it. The flavors were so complex. I could not get enough of that wonderful gravy. We had it for Easter this year.
The secret to sauerbraten is the long marinading process. A beef roast marinades in a mix of vinegar, wine, veggies and spices for 3-5 days. In that time, the meat becomes very tender and it picks up all those flavors. It’s almost like pickling the meat. While traditionally made with beef, you could use a pork roast.
When ready to cook, the meat is dredged in flour, browned, then simmered in water with the veggies from the marinade, until tender. All those ingredients in the marinade flavor the cooking water, creating a broth. The broth is tart. To offset the sourness of the vinegar, a gravy is made with the broth that contains cookies. Yes, cookies. Gingersnaps, to be exact.
It sounds odd, but it really is wonderful. The ginger, cinnamon and cloves in the cookies add such a wonderful flavor to the gravy. You can make your own gingersnaps or use store bought.
Sauerbraten
Marinade:
1 c. red wine vinegar
½ c. cider vinegar
½ c. red wine
1 large onion, sliced
2 carrots, peeled and sliced
top from 1 bunch celery
few sprigs of fresh parsley or 1 T. dried
1 bay leaf
4 whole cloves
3 whole allspice
½ t. whole peppercorns
1 t. salt
4- 6 lb. lean boneless chuck roast – I actually used a bottom round roast
additional flour for dredging
⅓ c. oil
2 c. warm water
¼ c. flour
I T. sugar
1 c. crushed gingersnaps – or a few more
water
salt and pepper to taste
Combine marinade ingredients in a large glass or ceramic bowl. Add meat and cover. Refrigerate 3-5 days. Tum meat at least once a day. Remove meat from marinade and pat dry. Strain out the vegetables and set aside. Discard marinade. Dredge meat in flour. Heat oil in Dutch oven and brown meat in pan. Add saved veggies, warm water and simmer, covered, for 1- 2 hours or until fork tender. Start testing meat for doneness after the first hour. Remove meat to platter and keep warm while sauce is being prepared.
For sauce, strain the pan juices and discard solids. Skim off any fat. Return the juices to the Dutch oven and keep hot. In small bowl combine the ¼ c. flour, sugar, and gingersnaps. Stir in cold water until smooth paste is formed. Whisk this paste into the hot liquid in the pan and simmer, stirring until thickened. If it’s not thick enough, make a little more paste with flour and water. Serve meat sliced thin, with sauce on the side, and hot cooked noodles, potatoes, potato dumplings, or spaetzle.
Serves 8 – 12.
Pineapple Cake Roll


This cake roll makes a great dessert for almost any occasion. The tender sponge cake is filled with a mixture of sweetened pineapple, chopped nuts and coconut. Then it is topped with more pineapple and toasted coconut.
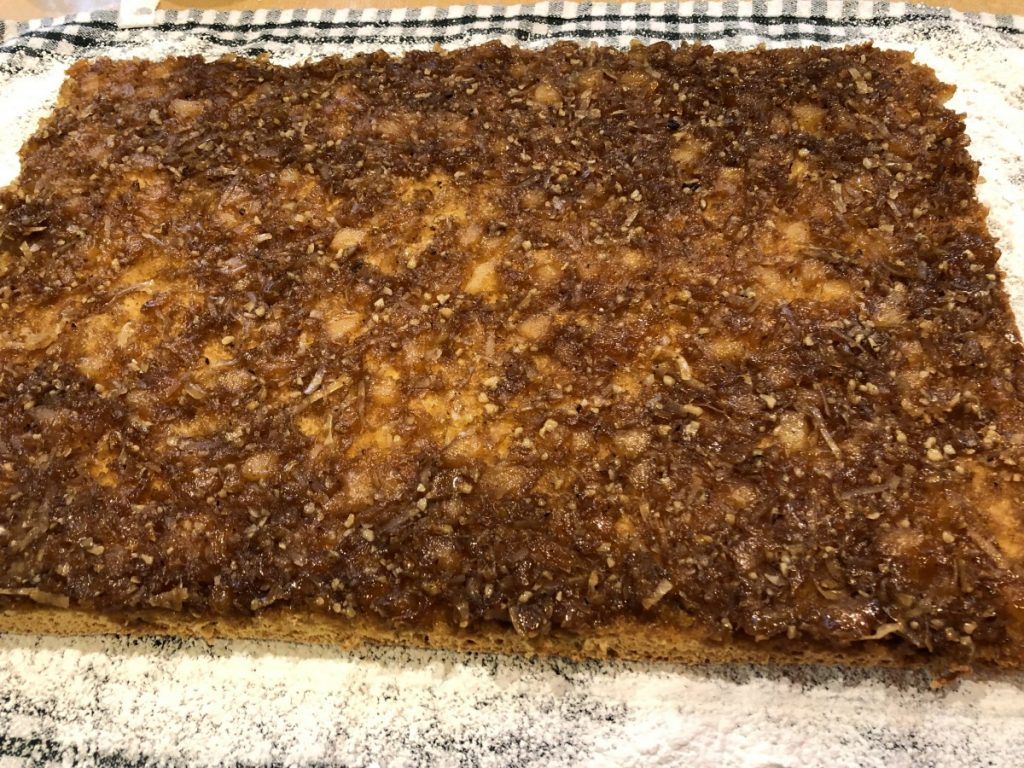
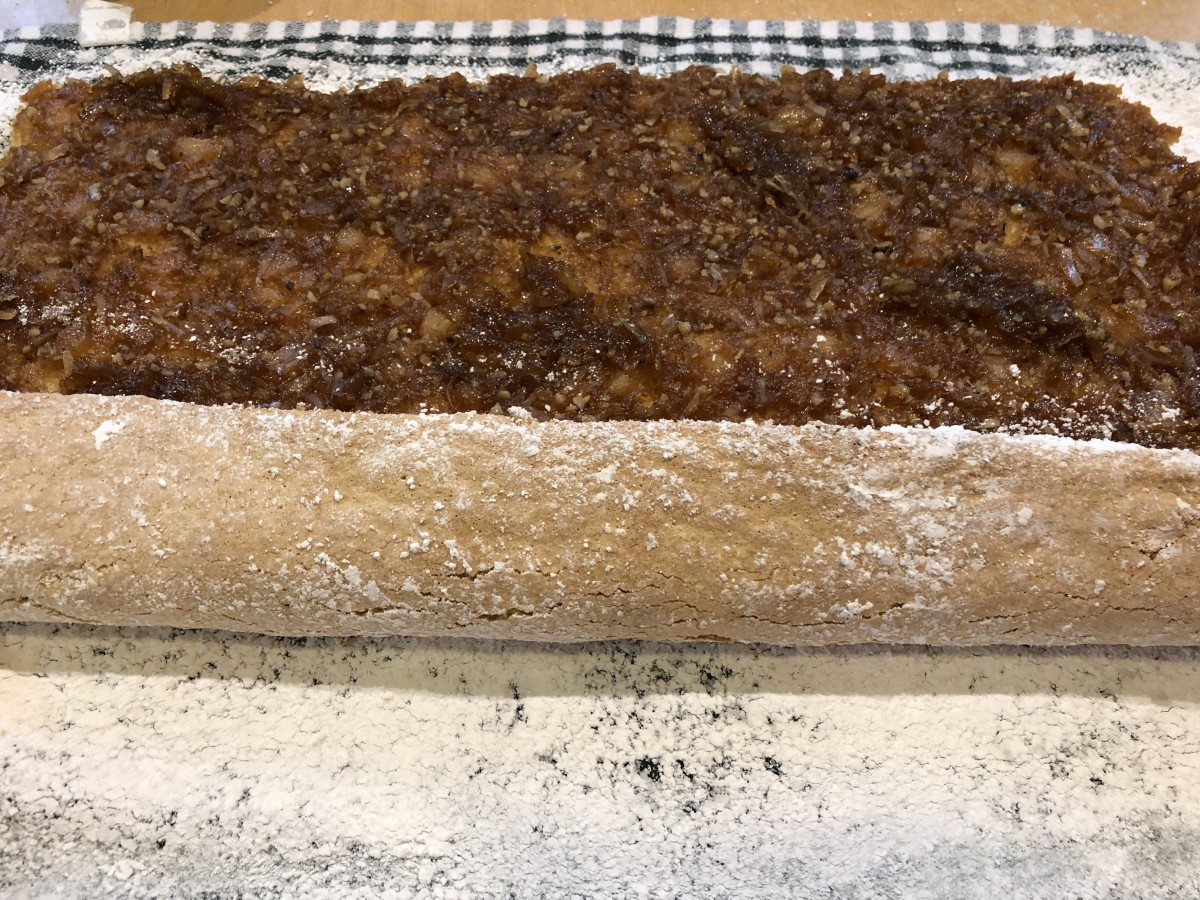
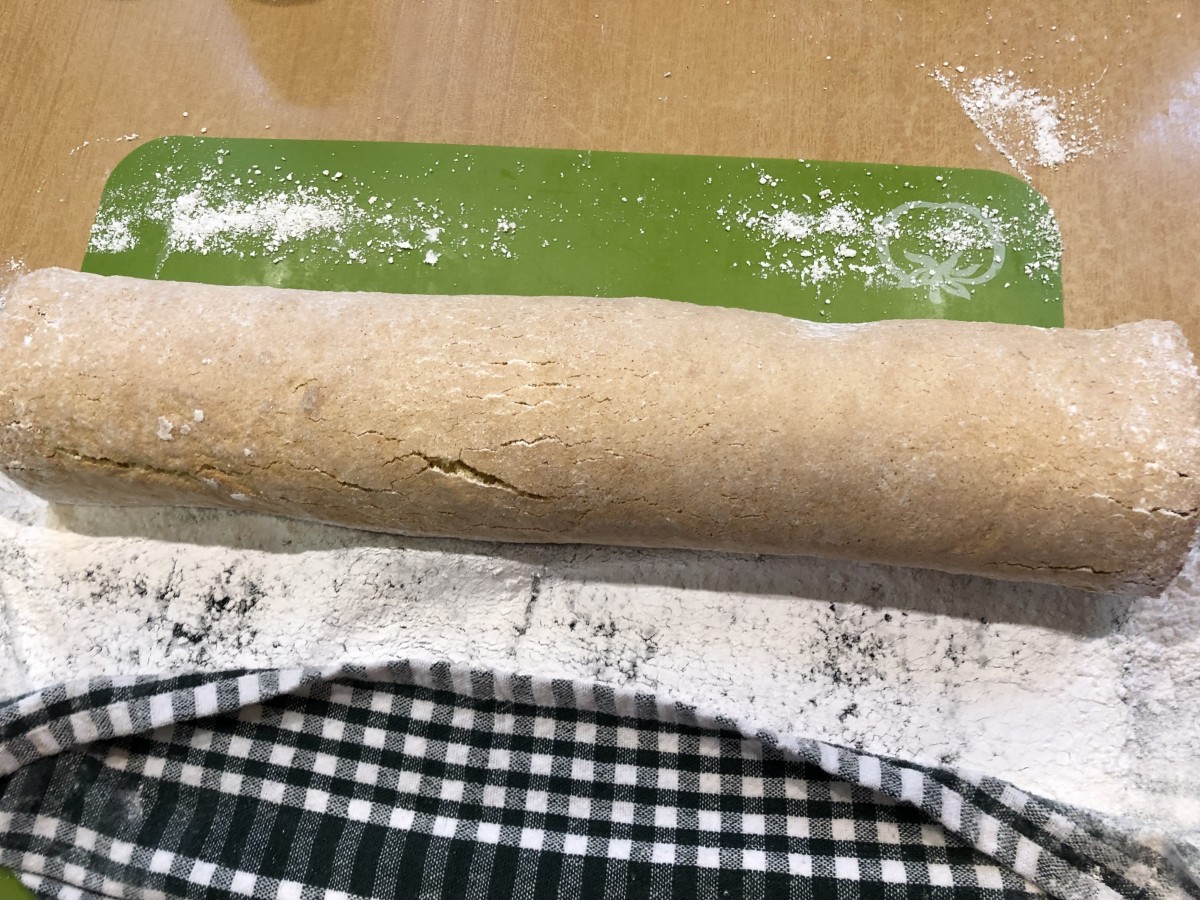
It looks difficult, but it is really easy to make. Most cake rolls are baked, then rolled, cooled and filled. In this recipe, the filling is baked in the roll. The pineapple mixture is placed in the baking pan, then the batter is spread on top, before baking. Once baked, the cake is rolled up and cooled. Once cooled, it is topped with the pineapple sauce and toasted coconut. You can make the cake a day or two ahead, wrap and pop in the fridge, then just add the toppings before serving. It also freezes well.
Here is the recipe. Hope you will give this one a try. I think you will love it as much as I do.
Pineapple Cake Roll
1 can (20 ounces) crushed pineapple, unsweetened
1 cup packed light brown sugar
1/3 cup flaked coconut
1/4 cup chopped nuts
1 1/2 teaspoons vanilla extract
3/4 teaspoon ground cinnamon
1/4 teaspoon ground cloves
4 large eggs
2/3 cup sugar
3/4 cup all-purpose flour
1 teaspoon double-acting baking powder
1/2 teaspoon salt
Powdered sugar
Topping, see below
Drain pineapple well; reserve 3/4 cup juice and 1/2 cup crushed pineapple for topping. Combine in a large mixing bowl the drained pineapple, brown sugar, coconut, nuts (your choice), 1 teaspoon vanilla extract, cinnamon and cloves. Mix well and spread over the bottom of an ungreased 15 × 10 × 1-inch jelly-roll pan. Set aside. Place egg whites in a bowl and beat until soft peaks form. Gradually add 1/3 cup sugar and beat until stiff but not dry. Set aside. In a separate bowl, beat egg yolks until thick and pale yellow; gradually beat in remaining 1/3 cup sugar and 1/2 teaspoon vanilla. Gently fold egg whites into egg yolk mixture. Sift flour with baking powder and salt. Gently fold flour mixture into egg mixture. Spread batter evenly over pineapple mixture in pan. Bake in preheated 375° oven for 20-25 minutes. Carefully loosen cake around edges. Invert cake onto kitchen towel which has been sprinkled with powdered sugar. Let stand 3-4 minutes then roll up, jelly-roll fashion. Cool cake then garnish with pineapple topping.
Topping: Combine 3/4 cup reserved pineapple juice, 2 tablespoons sugar and 1 tablespoon cornstarch in saucepan; blend well. Cook until thick and clear. Stir in reserved pineapple; cool. Spoon on cake roll and sprinkle with toasted coconut.
To toast coconut- place about a cup of coconut on a baking sheet . Bake in a 350 degree oven for about 5-8 minutes, or until coconut turns a nice golden color. Watch carefully, so you don’t burn it. I like to use large flake coconut.