Reuben Bread

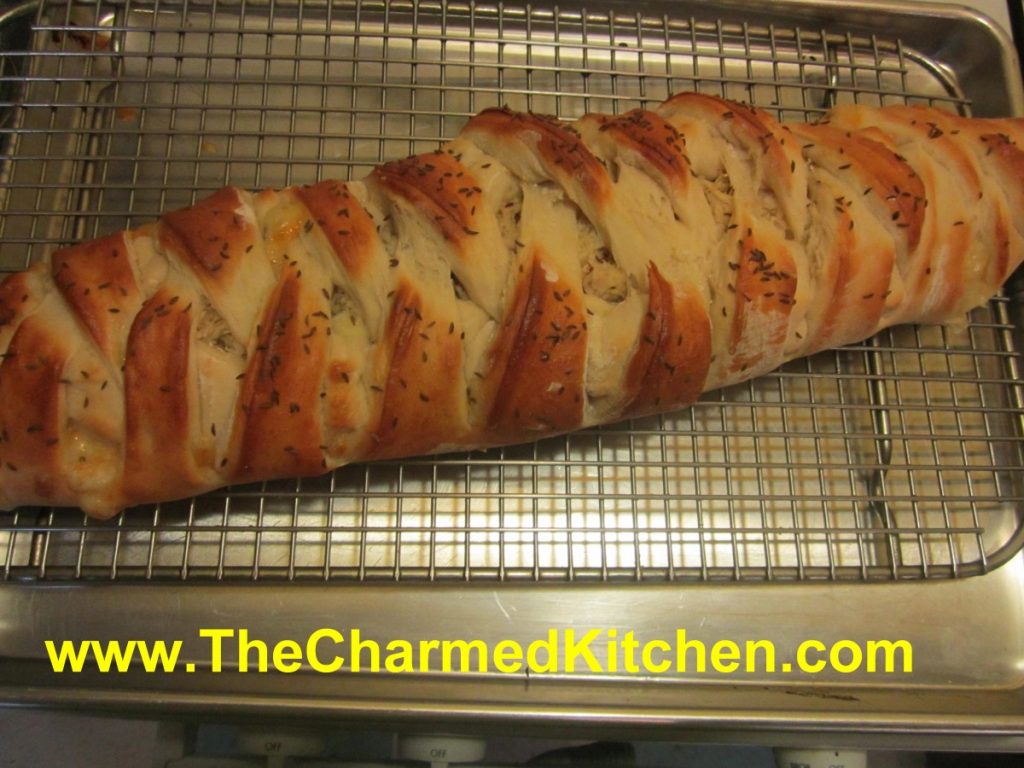
If you are looking for a twist on a Reuben sandwich try baking all the traditional ingredients into a loaf of bread. By using quick rising yeast, this bread can be ready to eat in right around an hour. It tastes amazing, and looks pretty impressive, too. Easier than you think, it will look like you spent all day making it. Plus, you can switch out the ingredients in all sorts of fun combinations. In class the other night we used ham and Gouda instead of the corned beef and Swiss for a cheesy ham bread. Added a grainy mustard to the bread, too. Came out so nice!
This would make a great bread to serve for your Super Bowl party. Fun for anytime. really.
Reuben Bread
3 ¼ c. all purpose or bread flour, you can add a little rye flour, too
1 T. sugar
1 t. salt
1 package quick-rising yeast, or a scant tablespoon of yeast in bulk
1 c. hot water
1 T. oil
¼ c. thousand island dressing*
6-8 oz. thin sliced corned beef – or thin sliced smoked turkey for a Rachel
4 oz. sliced Swiss cheese
1 c. sauerkraut, rinsed and squeezed dry
1 egg white, beaten
Caraway seeds
Set aside 1 cup of the flour. Combine remaining flour with the other dry ingredients in a medium bowl. Stir in water and oil and gradually stir in enough flour to make a soft dough. Turn onto lightly floured surface and knead until dough is smooth and elastic, about 5 minutes. Roll dough into a rectangle about 16 x 8. Spread dressing down center middle of dough. Top with meat slices, cheese and sauerkraut. Cut one-inch wide strips of dough from filling to edge on both sides. It will sort of look like fringe. Alternating sides, fold strips up and over the filling at an angle. Carefully lift loaf onto greased baking sheet and place at an angle. Cover with a towel and place sheet on top of a roasting pan half-filled with simmering water for 15 minutes. Brush with egg white and top with seeds. Bake in a preheated 400-degree for 20-25 minutes or until golden brown. Cool slightly before slicing. Serve warm and refrigerate leftovers.
* You can make your own Thousand Island Dressing by combining equal parts of ketchup, mayo and sweet pickle relish.
Note: The variations for this bread are almost endless. Some favorite combinations are ham and Swiss with mustard, roast beef and cheddar, chicken, broccoli and cheese, Spinach with ricotta or feta and onions, pizza, assorted fillings. You get the idea. Use your imagination and have fun. Just be careful not to overfill, or the bread will be hard to move, use fillings that aren’t too runny and always use cold fillings.
If you want to use regular yeast use warm, rather than hot water. Also, don’t let dough rise over boiling water. After kneading cover dough and let rise 45 minutes. Punch down and assemble as in original recipe. Cover with a towel and let rise until dough looks puffy, about 40 minutes. Bake as directed above. These breads can also be frozen.
Oatmeal Bread

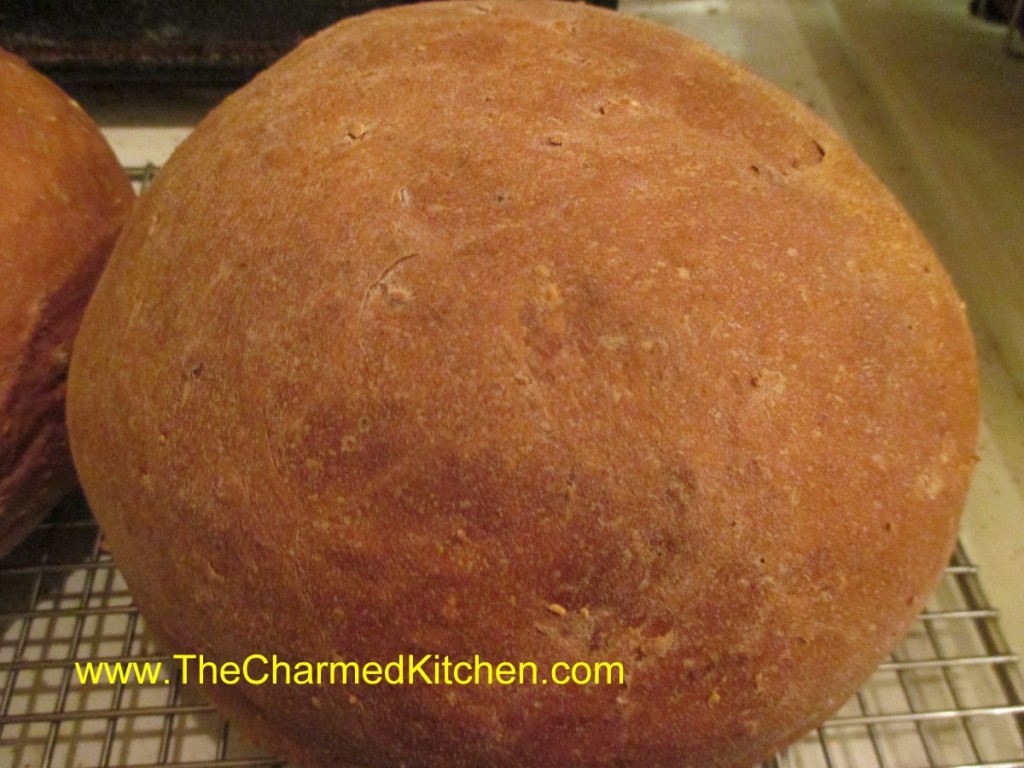
This oatmeal bread is one of my favorites. With the addition of molasses, the bread has an earthy sweetness that works well with the oatmeal. It makes a great sandwich bread and I love it for French toast.
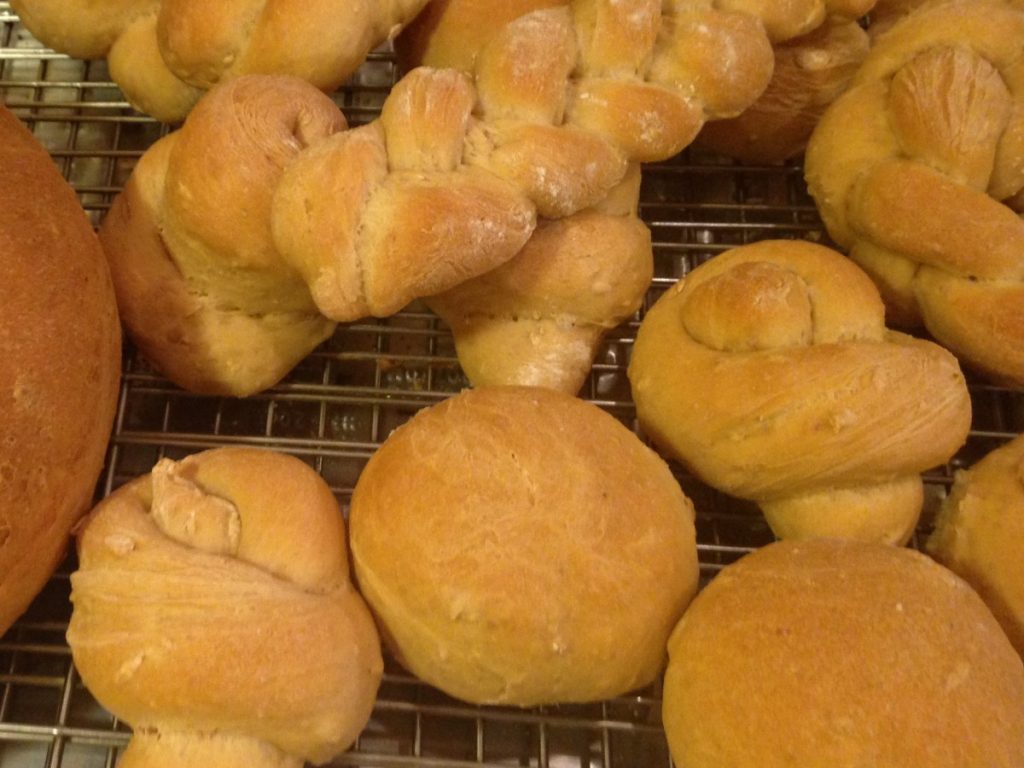
This is a very versatile recipe. You can make 2 round loaves, or bake it in 2 loaf pans (8×4) or even make dinner rolls out of it. I sometimes make hamburger buns out of it.
When making dinner rolls, instead of loaves, reduce baking time to about 15 minutes- but check on rolls at 12 minutes. Baking temperature remains the same.
There is something about the smell of baking bread that always makes me remember my childhood and going to the movies. I know that sounds odd, but there is an explanation. When I was a kid there was a neighborhood movie theater. It was close by, and we would walk there to see movies. On the walk home we walked past a local bakery. Late at night they would be baking bread and other goodies for the next day. The air would be filled with the aroma of baking bread.
Oatmeal Bread
5-5 ½ c. flour
1 package active dry yeast – or 2 1/2 teaspoons yeast
1 ½ t. salt
1 1/3 c. water
¼ c. milk
¼ c. molasses
¼ c. butter
1 egg
1 c. old fashioned rolled oats
In large bowl mix 1 cup of the flour with yeast and salt. In small pan heat together next 4 ingredients until warm. Pour into bowl with flour mixture and beat 2 minutes. Stir in 1 cup additional flour and egg and beat 2 minutes longer. Stir in oatmeal and 1 cup more flour and stir, adding enough flour to form soft dough. Turn onto lightly floured surface and knead, adding flour as needed until dough is smooth and elastic. Place dough on a greased bowl, turning to grease top and cover, allowing to rise in warm place until doubled in bulk, about 1 hour.
Grease a large baking sheet and set aside. Punch dough down and divide in half. Shape each half into a ball and place on prepared sheet. Cover with towel and allow to rise until doubled, about 1 hour. Bake in a preheated 375 degree oven for 30 minutes or until done. Loaves are done when they sound hollow when tapped lightly. Makes 2 loaves.
This versatile dough can also be shaped into loaves and places in 8×4-inch greased loaf pans. Baking time will remain the same. Dough can also be divided into 24 equal pieces and shaped into dinner rolls. Bake rolls at 375 for 15 minutes.
Homemade Pumpernickel Bread

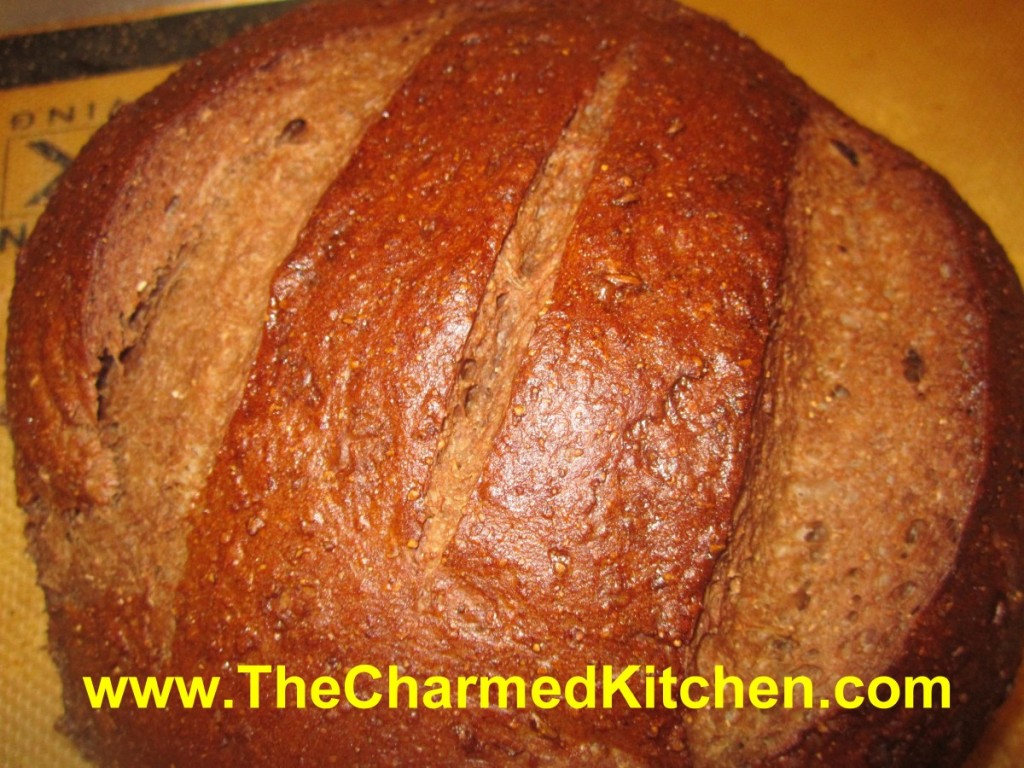
I bake a lot of bread. Homemade pumpernickel is one of my favorites. Plus, there is that wonderful aroma as it bakes.
The dark color comes from a mixture of rye flour, strong coffee, cocoa powder and molasses. These ingredients give this bread a flavor and texture I adore. We had this bread in class last night and the students really enjoyed it.
It’s hard for me to find a store-bought Pumpernickel bread that comes close to this one. Some store bakeries rely on caramel coloring for the color in the bread. For real flavor you need the real ingredients. It is worth the time to make your own.
Pumpernickel Bread
2 Packages active dry yeast
½ c. warm water
2 c. lukewarm strong coffee
¼ c. each molasses and unsweetened cocoa
2 T. Caraway seeds
2 t. salt
5-6 c. all-purpose flour or bread flour, if you prefer
2 c. rye flour
Cornmeal
1 egg white, slightly beaten
In large bowl dissolve yeast in warm water. Stir in coffee, molasses, cocoa, seeds, salt and 3 cups of flour. Beat with wooden spoon about 2 minutes. Stir in rye flour and enough of the remaining regular flour to make soft dough. Turn onto floured surface and knead until dough is smooth, about 10 minutes. Place in greased bowl, turning to grease top, cover and let rest until doubled, about 1 hour. Grease large baking sheet and sprinkle with cornmeal. Set aside.
Punch down dough, divide in 2, and form into balls. Place on baking sheet and cover. Let rise until double, brush with egg whites, slash tops and bake at 375 for 35-40 minutes. Makes 2 loaves.
Spinach Puffs


I love these little spinach puffs. They are tender balls of dough, filled with spinach and cheeses. They can be served on their own, or with honey mustard or a marinara sauce for dipping.
I love recipes that taste great, but don’t take too much time to make- or can be made ahead. These Spinach Puffs do both. The dough can be mixed ahead and then just bake a few when you want them. You can also bake up a batch, then freeze them. Take out as many as you need and reheat in no time.
These tend to brown on the bottom very quickly. Bake them in the upper half of the oven.
Spinach Puffs
1 (10oz.) package frozen spinach, cooked and drained well
2 T. dried minced onion
2 eggs
½ c. shredded cheddar cheese
½ c. grated Parmesan cheese
½ c. ranch dressing
2 T. oil
¼ t. garlic powder
2 c. biscuit mix (Bisquick or Jiffy Mix)
Mix all ingredients and chill several hours or overnight. Roll into 1-inch balls and place 2-inches apart on a greased baking sheet. Bake in a 350-degree oven for 10-12 minutes. Makes about 60.
Ethiopian Spiced Lamb Chops


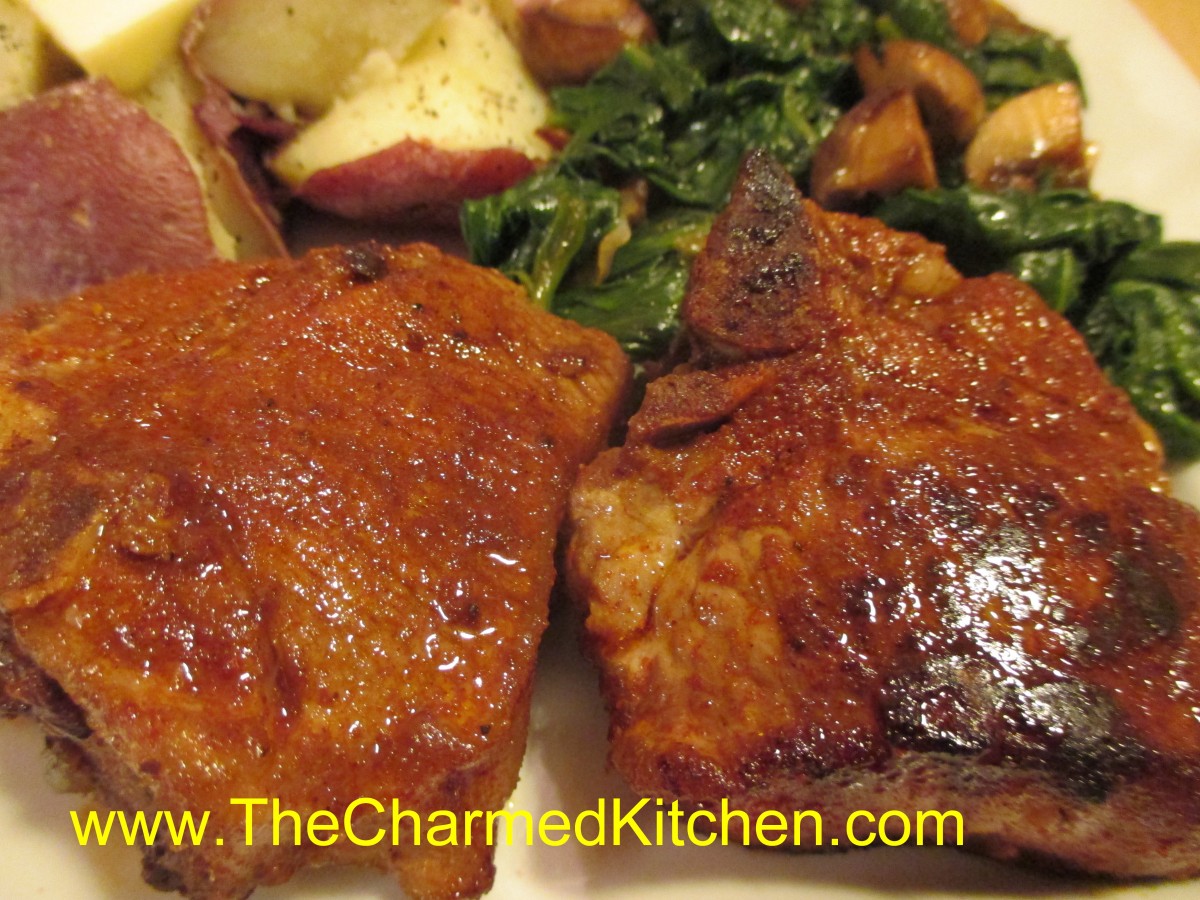
I was having a friend over for dinner and wanted to make something special. I know he really likes lamb, so I decided to make lamb chops. Since he also likes my Ethiopian seasoning blend, I decided to use them to season the lamb. They were amazing!!
I pan seared the lamb chops in a cast iron skillet, turning them to brown all all sides. They were thick chops and I wanted to cook them through, without burning the outside. So, once I browned them, I turned the heat down to let them cook more gently for a few more minutes. I cooked them about three more minutes per side. They came out great. Very tender, an even pink color throughout, with a nice brown exterior.
The Ethiopian spices complimented the lamb nicely. I’ve used this spice blend with chicken, beef and pork in the past. I can see using these spices with lamb again. They worked so well together.
So here is the recipe. Hope you enjoy it as much as we did.
Ethiopian Spiced Lamb Chops
4 lamb chops, about 3-4 oz. each
1 T. paprika
1 t. each cayenne pepper, cumin, garlic powder, salt and ginger
½ t. allspice
¼ t. cinnamon
Combine seasonings and rub all over the surface of the lamb chops. Heat a skillet until hot. Place lamb chops in skillet and brown on all sides. Turn down heat and allow chops to cook until cooked to your preference. I like lamb rare, and these were pretty thick chops. They took about three minutes per side to cook, once browned.
Orange Tea Bread

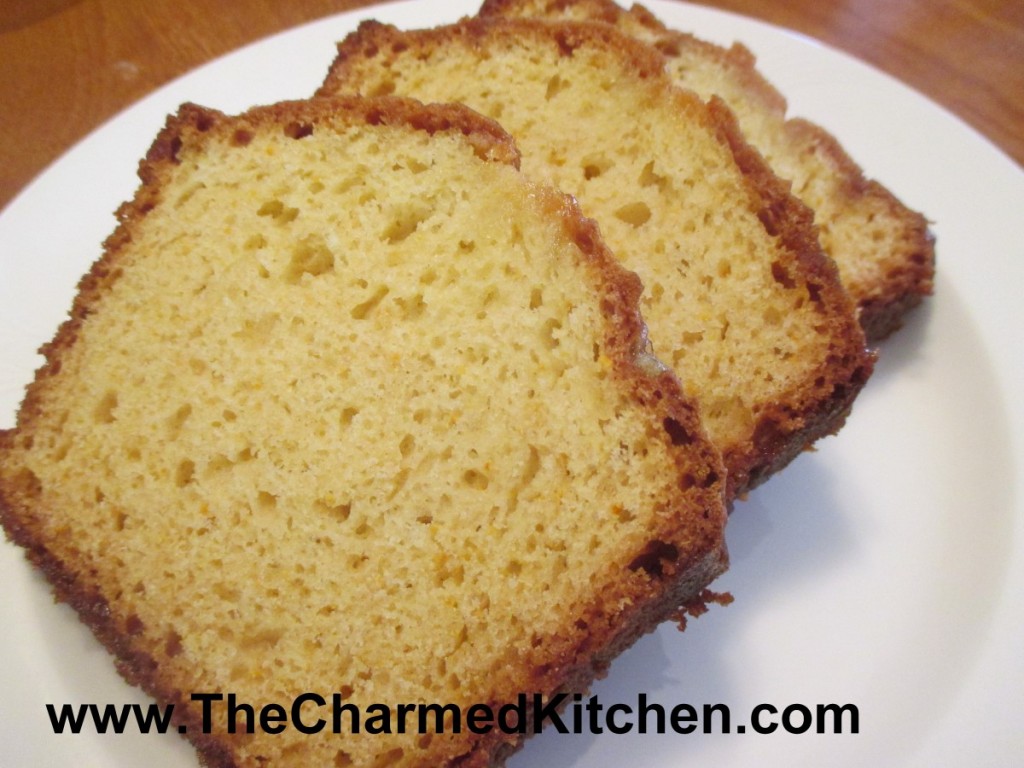
Winter is citrus season and I have been eating a lot of oranges lately. Besides eating them fresh, I also like to cook with oranges. If you are looking for a new recipe for a quick bread, I would recommend trying this one.
The bread is flavored with orange zest in the batter, then a warm orange syrup is drizzled over the bread, right out of the oven. This makes for a bread that is flavorful and moist. It can be breakfast, a brunch dish or even a dessert, when topped with ice cream or whipped cream. The recipe makes one loaf, but I often double the recipe and make two. It seems to disappear around here pretty quickly. The bread freezes well, too.
Orange Tea Bread
2 cups all-purpose flour
1-1/2 teaspoons baking powder
1 teaspoon baking soda
1/2 teaspoon salt
2/3 cup Greek yogurt or sour cream
2/3 cup sugar
2 large eggs
3 tablespoons melted unsalted butter
1 tablespoon grated orange zest
Syrup:
1/2 cup orange juice
1/4 cup sugar
Preheat oven to 350 degrees. Grease an 8×4″ loaf pan. Line pan with wax paper or parchment and set aside. Sift flour, baking powder, baking soda and salt into a bowl. In a separate bowl, whisk together yogurt, sugar, eggs, butter and orange zest. Add liquid ingredients to dry ingredients, and stir mixture until well combined. Transfer batter to loaf pan, smoothing top, and bake in oven for 45 to 50 minutes, or until skewer inserted in middle comes out clean. While the bread is baking, combine orange juice and sugar in a saucepan. Bring mixture to a boil over moderate heat while stirring, and simmer for 1 minute. Keep syrup warm. Make holes in top of bread with a thin wooden skewer and drizzle with syrup. Let stand in pan until cool. Makes 1 loaf.
A Tale of Three Dipping Sauces

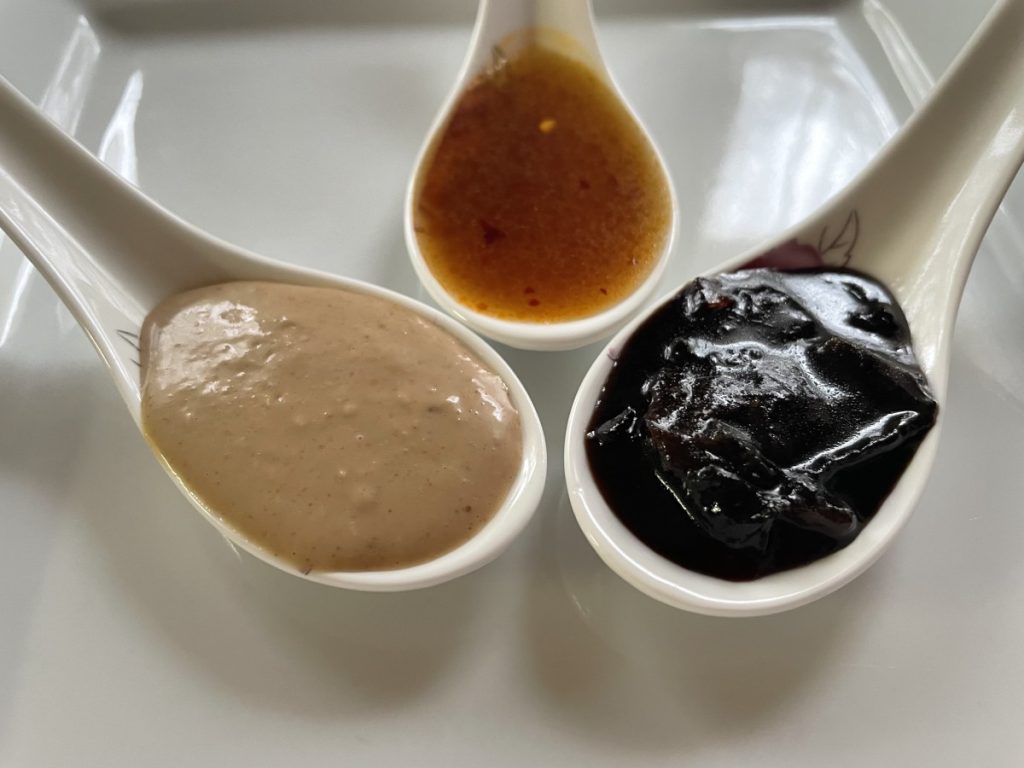
At a recent Lunar New Year party with friends, we all made dumplings. I made three dipping sauces to use on the dumplings and they were really well received. I had made the peanut butter sauce before and my friend Courtney, had found the green onion sauce online. The third sauce was my creation to have a spicy dipping sauce. My friend Diane liked it so much she said it was magic, so I named it Diane’s Magic Sauce. Here are the recipes. Enjoy!!!
Peanut Butter Dipping Sauce
1/3 c. peanut butter
1/3 c. coconut milk
1/2 t. crushed red pepper
1-2 cloves garlic
1 t. fresh grated ginger
1 t. soy sauce
Dash hot red pepper sauce
Salt and pepper to taste
Combine all ingredients in a blender or food processor until smooth.
Note: If you want to use this sauce on pasta, thin it with 1/3 cup of chicken or vegetable stock.
Diane’s Magic Sauce
½ c. rice vinegar
½ c. apple cider vinegar
½ c. sugar
2 T. spicy chili crisp sauce – found at Asian grocery stores
1 T. minced garlic or 1 t. dried minced garlic
1 T. orange zest
2T. light soy sauce
Combine all ingredients and stir until sugar melts. Use with dumplings.
Green Onion Dipping Sauce
5-6 green onions, trimmed and chopped into 2 inch pieces
2 T. oil
5 T. light soy sauce
1 T. Dark soy sauce
1 T. oyster sauce
1 T. sugar
Heat oil in skillet and cook onions until they are browned. Combine with remaining ingredients and stir to combine well. Keeps in fridge for about a month. Can be used as a pasta sauce, too.

Mom’s Oxtail Soup

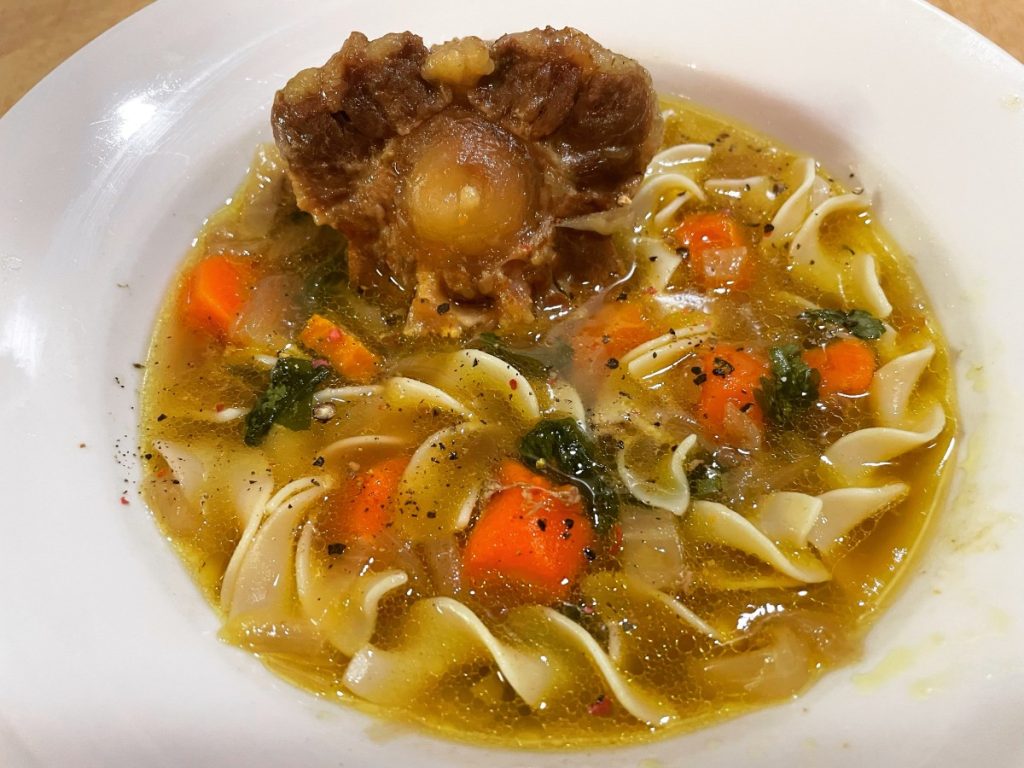
I always loved when my mom made oxtail soup. It took several hours to cook and the house smelled so good all day. Oxtails were cheaper back then and we had the soup often. Now, I almost look at oxtails as a splurge. Still, life is too short not to enjoy the things we love.
Oxtails can also be braised and stewed. They hold up well to pressure cooking, too, so they are great cooked in an Instant Pot. They just need the time or proper cooking method to get tender. The stock their long simmering produces is so tasty.
As a child, I thought oxtails came off of an ox. Seemed to make sense to me. I pictured a huge, almost feral beast. I was kind of sad to find out they were just another part of a cow.
Wherever they come from, oxtails are one of my favorite meats ever. This recipe is how my mom made the soup. You can tweak which veggies you add, depending on what you have around. Just be patient and let the soup simmer long enough for the oxtails to get tender and the stock to get filled with all that flavor. Enjoy!!
Oxtail Soup
5-7 lbs. Oxtails
6 qts. Water or beef stock* see note
2-3 small onions, peeled and halved
¼ c. chopped parsley, or to taste
handful of celery tops or two celery ribs
1 large tomato, or three small, fresh or canned, cut-up
4 large cabbage leaves
1 lb. carrots, peeled and trimmed, leave whole
3 cloves garlic, peeled
Salt and pepper to taste
Brown oxtails in soup pot in batches until browned. Add remaining ingredients, except carrots, to the pot with the oxtails. Simmer soup an hour, then add the carrots. Cook until meat is tender, about 2-3 hours longer. Remove meat and carrots from soup and strain stock. Return to kettle and skim off as much fat as you can. Adjust seasoning. Serve soup with cooked noodles and pieces of the carrots. You can eat the meat right off the bones, or remove some and dice it up to place in the soup. Makes 5-6 qts. Stock can be frozen and recipe can be halved.
Note: If you are using water, I would use Better Than Bouillon or another paste-type soup base to add extra flavor.
I got my Oxtails at Kocian Meats here in Cleveland. They were so well trimmed, I had very little fat in the stock. Thanks, Joe Kocian.
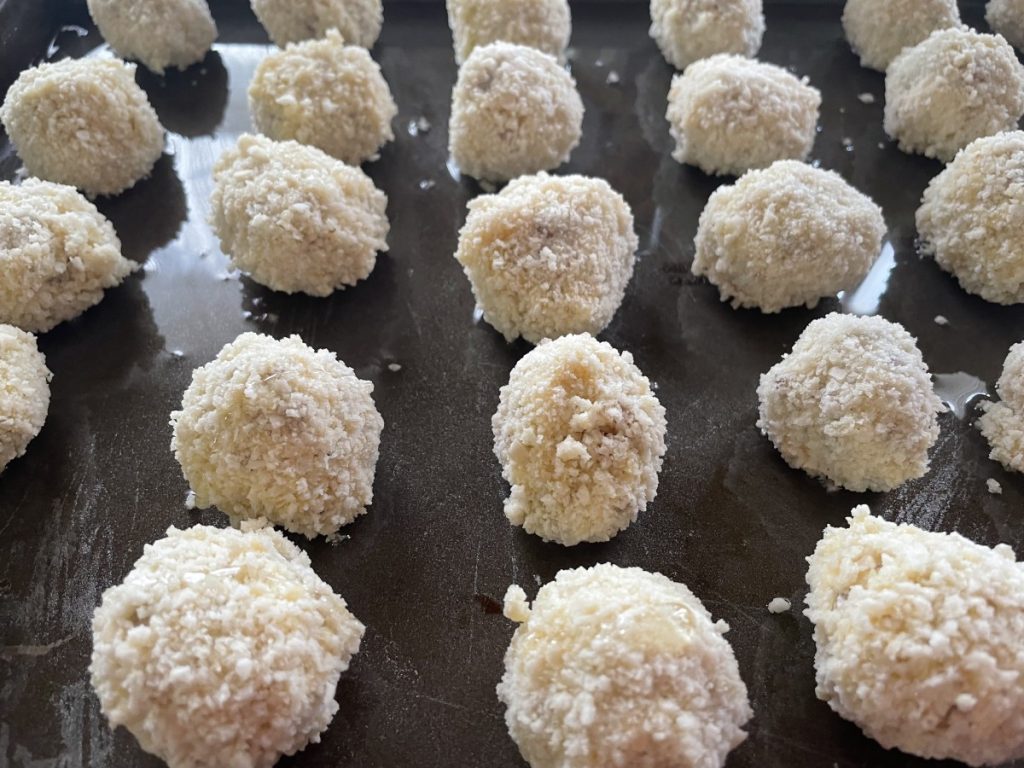
Sauerkraut Balls

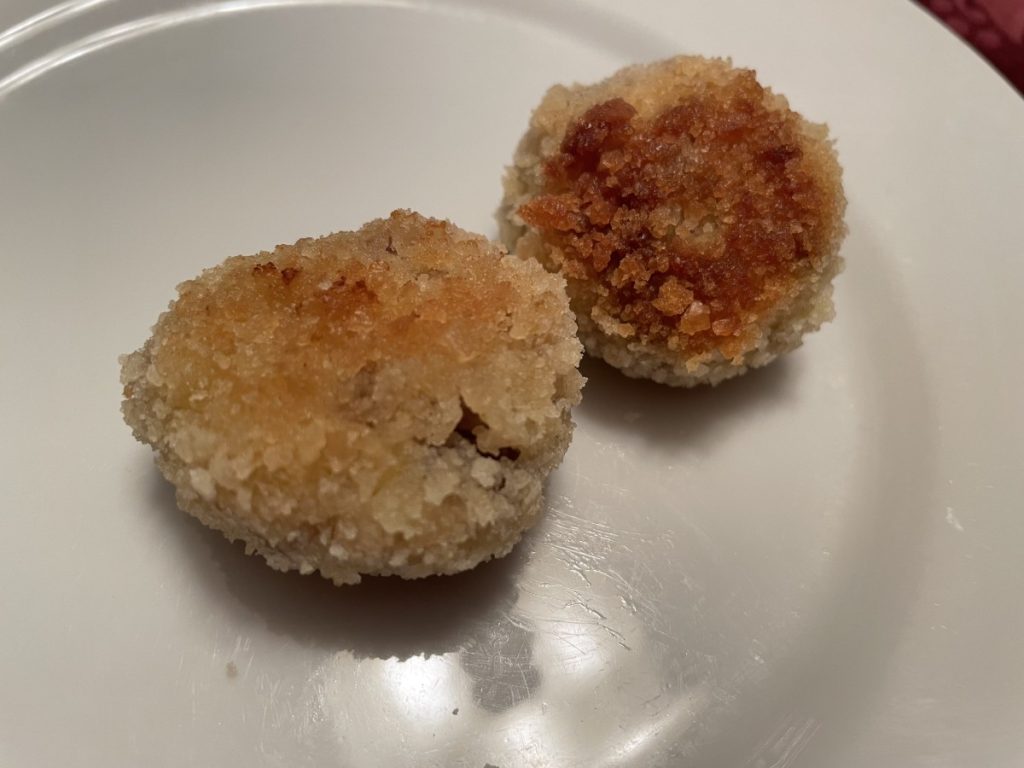
These are a fun appetizer to serve at parties. Sauerkraut balls are a mixture of sauerkraut, sausage, cream cheese and the ingredients you would see in traditional meatballs. These are not meatballs, though. They have a very different flavor and texture. The sauerkraut gives them a unique flavor. They are a big hit at parties.
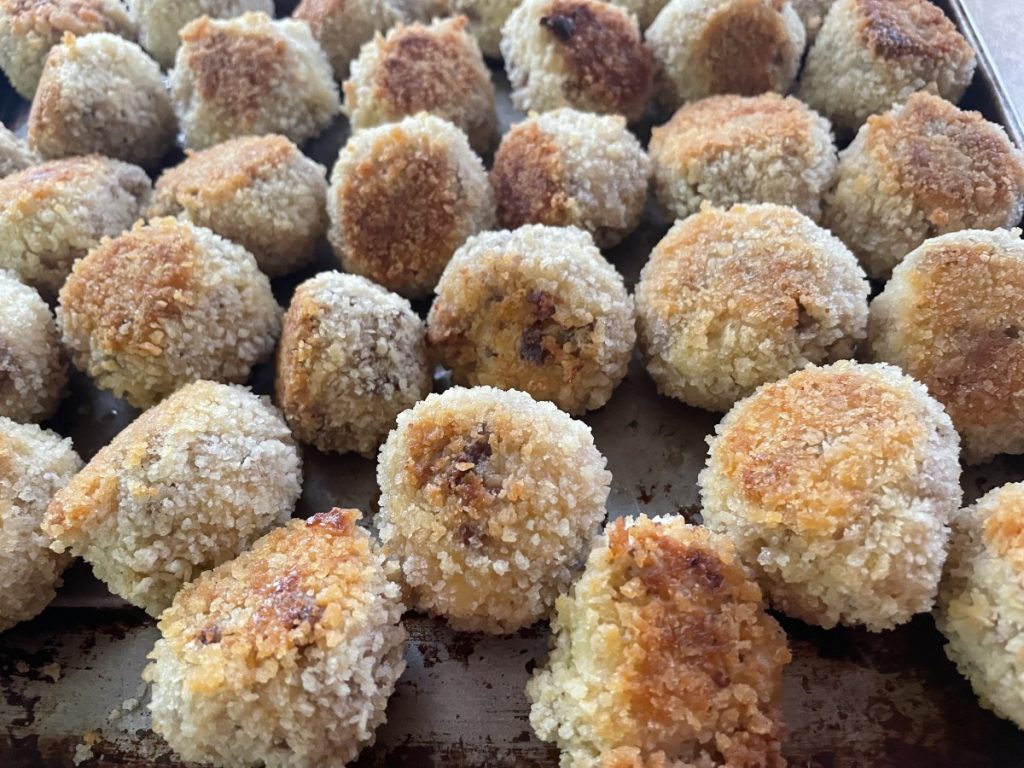
I bake mine, but there are directions for baking or frying.
Enjoy!!
Sauerkraut Balls
1 pound pork sausage
1 small onion, minced
2 cups sauerkraut, well drained and finely chopped
3 T. bread crumbs
1 teaspoon whole grain or Dijon mustard
½ t. garlic powder
⅛ t. ground black pepper
4 ounces cream cheese, softened
¼ c. fresh chopped parsley
¼ cup all-purpose flour
1 large egg, beaten
¼ cup milk
¾ cup dry bread crumbs
1 quart vegetable oil for frying, or as needed (Optional)
Heat a large skillet over medium-high heat. Cook and stir sausage and onion in the hot skillet until sausage is crumbly and browned, about 10 minutes. Drain grease and allow to cool slightly. Transfer sausage mixture into a large bowl. Stir in drained sauerkraut, bread crumbs, mustard, garlic powder, and pepper. Combine cream cheese and parsley in a small bowl; mix into sauerkraut mixture. Cover and refrigerate for 1 hour or longer.
Place flour into a shallow bowl. Whisk together egg and milk in another bowl. Place 3/4 cup bread crumbs in a third bowl. Shape sauerkraut mixture into 3/4-inch balls. Coat balls in flour, then dip in egg mixture and roll in bread crumbs to thoroughly coat. Chill the balls for 30 minutes before cooking. You have two options at this point when it comes to cooking them. You can fry the sauerkraut balls or you can bake them.
To fry: Heat oil in a deep fryer to 375 degrees F (190 degrees C). Working in batches, fry balls in hot oil until golden brown, 2 to 3 minutes. Drain on a paper towel-lined plate and serve hot.
To bake them: Place on silicone lined or lightly greased baking sheet. Bake at 375 for about 20 minutes.
Note: I sprayed them with a little non- stick cooking spray or you can drizzle a little oil on them. You can also bake them as is. I like the finished texture better with a little oil added before baking. Serve hot. I like to serve them with honey mustard or barbecue sauce. Makes about 2½ dozen.
You can cook them ahead of time, then reheat before serving. To reheat, bake at 350 degrees F for 10-15 minutes.
After breading, the balls can be quick-frozen on a cookie sheet, then stored in freezer bags. They do not need to thaw before frying or baking. Add 8-10 minutes to baking time if using from the freezer.
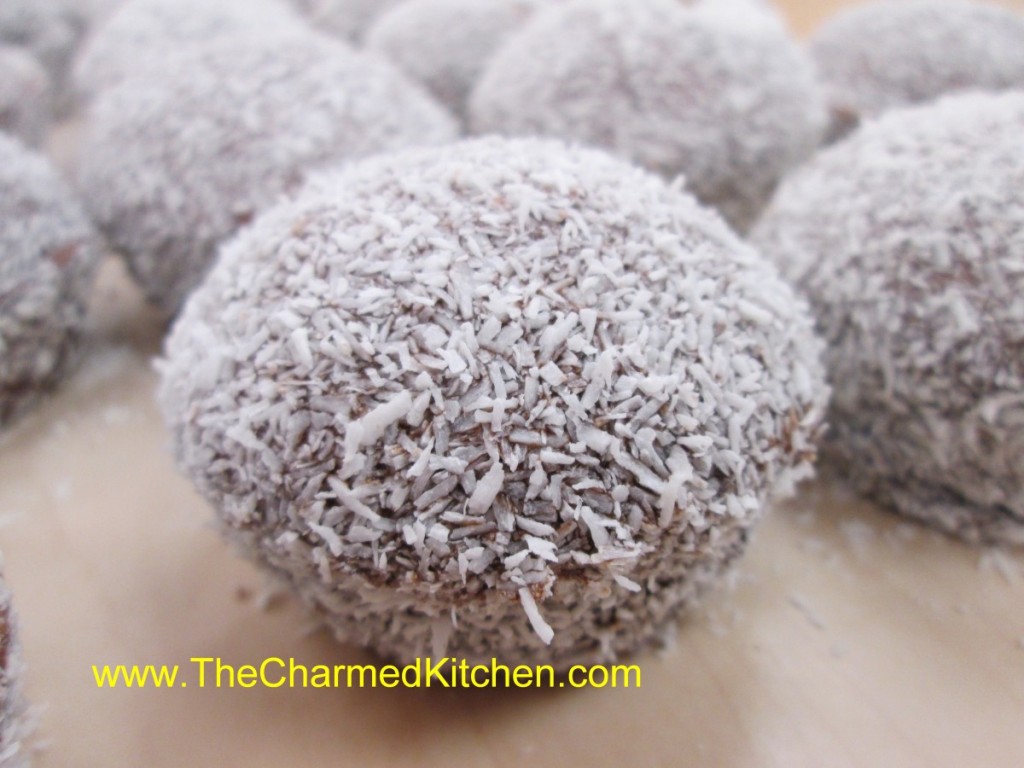
Coconut Chocolate Snowballs

I have wonderful memories of my Aunt Josie making these for every family gathering. Aunt Josie cut the cake into squares. They were all perfectly even. I asked her how she did that. She told me that she used her cooling racks to get the lines even. She would set the cooling racks on her cake and use the wires as guides. So clever.
I never could seem to get them even, so I bake my cake in cupcake tins and call then snowballs. Whatever the shape, these little cakes are a favorite treat in my family.
In bakeries, you’ll find them in squares or rectangles. She shared her recipe with me a long time ago, and I am sharing it with you.
You can bake the batter in mini muffin pans or standard muffin pans. It just depends on what size you want your snowballs to be. After the cupcakes are baked, freeze them. The frozen cakes are dipped in a chocolate sauce and then rolled in desiccated coconut.
Desiccated coconut is dried and unsweetened. It looks like coarse, white bread crumbs. You can find it in stores that carry baking supplies and at Asian markets. It is the same kind of coconut used to make coconut shrimp.
Here is the recipe for making the “snowballs”. The recipe for the cupcakes is listed below, as well. I just doubled my classic white cupcake recipe, but you could use a box mix, if you prefer.
Aunt Josie’s Coconut Cake Squares aka “Snowballs”
1 white cake, prepared and frozen solid* or cupcakes
Chocolate Sauce
1 c. unsweetened cocoa
1 1/4 c. sugar
2 c. water
1 t. vanilla
1 c. desiccated coconut (available at cake supply stores and some health food stores)
Cut frozen cake into small squares, or cake can be baked in regular or mini cupcake tins. Keep cake frozen until ready to use. Meanwhile, make the chocolate dipping sauce. Combine remaining ingredients, except coconut, in a medium saucepan. Bring to a boil then simmer 5 minutes. Remove from heat and cool completely.
Using toothpicks or fondue forks, dip frozen cake in sauce let drain a few seconds, then roll in the coconut. Can be enjoyed right away or frozen again for later use.
*If you make the cake in muffin tins you’ll get 24 cupcakes or about 60 mini cupcakes.
Classic White Cupcakes
1 cup sugar
1/2 cup butter
2 eggs
2 teaspoons vanilla extract
1 1/2 cups all-purpose flour
1 3/4 teaspoons baking powder
1/2 cup milk
Preheat oven to 350 degrees. Line a muffin pan with 12paper liners. In a medium bowl, cream together the sugar and butter. Beat in the eggs, one at a time, then stir in the vanilla. Combine flour and baking powder, add to the creamed mixture and mix well. Finally stir in the milk until batter is smooth. Pour or spoon batter into the prepared pan. Bake 20 to 25 minutes. Cupcakes are done when they springs back to the touch. Makes 12.


