Waldorf Salad

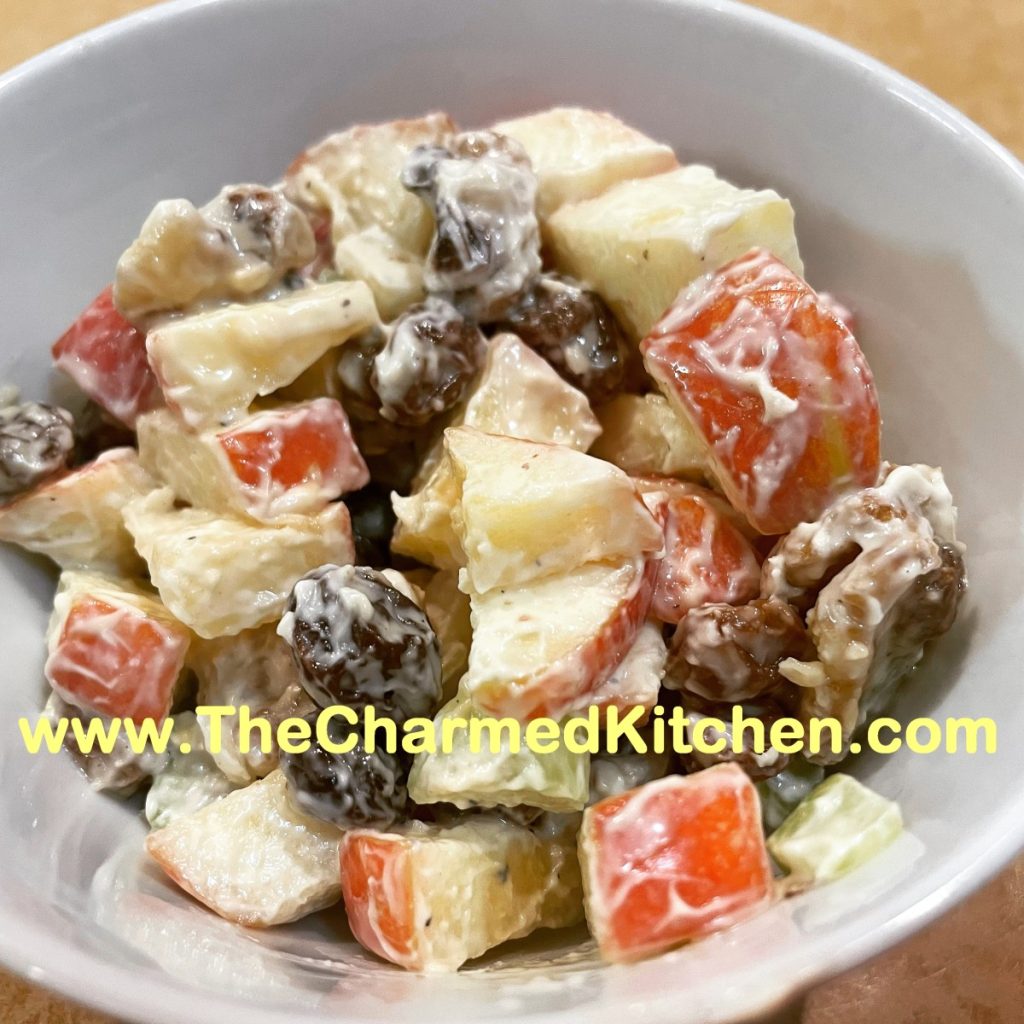
I can’t remember the last time I made a Waldorf Salad. Don’t know why it took me so long. The combination of sweet/tart apples with crunchy celery, nuts and raisins is such a classic. It is unseasonably warm for early November, putting me in the mood for a salad.
I think of my mom when making it. She made such a nice Waldorf salad. It always felt like a special occasion when she did.
The salad could not be simpler. Just a few ingredients, tossed together and seasoned. I went pretty basic this time, but you can add all sorts of extras like proteins (chicken, turkey, ham etc.). You can add different dried fruits, too. Dried cranberries or cherries would be wonderful.
I didn’t peel the apples. I like the peel, but you can peel them, if you prefer. I also used toasted walnuts, but feel free to play around with using other nuts or seeds. This time of year, toasted pepitas, (pumpkin seeds, hulled) would be a nice, seasonal addition.
So here is the recipe.
Mom’s Waldorf Salad
4 apples, cored and diced, peeling is optional
1 c. diced celery
1 c. raisins or other dried fruit like cranberries or cherries
½-1 c. mayonnaise
1 c. toasted walnuts or pecans*
Salt and pepper to taste
Combine apples with celery and raisins. Stir to combine and add mayo to your liking. Stir in nuts and season to taste. Nice served on a bed of greens. Serves 4.
Variations: Mom sometimes added grapes instead of raisins. She would cut them in half. The grapes will make the salad wetter over time, where the raisins plump and absorb moisture, so add grapes right before serving or leave them whole. Another classic addition is chicken. In this recipe, a couple of cups of cooked, diced chicken make it a different, but still tasty salad. Diced turkey is also fun and a nice way to use after Thanksgiving turkey. Same for ham. Diced ham adds a smokiness that pairs great with the apples. Just use less salt if adding ham.
* To toast nuts, place on a baking sheet and bake in a 325 degree oven for 10-15 minutes, or until nuts are toasted, but not burned.
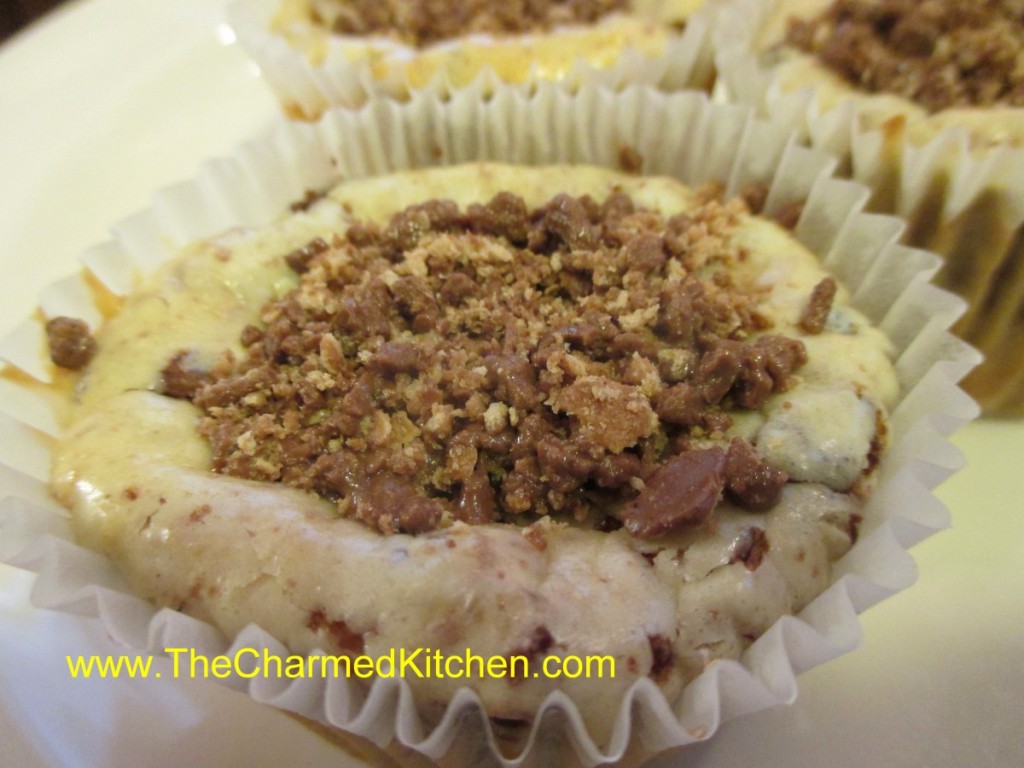
Halloween Candy Mini Cheesecakes


I am posting this as a public service to those of you with leftover Halloween candy.
Sometimes you end up with leftover Halloween candy. You could just eat the candy- or you can transform it into a dessert.
The idea I came up with was mini cheesecakes. I’ve made them before, so I used my recipe, and just folded in crushed candy bars. Once the cheesecakes cool they deflate a little, so I also added some crushed candy bars to the top to make them look nice.
Only change from the original recipe was a slight decrease in sugar, to compensate for the extra sweetness of the candy. I went down to 1/3 cup of sugar. I think 1/4 cup would also have been enough.
I am sure a lot of different candy bars would work. I used a small food processor to really crush up the candy bars. I made 2 batches, one with cookies and cream candy bars and the other with Kit Kat bars.
Since the candy will keep, you could use the candy in a Thanksgiving dessert. Of course, the candy might not last until Thanksgiving.
Halloween Candy Mini Cheesecakes
12 vanilla wafers
2 (8 oz.) cream cheese, softened
1/3 c. sugar
2 t. vanilla
2 eggs
2/3 c. crushed candy bars plus 1/4 c. crushed candy bar, for topping
Line 12 muffin tins with paper liners. Place 1 wafer in each. Beat together remaining ingredients (except candy) for 1 minute with an electric mixer. Fold in candy. Divide this mixture in the muffin tins, filling each 3/4 full. Bake 25 minutes at 325 degrees. Cool and decorate with extra crushed candy. Makes 12. These can be frozen.
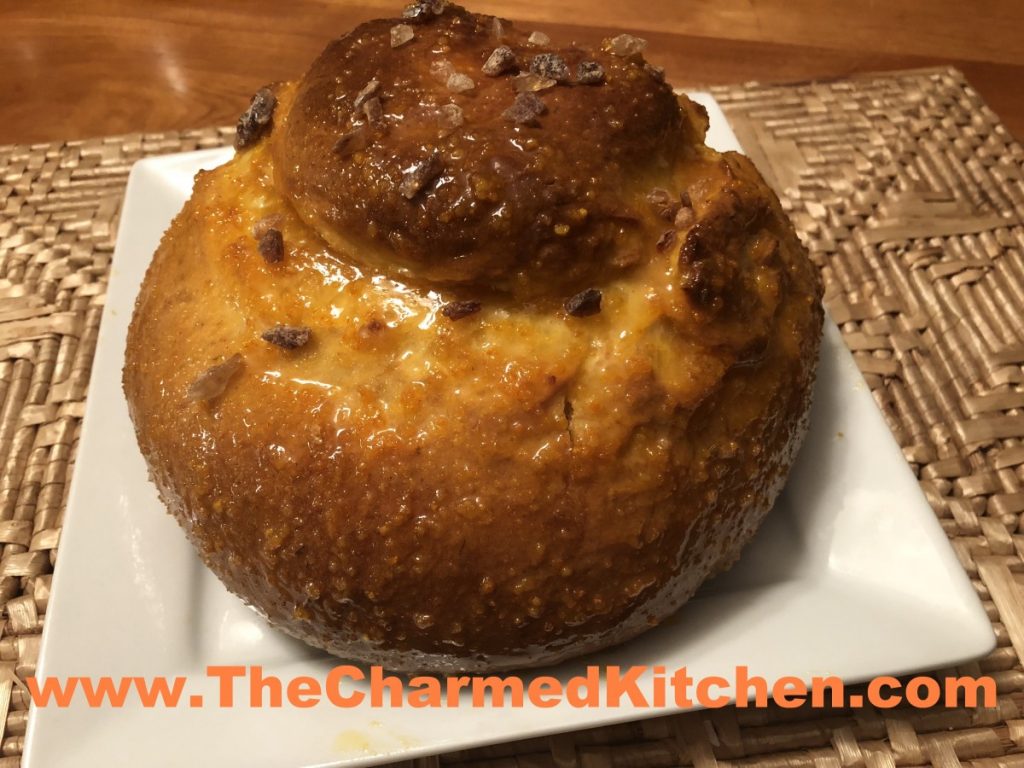
Pan de Muertos (Mexican Bread of the Dead)

Halloween isn’t the only holiday this week. Many people will be celebrating Dia de los Muertos (Day of the Dead). It is a holiday to remember and honor loved ones who have passed. It traditionally runs from October 31 to November 2.
Pan de Muertos is a traditional bread made for this holiday. This is a version of that bread that is flavored with anise (or fennel) and orange. It is glazed, after baking, with an orange sauce, then sprinkled with a little extra sugar. I like to use rock sugar, which, as the name implies, is a large sugar that looks like small rocks.
I shaped the dough into a round shape, with a knob of dough on the top. You can also mold the bread into different shapes like angels or animals.
The bread itself is so tasty. It is a rich dough with a lovely fragrance and texture.
Here is the recipe.
Pan de Muertos (Mexican Bread of the Dead)
1/4 c. each butter, milk and water
3 c. all-purpose flour
1 1/2 t. active dry yeast (half a packet)
1/2 t. salt
2 t. anise seed or fennel seed
1/3 c. sugar
2 eggs, beaten
2 t. orange zest
Glaze:
1/4 c. each sugar and orange juice
1 T. orange zest
Topping:
2 T. sugar, I used rock sugar
Heat together butter, water and milk until the butter melts. Cool to warm. In a large bowl combine 1cup of the flour, yeast, salt, anise seed and 1/3 c. sugar. Beat in the milk mixture then add the eggs and orange zest and beat until well combined. Stir in 1/2 cup of flour and continue adding more flour until the dough is soft. Turn the dough out onto a lightly floured surface and knead until smooth and elastic. Place the dough into a lightly greased bowl cover with plastic wrap and let rise in a warm place until doubled in size, about 1- 2 hours. Punch the dough down and shape it into a large round loaf with a round knob on top. Place dough onto a baking sheet, loosely cover with plastic wrap and let rise in a warm place for about 1 hour or until just about doubled in size. Bake in a preheated 350-degree oven for about 35 to 45 minutes. Cool on rack 5 minutes then brush with glaze. To make glaze: In a small saucepan combine the 1/4 cup sugar, orange juice and orange zest. Bring to a boil over medium heat and boil for 2 minutes. Brush over top of bread while still warm. Sprinkle glazed bread with 2 T. sugar.

Ready to bake
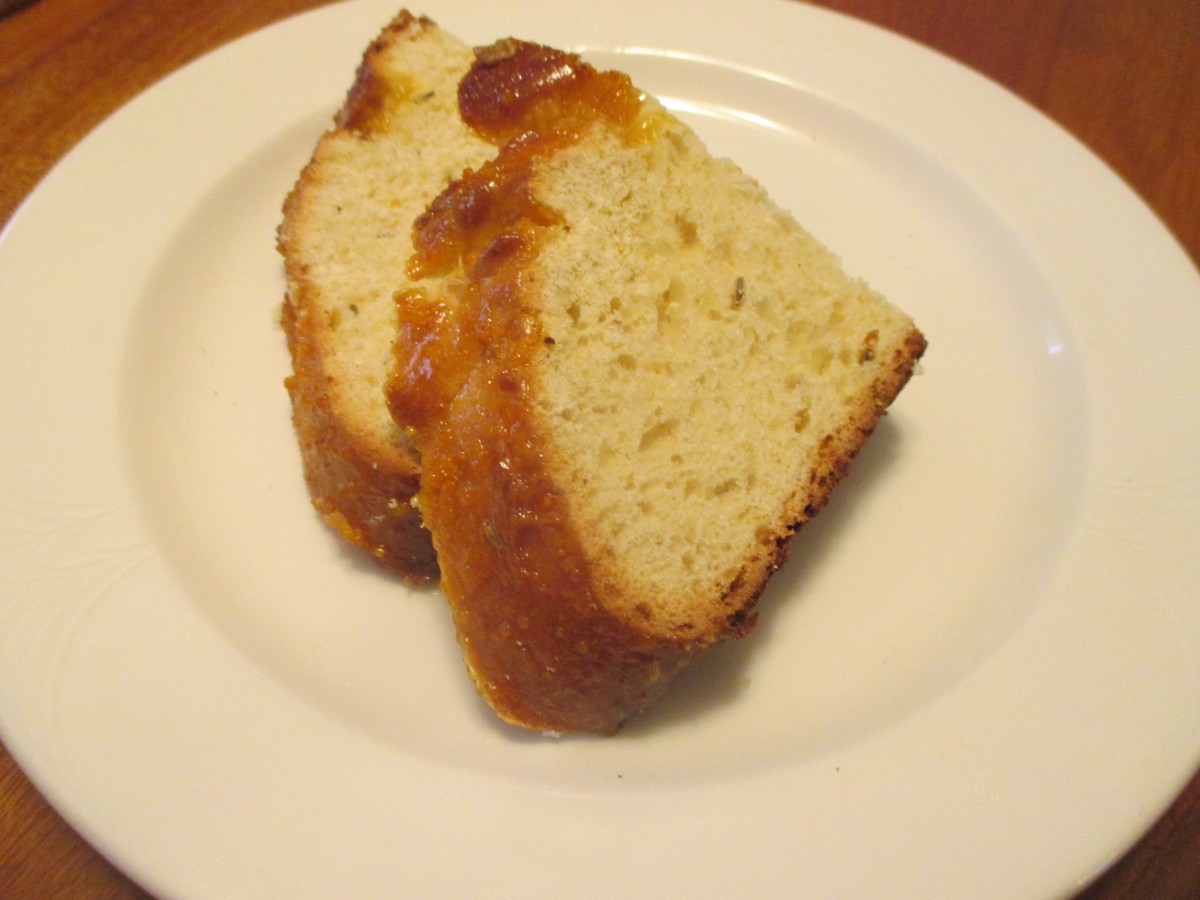
Eat plain, or lightly toasted with butter
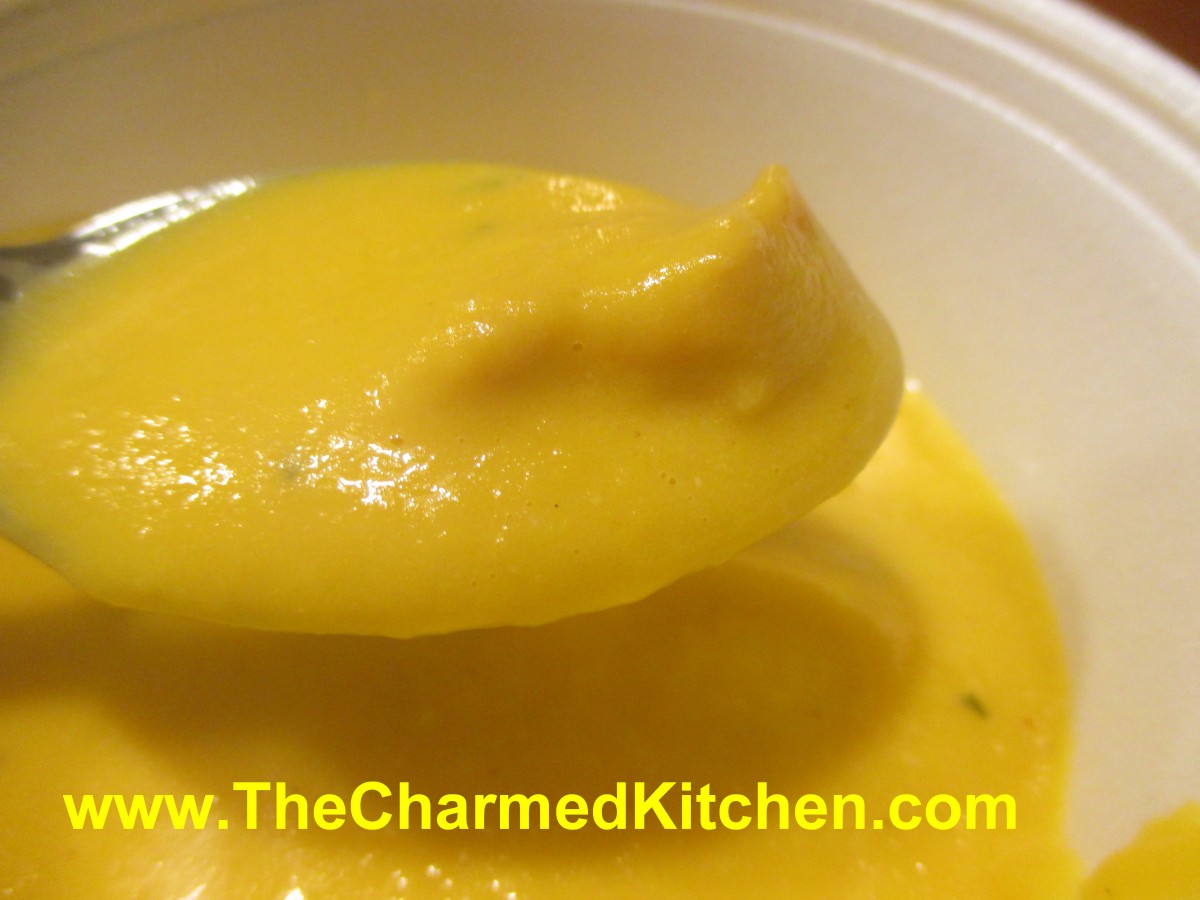
Smoky Pumpkin Soup


I was asked recently about how to use leftover pumpkins from Halloween. I think a rich soup is a great way to use them up. The soup actually has a lot more than just pumpkin in it. A mix of veggies, simmered with smoky ham, then pureed and finished with half and half, the soup is creamy and full of flavor. It makes a big batch, but freezes well so you can have some whenever you want.
Smoky Pumpkin Soup
2 qts. Water
2 lbs. uncooked smoked turkey on the bone, or a ham bone with lots of meat
2 onions, peeled and halved
3-4 large carrots, peeled and chunked
1 cauliflower, cut into flowerets
2-3 ribs celery, sliced
1-2 sweet red peppers, seeded and cut up
1 can (about 14.5 oz.), tomatoes
6 c. cubed pumpkin or winter squash (you can use 3-4 sweet potatoes instead)
1 qt. half and half
2 T. Italian seasoning (I use Tuscan, recipe follows
salt and pepper to taste, plus a healthy dash of hot sauce
Place all ingredients, except half and half and seasonings, in a large pot and bring to a boil. Cover and simmer until vegetables are very tender and meat is cooked and tender, at least 1½ hours and up to 3 hours. Remove meat to cool and add half and half and herbs. Use an immersion blender to puree the vegetables. It does not have to be completely smooth, but it should be close. Adjust seasonings if needed. Cut the meat off the bones and return meat to the chowder. Serves 10+.
Note: I make it in even larger batches because this chowder freezes well. You can add other vegetables like corn, potatoes, green beans or whatever else you have around. I often add cabbage and zucchini. If you want thicker chowder add a potato or two to the recipe. You can also add smoked sausage, if you like. Just remove the sausage, puree the chowder, slice sausage and return to the pot. I also use leftover chicken or turkey and just add a little liquid smoke for another way to get the smoky flavor. This is also a good way to use up a ham bone or leftover ham or turkey ham.
Tuscan Seasoning
½ c. dried basil
½ c. dried oregano
½ c. dried marjoram
3 T. dried minced onion
2 T. dried minced garlic
2 T. dried rosemary
2 T. dried parsley
1 t. crushed red pepper
Use this blend in tomato sauce or other Italian dishes. Also, you can add to vinegar and oil with a little salt, if desired, to make a quick salad dressing.
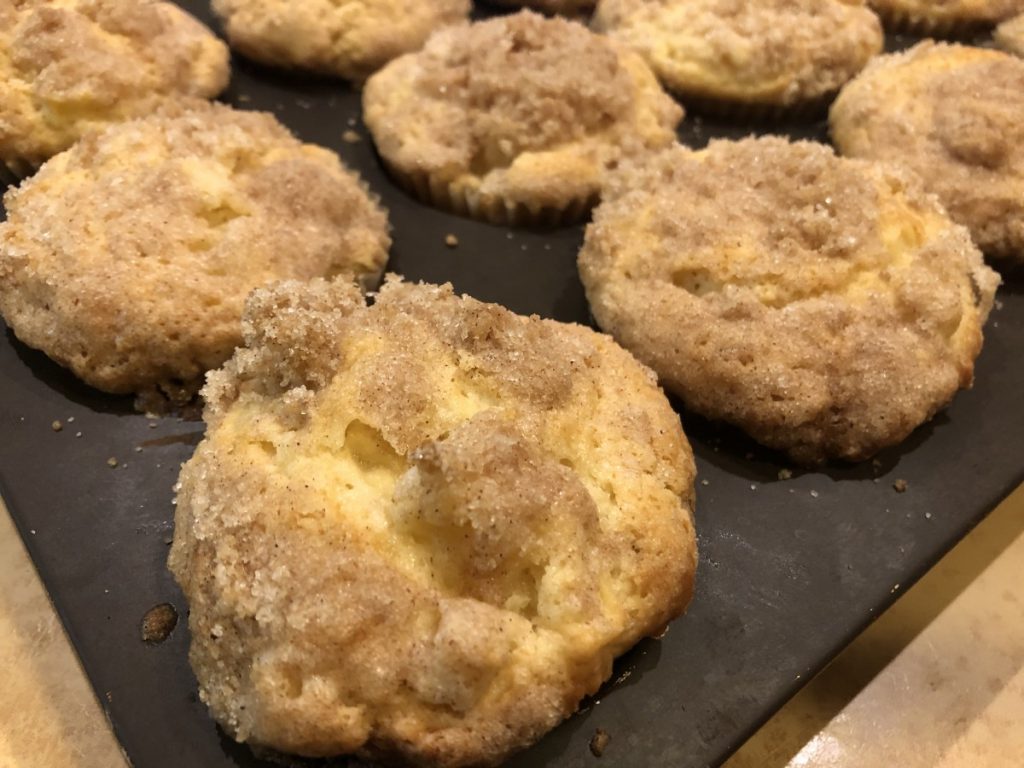
Apple Crumb Cupcakes

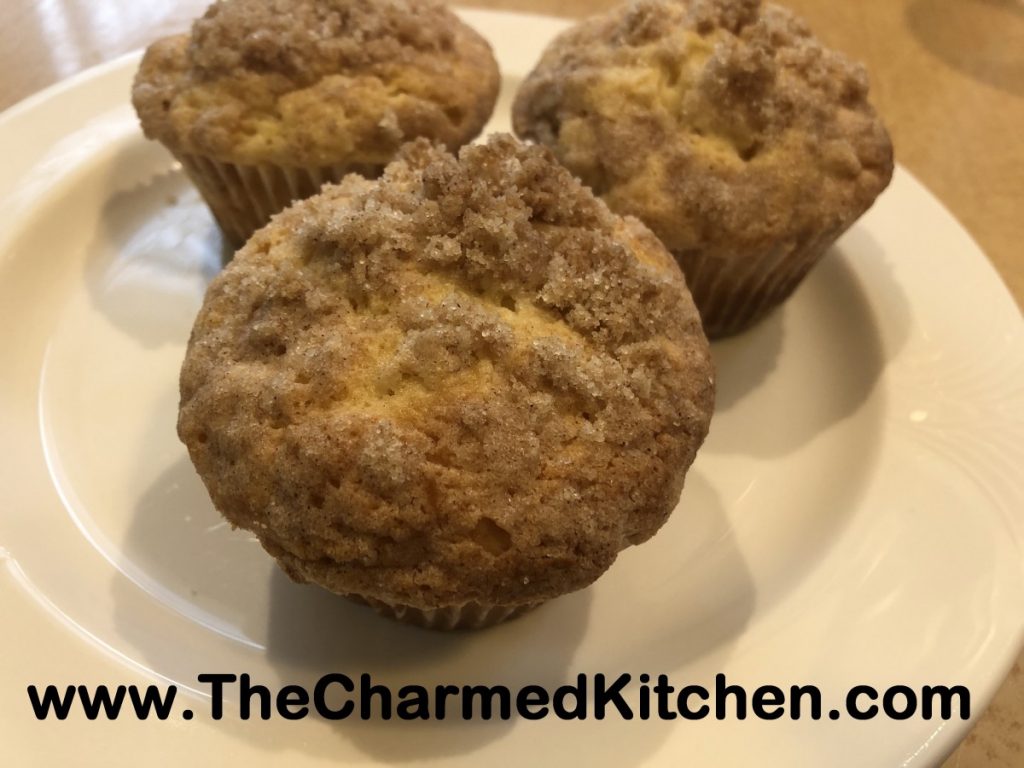
I wanted to make a dessert for a friend of mine. Since I had apples, I knew I wanted to use them. I decided to use my apple crumb cake recipe, but turn it into cupcakes instead. That crumb topping is so good. Just thought it would be a fun experiment. It mostly worked out.
The cupcakes worked out very nicely, and my friend was happy to get them. The only problem was that I ended up making 12 cupcakes. I should have made a few more. They were very full and rose more than I had anticipated. Don’t get me wrong, they still tasted great, but smaller cupcakes would have looked better. I would make 15-18 cupcakes the next time.
So here is the recipe. Enjoy!!
Apple Crumb Cupcakes
For cupcake batter:
2 c. flour
2 t. baking powder
½ t. salt
½ stick (¼ cup) butter, softened
¾ c. sugar
1 egg
½ c. milk
2 c. chopped peeled, cored apples
For topping:
½ c. sugar
¼ c. flour
1 t. cinnamon
½ stick (¼ c. butter, chilled and cut into bits)
Combine dry ingredients and set aside. In mixing bowl with electric mixer, beat butter and sugar until light and fluffy. Beat in egg and milk. Add flour mixture gradually until just mixed in. Fold in apples. Grease or line muffin tins with paper liners. You should get 15-18 cupcakes, depending on how full you fill them. I made 12 in my test batch, and they were too full. Divide batter among the prepared pans, filling about 2/3 full. The batter is pretty thick. That is normal. Combine topping ingredients until they resemble coarse crumbs. Sprinkle over batter in pans. Bake in a preheated 350-degree oven and bake for 20-22 minutes. Use toothpick to test. Makes 15-18.
Goblin Goo Drink

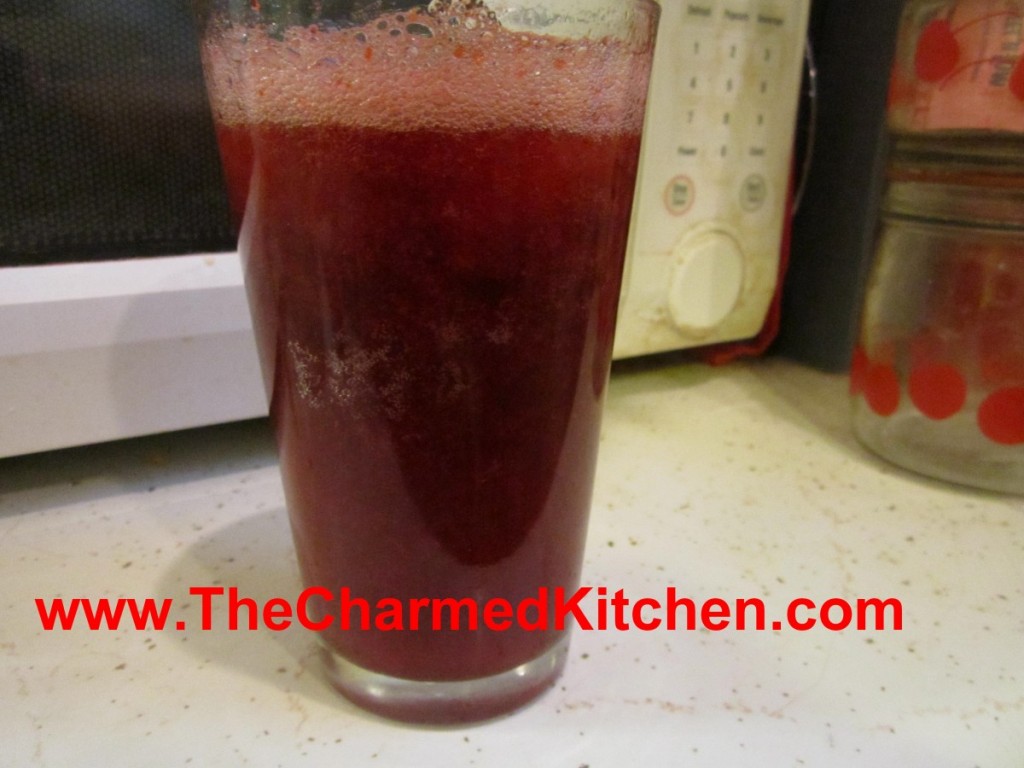
If you want a fun beverage to serve for Halloween, try this Goblin Goo Drink. It’s easy to make and will give guests a start. It’s fun for kids and adults.
The secret is Jell-o. Make whatever flavor Jell-o you like. Once it is firm, mash it with a fork into small pieces.
Place some of the mashed up Jell-o in a glass and add ice and whatever beverage you like. I used cherry Jell-o with sour cherry soda. The Jell-o is invisible that way.
When your guests take a drink, they get little gobs of Jell-o in every sip. You can also play with color combinations for fun. Grape Jell-o with orange soda looks like little black globs in the drink. Kids love it.
You can make it with Jell-o shots, for the grown-ups. Or add the mashed up Jell-o to adult beverages. You can also add the Jell-o to a punch bowl or pitcher of drinks.

Mash Jell-o with a fork

Add some Jell-o to the glass before adding ice and soda
Rye Crackers

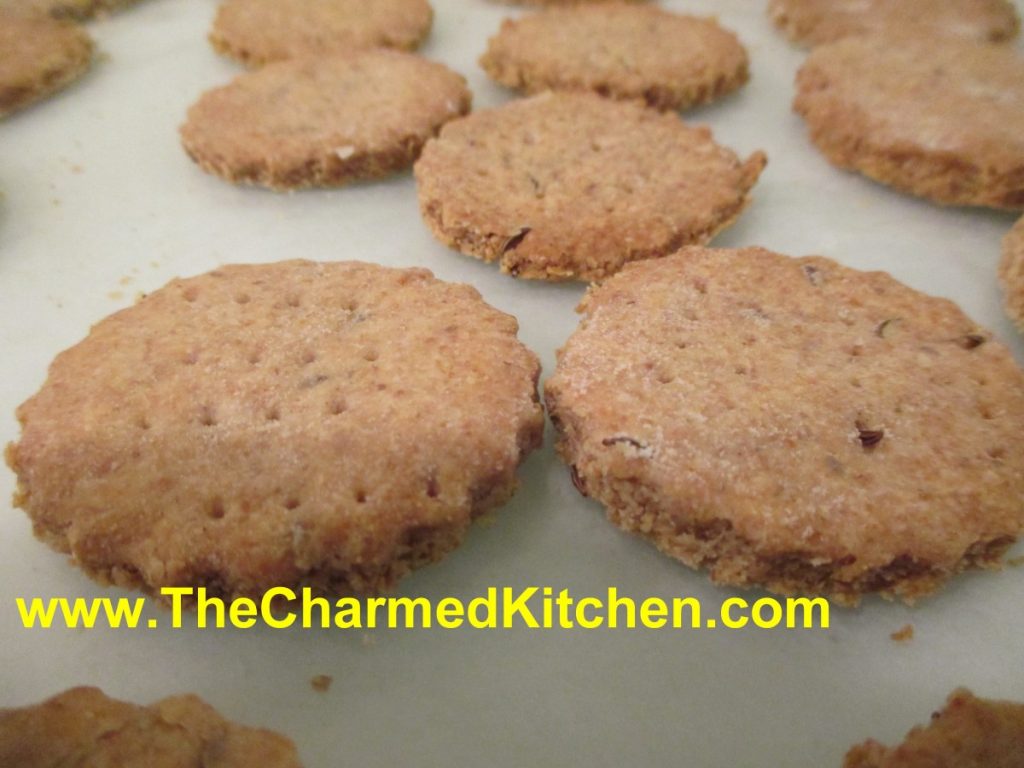
We made these tasty crackers in class the other night. Making crackers is fun, and actually pretty easy. These rye crackers are as simple to make as a batch of cookies. They are crisp and full of flavor. The thinner you roll them out, the crisper they will be.
I am a big fan of rye bread and a fan of these rye crackers, too. I love the flavor of rye flour. I think it pairs so well with any number of toppings. These are great with a little Swiss cheese melted on the top. You can also cut the crackers out in fun shapes.
So here is the recipe for rye crackers. I hope you’ll give cracker making a try.
Rye Crackers
1 c. rye flour
1 c. all-purpose flour
1 T. caraway seed
1½ t. salt
1 t. onion powder
1 t. garlic powder
1/3 cup oil
1 t. honey
¼ c. water, or as needed
Combine the rye flour, all-purpose flour, caraway seed, salt, onion powder, and garlic powder in a bowl. Stir in the oil and honey. While stirring with a fork, slowly add the water until the dough comes together in a ball. Cover and rest for 10 minutes. Preheat oven to 375 degrees. Divide the dough into 4 sections, rolling each piece out on parchment paper to 1/8 inch thick. Cut into desired shapes, then place on a baking sheet. Prick each cracker a few times with a fork. Bake until the edges are brown and the crackers are crisp, 10 to 12 minutes. Remove immediately to a cooling rack.
Bat Wings

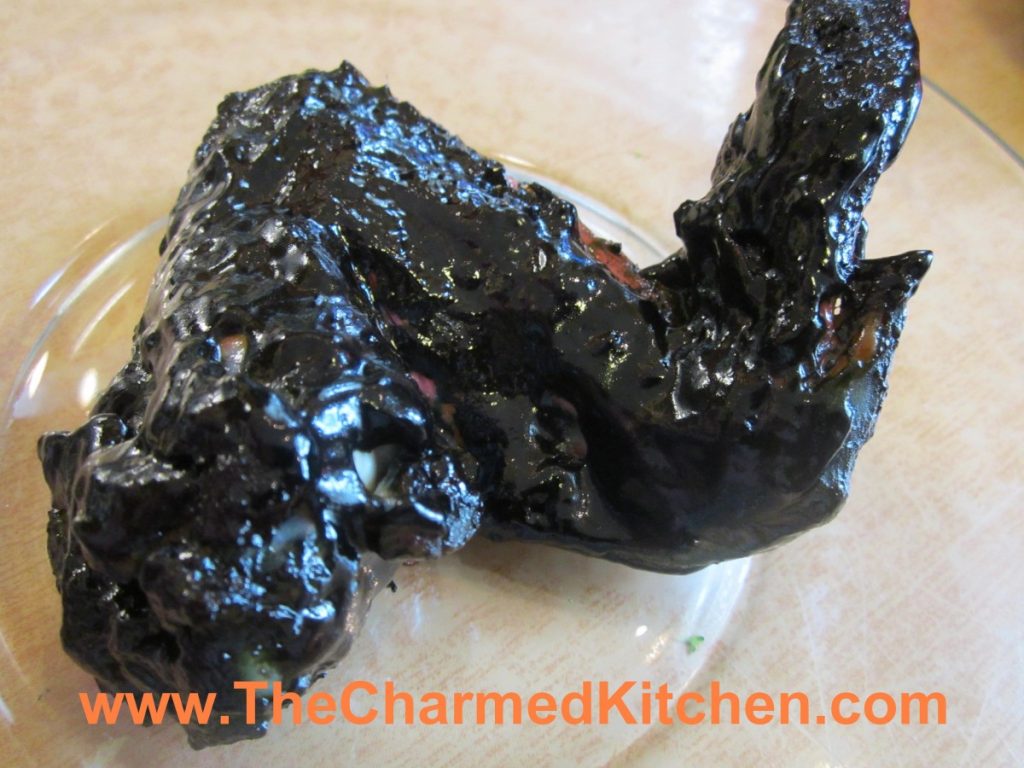
With Halloween fast approaching I thought I’d share this recipe for bat wings. OK, not really bat wings, but you already knew that. I just add black food coloring to barbecue sauce and use it to color chicken wings.
I made a batch for a Halloween party a few years ago and someone actually asked if they were real bat wings.
A word of warning- when you use black food coloring it will transfer to you. No matter how careful you are when you eat the wings, you’ll end up with purple fingers. Also, for the best effect, keep the wings intact- no trimming off of the tips. You can separate the drums before serving, if you like. Makes eating a little easier. They look pretty cool when set out on the table. Creepy- but very tasty.
Bat Wings
2-3 lbs. whole chicken wings
salt and pepper
1 c. barbecue sauce- store bought or home made
black food coloring- handle carefully- it stains
Place chicken wings in a roasting pan, season with salt and pepper and bake in a preheated 400 degree oven for 30 minutes. Meanwhile in medium bowl combine sauce with food coloring. Add just a little black food coloring at a time. Too much will alter the flavor of the food. Remove wings from the oven and dip them in the bowl of sauce. Turn to coat. Place wings on a clean baking sheet and return to the oven. Bake an addition 45 minutes. You can baste them with additional sauce during the baking, if you like. Place on a serving platter and provide plenty of napkins.
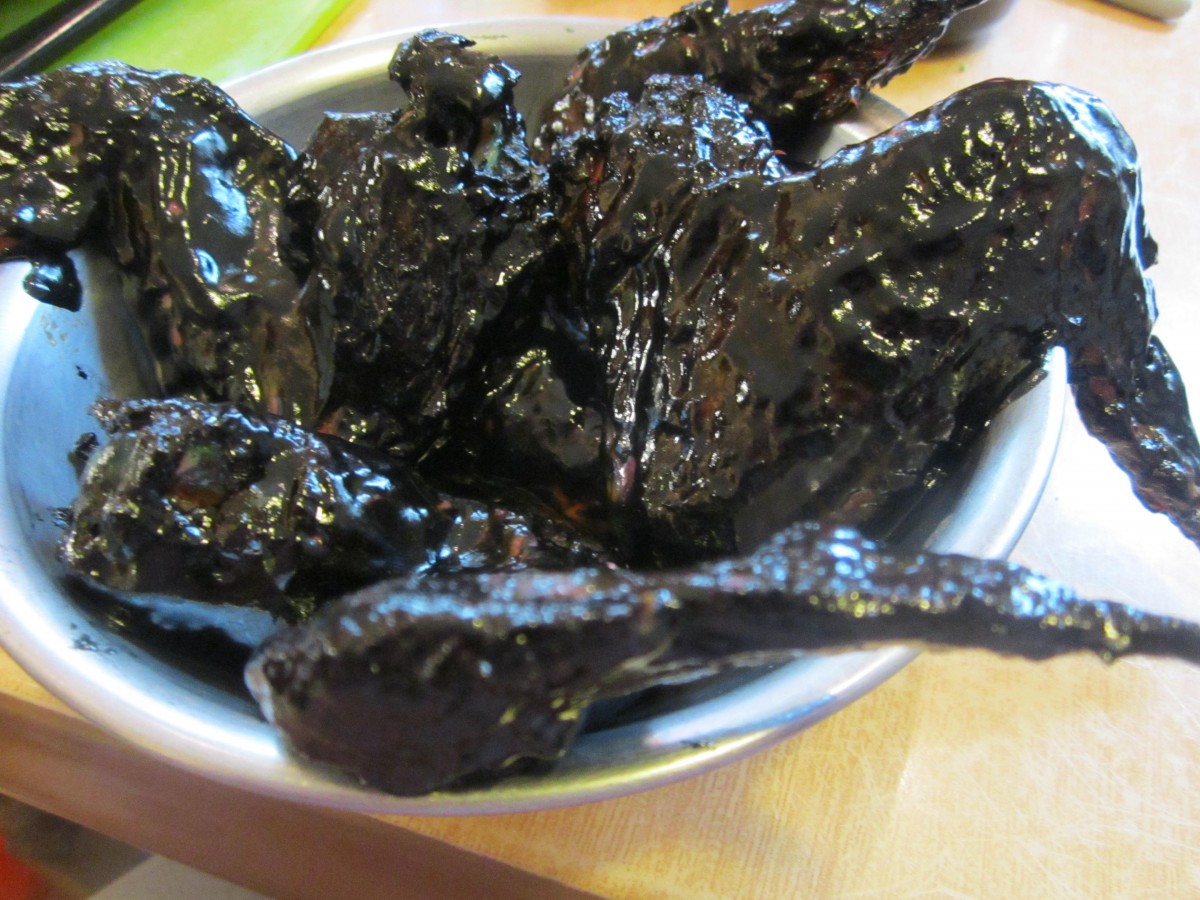
A pile of “bat” wings
Homemade Graham Crackers

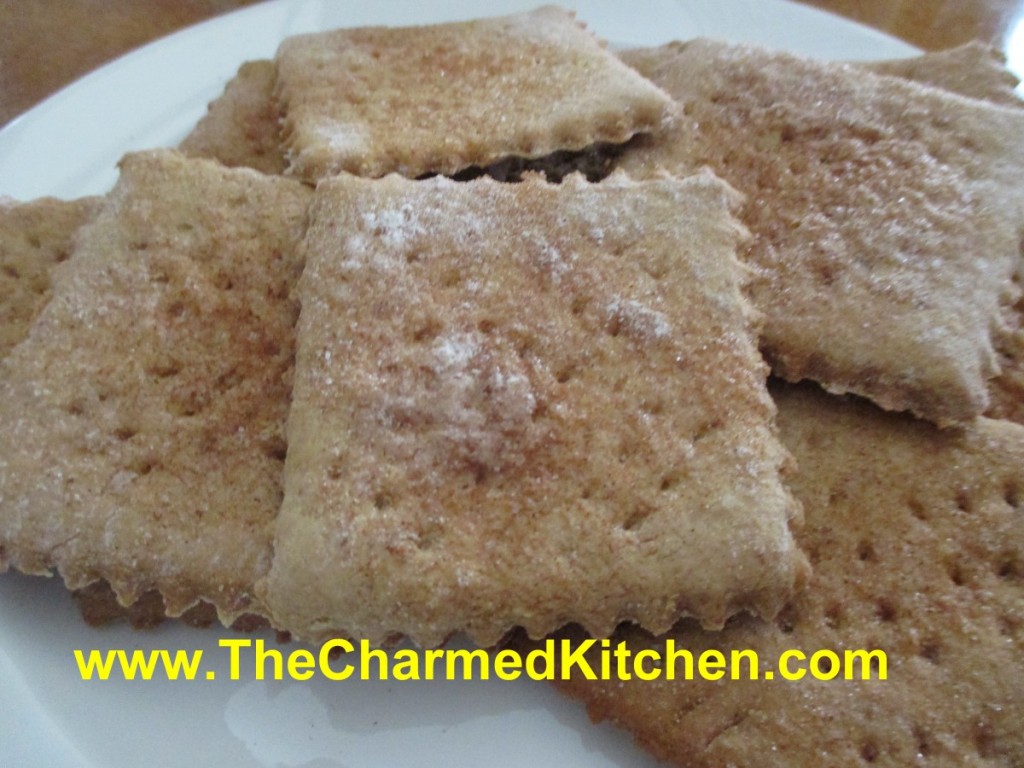
I have made graham crackers before, but it had been a few years. They aren’t all that hard to make. Rolling them to the right thickness is the hardest part. You want them pretty thin, but not too thin. We made them in cooking class last night. We were making several cracker recipes and the lady who chose the Graham crackers was not confident. She was only there because her daughter couldn’t make it and she was taking her place. I guided her along and her crackers came out great!! She nailed it!!
These taste really good and are not as sweet as grahams crackers you get at the store. If you like a sweeter cracker, add a little more sugar. I like them the way they are.
Someone asked for my marshmallow recipe last night, so I included it at the bottom of this post.
It is fun to make S’Mores using both homemade marshmallows and homemade graham crackers.
Graham Crackers
1 c. whole wheat flour or whole wheat pastry flour
1 c. all-purpose flour
1/3 c. sugar
½ t. salt
1 t. cinnamon
1 t. baking powder
1 large egg
¼ c. oil
¼ c. honey
2 to 3 tablespoons milk
additional milk for glaze
cinnamon-sugar (optional)
In a mixing bowl, combine whole wheat flour, all-purpose flour, sugar, salt, cinnamon and baking powder. In a separate bowl, beat egg till light, add oil, honey and 2 tablespoons milk. Stir into dry ingredients until you have a fairly stiff dough, adding additional milk if necessary. Wrap dough in waxed paper and chill until firm, about 1 hour (or longer, if it’s more convenient).
Turn the dough onto a floured surface and knead gently until it holds together. Roll dough out till it’s about 1/16-inch thick; make sure rolling surface is well-floured, or you’ll have trouble transferring crackers to baking sheet. Preheat your oven to 350°F.
Cut dough into 3-inch squares, prick each square several times with a fork, and place on lightly greased cookie sheets. Brush the tops with milk, sprinkle with cinnamon-sugar if you’re so inclined, and bake for 12-15 minutes, or until crackers are lightly browned. Remove crackers from oven, transfer to a wire cooling rack, and cool completely. Makes about 2 dozen graham crackers.
As promised here is the recipe for making marshmallows. I’ve used this recipe for ages and what I like about it is that it is super easy and still gives you yummy marshmallows. I’ve seen more complicated versions- but why make life harder than it already is? The recipe calls for packets of gelatin. If you want to use sheet gelatin instead, which I did, the adjustments are in the directions. Either works fine.
Marshmallows
1/2 c. cornstarch
1/2 c. powdered sugar
small amount of butter
2 envelopes unflavored gelatin, or 6 sheets of gelatin*
1/2 c. granulated sugar
1/3 c. water
2/3 c. corn syrup
1/2 t. vanilla
Combine cornstarch and powdered sugar in a small bowl. Butter an 8x8x2 inch-baking pan. Sprinkle with some of the cornstarch mixture. Reserve the rest of the mixture for use later on. Combine the gelatin, granulated sugar and water in a small saucepan and cook over low heat, stirring constantly until gelatin is dissolved.** Pour gelatin mixture into a large bowl, adding the corn syrup and vanilla. Beat with an electric mixer on high speed for 15 minutes. Be precise on the timing. The mixture will be thick and fluffy, marshmallow cream, actually. Pour mixture into the prepared pan, spread evenly and refrigerate overnight. The next day, sift some of the reserved cornstarch mixture over the marshmallows. Sprinkle some more of the coating mixture on a work surface and turn the marshmallow out onto the prepared surface. Cut the marshmallows into 1-inch squares, coating as you go. The marshmallows are very sticky until completely coated. Allow to dry on a rack. Store in an airtight container for up to 3 weeks. Makes about 4 dozen candies.
You can swap out flavorings- using maybe mint or lemon in place of the vanilla. You can also add a few drops of food coloring, if you like. Oh, and when you are at the rolling the pieces around in the cornstarch and powdered sugar stage of the process- don’t wear black. You’ll thank me later for that.
* Note: 3 sheets of sheet gelatin= one packet (1 tablespoon) of powdered gelatin.
** Note: If you are using sheet gelatin place it in the pan with COLD water and stir until dissolved. Then add the sugar and just cook, over medium-low heat until just warm, stirring often. Don’t let the mixture get too hot or the gelatin will not work.
Dissolve gelatin in water
Cook with water and sugar until warm
Apple Cider Sorbet

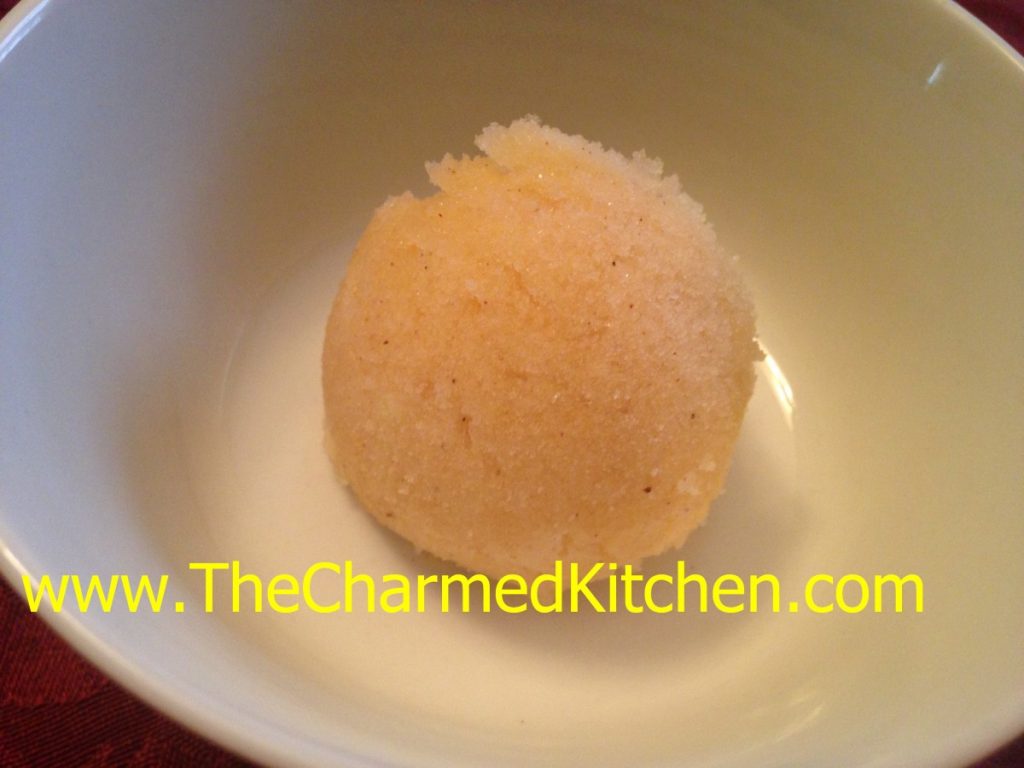
I’ve had my share of warm apple cider, but I never froze it before. This sorbet is such a nice dessert option. Light and naturally sweet, it is the perfect finish for any meal.
The cider is boiled down, to concentrate the sweetness. Then fresh apples are added and pureed. The mixture gets frozen, then pureed one more time- to really smooth out the texture. Cinnamon sticks impart their flavor when boiled in the cider. You could certainly used ground cinnamon, if you don’t have cinnamon sticks. Feel free to add other spices, too, like allspice, cloves or ginger.
Over the years, I have made all sorts of sorbets. I love the light, creamy texture. I am not sure why I never tried to make an apple sorbet before. I am so glad I finally did. This is a nice, lighter option for dessert. It is also a dairy-free option, for those who can’t have ice cream.
Apple Cider Sorbet
6 c. apple cider
2 (4-inch) cinnamon sticks
3 apples, peeled, cored and diced
In saucepan place cider and cinnamon sticks. Cook over medium high heat, uncovered, until cider has cooked down to 2 cups. Remove cinnamon sticks and discard them. Cool cider and combine in food processor with the apples. Puree until smooth. Transfer mixture to a container with a lid. Freeze until solid. Remove from freezer and allow to soften for a few minutes. Break into chunks and puree in processor, until smooth and creamy in texture. You can serve it right away, or return to freezer to enjoy later. Makes 1 quart of sorbet.


