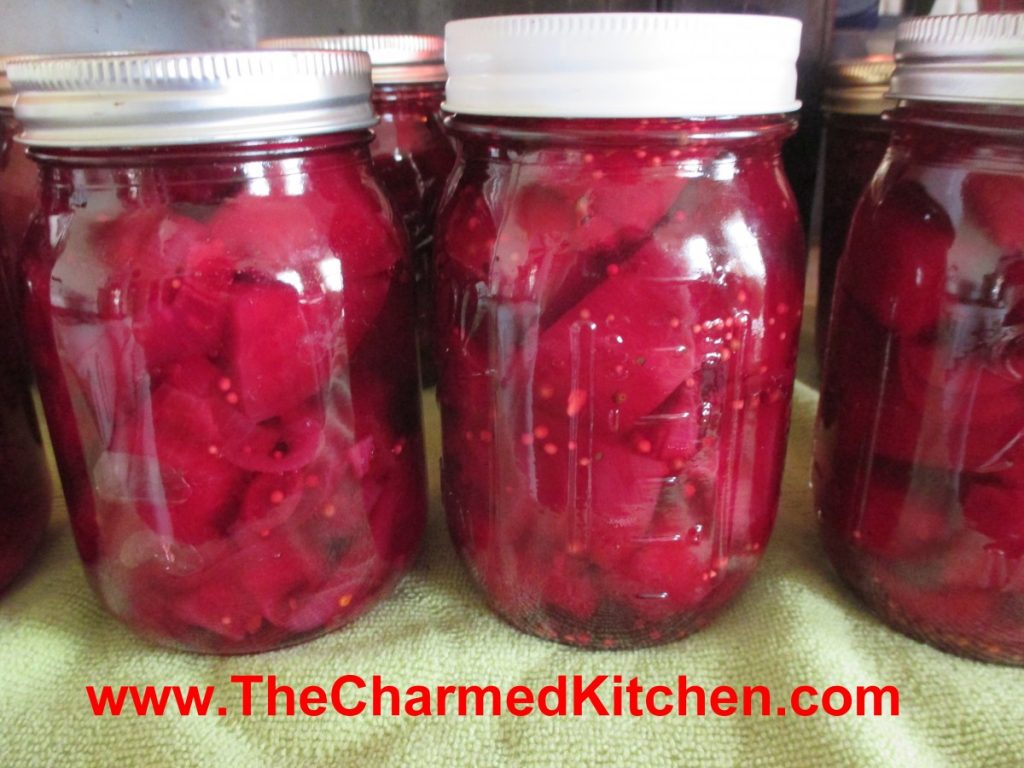
Spicy Pickled Beets

Beets are just one of those foods. People seem to love them, or hate them. I am a beet lover. I enjoy them in all sorts of dishes. The nice thing about making a batch of pickled beets is being able to open up a jar whenever you want.
This recipe is a pretty classic way to preserve beets. The brine is a sweet and sour mixture with pickling spice, salt and red pepper flakes for added flavor and heat. You could play around with the seasonings a little. Maybe adding more heat or less, depending on your preference. Keep in mind that spices tend to intensify in flavor when canned.
Pickled beets are great served as a side dish with all sorts of foods. I like them served with cheeses, crackers and other pickled foods as an appetizer. I also like to add them to salads. If you don’t want to can them- you can store them in the fridge for up to a couple of months.
Spicy Pickled Beets
4 lbs. beets, smaller sizes preferred
3 c. thin sliced onions
2 c. sugar
2 T. Pickling spice
1 T. canning salt
2 t. red pepper flakes
2½ c. cider vinegar- 5% acidity
1½ c. water
Wash and trim beets, leaving a couple inches of stem attached. Cook in boiling water until tender. Cool beets down so you can handle them. Peel beets and cut into 1½- 2-inch diameter pieces, if beets are large. Leave whole if beets are small. Set aside. Combine the rest of the ingredients in a pot and bring to a boil. Reduce to simmer and simmer 5 more minutes. Add beets and cook a few minutes, until beets are warmed through. Ladle hot beets into clean pint jars, leaving ½ inch headspace. Ladle in hot liquid, leaving ½-inch headspace. Remove air bubbles, wipe off rim, screw on lid to finger-tip tightness. Repeat with remaining beets and liquid. You should fill about 5 pint jars. Process in a boiling water bath for 30 minutes. Turn off the heat and leave jars in water bath 5 minutes before removing to counter to cool. Yield: 5 pints.
Corn and Barley Salad with Basil


This colorful salad can be a side dish or main dish. I like it as a main dish for hot summer days. It somehow manages to be light and filling at the same time. It makes a wonderful lunch, served over a bed of salad greens.
The combination of sweet corn and barley works so well together. I don’t think most people think of salad, when they think of barley. Barley is more commonly used in soups. But this versatile grain can also be a nice ingredient in a salad. Perfect on a hot day, when you want a lighter meal.
I had grilled corn, and had some leftover, so that is what I used. I think the smokiness of the grilled corn added a nice touch. I had some fresh basil so I added that, too.
If you are looking for a new salad idea this summer- you might try adding barley to your next salad.
Corn and Barley Salad with Basil
½ c. pearl barley
salt
3 T. cider or white wine vinegar
1 t. Dijon mustard
fresh ground pepper
3 T. olive oil
3 T. fresh basil, cut into thin strips
3 c. cooked corn, from about six ears
1 c. diced sweet onion
1 c. diced sweet pepper, any color
¼ c. sliced green onions
Combine barley, 2 cups water and ½ t. salt in saucepan and simmer, covered until barley is tender, about 50 minutes. Drain and rinse under cold water. Combine remaining ingredients and toss with barley in large bowl. Makes 6 servings.
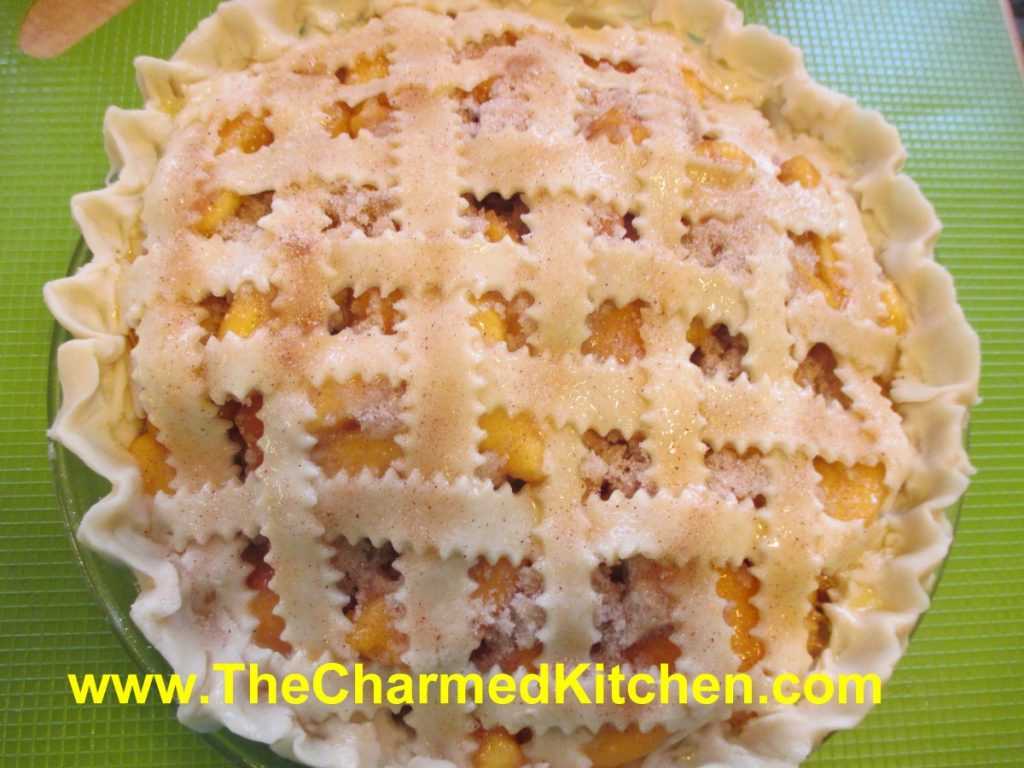
Mom’s Peach Pie

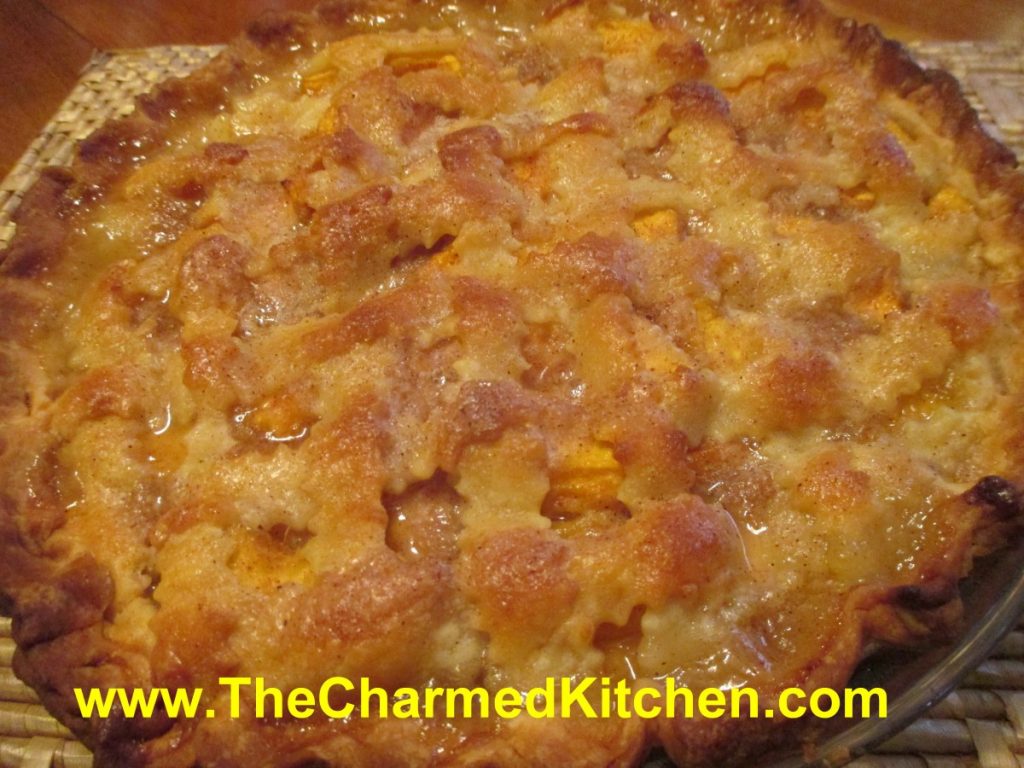
Sometimes, pie is more than just pie. Sometimes it is a memory and a tribute. We had a couple of peach trees at my parent’s house. One year there were so many peaches, my dad had to prop up the branches to keep them from breaking under the weight of the fruit. I remember the peach pie my mom made with some of them. It was bliss.
I have a handwritten copy of the peach pie recipe from my Mom. Well, maybe a partial recipe is a better description. What I have is a list, with the filling ingredients and the words “350-45-50”. No directions for how the ingredients are prepped or assembled. There was no recipe for the crust, but I knew the recipe she used, so that was not a problem. Her original recipe also did not have any cinnamon or vanilla, but I think she would have approved of their addition. I thought of her when I made this pie. Sweet memories, indeed.
Here is her recipe, as best I could figure it out.
Cinnamon-Vanilla Peach Pie
1 recipe pie crust- enough for two crusts- recipe follows
10 peaches
2 T. lemon juice
2 t. vanilla
1 c. sugar
1/3 c. flour
¼ c. butter
2 t. cinnamon
1 egg
2 T. cinnamon sugar*
Roll out 1 crust and place in a 9-inch pie pan. Set aside. Peel, pit and slice the peaches. Place in a bowl and toss with the lemon juice and the vanilla- set aside. In small bowl, combine sugar with flour, butter and cinnamon until mixture resembles coarse crumbs. Place about a third of the flour mixture in pie crust. Top with half of the peaches. Add another third of the flour mixture and then the rest of the peaches. Sprinkle remaining flour mixture on top of the peaches. Roll out and cut the remaining pie dough into strips and place in a lattice design on top of the pie. Trim off excess crust and crimp edges to seal. Combine egg with a tablespoon of water and mix well. Brush egg wash on lattice top and sprinkle with the cinnamon sugar. Bake in a 350 degree oven for 45-50 minutes. When I placed the pie in the oven, I put a baking sheet on the rack below the pie to catch drips. If edges start to get too brown, cover with foil. Makes 1 pie.
*Combine 1 teaspoon of cinnamon with 2 T. sugar
Flaky Pie Crust
2 c. flour
1 t. salt
3/4 c. lard, butter, shortening or coconut oil, chilled
1 T. cider vinegar
4-5 T. cold water
Combine flour and salt and cut in fat of your choice. Toss in vinegar and water 1 tablespoon at a time until dough holds together. Use a fork to toss the ingredients together and as soon as the mixture holds together stop adding water. Makes 2. Chill well before using.
Freezing Green Beans

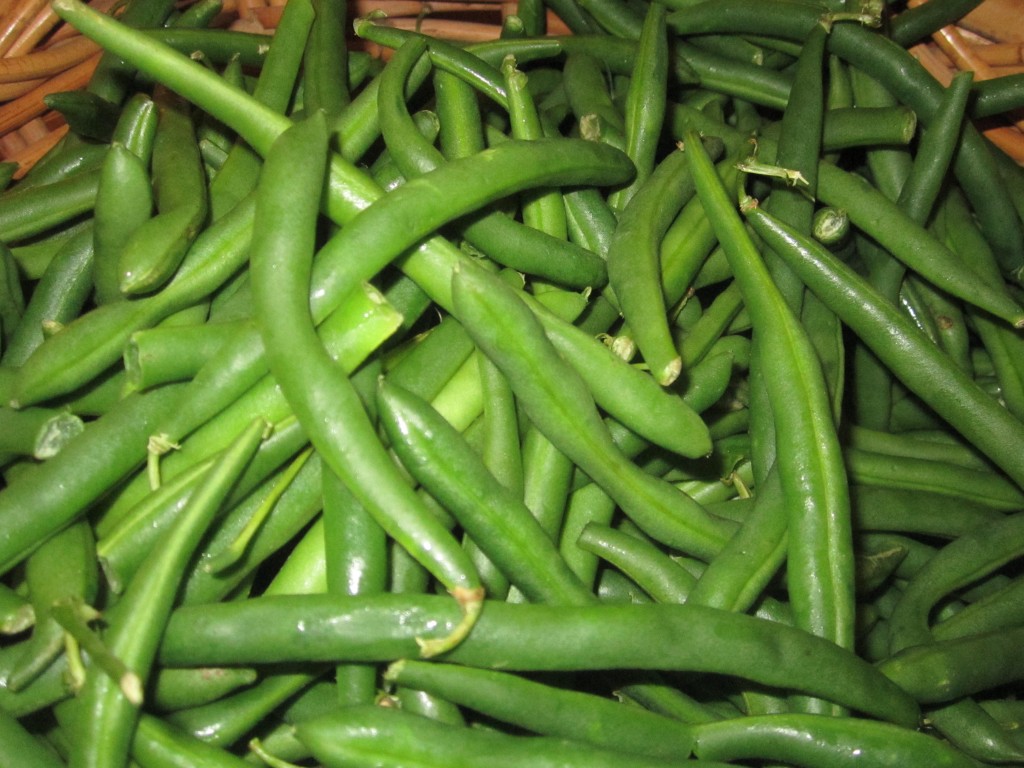
With so many vegetables and fruits in abundance now, I think its important to consider putting some away for winter. I had a request from a friend to post this info. She wants to have green beans from her garden at her Thanksgiving dinner. Not a problem at all. You could can green beans, lots of people do. Canning them does require a pressure canner, which my friend doesn’t have. You could also pickle them or dehydrate them, but for the green bean dish my friend wants, I think freezing them is the way to go.
Unlike canning, safety is not the primary concern when freezing. Quality is, however, and by following a few steps you can enjoy your harvest all year round.
To freeze green beans start by washing the beans and trimming off the ends. You can freeze them whole or cut. Beans are best when blanched in boiling water before freezing. Have a large pot of water boiling and a bowl of ice water ready. Place prepped beans in the boiling water for 3 minutes. Remove with a slotted spoon and place in the ice water to cool down. If you are blanching a lot of beans do them in batches. Placing too many will bring the temp of the boiling water down too much. Once beans are cooled down drain them and place in freezer bags or containers, label and date then place in freezer. When ready to use them take from the freezer and place beans in boiling water until tender- about 5 minutes.
Advantages of freezing are that you don’t need to buy a canner or worry about spoilage. You will, however, need freezer space and freezer containers to prevent freezer burn. And of course in the event of a prolonged power outage you could lose it all. I think some foods are better when frozen than canned, like green beans which must be processed for a very long time when canned.
Always label what you freeze and date it. It’s amazing how time flies. While food remains safe for ages in the freezer it is best to use most home-frozen foods within a year of freezing.
Some foods need to be blanched before freezing. Blanching is simply putting the food in boiling water steaming for a few minutes and then plunging the food into ice water to stop the cooking. Blanching kills surface bacteria and also causes the produce to wilt, thus making it easier to pack. Blanching also stops the action of ripening enzymes, thus keeping that just-picked taste. The issue with fruits and vegetables is whether to blanch before freezing or not. As a rule, fruits are not blanched and most vegetables are. Peppers and onions can be frozen without blanching.
For best long-term storage, the colder your freezer, the better. Generally, separate freezers tend to be colder than freezers connected to a fridge. Ideally you want your freezer to be somewhere around -10 to -20 degrees F.
Zucchini Carrot Cupcakes

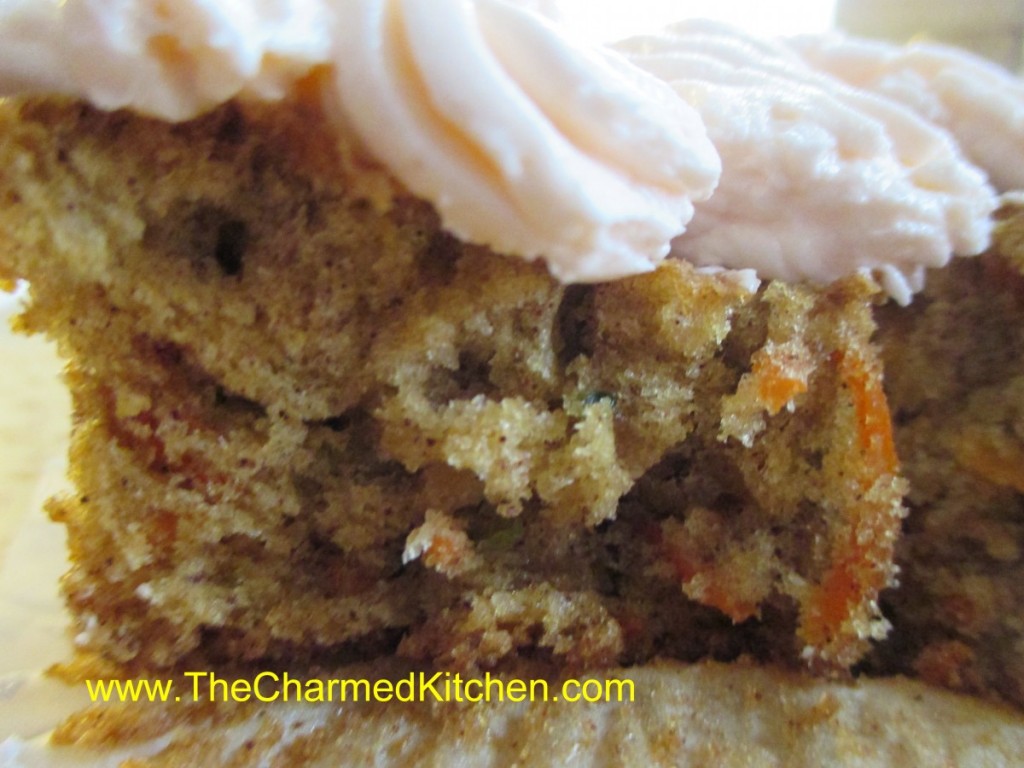
These are really good cupcakes. They are moist and not too sweet with a slightly dense texture. Sort of a cross between carrot cake and zucchini bread, they have more texture than a traditional cupcake and plenty of flavor. I had an abundance of zucchini and carrots and figured they might play well together.
I got 24 cupcakes out of the recipe but they were a little small. Perhaps 18 would be a better way to go. I used simple vanilla buttercream to finish them off. I whipped the frosting a long time so it was extra fluffy. Here are the recipes for both the cupcakes and the frosting.
Zucchini Carrot Cupcakes
2 eggs
1 c. sugar
2/3 c. oil
1¼ c. flour
1 t. baking powder
1 t. baking soda
1 t. cinnamon- I think I would use a little more next time
½ t. salt
1 c. grated carrot
1 c. grated zucchini, squeezed dry and packed tightly
½ c. chopped nuts, optional
Beat eggs with sugar until frothy. Beat in oil then add dry ingredients. Beat on high for 4 minutes. Stir in veggies and nuts. Pour batter into 18- 24 paper lined muffin tins, filling them 2/3 full. Bake in a 350-degree oven for about 15 minutes or until top springs back when lightly touched. Cool and frost. Makes 24.
Note: These cupcakes deflate a little while cooling.
Classic Vanilla Buttercream
3/4 cup butter
6 cups confectioners’ sugar
1/3 cup milk
1 1/2 teaspoons vanilla extract
1/4 teaspoon salt
2 tablespoons milk
Beat butter in a large bowl until fluffy. Gradually add 3 cups of the sifted confectioners’ sugar, beating well. Slowly beat in the vanilla, salt, and 1/3 cup of the milk. Gradually beat in the 3 remaining cups of confectioner’s sugar. Beat in additional milk (1 to 2 tablespoons) if needed, to make frosting of spreading consistency. You can also tint the frosting with juice (like pomegranate or raspberry) or food coloring.
Warm Pasta and Tomato Salad

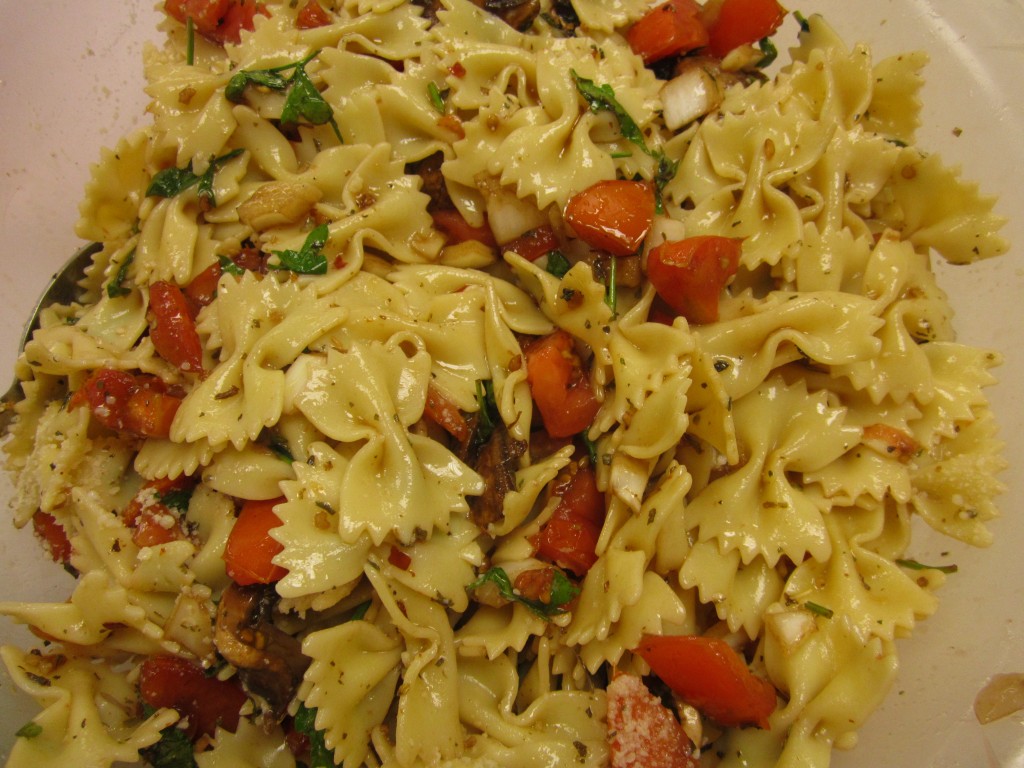
This salad has been a favorite of mine for a long time. I make it when fresh tomatoes are in season. You can serve it on its own, or as a side to grilled meats. It’s not like most salads, in that it is served warm.
The start of the salad is a mix of fresh tomatoes, mushrooms, oil, seasonings, vinegar. A lot of the typical ingredients you might find in a salad. These ingredients are mixed together and chilled, allowing enough time for the flavors to blend.
When you are ready to serve the salad, you toss the tomato mixture with fresh cooked, hot pasta. The result is a warm salad. Of course, you can serve leftovers cold, if you like.
Sometimes I top the salad with Parmesan cheese, too.
So here is the recipe. If you have some fresh tomatoes, you might want to try this salad. It really is tasty.
Warm Pasta and Tomato Salad
1 lb. Plum tomatoes, chopped
1 medium sweet onion, chopped
4 oz. Fresh mushrooms, sliced
2 cloves garlic, minced
¼ c. fresh parsley, chopped
1 T. dried basil or 1/4 c. chopped fresh basil
1 T. capers, optional
1 t. dried oregano
½ c. olive oil
¼ c. red wine vinegar
3 T. balsamic vinegar
Dash of hot red pepper flakes
Salt to taste
1 lb. Uncooked pasta
Combine all ingredients, except pasta, and chill overnight. Cook pasta, drain and toss with tomato mixture. Mixture should be served right away. Serves 6.
Eggplant “Fries”

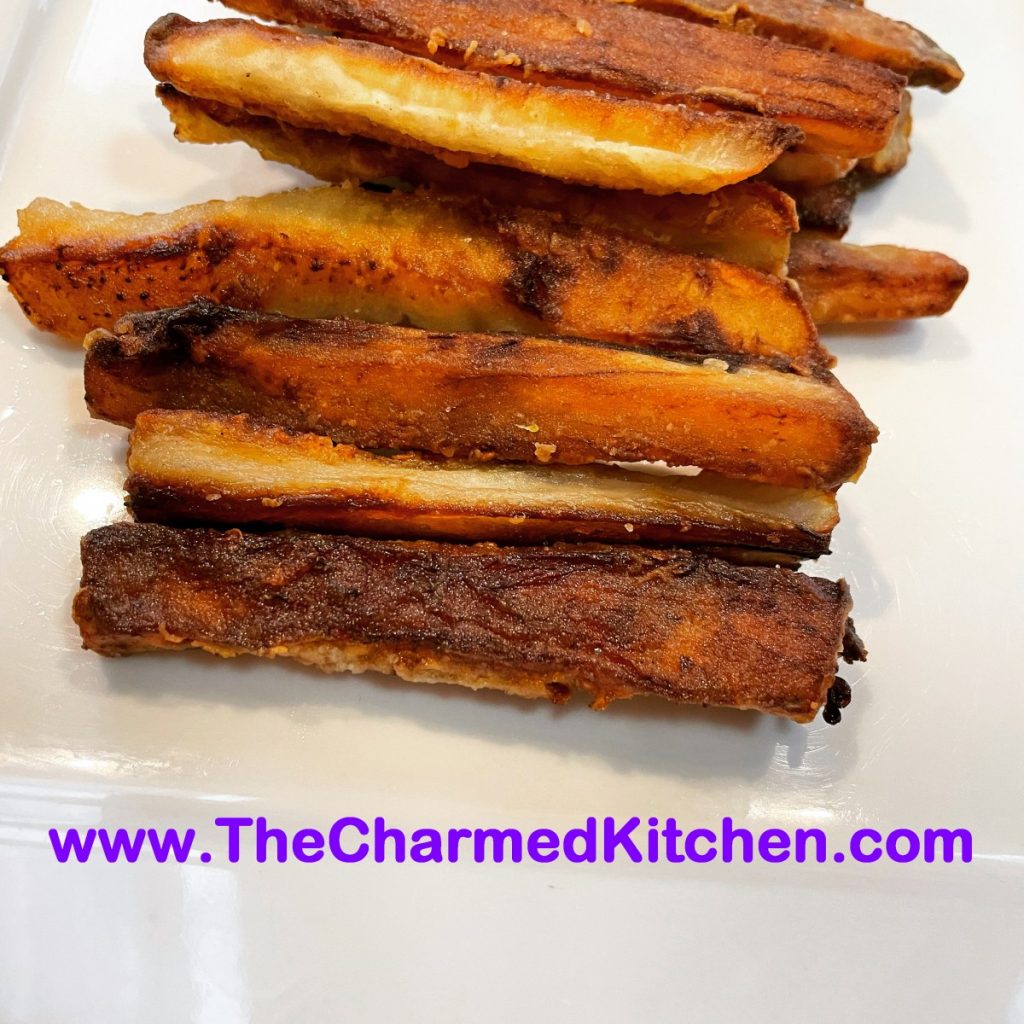
This dish started because I had an eggplant that needed to be used. I love eggplant, but none of my usual recipes were doing it for me. I decided to turn my eggplant into fries. I wasn’t in the mood to actually fry them, so I thought I would try to bake them and see if I could get a result I liked. They came out really good. Plenty crispy.
I shared a picture of my fries and a number of people asked for the recipe. I decided to write out a more detailed version than I posted. People also asked about other ways to make them. I only baked mine, so I can’t give absolute answers, but I can give you a pretty educated guess. Yes, these would work well in an air fryer or convection oven. You’d have to use a lower temp and keep an eye on them for cooking time. Yes, they can be deep fried. I have had deep fried eggplant at restaurants. They were pretty darn good. I have also pan fried them in the past. Just add about 1/2 inch of oil to a large skillet and fry them.
So here is a more detailed recipe. I know I say medium eggplant. I hate to be vague, but that is the best I could do.
Enjoy!!
Eggplant “Fries”
1 medium eggplant
Salt
½ c. rice flour, but you could use wheat flour or cornstarch
½ c. Oil
Preheat oven to 450F. Peel the eggplant, if you like. You don’t have to. Slice and crosscut into “fry” sized pieces. They are going to shrink some in cooking, so allow for the shrinkage. Lightly salt the eggplant and let it sit for about 10 minutes. The salt will draw some of the water out of the eggplant, making it easier for the flour to stick. Place the eggplant slices in a large bowl. Add the flour and toss until coated. Drizzle the oil on a large baking sheet. Add the eggplant slices, leaving room between them. Bake for 15 minutes. Remove from oven and turn the slices over. Return to oven and bake until golden brown- don’t burn them, but pretty dark brown if you want more crunch. Mine were in the oven for about 25 minutes total. Remove to platter with paper towels on it to drain. Toss with more salt, if needed and serve.
Tips for a Better Cheesecake

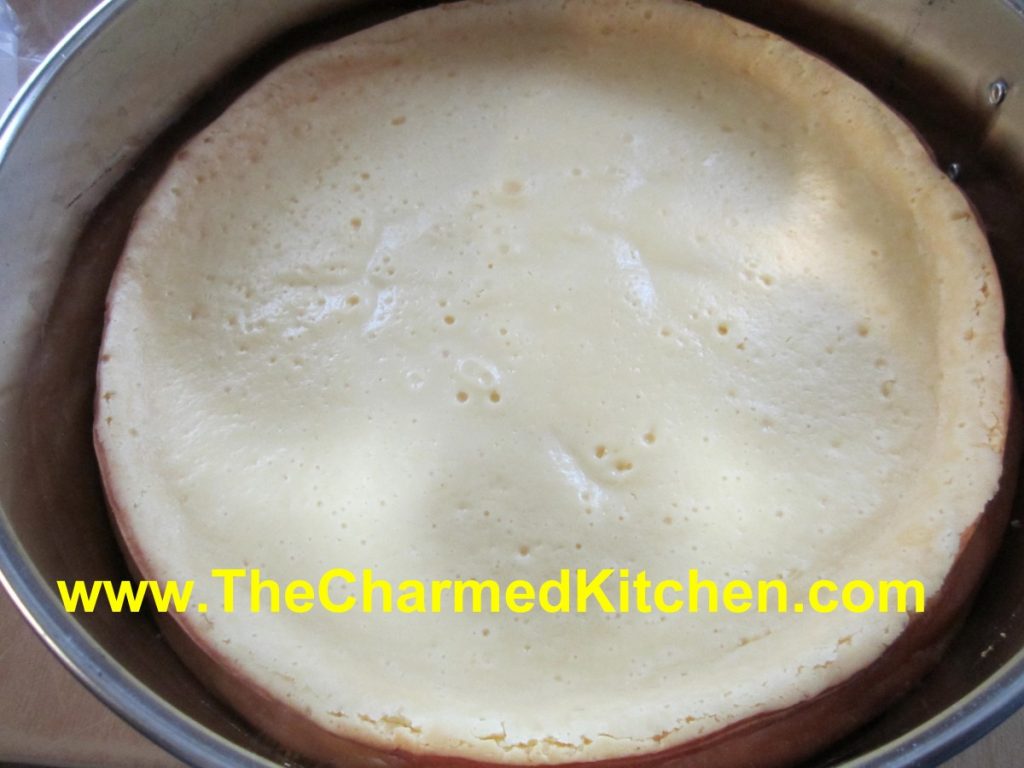
I thought I’d share some tips with you for better cheesecake. Have you ever had a cheesecake crack? You did everything according to the directions and it comes out of the oven just fine and then- a crack. It happens a lot but it doesn’t have to. There is a simple solution.
I followed the rules, too. I did not over beat the eggs, sometimes I added a pan of water to the oven. There are recipes that call for leaving the cheesecake in the oven, with it turned off, to cool down slowly. All work sometimes- but then- a crack. You cover it up with pie filling or sour cream but it still bothers you- what did you do wrong?
I came upon the solution that has worked for me. It’s simple really. Cheesecakes puff up while baking and then as they cool down they deflate. They crack because they stick to the sides of the pan. As it shrinks it pulls on the cheesecake and a crack results.While cheesecake recipes almost never tell you to do this- I just spray the pan with a non-stick coating or brush with a little oil or melted butter. So simple. Every time I have done this the cheesecake puffs then shrinks while cooling and the result- no cracks.
Here are some more cheesecake baking tips.
- Let the cream cheese and eggs stand at room temperature for 30 minutes before using.
- Mix the ingredients until just mixed, don’t over mix as that also causes cheesecakes to puff up and then fall and crack.
- Use a springform pan so you can remove sides after baking.
- Either butter the sides of the springform pan or loosen the sides as soon as it comes out of the oven to prevent cracks as the cake cools.
- Place springform pan on baking sheet or pizza pan to catch any drips.
- Keep oven humid during cooking to reduce cracking. Just place a pan of water on a lower oven rack for recipes that are not already using a water bath.
- Let baked cheesecakes cool down slowly. Cool on a wire rack and remove sides when the recipes specifies.
- Test for doneness near the end of the baking period by gently shaking the cheesecake. When fully cooked a 1-inch section in the middle will jiggle slightly. This area will be 2 inches wide in a sour cream recipe. This soft spot will firm up after cooling down. Knife tests do not work on cheesecakes because the knife will cause the cake to crack and cakes including sour cream will always test undone even when fully cooked.
- Stored cooled cheesecake in the refrigerator covered with plastic wrap or an inverted bowl to prevent drying out and also to keep it from picking up odors. Cheesecake will keep for up to 3 days.
- To freeze, place the cooled whole cheesecake or cheesecake slices in the freezer unwrapped. Leave in until partly frozen and then wrap tightly in freezer wrap. Use within a month for best flavor. Thaw in the refrigerator. Loosen wrap, but keep cake covered during thaw.
Bonus Tip: Don’t be afraid to play around with recipes. You can interchange crust recipes or add fine chopped nuts to a crust. Experiment with flavorings. Try using mint, lemon, almond, chocolate and nut flavorings to add a little zing to a favorite recipe. You can also decorate your cheesecake with powdered sugar, cocoa, fruit, nuts, candies, shaved chocolate…
Sweet Corn Ice Cream


This is one of those times when you just need to trust me. Ice cream flavored with sweet corn might sound odd to you, but it is really quite tasty. The corn flavor actually works very well when added to traditional ice cream ingredients like cream, sugar and eggs.
What a fun dessert to make for your next summer barbecue. You can even let people taste it to see if they can guess the secret ingredient!
I had heard of ice cream being made with corn before, but only tasted it recently. A cousin of mine made some and I was lucky enough to try it. It was really good. Corn ice cream is popular in Mexico, at least that is what I read.
I decided to make some of my own. It was perfect timing. I had some cream and half and half that needed to be used soon. I also had 2 ears of corn in the fridge. You can just cut the corn from the cob and add it to the recipe. That will leave you with kernels of corn in the finished ice cream. Nothing wrong with that. I pureed the corn mixture, because I wanted a smoother finished ice cream. Either is fine, based on your preference. I used 2 ears of corn- that was all I had. I could see adding another ear of corn for a more corny flavor. Frozen corn could also have been used.
Sweet Corn Ice Cream
2 ears sweet corn
1½ c. half and half
1 c. heavy whipping cream
¾ c. sugar- or a little more or less, to taste
4 egg yolks
1 t. vanilla
Scrape the corn kernels off the cobs and place in a medium saucepan. Add the half and half and the cream and bring to a simmer. You can leave the kernels as is, or puree the mixture at this point. I wanted a smoother ice cream, so I used my immersion blender to puree the corn in the pot. In a medium bowl, beat together the egg yolks, sugar and vanilla. Add ½ cup of the hot cream mixture to the eggs, whisking in well. Add another ½ cup of the cream mixture, whisking again. Add one last ½ cup of the hot cream and again, whisk until smooth. Pour the egg mixture into the saucepan with the cream and while whisking, simmer until mixture starts to thicken and will coat the back of a spoon. This will take about 5 minutes. Don’t use too high a heat, or you will scramble your eggs. Mixture should reach 160 degrees to be sure eggs are cooked. Remove from heat and pour mixture into a bowl. Allow ice cream base to cool down, then chill in fridge. Chilled mixture can be frozen in an ice cream maker once cold- in a few hours- or even the next day. Once mixture has been frozen in ice cream maker, place in a container and freeze until ready to serve. Makes about 5-6 cups of ice cream.
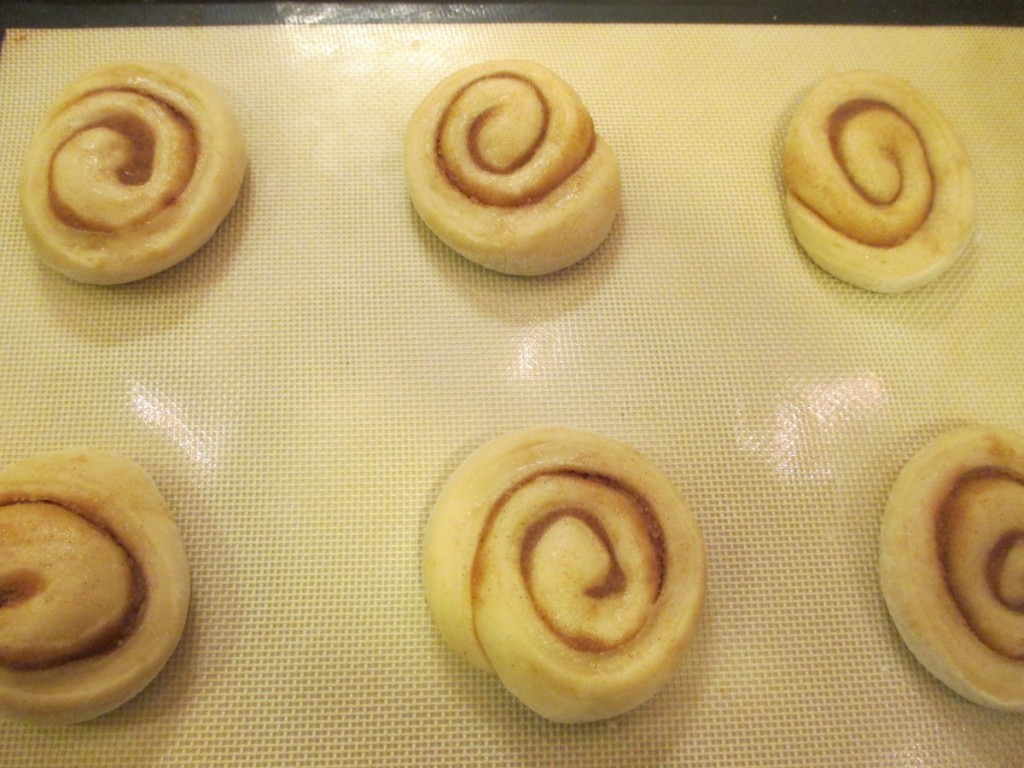
Cinnamon Pecan Crisps

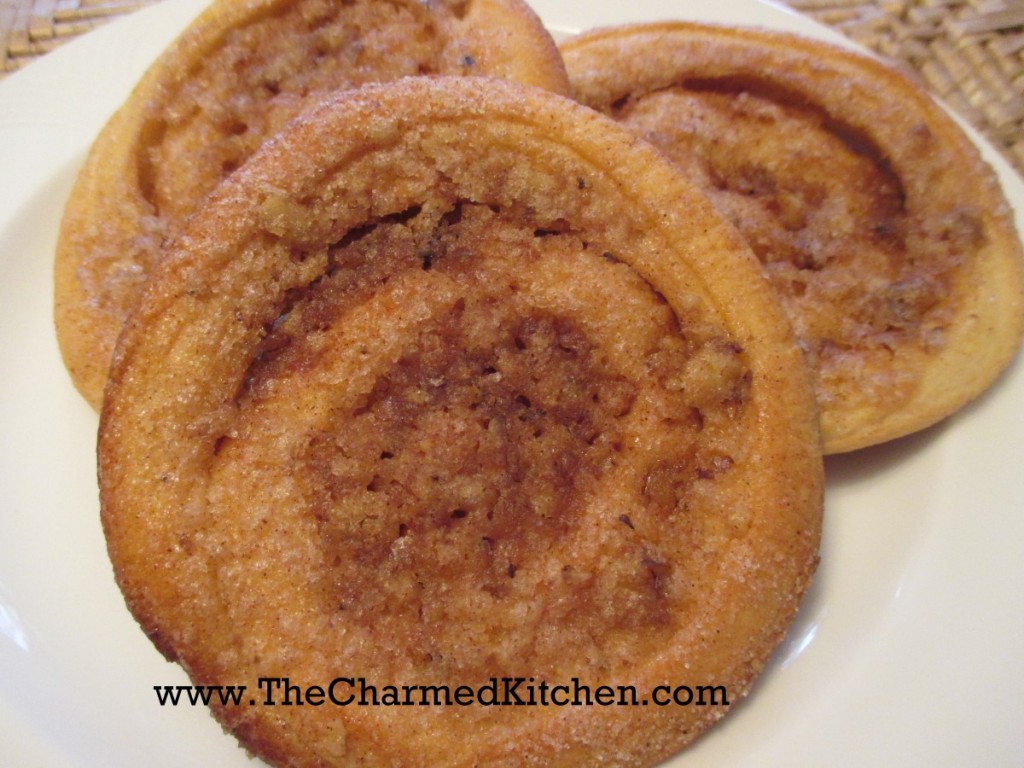
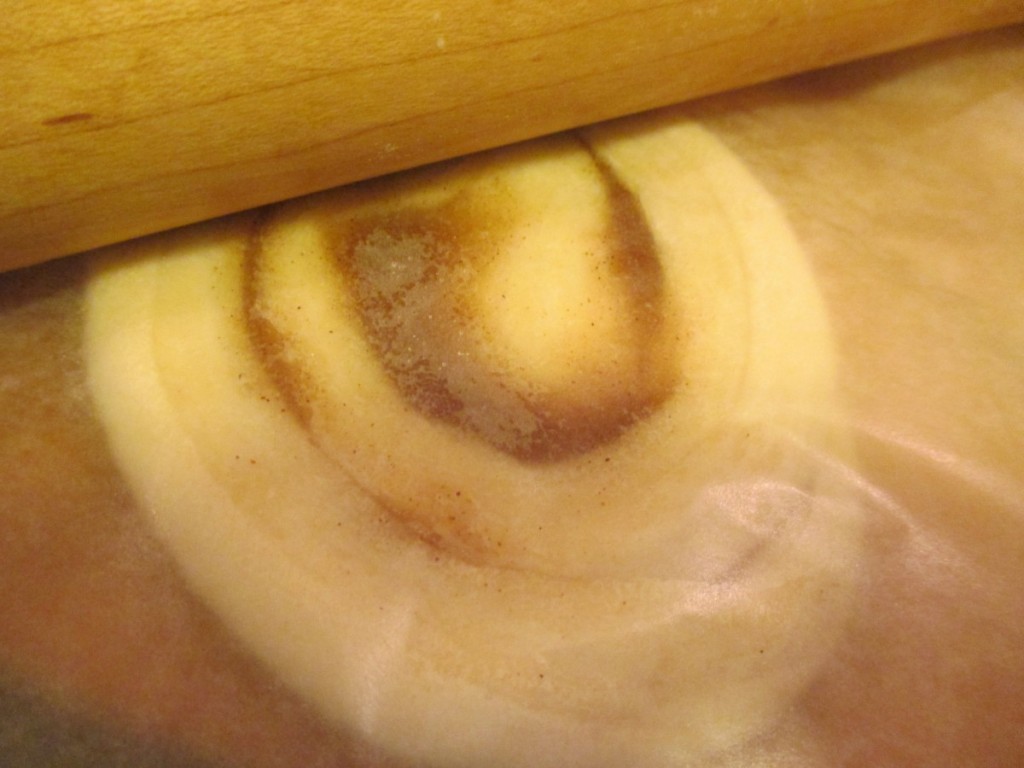
Imagine a cinnamon roll, but crispy. These pastries start out being made like a cinnamon roll, but then they are rolled flat, before baking, to create a crispy texture.
Reminds me of elephant ears. You know, those yummy fried treats from your local fair or carnival. If you are craving fair foods, why not make a batch of these? Unlike elephant ears you get at the fair, these are baked, not fried. They still give you the yummy cinnamon flavor and crispy texture of traditional elephant ears.
I serve them as they are, but you could top them with powdered sugar, a powdered sugar glaze, or a drizzle of melted chocolate.
I love them. I think you will, too.
Cinnamon Pecan Crisps
3½ – 4 c. flour
¼ c. sugar
1 pkt. Active dry yeast
1 t. salt
1¼ c. milk
¼ c. butter
1 egg
Filling:
½ c. brown sugar
½ c. sugar
¼ c. butter, melted
1 t. cinnamon
Topping:
¼ c. butter, melted
1 c. sugar
½ c. chopped pecans
1½ t. cinnamon
In mixing bowl combine 2 cups of the flour with the sugar, yeast and salt. Heat together the milk and butter until warm. Add to the flour mixture and beat for 3 minutes. Add another cup of flour and the egg and beat another 3 minutes. Gradually add enough of the flour to make a soft dough. Knead until dough is smooth- 3-5 minutes. Place dough in lightly oiled bowl and turn dough to coat in oil. Cover and let rise until doubled, about 1½ hours. Punch dough down and allow to rest 10 minutes. Meanwhile, prepare filling by combining sugars with cinnamon and stir in the melted butter. Divide dough in half. Roll one half into a square about 12 inches big. Let’s be honest here- rolling dough into a perfect square is pretty hard. Don’t freak out if it isn’t perfect, just shoot for sort of square. Spread half of the filling over the dough and roll it up. Slice the dough into 12 pieces. Prepare 2 baking sheets for these 12 pieces of dough. You’ll need 2 more for the rest of the dough. Line the baking sheet with parchment paper or a silicon baking sheet. Place 6 of the dough circles on each sheet- spacing them at least 3 inches apart. Flatten them to be about 3 inches across. I tuck the end under so they stay in a nice circle. Cover and let rise until doubled, about 30 minutes. Repeat this with the second half of the dough. You will end up with 4 baking sheets and 24 rolls in all. After the rolls have doubled preheat the oven to 400 degrees. Prepare the topping by combining the sugar, nuts and cinnamon in a bowl. Slide the parchment paper or silicone baking sheet off the cookie sheet and on to your work surface. Place a piece of wax paper over the rolls and roll then out pretty flat. Remove the wax paper and brush each of them with the butter and add a sprinkling of the sugar and pecan mixture to each one. I find a slightly rounded tablespoonful is about right. Put the wax paper back on the rolls and use a rolling pin to roll them again, pressing the nut mixture into them. Remove the wax paper. Repeat with the remaining rolls. I start baking the first 12 rolls while prepping the last 2 trays. It just saves me some time. Bake for 10-12 minutes. I put 2 in at a time and switch them halfway through the baking time. They should be a pretty golden brown color- top and bottom. Cool on a wire rack. Don’t be tempted to taste one when they are hot- the sugar will burn your mouth. Besides, they get crisper as they cool. Makes 24.