Homemade Lemon Curd

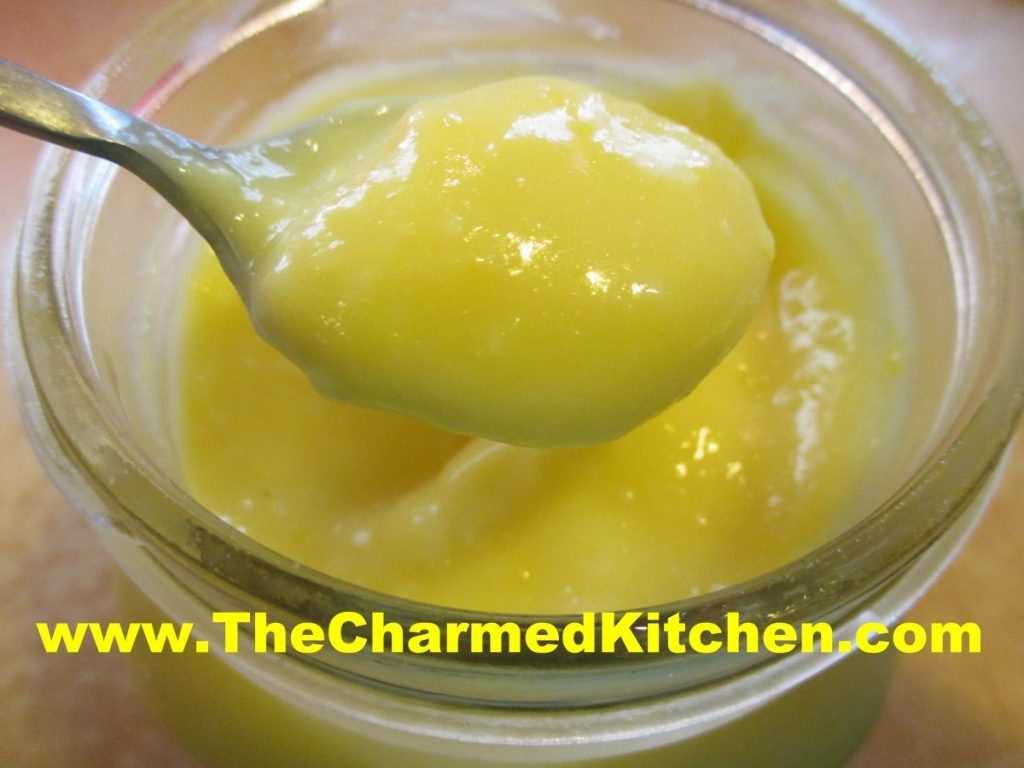
Spring is a perfect time to make lemon curd. Lemon curd is such a versatile dish. It’s a sort of lemon pudding and can be served plain, or with a dollop of whipped cream. It is also great in trifle or served as a topper for any number of cakes and sweet treats. I especially like to make lemon curd to serve with scones. It is also really nice served with berry shortcakes.
It is easy to make and packed with fresh lemon flavor. Lemon curd is just a few ingredients, cooked over low heat until it thickens up. You can make a batch in under 10 minutes. The longest part of the prep time is just waiting for it to cool down after cooking.
So here is the recipe for the lemon curd. If you never made your own- you might want to give it a try. Certainly worth the effort.
Lemon Curd
1/2 c. lemon juice
zest from one good sized lemon- you should have 2-3 teaspoons
1/2 c. sugar
3 eggs
6 T. unsalted butter- cut into little cubes
In medium saucepan combine all ingredients. Whisk the mixture until the eggs are well blended. Cook over medium low heat, whisking often, until the mixture thickens. This will take 5-7 minutes. Whisk more often as mixtures warms and starts to thicken. Better to heat over lower heat and take longer than over too high a heat. You don’t want the eggs to scramble. Once the mixture is thickened , transfer to a bowl or jar. Cover the surface with a piece of plastic wrap to keep the surface from developing a skin- like any pudding will do. Chill until ready to use. Makes about 2 cups. Will keep in fridge a week or two.
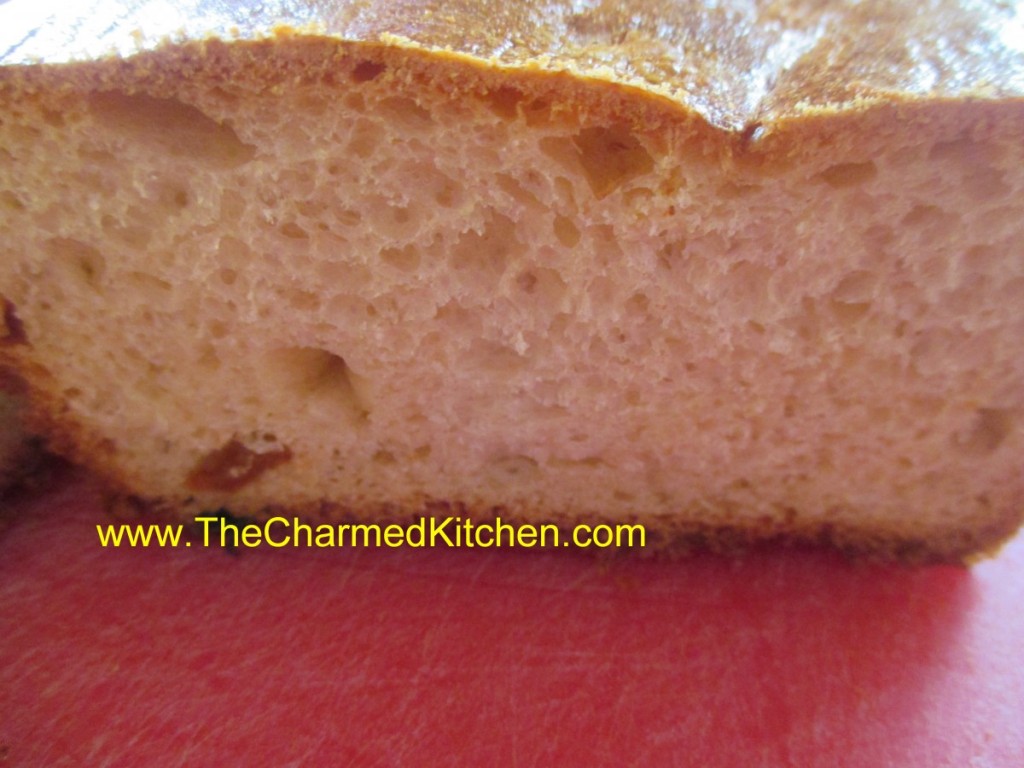
Classic Babka

What can I say? I am in a nostalgic mood this week. I have been working on my Easter menu and all sorts of favorite foods are on my mind. Babka is one of them.
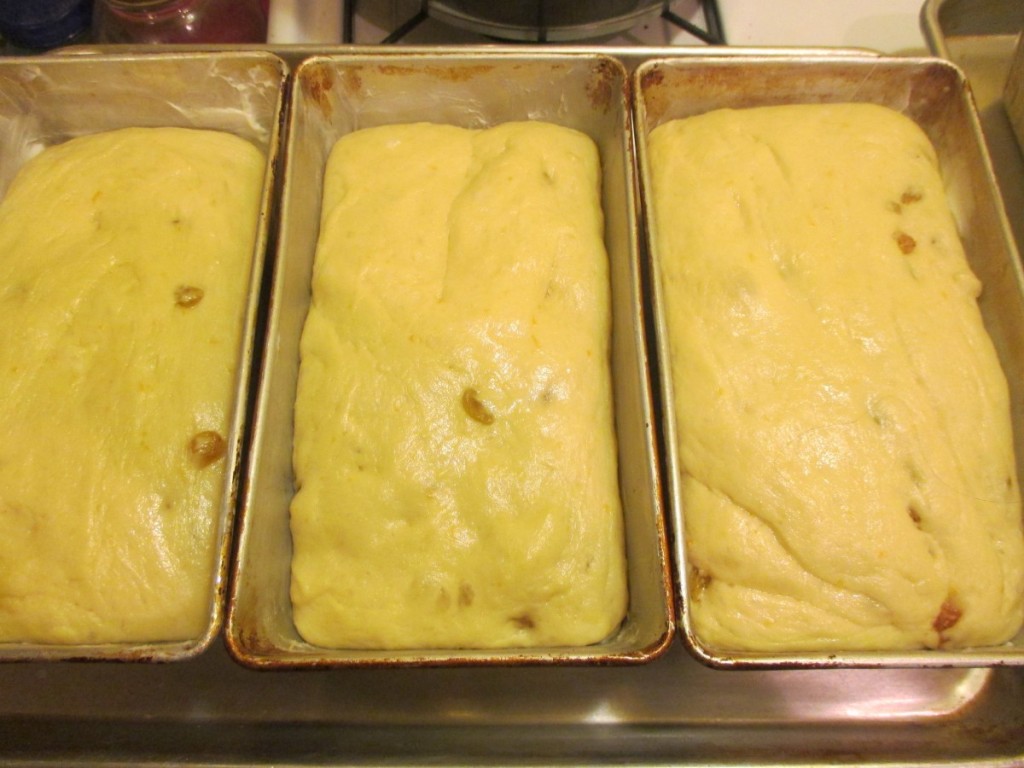
Babka is a different bread from most others that I make. For starters, the recipe makes 6 loaves of bread at once. Great for gift giving in those quantities.
Babka also uses much less flour than most of my bread recipes. Only 8 cups of flour for the 6 loaves. I can use close to 8 cups of flour for 2 loaves of other breads.
The babka dough is really a batter- so sticky you have to oil up your hands to divide the dough into the bread pans. This very tiny amount of dough rises to fill 9×5-inch bread pans. The result is a bread that is very light with a crunchy exterior and tender interior.
I can’t remember where I got this recipe. I still have the original handwritten recipe, but it isn’t handwriting I recognize. Maybe one day I will figure it out.
In the meantime, I will continue to make babka- and to share it with friends and family.
Babka
3 packets active dry yeast
1 c. warm water
1 c. sugar
8 c. bread flour
1 t. salt
5 large eggs
1 stick butter
2 T. oil
Grated rinds of an orange and a lemon
2 c. warm milk
1 c. raisins
1 egg mixed with 2-t. milk
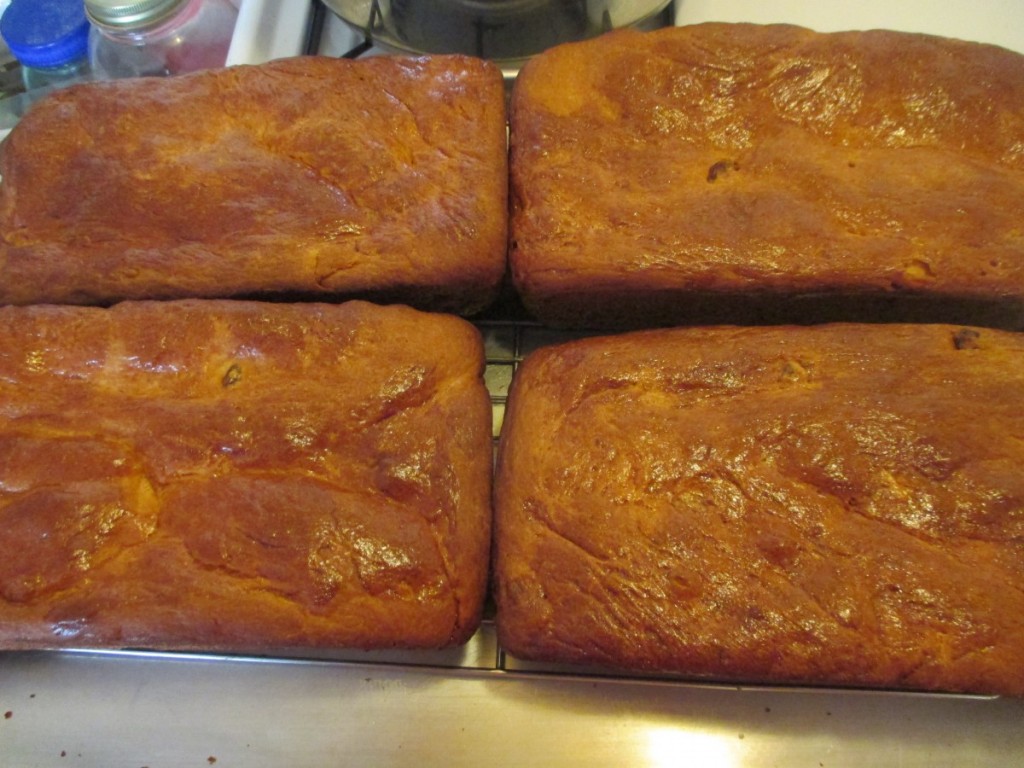
In bowl combine yeast, water, sugar, 1 c. flour, and salt. Allow to stand 10 minutes. Beat in eggs, butter, oil and grated rinds. Add remaining flour alternately with milk, beating a total of five minutes. Stir in raisins. Dust a large bowl with flour and put in dough. Cover and allow to rise until doubled, about 2 hours. Generously grease loaf pans. This recipe will fill 6 standard loaf pans – 9×5 – inch. Lightly oil hands and divide dough into portions, smoothing tops as you place dough in pans. Cover and allow dough to rise until more than doubled, about 1 hour. Brush loaves with egg and milk mixture. Bake in a preheated 325 degree oven for 1 1/2 hours or until bread is well browned and sounds hollow inside when tapped. Mine is normally done at about an hour and 15 minutes. Cool a few minutes in pans before removing to racks to cool. Babka in great eaten warm from the oven.
Chocolate Easter Egg Biscotti

After a friend mentioned that she would love my Easter Egg Biscotti even better if they were chocolate, I decided to try to make her some.
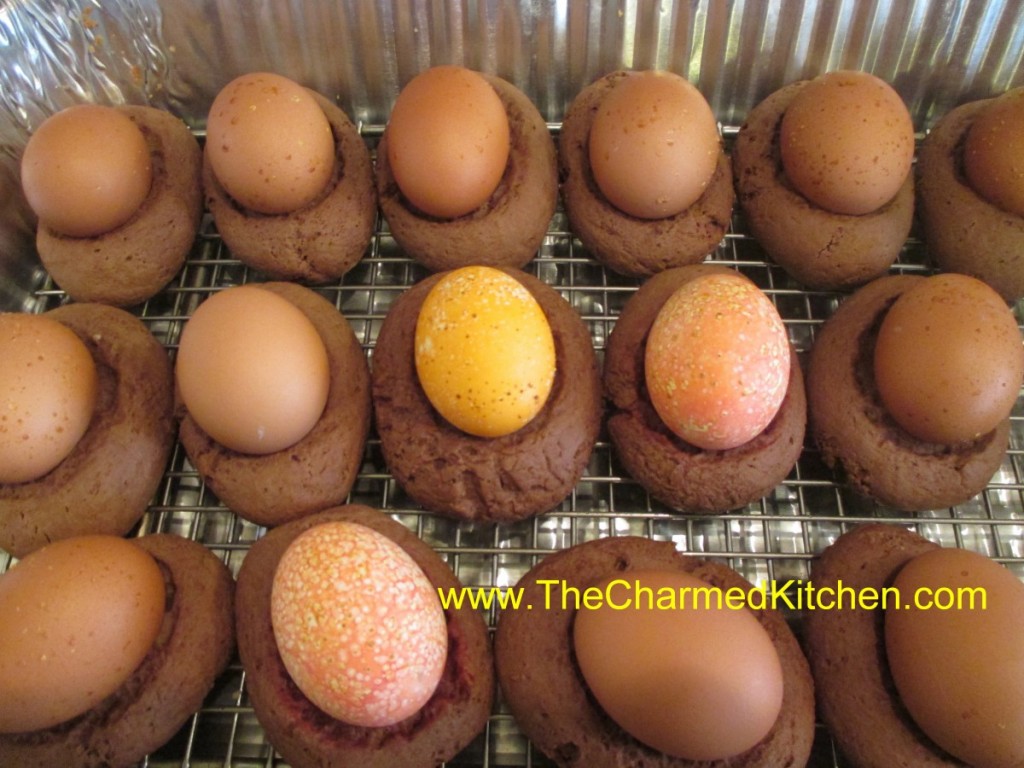
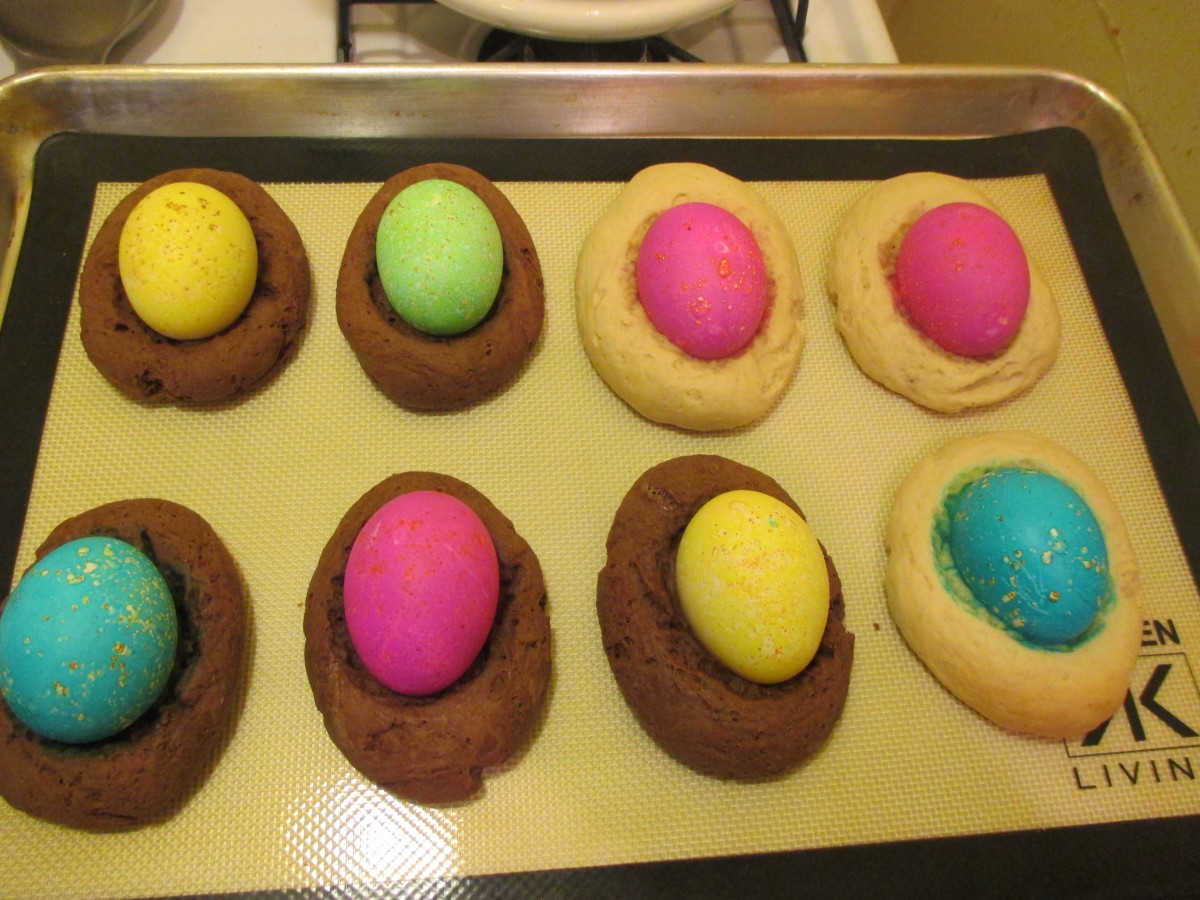
These biscotti are really just a big cookie, baked around an egg. Once cooled, I drizzle with a powdered sugar glaze. They are such a fun treat for Easter.
You don’t have to precook the eggs used in the middle. They will cook when the biscotti bake around them. If your eggs are already hard- cooked, that is fine, too. You can used dyed eggs or brown eggs.
This is the end result of my experiment. I used the original recipe, and added cocoa powder. Worked out really nice, so I thought I’d share them with you.
The original recipe came from the mother of a childhood friend. Rose made them with shortening. Over time I started making mine with butter, instead. The only change is, I chill the dough 30 minutes, or so, before using.
Chocolate Easter Egg Biscotti
1 c. shortening or butter – I use butter
1 ½ c. sugar
4 eggs
5 t. baking powder
1 t. salt
2 t. vanilla
1 c. milk
6 c. flour
¾ c. cocoa powder
24-30 eggs, plain or dyed
Powdered sugar glaze- recipe follows
Preheat oven to 350 degrees. Cream together shortening and sugar. Beat in eggs. Add next 4 ingredients and blend until smooth. Mix flour with cocoa. Stir in flour mixture 2 cups at a time. Dough should be pliable. If dough is too sticky add a little more flour. If using butter in the recipe, chill dough at this point. Take a piece of dough about the size of a large egg and roll until smooth. Place on a greased baking sheet. Indent middle slightly and then place an egg in the center, pressing down slightly. It should look like a nest. Continue with remaining dough allowing about 2-3 inches in between, as they will spread some. You can fit 6-8 on a large baking sheet. Bake 20 –25 minutes or until browned on the bottom. Cool on wire rack before drizzling with frosting. Makes 24-30. Store in the fridge.
Sugar glaze
2 c. powdered sugar
2-3 T. milk or orange juice
1 t. vanilla
Food coloring, if desired
Mix together until smooth and of drizzling consistency.
Easter Egg Biscotti

I get so many requests for this recipe, I decided to post it again. This is a treat from my childhood. Rose Dieglio was the mother of my best friend, Debbi. Rose made these every year, and I loved them. Years later, she was kind enough to share her recipe with me. I always make a bunch to hand out to friends and family. It is a tradition I enjoy very much.
The dough is a type of cookie. You roll the dough out in pieces about the size of eggs. Make an indent in the dough and press in a tinted egg. The egg does not have to be cooked- it will cook when the biscotti bakes.
The dough will be a little sticky. Just add some flour to your fingers when shaping the dough, if needed.
The original recipe calls for shortening. I make them with butter, instead. If you use butter in the dough- chill it before baking.
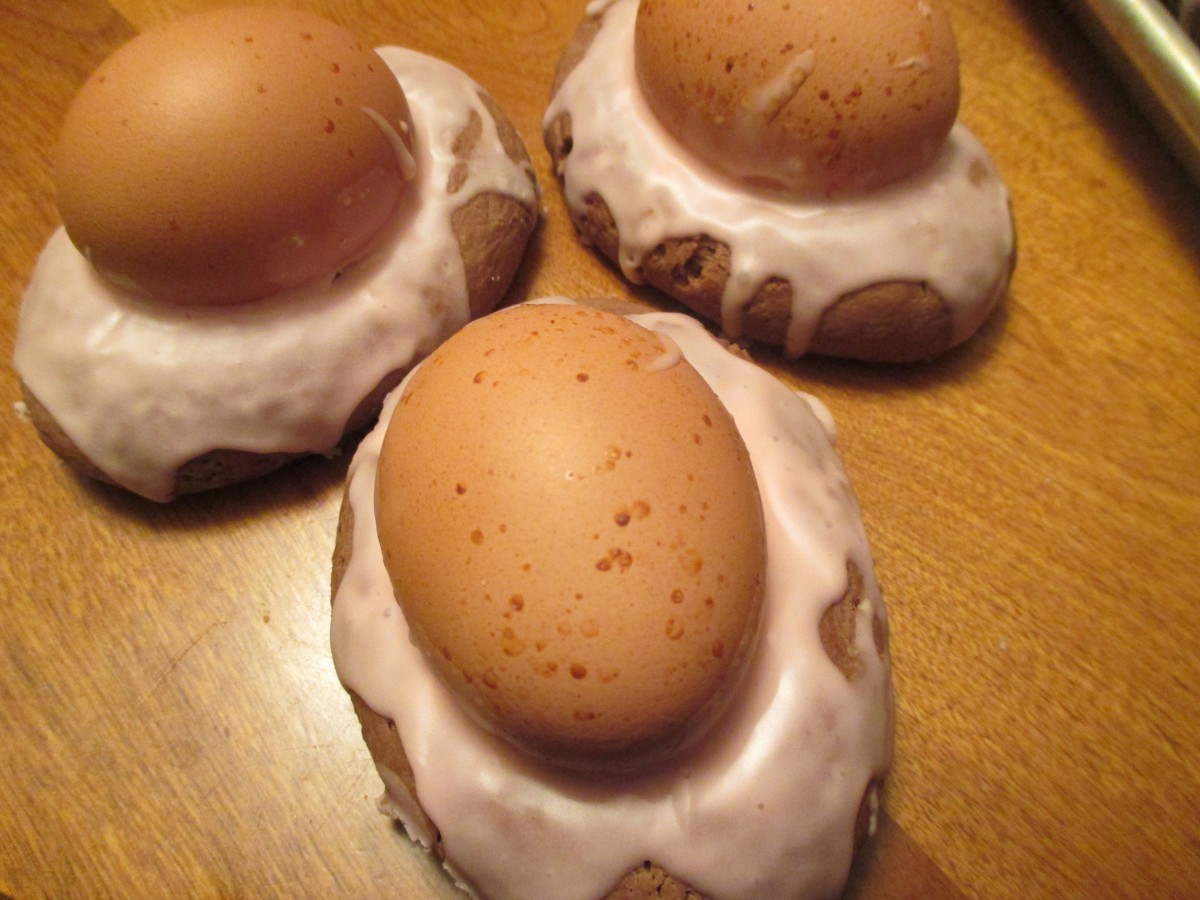
For years I made the biscotti with hard cooked eggs, that I dyed. My mom always asked if I needed to cook the eggs. She wondered if the eggs would cook during the baking process. So I tried it a few years ago. I placed a raw, un-decorated egg on one of the biscotti “nests” and baked it with the rest. What do you know? The egg cooked in the oven when the biscotti baked. The lesson here- always listen to Mom. Saves a whole step in making this recipe. Just be gentle when you press the eggs into the dough. They are raw eggs, after all.
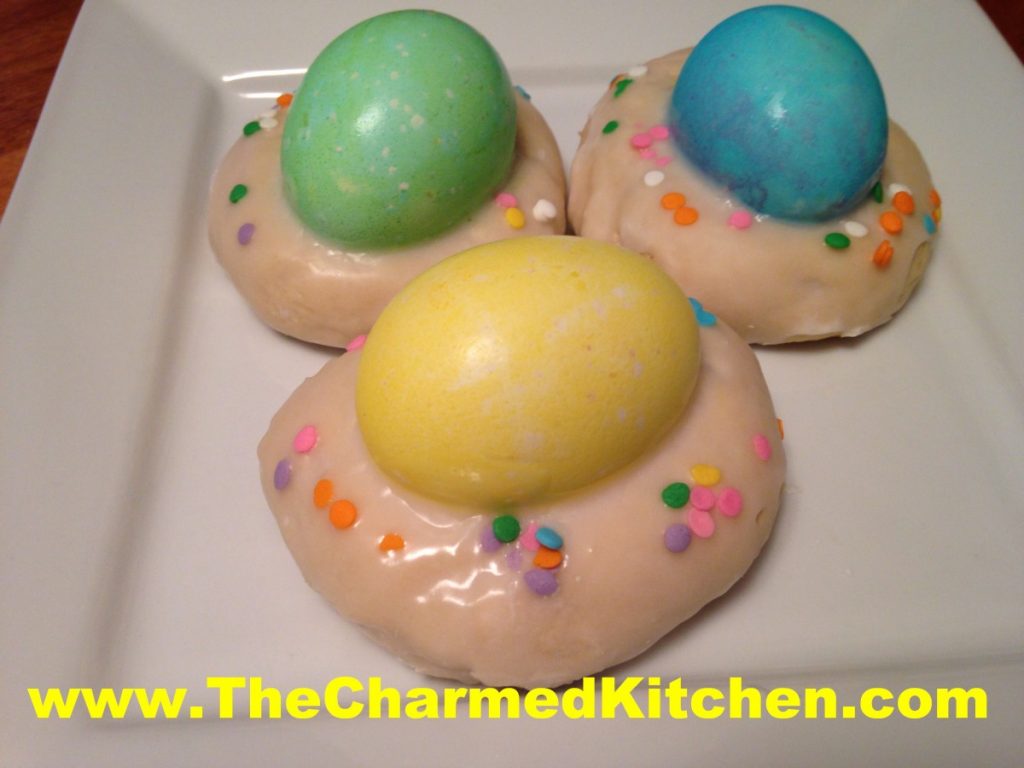
Once baked, the biscotti can be topped with a powdered sugar glaze and sprinkles, if you like. Because they have hard cooked eggs in them, store in fridge after cooking.
Easter Egg Biscotti
1 c. shortening or butter- I use butter*
1 ½ c. sugar
4 eggs
5 t. baking powder
1 t. salt
2 t. vanilla
1 c. milk
6 c. flour
24-30 eggs, plain or dyed
Powdered sugar glaze
Preheat oven to 350 degrees. Cream together butter or shortening and sugar. Beat in eggs. Add next 4 ingredients and blend until smooth. Stir in flour 2 cups at a time. Dough should be pliable. If dough is too sticky add a little more flour. Take a piece of dough about the size of a large egg and place on a greased baking sheet. Indent middle slightly and then place an egg in the center, pressing down slightly. It should look like a nest. Continue with remaining dough allowing about 2-3 inches in between as they spread when baking. You can fit 6-8 on a large baking sheet. Bake 20 –25 minutes or until browned on the bottom. Cool on wire rack before drizzling with frosting. Makes 24-30. Store in fridge.
* If using butter- chill dough a couple of hours before baking.
Sugar glaze
2 c. powdered sugar
2-3 T. milk or orange juice
1 t. vanilla
Food coloring, if desired
Mix together until smooth and of drizzling consistency.

Cooling down
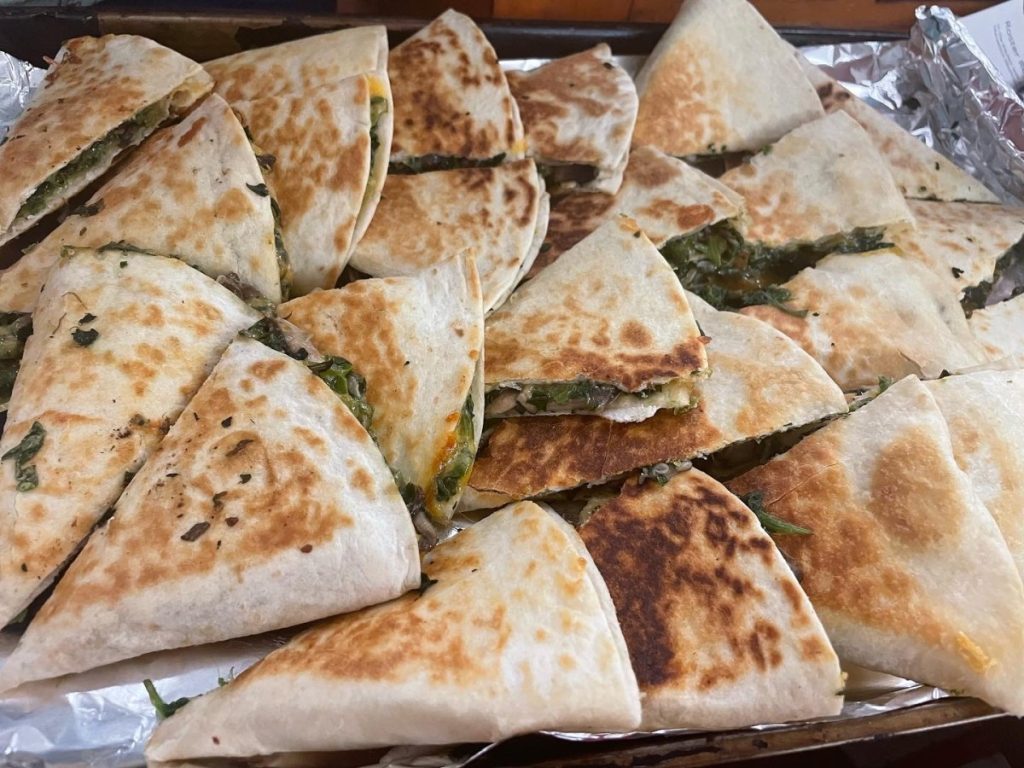
Mushroom and Spinach Quesadillas

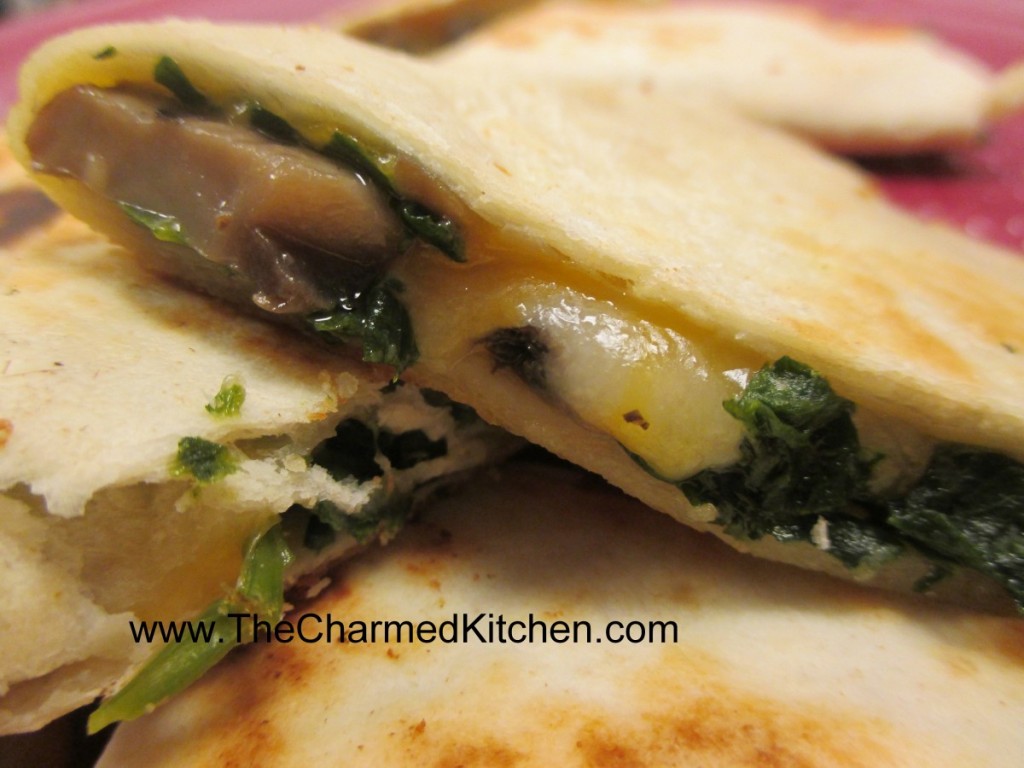
Quesadillas are a fun and easy appetizer for any party. They also are great for lunch, brunch or dinner. You can fill them with all sorts of fillings. We made these in cooking class the other night. We used frozen spinach, which had been thawed, but fresh spinach could also be used. We also used a combination of Portobello mushrooms and shitakes.
The spinach and mushrooms worked really nicely together. We used cheddar cheese in class, but I could see using a smoked Gouda instead. The ones in the picture have Swiss cheese in them. We just cooked the quesadillas in a skillet, but you could also bake them in the oven, or brush with oil and cook them on the grill. You can serve them as is- or maybe top with some salsa or sour cream.
Mushroom and Spinach Quesadillas
1 (10 ounce) package fresh or frozen spinach
2 cups shredded cheese, I like cheddar or Swiss, but use what you like
2-3 tablespoons butter- you can use oil instead
2 cloves garlic, sliced
2 Portobello mushroom caps, sliced
Salt and pepper to taste
Hot sauce to taste
4 (10 inch) flour tortillas
1 tablespoon oil
Saute spinach in a little butter until wilted. Cool and chop. Set aside. Melt the remaining butter in a skillet over medium heat. Stir in garlic and mushrooms, and cook about 5 minutes. Mix in spinach, and continue cooking 5 minutes. Add seasonings to suit your taste. Place a quarter of the mixture on one side of each tortilla. Top with a quarter of cheese. Fold tortillas in half over the filling. Heat oil in a separate skillet over medium heat. Place quesadillas in the skillet, and cook 3 minutes on each side, until golden brown. Cut each quesadilla into 4 wedges to serve.
Mushroom Pastries/Empanadas

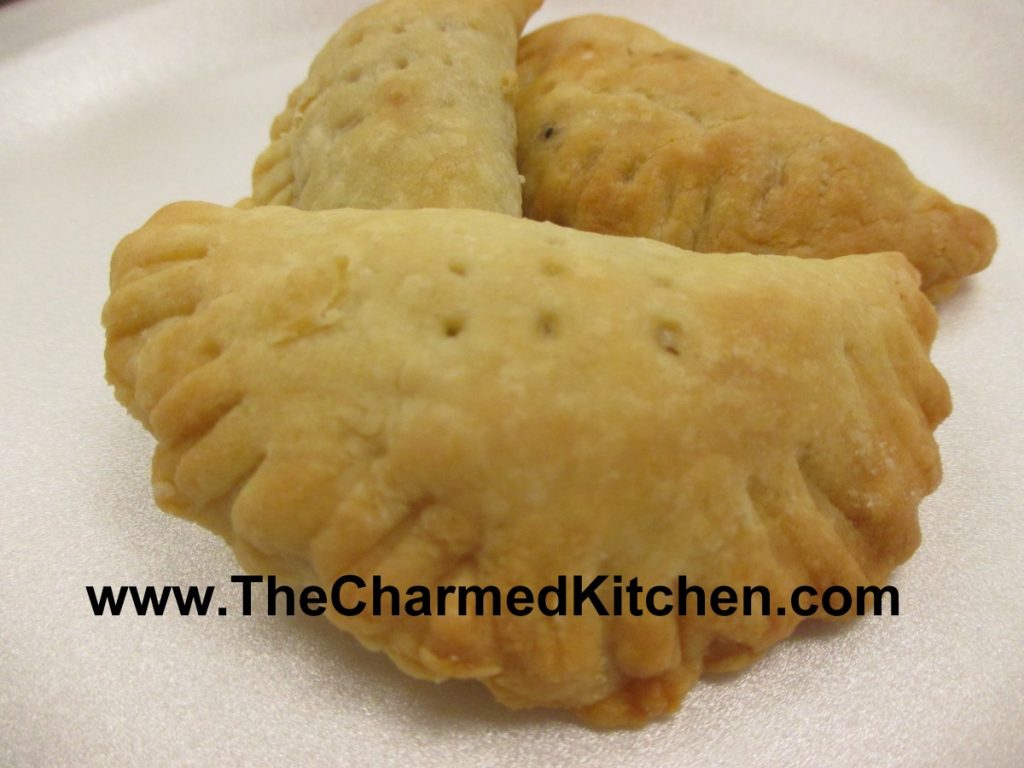
We made these little goodies in cooking class the other night. I always called them mushroom pastries, but thought empanadas might be a better name for them. They are very tasty, whatever you call them. The filling is a combination of mushrooms with onions, thyme and sour cream. The pastry is a tender, flaky dough.
They make great appetizers or can be served as a meal, maybe with a salad or bowl of soup. Fun for parties, brunch or lunch!
Mushroom Pastries/Empanadas
1 (8 ounce) package cream cheese
1 cup butter
2 cups all-purpose flour
2 tablespoons butter
3/4 pound fresh mushrooms, finely chopped
1/2 medium onion, chopped
1/8 teaspoon dried thyme
1/4 teaspoon salt
1/2 teaspoon ground black pepper
1 1/2 teaspoons all-purpose flour
1/2 cup sour cream
In a medium bowl, mix together the cream cheese and 1 cup of butter until well blended. Mix in the flour until fully incorporated. Pat into a ball, and refrigerate while you make the filling. Melt 2 tablespoons of butter in a large skillet. Add the mushrooms and onion. Season with thyme, salt and pepper. Cook and stir until tender, about 5 minutes. Sprinkle the flour over everything so it won’t get lumpy, then reduce the heat to low, and stir in the sour cream. Heat just until thickened, then remove from the heat. Cool filling. Preheat the oven to 350 degrees F. On a lightly floured surface, roll the dough out to about 1/4 inch thickness. Cut into 3 inch rounds. Place a small amount of the mushroom mixture on one side of each circle, then fold the dough over and press to seal. Prick the tops with a fork to vent steam, and place the pastries on a baking sheet. (They can also be frozen at this time until needed.) Bake for 15 minutes in the preheated oven, or until golden brown. If baking frozen turnovers, it may take an additional 5 minutes.
Mushroom, Leek and Asparagus Quiche


We had this quiche in the mushroom class last night. It is a nice combination of ingredients for any Spring gathering. Would be great for a brunch, too.
Mushroom, Leek and Asparagus Quiche
1 unbaked pie shell
2 T. oil or butter
1 c. sliced leek- white or light green part only
4 oz. sliced mushrooms- I used baby Portobello
8 oz. asparagus, trimmed and sliced
4 oz. shredded Swiss cheese
2 T. flour
3 eggs, beaten
¾ c. half and half
1 T. fresh dill or 1 teaspoon dried dill
Salt and pepper to taste
Hot sauce to taste
Roll out crust to fit a 9 or 10- inch tart pan. Place crust in pan and trim edges. Chill crust until ready to use. Preheat oven to 400 degrees. In skillet, heat oil or butter and cook leeks until tender. Add mushrooms and continue cooking until mushrooms are golden. Set aside. Steam asparagus for 3-4 minutes, or until just tender. Set aside. Combine flour with cheese and toss to coat. Spread cheese in prepared tart shell. Top with the mushroom and leek mixture. Season with salt and pepper. Combine the eggs with the half and half, dill and hot sauce. Pour over the mushrooms mixture in the tart shell. Add the asparagus. Place in preheated oven and bake at 400 for 30 minutes. Turn down heat to 350 and cook for 20-25 minutes longer, or until crust is golden and filling has set up. Serves 4-6.
* While I would normally use a more traditional pie crust, I ended up using the dough I normally use for my kolachy. It was leftover and seemed like a nice choice. The kolachy dough is 3 sticks of softened butter, 8 oz. of cream cheese and 3 cups of flour. Mix all ingredients until smooth and chill until ready to use. It was leftover, so hard to say how many crusts a full recipe would make. I would think you could easily get three crusts from one recipe. You can, of course, use your favorite pie crust recipe.
Lamb in Greek Lemon and Egg Sauce

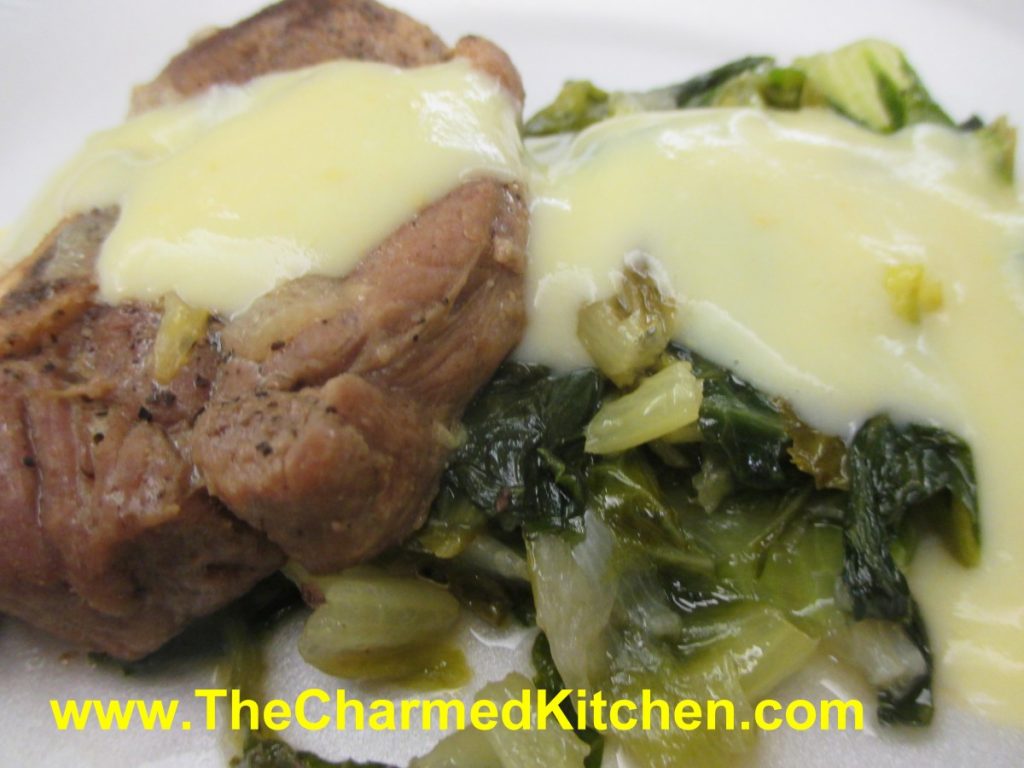
I am not sure which I love more in this recipe- the lamb that is cooked to tender perfection- or the Greek lemon egg sauce. Both are very special. I love lamb and have cooked it lots of different ways. This preparation will always be a favorite. This a great dish to serve for Easter dinner.
The recipe uses lamb shoulder, cooked with onions and Romaine lettuce- yes lettuce. The lamb is browned and then cooks gently until tender. The lettuce also cooks down and adds a nice green flavor to the dish. I have used lamb shoulder chops, and cooked them bone in. You could certainly use lamb shanks, if you prefer. Just allow enough time for the shanks to get tender.
The real magic is the lemon egg sauce, used to top the lamb once finished. It is creamy and has just the right amount of tang from the lemon juice.
If you are thinking of serving lamb for Easter, this would be a lovely recipe to use.
You can make this dish with pork or even chicken, but my favorite version is with lamb. I also use the lemon sauce with meat and rice stuffed zucchini. My dear friend Amy, had the dish on a trip to Greece and we made it often.
Fricassee of Lamb with Lemon Egg Sauce
2 1/2-3 lbs. lamb shoulder, or use pork
3 medium onions, chopped
2-3 heads romaine lettuce, washed and sliced thin
1/2 c. olive oil
Egg and Lemon Sauce -recipe follows
Cut the meat into serving pieces. Heat the oil in a pot and sauté the meat. Add salt, pepper, the onions, lettuce and a small amount of water. Cover the pot and let the fricassee simmer for about an hour. Prepare the egg and lemon sauce, pour it over the fricassee and serve.
Lemon and Egg Sauce
1-2 c. stock
2 eggs
juice of 1 lemon
flour, about 1-2 tablespoons, depending on how thick you want the sauce
Bring stock to the simmer. Beat eggs well. Mix the flour with the lemon juice.
Add to the eggs and keep beating. Add the hot broth slowly while you keep beating. Pour the egg and lemon sauce in the pot and bring to a simmer, stirring constantly. Makes 1-2 cups. For a thinner sauce eliminate the flour.
A Trio of Easter Cupcakes


These cupcakes would make a great dessert for Easter- or any time. They are also a fun dessert for kids to make.
I started out by making a double batch of my classic white cupcakes- recipe follows. To add a little color to the cupcakes, I divided the batter into three bowls and tinted each of them a different pastel color.
As I filled the pans, I just added a spoonful of each of the tinted batters in them. They came out really nice.
I made three different cupcakes: bunnies, chicks and nests.
I also made a double batch of white chocolate frosting. You could certainly make a vanilla buttercream, if you prefer.
Details on how to make each of them are listed below.
Classic White (Vanilla) Cupcakes
1 cup sugar
1/2 cup butter
2 eggs
2 teaspoons vanilla extract
1 1/2 cups all-purpose flour
1 3/4 teaspoons baking powder
1/2 cup milk
Preheat oven to 350 degrees. Line a muffin pan with 12 paper liners. In a medium bowl, cream together the sugar and butter. Beat in the eggs, one at a time, then stir in the vanilla. Combine flour and baking powder, add to the creamed mixture and mix well. Finally stir in the milk until batter is smooth. Pour or spoon batter into the prepared pan. Bake 20 to 25 minutes. Cupcakes are done when they springs back to the touch. Makes 12.
White Chocolate Frosting
6 oz. white chocolate – if using bars, chop before melting
1 stick (4 oz.) cold butter, cut into cubes
1-2 c. powdered sugar
1 t. vanilla
Melt chocolate. I just melt mine in a microwave safe dish, but you can use a double boiler. Let chocolate cool down a little. Beat butter into the melted chocolate. Beat until smooth and then beat in the powdered sugar and vanilla. Whip until frosting is smooth and fluffy. I normally beat for 5 minutes or longer. If too thick, add a few drops of water or milk. For this recipe, I made a double batch of frosting.
Bunnies
extra white chocolate
food coloring- pink or red
chocolate chips
pastel ( pink) M&M’s
Make bunny ears by melting some white chocolate and putting it in a piping bag or bottle. On wax paper, make outline of the ears in white chocolate and allow to cool/harden. Place a drop or two of pink or red food coloring in a microwave safe bowl and add some white chocolate. Melt in microwave, being careful not to burn the chocolate and stir until it turns pink. Pipe the pink chocolate into the middle of the ears. Allow to harden before peeling off of the was paper. Using a star tip, pipe frosting on cupcake. I made three layers – to add height to the cupcake. place ears on cupcake and add chips/candy for eyes and mouth.
Chicks
Frosting tinted yellow and green
mini chocolate chips
fruit roll up
Using star tip, pipe the chick’s body onto the cupcake in yellow frosting. Pipe on head and wings. Pipe green frosting around chick to form a nest. Use mini chips for eyes and cut fruit roll up for beak.
Nests
Frosting tinted green
egg shapes malted milk balls- or you could use jelly beans
Pipe green frosting on cupcakes to make nests. Add three, or more, candies in the middle for eggs.

Piping pink filling in ears
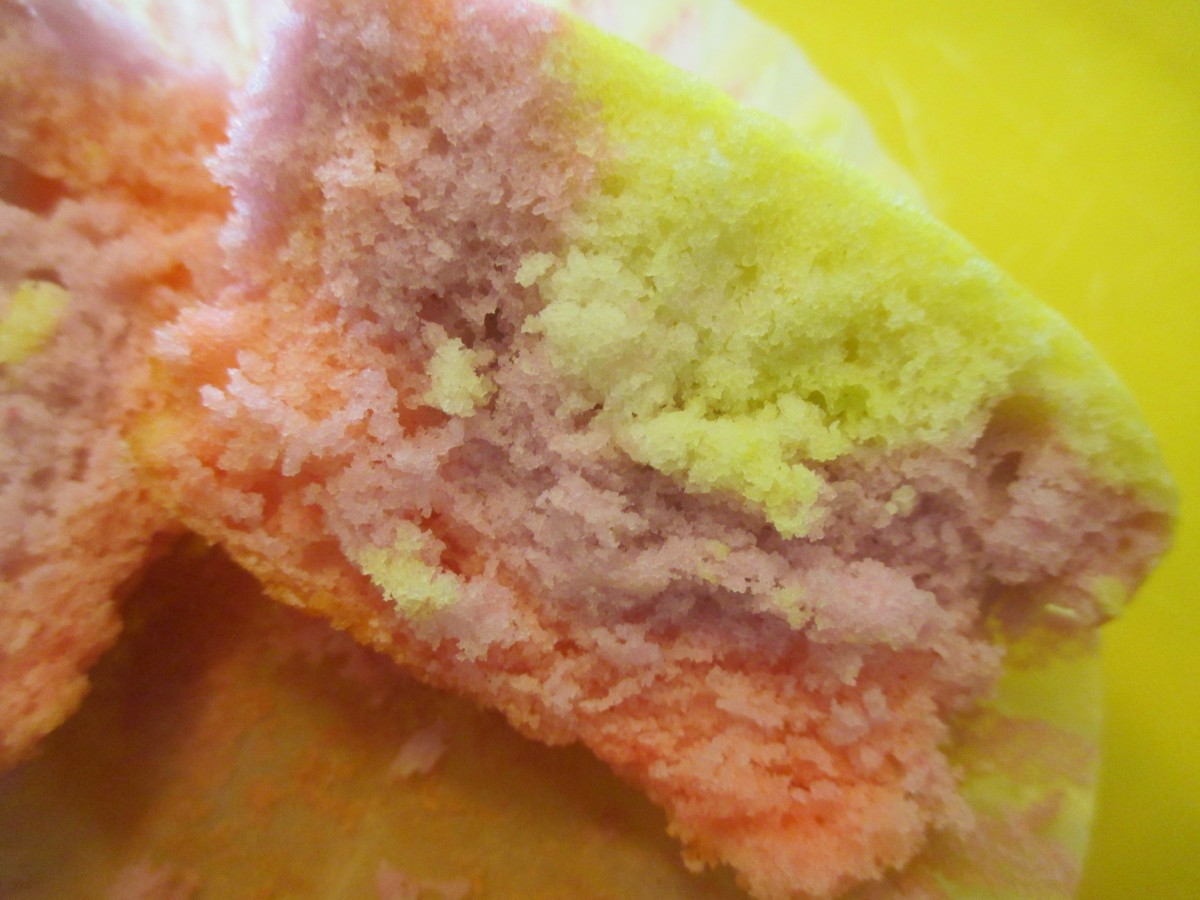
rainbow cupcake
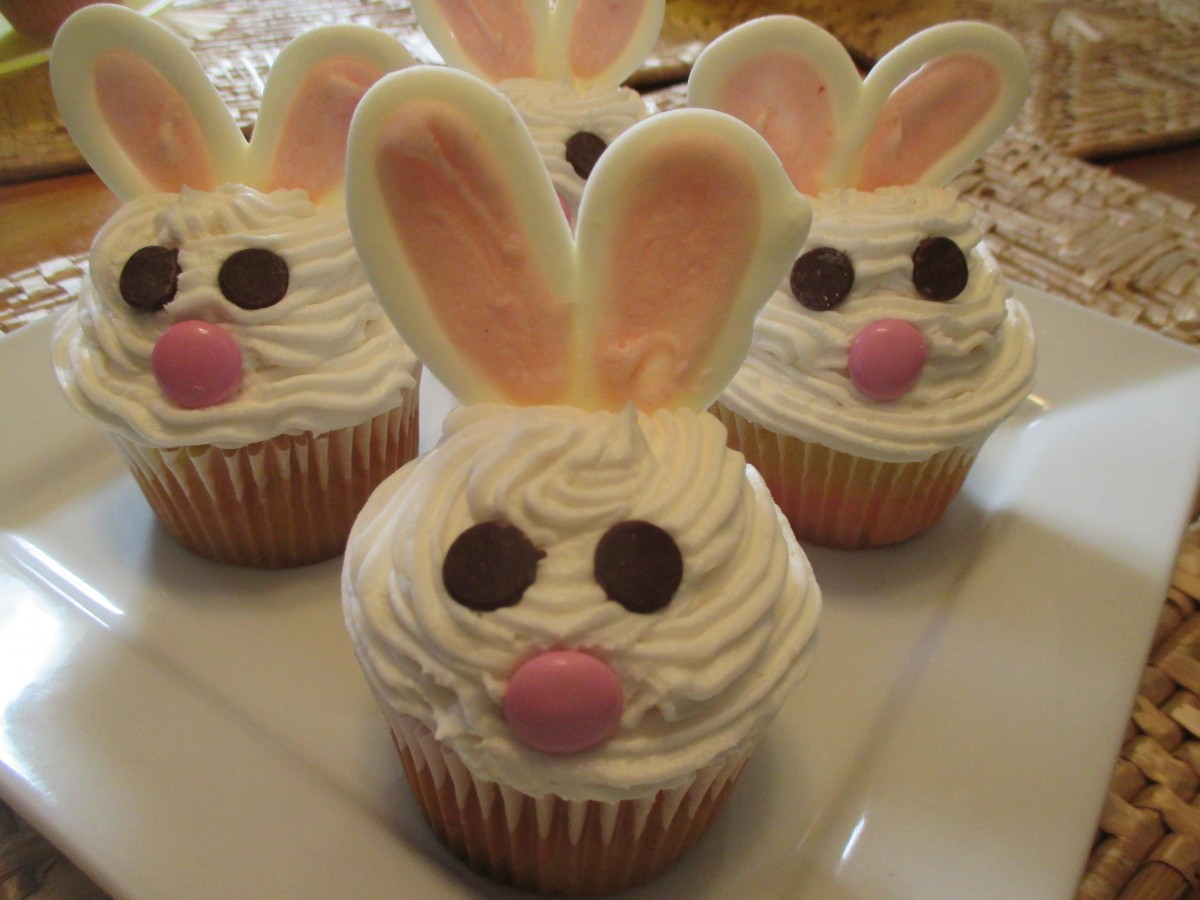
bunnies
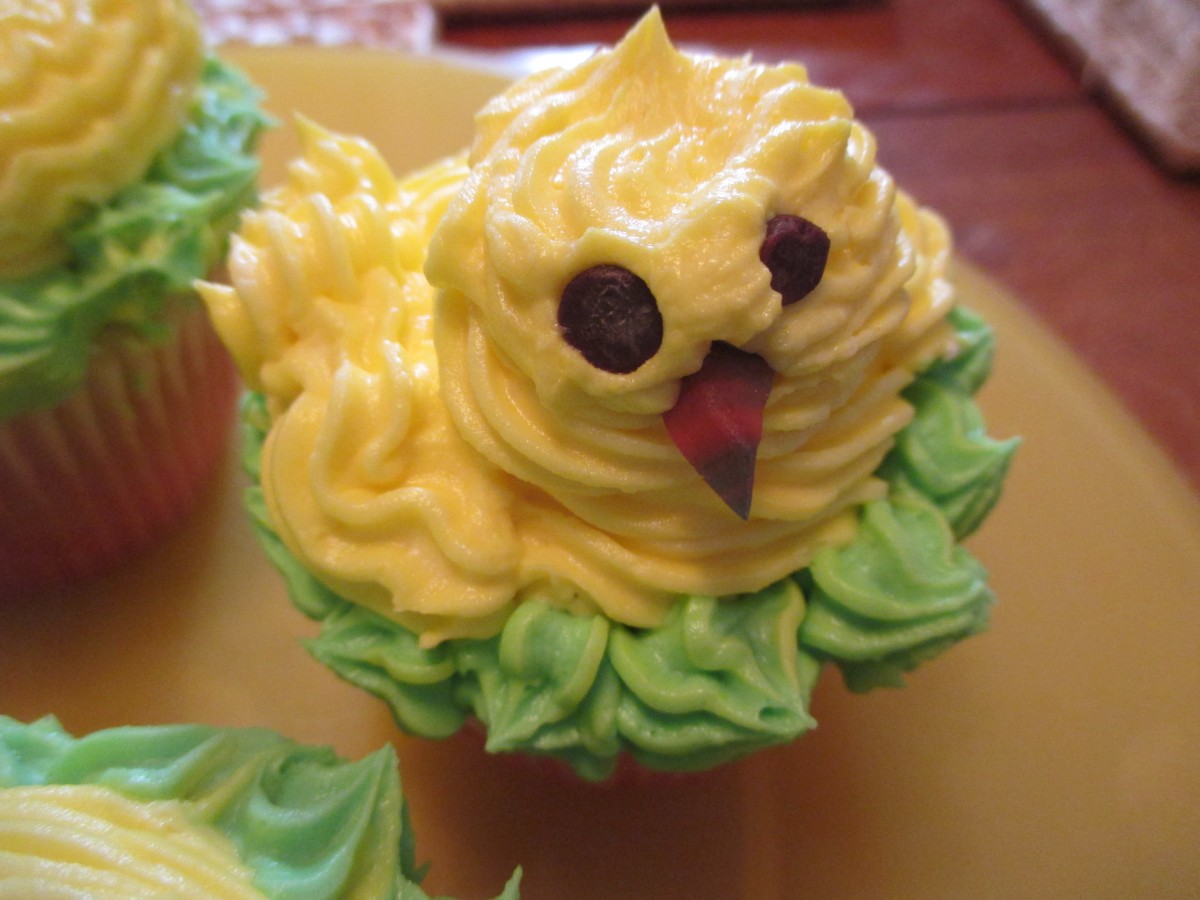
Chick cupcake
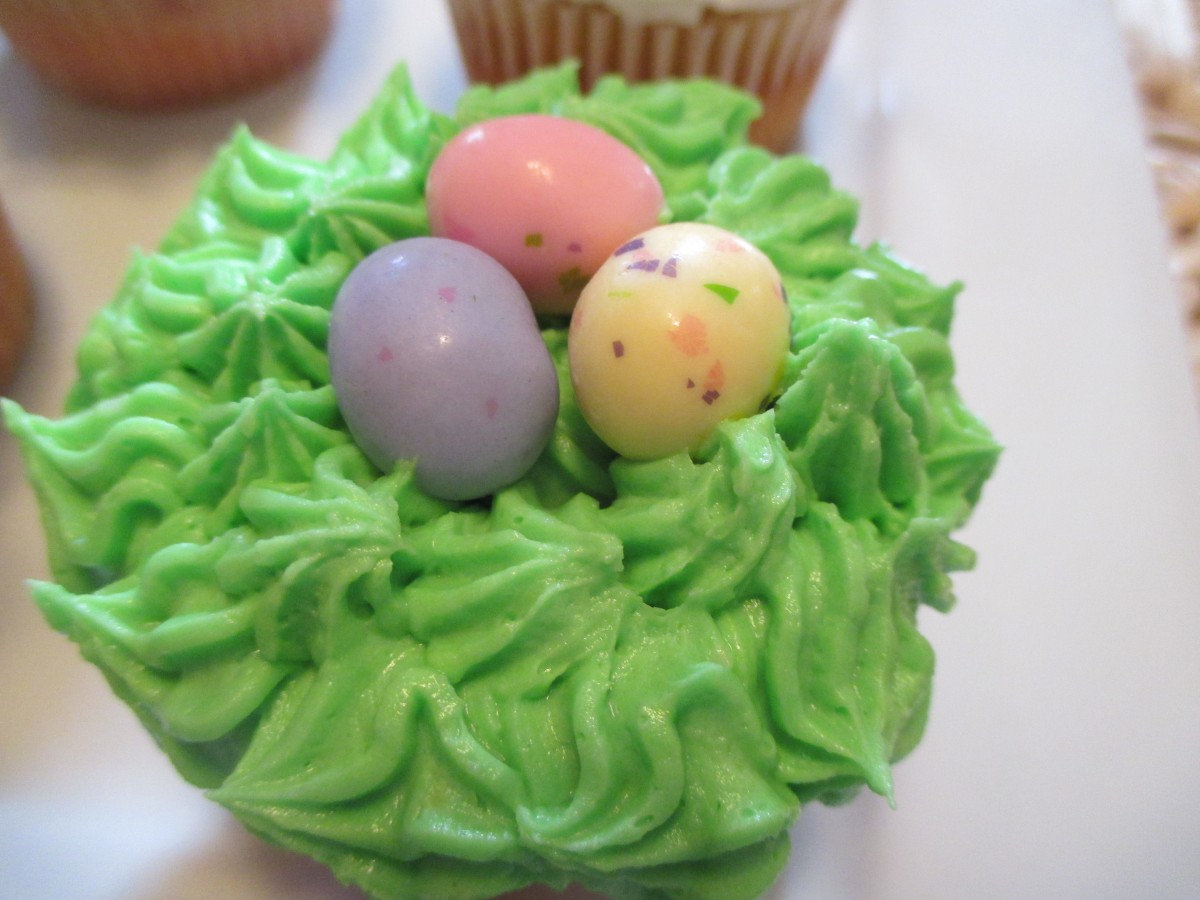
The nest cupcake
Amy’s Easter Hummus

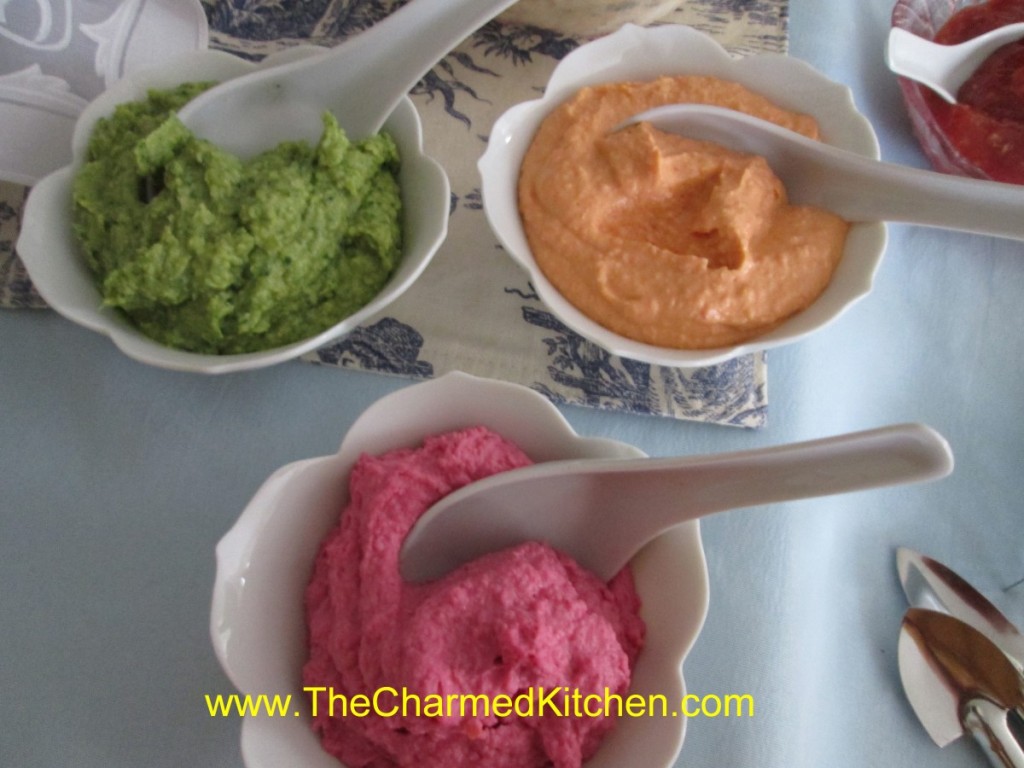
Hummus is always a favorite at parties around here. I’ve made classic hummus and have made variations with roasted peppers, black olives and garlic scapes.
I always remember the time my dear friend, Amy, wanted her hummus to be really colorful. It was for her Easter dinner. I believe that was the same year she dyed the egg whites for the deviled eggs. Amy really knew how to get the details right.
She and I had talked about how best to make tasty, colorful hummus. She decided to make spinach hummus and beet hummus in addition to her classic hummus. She wanted something that tasted good, but looked like Spring. She ended up with a beautiful array for Easter dinner that year. Tasty, too.
Here are the directions for making them.
Hummus
1 can garbanzo beans, drained, or about 2 cups cooked garbanzos
1/4 c. olive oil
2 T. lemon juice
2 T. tahini (sesame seed paste)
2 cloves garlic
salt and hot pepper sauce to taste
Combine all ingredients in a blender or food processor until smooth. Adjust seasonings. Chill. Serve with pita bread, crackers or fresh vegetables. Also nice spread in a pita bread with sliced tomatoes, cucumbers and lettuce. Freezes well.
Green Hummus (Spinach)
Make the original hummus recipe from above but add 2 c. fresh spinach and ½ c. chopped cilantro.
Pink Hummus (Beet)
Make the original hummus recipe from above but add 2-3 small cooked beets.
Note: You might want a little more salt in either of these recipes or a bit more lemon juice.
Miss you, Amy.


