Easy Bear Claws


I taught a class on Coffeehouse Treats last night. One of the favorites that night were the Easy Bear Claws.
While not a true classic version of a bear claw, these pastries are pretty close. They are pretty tasty, too.
The secret is to start with prepared puff pastry dough. The dough is thawed, filled and sliced. Then it is baked until crispy and golden brown. Once the bear claws cool down a bit, the “toes” are dipped in melted chocolate.
These make a great dessert. I almost always have puff pastry dough in the freezer, so a nice option if you need dessert in a hurry.
Easy Bear Claws
1 package frozen puff pastry (2 sheets) thawed
1 can or jar (10-12 oz.) almond filling
1 c. chocolate chips
1 T. shortening or coconut oil
Open one pastry sheet onto lightly floured surface and spread with half of the filling. Roll up loosely, jelly roll fashion, leaving seam side down on surface. Cut roll in half and each half into thirds. You will have 6 pieces total. On one closed edge of each pastry use scissors (preferred) or a sharp knife to cut 3 “toes”. Do not make cuts on open filling sides. Pull apart slightly. Place 2 inches apart on ungreased baking sheet. Repeat with remaining dough and filling. Bake in a preheated 425-degree oven until golden, about 20-25 minutes. Cool on wire rack. Melt together chocolate and shortening in microwave-safe bowl in microwave. Stir to smooth and dip top of each “claw into chocolate. Set on rack or wax paper to set up chocolate. You can also put in the fridge for a few minutes to harden chocolate quicker. Makes 12.
Variations: For filling you can use cinnamon sugar in stead of almond filling or even use another filling flavor like poppy seed.
For topping you can use a powdered sugar glaze or even just powdered sugar.


Cinnamon “Bunny” Breads


These slightly sweet bunny breads are a great addition to your Easter table. They can be used for breakfast or brunch. They could also be served with dinner, minus the candies!! The dough itself has plenty of cinnamon flavor and a slightly dense texture.
They are moist enough to eat just the way they are, or spread with butter. My favorite parts are the feet- which are a little crunchy. The recipe makes 6 bunnies. I chose to decorate mine with melted white chocolate and candies, but they are also pretty when left un-decorated. This would be a fun decorating activity for kids, too.
Cinnamon “Bunny” Breads
6-6½ c. flour
¾ c. sugar
2 pkts. Active dry yeast
1 T. cinnamon
1 t. salt
1 c. milk
½ c. water
¼ c. butter – half a stick
5 eggs – save one for brushing the breads
White chocolate and tiny candies for decorating
In mixing bowl place 2 cups of the flour with the other dry ingredients. Heat milk, water and butter together until very warm. Butter does have to melt completely. Place milk mixture in bowl with flour mixture and beat for 3 minutes. Add another cup of flour and beat another 2 minutes. Beat in 4 eggs and gradually add enough flour to make a soft dough. Place dough on a floured surface. Knead until smooth. Return dough to bowl and cover, allowing to rise until doubled, about an hour. Grease two large baking sheets, or cover in parchment or use a silicone liner. You will put 3 bunnies on each sheet. Place dough on floured surface. Divide into 6 pieces. Each piece will be a bunny. To form a bunny, take about a third of one of the pieces of dough. Shape into a round and place on a greased baking sheet. This is the body. Use about ¼ cup of the dough to form the head. Flatten the head a little on one edge and tuck the flattened part under the body. Pinch off a tiny piece for the nose and place on the head. Divide the rest of the piece of dough into 6 pieces. Use 4 pieces to form the feet. Shape into balls and tuck one edge under the body, like you did with the head. Use the last two pieces for the ears. Roll each into a tube, shape a little to look like ears, and stick one edge under the head. Repeat with the rest of the dough pieces. You’ll end up with 6 bunnies. Cover with plastic wrap, then a towel, and allow to rise in a warm place until doubled, 30-60 minutes. Preheat oven to 350 degrees. Combine remaining egg with a tablespoon of water and beat to combine. Remove the plastic wrap from the bunnies. Brush the bunnies with the egg mixture, covering completely. Bake for 20-25 minutes, or until golden brown and bread sounds hollow when tapped lightly. I switched the baking sheets in the oven after 10 minutes, so the bunnies bake evenly. Cool on rack. Once cool, decorate with melted chocolate, piped on to make whiskers. You can also use the melted chocolate to affix candies. Makes 6 bunnies.
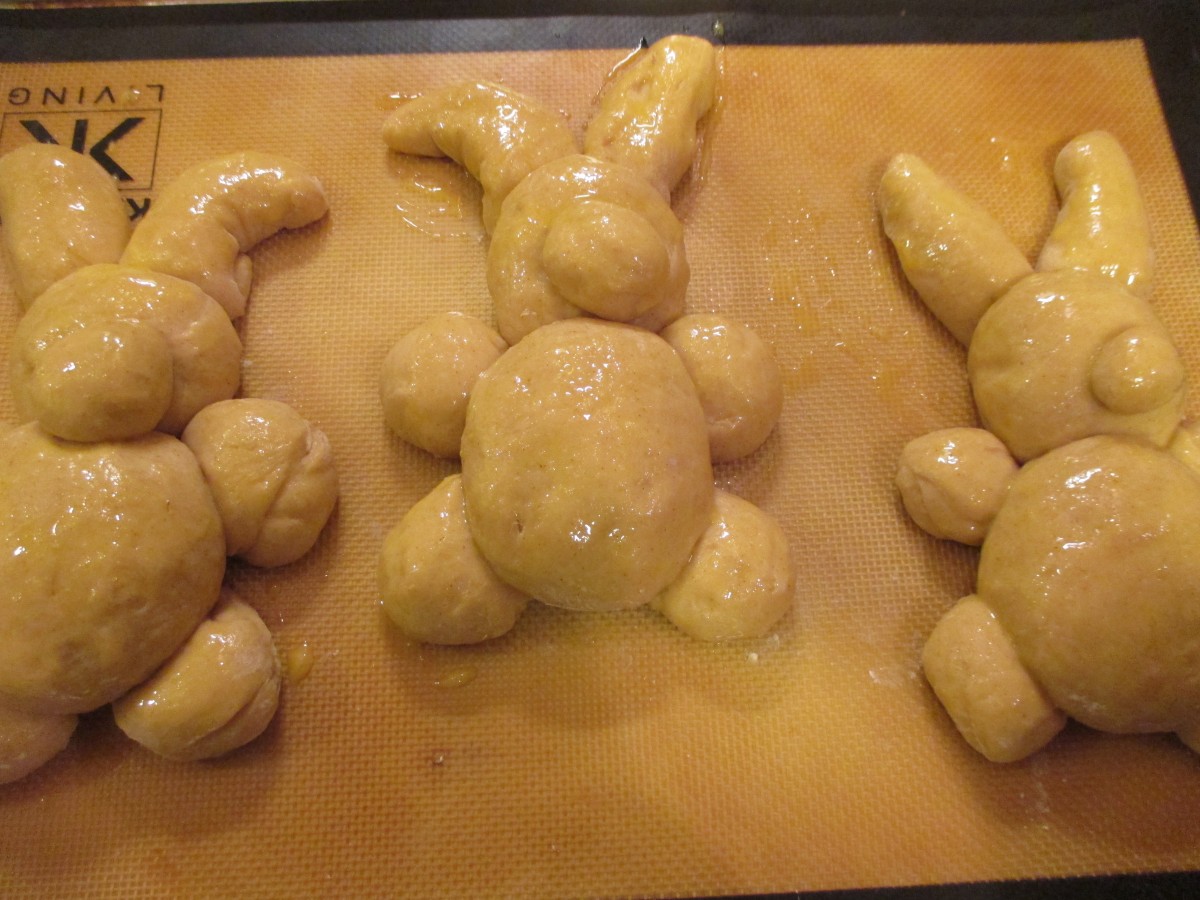
ready to bake

Rainbow Pierogi

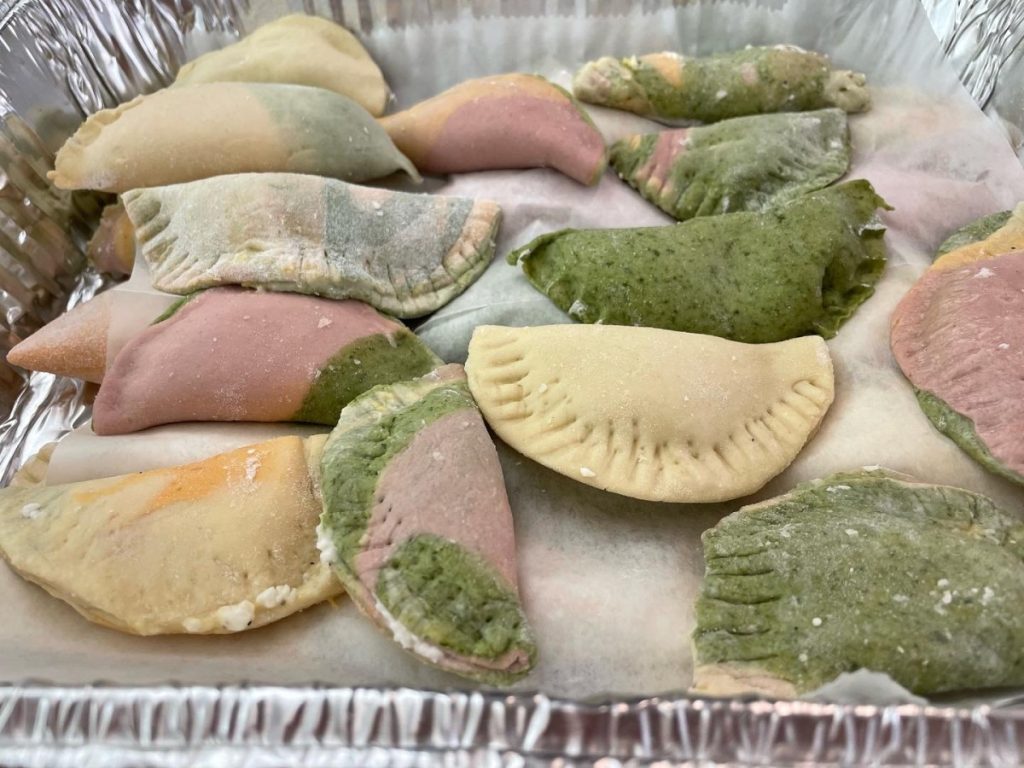

I enjoy making pasta with veggie- based dough. The colors are so pretty, and I love the way they taste. We made them in pierogi class last week. They were a lot of fun to play with. They remind me a little of Easter eggs.
I often serve them with sauteed onions and sour cream. Here is the recipe for the pasta and the pierogi filling.
Rainbow Pierogi
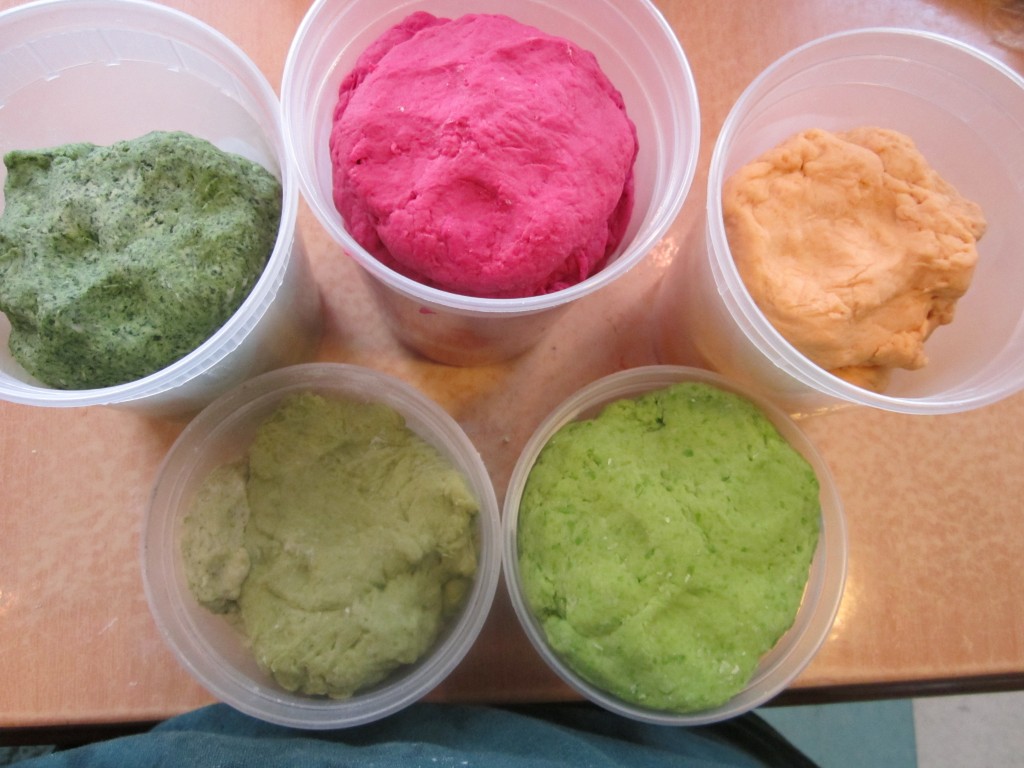
All of the vegetable doughs were mixed using a food processor. If you want to mix them by hand- puree the veggies first. Once the doughs are made allow them to rest at least 30 minutes. Since veggie pasta dough tends to be a little softer than traditional pasta- I actually prefer to make them a day ahead and chill. Chilling the dough, even for an hour, will help. The traditional pierogi dough was mixed in a stand mixer.
To make the pierogi a little sturdier, you can also make regular pierogi dough and mix a little of that dough in with the veggie-based doughs.
When ready to roll out your dough, grab a hunk of each dough and press them together. If the the dough is a little sticky that will help. On a floured surface, roll out to the desired thickness. Folding and rolling a couple of times helps to mix up the color pasta better. I use a template to make my pierogi- but you can cut them out with any round cutter or even a glass or jar. Spoon filling of your choice on center of dough circle. Fold dough in half over filling and press edge with fork to seal. Wetting the edge of the dough will help the dough to stick. Don’t overfill or pierogi will split. Test a couple first to get the hang of it. Place a few at a time, into salted boiling water, and cook until they float. You can eat them as is, or brown cooked pierogi in butter, in a skillet. Serve with grilled onions and/or sour cream. We would often make a larger batch and then freeze them, uncooked, on wax paper-lined baking sheets. When frozen they would be transferred to a freezer bag or container. Place right from the freezer into boiling water when ready to use.
Carrot Pasta
1 c. flour
1/2 t. dried dill
1/3 c. carrot puree
1-2 T. water, if needed
Beet Pasta
1 c. flour
1/2 t. dill
1/3 c. beet puree
1-2 T. water, if needed
Spinach Pasta
2 c. flour
1 10 oz. package frozen spinach, cooked, drained, reserving some of the liquid
Mix this dough as for other pastas, but don’t be too quick to add reserved liquid. While kneading you’ll get water out of the spinach. May require more kneading and rolling than other pasta doughs. Be patient, it’s worth the work.
Classic Pierogi Dough
2 c. flour
1 t. salt
½ c. water (you can also use half milk and half water)
1 egg
Mix all ingredients together and knead on floured surface until smooth. Cover and let rest at least 15 minutes. Roll out thin and cut into circles. Re-roll scraps. You should get between 20-30.
Pierogi Filling
Potato filling:
2 lbs. Potatoes, peeled and boiled
½ onion, minced
2-3 T. cottage cheese or farmer’s cheese, optional
salt and pepper to taste
Mash potatoes with other ingredients and season to taste.
Note: you can also add cheddar cheese if you like. In class we had some with cheddar cheese and added ham, too.
Blueberry Lemon Trifle

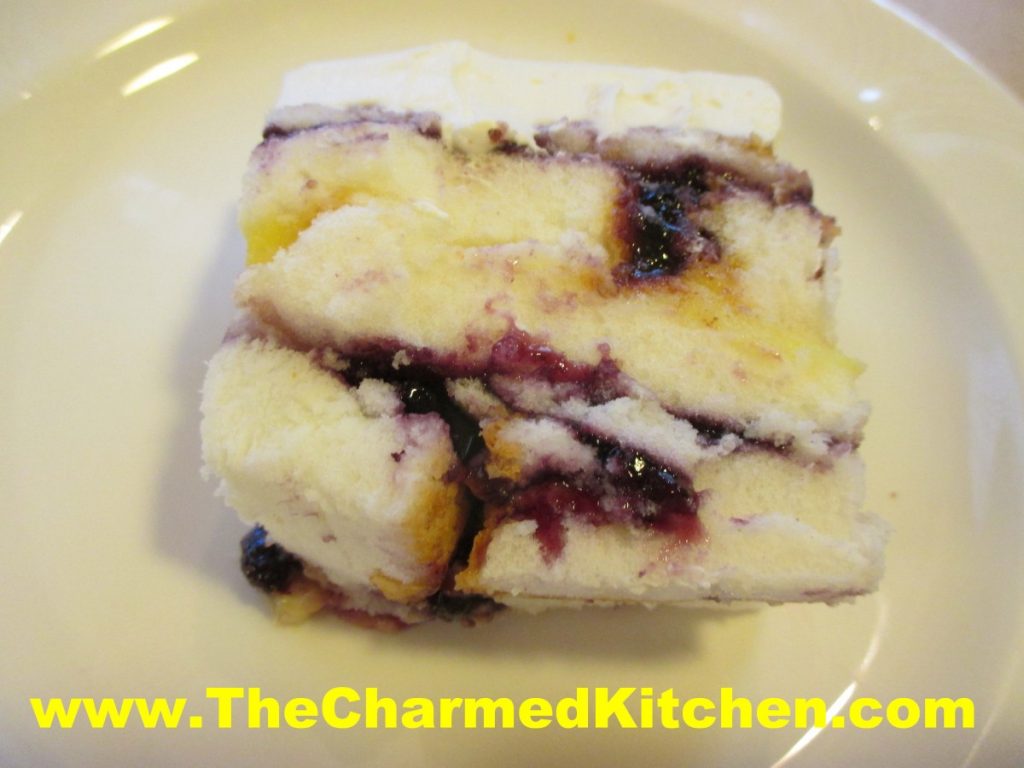
Trifle is one of those desserts that can be whatever you want it to be. The basics of a traditional trifle are sponge cake, layered with some sort of pudding or custard and fruit. The cake is sometimes soaked in sherry or some other alcohol. Trifles are often topped with whipped cream.
We made this blueberry lemon trifle in Spring baking class recently. I love the combination of flavors.
Once you have all the ingredients, the trifle is simple to assemble. Pick a nice, glass bowl, so you can see the layers in the trifle. It is best to put your trifle together a bit in advance, so the cake can soak up some of the moisture from the berries and the lemon curd. It also helps the trifle to stay together. You can actually slice the trifle to serve it.
So here is the recipe. I made the pie filling ahead of time and we made the and lemon curd in class, but you can use store bought, to save time.
Blueberry Lemon Trifle
1 angel food cake, sliced thin
2 c. blueberry pie filling- homemade or store bought- recipe follows
2 c. lemon curd- recipe follows
1 c. whipping cream
1/4 c. powdered sugar
Place a layer of cake slices in the bottom of the bowl. Spread half of the blueberry mixture on top of the cake. Place another layer of cake slices on top of the blueberry layer and press down a little to even it out. Cut cake pieces to fit as best you can. Add half of the lemon curd and top with more cake. Repeat the process one more time. Don’t worry if something isn’t perfect in the layers- that is kind of the charm of a trifle. Just be sure to get all the ingredients in the bowl. Cover and chill the trifle. When ready to serve beat the whipping cream and powdered sugar together until stiff peaks form and spread over the trifle. You can do this part ahead of time, if you prefer, Just keep trifle, covered, in the fridge, until ready to serve. Serves 6-8.
Blueberry Pie Filling
3 1/2 c. blueberries
3/4 c. sugar, or to taste
1/4 c. Clear Gel* or cornstarch
1 c. water
1 T. lemon juice
In saucepan, bring blueberries and sugar to a boil, stirring often. Combine clear gel with water and lemon juice and add to the blueberry mixture. Return to the boil and cook until thickened and bubbly. Makes 4 cups. You won’t need the whole batch for the trifle.
*Clear gel is a modified cornstarch. It is used in commercial pie fillings and in homemade pie fillings, as well. Unlike regular cornstarch, Clear Gel retains it’s thickness, even if you reheat it. You can find it online or in some specialty food stores.
Lemon Curd
1/2 c. lemon juice
zest from one good sized lemon- you should have 2-3 teaspoons
1/2 c. sugar
3 eggs
6 T. unsalted butter- cut into little cubes
In medium saucepan combine all ingredients. Whisk the mixture until the eggs are well blended. Cook over medium low heat, whisking often, until the mixture thickens. This will take 5-7 minutes. Whisk more often as mixtures warms and starts to thicken. Better to heat over lower heat and take longer than over too high a heat. You don’t want the eggs to scramble. Once the mixture is thickened , transfer to a bowl or jar. Cover the surface with a piece of plastic wrap to keep the surface from developing a skin- like any pudding will do. Chill until ready to use. Makes about 2 cups. Will keep in fridge a week or two.

Homemade Rye Bread

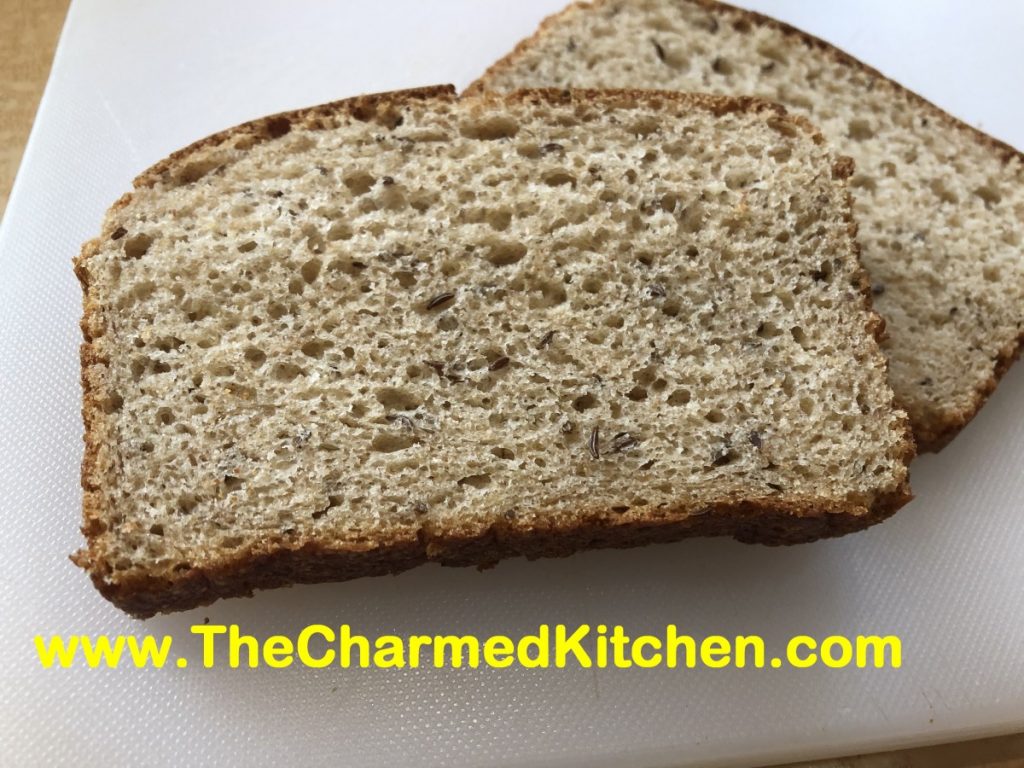
I have been playing around with baking rye bread for awhile now. Tried a few different recipes recently. I found this recipe online, but I did change it a little. I ended up with a rye bread with lovely flavor and texture.
Rye bread can be tricky. Rye flour needs to be paired with wheat flour to have the necessary type of gluten to rise. Rye flour does contain gluten, but not the type of gluten that gets stretchy. Rye flour also rises better when some acid is added to the dough. Molasses adds some acid. In this dough, sour pickle juice is added. Vinegar also works.
Rye flour is higher in the enzymes that break down starch into sugars. Starch is needed to form the structure of the crumb, and if too much starch is split up, the texture of the bread suffers and becomes gummy. Traditionally, this is prevented by acidifying the rye dough. This is why breads with a high percentage of rye flour are made with rye sour (rye-based sourdough starter), even if commercial yeast is added, to preserve the structure of the bread.
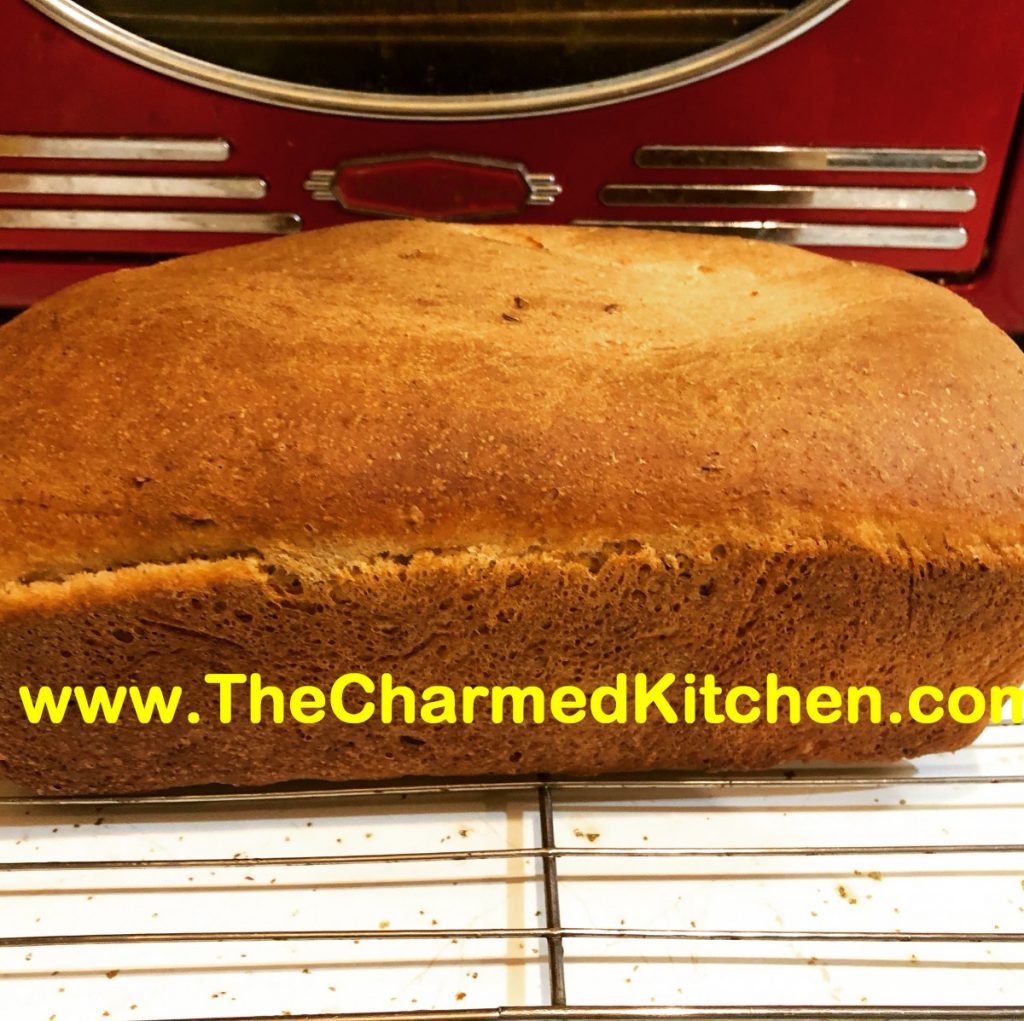
So here is the most recent rye bread I made. More variations are coming.
Deli Rye Bread
2 c. bread flour
1 c. rye flour
3 T. potato flakes
2 T. caraway seeds
2 T. brown sugar
1 packet active dry yeast- scant tablespoon
2 t. salt
1 c. warm water
¼ c. olive or avocado oil
¼ c. sour pickle juice
2 T. molasses
Place bread flour, rye flour, potato flakes, caraway seeds, brown sugar, yeast, and salt in the bowl of a large stand mixer. Stir dry ingredients to combine. Add warm water, oil, pickle juice and molasses into dry ingredients. Fit dough hook onto mixer and beat until dough is just coming together. It will look rough. Cover bowl with plastic wrap and let rest for about 30 minutes. Remove plastic wrap and knead dough in stand mixer with dough hook until smooth, firm, and only slightly sticky, 6 to 8 minutes. Turn dough onto a floured work surface and knead until smooth, 1 to 2 more minutes. Form dough into a ball, place dough into an oiled bowl, and turn dough around several times in bowl to coat with oil. Cover the bowl with plastic wrap, set into a warm place, and let rise until nearly double, about 1 hour. Grease a 9×5-inch loaf pan. Turn dough onto a lightly oiled surface, shape into a log, and place into prepared loaf pan. Cover with a linen kitchen towel and let rise until top of dough has risen slightly over top of pan, 60 to 90 minutes. Preheat oven to 350 degrees F (175 degrees C). Bake loaf until golden brown and cooked through, about 35 minutes. If loaf browns too quickly, cover loosely with a tent of aluminum foil with shiny side out. Bread should sound hollow when tapped lightly. Remove from pan and cool on wire rack. Makes 1 loaf.
Pecan Crusted Salmon

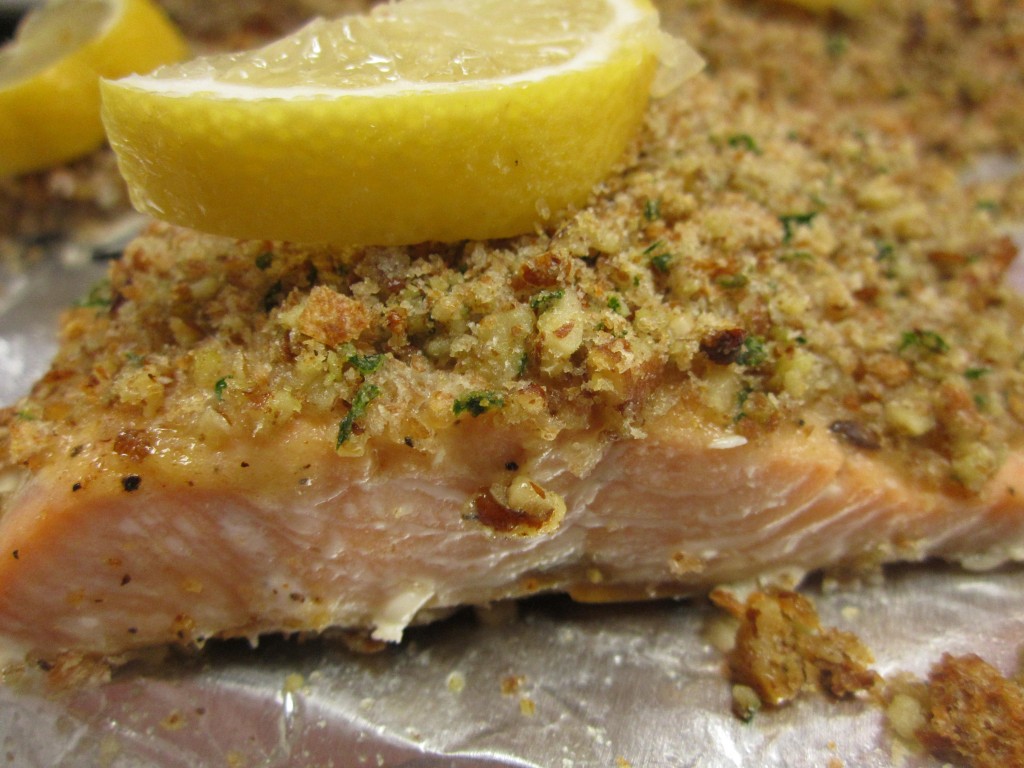
If you love salmon like I do, this is a fun way to prepare it. The crunch from the nuts adds a nice contrast to the texture of the fish. The flavors work well together, too. You don’t have to use pecans. I prefer them, but finely chopped walnuts, hazelnuts, almonds or even pumpkin seeds might be fun.
A combination of Dijon mustard, butter and honey helps the nuts to stick to the fish. There are a few fresh bread crumbs in there as well.
This dish is simple enough to prepare any night of the week, but special enough to make for company.
I used salmon fillets. You could use a whole side of salmon. You just have to increase the baking time to about 20-25 minutes and reduce the oven to 425 degrees. Depending on the size of the piece of salmon, it might take a few more minutes.
You could use other fish, but you need a sturdy fish that will stand up to the topping. I have made it with Steel Head Trout and it worked out beautifully.
Pecan Crusted Salmon
2 T. Dijon Mustard
2 T. melted butter
4 t. honey
1/4 c. fresh bread crumbs
1/4 c. finely chopped pecans or walnuts
2 t. chopped parsley
4 salmon fillets
Salt and pepper
Lemon wedges
Mix together mustard, butter and honey and set aside. Mix together bread crumbs, nuts and parsley and set aside. Season each fillet with salt and pepper. Place on lightly greased baking or broiling pan. Brush each fillet with mustard mixture. Divide crumb mixture among fillets, patting to hold. Bake in 450 degree oven for 10 minutes per inch thickness of fillets. Serve with lemon wedges. Serves 4.
Corned Beef Quesadillas


For those of you with leftover corned beef, you might want to try making corned beef quesadillas. You could use a number of fillings, including perhaps, a Reuben quesadilla.
I used a combination of cheese, corned beef, caramelized onion and spinach. It came out so tasty.
The quesadilla make a great lunch dish- maybe served with a salad. You can also serve them as appetizers or a fun snack.
Make sure any fillings are not too wet- they will cause the tortilla to be soggy, instead of crisp. I like to cook most of my veggies first, to wilt them down and remove some moisture. I also drain any veggies that are really wet.
Cheese can be sliced thin, or shredded. Corned beef should also be in thin slices or shredded.
You have options for how you want to cook your quesadillas. You can cook in a little oil, in a skillet, cooking until golden brown on both sides. You can brush them with oil and bake in the oven. You can also grill them. The important thing is to get them crisp. No microwave cooking for this recipe.
Don’t be afraid to be a little creative. You can serve them as is, or with a dipping sauce on the side.
Corned Beef Quesadillas
4 large flour tortillas- 8-inch or larger
8 oz. corned beef, sliced thin or shredded
1½ c. shredded cheese or 6 oz. sliced cheese- I used sharp cheddar
12 oz. fresh spinach, cooked down in a little oil or 10 oz. box frozen spinach, thawed and squeezed dry
1 sweet pepper, seeded and diced
2 medium onions, sliced thin and cooked in oil or butter until wilted down and golden- season with salt and pepper
Whole grain mustard, optional
Mayo- mustard
Oil for frying or brushing the tortilla before grilling
Get all your ingredients prepped before starting. If baking in the oven- have oven preheated to 425 degrees. Place tortilla on a work surface and brush with mustard and mayo, if you are using them. Place 2 oz. of corned beef on the tortilla. Keep all the ingredients on one half of the tortilla, since you will be folding it in half. The mayo and mustard can be spread over the whole tortilla. Top the corned beef with ¼ of the cheese, spinach, pepper and onions. Fold in half, set aside. Repeat with remaining ingredients. You will have 4 tortillas, filled and folded in half. Cook one of several different ways. I heated a skillet, added oil, and cooked the quesadillas until golden brown on both sides. You can place them on a baking sheet and bake in the oven until crisp and golden. You can also brush the outsides of the quesadillas with a little oil and grill, turning until golden on both sides. Cut in wedges to serve. Makes 4.
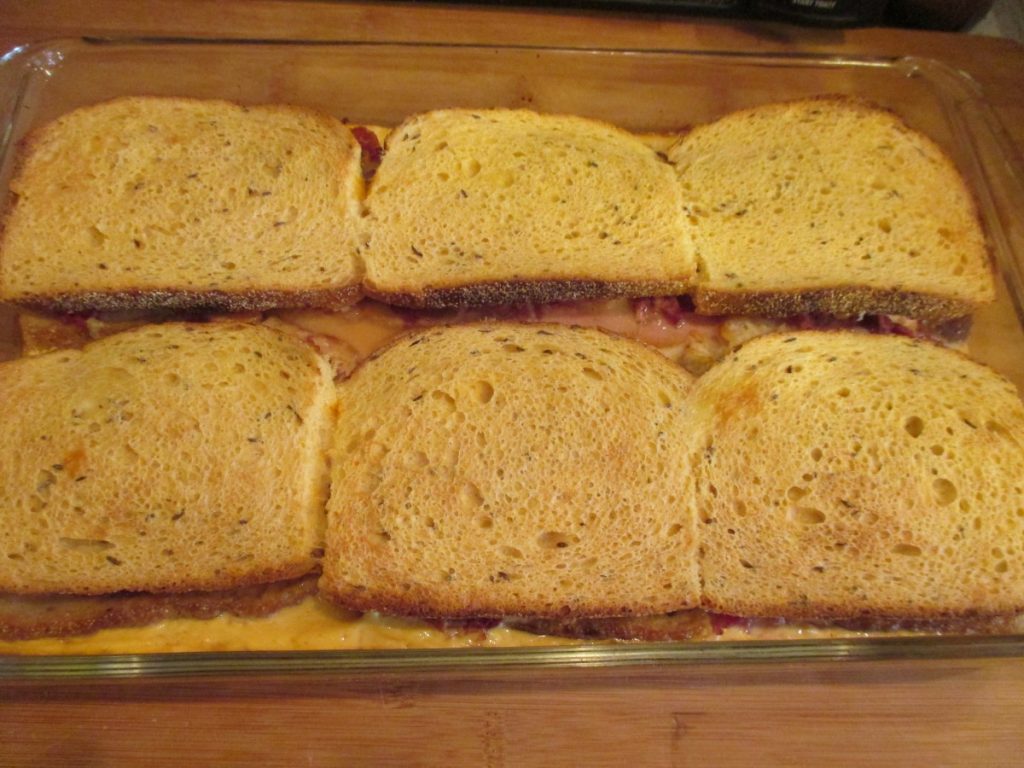
Reuben Strata

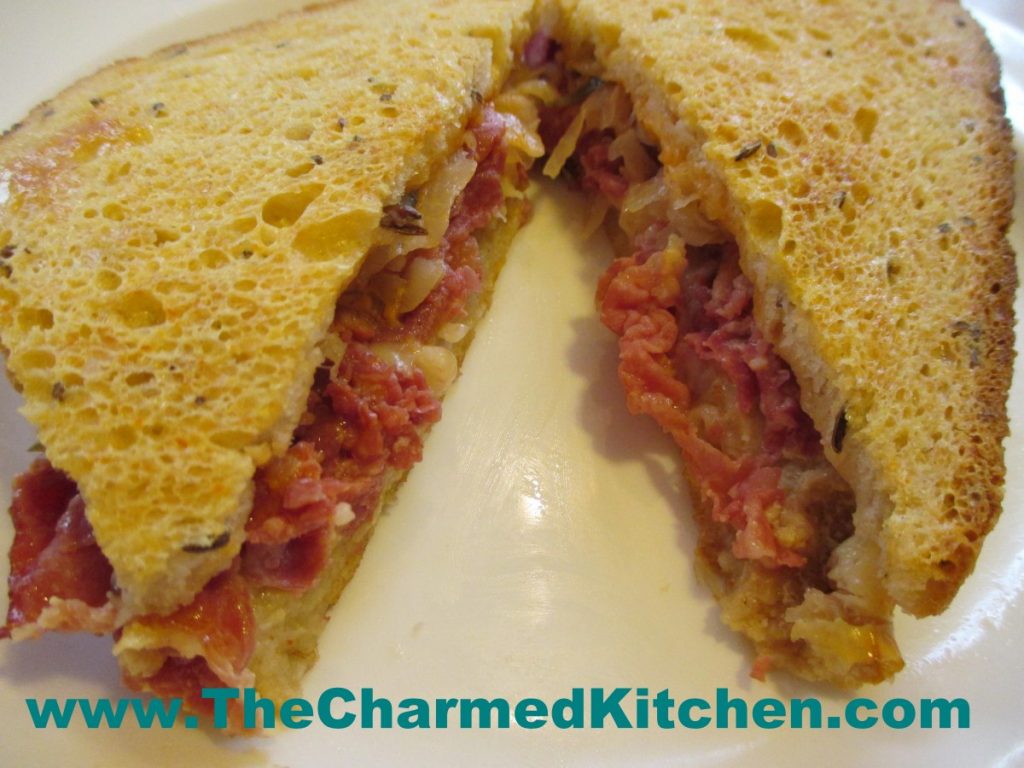
If you need a new recipe for corned beef- I would suggest making this strata. It contains all the ingredients found in a traditional Reuben sandwich, but with a twist. These “Reubens” are baked, after being soaked in an egg custard.
The dish is assembled at least a few hours before baking, so you can make it the day before, or in the morning. Just pop in the oven about an hour before you want to serve it.
Strata just means layers. Ingredients are layered before pouring over an egg/milk mixture. These layers add flavor to the final dish. In this strata, layers include rye bread, Swiss cheese, corned beef, sauerkraut and thousand island dressing. Of course, you can play around with the ingredients you use. If you don’t like sauerkraut, you can leave it out- or only put in on some of the sandwiches. Strata can be served for breakfast, brunch, lunch or dinner.
I used very thinly sliced corned beef from the deli. You can also use home-cooked corned beef. Just dice it or shred it up. I also used homemade Thousand Island dressing, but use what you like. You can also serve extra dressing on the side.
Reuben Strata
12 slices rye bread
6 slices Swiss cheese
12 oz. thinned sliced corned beef- or 2 cups chopped corned beef
1 c. sauerkraut, squeezed dry
½ c. Thousand Island dressing*
3 eggs
2 c. milk
½ t. salt
½ t. hot pepper sauce, or to taste
Lightly grease a 9×13-inch baking dish. Place six slices of bread on bottom of the dish. You might have to trim the bread to fit. Top each slice of bread with a slice of cheese. Top cheese with the corned beef and sauerkraut. You can use a little more or less sauerkraut, depending on your taste. Spoon about a tablespoon of the dressing over each “sandwich”. Top with remaining six slices of bread, trimmed to fit pan, if needed. Combine remaining ingredients and pour over sandwiches. Cover dish and let stand in the fridge, several hours or overnight. Bake, uncovered, in a 350-degree oven for 40-45 minutes, or until puffed and set. Let sit a few minutes before serving. Serves 6.
*Homemade Thousand Island Dressing is just equal parts of sweet pickle relish, ketchup and mayo. You can make your own pretty easily.

Corned Beef on Rye Salad

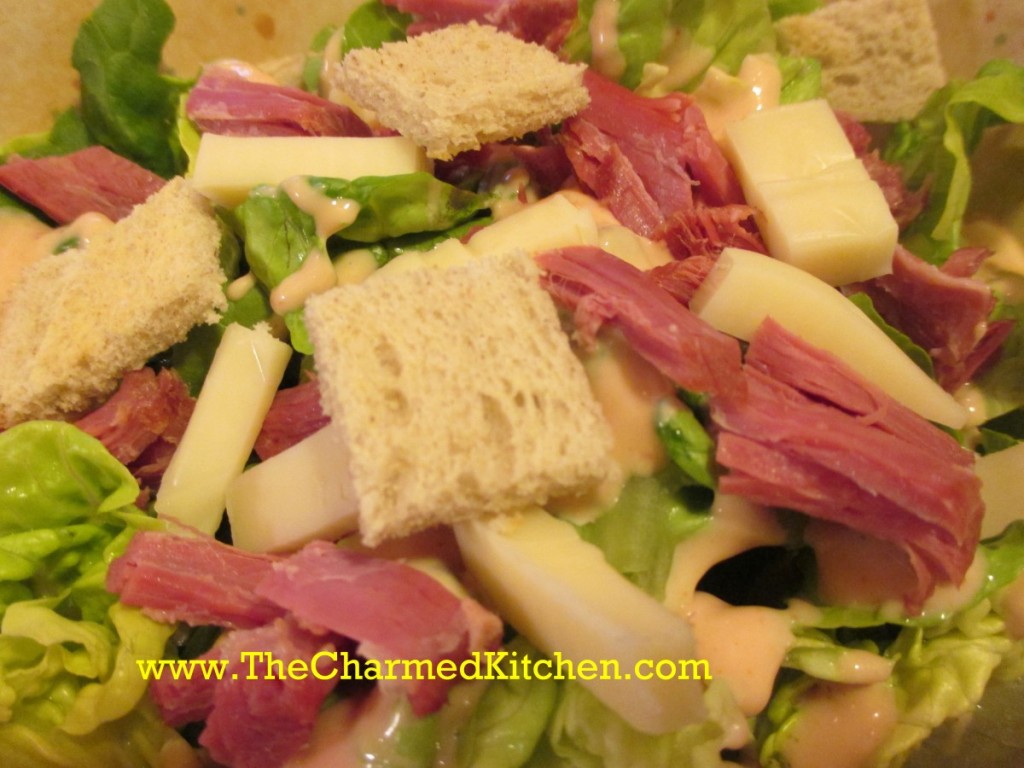
If you have leftover corned beef, you might want to try using it in a salad. This recipe came about when I had some corned beef that I was planning on using in a sandwich. But I was more in the mood for a salad. Since I also had some lovely salad greens, I decided to combine them in one dish.
The end result was very tasty.
I prepped my greens, then topped them with the corned beef and Swiss cheese. I made croutons out of the rye bread and dressed the salad with homemade thousand island dressing. A nice Russian dressing would have worked, too. Perhaps, even a simple oil and vinegar dressing. The thousand island dressing made it like a Reuben sandwich, minus the sauerkraut.
Corned Beef on Rye Salad
6-8 c. mixed salad greens, washed and dried off
6 oz. corned beef, cut in bite sized pieces
4 oz. cubed Swiss cheese
2 slices rye bread, toasted and cubed
4 T. Thousand island dressing- recipe follows
Place greens in a bowl. Top with the meat, cheese, rye bread and drizzle with the dressing. Serves 2.
Homemade Thousand Island Dressing
Combine equal amounts of mayo, ketchup and sweet pickle relish. Stir to combine. I like to add capers sometimes, too. Store unused portion in the fridge.
Potatoes O’Brien


In all honesty, I love potatoes in pretty much any dish. Sometimes you just want to go with an old time classic. I always loved when my mom made potatoes O’Brien.
Potatoes O’Brien are hash browns, with onions and diced peppers. The combination is so tasty. To speed up the cooking process, I cooked the potatoes in the microwave first. You could also just use raw, diced potatoes. Either way, the end result is sure to be a hit.
Potatoes O’Brien could also be a nice side dish for your St. Patrick’s day dinner.
Potatoes O’Brien
oil
1 medium onion, chopped
1 c. chopped sweet pepper- I used baby peppers, sliced in rings
2 lbs. potatoes, diced, peeling is optional
salt and pepper
fresh parsley and thyme, optional
In skillet, heat a couple of tablespoons of oil. Saute onion until tender, add peppers and cook until they peppers are tender. Remove from skillet and set aside. Add a few more tablespoons of oil to the skillet and let it get pretty hot. Add the potatoes and cook, stirring often, until the potatoes are browned. They should be cooked, tender in the middle, crisp on the outside. I cooked the potatoes in the microwave first, then diced them once they were cool enough to handle. This made them cook up faster, but raw potatoes are fine, too. Return onion mixture to skillet with the potatoes, season with salt and pepper to taste and add the fresh herbs, if you like. Stir together until heated through. Serves 4-6.


