Ginger Cinnamon Cider


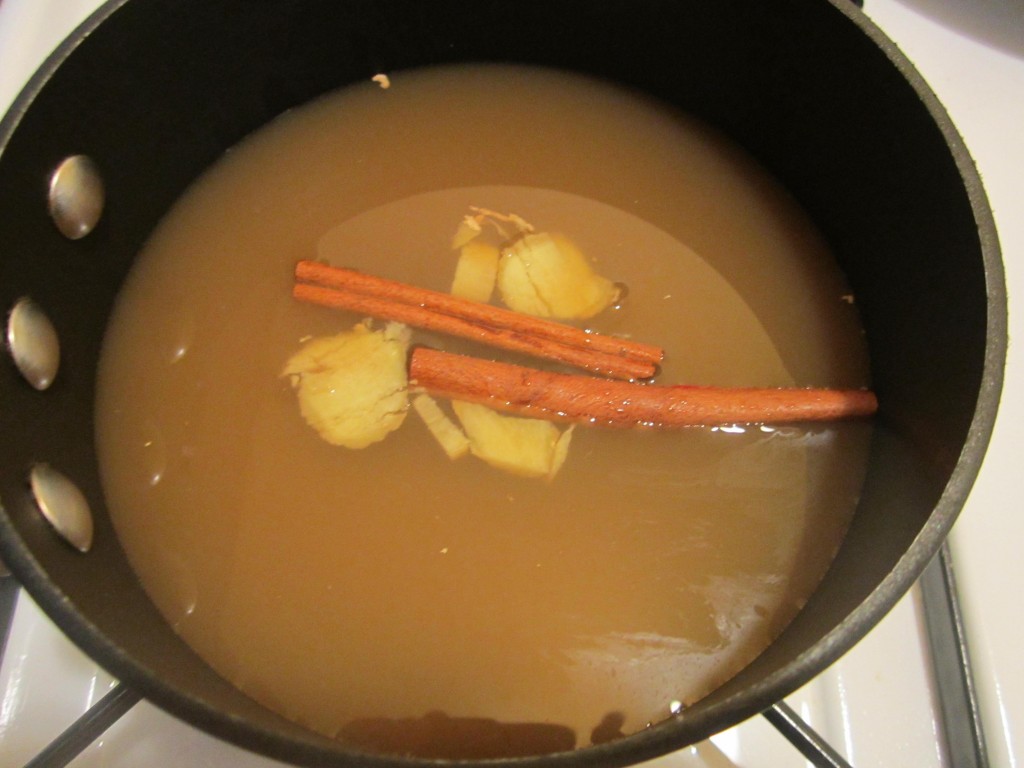
It’s been chilly lately, and I love a mug of hot apple cider to warm up. I made some recently, but I wanted to spice it up a little. I ended up adding sliced ginger and a cinnamon stick and the result was really good.
I always keep ginger root in my freezer. It is frustrating to buy a piece of ginger and then find it in the bottom of the crisper drawer weeks later looking like a science experiment gone bad. Freezing it solves that problem. When I want to use it, I just take it out of the freezer, scrape off the peel and grate or slice off what I need. It keeps pretty much forever that way, and I have “fresh” ginger whenever the mood strikes me. You can also finish the cider off with a splash of brandy just before serving.
Ginger Cinnamon Cider
2 cups apple cider
1-inch piece of ginger, sliced
1 cinnamon stick, broken in half
Place cider in a saucepan with the ginger and cinnamon. Simmer gently for 5 minutes- or a little longer if you want a more intense ginger taste. Strain and serve. Serves 2.
Note: Some of the cider will boil off so add a little more if you simmer it longer or keep the pot covered to reduce evaporation. I actually like the more intense flavor when it cooks down a little.
Maple Bacon Doughnuts

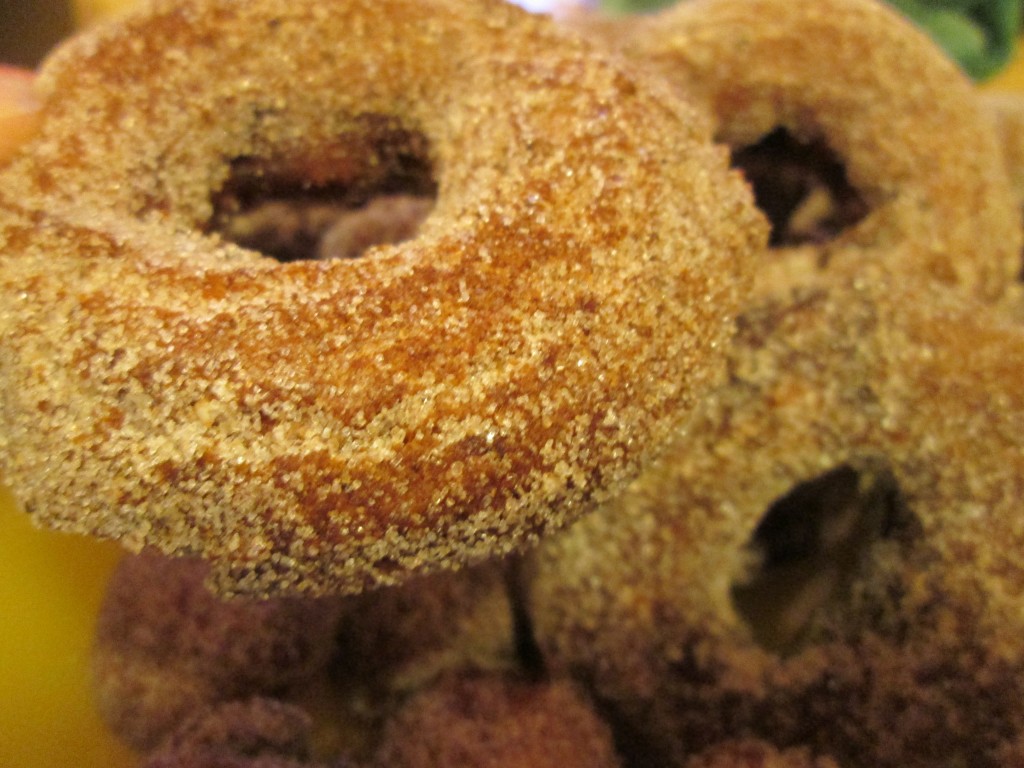
If you want homemade doughnuts, you can’t much easier than these Maple Bacon Doughnuts. They are a cake-style doughnut. That means baking powder is used to leaven the doughnuts, not yeast. You can mix up a batch of dough in just a few minutes.
You do need to let the dough chill before frying, so allow time for that.
The sweetness from the maple syrup pairs so well with the smoky bacon. Once the doughnuts are fried, I like to roll them in cinnamon sugar, but you can dust them with powdered sugar, or even make a powdered sugar glaze.
Maple Bacon Doughnuts
3 c. flour
1 T. baking powder
2 t. cinnamon
1 t. salt
1/2 t. grated ginger
2 eggs
1/2 c. sugar
1/2 c. maple syrup
1/3 c. buttermilk
1/4 c. melted butter
1 c. cooked, crumbled bacon
oil for deep frying
cinnamon sugar
Combine dry ingredients and set aside. In another bowl beat together eggs, sugar and syrup until well mixed. Stir in buttermilk and butter then stir in dry ingredients and bacon. Do not over mix. Chill dough at least a couple of hours before using it. Overnight is better. When ready to use, heat oil to 375 degrees. While oil is heating roll dough out, on a floured surface, 1/2 inch thick, and cut out with a doughnut cutter. Fry several at a time for 1 minute per side. Drain on paper towels. Roll warm doughnuts in cinnamon sugar. Re-roll scraps. You will end up with about 18 doughnuts and 18 doughnut holes.
Red Onion Relish

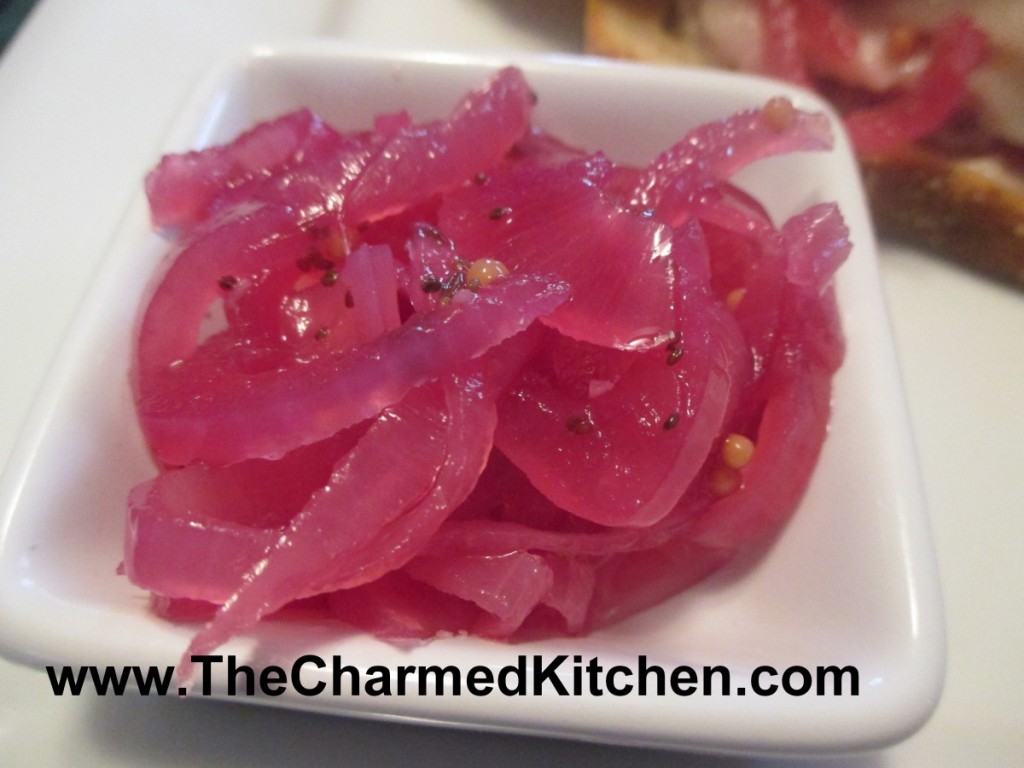
I made this relish last night. I had a few red onions I wanted to use up. I love the tart flavor and bright color it adds to my food. This relish is a great topper for sandwiches, but can be used for a whole lot more.
The onions can be served with cheese and crackers for an easy appetizer. It looks great on a charcuterie board. You can add some to salads, and the liquid can be combined with a little oil for a simple salad dressing. I even had some with my scrambled eggs for breakfast.
After you cook it, you just ladled into jars, cool it down, and store it the fridge. It will keep for weeks and weeks. Nice to have on hand for last minute entertaining.
Red Onion Relish
4-5 medium red onions, peeled and sliced thin
2 c. red wine vinegar
1½ water
1 c. sugar- or to taste
2 T. salt
1 T. mustard seed
1 T. celery seed
1 t. fennel seeds, optional
2 cloves garlic, minced
1 cinnamon stick- 4 inch
4 whole cloves
Place all ingredients in a pot and bring to a boil. Turn down to a simmer and cook, uncovered for 10-15 minutes. Cool and place in jars, then store in the fridge. Use as a sandwich topper, salad addition, appetizer with cheese and crackers. You can also use the liquid as the base for a salad dressings, with the addition of some oil. Keeps for weeks in the fridge. Makes 5 cups.
Vampire Chasers- Cheesy Garlic Toast


If you are concerned about keeping away vampires this Halloween, you might want to make this recipe for cheesy garlic toast. Garlic is widely accepted as a repellent for vampires- and a lot less messy than a stake through the heart.
This is one of my favorite appetizers. I make them a few times a year, but they are extra fun to serve at a Halloween party.
A mixture of garlic and onions are cooked in butter, then spread over the bread slices. That would be plenty for most garlic bread- but you take it up a notch with a cheesy/ mayo mix on top. They are baked for just a few minutes to get all toasty. These are always a hit. They can be served as an appetizer, or as a side with dinner. We had them last night with our mushroom barley soup.
Vampire Chasers
1 French baguette, cut into 3/4 inch diagonal slices
1 large onion, minced
8 cloves minced garlic
1/4 cup butter
2 cups shredded mozzarella cheese
1/2 cup grated Parmesan cheese
1 cup mayonnaise
Slice the French baguettes diagonally into 3/4 inch slices. In a medium skillet, over medium heat, melt the butter. Combine the onions and garlic in the skillet. Cook and stir until tender. Set aside to cool. In a mixing bowl, combine the mozzarella cheese, Parmesan cheese and mayonnaise. On a cookie sheet, arrange the French bread slices in a single layer. Spread the onion and garlic mixture on the bread slices. Spread the cheese and mayonnaise mixture over the onion and garlic mixture on the bread slices. Bake in a 400 degree oven for 10 minutes or broil about 5 minutes, until the cheese is bubbly and slightly browned. Serve immediately.
Cinnamon Pear Coffee Cake

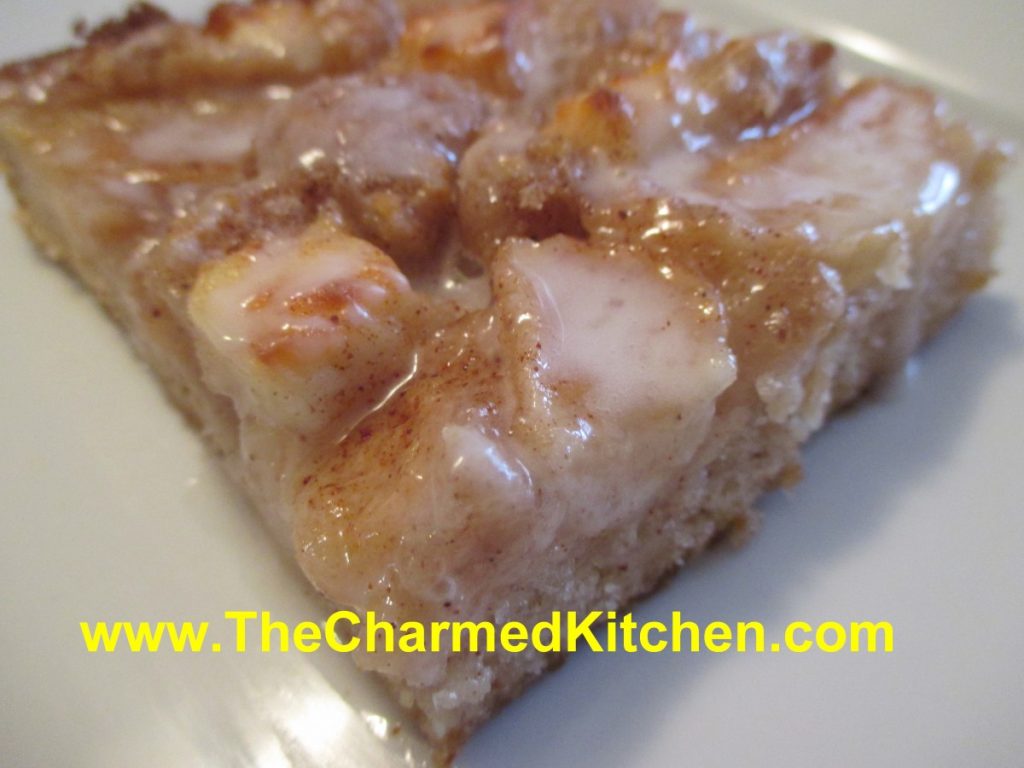
This pear-studded cake is perfect to have with that morning cup of coffee- or for dessert. The tender cake is topped with chopped pears, cubes of cream cheese, cinnamon sugar and a vanilla glaze. The taste is amazing. I used Bartlett pears, but any ripe pear would work.
I will say up front, that this is not the prettiest cake out there. It comes out of the oven kind of lumpy, from all those pears and the tiny cubes of cream cheese. Once you top it with the cinnamon sugar, and later the glaze, it looks a lot better. It is one of the tastiest cakes, though, and isn’t that what’s important?
So if you want to enjoy one of my favorite Autumn fruits in a new way- try making this simple, tasty pear coffeecake. I don’t think you will be disappointed.
Cinnamon Pear Coffeecake
1 stick (½ cup) butter
1 egg, lightly beaten
1 c. half and half
1 c. all-purpose flour
1 c. sugar
2 t. baking powder
2 t. cinnamon
1 t. vanilla
½ t. salt
2 lbs. pears, about 4 large, cored, peeled and sliced *
8 oz. cream cheese, cut in small pieces
Topping
3 T. cinnamon sugar
Glaze:
½ c. powdered sugar
1-2 T. milk
½ t. vanilla
Preheat oven to 350 degrees. Melt butter and pour into a 9-by-13-inch glass baking dish. In a small bowl, mix together the egg, half and half, flour, sugar, baking powder, cinnamon, vanilla and salt. Pour directly over the butter in the baking dish, but do not stir. Drain pears well. Add the pears, arranging in a single layer as much as possible. Sprinkle cream cheese pieces over fruit. Place in preheated oven and bake for 45 minutes, or until top is golden brown and edges are bubbling. When you remove the cake from the oven, sprinkle with the cinnamon sugar. Set cake aside to cool. Make glaze by combining glaze ingredients. Add just enough milk for a nice consistency for drizzling. Drizzle over cooled cake. Store leftovers in fridge. Serves 12.
* To keep pears from discoloring place in a bowl with 2 cups of water and 2 tablespoons lemon juice
Apple Pie “Blintzes”


Since I posted the recipe for making your own apple pie filling yesterday, I thought I’d share a fun way to use it- other than in a pie. In tortilla class the other night, we made “blintzes” with the pie filling.
We used flour tortillas for the crepes. Don’t get me wrong, I love making real crepes. But, when you don’t have the time, the tortillas are a fun and tasty substitute.We soaked the tortillas in milk. By soaking the tortillas in milk, they soften up, and can be used like a crepe. Soak them for about 10 minutes, or up to 30 minutes. If you don’t want to soak them in milk, you can use a milk substitute or even juice or water.
After they are filled, the blintzes are toasted in a pan with butter, than dusted with powdered sugar. They are so tasty. Like a warm apple pie. These were a big hit in class
Apple Pie Blintzes
10-12 flour tortillas
1/2 c. milk
2 c. apple pie filling
3-4 T. butter
Powdered sugar or cinnamon sugar, for topping the blintzes
For the filling, I used some of my homemade apple pie filling. If you have fresh apples, you can just peel and slice the apples, then cook them in a little water and sugar until softened. You can make them as sweet as you like. You made need less sugar if the apples are extra sweet. Add some cinnamon and nutmeg, too. If they are too watery- combine a little cornstarch with cold water and drizzle the mixture in until the apples thicken up. Don’t add too quickly or you might them too thick and gummy.
Place tortillas in a shallow pan, drizzling with a little milk as you go. Set aside for a few minutes, so the tortillas will soften.
To assemble the blintzes, place a softened tortilla on your work surface and spoon a little apple filling in the middle. You can do this with hot filling, but cold or room temperature filling is easier to use. Don’t over fill them or you won’t be able to fold them up. I used 8-inch tortillas and used about 1/3 cup of filling for each one. Fold the sides in until they almost meet in the middle and them roll the tortilla up to cover the filling. Place seam side down until ready to fry them.
Heat butter in a skillet, and brown the blintzes over medium heat until lightly toasted on both sides. They will be crispy on the outside, but tender in the middle. Put on a serving plate, sprinkle with powdered sugar and serve while warm. These are fine just as they are, but feel free to add ice cream or whipped cream, too.
I have made these before and use different fruit fillings. I’ve even made a cheese filled version a few times. It seems I usually have a package of tortillas, so it is a go-to dessert for me in a pinch.
How to Can Apple Pie Filling

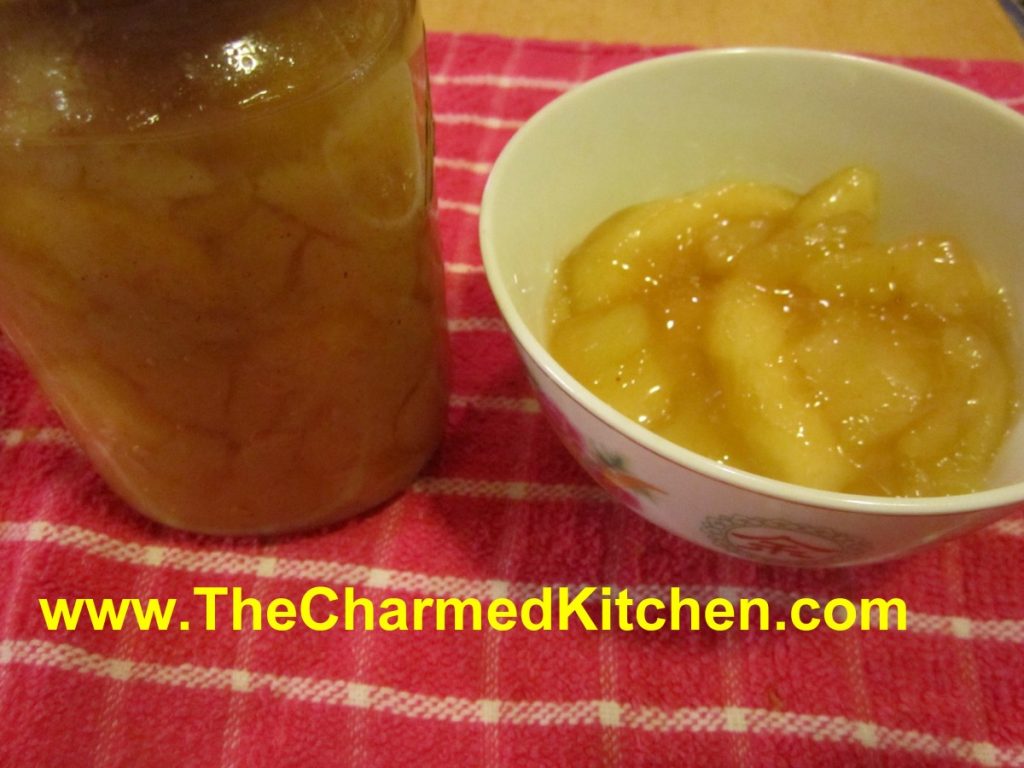
While I think the best pie is made with fresh apples, I also like making and canning my own apple pie filling. It is a handy way for me to enjoy local apples throughout the year. It is also a whole lot better than any commercial pie filling I have tried. Loaded with plenty of big chunks of apples and seasoned with cinnamon and nutmeg- I think it the next best thing to fresh apples for baking.
I use my canned pie filling to make pies, but I also use it for kolachy, blintzes, cakes and more.
The hard part, for some, is getting a hold of Clear Gel. It is a special type of modified cornstarch. I buy mine online, but you can find it in stores where the Amish shop. Clear Gel stays thick, even if it is reheated. Regular cornstarch will not. Don’t use Instant Clear Gel, either.
Here is the recipe I use. You can tweak the seasonings to suit your own taste, but keep in mind that spices sometimes get stronger when canned, so don’t go too crazy!! You can always add more spices when you use your pie filling.
Apple Pie Filling
6 qts. apples, sliced and blanched
5 1/2 c. sugar
1 1/2 c. Clear Gel- modified cornstarch available on line and in Amish stores
1 T. cinnamon
1 t. nutmeg
2 1/2 c. cold water
5 c. apple juice
3/4 c. lemon juice
If apples lack tartness, use an additional 1/4 cup of lemon juice. Wash, peel and core apples and cut into 1/2 thick slices. Place in water treated with either lemon juice, citric acid or ascorbic acid to prevent darkening. Remove from solution and drain well. Blanch in boiling water- 2 quarts at a time- for 1 minute. As you finish each batch place in a bowl and cover to keep warm. In large pot combine sugar, Clear Gel, cinnamon, nutmeg, water and apple juice. Stir over medium heat until mixture begins to bubble and thicken. Add lemon juice and boil 1 minute. Add drained apples and stir gently to combine. Ladle into hot, clean jars leaving 1 1/2 inches of headspace. Remove air bubbles. Wipe rims and adjust lids. Process in a boiling water bath- pints or quarts for 25 minutes. After the time is up, turn off canner and let jars sit in water bath for 5 minutes before removing. This will reduce the chance of siphoning. Makes 7 quarts or 14 pints.
For only 1 quart
3 1/2 c. apples
3/4 plus 2 T. sugar
1/4 c. Clear Gel
1/2 t. cinnamon
1/8 t. nutmeg
1/2 c. cold water
3/4 c. apple juice
2 T. lemon juice
Halloween Quesadillas


OK, maybe I’m taking the whole Halloween theme too far. I was making quesadillas the other day, and realized that the ingredients were black, orange and green. Thought the combination would be perfect for a Halloween party.
Quesadillas are a fun party food already, and by using black olives, orange sweet peppers, green chilies, onions and cheddar cheese, they fit in well with the color scheme for Halloween. They taste great, too, which is always the most important thing in the end.
Of course other ingredients can be used. In the tortilla cooking class last night, we also had nopales and green enchilada sauce.
I pan fried these, but you can also bake them in the oven. They can be made ahead, and warmed up before serving. Serve with a nice blood- red salsa. Ok, I’ll stop now.
Halloween Quesadillas
Large flour tortillas
oil
sliced or shredded cheese
sliced black olives
chopped orange sweet peppers
chopped sweet onion
diced green chilies, fresh or canned
Mix olives with veggies and set aside. Place tortilla on work surface and spread one half with some of the veggie mixture. Top with some of the cheese and fold over. Press slightly. Repeat with remaining ingredients. Heat oil in skillet and cook quesadillas over medium heat until golden on both sides and heated through. Remove to cutting board and cut into wedges before serving. Serve on a platter with sour cream and salsa, if desired.
Note: If you would rather bake the quesadillas assemble as directed above. Place on a baking sheet and brush with a little oil. Bake in a preheated 425 degree oven until golden, about 15 minutes.
Pumpkin Cheese Dip

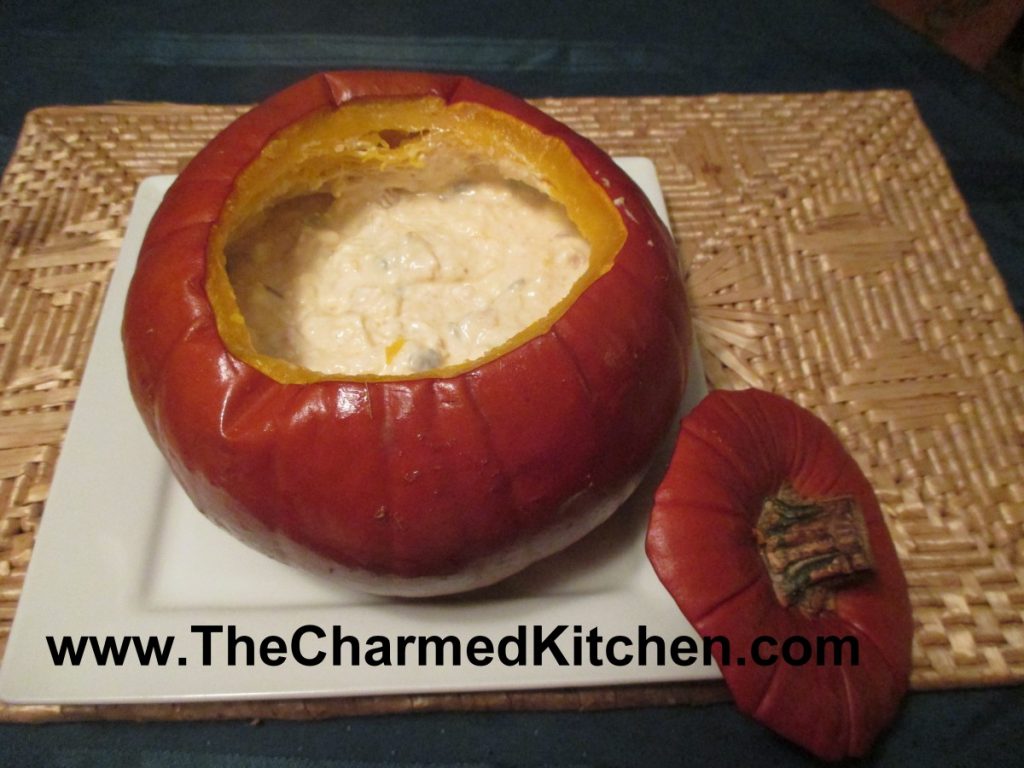
This is a pretty way to serve dips this time of year. The dip bakes inside the pumpkin- and the pumpkin bakes, too. It is served hot. Fun for Halloween, Thanksgiving, or just movie night with the family.
It really is simple and could be filled with any number of combinations of cheesy goodness. I have included the recipe I used in the picture. I also included my recipe for Spinach and Artichoke Dip, to give you another option.
You could also add a hot cheese sauce and serve like fondue, with long forks and pieces of bread.
You just get a pie pumpkin, about 2-3 lbs. Cut off the top to make a lid and scoop out the seeds, like you would if you were making a Jack-o-Lantern. Wipe off the outside and then just fill it up with the dip mixture. Put the lid back on, bake for an hour, and you are good to go. The fun part is scraping some of the cooked pumpkin in with the cheese dip. More detailed directions follow.
So here is the recipe for making the cheesy filled pumpkin. I think it is simple enough to serve anytime, not just on a holiday. Enjoy!!
“Pumpkin” Cheese Dip
Directions: Preheat oven to 350 degrees. Cut off top of pumpkin. Cut in at an angle, so top will fit like a lid and not fall in. Set top aside. Scoop out seeds and clean out any stringy bits*. Set pumpkin on a baking sheet. Combine cheese filling of your choice and place inside the pumpkin. Place the top of the pumpkin back on the pumpkin, and place in oven. Bake for 1 hour. Remove pumpkin and place on heat proof dish. I used a glass pie plate. Remove lid. Serve with crusty bread or crackers.
Smoky Cheese Dip
8 oz. cream cheese, cubed
4 oz. extra sharp cheddar cheese, shredded
8 oz. bacon, cooked and crumbled
½ c. sour cream
¼ c. mayo
¼ c. chopped parsley
½ t. each cumin and smoked paprika
Pinch of nutmeg
½ c. hulled pumpkin seeds
In medium bowl, stir together all ingredients, except the seeds. Place this mixture in the pumpkin when ready to bake. Don’t add the pumpkin seeds until right before serving. Stir them in a little, if you like.
Another nice choice…….
Spinach and Artichoke Dip
1 (12-14 oz.) can artichoke hearts, drained and coarsely chopped
10 oz. package frozen spinach, thawed and squeezed dry
8 oz. cream cheese, cubed
4 oz. shredded cheddar cheese
½ c. diced onion
¼ c. Italian dressing
Dash of hot sauce
In medium bowl, combine dip ingredients, stirring to combine. Place in pumpkin when ready to bake.
* You can rinse off the seeds, lightly salt them and toast them, if you like. Then serve with the pumpkin dip. If you aren’t interested in eating them- please put them outside for the birds to eat.
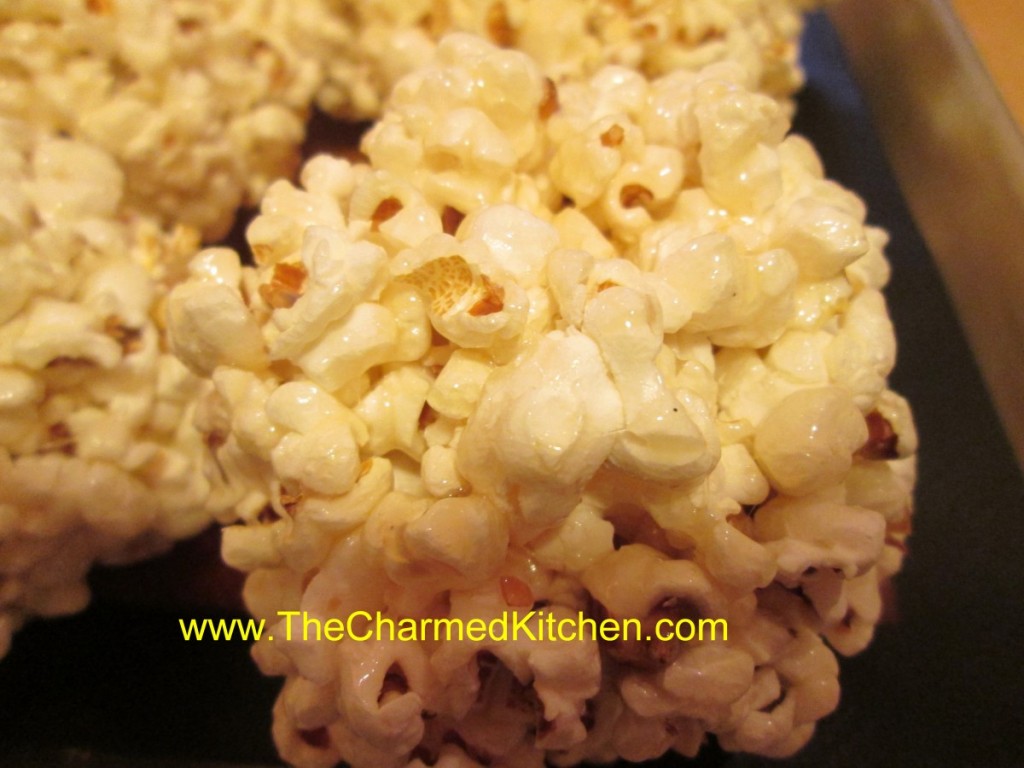
Homemade Popcorn Balls

I have fond memories of eating popcorn balls when I was a kid. One memory was during the summer. An amusement park near my home was famous for their popcorn balls. Every time we went there, we would end the day with popcorn balls.
The other memory was making our own, around Halloween. They seem to be a part of more than a few Halloween parties when I was younger.
I don’t make them often, but popcorn balls are always a special treat for friends and family. This recipe is pretty easy. Kids, supervised, could help make them. You just have to make sure the mix cools down enough before you let them form the popcorn into balls.
I am a bit of a purist and enjoy them plain, but you can add Halloween themed candies to the mix, to dress them up for a party. Candy corn or black and orange M&M’s would both work.
The recipe calls for corn syrup. If you don’t want to use corn syrup, my recipe for a corn syrup substitute, (sugar syrup) is listed below.
Homemade Popcorn Balls
9 c. popped popcorn
1 c. sugar
1 T. butter
1 T. vanilla
1 c. corn syrup*
Place popcorn in large bowl and set aside. Combine sugar, butter, vanilla and corn syrup in a saucepan. Heat and boil until thick, about 4 minutes. Pour over popcorn. Stir until well coated. Let cool until safe enough to handle. With buttered hands form mixture into balls. Store wrapped tightly in plastic wrap until ready to eat. Best eaten within a few days of making. Makes about 8.
*If you don’t have corn syrup- or don’t want to use it here is a way to make a substitute for it.
Sugar Syrup- corn syrup substitute
3 cups granulated sugar
1 cup Water
1/2 tsp. Cream of Tartar
1/4 t. salt
Combine ingredients in a large saucepan. Bring to a boil and cover the pot. Reduce to a simmer and cook covered for 5 minutes. Uncover and cook to soft-ball stage. Stir frequently.
Soft ball stage occurs at 235-245 degrees. This stage can be determined by dropping a spoonful of hot syrup into a bowl of very cold water. In the water, use your fingers to gather the cooled syrup into a ball. If it has reached soft-ball stage, the syrup easily forms a ball while in the cold water, but flattens once removed from the water.
Remove from heat. Cool and store at room temperature. It will keep well for a month or two.


