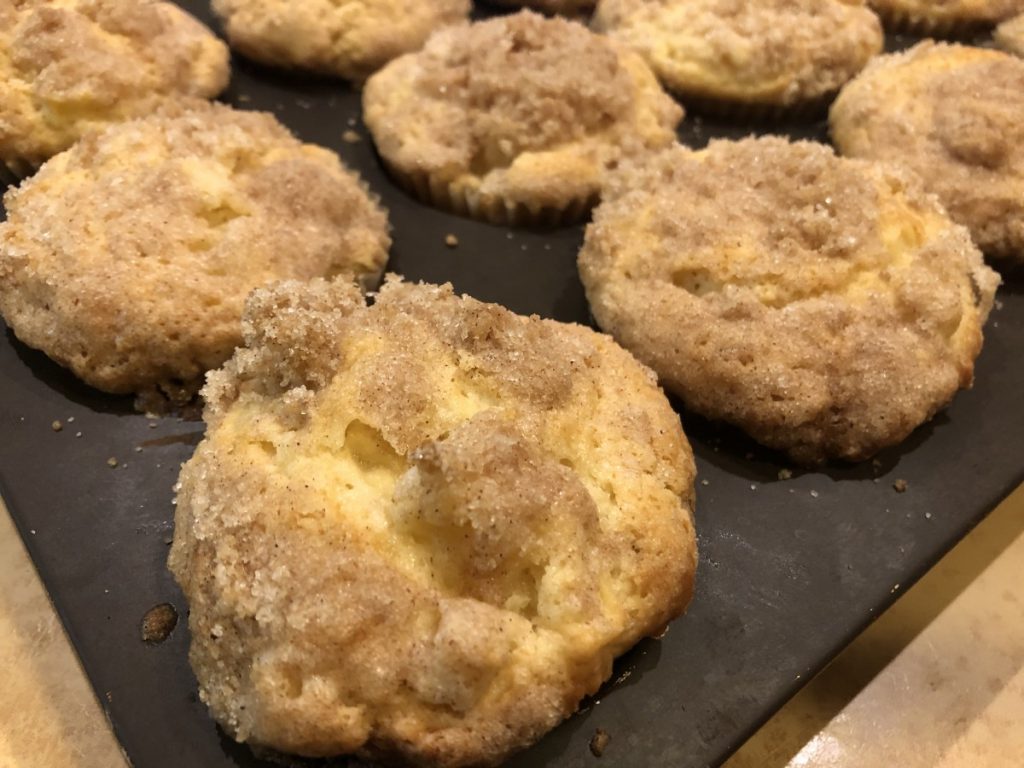
Apple Crumb Cupcakes

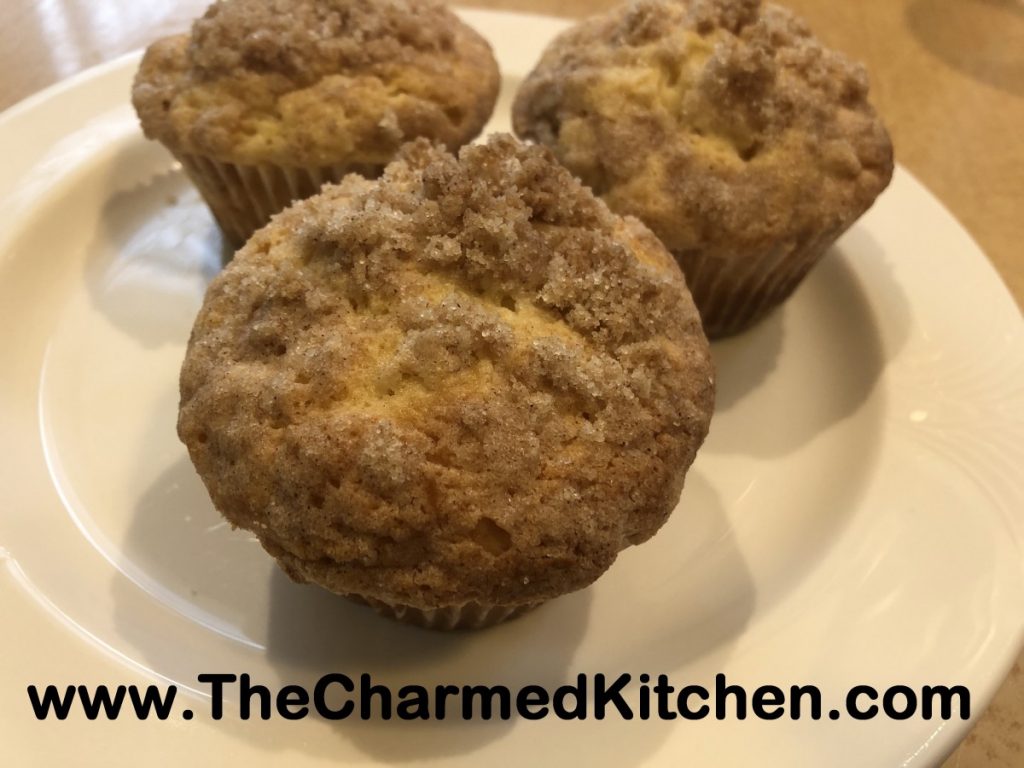
I wanted to make a dessert for a friend of mine. Since I had a couple of apples, I knew I wanted to use them. I decided to use my apple crumb cake recipe, but turn it into cupcakes instead. That crumb topping is so good. Just thought it would be a fun experiment. It mostly worked out.
The cupcakes worked out very nicely, and my friend was happy to get them. The only problem was that I ended up making 12 cupcakes. I should have made a few more. They were very full and rose more than I had anticipated. Don’t get me wrong, they still tasted great, but smaller cupcakes would have looked better. I would make 15-18 cupcakes the next time.
So here is the recipe. Enjoy!!
Apple Crumb Cupcakes
For cupcake batter:
2 c. flour
2 t. baking powder
½ t. salt
½ stick (¼ cup) butter, softened
¾ c. sugar
1 egg
½ c. milk
2 c. chopped peeled, cored apples
For topping:
½ c. sugar
¼ c. flour
1 t. cinnamon
½ stick (¼ c. butter, chilled and cut into bits)
Combine dry ingredients and set aside. In mixing bowl with electric mixer, beat butter and sugar until light and fluffy. Beat in egg and milk. Add flour mixture gradually until just mixed in. Fold in apples. Grease or line muffin tins with paper liners. You should get 15-18 cupcakes, depending on how full you fill them. I made 12 in my test batch, and they were too full. Divide batter among the prepared pans, filling about 2/3 full. The batter is pretty thick. That is normal. Combine topping ingredients until they resemble coarse crumbs. Sprinkle over batter in pans. Bake in a preheated 350-degree oven and bake for 20-22 minutes. Use toothpick to test. Makes 15-18.
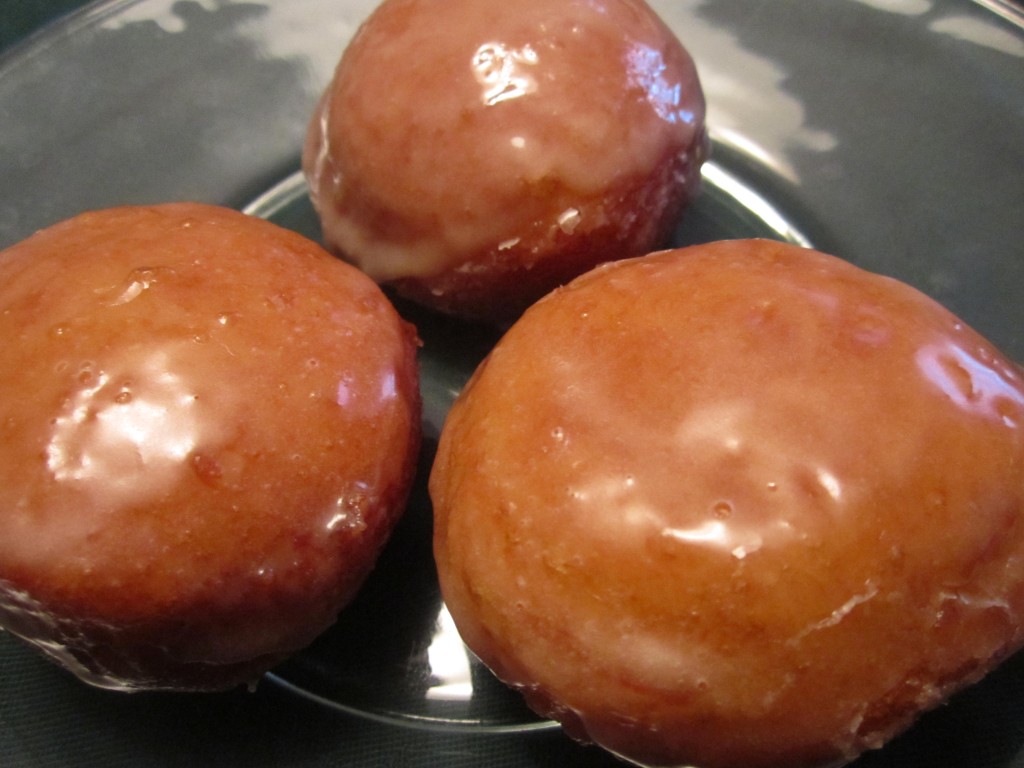
Biscuit “Doughnuts”

I always feel like I am cheating when I make these doughnuts. As most people know, I am all about making stuff from scratch. I also live in the real world and I know people just don’t always have time to make everything from scratch.
These doughnuts are made from refrigerator biscuits. Yes, those little blue tubes of dough in the dairy counter at the store.
I made these in a class with Girl Scouts yesterday. The kids loved making them. Some were left whole, others had holes poked in them, so we had doughnuts and doughnut holes. They also made heart-shaped doughnuts and other fun shapes. They were a very creative group!!
Here is how to make them.
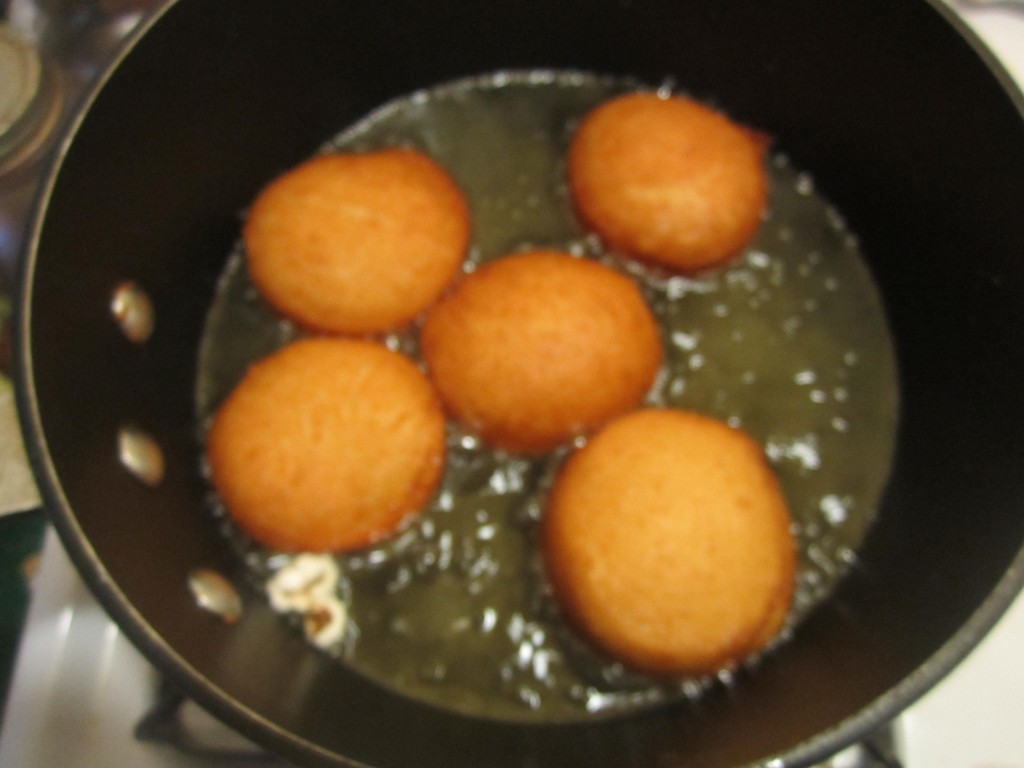
I heated up oil in a mini deep fryer. You want to heat the oil to 350-360 degrees. If you don’t have a fryer with a built in thermometer, you can heat up oil in a deep pan and toss in a kernel or two of popcorn as the oil is heating up. Popcorn pops at 350 degrees so when it pops you will know the oil is hot enough. I fried the biscuits, 6-7 at a time, for a minute or so per side, or until they were golden brown. Then I drained them on paper towels. The girls also helped to fry the dough.
The girls had three options for finishing the doughnuts. We mixed a couple of cups of powdered sugar with some water and vanilla to make the glaze. We also had a bowl of powdered sugar and a bowl with cinnamon sugar. The girls could either dip the warm doughnuts in the glaze or roll them in the sugars. They were a big hit.
If you don’t have biscuits laying around- I normally don’t have them- you can make biscuits from scratch and do the same thing. Great when you have unexpected guests- or just a taste for a warm doughnut.
Note: Additional options. We could have melted chocolate chips with a little milk and made a chocolate glaze. I have made these before where I use a small cake decorating tip to insert jelly. Sprinkles can be used on the glazed doughnuts, if you like.
Pan de Muertos

Halloween isn’t the only holiday this week. Many people will be celebrating Dia de los Muertos (Day of the Dead). It is a holiday to remember and honor loved ones who have passed. It traditionally runs from October 31 to November 2.
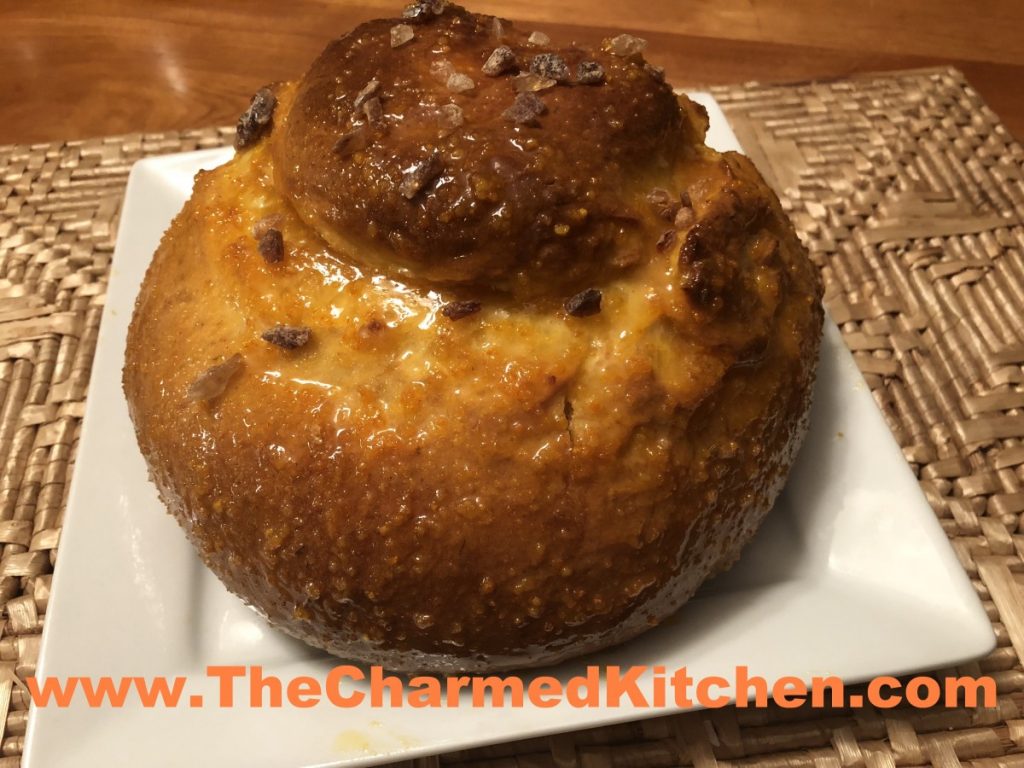
Pan de Muertos is a traditional bread made for this holiday. This is a version of that bread that is flavored with anise (or fennel) and orange. It is glazed, after baking, with an orange sauce, then sprinkled with a little extra sugar. I like to use rock sugar, which, as the name implies, is a large sugar that looks like small rocks.
I shaped the dough into a round shape, with a knob of dough on the top. You can also mold the bread into different shapes like angels or animals.
The bread itself is so tasty. It is a rich dough with a lovely fragrance and texture.
Here is the recipe.
Pan de Muertos (Mexican Bread of the Dead)
1/4 c. each butter, milk and water
3 c. all-purpose flour
1 1/2 t. active dry yeast (half a packet)
1/2 t. salt
2 t. anise seed or fennel seed
1/3 c. sugar
2 eggs, beaten
2 t. orange zest
Glaze:
1/4 c. each sugar and orange juice
1 T. orange zest
Topping:
2 T. sugar, I used rock sugar
Heat together butter, water and milk until the butter melts. Cool to warm. In a large bowl combine 1cup of the flour, yeast, salt, anise seed and 1/3 c. sugar. Beat in the milk mixture then add the eggs and orange zest and beat until well combined. Stir in 1/2 cup of flour and continue adding more flour until the dough is soft. Turn the dough out onto a lightly floured surface and knead until smooth and elastic. Place the dough into a lightly greased bowl cover with plastic wrap and let rise in a warm place until doubled in size, about 1- 2 hours. Punch the dough down and shape it into a large round loaf with a round knob on top. Place dough onto a baking sheet, loosely cover with plastic wrap and let rise in a warm place for about 1 hour or until just about doubled in size. Bake in a preheated 350-degree oven for about 35 to 45 minutes. Cool on rack 5 minutes then brush with glaze. To make glaze: In a small saucepan combine the 1/4 cup sugar, orange juice and orange zest. Bring to a boil over medium heat and boil for 2 minutes. Brush over top of bread while still warm. Sprinkle glazed bread with 2 T. sugar.

Ready to bake
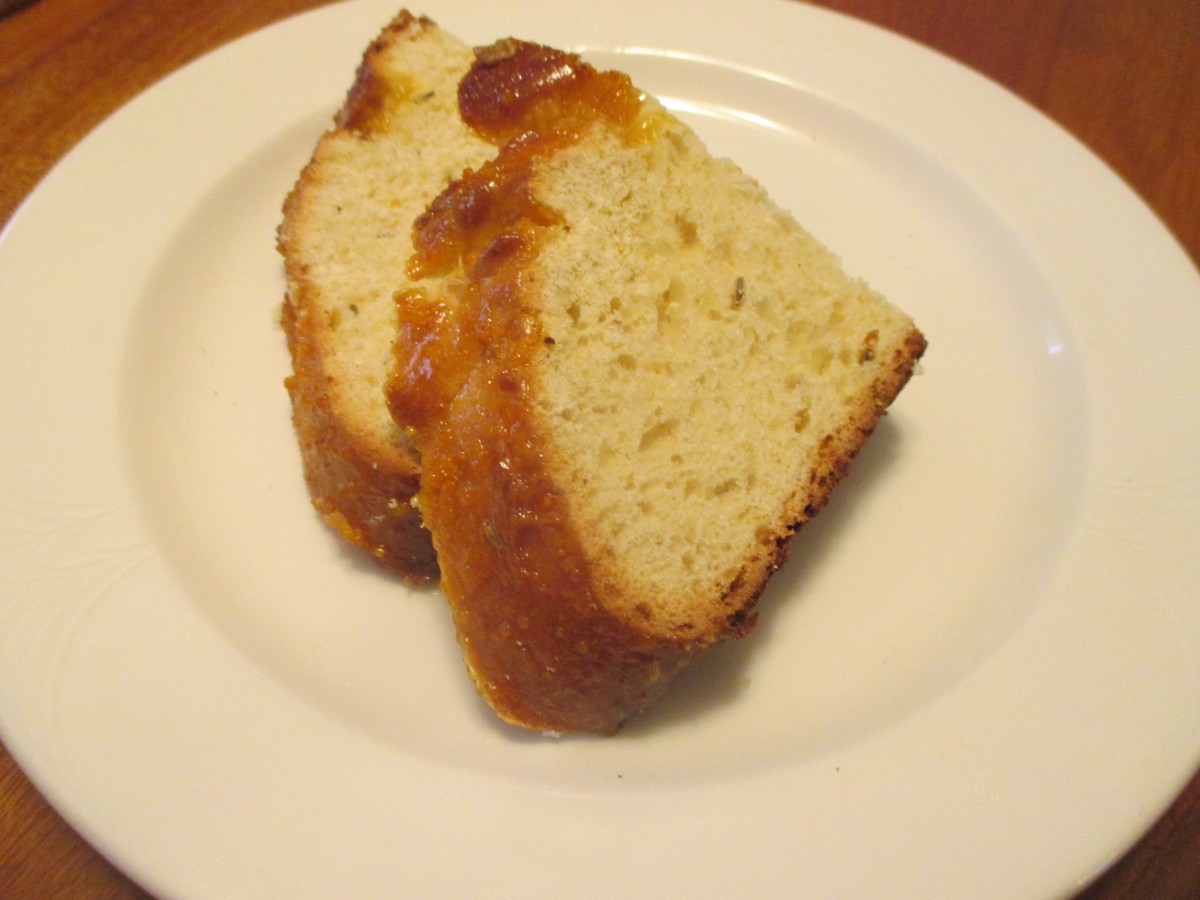
Eat plain, or lightly toasted with butter
Candy Spiders

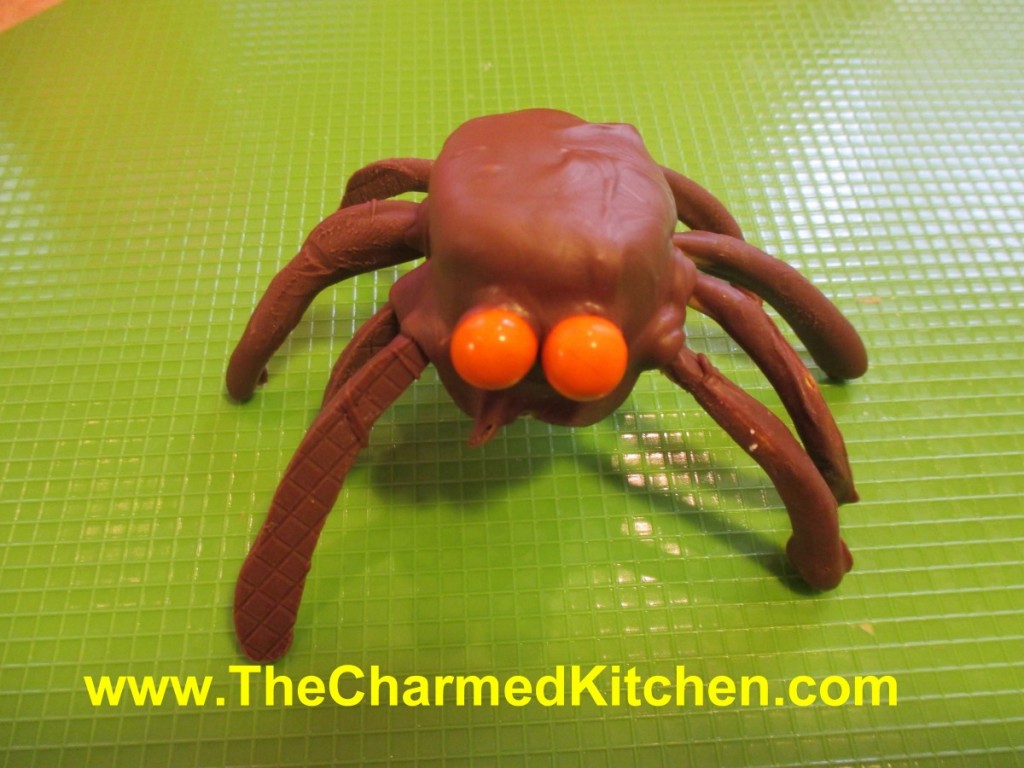
If you are looking for a quick spooky decoration/treat idea, you might want to make some candy spiders. These are about the size of a tarantula. Super simple, and kids can make them, too. You only need a few ingredients.
The body is made from marshmallows, the legs are chow mein noodles and the eyes are small candies. Sixlets work well.
I used melting chocolate, but you can use any kind of chocolate you like. To start, melt some chocolate. Dip the chow mein noodles in the chocolate and tap gently to remove excess. I leave one end un-dipped to make it easier to stick in the marshmallow later. Allow to harden up before going to the next step. I set them on a flexible cutting board, but wax paper is good, too. You have to peel them off later, a flexible surface is best. You’ll need 8 for each spider- so be sure to make enough. Allow for breakage. Set a marshmallow flat side down and poke 4 holes in each side, 8 total. I used a bamboo skewer. Stick a noodle “leg” in each hole. Spoon chocolate over the marshmallow until coated. Whatever drips off can be re-melted and used again. While the chocolate is still soft, press 2 candy eyes into place. Hold them for a minute to be sure they are secure. Now, you can decorate cakes with them, use them on a dessert tray- or just eat them.
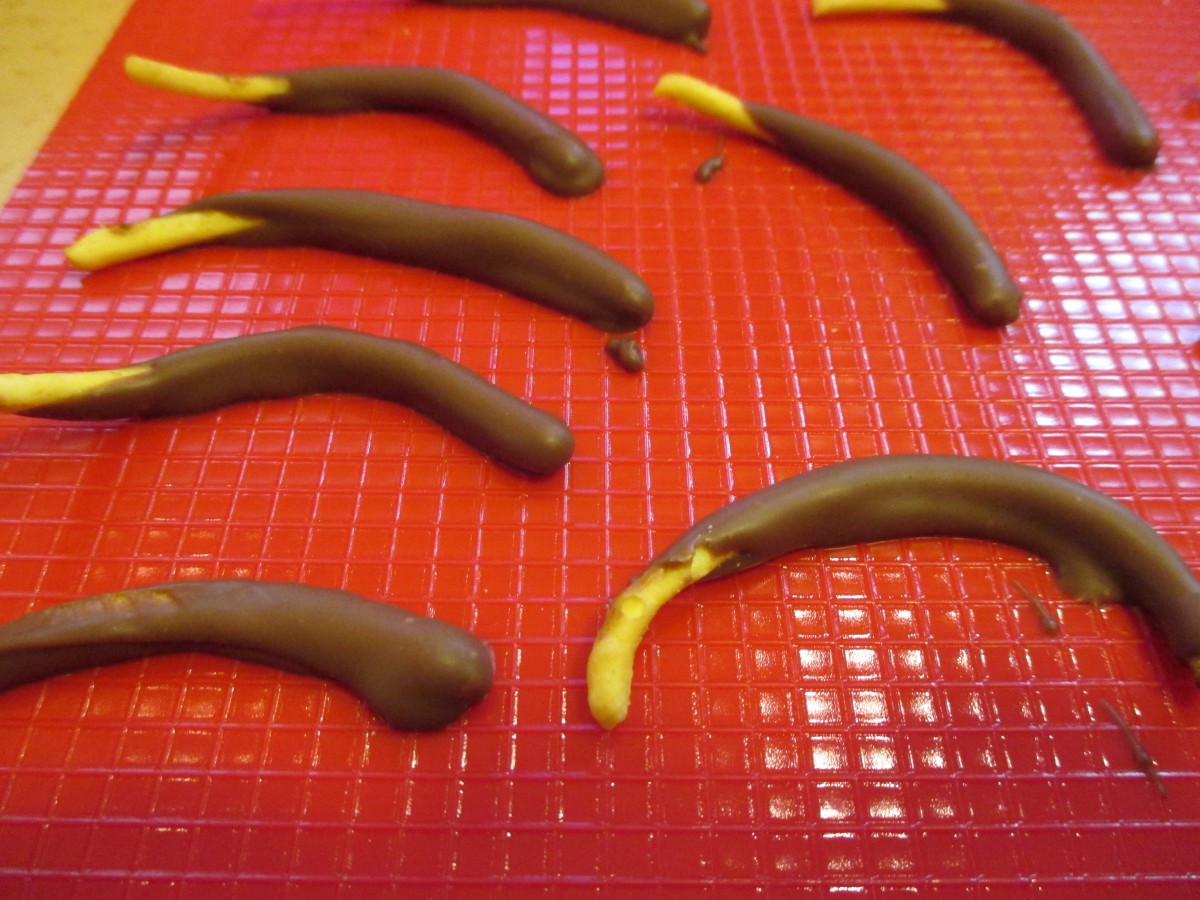
Chow mein noodle legs

Insert legs into marshmallow
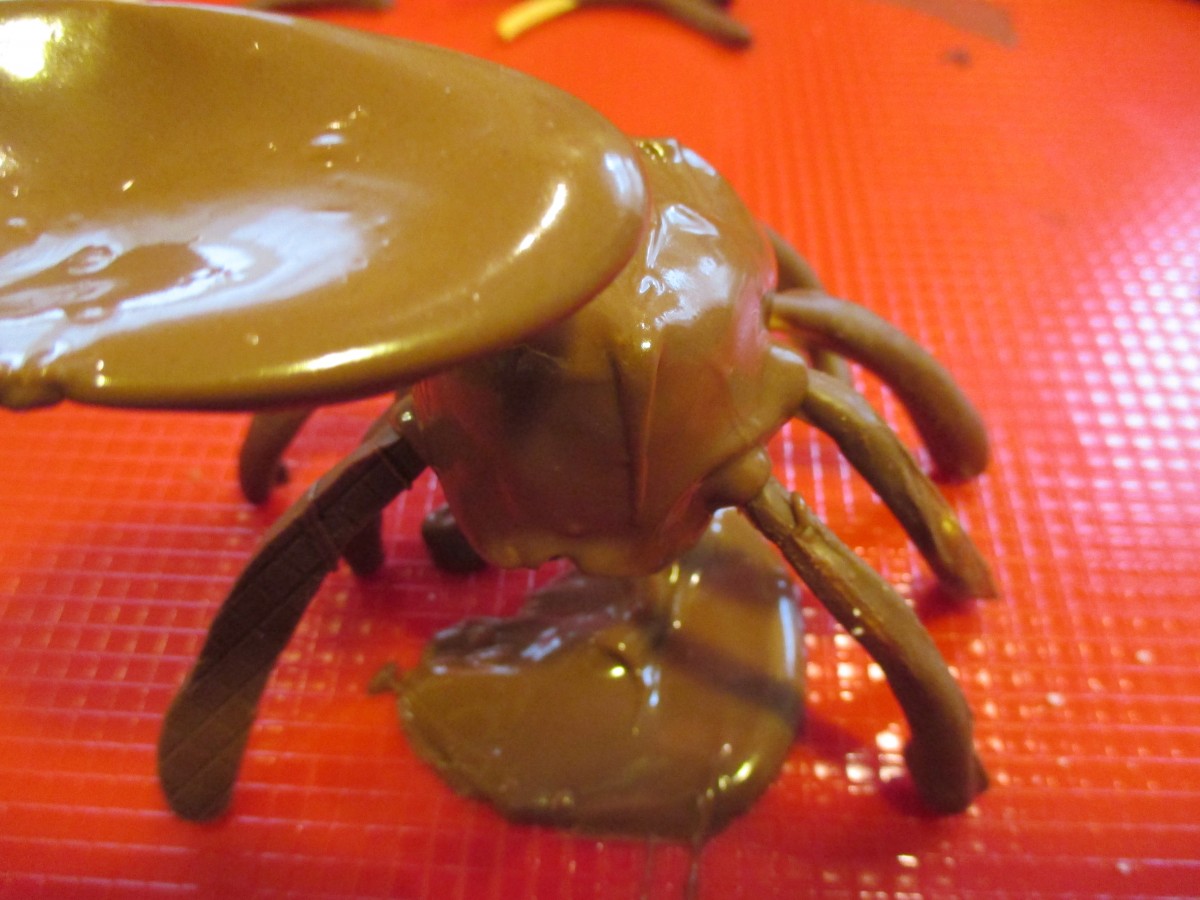
Spoon chocolate over the marshmallow to cover it.
Apple Bacon Fritters with Maple Glaze

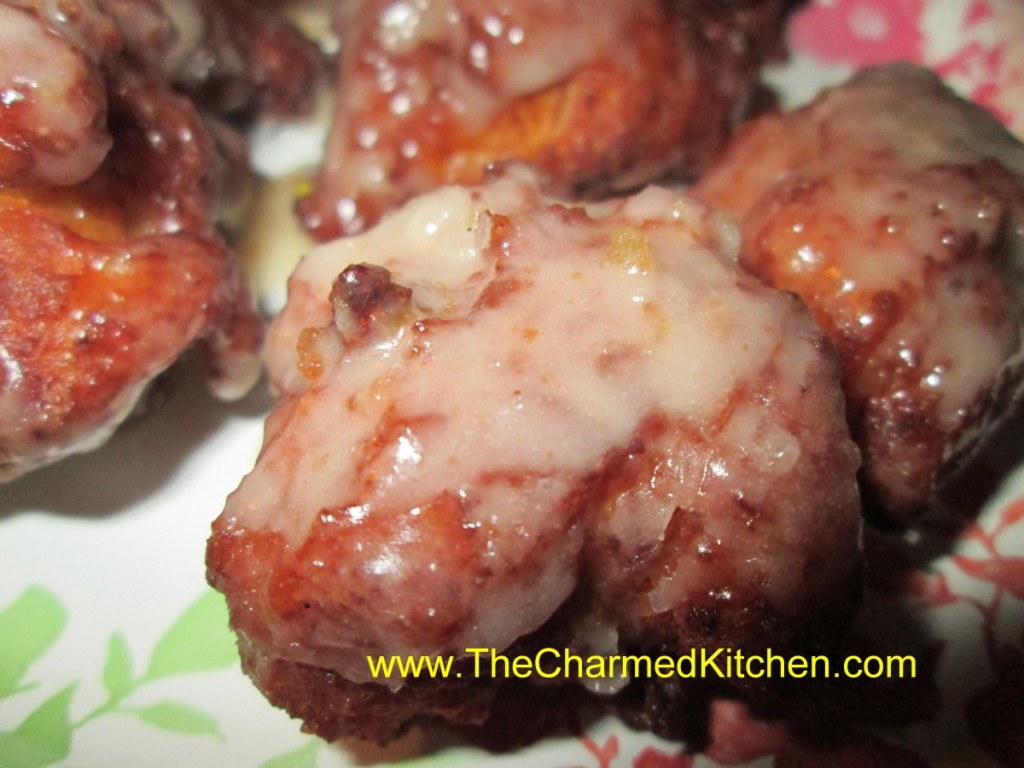
I recently posted a recipe for apple fritters. I also love this variation on that recipe. The batter contains diced, fresh apples and crispy bacon. The combination is really special.
Fritters aren’t difficult to make. They really don’t take that long to make, either. I prefer to make fritters close to when I am serving them- so my guests can enjoy them warm.
They make a wonderful dessert, or a fun addition to a breakfast or brunch menu. I dipped them in the maple glaze, which also went well with the apples and bacon.
I must warn you, they are addictive.
Apple and Bacon Fritters
2 c. flour
2 T. sugar
2 T. baking powder
1/2 t. salt
1 c. milk
2 eggs, beaten
2 T. melted butter
1 c. diced apples
1 c. cooked, crumbled bacon
oil for frying- I used coconut oil
Combine dry ingredients and set aside. Mix together milk with the eggs and butter. Stir in dry ingredients until just moistened and add the apples and bacon. Heat oil to 375. If using gluten free flour, heat oil to 350. Drop dough by tablespoonfuls into the hot oil and fry until golden brown. Don’t do more than 4-5 at a time. It will take about 4 minutes in total but you need to turn them to brown evenly so 2 minutes per side. Drain on paper towels. Dip in maple glaze (recipe follows) while warm. Makes about 32.
Maple Glaze
1 c. Powdered sugar
1/2 c. maple syrup
a little water if mixture gets too thick
Combine all ingredients and set aside until ready to use.
Aunt Josie’s Clam Chowder


It is clambake season around here and it seemed like a great time to share this recipe. Aunt Josie’s clam chowder is a favorite of mine. I have loved it from the first time I had it. It is pretty easy to make and full of flavor. We have it at every family clambake.
You have the option of adding some stock or water at one point. I sometimes have seafood stock in the freezer, but a bottle of clam juice would work great, too.
So here is the recipe. I hope you enjoy it as much as I do.
Aunt Josie’s Clam Chowder
2 T. butter
1 onion, chopped
1 rib celery, chopped
2-3 small potatoes, cubed
1 c. water or stock
2 (10 oz.) cans clams, undrained*
1 T. butter
2 T. flour
2 c. milk – I use half and half
salt and pepper to taste
Sauté onions and celery in butter until tender, but not browned. Add potatoes and water or stock and cook, covered until potatoes are tender. Stir in clams and set aside. In another saucepan, combine butter and flour over low heat and stir in milk, stirring to make a white sauce. Cook mixture until it thickens and starts to bubble. Add it to the clam mixture and adjust seasonings. Bring to a gentle simmer. I added some parsley right before serving. Serves 4.
* You can also add clam meat and a little extra stock. I often buy frozen clam meat.
This post is dedicated, with love, to Aunt Josie.
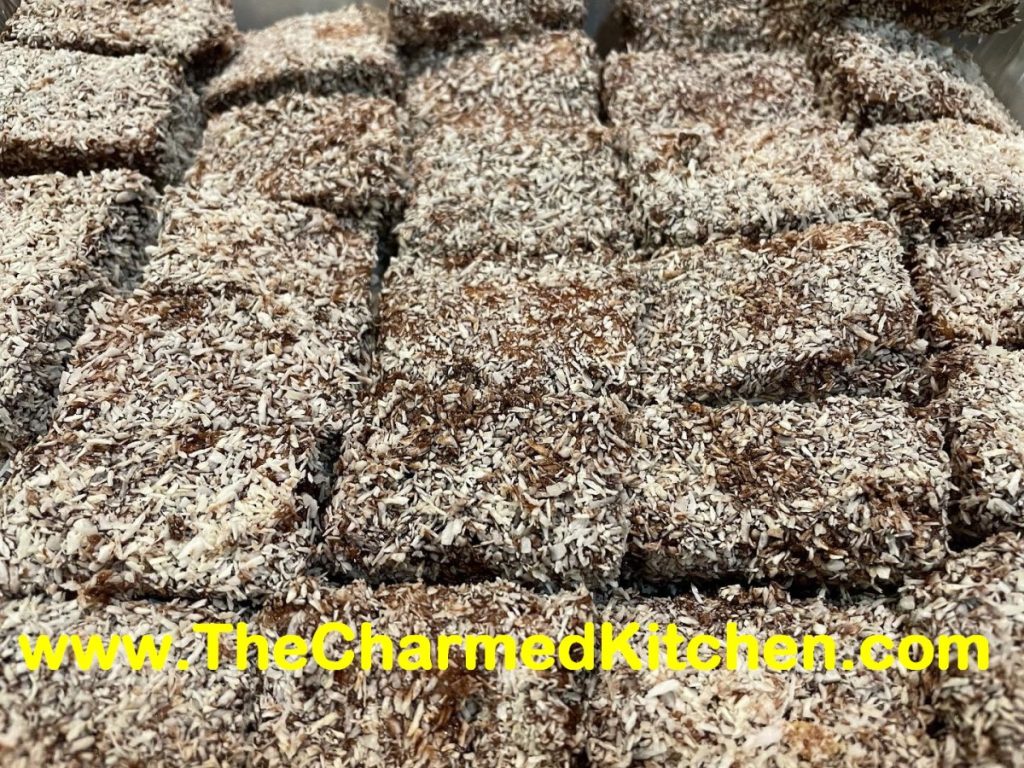
Aunt Josie’s Coconut Bars

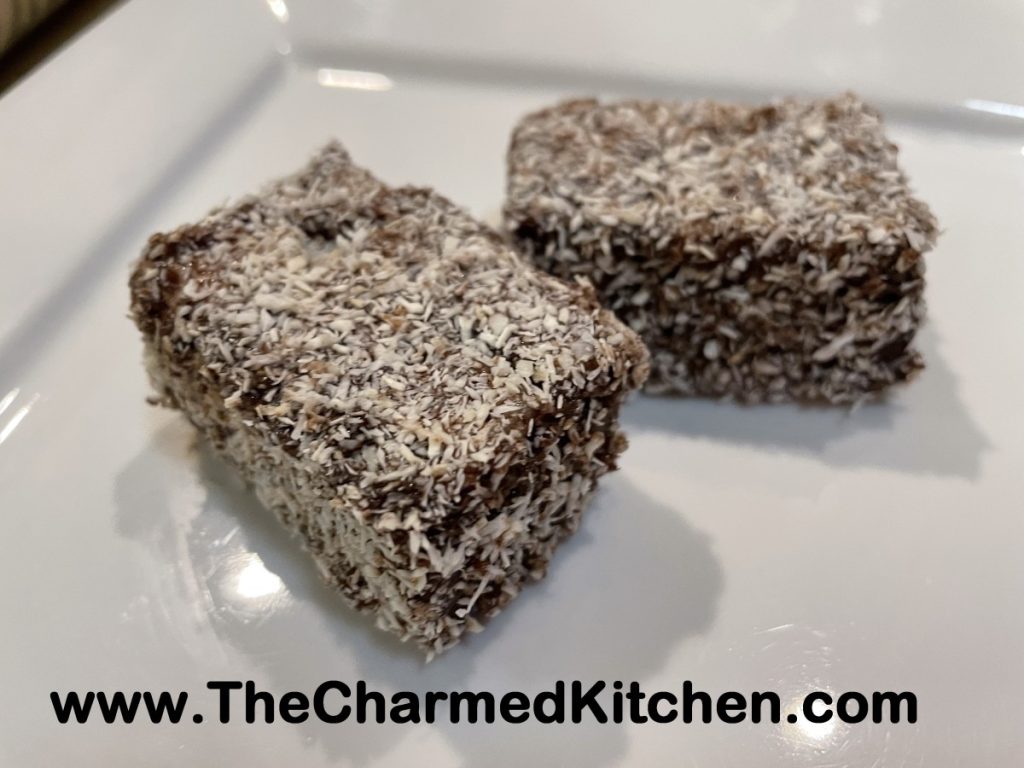
My Aunt Josie used to make these coconut bars for almost every family party. They were a favorite of mine when I was a kid and they are a favorite of mine now. The bars are made from white cake that is cut up and frozen. The frozen cake is dipped in a chocolate sauce and then dipped in desiccated coconut. Desiccated coconut is the same kind of coconut used for coconut shrimp. It looks like panko bread crumbs and is not sweetened. I get mine at the local Asian grocery store.
The result is a cake that is tender and delicate and full of flavor. I sometimes make cupcakes instead of a sheet cake that I cut up. Either will work just fine. You can also make a gluten free cake, if you prefer.
Every time I make these, I think of my Aunt Josie.
Coconut Bars
1 white cake, prepared and frozen solid
1 c. cocoa
1 1/4 c. sugar
2 c. water
1 t. vanilla
1-1½ c. desiccated coconut (available at cake supply stores, Asian stores and some health food stores)
Cut frozen cake into small squares, or cake can be baked in regular or mini cupcake tins. You can also cut the cake into squares before freezing. Keep cake frozen until ready to dip. Meanwhile, combine remaining ingredients, except coconut in a medium saucepan. Bring to a boil then simmer 5 minutes. Remove from heat and cool completely. This can be done a day ahead, if you like, and sauce stored in fridge until ready to use.
Using skewers or fondue forks, dip cake in sauce, let drain a few seconds, then roll in the coconut. Can be served almost right away. They thaw very quickly. You can refreeze them to enjoy later, too.
“Pumpkin” Fritters

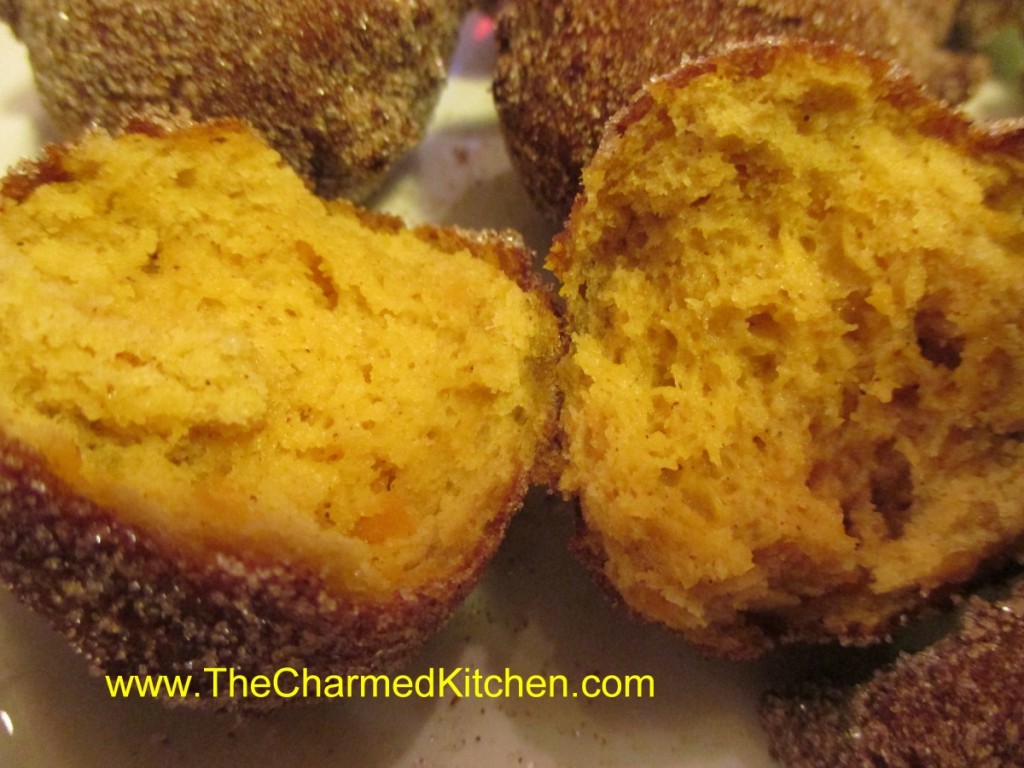
These tasty fritters would be a fun dessert for Halloween. This is also a great recipe when you have a little cooked pumpkin or winter squash to use up. The recipe only uses a cup of cooked pumpkin or winter squash.
It is a pretty simple recipe. I started with cooked butternut squash puree. I added eggs, flour, baking powder and a few other ingredients, then fried them up in oil, and ended up with a really good fritter. Crispy on the outside, soft and tender on the inside. I drained them on paper towels and then rolled them in cinnamon sugar while still warm. You could also dip them in a powdered sugar glaze. I think I might make a maple glaze for the next batch.
Pumpkin Fritters
1 c. cooked, mashed pumpkin or winter squash
2 eggs
2 T. brown sugar
2 t. baking powder
1 t. cinnamon
1/2 t. baking soda
1/2 t. nutmeg
1/2 t. salt
1 1/2 c. flour
oil for frying
cinnamon sugar for rolling- powdered sugar would work, too
In mixing bowl combine all ingredients, except the flour and beat until smooth. Stir in flour. Batter will be thick. Heat oil to 350 degrees.* There should be enough oil in the pan top be at least 1 inch deep- or deeper. To save oil I used a smallish pan and cooked 3-4 fritters at a time. Drop dough by rounded teaspoonfuls into hot oil and cook, turning once until golden brown on both sides. This will take about 3 minutes. Drain on paper towels then roll in cinnamon sugar while warm. Makes 24-30. Best served warm.
* Fun way to know when your oil has hit 350 degrees. Place an un-popped popcorn kernel in the oil. Popcorn pops at 350 degrees.
Flaming Ghost Cake

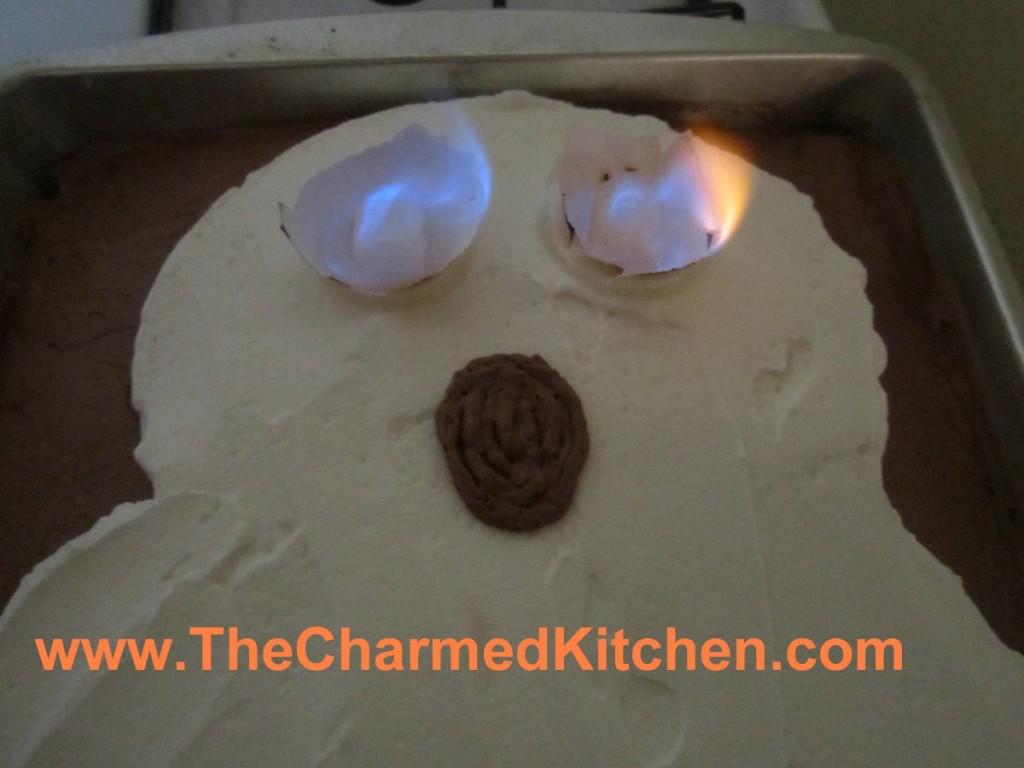
I have posted this recipe before, but thought it might be a good time to post it again. This one is fun for Halloween. You start with a baked 9×13-inch cake. Frost it with chocolate frosting and then use white frosting to draw a ghost on the cake.
You can make all sorts of images- cats, bats, pumpkins. When ready to serve the cake, the eyes are set on fire. Fun effect. Kids and grown-ups both will get a kick out of it.
Just be sure to have proper adult supervision for the kids. The picture doesn’t do it justice. Very cool blue flames. Don’t forget to turn down the lights!
Flaming Ghost Cake
1 prepared 9×13- inch cake, any flavor
2 c. chocolate frosting, I prefer homemade
1 c. vanilla frosting, I prefer homemade
3 oz. semi sweet chocolate, optional
2 empty eggshell halves, washed well and dried
2 sugar cubes
Lemon extract
Frost cake with chocolate frosting, then spread vanilla frosting in the shape of a ghost. Melt chocolate in a small plastic bag. When chocolate is melted snip off the corner of the bag and use to outline ghost. Place eggshell halves in cake, round side down where the ghost’s eyes would be. Soak sugar cubes in lemon extract and place in eggshells. When ready to serve light sugar cubes and turn off the lights. Serve 12-16.
Variations: You can use the flaming eyes effect on cat shapes, pumpkins or even bats. Practice drawing the shape on paper before frosting the cake. If you bake a larger round cake the whole thing can be the pumpkin. Just frost it with orange tinted frosting.
Butternut Squash Soup

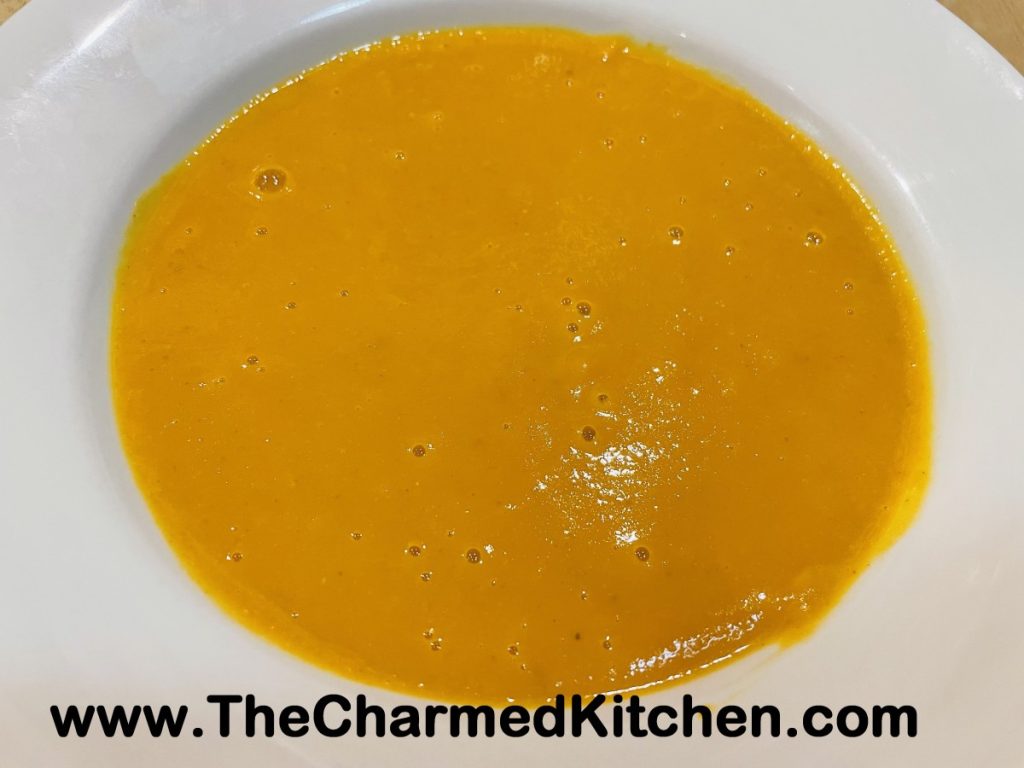
When fall arrives, I look forward to winter squash and all the wonderful dishes I can make with them. One of my favorites is butternut. A friend recently gifted me with squash from her garden. It has gotten chilly and I decided to make soup with one of the butternuts. Thanks, Irene.
I have been making versions of this soup for a long time. I tend to make a vat of it, then freeze some for later. I pared the recipe down this time. I tend to use the veggies I have on hand. Some, like onions, carrots, garlic and celery are always used.
I used a fresh squash that I peeled and cubed up, but you can use frozen or canned squash instead. Here is my latest version of this wonderful autumn soup.
Butternut Squash Soup
2 qts. Water, or a bit more
1 ham bone or smoked turkey on the bone (1 small turkey drumstick)
2 onions, peeled and halved
3-4 cloves garlic, peeled- the ones I had were very large
3-4 carrots, peeled and chunked
4 c. chopped cabbage
2 ribs celery, sliced
1 c. tomato sauce – or a couple of cups of chopped fresh or canned tomatoes
8 cups cubed butternut squash- you could use pumpkin or most any winter squash
-OR-
3-4 c. cooked pumpkin or winter squash
Paste-type soup base to taste, about 3-4 tablespoons
1 fresh sage leaf or ¼ teaspoon dried
Hot sauce to taste
Place all ingredients, except soup base and seasonings, in a large pot and bring to a boil. Cover and simmer until vegetables are very tender and meat is cooked and tender, at least 1½ hours and up to 3 hours. Remove bone or meat to cool and add soup base and sage. Use an immersion blender to puree the vegetables. It does not have to be completely smooth, but it should be close. If it is too thick, you can add a little more water. Density is a personal preference. Add hot sauce to taste. Puree a little more. Adjust seasonings if needed. Optional: Cut the meat off the bones and return meat to the soup once pureed. Serves 6-8. Freezes well.
Note: I make it in even larger batches because this soup freezes well. You can add other vegetables like sweet potatoes, corn, potatoes, green beans or whatever else you have around. I often add cauliflower and zucchini. If you want thicker chowder add a potato or two to the recipe. For a smoky taste you can also add smoked turkey sausage and the chowder will be cooked in less time. Just remove the sausage, puree the chowder, slice sausage and return to the pot. Smoked paprika or liquid smoke can also be used to add a smoky flavor. This is a good way to use up a ham bone or leftover ham.


