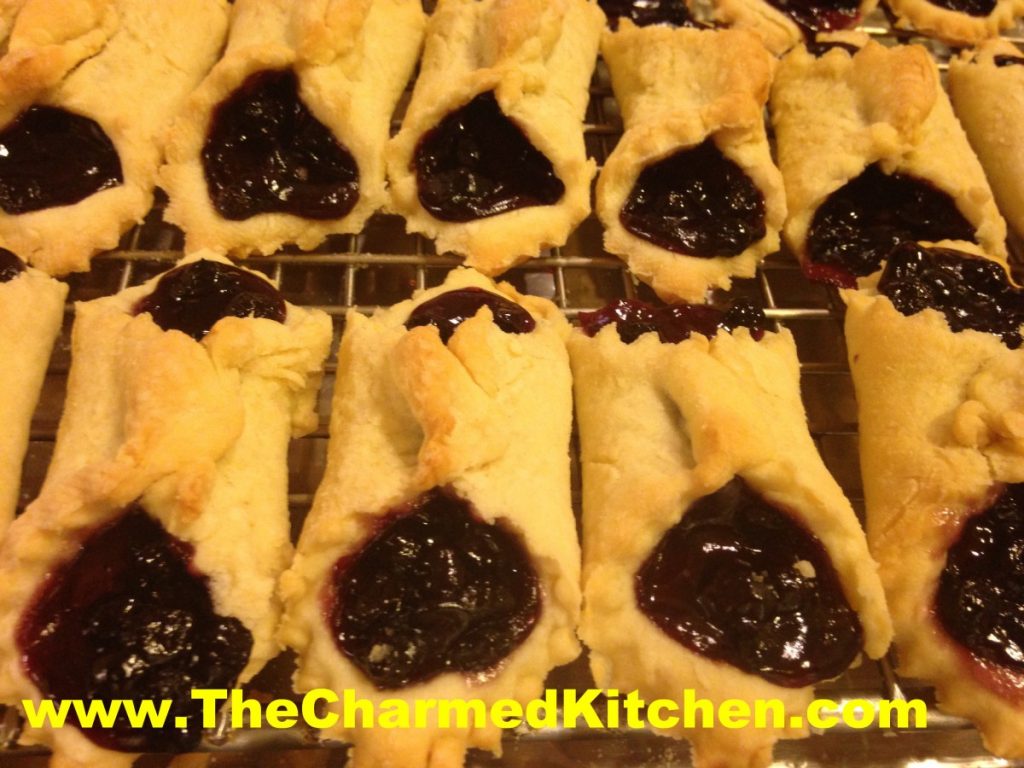
Eva’s Kolachy

Over the years, I have shared many of my family recipes. This is another family recipe- but not my family. Tia Houpt found this recipe when going through her Grandmother’s recipe collection. She was kind enough to share the recipe- and gave me permission to share it with you. Her grandmother was Eva Skero- so I have named the kolachy in Eva’s honor.
There is something special in having old family recipes. We find so many recipes online these days, we sometimes forget there was a time when recipes were handwritten. Often, they were stored in a drawer or in a shoe box. There is usually a mix of handwritten recipes and recipes cut out of newspapers and magazines.
Sometimes you just find a list of ingredients. Measurements aren’t always precise. A handful of this a pinch of that. The phrase moderately hot oven doesn’t real help, does it? And what exactly is a number 2 can? Still, there are some real gems in those collections.
This is one of those recipes. A real gem.
I have made kolachy for years and have used the recipe for the crust that my mom used. I love my mom’s recipe. I love this recipe even more.
I was intrigued that the dough contains both baking powder and yeast. I had to make it, just to see what it was like.
The dough is tender and very easy to work with. It doesn’t get chilled. You just make the dough, then roll it out and make the cookies. I did let my butter soften a little before cutting it into the flour. I could see using cold butter instead.
The dough rolled out beautifully and baked up a perfect golden brown. I had to let them cool a bit before I could taste one. I am not kidding- they were heavenly. Tender and so flaky. Tia and I both see this as a very nice tart or pie dough, too.
So here is Eva’s recipe. I hope you will give it a try. Thanks, Tia, for sharing it.
Eva’s Kolachy
Dough:
3 c. flour
1 t. baking powder
½ t. salt
1 c. butter*
3 eggs
2 pkts. Yeast
½ c. warm milk
Filling:
Assorted pie fillings, jams, sweetened cream cheese or ricotta cheese. You will need about three cups of filling.
In mixing bowl, combine flour with baking powder and salt. Cut butter into flour until mixture looks like coarse crumbs. Set aside. Place eggs in a small bowl and beat until smooth. In small bowl, dissolve yeast in warm milk. Add to egg mixture and stir to combine. Add egg mixture to flour mixture and stir until combined. If mixture is sticky add a small amount of flour. Roll dough out on floured board. Thinner the better, as this dough will puff some when baked. Cut into squares- or whatever shape you like. I did 2-inch squares. Place a spoonful of filling into center of each cookie. Fold up two of the corners and press firmly to seal. Fold over and press seam again. These like to pop open when baking, so the second fold over and pressing helps them to stay closed. Some people like to add a bit of egg wash or milk to the tops to help them seal better. I just squeeze together and fold twice. Place cookies on an ungreased baking sheet, about an inch apart. Bake in a preheated 350 degree oven for 20 minutes, or until golden brown. Cook on a rack. Dust cooled cookies with powdered sugar or with a powdered sugar glaze. Makes about 5-6 dozen.
*The original recipe called for shortening. Tia and I both decided butter was better!! That is the only change we made to Eva’s original recipe.
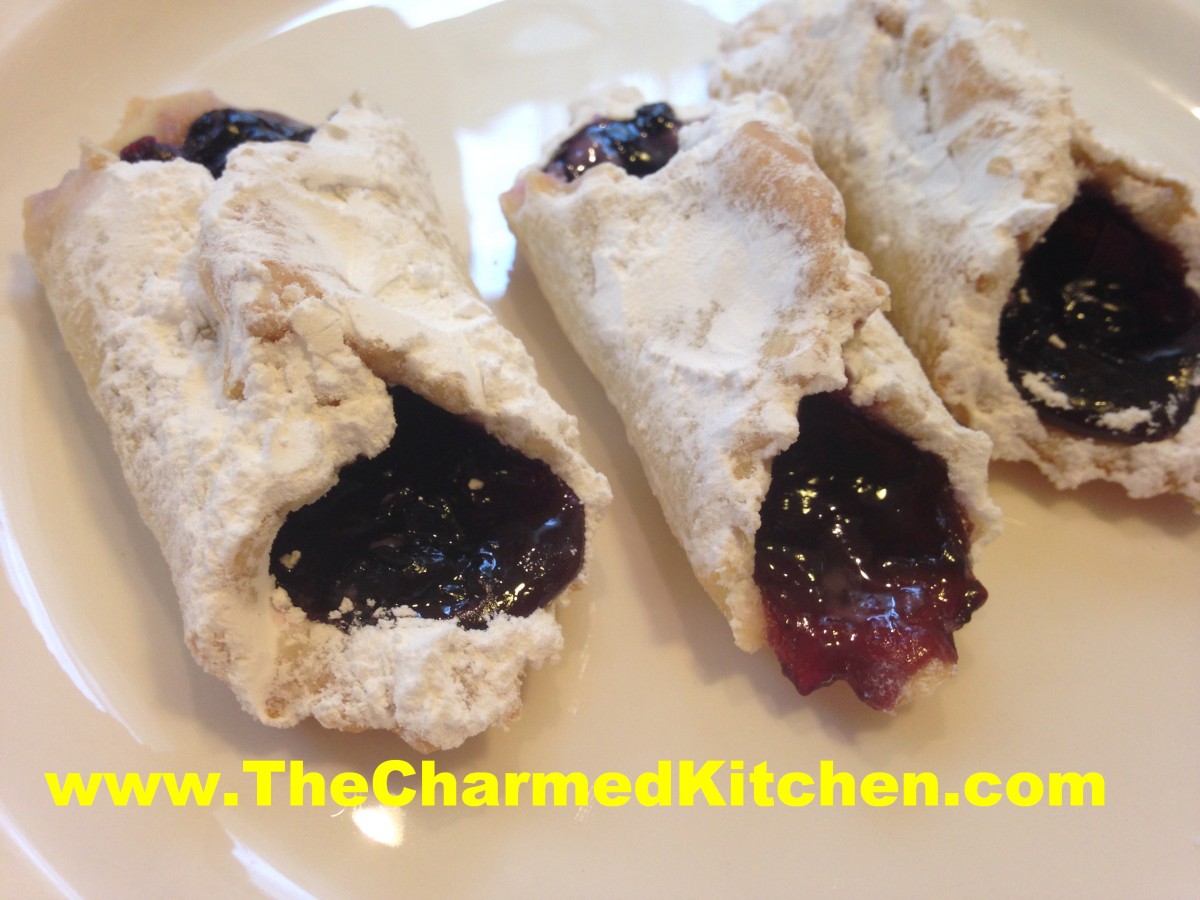
Cooled and dusted with powdered sugar
This post is dedicated to Eva Skero and all the home cooks out there who lovingly kept their recipes for us to find.
Snow People Cookies

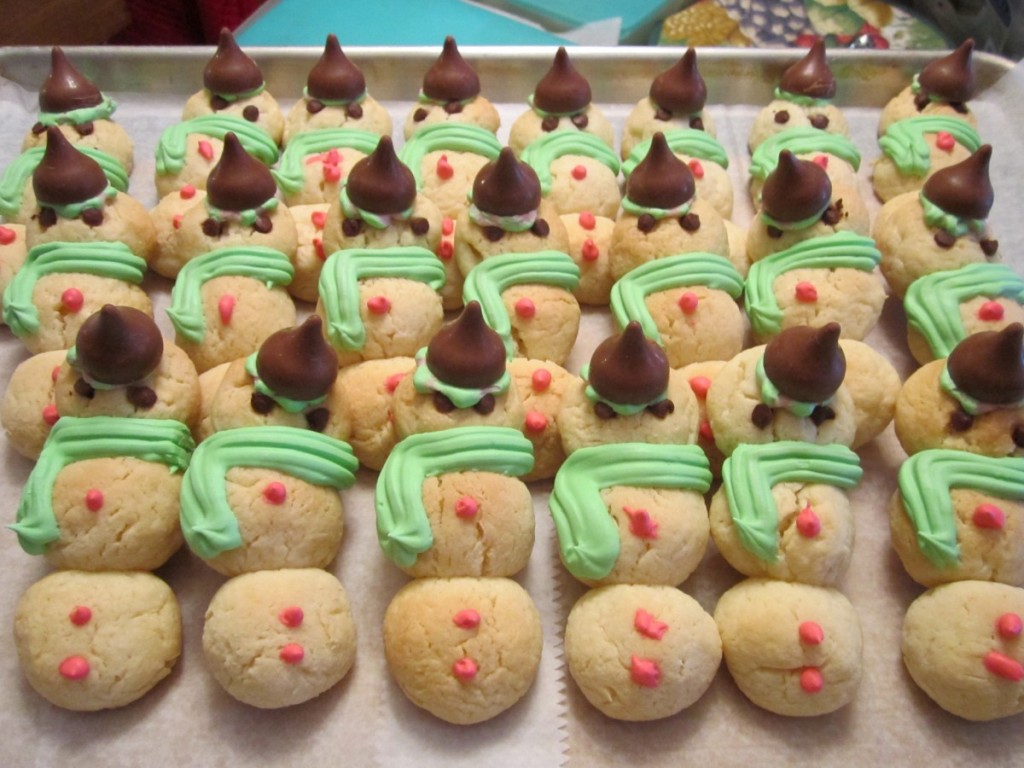
These cookies are adorable and fun to make. They also taste really good. They are a fun cookie for kids to make. The cookies are made from a rich, cream cheese dough. They stay soft in the middle, with a little crunch on the outside. They are even cuter if you use the candy-striped kisses available this time of year.
Snow People
Dough:
4 c. flour
1 t. baking powder
1 c. butter, softened
1 (8oz.) package cream cheese, softened
2 c. sugar
1 egg
1 t. vanilla
¼ t. almond extract
Decorations:
Mini chocolate chips or mini M&Ms
Kisses, whole, or mini peanut butter cups, halved
Frosting:
2 c. powdered sugar
Few drops green food coloring
Milk
Extra powdered sugar for sprinkling
Mix dry ingredients and set aside. Cream together butter and cream cheese until smooth. Beat in sugar until light and fluffy. Beat in egg and flavorings then stir in dry ingredients. Chill dough overnight. For each snow person rolls out 3 balls of dough, 1-inch, ¾-inch and ½-inch in diameter. Place balls in descending order on ungreased baking sheet. Press together lightly. Use 2 mini chocolate chips for eyes in smallest ball and use either chips or mini M&Ms for buttons (2 on largest ball and 1 in medium). You can also add a tiny dot of frosting once they are cooled for the buttons, too. Bake in a preheated 325-degree oven for about 18 minutes or until edges are firm and bottoms are lightly browned. Cool on baking sheet 1 minute then remove to rack to finish cooling. Combine powdered sugar with green food coloring and just enough milk to make a frosting that can be piped. Use a little dab of frosting to attach either a chocolate kiss (unwrapped) or half of a peanut butter cup as a hat. Pipe a small amount of frosting to form a scarf. Dust cookies with a little extra powdered sugar for snow when finished decorating. Makes about 48 cookies.
Chocolate Chip Shortbread Cookies


It is the time of year when a lot of people are baking cookies. I thought I would share one of my favorite cookie recipes with you. It takes the chocolate chip cookie to another level. Kind of dressed up for the holidays.
These little cookies are delicate and full of flavor. I will admit to being a big fan of shortbread cookies. I make a lot of different shortbread cookies for Christmas. This one is always on my list.
These are enhanced with mini chocolate chips and just melt in your mouth. I leave them as is, but you could add a drizzle of melted chocolate if you like. The cornstarch in the dough makes them extra tender.
Other options could include using mint chocolate chips or adding mint extract, almond extract, or even orange zest. These cookies are very versatile.
Chocolate Chip Shortbread Cookies
1 c. butter (no substitutions), softened
½ c. brown sugar
1 t. vanilla extract
2 c. flour
¼ c. cornstarch
½ c. mini chocolate chips
2-3 T. granulated sugar
With electric mixer beat butter, brown sugar and vanilla until well mixed. Stir in flour and cornstarch and then stir in chips. Form into 1-inch balls and place on an ungreased baking sheet. Pour granulated sugar on a small plate and dip bottom of drinking glass into the sugar and use this to gently flatten down the cookies. Press small indent in each cookie with a teaspoon. Bake in a preheated 300-degree oven for 15-20 minutes or until the cookies start to brown on the bottom. Cool on sheets 5 minutes before removing to a cooling rack. Makes about 3 ½ dozen.
Old Fashioned Gingersnaps

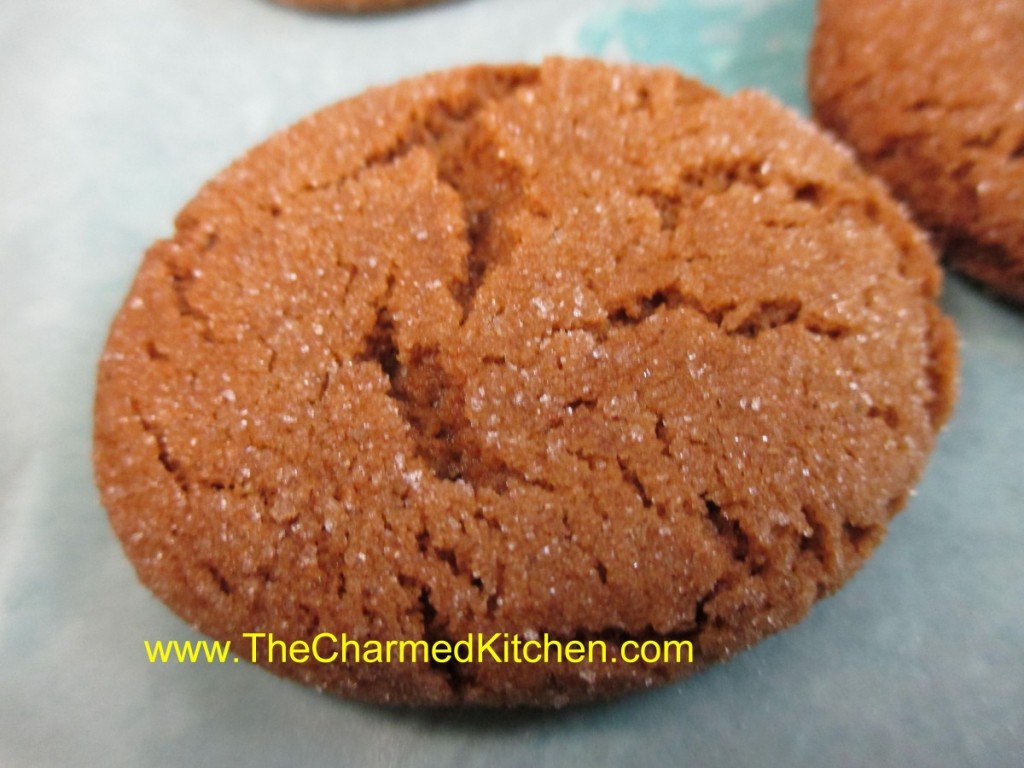
Gingersnaps are one of those cookies- the people that love them – REALLY love them. I will admit to being one of those people. The mixture of spices and crunchy texture just work together so well.
I cannot remember where I first got this recipe. This richly spiced cookie is perfect with a cup of coffee or a cup of tea. They are not too sweet, which I also like.
You can use either dried or fresh grated ginger. I really prefer fresh. I keep a piece of ginger root in my freezer, then just grate what I want, whenever needed. The ginger lasts nearly forever that way.
The original recipe called for shortening. I use butter, but chill the dough at least an hour before baking. You can use shortening, if you prefer.
So here is the recipe. Enjoy!!
Gingersnap Cookies
2 c. flour
2 t. baking soda
1 t. cinnamon
¾ t. ginger (fresh grated preferred)
½ t. cloves
¼ t. salt
1 c. sugar, plus extra for rolling
¾ c. butter
¼ c. molasses
1 egg
Mix together dry ingredients and set aside. Beat together sugar with butter, molasses and egg until light. Stir in dry ingredients and chill dough at least an hour. When ready to bake, roll dough into 1-inch balls. Roll balls in additional sugar. Place 2 inches apart on ungreased baking sheet. Bake in a preheated 350-degree oven for 10-12 minutes. Edges should look dry. Cool on sheet for a few minutes and then move to rack. Makes about 36.
Cookie Candies

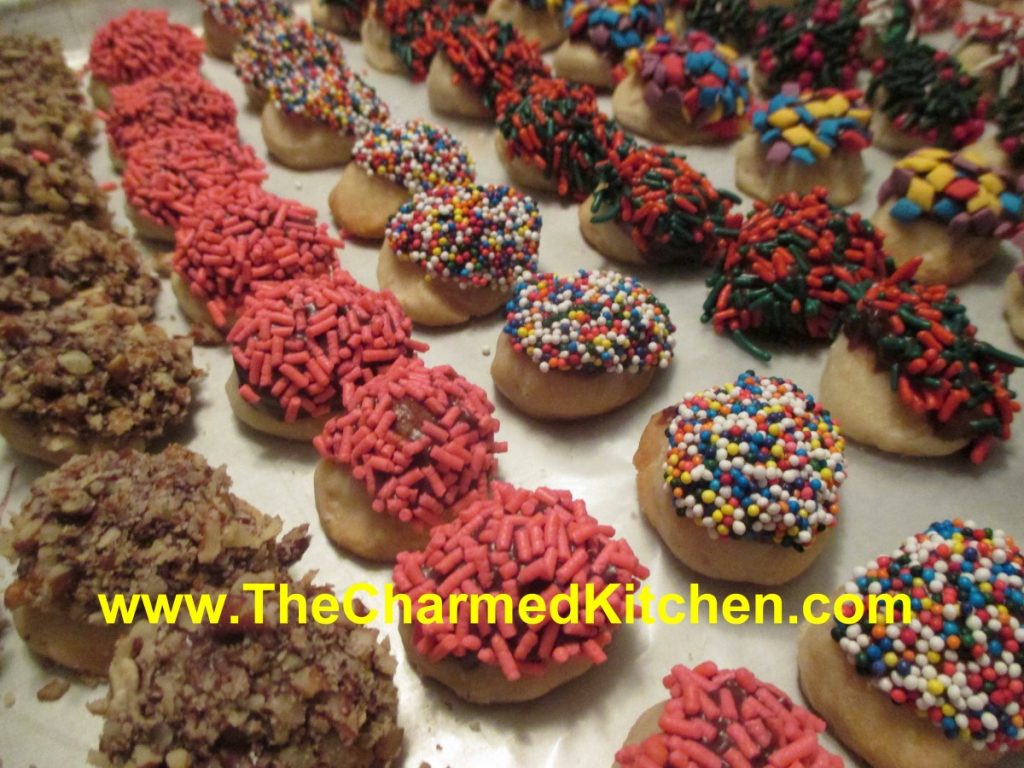
There are so many cookies I bake this time of year, I could never pick a favorite. There are some cookies that are a MUST bake, however.
These cookie-candies are one of them. They get their name because, once decorated, they look like little pieces of candy.
Under the sprinkles are rich and tasty oatmeal shortbread cookies. Shortbread cookies are always a favorite of mine. I think I make half a dozen varieties of shortbread.
The dough is easy to handle. You just shape small amounts into shapes like circles, squares and ovals. They hold their shape. Like most shortbread, they bake at a lower temperature than other cookies. They also bake a bit longer. They should be a little golden on the bottom when done.
After they are baked and cooled, the cookies are dipped in melted chocolate and then in assorted toppings. You can dip them in sprinkles, finely chopped nuts and coconut. Pretty and tasty.
Cookie-Candies
1 c. butter
¾ c. powdered sugar
1 T. vanilla
2 c. flour
½ c. rolled oats
½ c. chocolate chips
¼ c. milk
finely chopped nuts
assorted sprinkles
shredded coconut
Cream together butter, sugar and vanilla. Stir in flour and oats. Shape teaspoonfuls of the dough into different shapes like rounds, ovals, cones cubes etc. Try to make them look like little candies. They will hold their shape very well while baking. Bake in a 325- degree oven for 20-25 minutes on an ungreased baking sheet. Cool. In microwave safe dish combine chocolate and milk and melt. Dip tops of cookies in chocolate mixture and then in one of the toppings you have. Chocolate topping will harden up after a while. Makes about 4 dozen.
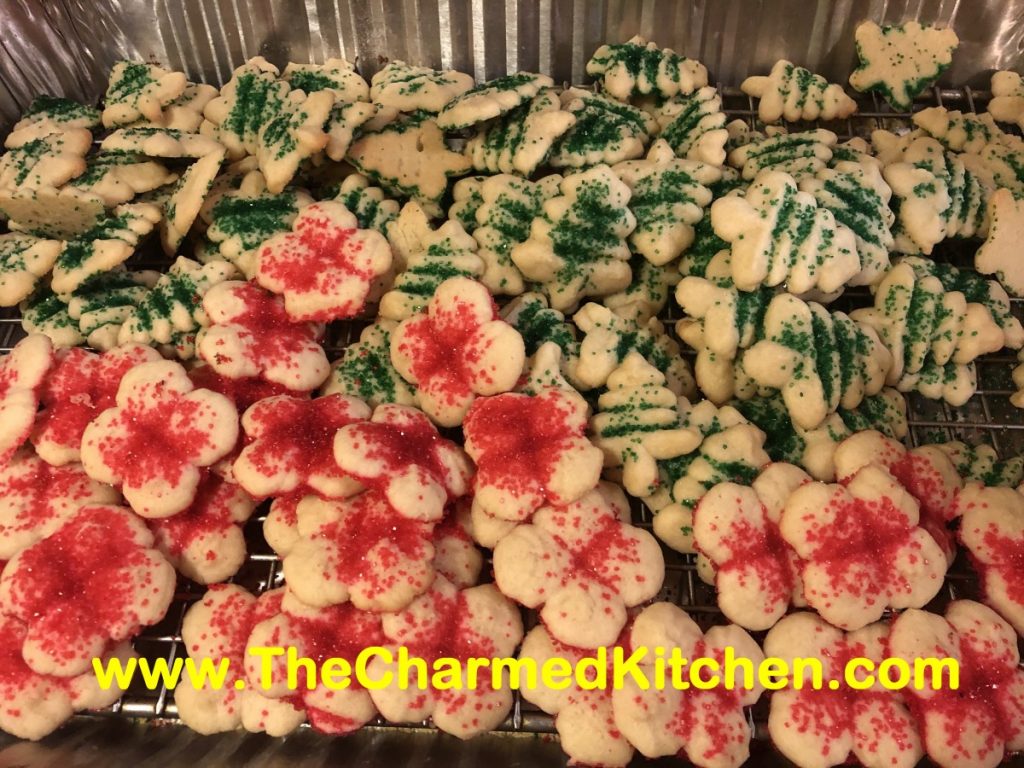
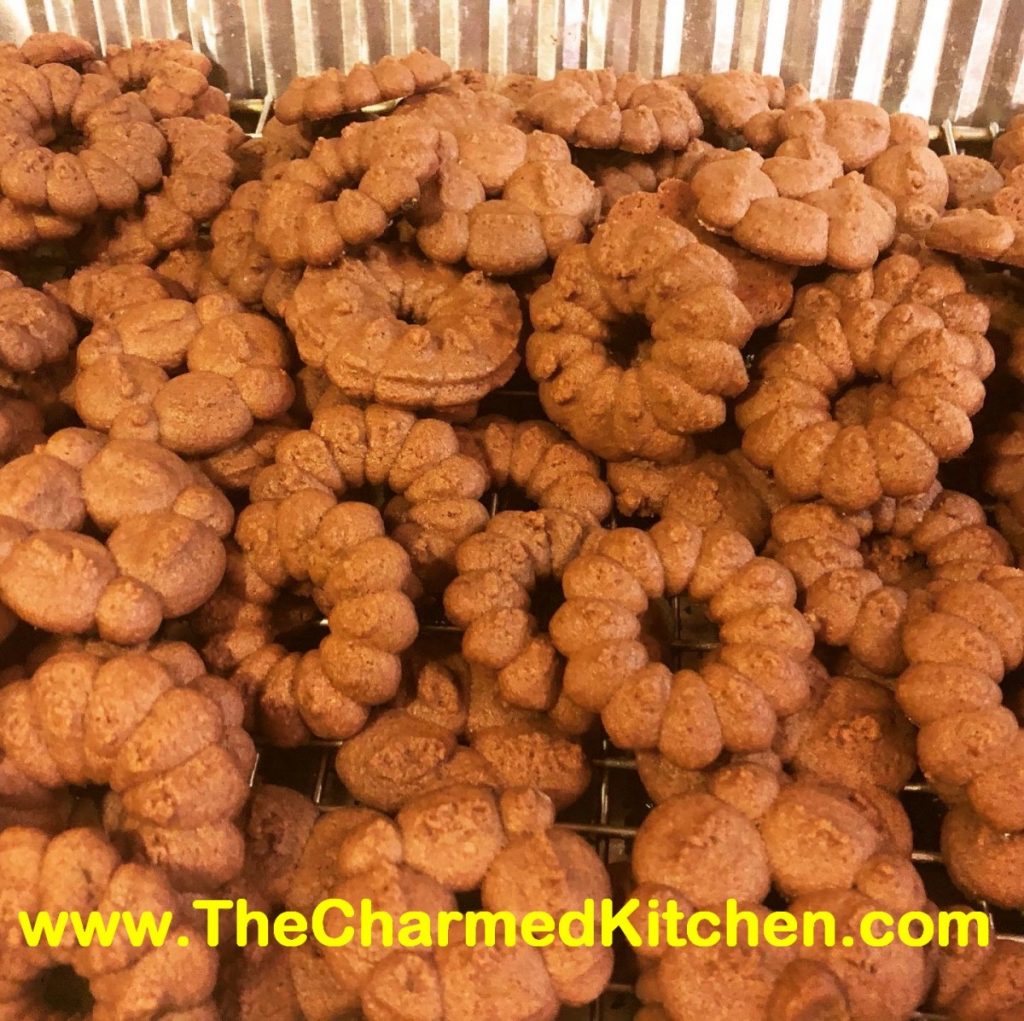
Puttin’ on the Spritz

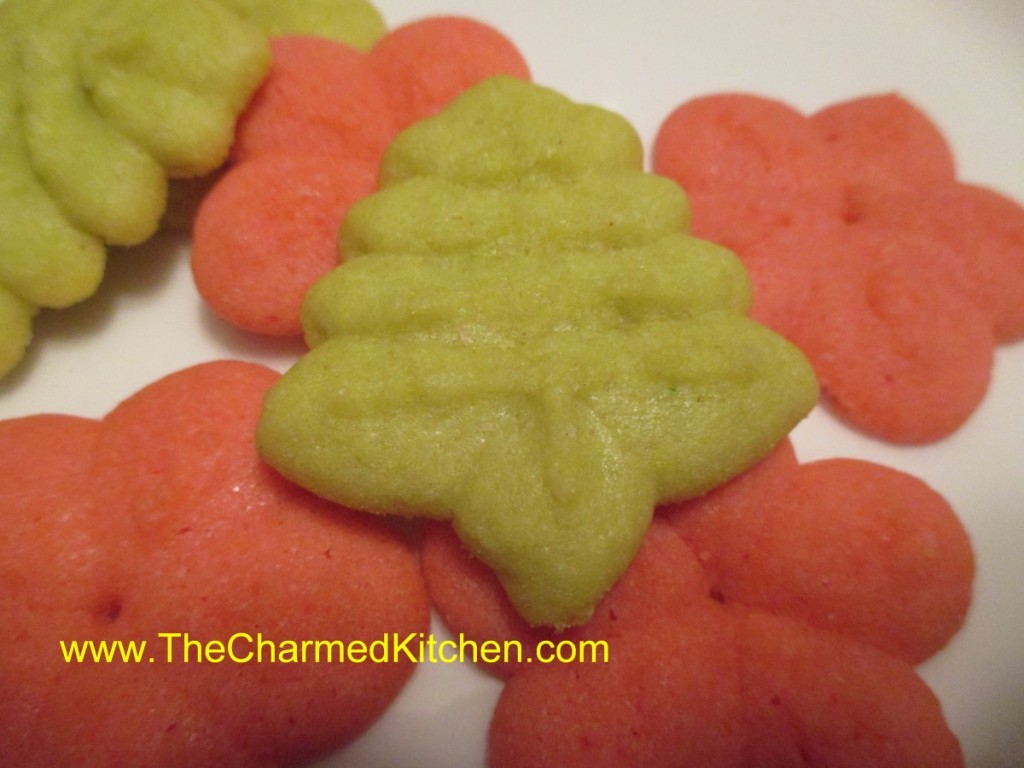
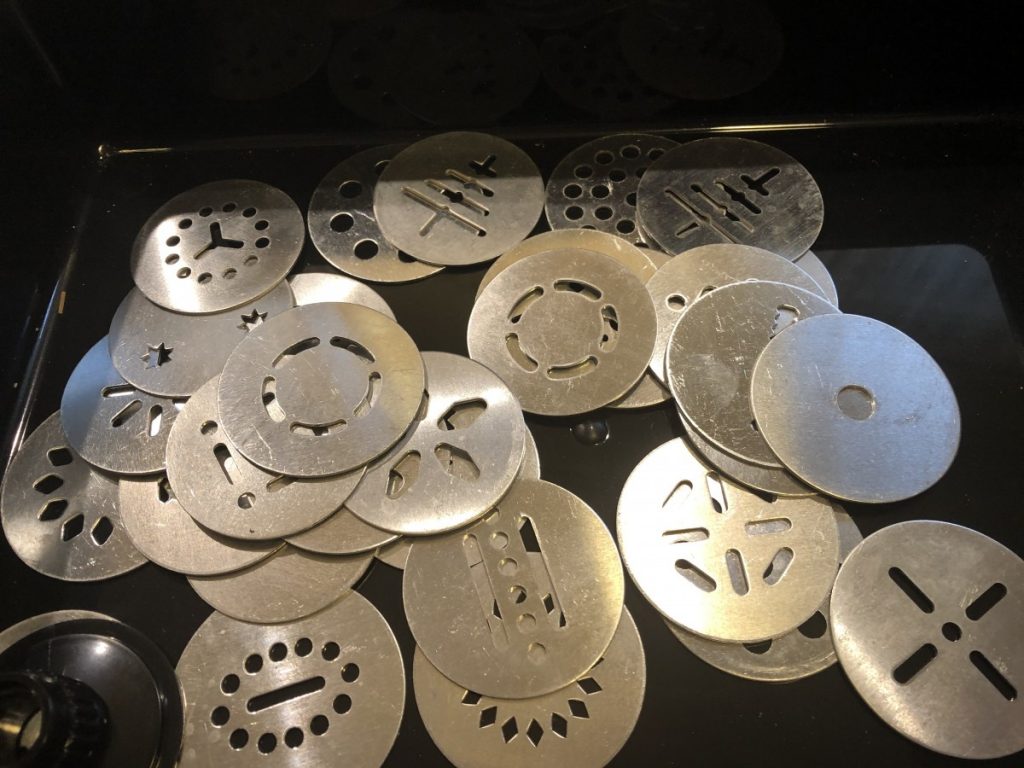
Spritz cookies are so fun to make. Delicate, tender and buttery, they are also so pretty. The dough is squeezed through a cookie press with different discs to produce a wide variety of shapes.
I have been making a lot of different variations of Spritz cookies in the last few days. I’ve also received a few messages from people who have issues with using their cookie presses.
Hope I can answer a few questions and make your Spritz cookies easier to create. The big problem is getting the dough to stick to the cookie sheet. There is a balance you need to get where there is enough friction to get the dough to stick, but not too much, so the cookies will release after baking.
I use silicone liners on my cookie sheets. Parchment paper works well. You can also squeeze the dough onto ungreased baking sheets. Hold the cookie press firmly down on the baking sheet. Click the ratchet once or twice and lift up. The dough, hopefully, will be on the sheet. Sometimes I can click 10 or 15 cookies with no problem, then get one that sticks. Just remove the excess dough from the end of the cookie press and start over. Little gaps or air pockets in the dough can cause that to happen.
The dough has to be soft enough to go through the press. Make the dough with room temperature butter and don’t chill the dough after mixing it. A good spritz dough should be soft, but easy to shape into a roll shape and put in the cookie press. It should not be dry or crumbly.
Within certain parameters, dough for Spritz cookies are all pretty similar. At least in that the texture is all pretty much the same. My classic recipe uses egg yolks. Some of the recipes I tried used whole eggs instead. Both variations produced tender, tasty cookies. Some have a little more or less sugar. Sweetness level is a personal preference.
You can vary them by adding different flavorings or extracts. You can’t add ingredients like nuts or chips because the dough would not go through the press. You can also tint the dough to produce colorful cookies.
So here are some of the Spritz cookies I have been making. Enjoy.
Classic Spritz Cookies
1 c. butter
1 c. sugar
3 egg yolks
2 t. vanilla
½ t. salt
2½ c. flour
In mixing bowl, beat together butter and sugar until fluffy. Beat in egg yolks. Stir in vanilla and salt. Tint dough, is desired. Add flour and stir until smooth. Using a cookie press with desired shape press cookies on to ungreased baking sheet. Leave about 1-inch between cookies. Bake in a preheated 375-degree oven for about 8-10 minutes- cookies should be a light golden color around the edges. Cool on a wire rack. Makes about 4-5 dozen.
Vanilla Spritz
1 c. butter, room temp
¾ c. sugar
1 egg
1 t. vanilla
1 t. almond extract
2¼ c. flour
½ t. salt
Mix butter and sugar until well mixed. Beat in egg and extracts. Stir flour and salt together in a medium bowl, then add to butter mixture. Mix well. Don’t chill dough. Place dough in cookie press and press dough onto parchment or silicone lined baking sheets. Bake in a preheated 350-degree oven for 8-10 minutes. Cookies should be lightly toasted on the edges. Cool on the baking sheet for a few minutes. Makes 6-7 dozen tiny cookies.
Chocolate Spritz
Make the Vanilla Spritz or Classic Spritz dough, but add 2 oz. of unsweetened chocolate (baking chocolate) melted, when you combine the butter and sugar.
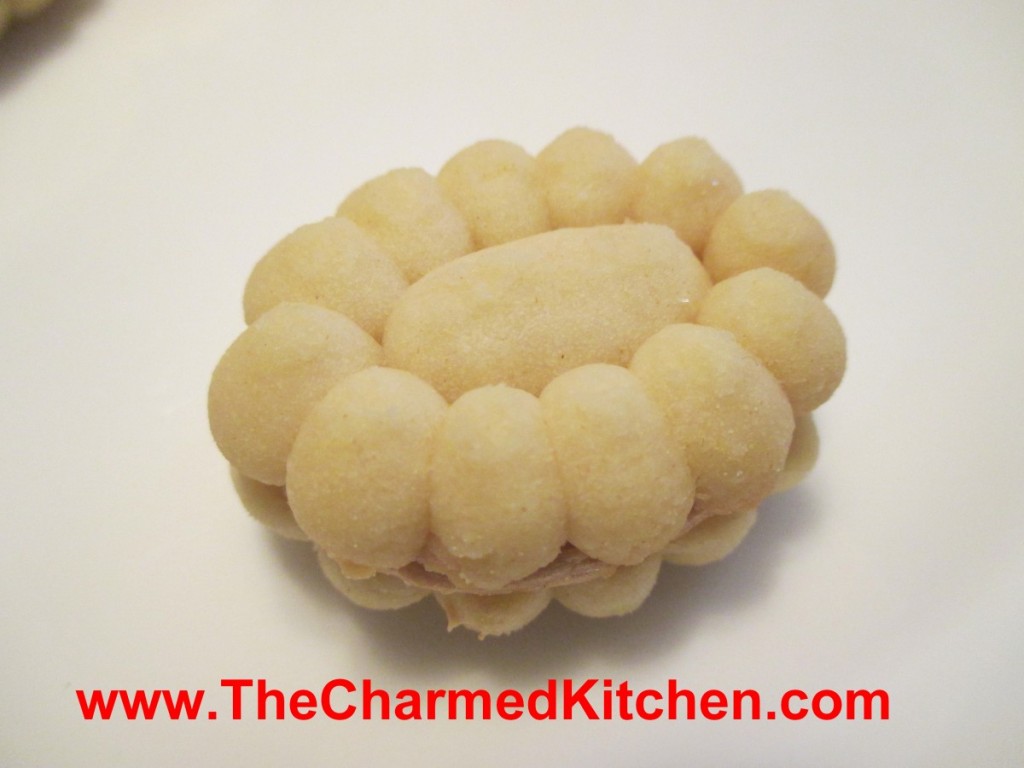
Viennese Shortbread with Coffee/Cinnamon Filling
1 c. butter
½ c. powdered sugar
½ t. vanilla
2 c. flour
¼ t. baking powder
Heat oven to 375-degrees. Cream together butter, sugar and vanilla. Blend in flour and baking powder. Using flower design of cookie press to make 1- inch cookies on ungreased baking sheet. Bake about 7 minutes, or until very lightly browned. Cool and then put two cookies together with coffee filling.
Note: You can make these cookies in almost any cookie press design that is symmetrical. I have made strips, trees and stars among others. Makes about 2 dozen double cookies.
Coffee/Cinnamon Filling
2/3 c. powdered sugar
2 T. butter, softened
1 t. instant coffee dissolved in 1 t. boiling water
1 t. cinnamon
Beat all ingredients together until smooth. Add a few drops of water if too dry.
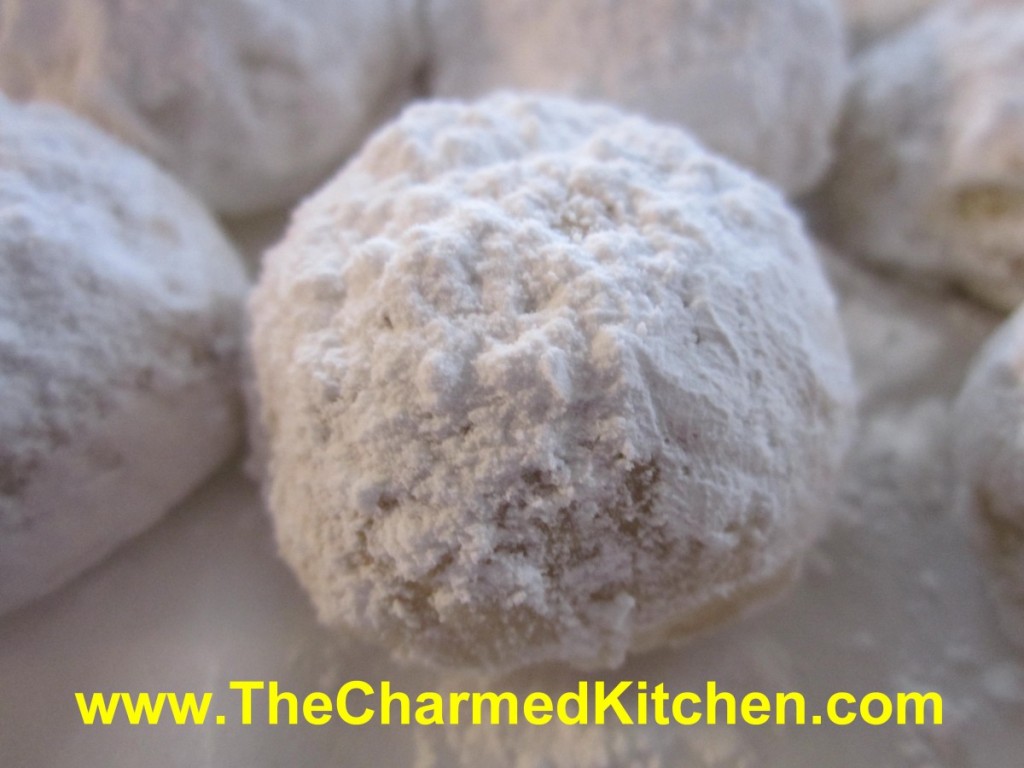
Russian Teacakes

This is the first cookie I can remember making with my Mother. She sat me down at the kitchen table with a pile of chilled dough. I think I was 7. She put a piece of wax paper on the table, then rolled out one small ball of dough. She told me to do what she had just done. Roll out the rest of the dough into little balls. I sat there and made one tiny dough ball after another, until I was done. I can’t make these cookies without thinking of her. A special memory, indeed.
I had a conversation with a childhood friend recently about these cookies. She remembered that my Mom used to make them, and she wondered if I still did. I still do make them. Wouldn’t seem like Christmas without them.
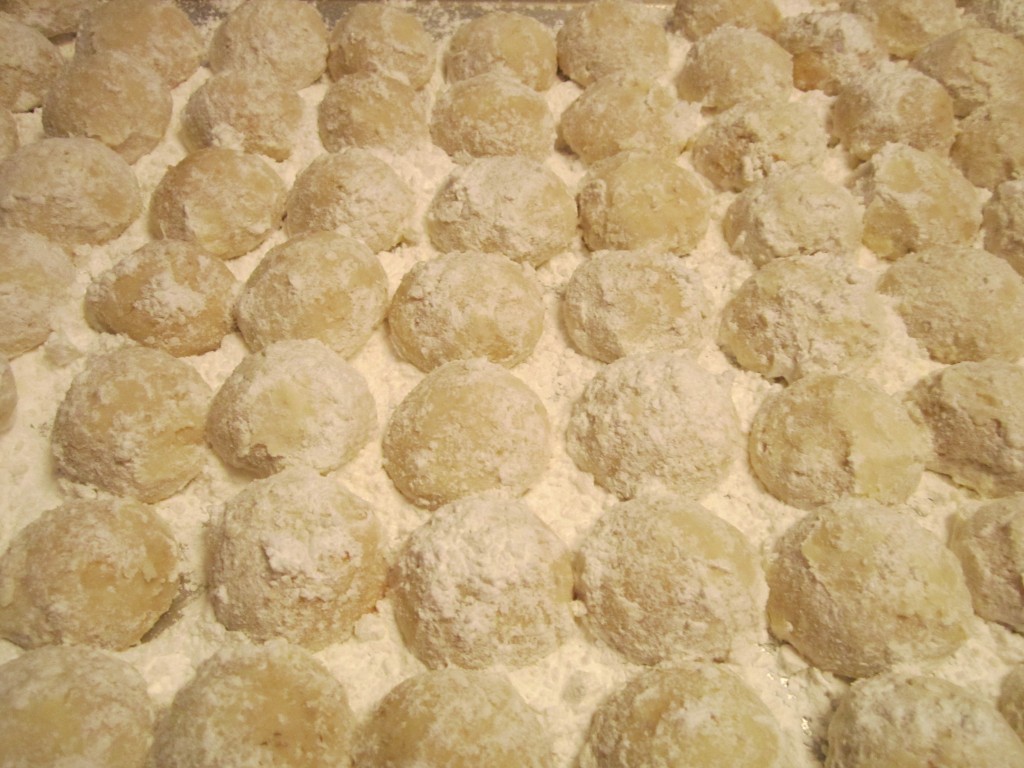
Russian Teacakes, also known as Mexican Wedding Cakes are a delicate nut-filled shortbread cookie coated in powdered sugar. The magic is created when the cookies, hot from the oven, are rolled in powdered sugar. The powdered sugar clings to the hot cookies and makes a sort of sweet coating. Once cooled, they are dusted with more powdered sugar. Whether you call them Russian Teacakes, Mexican Wedding Cakes, or as another friend always refers to them, butter balls, these cookies are a must for your holiday cookie baking.
Russian Teacakes
1 c. butter
½ c. powdered sugar, plus extra for coating
1 t. vanilla
2 ¼ c. flour
¼ t. salt
¾ c. finely chopped nuts, nearly ground
Mix butter, ½ cup sugar and vanilla well. Stir flour and salt together and then add to butter mixture. Mix well and stir in nuts. Wrap dough and chill. Heat oven to 375 degrees. Roll dough into 1-inch balls and place 1 inch apart on ungreased baking sheet. Bake 10-12 minutes. Cookies should be lightly browned on the bottom. While still warm, roll cookies in powdered sugar. Dust again with sugar once cooled. Makes about 4 dozen.
Soft Butter Cookies


If you are looking for a truly tender cookie, this may be it. These cookies are so delicate, they just melt in your mouth!!
The secret ingredient might surprise you. It is oil. Yes, I know I said butter cookies – they also contain butter. But the combination of oil and butter makes them soft and delicate, even days after baking.
They also contain both granulated and powdered sugar. Not your typical cookie recipe, for sure. This just may be my “go to” butter cookie recipe from now on.
I found a sheet of paper with the ingredients written on it. No directions, just ingredients listed and a notation about cooking time and oven temperature. I wish I knew where I got the recipe. I would certainly give the source credit. I did increase the amount of vanilla a little. You don’t have to chill the dough and they roll very easily, without sticking to your fingers. You could chill the dough, but let it warm up a little before rolling. The dough can also be made ahead and frozen- I tested it.
I dipped the tops of the raw cookies in nonpareils, then baked them. I also dipped some in sprinkles. You could leave them plain, then roll in powder sugar, once baked and cooled, or drizzle with melted chocolate.
Soft Butter Cookies
1 c. butter
1 c. oil, I used avocado oil
1 c. sugar
1 c. powdered sugar
2 eggs
1 T. vanilla
1 t. baking soda
1 t. cream of tartar
½ t. salt
4 ½ c. flour
In mixing bowl, beat together butter, oil, sugars and vanilla. Once well blended, beat in eggs. Stir in the baking soda, cream of tartar and salt, then add the flour, mixing until well combined. Heat oven to 350 degrees. Roll dough into one inch balls and press tops of cookies in sprinkles or colored sugar, if desired. Place one inch apart on ungreased baking sheets. Bake for 12 minutes, or until light golden on bottom. Leave cookies on baking sheets 3 minutes before placing on cooling rack. Makes about 6 dozen cookies.
Phyllo Chocolate Fan Cookies

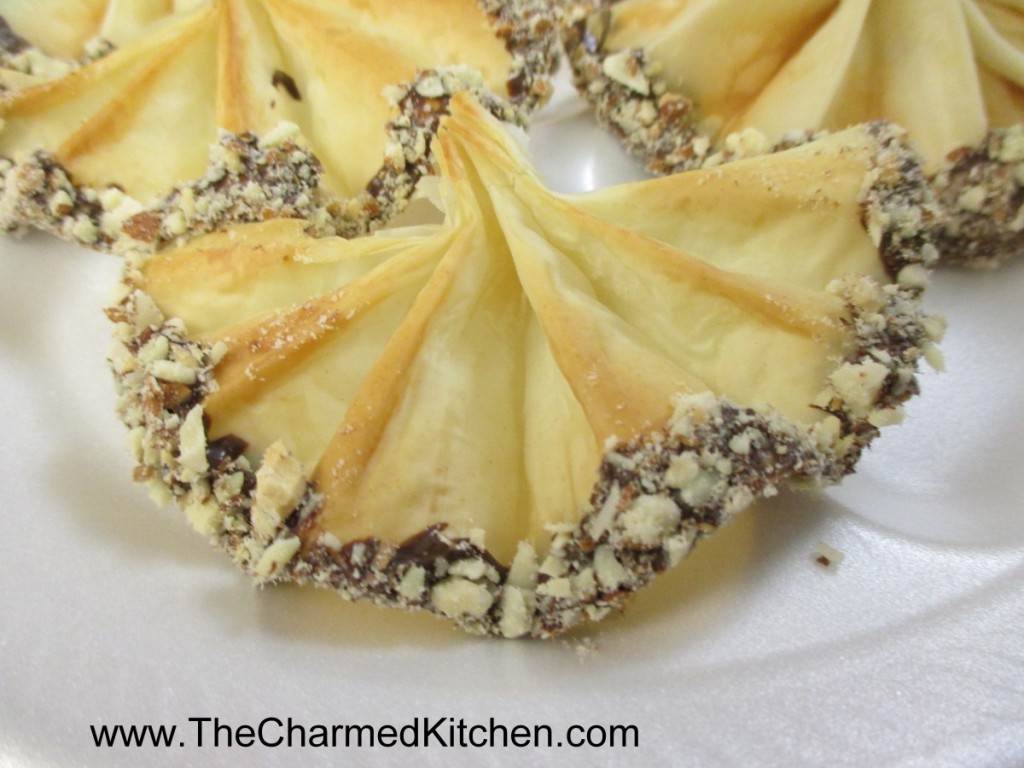
If you want a cookie that is really going to impress, you might want to make these Chocolate Fans. They are crisp, not too sweet, and tipped with chocolate and fine chopped nuts.
While they look difficult to make, they are actually quite easy. For starters, you don’t have to make dough. These are made with phyllo dough.
Phyllo is found in the freezer section at the grocery store. Phyllo dough (also spelled filo) can be a little fussy. Be sure to keep extra dough covered with a damp towel so it won’t dry out and get brittle. It is best to work quickly when making these. We made these dipped in finely chopped toasted almonds. Other nuts could be used. You could also use white chocolate, if you prefer. I have even added a few sprinkles to the nuts for a pop of color.
Chocolate Fan Cookies
1 lb. phyllo dough, thawed*
1 c. butter, melted
12-oz. chocolate chips
2 T. shortening- you can use coconut oil instead
1 c. finely chopped nuts or coconut, pistachios are extra nice
Remove phyllo from box, still rolled up and cut crosswise into 5-6 equal pieces. Keep unused dough covered in a damp towel to prevent drying out. Take one piece of dough and open it up, cutting it in half crosswise. Take 1 sheet and brush with butter. Place another sheet on top and brush again with butter. Place third piece of dough on top and butter again. Starting at short end begin to fold the dough in ¾ inch folds, accordion style. Pinch together at one end and fan out the dough at the other. It should look like a little fan. Place on ungreased baking sheet and repeat with remaining dough. Bake at 375 degrees for 5 minutes. Cool. Melt chocolate and shortening together in microwave or on top of double boiler. Stir to smooth. Dip tip of wide end of fans in melted chocolate and then in the nuts or coconut. Place on a rack to cool and harden. Makes about 65 fans. Can be frozen.
*I buy frozen phyllo dough but be sure to get the right one. Around here there are 2 different sizes. You’ll need the long box- where the dough is 15 inches long.
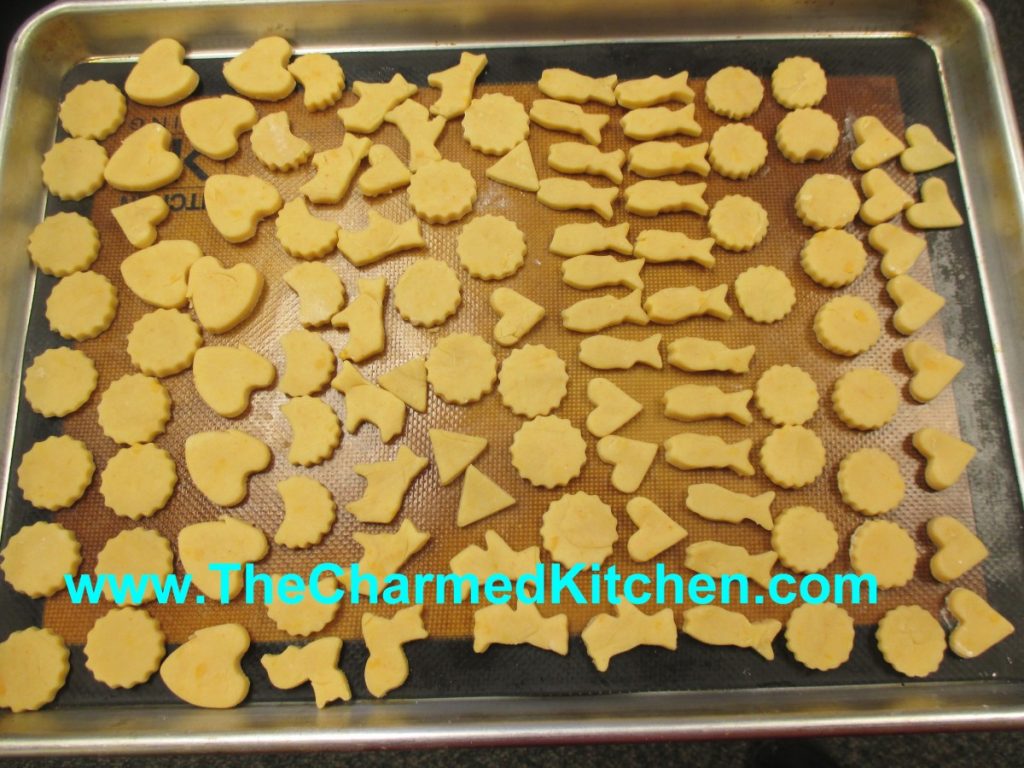
Cheese Puffs

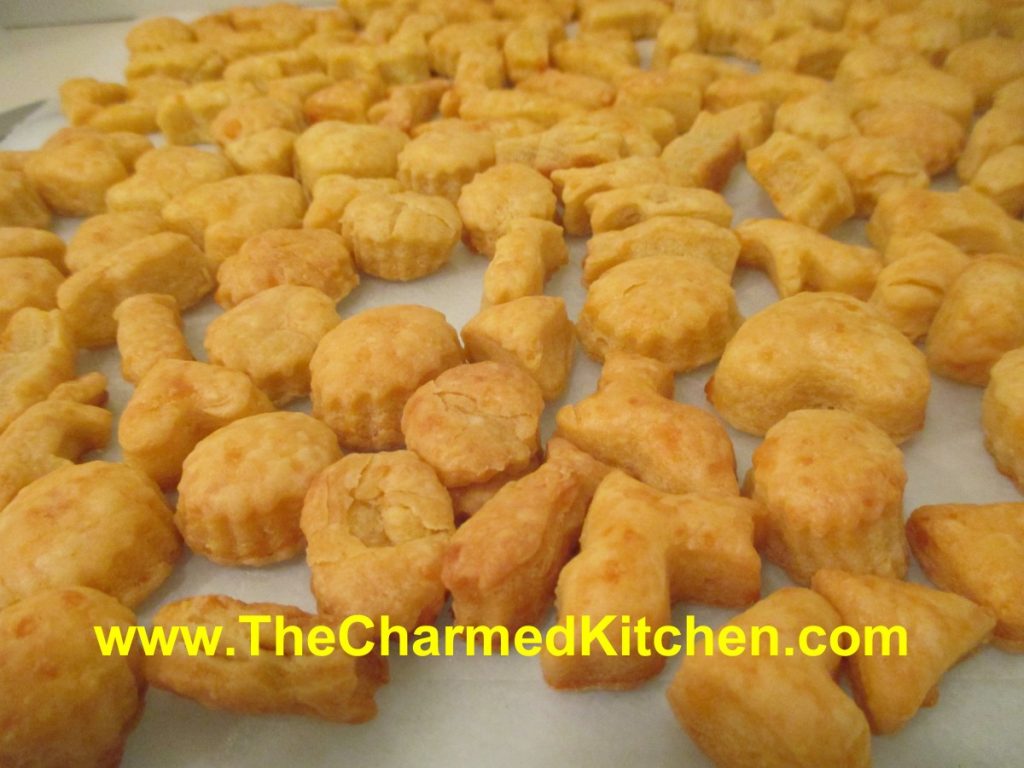
Forget any of the store-bought “cheesy” crackers you have had in the past. These are so much better. The dough is pretty simple, with just 5 ingredients- cheese, butter, salt, cayenne or hot sauce and flour.
Homemade crackers are not hard to make at all. They do involve a little time, but it is well worth it.
We used miniature cookie cutters (also called aspic cutters) that come in all sorts of adorable shapes. You can also just cut the dough into thin strips, or small squares. We even cut some in little fish shapes, like a popular cheesy snack cracker.
I used sharp cheddar cheese, but you can play around with other cheeses. I have made these with Swiss cheese and they were also good. You can add more cayenne or add some herbs, if you like. I really recommend using a food processor to make the dough. It helps to get the cheese and flour to combine.
They don’t spread at all, so you can place them pretty close together on the baking sheet.
Think of how much fun these would be to serve at your next party. They make a nice gift, too.
Cheese Puffs
1 lb. sharp cheddar cheese, grated
½ c. butter
½ t. salt
¼ t. cayenne pepper or hot pepper sauce to taste
1¾ c. flour
In mixer or food processor, combine cheese and butter until smooth. Add remaining ingredients and blend until pretty smooth. Roll out onto lightly floured surface to 1/4-inch thickness. Cut into thin strips or use mini cookie cutters to make shapes. Place on ungreased baking sheet, nearly touching, as they do not spread. Bake in a preheated 350 degree oven for 15-20 minutes. Bottoms should be lightly browned. Makes about 100, freeze well.