Mushroom Stroganoff with Mushroom Pasta

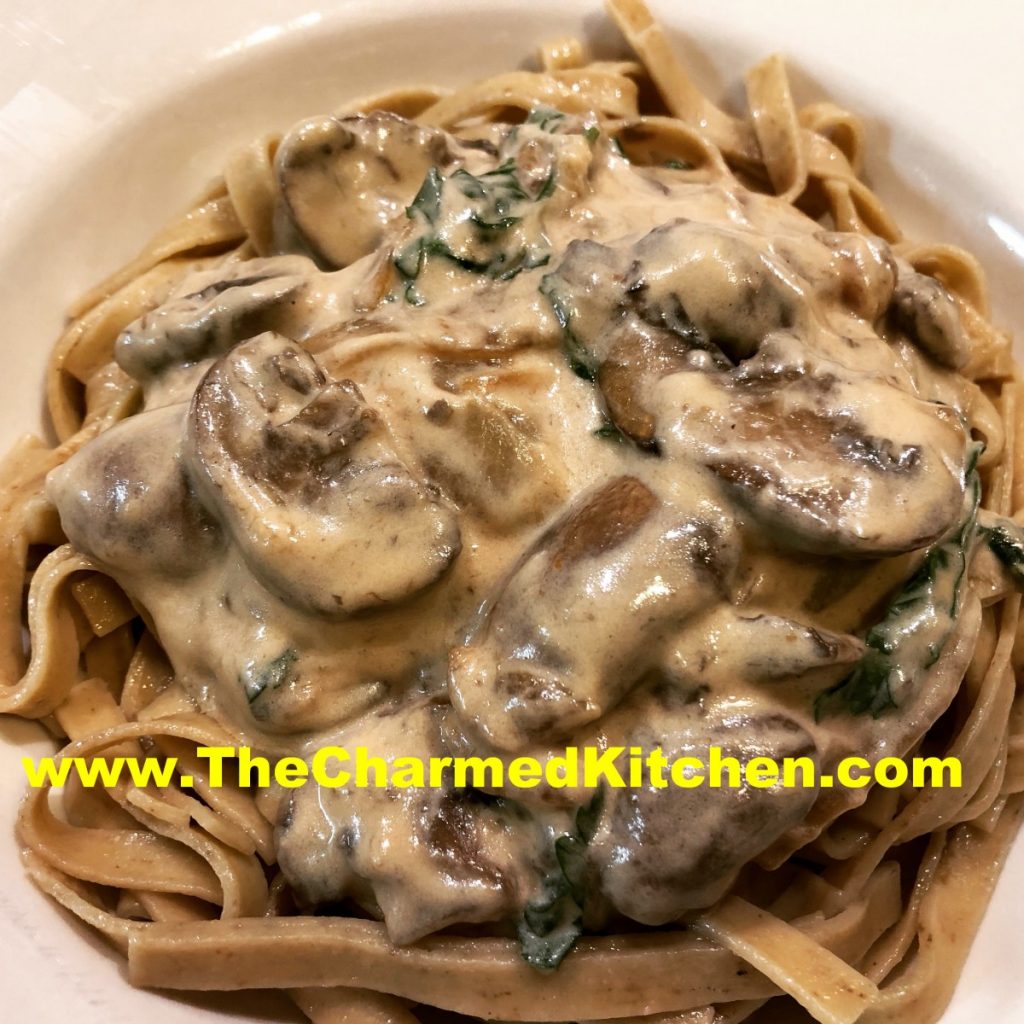
If you are looking for a meat-free meal, you can’t go wrong with mushrooms. Mushrooms add so much flavor to any dish. This mushroom stroganoff is easy to make and tastes great. I also made mushroom pasta, but you can use store bought pasta.
I used a pound of mushrooms, but I could see making this dish with even more mushrooms. I also think it would be fun to make it with a few different types of mushrooms.
For the pasta, I used mushrooms I had dried myself. Store bought dried mushrooms often have to be soaked first, to remove dirt. I only recommend using mushrooms you washed and dehydrated yourself. You don’t want grit in your pasta.
Mushroom Stroganoff
3 T. oil or butter
1 c. chopped onions
1 lb. mushrooms, washed, trimmed and sliced
1 c. stock- I used chicken stock, veggie or beef would also work
1/2 c. dry sherry
1 c. sour cream
1/2 c. half and half
1/2 c. fresh chopped parsley
salt and pepper to taste
Heat oil in large skillet and cook onions until golden. add mushrooms and cook until they are golden, too. Add stock and sherry and cook until most of the liquid is cooked off. Remove from the heat and stir in the sour cream, half and half and parsley. Warm gently for several minutes until sauce thickens a little. Adjust seasonings and serve over mushroom pasta. Recipe follows. Serves 4-5. I only used some of the pasta for the dish.
Mushroom Pasta
3 c. flour, more if using electric pasta machine. See note.
½ c. mushroom powder- made from dried mushrooms
1½ t. salt
4 eggs
Water, as needed
Mix flour, mushroom powder and salt. Stir in eggs, kneading until dough is smooth and elastic. Dough will be very stiff. Add a little water, as needed, to hold dough together. You may wish to mix the dough in a mixer or food processor. Cover dough and let rest at least 15-20 minutes before rolling. Under kneading your dough will result in coarse, crumbly pasta. This batch makes about 1 pound. Serves 4-6.
Roll dough out on a well-floured board or with a pasta machine until desired thickness in reached. Add flour as needed to prevent sticking. Cut into strips or whatever shapes are desired. You might want to let the noodles dry 1-hour or more before cooking, but this is not necessary. Pasta can be hung to dry or separated and allowed to dry flat on a table. When pasta is not hanging to dry it must be turned occasionally to dry evenly. Although you may hear otherwise, homemade pasta, even when dried, should be frozen for long term storage. Storing at room temperature can lead to spoilage. Fresh pasta can also be stored in the refrigerator for a day or two.
Cooking fresh pasta happens quickly. For most noodles you are looking at 2-3 minutes at the most. Thicker cuts and ravioli would take a little longer. Watch it carefully. Drain after cooking, and toss with your favorite sauce.
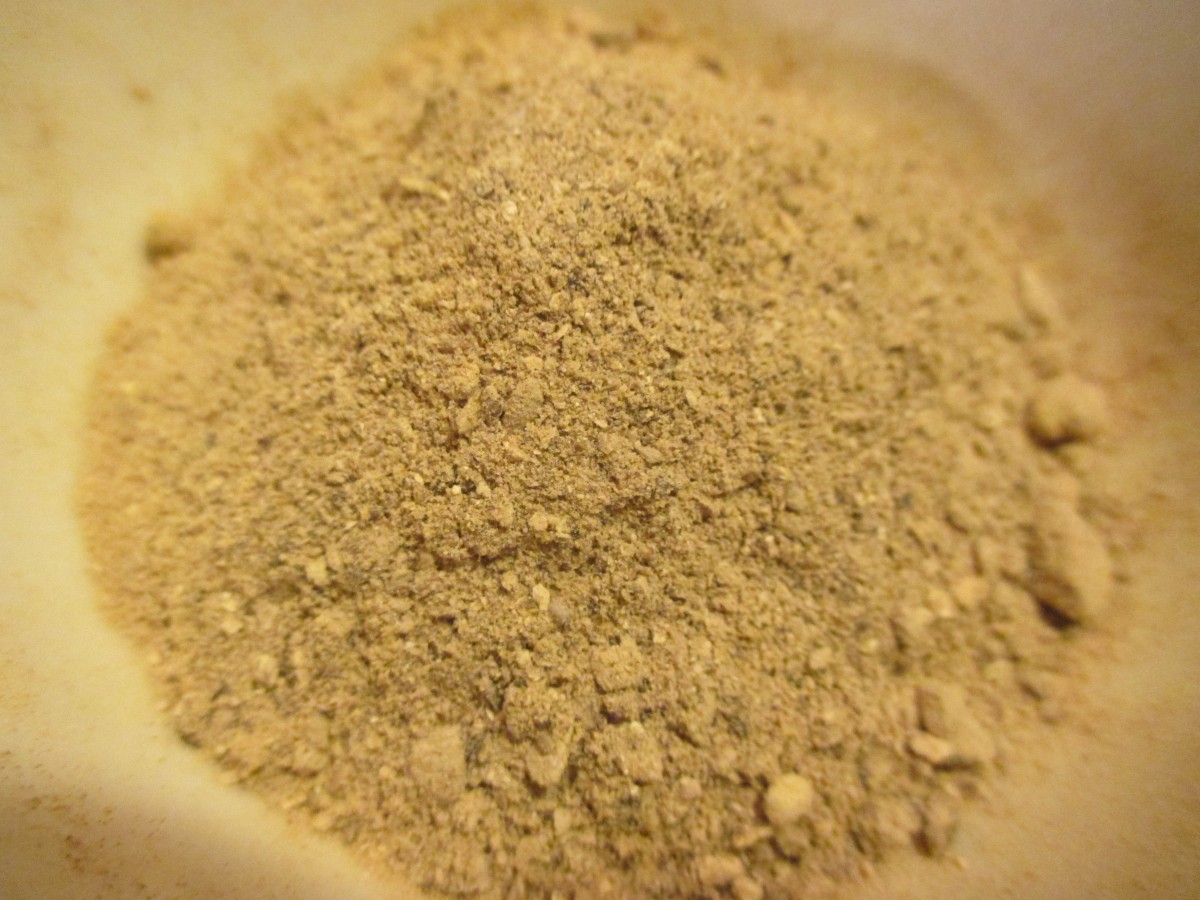
Mushroom powder
Fish Chowder

When I think of seafood chowder, I usually think about a creamy mix of some sort of shellfish, like clams or shrimp, with assorted veggies.
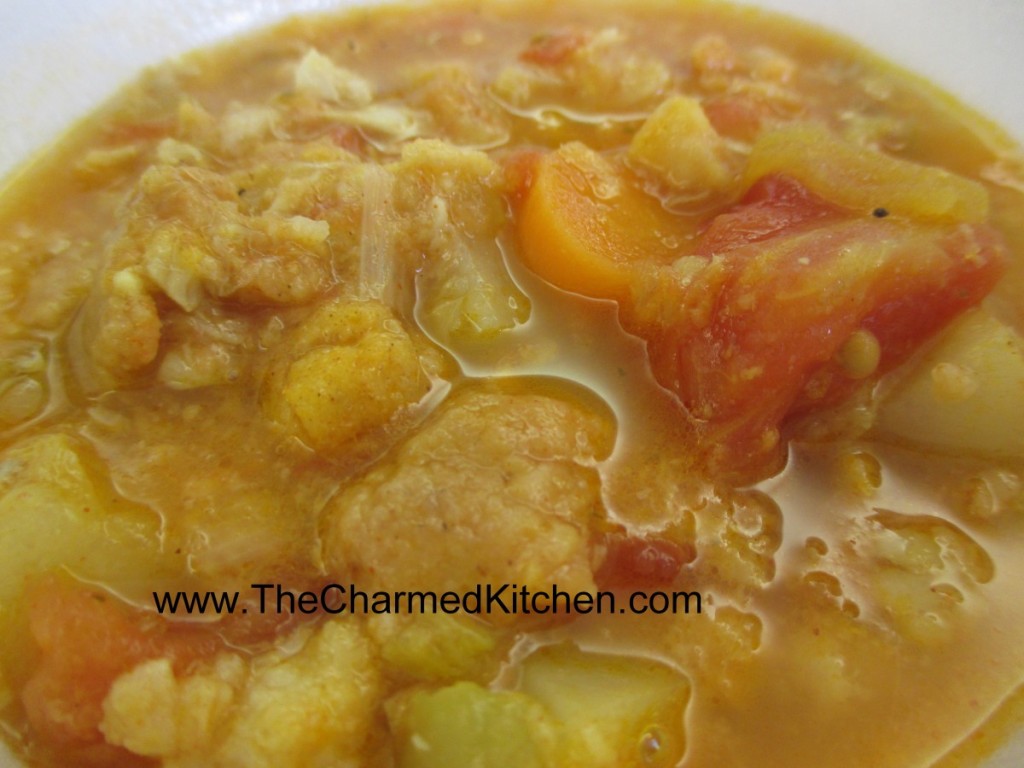
This chowder is a little different. It is a mix of fish and veggies, but there is no dairy or shellfish. Almost like a Manhattan style clam chowder, minus the clams!! We made it in class the other night. Came out really well.
It is a nice alternative to those who can’t eat shellfish, but still want to enjoy a bowl of chowder. The chowder is both hearty and light at the same time, if that makes sense.
You can use any mild fish you happen to like. I have used salmon, catfish, cod and flounder in the past, and liked the way all of them tasted in the chowder. I used catfish this time.
The recipe calls for Roma tomatoes, but any tomatoes would work. I used bottled salsa in class the other night. It added a nice little bit of extra flavor. The tomatoes at the markets this time of year were just too anemic.
Fresh Fish Chowder
1 medium carrot, sliced
2 ribs celery, diced
2 medium potatoes, peeled and sliced
1 large leek, white part only, cleaned and chopped
5 c. chicken, vegetable or fish stock
2 c. plum tomatoes, chopped- I used salsa in class
Salt and pepper to taste
1 1/2 lb. firm white fish cut into 1/2 inch cubes – I used flounder
1/4 c. flour
1/2 t. paprika
2 T. oil
In broth cook the carrot, celery and leeks 10 minutes. Add tomatoes and potatoes and simmer, covered, for 15 minutes longer. Season to taste. Meanwhile mix the flour and paprika together and dredge the fish in it. Heat oil in a skillet over medium high heat and cook the fish until lightly browned on both sides. Drain on paper towels. Before serving add fish pieces to the soup and simmer 5 minutes. Serve with crusty bread. Serves 6.
Pecan Crusted Salmon

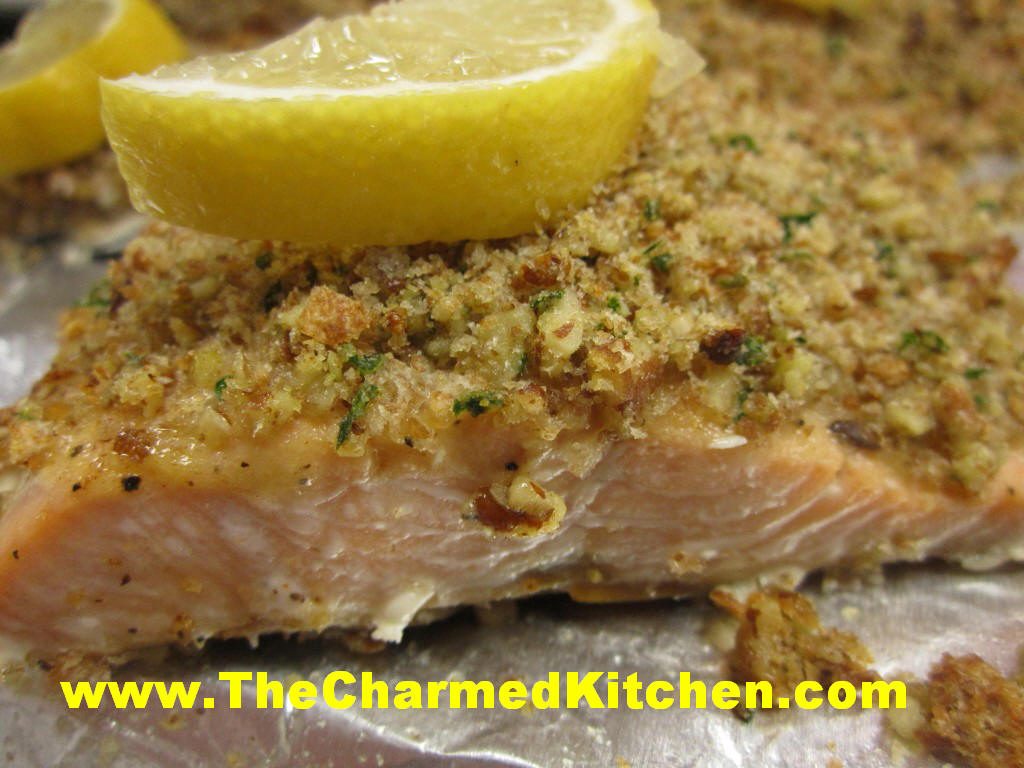
If you love salmon like I do, this is a fun way to prepare it. The crunch from the nuts adds a nice contrast to the texture of the fish. The flavors work well together, too. We made this in my Seafood class last night. Everyone seemed to enjoy it.
You don’t have to use pecans. I prefer them, but finely chopped walnuts, hazelnuts, almonds or even pumpkin seeds might be fun.
A combination of Dijon mustard, butter and honey helps the nuts to stick to the fish. There are a few fresh bread crumbs in there as well.
This dish is simple enough to prepare any night of the week, but special enough to make for company.
I used salmon fillets. You could use a whole side of salmon. You just have to increase the baking time to about 20-25 minutes and reduce the oven to 425 degrees. Depending on the size of the piece of salmon, it might take a few more minutes.
You could use other fish, but you need a sturdy fish that will stand up to the topping. I picked up some Steel Head Trout this morning that should work out beautifully.
Pecan Crusted Salmon
2 T. Dijon Mustard
2 T. melted butter
4 t. honey
1/4 c. fresh bread crumbs
1/4 c. finely chopped pecans or walnuts
2 t. chopped parsley
4 salmon fillets
Salt and pepper
Lemon wedges
Mix together mustard, butter and honey and set aside. Mix together bread crumbs, nuts and parsley and set aside. Season each fillet with salt and pepper. Place on lightly greased baking or broiling pan. Brush each fillet with mustard mixture. Divide crumb mixture among fillets, patting to hold. Bake in 450 degree oven for 10 minutes per inch thickness of fillets. Serve with lemon wedges. Serves 4.
Spicy Shrimp and Grits


A fun way to celebrate Mardi Gras is with shrimp and grits. Everybody seems to love them. As an added bonus, they are fast and easy to make. It’s all in the timing. Get your grits simmering on the stove, while you clean and season the shrimp. Once the grits are ready, keep them warm and quickly saute the shrimp. Then just serve them up.
Some folks like to add cheese to the grits. I didn’t this time, but feel free to add a cup or two of shredded cheese, if you like. Sharp cheddar or Parmesan are good choices. Add the cheese when you add the cream and butter.
I didn’t get specific on how much of the seasonings to add. I dusted the shrimp with the seasonings and tossed to get them all coated evenly. I was generous with all but the cayenne. I used about a 1/4 teaspoon of cayenne. They still had a nice kick, but I think I could have used a bit more. You can always serve them with hot sauce on the side, so guests who like spicier foods can add that to their shrimp.
Spicy Shrimp and Grits
1 c. yellow grits
4 c. water
½ t. salt
3 T. butter
1/3 cup heavy cream
1 lb. large raw shrimp, shelled and deveined
Salt
Pepper
Cayenne pepper
Garlic powder
Paprika
2 T. oil
2 T. butter
In saucepan, bring water to a boil and add the grits and salt. Turn down to a simmer and cover the pan. Stir every few minutes. Cook until grits are tender and water is absorbed, about 20 minutes. While the grits are cooking, place shrimp in medium bowl and season to taste with the salt, pepper, cayenne, garlic powder and paprika. Toss shrimp to coat evenly and set aside. Once grits are done cooking, stir in the cream and butter. Adjust seasoning. Cover and remove from the heat. Heat oil and butter in skillet and cook shrimp over medium high heat, turning to cook on both sides until shrimp are cooked, about 5 minutes. They should get a nice, golden color. Larger shrimp will take longer, but be careful not to overcook them. To serve, spoon some grits on a plate or in a shallow bowl. Top with some shrimp and serve. Serves 4.
Spelt and Walnut Biscotti

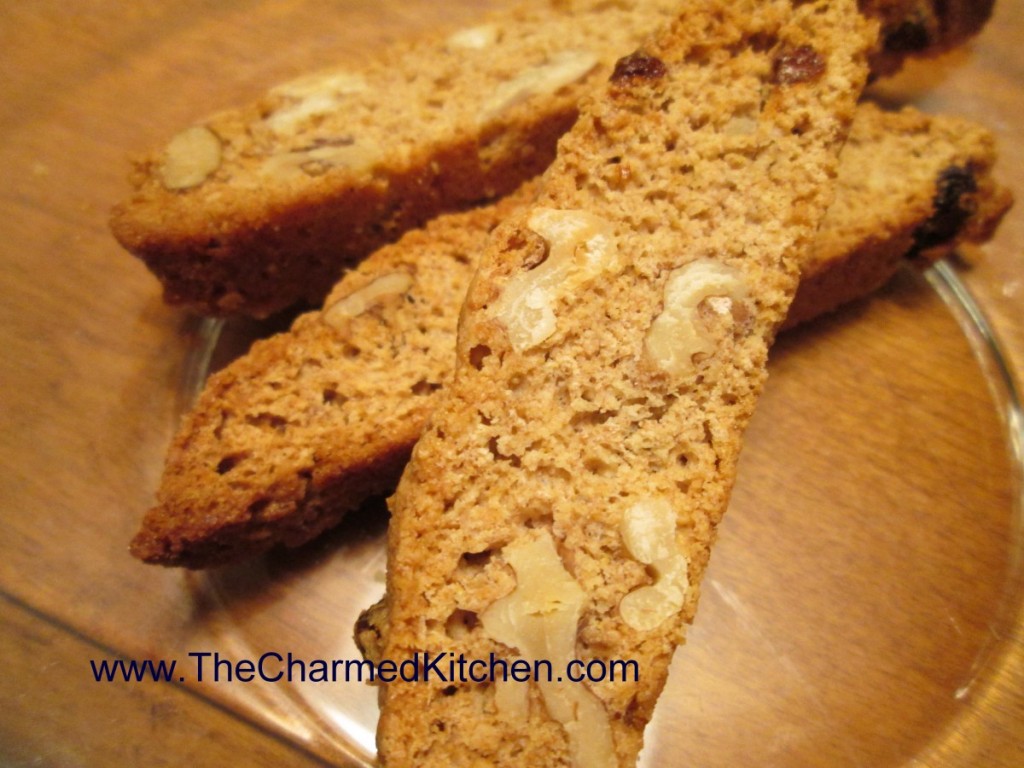
Biscotti are so easy to make. I don’t know why more people don’t bake their own. They are always nice to have with coffee, tea or a cold glass of milk. They aren’t too sweet, so biscotti make a nice breakfast. Biscotti also stay crisp for a long time, if stored in an air tight container.
These biscotti are made with spelt flour. Spelt is an ancient grain that is very closely related to wheat. It does contain gluten, so not an option for people with wheat allergies or Celiac, but a nice way to add a whole grain to your menu if you do eat wheat. Unlike whole wheat flour, which tends to be heavy in baking, spelt has a lighter texture and acts more like white flour. I used it to make these biscotti and they are crisp, light and very tasty.
Biscotti are twice baked. First in a loaf shape, then they are sliced and baked again. Most recipes will tell you to bake the slices half way, then turn them over to finish baking. A little time saving trick- just place a cooling rack on the baking sheet, then place the sliced biscotti on the rack. That way, they get crisp on both sides at once and there is no need to turn them during their second bake.
Spelt Biscotti – with Walnuts
1 ¼ c. spelt flour*
⅓ c. sugar
1 t. baking powder
¼ t. salt
½ c. walnuts
¼ c. golden raisins- I often use dried cranberries or other dried fruit
2 eggs
1 t. vanilla
Combine dry ingredients with nuts and raisins in medium mixing bowl. In small bowl combine eggs and vanilla and add to dry ingredients. Stir together to make a slightly sticky dough. With oiled hands shape into loaf (2”x11”) on oiled sheet. Bake at 350-degrees for 20 minutes. Remove from oven. Slice the loaf thin using a serrated knife and place slices on a rack on a baking sheet then return to oven, reduce heat to 300-degrees bake 25 minutes. Remove from oven and allow to cool. Store in an airtight container to retain crunch. Makes about 16.
* If you can’t find spelt flour you can use 3/4 c. all purpose flour and 1/2 c. whole wheat flour instead or substitute the entire amount of flour with whole wheat pastry flour.
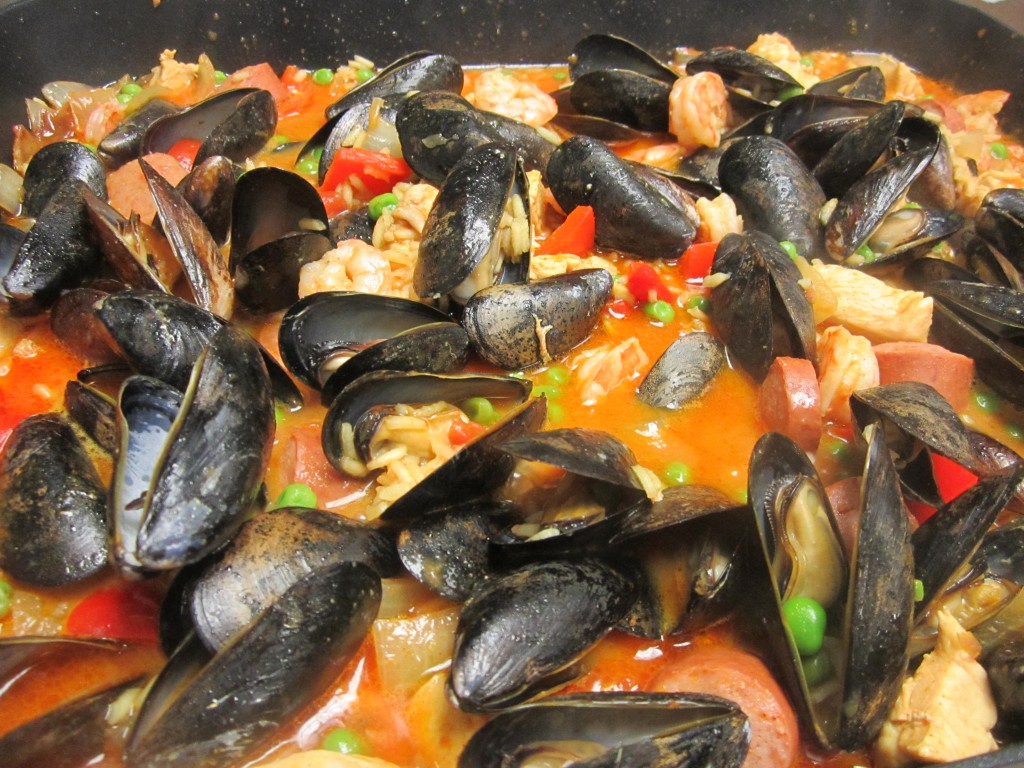
Creole Jambalaya

There are so many variations for Jambalaya. I don’t think I ever had a Jambalaya I didn’t like.
This Creole dish varies a little with each person who makes it. The assortment of ingredients adds so many layers of flavor.
Traditionally, Jambalaya would include smoked sausage or ham, chicken, shellfish, rice, tomatoes and assorted veggies and seasonings.You can see why there are so many variations. For me, it just isn’t Jambalaya without mussels. Lots and lots of mussels.
It is definitely a great dish for a party. It is impossible to make a small batch of Jambalaya!!!
This recipe is a tweaked version I got from a boss of mine a long time ago. I must say, every time I make this for friends or family it gets rave reviews.
The heat level in this dish is really about personal preference and for the people who are going to be eating it. I like it a bit spicier, so I add more cayenne. If I am making it for friends who like their food less spicy, I use less. Of course, you can always serve it with hot sauce on the side, so people can spice it up a little more.
Creole Jambalaya
1 lb. smoked sausage, sliced into 1 inch pieces
1 c. chopped onions
1 c. chopped celery
2 garlic cloves, chopped
1/4 c. oil
2 c. cubed uncooked chicken
3 c. chicken stock
1 1/2 c. uncooked rice
1 16 oz. can tomatoes
2-3 t. paprika
Cayenne pepper to taste
Black pepper to taste
1/4 t. ground turmeric
1 lb. medium shrimp, peeled and de-veined, uncooked
1 1/2 c. shelled peas, fresh or frozen
1/2 c. chopped red pepper
1-2 lb. mussels, scrubbed
In Dutch oven cook sausage, onion, celery and garlic in oil until onion is tender. Add remaining ingredients, except shrimp, peas, sweet red peppers and mussels. Bring to a boil, turn down to simmer and cook 20 minutes. Stir in shrimp, and peppers, cover and cook 10 minutes. Stir in peas and stick in mussels. Cover and cook 5 more minutes. Discard any mussels which have not opened in 5 minutes. Serves 8.
Tiramisu Doughnuts

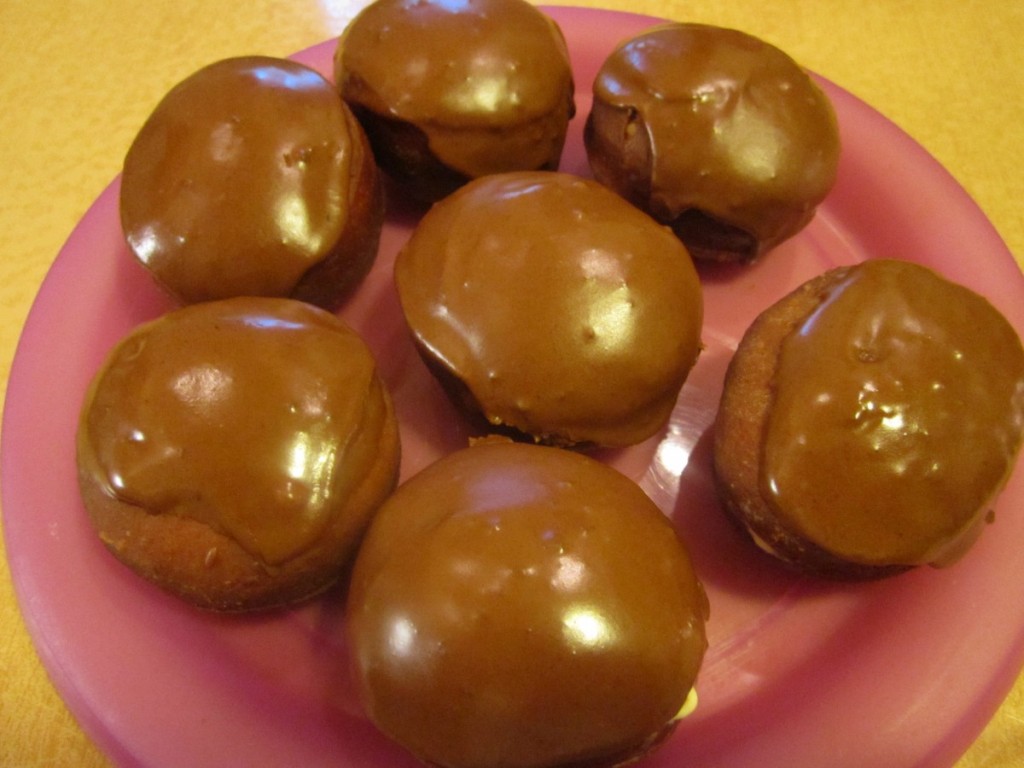
These doughnuts are inspired by the flavors of tiramisu, a traditional Italian dessert. They are a filled doughnut, like jelly doughnuts. I used the filling that I would normally use for making tiramisu. It is an egg custard, combined with mascarpone cheese and whipped cream. After the doughnuts are filled, they are topped with a mocha ganache. The end result is sublime.
I started making these doughnuts a number of years ago. It was Fat Tuesday and I was making jelly doughnuts, a family tradition. Not everybody likes jelly doughnuts and I wanted to switch things up. As a kid, I loved the cream filled doughnuts my folks would make. I decided to use the filling recipe I used for tiramisu. To finish it off, a little coffee is added to the ganache to give it the flavors of classic tiramisu.
You do need to store finished doughnuts in the fridge, assuming any are leftover.
I won’t lie, these doughnuts are a bit of work, but worth the effort. Here is the recipe.
Tiramisu Doughnuts
Filling:
5 egg yolks
1/4 c. sugar
1/2 c. Marsala wine (not cooking wine)
2 c. whipping cream
4 T. sugar
1 lb. mascarpone cheese
Make zabaglione (egg custard). In double boiler, over simmering water, beat together egg yolks and sugar until lemon colored. Stir in Marsala and continue cooking, stirring constantly until mixture thickens and will mound on a spoon. This will take about 10 minutes. Remove from heat and cool down. You can place in bowl in fridge 30 minutes or so. Beat together whipping cream and sugar until stiff peaks form. Beat in mascarpone and chilled zabaglione. Chill 1 hour.
Dough:
4 c. flour
2 T. sugar
1 t. salt
½ c. butter
1 packet yeast
¼ c. warm water
2 t. sugar
1 c. evaporated milk
2 eggs, beaten
Combine flour with sugar and salt. Cut in butter and set aside. Dissolve yeast in warm water and 2 t. sugar and set aside. Combine milk with eggs. Stir in yeast mixture and add to flour mixture stirring well. On lightly floured surface knead dough until dough is smooth, about 5 minutes. Dough will be very sticky. Cover and let rise until doubled, about 1½ hours. Remove dough from bowl and punch down. Using about a third of the dough at a time roll dough out to about an ½ -inch thickness and cut out with a 2½ -inch biscuit cutter. Re-roll scraps and cut out. You should get about 2 dozen. Place dough circles on a floured surface and cover with a towel until doubled, about an hour. Heat oil in a deep pan until it reaches 375 degrees. Cook doughnuts a few at a time until golden on both sides, about 1 minute per side. Drain on paper towels and cool before filling.
Note: You can also refrigerate the dough after kneading it if you would prefer. Just place dough in an oiled bowl, cover with plastic wrap and chill overnight. Roll and cut dough into doughnuts when cold from the fridge. Allow to rise, covered, until doubled in bulk, about 2-3 hours. Fry as directed.
To fill doughnuts use a pastry bag fitted with a long tube tip for filling. I have these handy plastic syringes which are easy to use. Insert tube tip into doughnut and squeeze gently until doughnut is filled with cream (or jelly). Be careful not to overfill or doughnut will split. Once filled doughnuts can be frosted or topped with a sugar glaze. For the Tiramisu Doughnuts I made a mocha ganache.
Mocha Ganache
2 c. chocolate chips
1 c. whipping cream
1 T. instant coffee powder
Combine all ingredients in a microwave safe dish and heat in microwave for 2 minutes. Stir mixture until smooth and return to microwave if chocolate is not fully melted. Heat in microwave for 30 seconds more at a time, stirring after each time until mixture is smooth. For extra smooth mixture strain before using. Dip the top of the filled doughnuts in ganache.
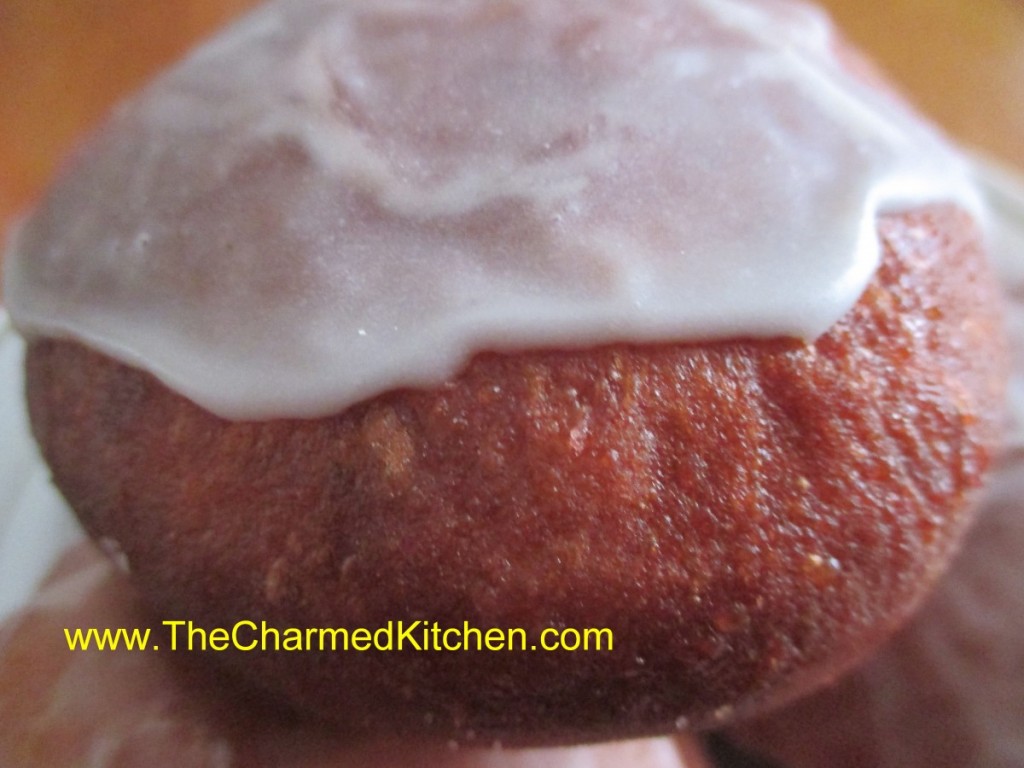
Homemade Jelly Doughnuts

I remember how fun it was to watch my parents making doughnuts. The making of the dough, then cutting the dough into circles. The dough circles would then rise on the counter, under linen towels, until puffed up. Gently they would be fried, then set on paper towels to drain. Once cooled, the filling would be piped into them through a pastry bag filled with some wonderful jelly or jam.
I also remember learning to fill them. Squeezing the jelly from the pastry bag into the doughnut was tricky. You wanted to make sure there was enough filling, but not so much that they split open. After a couple of tries, I realized you could figure it out by the weight of the filled doughnut in your hand.
My parents were both excellent bakers. My father had even been a professional baker at one time. I thought it was normal to have parents who made doughnuts. It was the norm in my family.
My folks only made them for special occasions. Unless my Mom got a taste for homemade jelly doughnuts. Then, my dad would make them for her. She loved jelly doughnuts. More than pretty much anyone else I knew.
You can fill them with any number of jellies, jams and cream fillings. Once fried and filled, the doughnuts can be eaten plain or topped with a drizzle of powdered sugar glaze or just rolled in granulated sugar or powdered sugar. They are a bit of work, but well worth the effort.
Jelly Doughnuts
Dough:
4 c. flour
2 T. sugar
1 t. salt
½ c. butter
1 packet yeast
¼ c. warm water
2 t. sugar
1 c. evaporated milk
2 eggs, beaten
Combine flour with sugar and salt. Cut in butter and set aside. Dissolve
yeast in warm water and 2 t. sugar and set aside. Combine milk with
eggs. Stir in yeast mixture and add to flour mixture stirring well. On
lightly floured surface knead dough until dough is smooth, about 5
minutes. Dough will be very sticky. Cover and let rise until doubled,
about 1½ hours. Remove dough from bowl and punch down. Using about a
third of the dough at a time roll dough out to about an ½ -inch
thickness and cut out with a 2½ -inch biscuit cutter. Re-roll scraps and
cut out. You should get about 2 dozen. Place dough circles on a floured
surface and cover with a towel until doubled, about an hour. Heat oil
in a deep pan until it reaches 375 degrees. Cook doughnuts a few at a
time until golden on both sides, about 1 minute per side. Drain on paper
towels and cool before filling.
Note: You can also refrigerate the dough after kneading it if you would prefer. Just place dough in an oiled bowl, cover with plastic wrap and chill overnight. Roll and cut dough into doughnuts when cold from the fridge. Allow to rise, covered, until doubled in bulk, about 2-3 hours. Fry as directed.
To fill doughnuts use a pastry bag fitted with a long tube tip for filling. I have these handy plastic syringes which are easy to use. Insert tube tip into doughnut and squeeze gently until doughnut is filled with jam. Be careful not to overfill or doughnut will split. Once filled doughnuts are topped with a powdered sugar glaze or rolled in powdered sugar.
Apricot Filling
12 oz. dried apricots, chopped up
2 c. water
2 c. sugar, or to taste
Combine apricots with water in saucepan and simmer, covered until apricots are really tender. This will take at least an hour- add more water, if needed. Add sugar to taste and cook until thickened. Puree mixture in a blender.
Strawberry Filling
1 lb. strawberries
1½ c. sugar
½ c. water
3 T. cornstarch
Crush berries and place in saucepan with the sugar. Cook until berries are tender, about 10 minutes. Combine water with cornstarch and add to strawberries. Cook until thickened and bubbly. Cool. Puree. Makes 2 cups.
King Cake

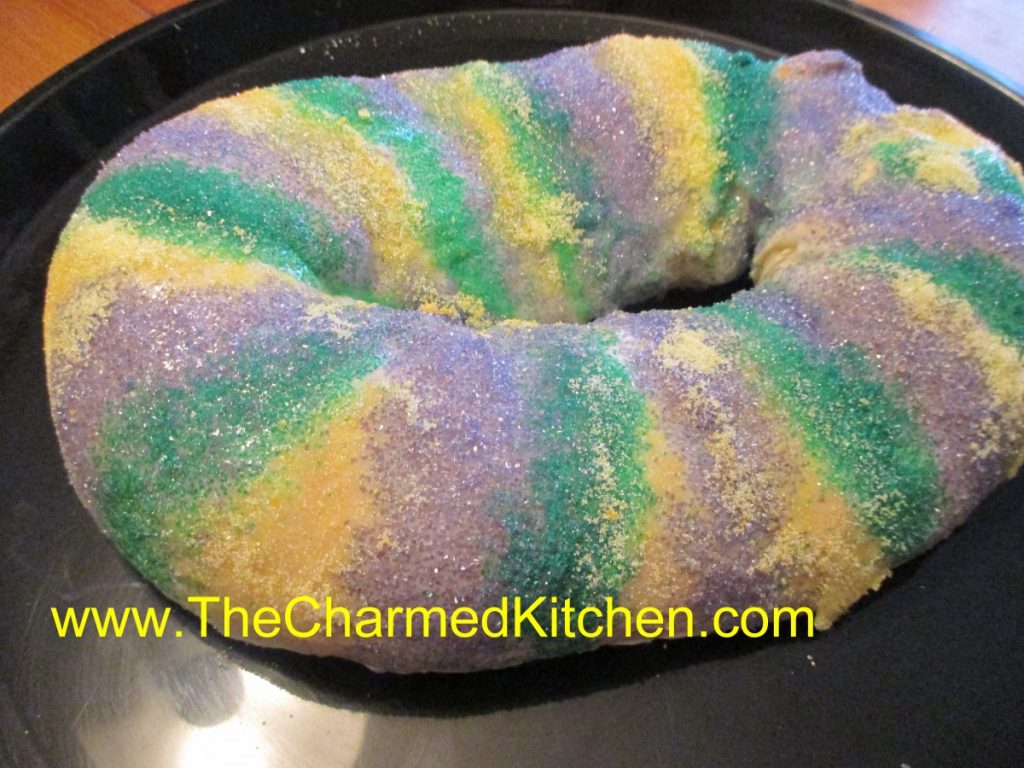
If you are planning a Mardi Gras party, you will want a King Cake. King Cakes are a long-standing tradition in New Orleans at Mardi Gras. A small plastic baby is often hidden in the cake, although you can use a bean or even a whole pecan or almond.
Tradition has it that the guest who finds the “surprise” in their piece will host next year’s party. Be careful to warn guest so they don’t break a tooth or swallow the “prize”. You can also use the whole nuts inside the cake and just set the baby on top of the cake when serving.
The “cake” is really a sweet cinnamon swirl bread. The yeast dough is rolled out, spread with butter and cinnamon sugar, and rolled up. Then the dough is shaped into an oval shape.
After it is baked, the king cake is decorated with colorful frostings, sugars or both. Traditionally the colors used are yellow, green and purple, but, hey it’s your cake have fun with it.
If you want just the sugars, and no frosting, then brush the king cake with a beaten egg before baking and sprinkle with the sugar then. Otherwise, you’ll decorate the cake once baked and cooled.
King Cake
1/4 c. butter
16 oz. container sour cream
1/3 c. sugar
1 t. salt
2 packages active dry yeast
1 T. sugar
1/2 c. warm water
2 eggs
6 /2 c. flour
1/2 c. white sugar
1 1/2 t. cinnamon
1/3 c. butter, softened
Colored sugars and frostings (recipes follow)
Heat together the first 4 ingredient to about 100 degrees. Dissolve yeast and sugar in warm water in large bowl and let stand 5 minutes. Add butter mixture, eggs and 2 cups of the flour. Beat 2 minutes at medium speed and gradually work in enough flour to form a soft dough. Knead until smooth and elastic, about ten minutes. Place dough in a greased bowl, turning to grease top and cover. Allow to rise in a warm place until doubled, about 1 hour. Stir together 1/2 c. sugar with cinnamon and set aside. Punch dough down and divide in half. Roll out one piece of dough into a 28×10-inch rectangle. Spread dough with half of the butter and sprinkle with half of the sugar mixture. Starting at long end roll up jelly roll fashion and pinch seam to seal. Shape dough into an oval shape and pinch ends together. Place seam side down on a greased baking sheet. Repeat with remaining piece of dough except remember to add the toy baby, nut or bean if you want the “surprise”. Cover and let rise about 20 minutes. Bake in a preheated 375-degree oven for 15-20 minutes, or until golden brown. Cool before decorating with tinted frostings and colored sugars. Makes 2, serving 24.
Frostings
3 c. powdered sugar
3 T. melted butter
3 t. milk
1/2 t. vanilla
Green, yellow, red and blue food coloring
Combine sugar and butter and add enough milk to make the glaze a drizzling consistency. Add vanilla and divide mixture in three small bowls. Tint one bowl yellow, one green and one purple, using both the red and blue food coloring. I often don’t bother to tint the frostings, but rely on the tinted sugars for color.
Tinted sugars
1 1/2 c. granulated sugar
Food coloring
Place 1/2 c. sugar in each of three small bags and add a couple of drops of food coloring to each. One use yellow, one green and one both the red and blue for purple. Shake the bags to distribute the color. You should only need a couple of drops of each.
Decorate the cake by making bands of the colored frostings and then sprinkling on the sugars.
Lemons in the Snow Cookies

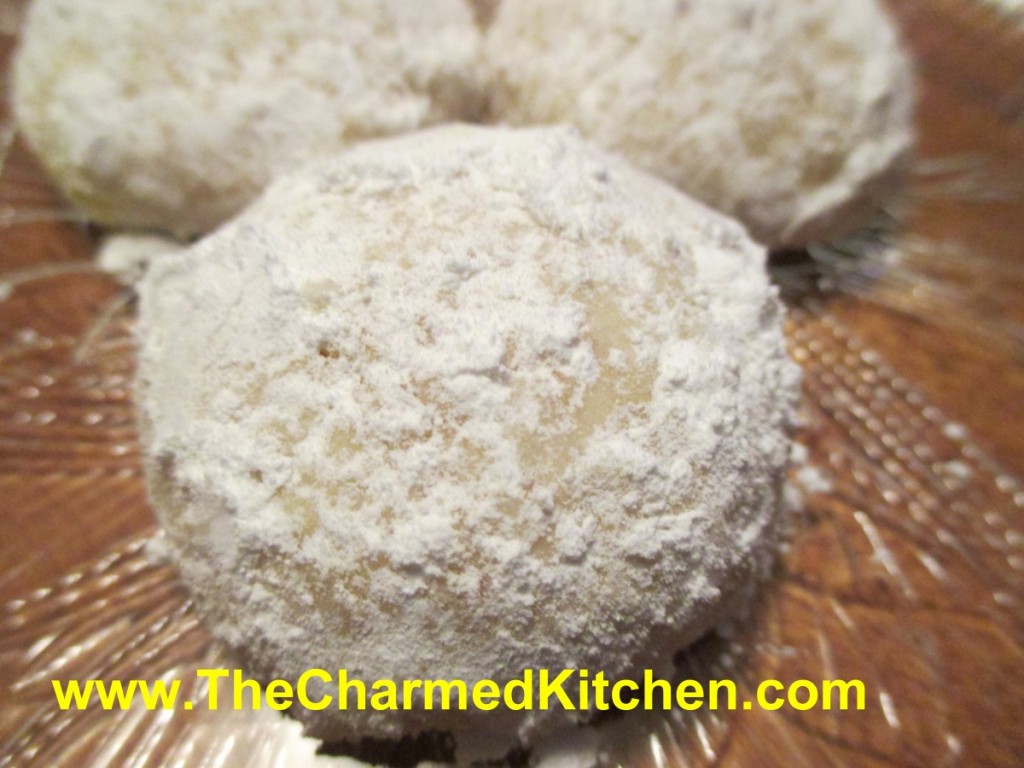
The funny name for these cookies is really easy to explain. The cookies are flavored with both lemon juice and lemon zest in the dough. When nearly cooled, they are rolled in powdered sugar. They end up looking like little snowballs.
Yummy, lemon flavored snowballs.
The dough also contains finely ground almonds, for extra texture. They are a delicate, cake-like cookie, with a slightly crisp outside. You could also add a little grated lemon peel to the powdered sugar, before rolling the cookies in it, for a more intense lemon flavor.
Lemons in the Snow Cookies
1/2 cup butter (no substitutes), softened
2/3 cup sugar
1 egg
1/4 cup lemon juice
1 tablespoon grated lemon peel -or more if you like
1 3/4 cups all-purpose flour
1/4 teaspoon baking soda
1/4 teaspoon cream of tartar
1/4 teaspoon salt
1/2 cup finely chopped almonds
confectioners’ sugar
In a mixing bowl, cream butter, sugar and egg until well blended. Add lemon juice and peel. Combine flour, baking soda, cream of tartar and salt; stir into creamed mixture. Add almonds. Cover and refrigerate the dough for at least 1 hour or overnight. Roll into 1-in. balls. Place on ungreased baking sheets. Bake at 350 degrees for 10-12 minutes or until bottoms are lightly browned (cookies will not brown on top). Remove immediately to wire racks; cool for 5 minutes, then roll in confectioners’ sugar. Makes 36.


