Homemade Peach Liqueur


I like to think of making fruit liqueurs as just one more type of food preservation. I make jams and jelly with seasonal fruit, so why not preserve some of summer’s bounty in alcohol?
Peach liqueur is one of my favorites. Pretty simple, really. Just combine peaches with vodka (or brandy) and allow the mixture to steep. After a week or two, strain it. After straining out the fruit, I also filter the liqueur through either coffee filters or cheesecloth to get it nice and clear.
Sweetening is optional. Unsweetened, it is called a Peach Eau de vie, which translates into water of life. Got to love the French!!! Sweetened, it is a liqueur.
Poured into pretty bottles, these liqueurs can make fun gifts, too.
Peach Liqueur
10 medium sized, ripe peaches
3 c. vodka or brandy
1 c. sugar syrup – optional – recipe follows*
Peel and pit peaches reserving only the fruit. You can leave the skins on, if you prefer. Place in jar with the alcohol and steep at least a week, shaking several times. You can leave the fruit in for up to two weeks. Strain, squeezing out as much juice from the fruit as possible. Filter through cheesecloth, fine mesh strainer or coffee filters for a clearer product. Add sugar syrup, if desired, and mature 4-6 weeks. Makes 4 cups.
*Sweetening– Simple syrup is made from 1 cup of sugar and ½ cup of water. Bring to a boil, then cool. You will have 1 cup of syrup. Some recipes call for plain sugar and others for honey. Watch when you substitute honey for sugar, as it is sweeter and stronger flavored.
Corn and Barley Salad with Basil

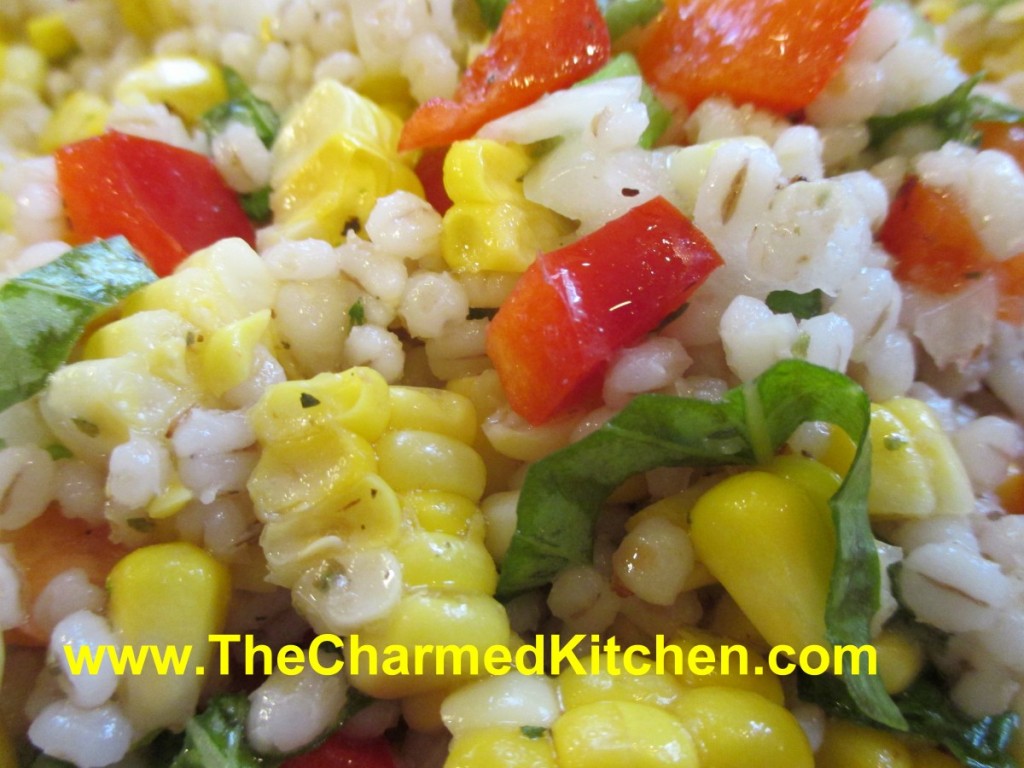
This colorful salad can be a side dish or main dish. I like it as a main dish for hot summer days. It somehow manages to be light and filling at the same time. It makes a wonderful lunch, served over a bed of salad greens.
The combination of sweet corn and barley works so well together. I don’t think most people think of salad, when they think of barley. Barley is more commonly used in soups. But this versatile grain can also be a nice ingredient in a salad. Perfect on a hot day, when you want a lighter meal.
I had grilled corn, and had some leftover, so that is what I used. I think the smokiness of the grilled corn added a nice touch. I had some fresh basil so I added that, too.
If you are looking for a new salad idea- you might try adding barley to your next salad.
Corn and Barley Salad with Basil
½ c. pearl barley
salt
3 T. cider or white wine vinegar
1 t. Dijon mustard
fresh ground pepper
3 T. olive oil
3 T. fresh basil, cut into thin strips
3 c. cooked corn, from about six ears
1 c. diced sweet onion
1 c. diced sweet pepper, any color
¼ c. sliced green onions
Combine barley, 2 cups water and ½ t. salt in saucepan and simmer, covered until barley is tender, about 50 minutes. Drain and rinse under cold water. Combine remaining ingredients and toss with barley in large bowl. Makes 6 servings.
Fresh Peach Cake

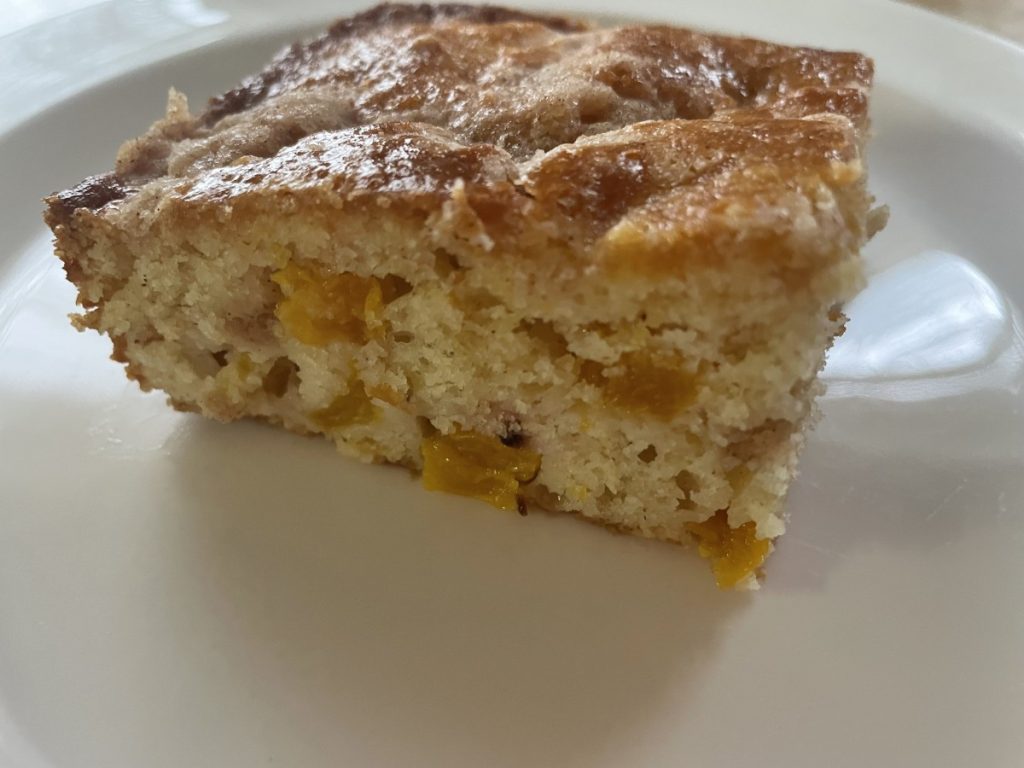
Fresh Peach Cake
If you need a quick dessert or even a nice addition for a brunch this cake is a great choice. It really is so easy to make. It can be served warm, but it’s good at room temp, too. It’s not too sweet, which I like.
This was a new recipe for me. I had tweaked an old recipe that used blueberries. I was very happy with how this worked out. I wanted about 1 1/2 cups of chopped fruit. I had 2 very large peaches and that worked out great. You might need a third or even fourth peach if yours are smaller.
Next, I want to try this recipe with plums!!
Fresh Peach Cake
Batter:
2 c. biscuit mix*
1/2 c. sugar
1/3 c. milk
2 T. oil
1 egg
1 1/2 c. chopped fresh pitted and peeled peaches
Topping:
1/2 stick ( 1/4 cup) cold butter, cut in small cubes
1/4 c. flour
1/4 c. sugar
2 t. cinnamon
Preheat oven to 350. Grease and flour a 9×9-inch pan. Beat all batter ingredients together, except peaches, for about 30 seconds. Fold in fruit and pour into prepared pan. Place topping ingredients in a bowl and mix together with your fingers or a fork until mixture looks like coarse crumbs. Sprinkle on the cake batter in the pan. Bake for about 35 minutes. Cake should be golden brown on top and test clean with a toothpick. Serve warm or at room temp. Great with ice cream or whipped cream.
*Like Bisquick or Jiffy mix. I make my own. Recipe follows.
Biscuit Mix
8 c. flour
1 c. powdered milk
1 c. powdered buttermilk (or 1 more cup powdered milk)
1/4 c. baking powder
1 T. salt
1 1/2 c. shortening*
Combine dry ingredients and cut in shortening until well mixed. Store in tightly covered container. Makes 10 cups.
* You can use butter instead, but keep mix in fridge and use in a couple of months. You can also use coconut oil- also best to keep this version in the fridge.
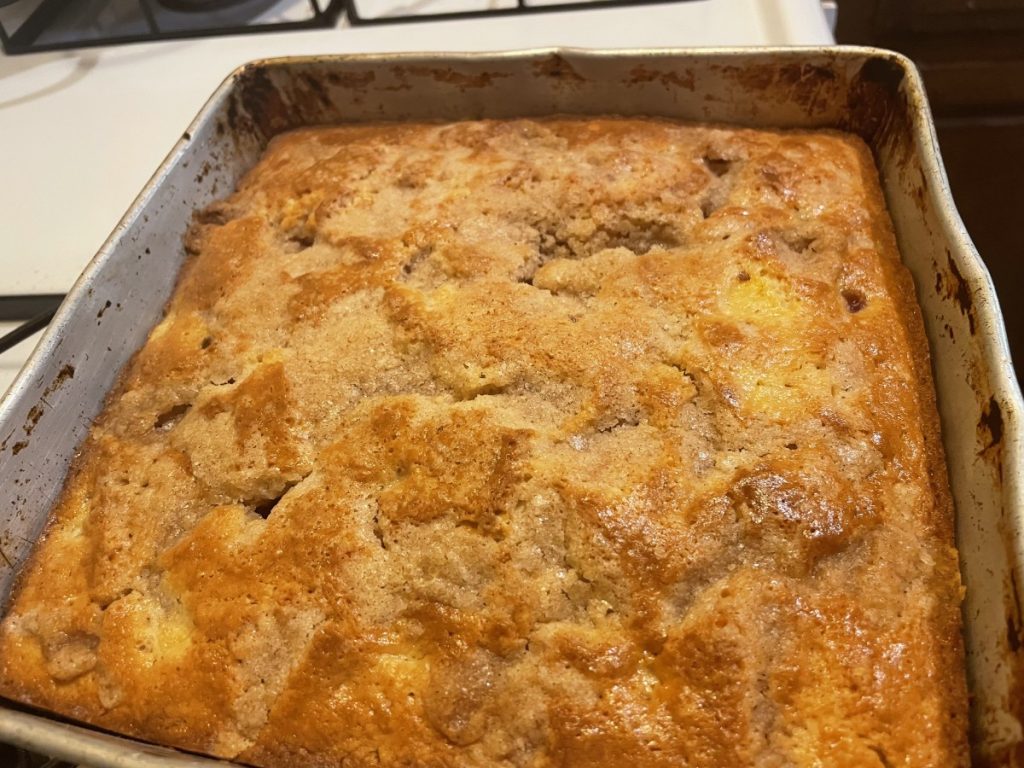
Right out of the oven.
Peach Chef Salad


When you think about cooking with peaches, don’t limit yourself to desserts and jam. Peaches can pair well with savory dishes, too. I often use peaches for glazes and sauces for meats.
In this dish, I paired peaches with traditional chef salad ingredients. I tossed the peaches in a homemade honey French dressing, then spooned them over the salad. The result was wonderful- and a great lunch or dinner option for hot weather.
You can top the salad with cheese, meats or both. I like to add some nuts, too. I topped the salad with sharp cheddar cheese and bacon. I really liked the combination of the sweet fruit with the smoky bacon. Use what you like- and what you have on hand.
A chef salad is a great way to use up leftover grilled chicken or that open package of cheese. Add extra veggies, too, if you like. It also makes a wonderful meal when you don’t want to cook. Lovely, cool meal for a hot day.
Peach Chef Salad
Honey French Dressing:
1/3 c. honey
1/4 c. white wine vinegar or cider vinegar
1 t. paprika
1 t. dry mustard
1/4 t. salt
1/2 c. olive oil
3 cups chopped peaches
Salad:
6 c. torn salad greens
12 oz. cooked chicken, turkey, ham etc, cut into strips
1 c. cubed cheese
1/2 c. cashews, optional
To make the dressing, in blender, combine first five ingredients and start running machine on high. Add oil in a slow stream until mixture becomes thickened. Pour into bowl and stir in peaches and chill, several hours if you can. When ready to serve arrange greens on one large platter or on smaller salad plates. Arrange meat and cheese on platter or plates. Spoon over the peach/dressing mixture, add cashews, then serve. Serves 4-6.
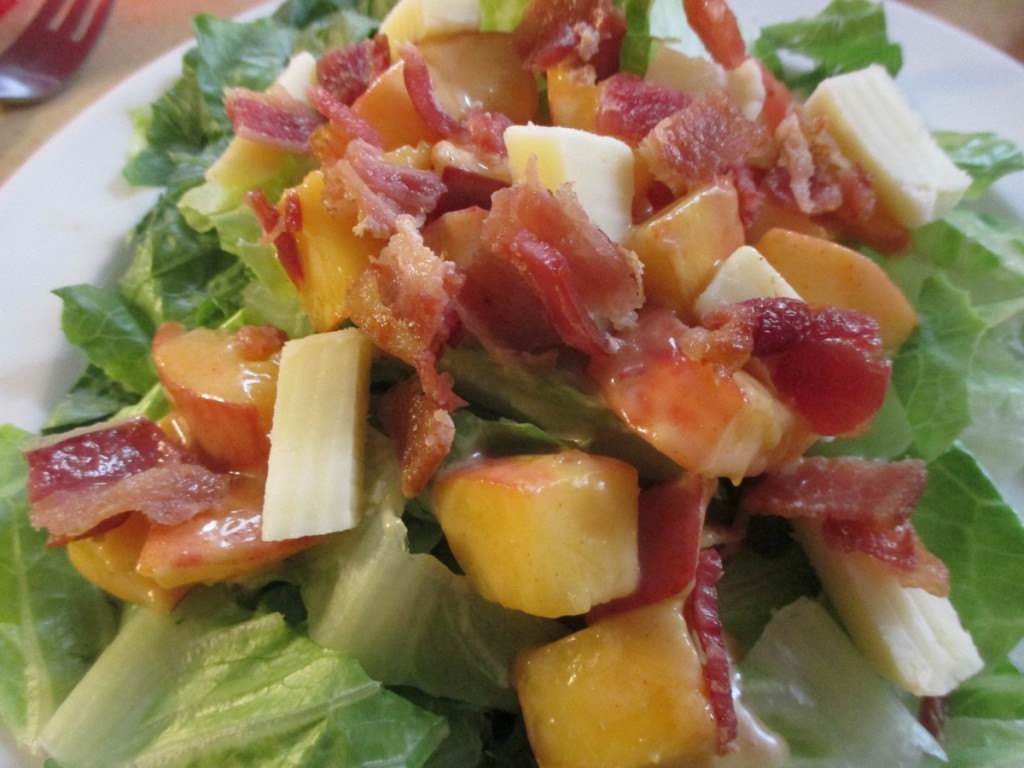
Salad topped with bacon and cheese
Blueberry Pie Filling

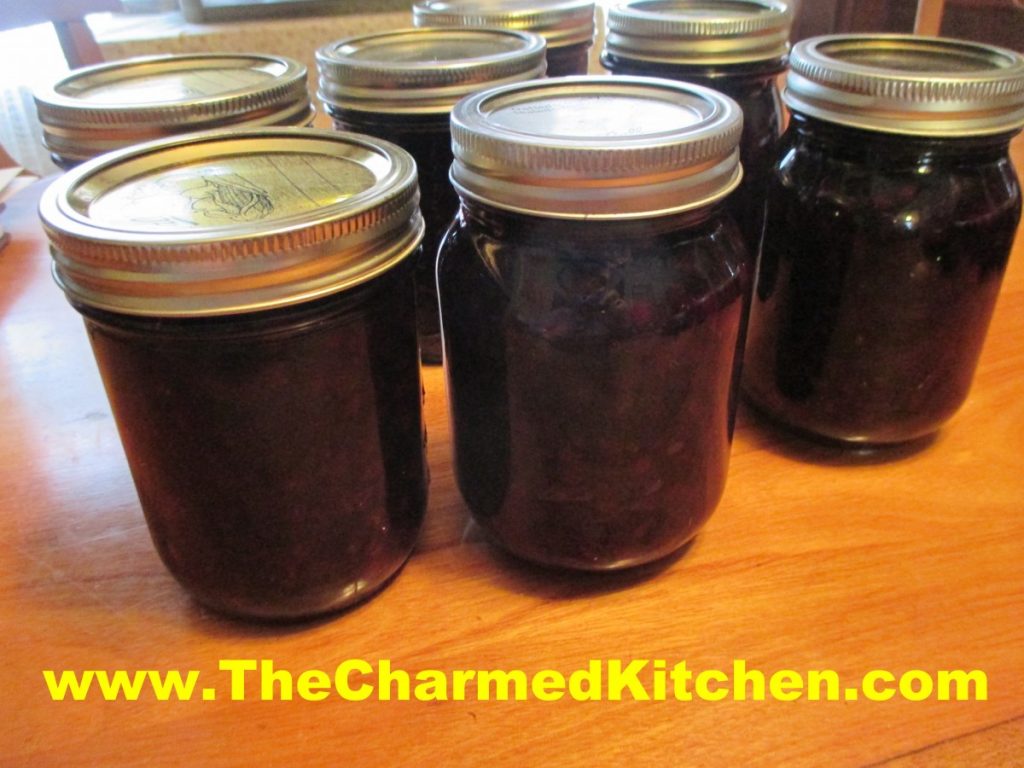
I recently came across a wonderful price on blueberries. Being the thrifty person that I am, I stocked up. I put some in the freezer and placed some in vodka for liqueur. I made cupcakes and syrup, muffins and pancakes. I have been eating plenty of them, too. I decided to use some of them to make pie filling.
There is something very satisfying in making your own pie filling. It is so much better than anything you would find in a can. It is a convenient ingredient to have on hand, too. A good quality pie filling can be turned into any number of desserts in no time- even pie!!
You do need to have Clear Gel ( cook type) to can pie filling. It is modified cornstarch. You can’t use regular cornstarch and you can’t use other thickeners. You could just can the berries, then thicken them later, but the Clear Gel makes it so much more convenient to use. I just order mine online, but it is available in some stores- primarily in Amish communities.
I opted to can my filling in pints. I find that size more convenient for me. Let the jars stay in the canner 5 or 10 minutes after they finish processing. It will reduce siphoning. Some foods, hot in the jars- will leak out of removed from the heat too quickly. Pie fillings are known for issues with siphoning.
Blueberry Pie Filling
6 qts. Blueberries
6 c. sugar
2 1/4 c. Clear Gel, cook type (modified cornstarch, not regular cornstarch)
7 c. water
1/2 c. lemon juice
Wash and drain berries. Boil a large pot of water. Place berries in the water and blanch for 1 minute. Drain berries, cover them with a towel, set aside and keep warm. In large sauce pot combine sugar and Clear Gel. Stir in water and cook on high heat until mixtures bubbles and thickens. It is going to be really thick- don’t panic, just keep stirring so it won’t stick. Add lemon juice and boil 1 minute, stirring constantly. Fold in berries and ladle in hot, clean canning jars immediately. Leave 1/2 -inch headspace and remove any air bubbles with a knife. Wipe rims clean and put on lids. Place jars in boiling water bath and process for 30 minutes. Start timing when water returns to the boil. Turn off heat and let jars sit in the water bath 5-10 minutes before removing to counter to cool. Cool jars on counter on rack or towel, free from drafts. Check seals next day. Remove rings and wipe down jars with a soft, damp cloth before storing. Makes 14 pints or 7 quarts.
Source NCHFP
Fresh Tomato Salads

Tomato season is too short around here. I can never get enough of what my mom called “real tomatoes”. The first few tomatoes never made it in the house. Warm from the sun, they were too tempting. We would pick them right off the plant and eat them. Deer have made it pretty impossible for me to grow tomatoes right now. Luckily, local farm markets have many beautiful tomatoes.
I am enjoying eating fresh tomatoes right now. Later in the season, I will purchase enough tomatoes to can and dehydrate to enjoy once the season is over.
I thought I would share a few of my favorite tomato salad recipes with you.
They are pretty simple. I think that is how it should be. When you have something as close to perfection as a ripe tomato, little more is needed.
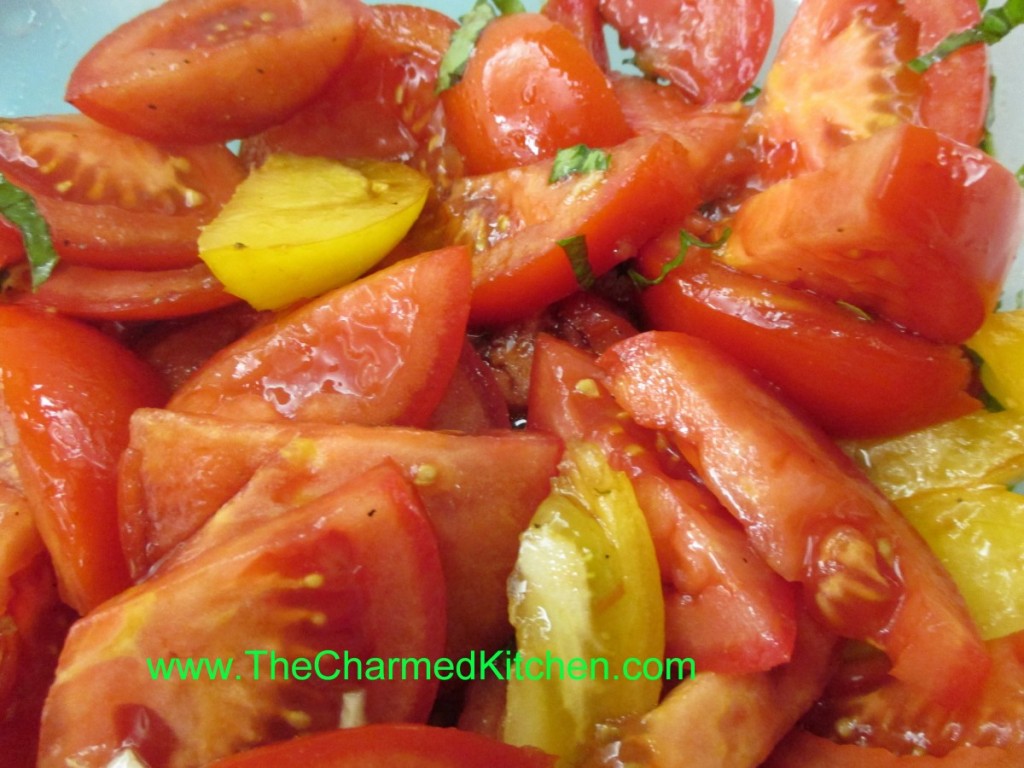
Marinated Tomato Salad
3 large tomatoes, cut in wedges, or 2 pints cherry tomatoes, halved
1 T. olive oil
1 clove garlic, minced
2-3 basil leaves, cut into thin strips
2 T. balsamic vinegar
salt and pepper to taste
Combine ingredients and serve at room temperature. Serves 4-6.
Tomato and Feta Salad
3 tablespoons crumbled feta cheese
12 cherry tomatoes, thinly sliced
1/2 sweet onion, diced
1 tablespoon olive oil -I used a lemon infused olive oil
1 tablespoon lemon juice
Salt and pepper to taste
In a bowl, mix the feta cheese, cherry tomatoes, onion, olive oil, and lemon juice. Add salt and pepper to taste. Serve immediately. Serves 2.
Warm Pasta Salad
1 lb. Plum tomatoes, chopped
1 medium sweet onion, chopped
4 oz. Fresh mushrooms, sliced
2 cloves garlic, minced
¼ c. fresh parsley, chopped
1 T. dried basil or 1/4 c. chopped fresh basil
1 T. capers, optional
1 t. dried oregano
½ c. olive oil
¼ c. red wine vinegar
3 T. balsamic vinegar
Dash of hot red pepper flakes
Salt to taste
1 lb. Uncooked pasta
Combine all ingredients, except pasta and chill overnight. Cook pasta, drain and toss with tomato mixture. Mixture should be served right away . Serves 6.
BLT Salad
6-8 slices bacon
2 slices rye bread
2 slices Swiss cheese
5 c. torn up lettuce or mixed greens
3 T. olive oil
2 T. apple cider vinegar
1 T. balsamic vinegar
Salt and fresh ground pepper
2-3 tomatoes, diced
Cook bacon until crisp. Remove from pan, drain and crumble. Remove most of the bacon grease from the pan. Make a sandwich with the rye bread and the Swiss cheese. Toast in the skillet over medium heat until golden brown and cheese is melted. Set aside. Place lettuce in bowl and toss with the oil to coat the leaves. Toss with the vinegars and season with salt and pepper to taste. Add the tomatoes and the bacon and toss. Cut the sandwich into cubes and place on the top of the salad. Serves 2.
Note: you can make two sandwiches if you want more bread and cheese in the salad.
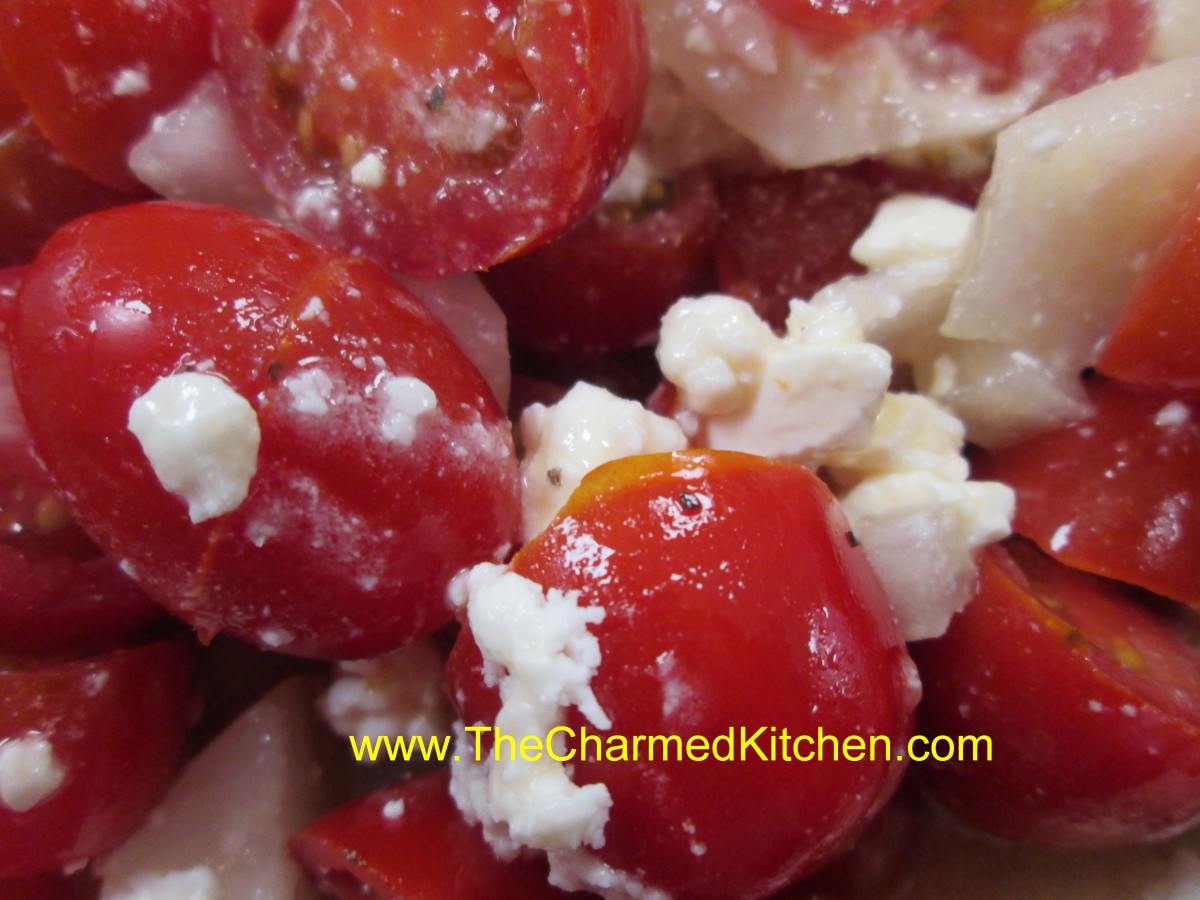
Tomato Feta Salad
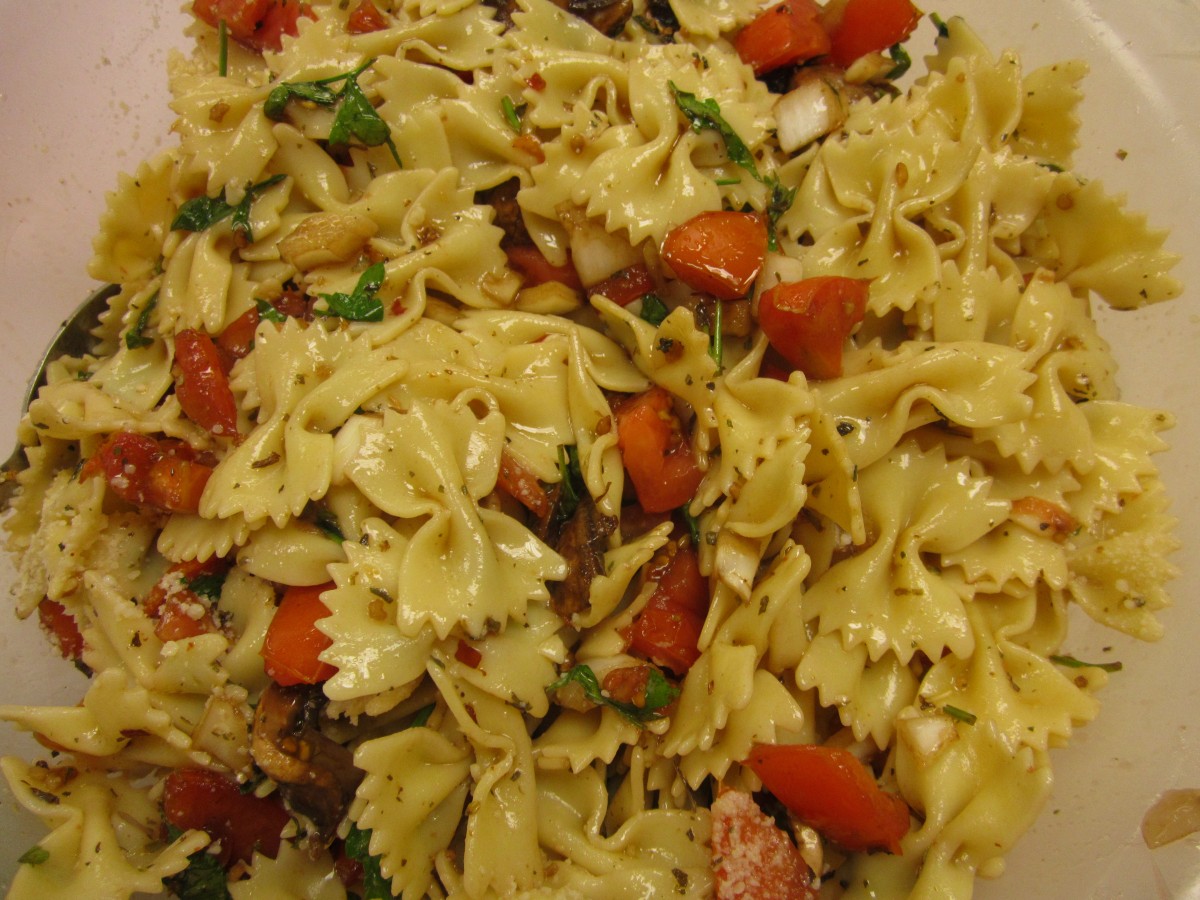
Warm Pasta Salad

Cherry Crumb Cake

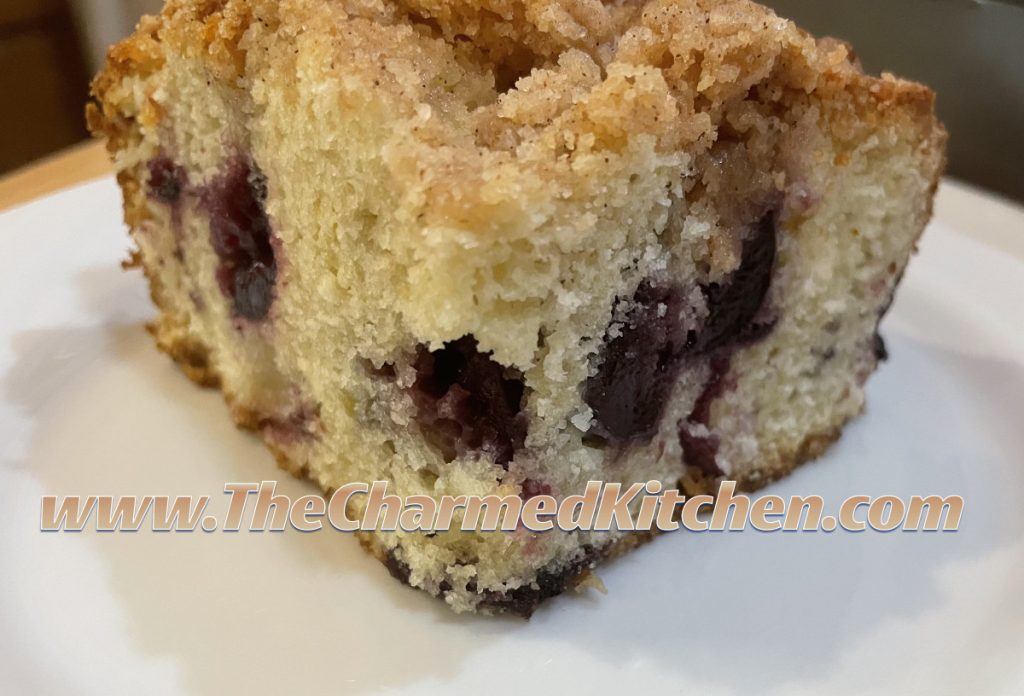
I was experimenting with a new cake recipe this week. I wanted to use some fresh cherries in a cake and I ended up deciding to make a cherry crumb cake. I already had a recipe for a blueberry crumb cake. I changed the recipe a little and I really like the way it came out. I added an extra egg to the original recipe. Not because of some intuitive idea of how to improve the recipe. I just thought it had two eggs in it to begin with. Turns out I prefer the recipe with the extra egg.
So here is the cherry crumb cake recipe. I loved it and think you will, too. I used sweet cherries, because that is what I had. Sour cherries would also work well in this cake.
Cherry Crumb Cake
For cake batter:
2 c. flour
2 t. baking powder
½ t. salt
½ stick (¼ cup) butter, softened
¾ c. sugar
2 eggs
½ c. milk
2 c. pitted cherries, coarsely chopped
For topping:
½ c. sugar
¼ c. flour
½ t. cinnamon
½ stick (¼ c. butter, chilled and cut into bits)
Combine dry ingredients and set aside. In mixing bowl with electric mixer, beat butter and sugar until light and fluffy. Beat in egg and milk. Add flour mixture gradually until just mixed in. Fold in cherries. Grease and flour an 8 or 9-inch pan and add prepared batter. Combine topping ingredients until they resemble coarse crumbs. Sprinkle over batter in pan and bake in a preheated 375-degree oven and bake for 35-45 minutes. Use toothpick to test.
Versatile Bean Dip


We made bean dip in cooking camp a couple of weeks ago. The kids were not sure they would like it. Once they tasted it, they ate it all. I just served it with corn chips.
If you only use bean dip as an appetizer you are really missing out. Bean dip is often served with chips and veggies and it is always a hit. But, it can be used for a lot more than that.
Certainly in other Tex-Mex dishes like burritos or enchiladas. I like to spread it on fresh tortillas and top with cheese, chopped peppers, onions and olives- then bake until hot and cheese has melted. Bean dip can also be spread inside pita bread and then the bread filled with sprouts or sliced veggies for a quick sandwich. You can also add the bean dip to hot cooked veggies like corn, green beans, or carrots, in place of, or in addition to, the butter. It also can be added to stir-fries for extra flavor or to soup as a thickener. I sometimes add it to chili, too. I often make a big batch and freeze some for later use.
I have a couple of recipes for bean dip, so I included them both. A friend requested a version without the tomatoes ( salsa).
Bean Dip
2 cans kidney beans, drained and rinsed – you can use other beans
1 c. salsa, store bought or homemade
¼ c. olive oil
2 T. cider vinegar
2 t. chili powder
1 t. cumin
Healthy dash of hot sauce
Salt and pepper to taste
In food processor blend all ingredients until smooth. I usually start the beans first for 30 seconds or so and then add everything else. If you want it thinner you can add some extra oil. Makes 3 cups. Freezes well.
Bean Dip Recipe#2
Creamy Bean Dip
2 c. cooked beans (pinto, black or kidney preferred)
1 c. cottage cheese
2 T. sour cream
salt and pepper sauce to taste
1 t. each chili powder and cumin
1/2 t. each paprika and oregano
Combine all ingredients in a blender or processor until smooth. Adjust seasonings. Chill. Serve with taco chips or fresh veggies. Makes 3 cups.
Note: You can also spread on tortillas and top with salsa, cheese, peppers and olives for Mexican pizza. Just heat and eat.
Giant Fruit-Filled Pie Tart


We made these in camp a couple of weeks ago and the kids loved them. They are fun and easy to make, especially if you use pre-made pie crusts. Homemade crusts are great, but sometimes time is a factor.
They should remind you of the ubiquitous square toaster pastries of our childhoods. Only round and much bigger. We used homemade strawberry jam and the kids decorated them when finished. They came out so cute and they were fun to make, serve and eat. These are great for parties.
Giant Fruit- Filled Pie Tart
2 prepared pie crusts – store bought or homemade
1-1½ cups fruit jam, preserves or pie filling
1 egg
2 c. Powdered sugar
milk or lemon juice
non pareils or sprinkles
Preheat oven to 375. Roll out one pie crust on baking sheet. Spread jam over the surface, leaving a one-inch border. Moisten the edge with a little water. Place second pie crust on the jam covered crust. Use a fork all around the edges to seal the tart. Combine egg with a little water then brush over the crust. Pierce crust all over with a fork. Bake for 15-20 minutes, or until golden brown. Make a frosting with the powdered sugar and milk or lemon juice, Tint with food coloring, if you like. Pour the frosting over the tart. Add sprinkles. Serve by cutting into wedges, like pie. Serves 8.
Before decorating

Decorated “pop tart”
Cauliflower and Broccoli Salad


I make broccoli salad pretty often, but sometimes like to switch it up a little by adding cauliflower. The result is a salad that has a great mixed of flavors, colors and textures. The addition of bacon also adds a wonderful smoky flavor. Certainly, feel free to omit the bacon for a vegetarian salad. With or without the bacon, this is a great salad for the warmer days ahead.
Cauliflower and Broccoli Salad
1 small head cauliflower, trimmed and broken into bite- sized pieces
2 broccoli crowns, cut into bite- sized pieces
1 sweet pepper, seeded and chopped
1 c. shredded cheese- I used a sharp cheddar
8- 10 slices of bacon, cooked and chopped
1/2 cup of mayo – or more according to your taste
salt and pepper to taste
Steam the cauliflower and broccoli until just tender/crisp. About 5 minutes in a microwave steamer, 6 minutes in a conventional steamer. Place in a bowl to cool down then combine with remaining ingredients and stir to combine well. Adjust seasonings, if needed. Serves 6-8.


