Chicken Pot Pie Soup


Chicken Pot Pie Soup
I have to thank my friend, Vicky Singleton, for the inspiration of this recipe. I had shared a soup recipe a couple of weeks ago. She asked if I had ever made chicken pot pie soup. I hadn’t. I told her I hadn’t ever heard of it. She explained to me what it was.
So what exactly is Chicken Pot Pie Soup? Imagine the ingredients of a pot pie, only in a soup. Then imagine using baked pie crust like croutons on the soup. A classic casserole, presented in soup form.
I immediately fell in love with the idea. So I tried my hand at making it last night. The end result was very good. The flavors are just like pot pie and fun to make and serve. Perfect comfort food.
You want this soup to be creamy, like a pot pie filling. How “thickened” is really up to you. I didn’t want my soup to be as thick as a pot pie, but I wanted it thickened, so I played around with the amount of flour I added to it. Half a cup of flour worked perfectly for me, but you can add 1/4 cup more flour if you want a thicker soup.
The vegetable selection has some wiggle room, too. I think green beans would be a nice addition, I just didn’t have any. That is the fun part of making your own version. I think I might add mushrooms to the next batch. There will most definitely be a next batch.
I could see making this soup with leftover turkey after Thanksgiving.
I made my own pie crust, but feel free to use store bought. The recipe for the crust is at the bottom of this post. I used cookie cutters, but you could cut the crust out free-hand into little squares or triangles.
So here is the version of Chicken Pot Pie Soup I came up with. I hope you’ll give it a try. You can thank Vicky.
Chicken Pot Pie Soup
Dough for 2 pie crusts – recipe follows
3 T. oil or butter
1 large onion, chopped
3 medium carrots, peeled and sliced thin
1 c. sliced celery
3 medium potatoes, peeled and cubed
1 c. fresh or frozen corn
3 c. cooked chicken, diced
8 c. chicken stock
1 c. peas, fresh or frozen
½ c. flour
¼ c. fresh chopped parsley- or 1 T. dried
Salt and pepper to taste
The pie dough makes the croutons for the top of the soup. You can use homemade pie crust or store bought. Roll out the crust to about 1/8-inch thick and cut out in pretty shapes to top your soup. Re roll scraps and place all the cut out dough pieces on an ungreased baking sheet. It will take two sheets for all the dough. Bake in a 350 degree until golden, about 7-10 minutes. Remove to a cooling rack.
In a soup pot, heat up the butter or oil and add the onions, cooking until onions are tender. Add the carrots, celery, potatoes, corn and 7 cups of the stock. Set the remaining cup of stock aside for now. Bring to a boil, reduce to a simmer and cook, covered, until the vegetables are tender. Place the reserved stock in a jar with a tight fitting lid. Add the flour, close jar tightly and shake until the mixture is smooth. Add the flour/stock mixture to the soup along with the peas and parsley. Bring to a simmer and cook, covered 5 minutes- or a little longer. Adjust seasonings.
Ladle soup into individual bowls and top with some the pie crust croutons. Serves 6-8.
Flaky Pie Crust
2 c. flour
1 t. salt
3/4 c. butter, chilled – you could also use chilled coconut oil, lard or shortening
1 T. cider vinegar
4-5 T. cold water
Combine flour and salt and cut in shortening. Toss in vinegar and water 1 tablespoon at a time until dough holds together. Use a fork to toss the ingredients together and as soon as the mixture holds together stop adding water. Makes 2. Chill well before using.

Have fun with the shapes of the pie crust
Apple Pie “Blintzes”


Apple Pie Blintzes
Since I posted the recipe for making your own apple pie filling recently, I thought I’d share a fun way to use it- other than in a pie. I made blintzes with the pie filling.
I used flour tortillas for the crepes. Don’t get me wrong, I love making real crepes. But, when you don’t have the time, the tortillas are a fun and tasty substitute.
I soaked the tortillas in milk. By soaking the tortillas in milk, they soften up, and can be used like a crepe. Soak them for at least 10 minutes, or up to 30 minutes. I placed the tortillas in a shallow baking pan and made sure to drizzle each one with milk as I added them to the pan.
For the filling, I used some of my homemade apple pie filling. If you have fresh apples, you can just peel and slice the apples, then cook them in a little water and sugar until softened. You can make them as sweet as you like. You made need less sugar if the apples are extra sweet. Add some cinnamon and nutmeg, too. If they are too watery- combine a little cornstarch with cold water and drizzle the mixture in until the apples thicken up. Don’t add too quickly or you might them too thick and gummy.
To assemble the blintzes, place a softened tortilla on your work surface and spoon a little apple filling in the middle. You can do this with hot filling, but cold or room temperature filling is easier to use. Don’t over fill them or you won’t be able to fold them up. I used 8-inch tortillas and used about 1/4 cup of filling for each one. Fold the sides in until they almost meet in the middle and them roll the tortilla up to cover the filling. Place seam side down until ready to fry them.
Heat butter in a skillet, and brown the blintzes over medium heat until lightly toasted on both sides. They will be crispy on the outside, but tender in the middle. Put on a serving plate, sprinkle with powdered sugar and serve while warm. These are fine just as they are, but feel free to add ice cream or whipped cream, too.
My guests really liked them and said they did not realize they were made from tortillas. I have made these before and use different fruit fillings. I’ve even made a cheese filled version a few times. It seems I usually have a package of tortillas, so it is a go-to dessert for me in a pinch.
Wonton Soup

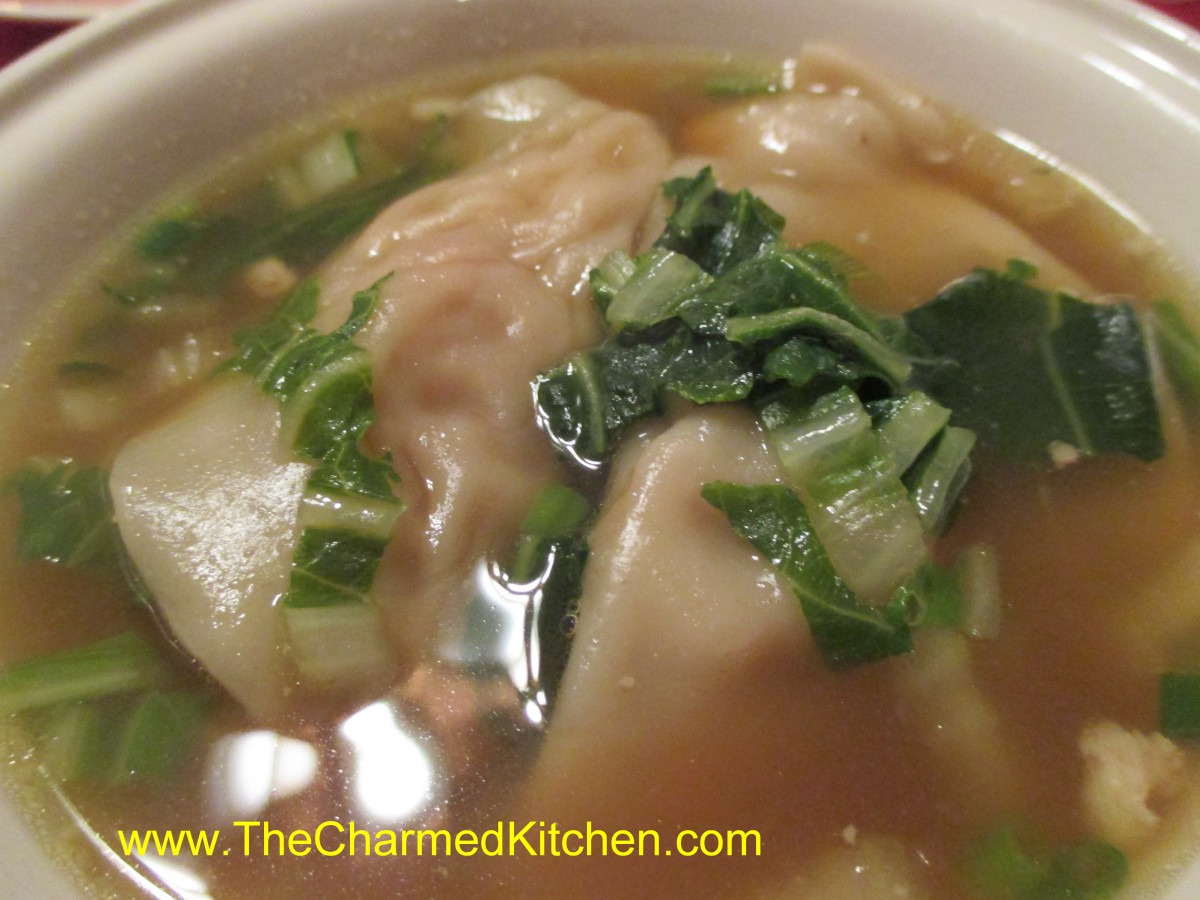
Homemade Wonton Soup
With a chill in the air today, I decided to make wonton soup. It is one of my childhood favorites. Wonton soup is actually not that hard to make, and everyone seems to like it.
For me, Wonton soup always brings back memories of going out for Chinese food with my family, when I was a kid. The restaurant would serve it family style, and my mom or dad would ladle out everyone’s soup. It always looked and smelled wonderful. Tasted wonderful, too. Even more special, because we only had it when we out to dinner.
The one problem I find when trying to make this soup at home is finding wonton wrappers that are thick enough. The square ones I find at the neighborhood grocery store are OK, but thinner than the ones in Wonton Soup at a restaurant. At a local Asian grocery I have found round wrappers that are labelled for dumplings and are thicker. That is what I used. They worked out better. I normally add strips of roast pork to wonton soup, but one of my friends doesn’t eat pork, so the use of chicken thighs was a great substitute. You can play around with fillings, too. I often add shrimp as both a filling and to the soup itself.
Homemade Wonton Soup
1½ lb. chicken
1 head bok choy
3 T. hoisen sauce
1 clove garlic, minced
24 won ton wrappers
2 qts. chicken stock
1 t. ginger
1 t. hot pepper sauce
Chopped green onions
Sesame oil
Bake the chicken until cooked. I used boneless chicken thighs, but even leftover roasted chicken would work. Once cooled, I minced enough of the chicken to give me 1 cup of meat. The rest I cut into thin strips. I then took stems from the bok choy and minced enough of them to make 1 cup. Combine the minced chicken with minced bok choy, the hoisen and the garlic. This is the filling for your wontons. Slice more of the bok choy- using mainly the leaves, into thin shreds. This will go into the soup later, along with the strips of chicken. You should have at least a couple of cups of the shredded bok choy, but more is OK, too. To make the wontons place one on your work surface and spoon a rounded teaspoon of the filling into the middle of it. Moisten edge with water, fold in half and press to seal. I used round wrappers, but square wrappers are fine, too. Repeat with remaining wontons and fillings until done. Bring stock to a boil and add the ginger and hot sauce. Add the wontons to the simmering stock. Simmer gently for 3-4 minutes, stirring occasionally, then add the strips of chicken and the shredded bok choy greens. Cook about 5-6 minutes longer. Finish soup with chopped green onions and a drizzle of sesame oil. Serves 6-8.
Hot or Cold Pink (Beet) Soup

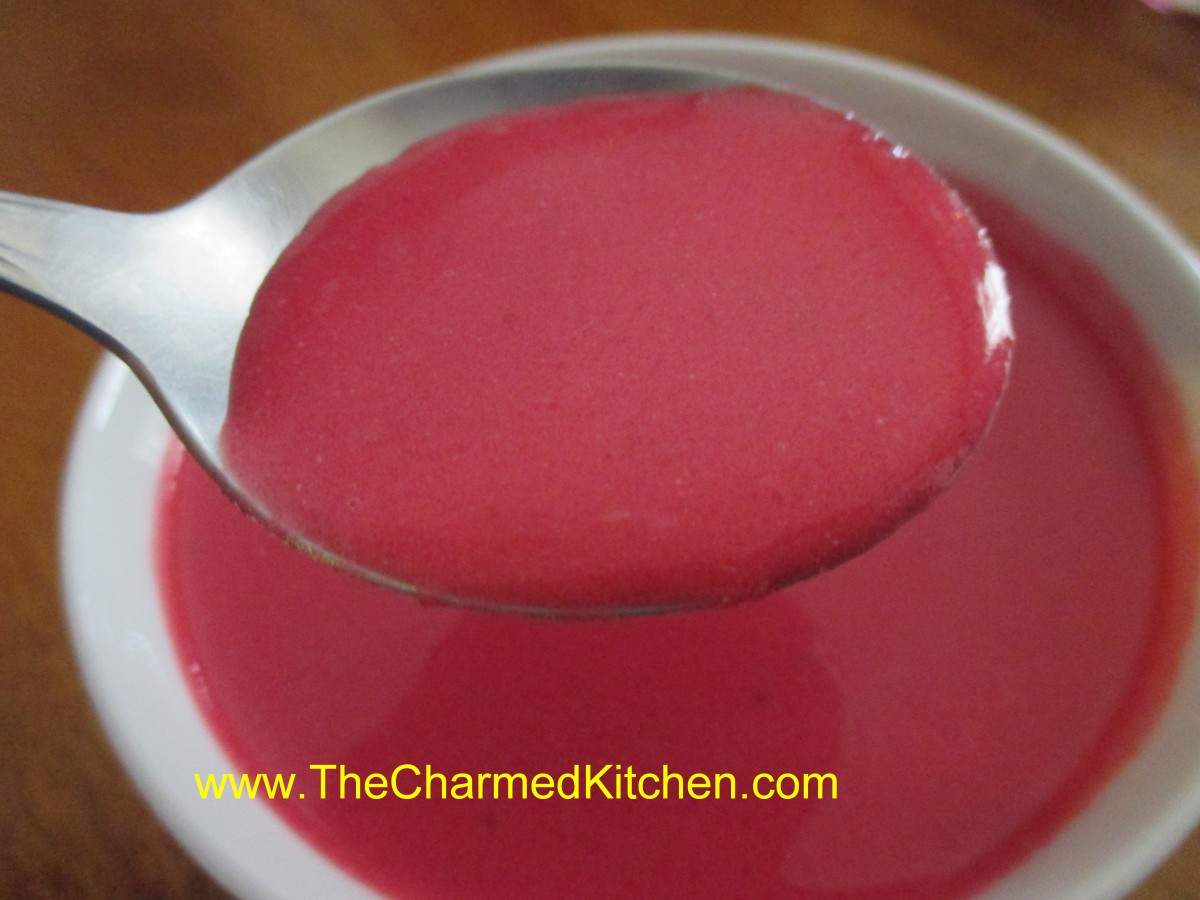
Hot or Cold Beet Soup
Since I have some fresh beets, I decided to make this soup. It was 87 degrees yesterday, so I enjoyed my beet soup chilled. Tomorrow, when it is much cooler, I will warm it up, before eating.
That is one of the nice things about this recipe. This soup is good, what ever temperature you serve it.
It is also a pretty soup. The color is so beautiful. A friend came over and I offered her a bowl. When I set it down in front of her she said, “Wow, this is really pink soup.”
People seem to have strong opinions about beets. They either love them or hate them. I love them and I enjoy them in soups, salads, relishes, casseroles and more. The earthy flavor really appeals to me and the color is a delightful bonus. I added some extra veggies for more flavor and sour cream for a tart, creamy flavor and texture element. The result was a very tasty dish that is also sort of striking to look at.
Hot or Cold Beet Soup
6 or 7 small beets – or 3 large beets
2 T. olive oil
1 large onion, chopped
2 carrots, peeled and chopped
1 rib celery, chopped
3 medium potatoes, peeled and chopped
6 cups stock- I used chicken but vegetable stock or beef stock would also work
2 t. dill weed
salt and pepper to taste
1 c. sour cream- or a little more if you like
Cut beets off of their stems- leaving about 2 inches attached- this will reduce bleeding and retain more color in the beets. Place beets in a pot of water deep enough to cover them and cook until the beets are just getting tender, about 20 minutes – longer for larger beets. Remove and place in cold water. Once the beets are cool enough to handle trim off the stems and slip off the skins. Cut the beets into chunks and set aside. In soup pot heat the oil and cook the onion until tender. Add the carrots and beets and cook a few minutes longer. Add the rest of the vegetables, stock, dill and simmer, covered, until vegetables are very tender. This will take at least 30 minutes- but cooking longer is better- around an hour. Puree the soup. To add the sour cream place sour cream in a bowl and add a ladle full of the hot soup to the sour cream, whisking until smooth. Add another ladle or two of the soup and whisk again. Return sour cream mixture to the soup. By warming the sour cream gently you prevent it curdling. Adjust seasonings and serve right away, or refrigerate and serve cold. Serves 6-8. Freezes well.
Apple Pie Filling

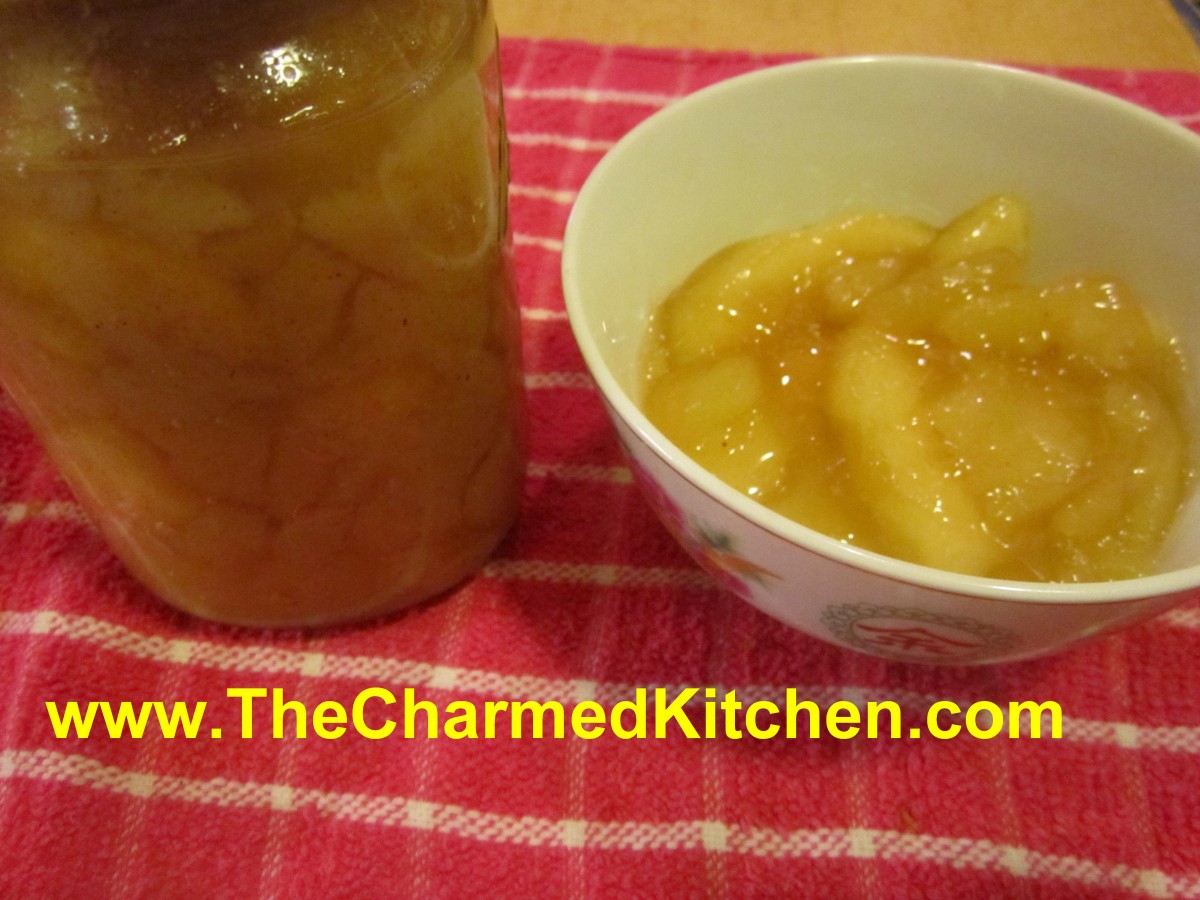
Apple Pie Filling
While I think the best pie is made with fresh apples, I also like making and canning my own apple pie filling. It is a handy way for me to enjoy local apples throughout the year. It is also a whole lot better than any commercial pie filling I have tried. Loaded with plenty of big chunks of apples and seasoned with cinnamon and nutmeg- I think it the next best thing to fresh apples for baking.
I am picking up a couple of bushels of apples this weekend, so I know I will be using some of them to make pie filling.
I use my canned filling to make pies, but I also use it for kolachy, blintzes, cakes and more.
The hard part, for some, is getting a hold of Clear Gel. It is a special type of cornstarch. I buy mine on line, but you can find it in stores where the Amish shop. Clear Gel stays thick, even if it is reheated. Regular cornstarch will not.
Here is the recipe I use. You can tweak the seasonings to suit your own taste, but keep in mind that spices sometimes get stronger when canned, so don’t go too crazy!!
Apple Pie Filling
6 qts. apples, sliced and blanched
5 1/2 c. sugar
1 1/2 c. Clear Gel- modified cornstarch available on line and in Amish stores
1 T. cinnamon
1 t. nutmeg
2 1/2 c. cold water
5 c. apple juice
3/4 c. lemon juice
If apples lack tartness use an additional 1/4 cup of lemon juice. Wash, peel and core apples and cut into 1/2 thick slices. Place in water treated with either lemon juice, citric acid or ascorbic acid to prevent darkening. Remove from solution and drain well. Blanch in boiling water- 2 quarts at a time- for 1 minute. As you finish each batch place in a bowl and cover to keep warm. In large pot combine sugar, Clear Gel, cinnamon, nutmeg, water and apple juice. Stir over medium heat until mixture begins to bubble and thicken. Add lemon juice and boil 1 minute. Add drained apples and stir gently to combine. Ladle into hot, clean jars leaving 1 1/2 inches of headspace. Remove air bubbles. Wipe rims and adjust lids. Process in a boiling water bath- pints or quarts for 25 minutes. After the time is up, turn off canner and let jars sit in water bath for 5 minutes before removing. This will reduce the chance of siphoning. Makes 7 quarts or 14 pints.
For only 1 quart
3 1/2 c.apples
3/4 plus 2 T. sugar
1/4 c. Clear Gel
1/2 t. cinnamon
1/8 t. nutmeg
1/2 c. cold water
3/4 c. apple juice
2 T. lemon juice
Apple Fritters


Apple Fritters
I love apple season. Besides eating them fresh, I enjoy cooking with fresh apples. One of my favorite apple dishes is apple fritters.
Fritters are similar to doughnuts. Rather than being made from a dough that is rolled and cut, like doughnuts, fritters are made from a batter. The fritter batter is spooned into oil for frying. They are actually very easy to make.
Good fritters are light and airy inside, with a crisp outside.
These are very good fritters. These fritters have diced apples and cinnamon in the batter and cook up tender and light.
You could play around by adding other fruits, like pears, peaches or even berries. They are good plain, but can be rolled in powdered sugar, cinnamon sugar or drizzled with a powdered sugar glaze.
So enjoy one of the best recipes of the season, and make yourself some fritters.
Apple Fritters
2 c. flour
2 T. sugar
2 T. baking powder
1 T. cinnamon
1/2 t. salt
1 c. milk
2 eggs, beaten
2 T. melted butter
1 c. diced apples
oil for frying- I used coconut oil
Combine dry ingredients and set aside. Mix together milk with the eggs and butter. Stir in dry ingredients until just moistened and add the apples. Heat oil to 375. If using gluten free flour heat oil to 350. Drop dough by tablespoonfuls into the hot oil and fry until golden brown. Don’t do more than 4-5 at a time. It will take about 4 minutes in total but you need to turn them to brown evenly so 2 minute per side. Drain on paper towels. While warm roll in powdered sugar, cinnamon sugar or drizzle with a powdered sugar glaze. Makes about 32.
Mediterranean Pasta with Greens

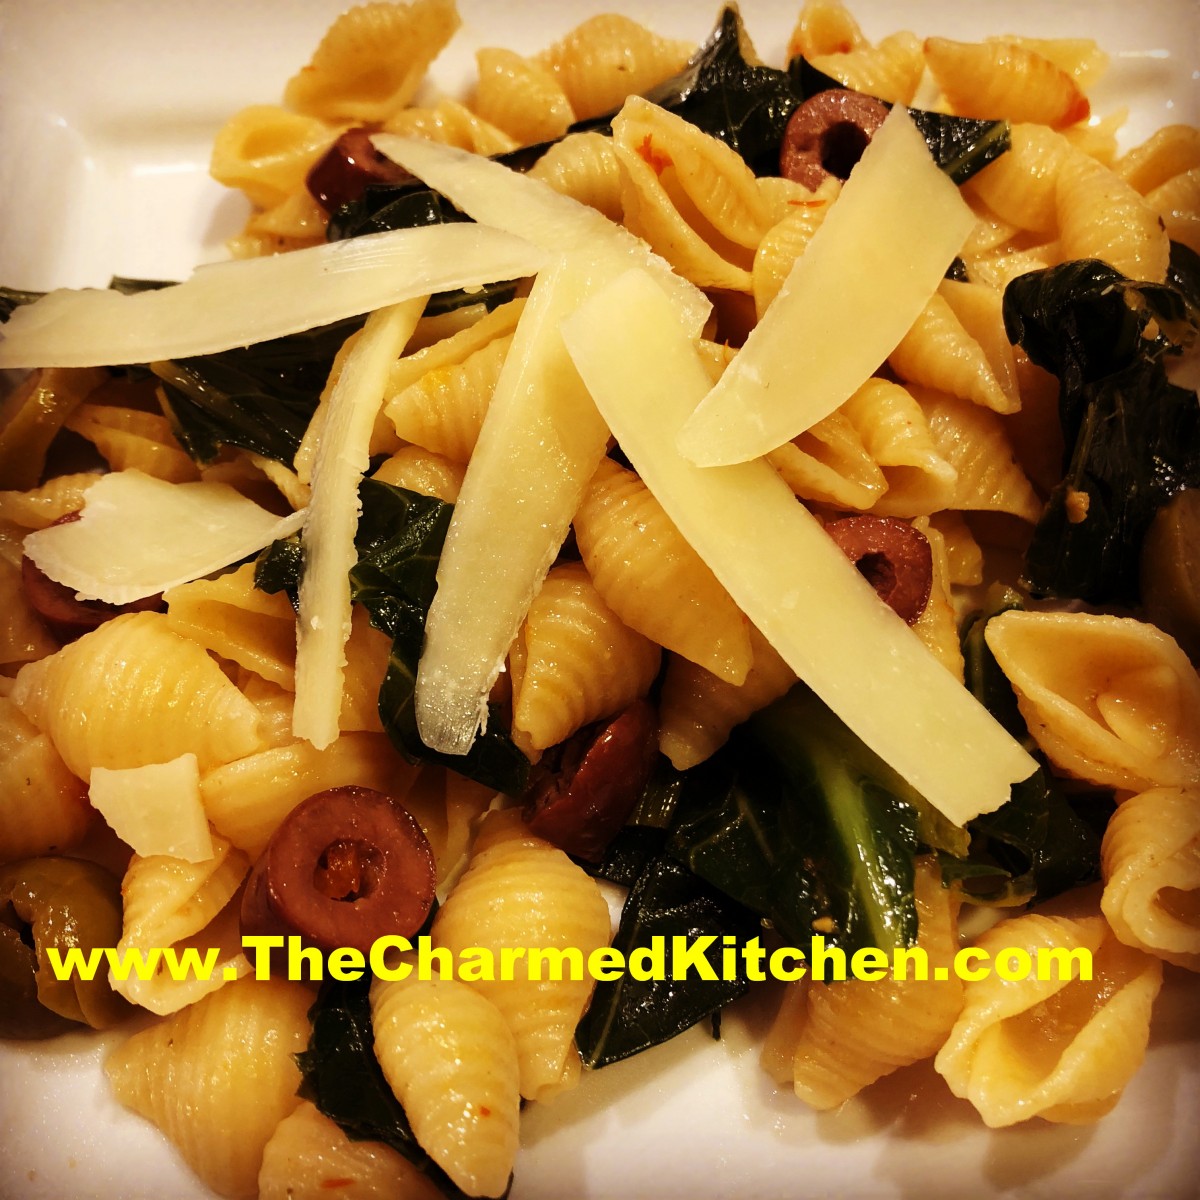
Mediterranean Pasta with Greens
Since I am still harvesting greens from my garden, I decided to use some for dinner last night. This recipe is easy to make, and full of wonderful flavors. The fresh cooked pasta is combined with greens, sun-dried tomatoes, olives, onion and cheese. The combination is wonderful.
You could use any number of greens in this recipe. I used collards because that is what I had. Chard or kale would work well. Spinach, too.
While the pasta is cooking, I start prepping the rest of the ingredients. This dish comes together in no time.
Feel free to play around with this dish a little. I could see adding toasted nuts to it, or maybe a protein like chicken breast or prosciutto. Here is the recipe. Enjoy!!
Mediterranean Pasta with Greens
1 (16 ounce) package uncooked pasta
1 bunch Swiss chard, kale or collards, stems removed
2 tablespoons olive oil
1 medium onion, chopped
1/2 cup oil-packed sun-dried tomatoes, chopped
1/2 cup pitted, sliced black or kalamata olives
1/2 cup pitted, sliced green olives
1 clove garlic, minced
salt and pepper to taste
1/4 cup fresh grated Parmesan, Romano or Asiago cheese
Bring a large pot of lightly salted water to a boil. Stir in pasta, cook for 10 to 12 minutes, until al dente, and drain. Place greens in a microwave safe bowl. Fill bowl about 1/2 full with water. Cook on high in the microwave 5 minutes, until limp; drain. You can also steam the greens on top of the stove. If cooking collards, give them an extra couple of minutes. Heat the oil in a skillet over medium heat. Saute the onion until tender. Stir in the sun-dried tomatoes, kalamata olives, green olives, and garlic. Mix in the greens. Cook and stir until tender. Toss with pasta and adjust seasonings. The olives are pretty salty, so you might not need additional salt. Sprinkle with cheese and serve. Serves 8
Spiced Parsnip Cupcakes


Spiced Parsnip Cupcakes
If you only use parsnips in savory dishes (or maybe you never use parsnips at all), you might be surprised to see them used in a dessert.
Truth is, parsnips are similar in flavor to carrots and carrots are used in cake quite successfully. While not exactly the same in flavor, think of parsnips as white carrots.
Combined in a spiced batter, they make wonderful cupcakes. Good any time of the year, they seem especially nice for an Autumn dessert.
I have company coming for dinner later. I had some parsnips, so I decided to make cupcakes for our dessert.
Spiced Parsnip Cupcakes
1 1/2 c. flour
1 c. sugar
1 T. ground ginger
1 T. cinnamon
2 t. baking powder
1 t. nutmeg
1 t. allspice
1 t. salt
1/2 t. cloves
3 eggs
1/2 c. oil
1/2 c. milk or half and half
2 t. vanilla
2 c. packed peeled and shredded fresh parsnips, 2-3 large
1/2 c. chopped nuts, optional plus extra for topping, optional
1 recipe cream cheese frosting- see below
Preheat oven to 350. Line 24 cupcake pans with paper liners- or grease lightly. Combine dry ingredients in a mixing bowl. In smaller bowl combine eggs, oil, milk and vanilla and mix well. Stir egg mixture into flour mixture until smooth. Stir in parsnips and nuts, if adding. Spoon batter into the prepared pans, filling half-full. Bake for 15 minutes – or until toothpick inserted into a cupcake comes out clean. Cool and frost. Sprinkle with fine chopped nuts, if you like. Makes 24.
Cream Cheese Frosting
8 oz. cream cheese, softened
4 0z. (1 stick) butter, softened
1 c. powdered sugar
1 t. vanilla
Beat all ingredients together until fluffy. Frost cupcakes and chill until ready to eat.
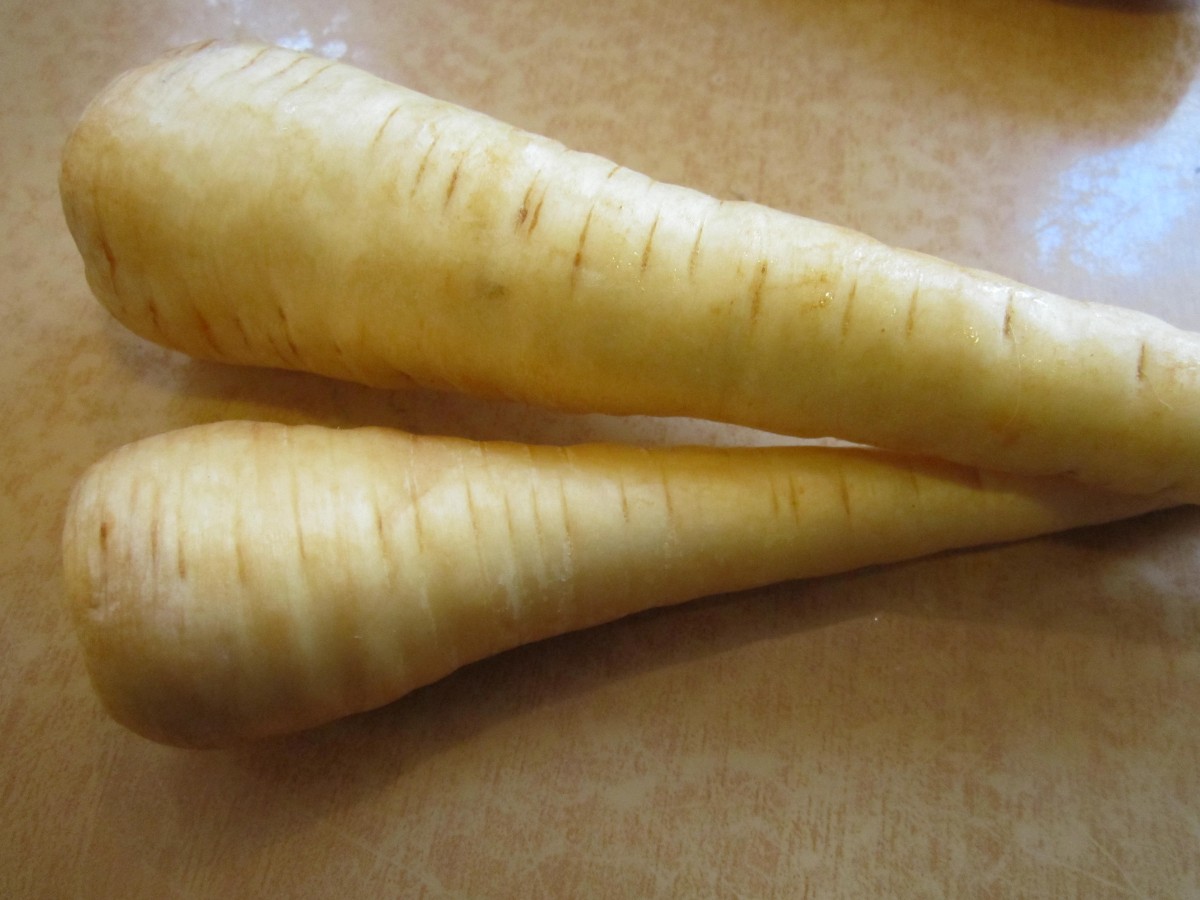
Parsnips
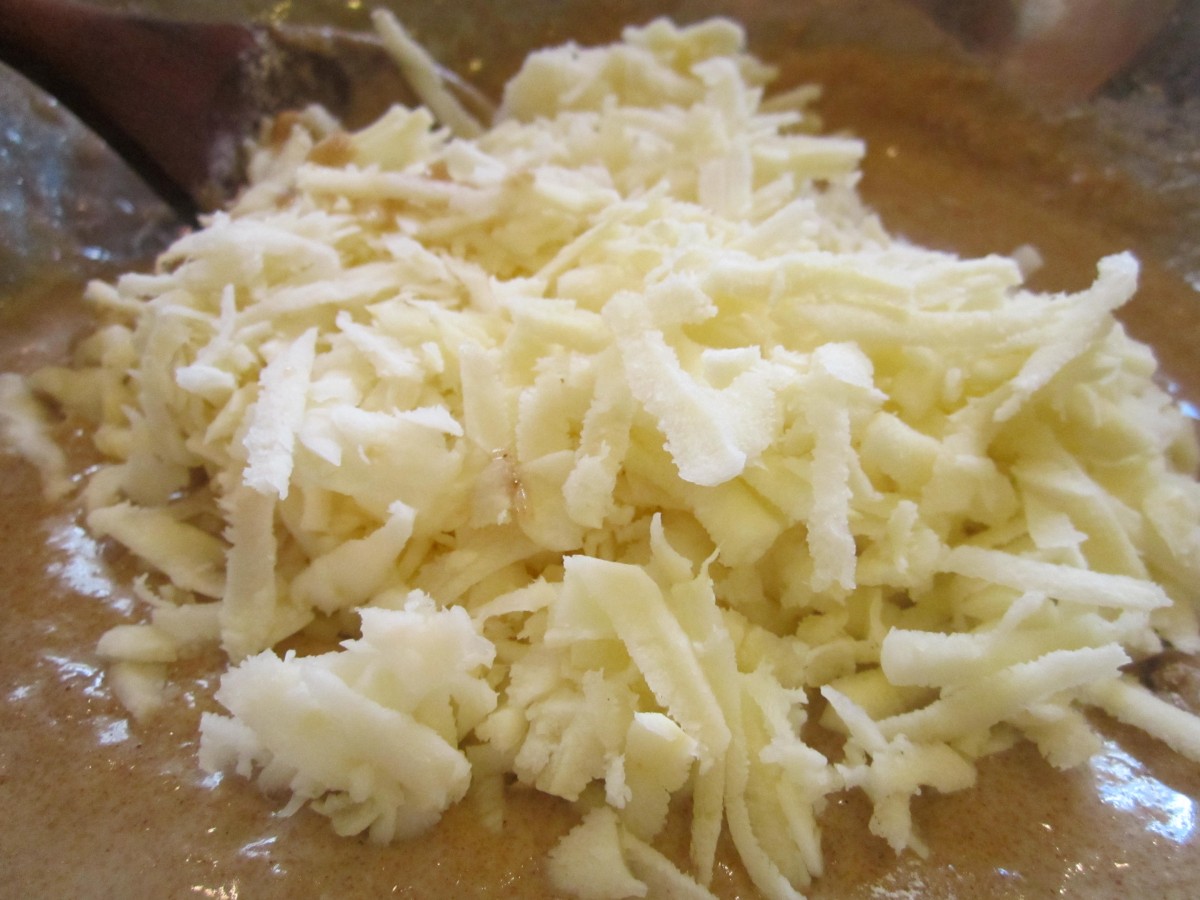
Shredded parsnips
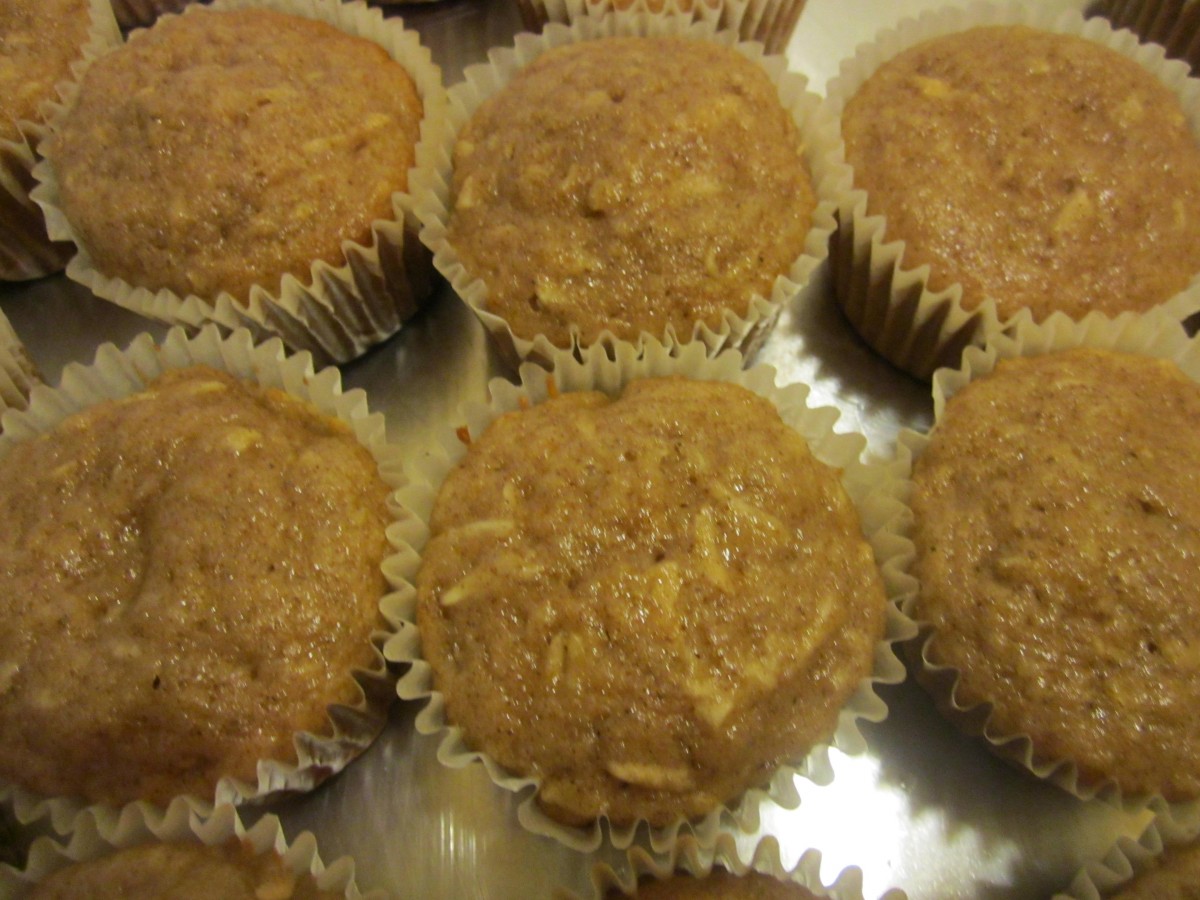
Fresh out of the oven
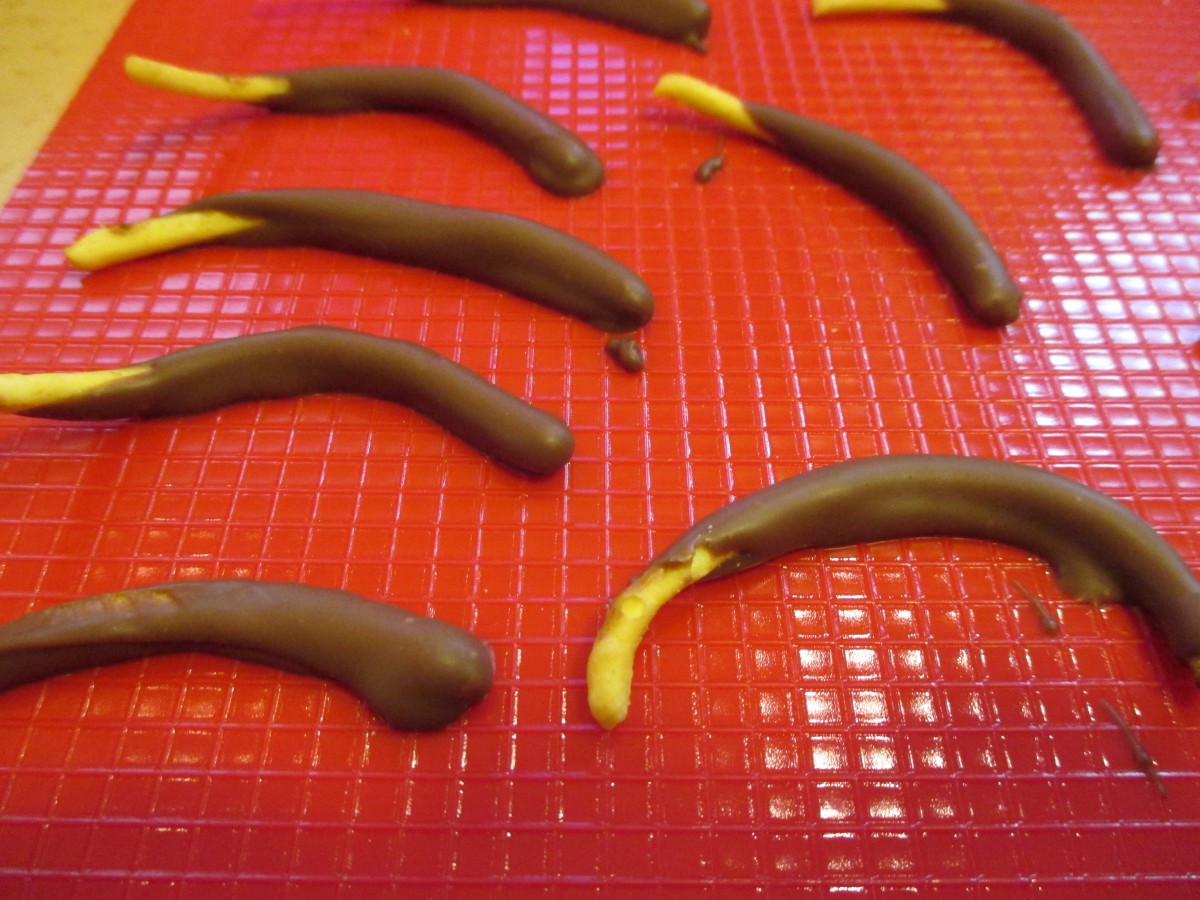
Halloween Candy Spiders

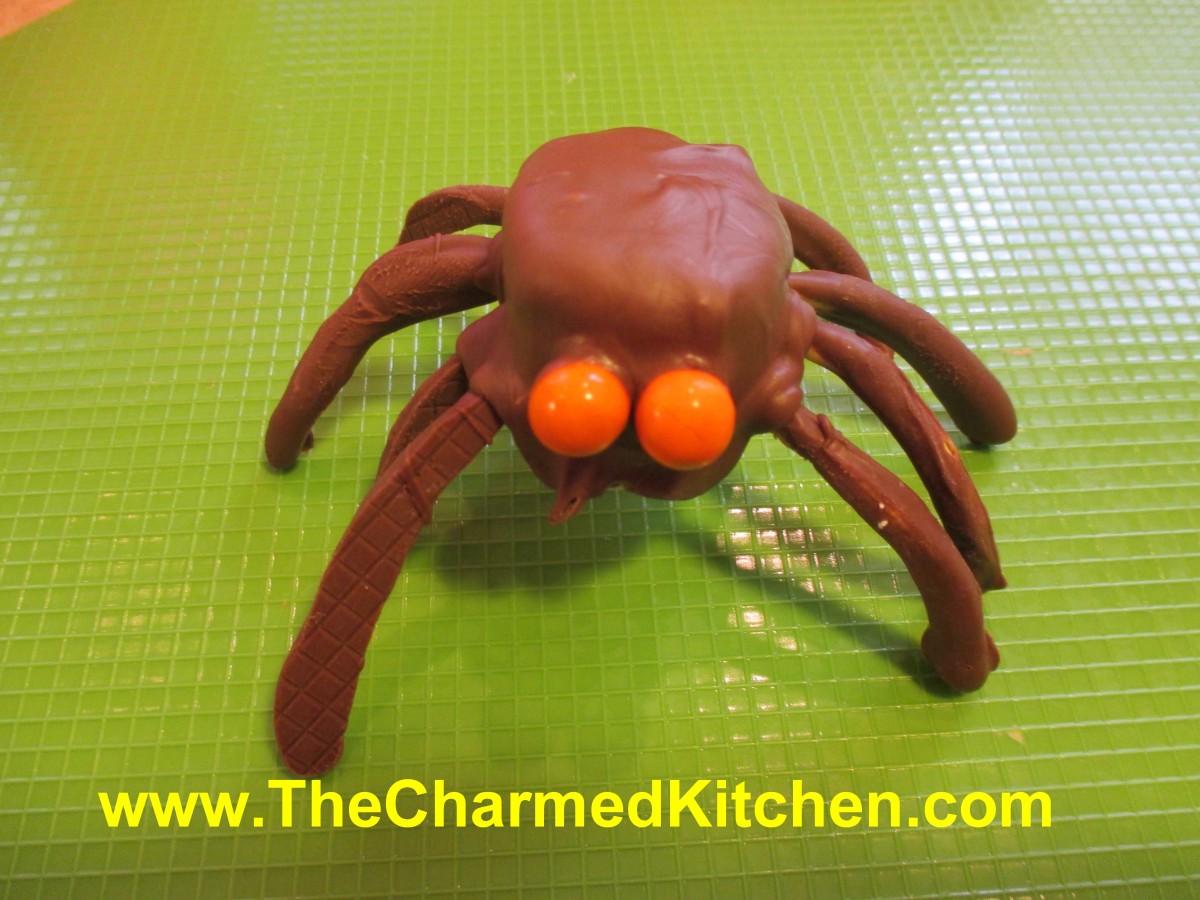
Candy Spider
This is the only kind of spider I want in my house. If you are looking for a quick spooky decoration/treat idea, you might want to make some candy spiders. These are about the size of a tarantula. Super simple, and kids can make them, too. You only need a few ingredients.
The body is made from marshmallows, the legs are chow mein noodles and the eyes are small candies. I used melting chocolate, but you can use any kind of chocolate you like.
To start, melt some chocolate. Dip the chow mein noodles in the chocolate and tap gently to remove excess. I leave one end un-dipped to make it easier to stick in the marshmallow later. Allow to harden up before going to the next step. I set them on a flexible cutting board, but wax paper is good, too. You have to peel them off later, a flexible surface is best. You’ll need 8 for each spider- so be sure to make enough. Allow for breakage. Set a marshmallow flat side down and poke 4 holes in each side, 8 total. I used a bamboo skewer. Stick a noodle “leg” in each hole. Spoon chocolate over the marshmallow until coated. Whatever drips off can be re-melted and used again. While the chocolate is still soft, press 2 candy eyes into place. Hold them for a minute to be sure they are secure. Now, you can decorate cakes with them, use them on a dessert tray- or just eat them.
Chow mein noodle legs

Insert legs into marshmallow
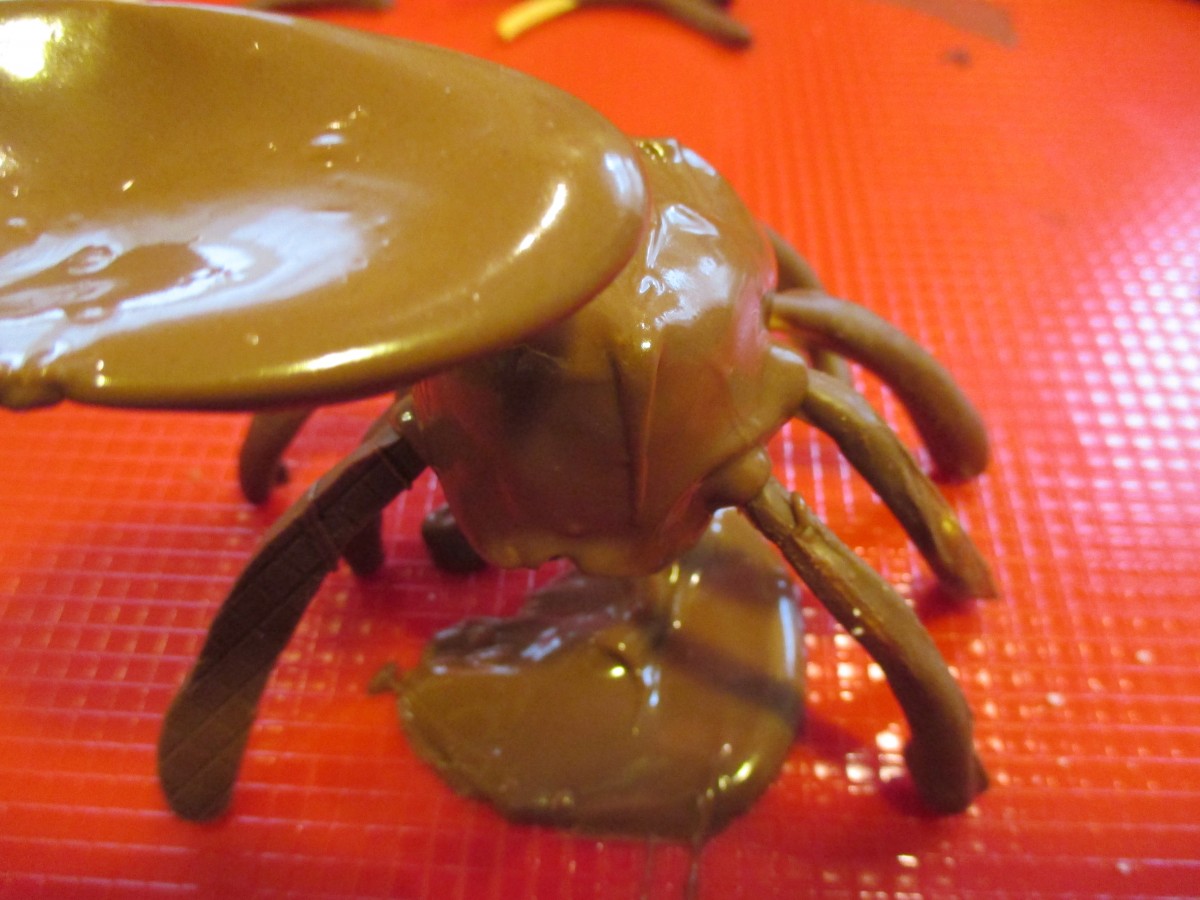
Spoon chocolate over the marshmallow to cover it.
My Favorite Caramel Apples


Caramel Apple dipped in Pumpkin Seeds
I did a program with kids recently, and we made these caramel apples. The kids loved them and I wanted to share the recipe. Making caramel apples is a wonderful childhood memory for me. Every Autumn, we would make a batch.
We used those little store bought caramels. I was often the one tasked with unwrapping them. I can remember unwrapping one after the other. It seemed to take forever.
I wanted to make my own caramel, so that is what I did with the kids. It is so much better than the store bought version.
Caramel is not that hard to make. You do need to keep an eye on it. Stir constantly. Just a hint, be sure your candy thermometer is really secure. Mine was a little slippy on the pan I was using. At one point the thermometer slid into the caramel. Not what you want to have happen!!!
Once dipped in the caramel, you can dip the bottom of the apples in nuts, pumpkin seeds, sprinkles, cereal, or even popcorn.
Homemade Caramel Apples
1/2 c. butter, cut in cubes
2 c. packed brown sugar
1 c. corn syrup
pinch of salt
1 can sweetened condensed milk
2 t. vanilla
8-12 apples
chopped nuts, pumpkin seeds, cereal, sprinkles, popcorn for dipping the bottoms of the caramel apples, optional
In heavy saucepan combine the butter, sugar, syrup and salt. Bring mixture to a boil, stirring constantly. This will take about 10 minutes. Add milk and bring mixture up to 248 degrees. Remove from heat. Stir in vanilla. Place a Popsicle stick, skewer or chopstick down the center of each apple. Dip apples in the caramel, allowing excess to drip off- or not. Dip bottoms of apples into nuts, seeds or whatever ingredient you picked. Place on wax paper and allow to set up. If you don’t want to dip the bottoms in anything, place the dipped apples on lightly buttered wax paper. Cool before serving. Makes 8-12 caramel apples.
Note: You could also use pears in the recipe.
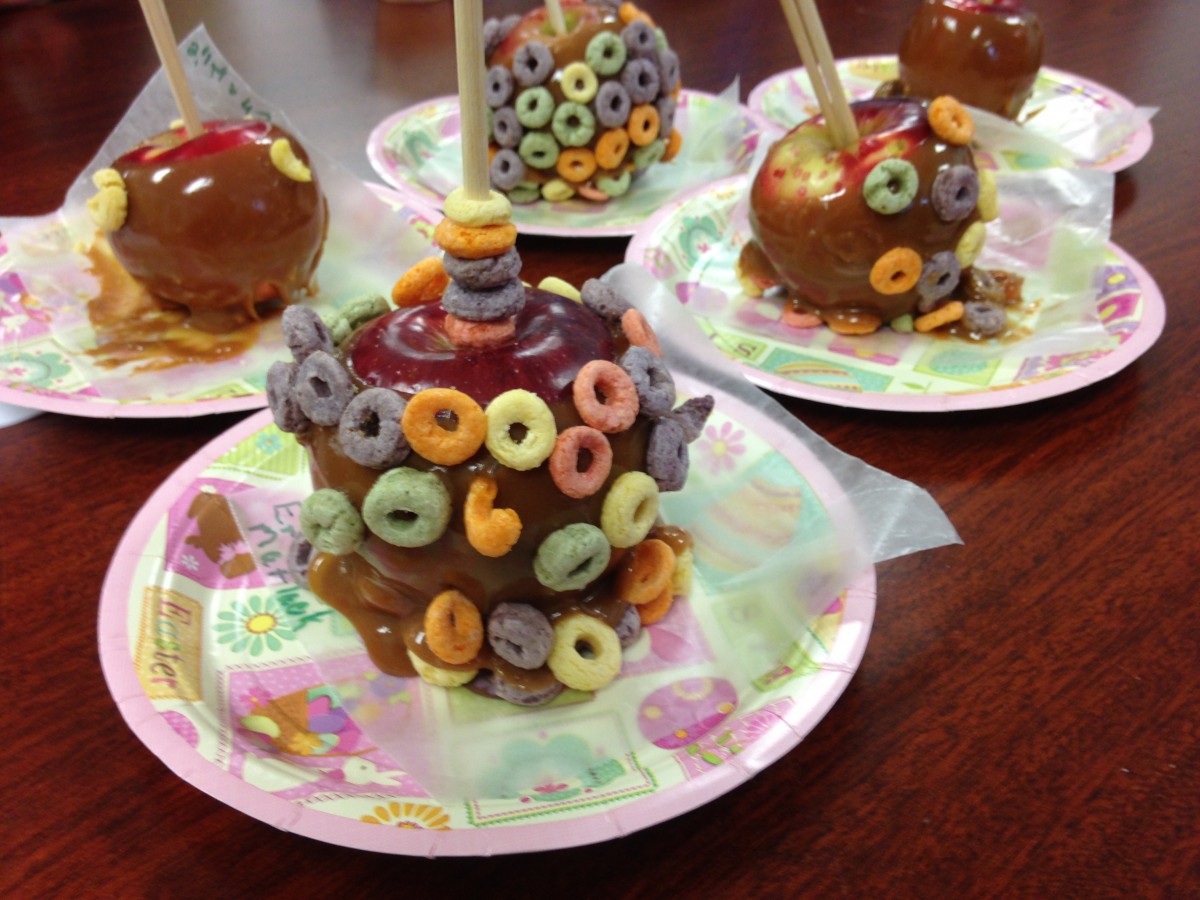
The kids dipped their apples in cereal.


