Mom’s Macaroni Salad

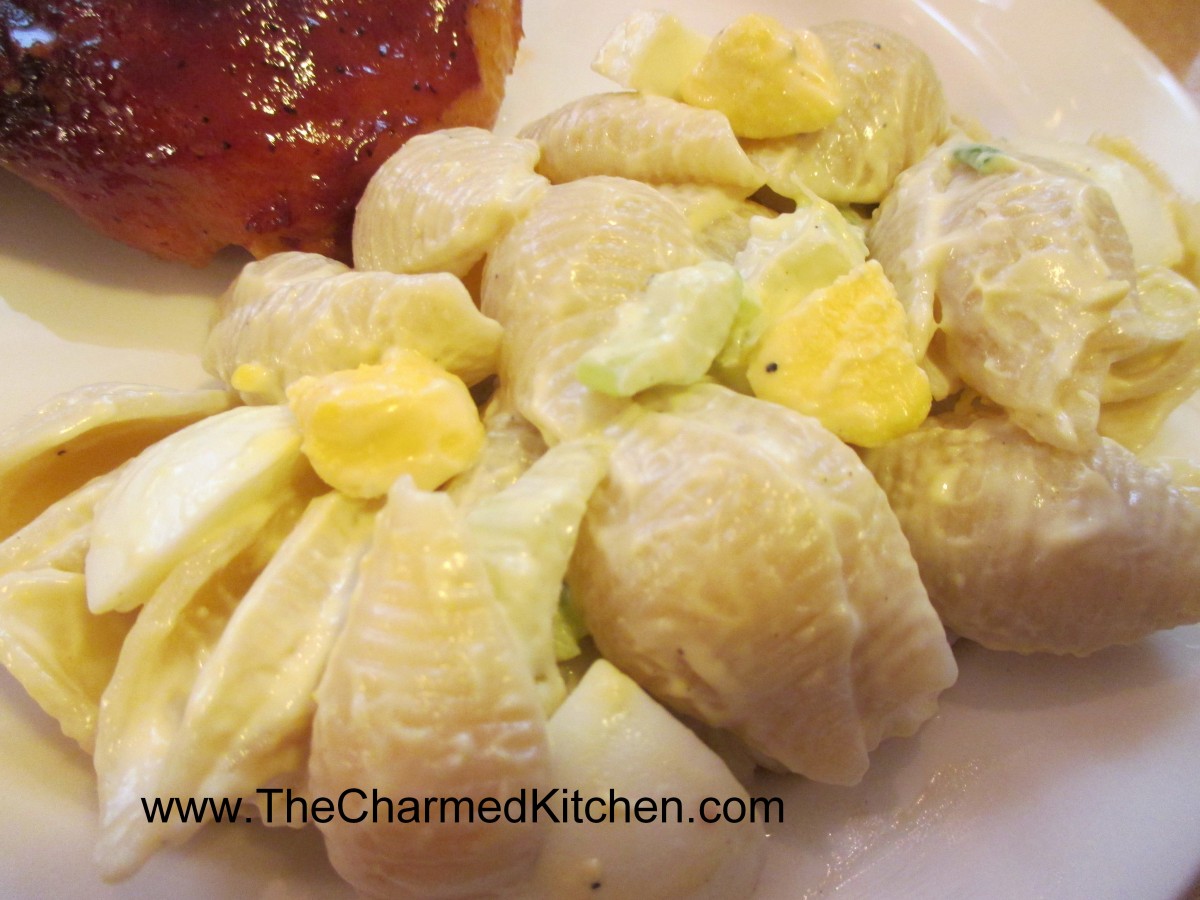
Mom’s Macaroni Salad
I’ve been in a nostalgic mood this week. First, I posted my Mother’s breaded chicken recipe. Now, her macaroni salad. For summer cookouts, we always had this salad. Long enough ago that it was called macaroni, not pasta. I loved it then, and I love it now.
I won’t say I don’t make other pasta salads. I do. I make all sorts of combinations, but this is the salad that brings me home.
Mom used mostly mayo, with a little salad dressing like Spin Blend. She felt it gave the salad just a little more zing. I use straight mayo, but that part of the recipe is flexible.
She added quite a few hard cooked eggs and I think they add a richness to the dish. My dad would cut up the celery and green onions for her. Mom liked the veggies cut into a fairly small dice in this dish, and Dad had great knife skills. I love the image of them cooking together.
So here it is- a family recipe wrapped up nicely with some memories, too.
Mom’s Macaroni Salad
1 lb. uncooked pasta, shells are preferred
Salt and pepper
Mayonnaise, about 1 cup
Salad dressing, like Miracle Whip, about ½ cup or more mayo
3-4 ribs celery, sliced thin
4-5 green onions, trimmed and sliced thin
8-12 hard-cooked eggs, cooled and peeled
Cook pasta according to package directions, but do not overcook. Rinse with cold water and drain well. Place drained pasta in a large bowl and sprinkle with salt and pepper to taste. Add dressings and vegetables and stir until well mixed. You may want to add more dressing to suit your taste. Chop eggs and stir into salad. Adjust seasonings if needed and chill before serving. Serves 8-10.
Mom’s Breaded Chicken

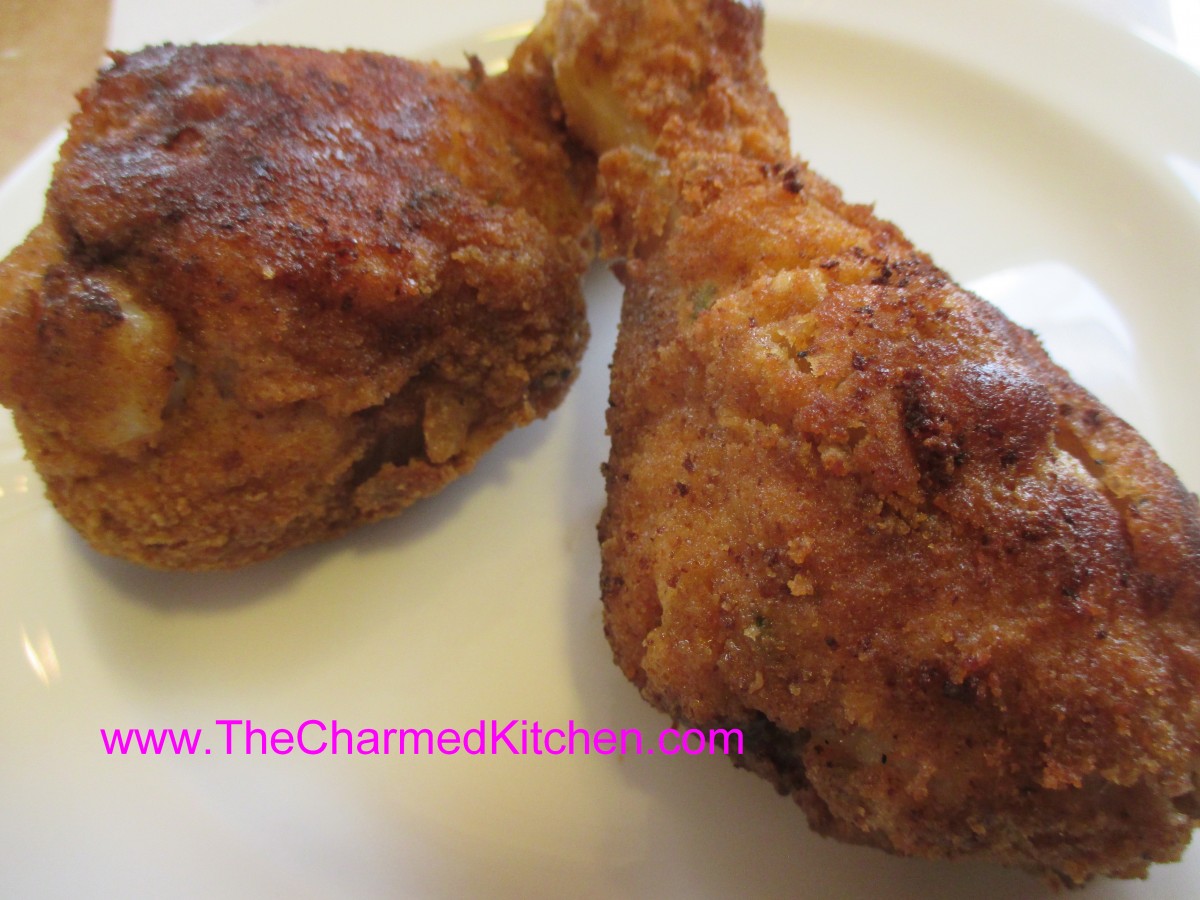
Mom’s Breaded Chicken
With the holiday weekend approaching, I thought I would share this recipe again. It always brings back great memories of childhood picnics/cookouts with my family. I love this recipe and I hope you do, too.
I looked forward to the big family picnics we had when I was a kid. My Dad and I would go early in the morning to pick out our favorite location, and get tables arranged. Then he would start a fire in the grill and make us bacon and eggs in the cast iron skillet.
Everyone started arriving soon after that. Well, not everyone. My Mom, and one of my aunts, would always come a little later. That is because they were finishing up the breaded chicken that was always a part of these picnics. She wanted it to be served nice and warm.
It would have been breaded the day before. My mom felt that when you breaded the chicken ahead of time, it seemed to help the breading to stick better. I do it the same way today.
This isn’t fried chicken. The breaded chicken is lightly browned in a skillet, then finished off in the oven. It is crispy on the outside and nice and juicy inside. It is also a lovely memory for me of time spent with family. Here are the directions for how she made it.
Mom’s Breaded Chicken
Chicken pieces, I often use a whole bird, cut into pieces, or just thighs and drumsticks.
salt and pepper to taste
flour
Parsley
Paprika
Garlic powder
eggs
Milk
Bread crumbs
oil
Pat chicken pieces dry. Season with salt and pepper. In a bag, combine flour- about ½ c. per 8 pieces of chicken should be about right. Season flour with a little salt and pepper. In bowl combine milk and eggs with the rest of the seasonings, including more salt and pepper. I use 1 egg with enough milk to make a thin batter for every 4-5 pieces of chicken. Keep in mind that the size of the pieces matters. Wings will need less batter than legs. Place bread crumbs in a shallow dish or in a plastic bag. Place a few pieces of chicken in bah with the flour and shake to coat, dipping off the excess. Then dip chicken pieces (1-2 at a time) in egg mixture, turning to moisten completely. Then place in crumbs and turn or shake to coat evenly. Repeat with remaining chicken until all of it is breaded.
At this time you can cover and refrigerate the chicken for several hours or overnight if desired. You can also go ahead and cook it right away. Mom suggests you bread the chicken the night before so it will stick better, but hey, you’re an adult, do what you want.
To cook the chicken, heat ½- inch of oil in a heavy skillet and preheat the oven to 400 degrees. Foil a roasting pan and then place a rack inside. Once the oil is hot, brown the chicken pieces several at a time, turning to brown evenly. Place the browned chicken on the rack in the baking dish and continue to brown remaining chicken. Place chicken in oven and bake until chicken is cooked and juices run clear when chicken is poked. Cooking time will vary depending on the size of the pieces, how much you browned them and how many you are cramming in one pan. Baking time will be about 45 minutes. Check a large piece of chicken, near the middle of the pan to be sure.
This is a real summer favorite and the baking on the rack helps fat to drip off, giving you fried chicken flavor with fewer calories. This chicken can be served hot, warm or cold.
Fried Green Tomatoes

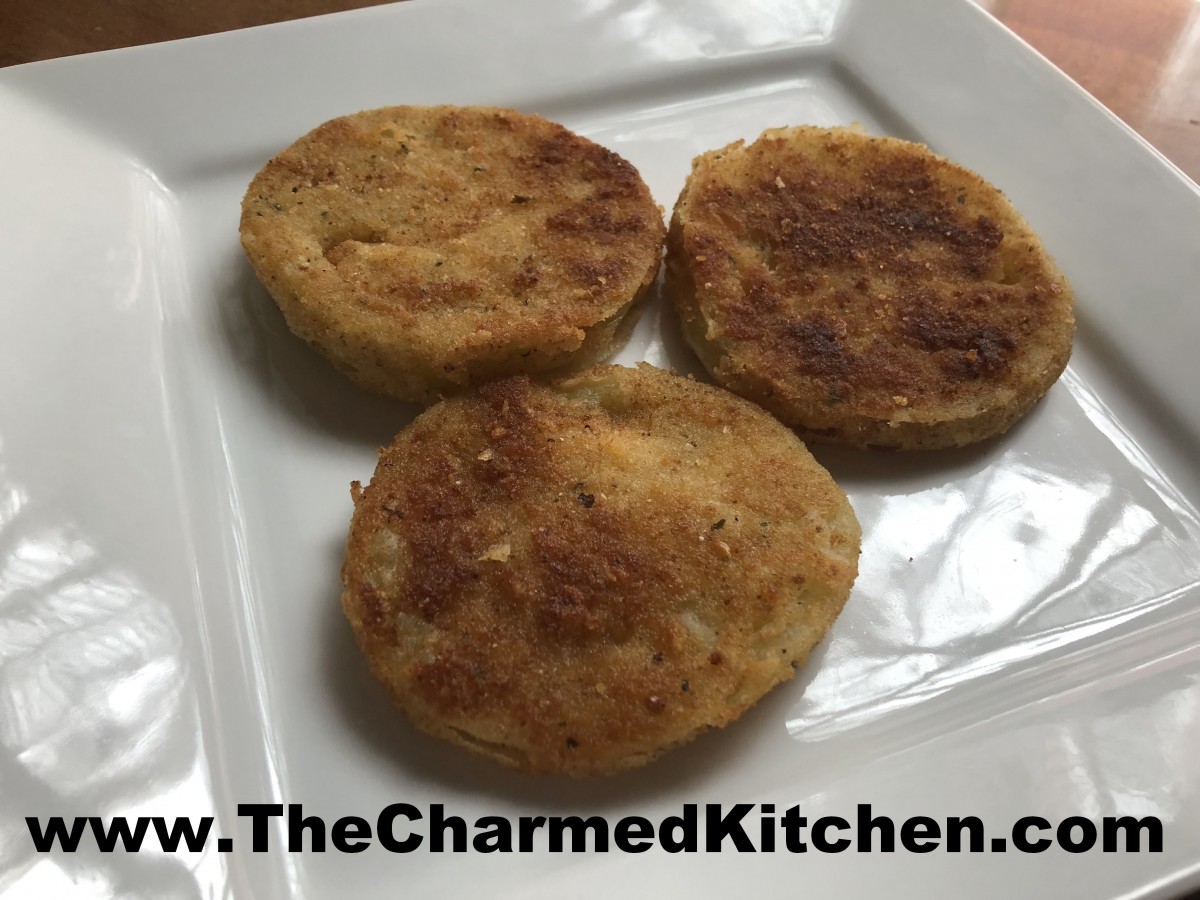
Fried Green Tomatoes
Tomato season is all about those firm, ripe, juicy tomatoes. For me, tomato season is also about fried green tomatoes.
Green tomatoes have a very different flavor than ripe tomatoes. It is like tomatoes and lemons had a baby. There is a distinct citrus-like tartness in green tomatoes.
Green tomatoes are pretty hard, compared to ripe tomatoes, which makes them great for frying. They soften, but don’t fall apart when fried.
There are a number of variations on exactly how to fry your tomatoes. I do a traditional breaded method, flour, egg wash and cracker crumbs. Then I pan-fry them.
I like using cracker crumbs, but you could use bread crumbs instead. I have friends that love to use cornmeal instead.
So here is my recipe. I hope you give it a try.
Fried Green Tomatoes
1 c. flour, or 1/2 c. flour and 1/2 c. cornmeal
1 t. salt
1 t. pepper
5 green tomatoes, sliced 1/2-inch thick
1 c. cracker crumbs, saltines preferred
2 eggs, beaten
butter or oil for pan frying
Place flour and seasonings in small bowl. Place crumbs in second bowl and eggs in a third bowl. Dip tomato slices in eggs then in flour. Dip slice in egg again and then in crumbs. Fry slices in hot oil until golden and tender in the middle, turning to cook evenly. Drain and serve warm. Serves 4-6.
Cooking with Pickle Juice


Chicken in Pickle Juice/Honey Glaze
The older I get, the more I realize I am turning into my Mother. She hated to waste food. She also hated to waste flavor. Let me explain.
If mom were roasting a piece of meat or perhaps a chicken, she would use the pan drippings to make gravy. Nothing odd about that.
However, if she was not using the drippings to make gravy, she would still save the drippings to use later on. She would scrape them out of the pan and toss them in the freezer. Then she would use her saved drippings in all sorts of dishes later on. She would add them to soups, or her sweet and sour cabbage.
When the last pickle was eaten from a jar- Mom would save the pickle juice, as she called it. She said she hated to just throw it away, it had so much flavor in it. She would use the liquid in different ways. Sometimes, she would just add more veggies to the jar. Sometimes she would add the pickle juice to a dish. She saved the liquid from both sweet pickles and dill pickles.
To this day, I have a hard time tossing leftover pickle juice. I have two jars in my fridge right now. I also save those drippings to use later. Whenever I use them, I remember her. That is a nice memory for me.
So how do you use pickle juice? Probably the easiest way is in salad dressing. It’s already vinegar based. I just prep my salad veggies, toss with some oil and drizzle with some pickle juice. Depending on the brine, you might not even need to add salt. Finish with some fresh ground pepper.
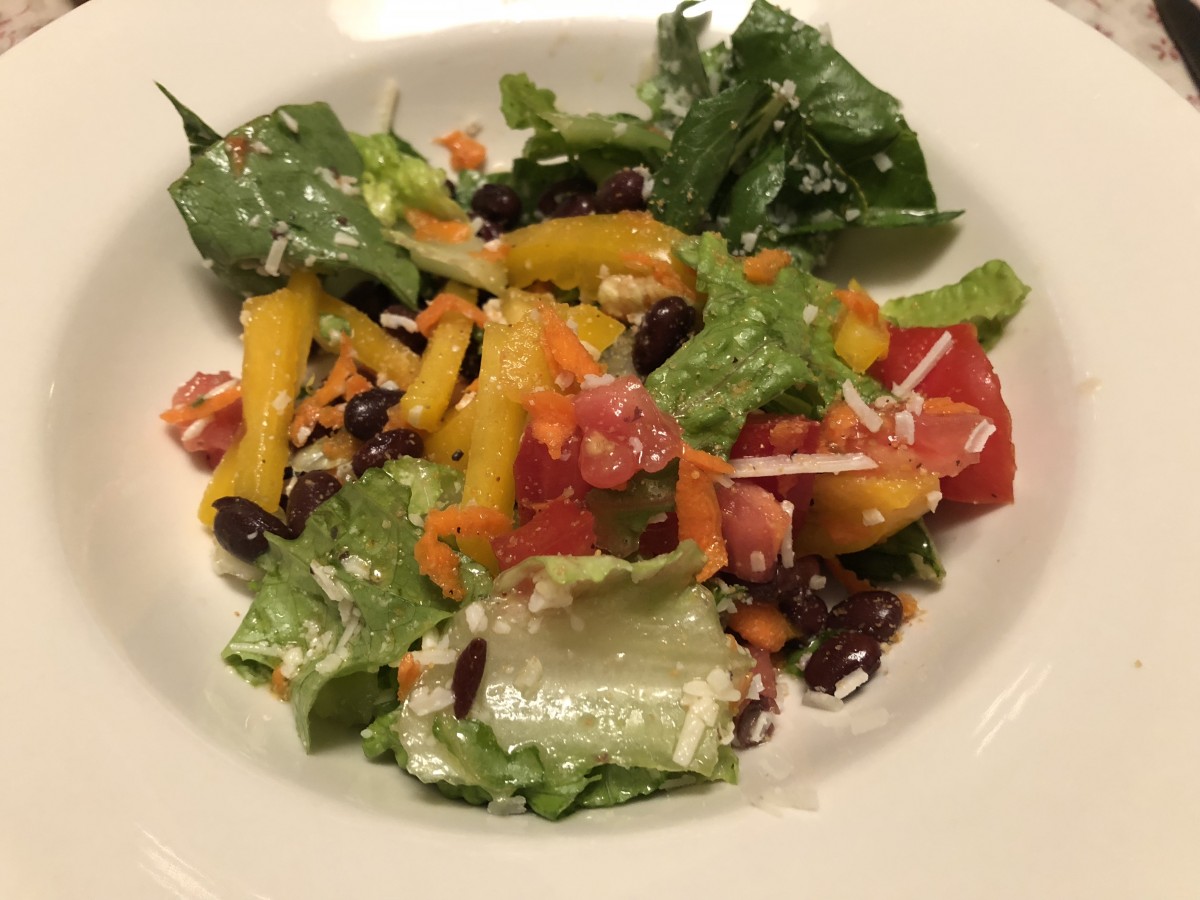
Tossed Salad with Pickle Juice Dressing
You can add pickle juice to sauces, chili, dressings, soups and veggies. Add a little, then see if you want a bit more.It is a nice base for marinades, too.
I used it in a tossed salad the other night. I just added some avocado oil to the veggies first. I tossed the oil in, then drizzled in some pickle juice. I added some fresh ground pepper and a little Asiago cheese to finish off the salad.
Pickle juice can make a nice base for a sweet and sour sauce, too.
I used it in a chicken dish the other night. I sauteed chicken thighs and shallots in a pan. Then I added sherry, pickle juice and honey to the pan. The mixture, cooked down into a glaze was very tasty.
Chicken Thighs in a Pickle Juice/Honey Glaze
6 chicken thighs, bone in
1 lb. shallots, peeled and sliced
1 c. chicken stock
1/2 c. pickle juice- from sour, not sweet, pickles
1/4 c. sherry
1/4 c. honey
1 t. fresh grated ginger
hot sauce to taste
fresh ground pepper to taste
In large skillet, brown thighs on both sides over medium-high heat. Add the shallots and cook until they are just starting to turn golden. Add remaining ingredients and reduce heat to low. Cover pan and let chicken cook about 15 minutes. Really large thighs could use 20 minutes. Remove lid and turn heat up to medium. Allow liquids in pan to cook down into a glaze. Baste chicken pieces a few times. As sauce cooks down, turn heat down a bit to prevent it from burning. This will take about 10 minutes. You probably won’t need salt, but check seasonings before serving. Place chicken on serving plate and spoon over the shallots and sauce.
Fresh Pea Soup with Lovage


Fresh Pea Soup with Lovage
This soup is great for summer because you can eat it hot or cold. It has a creamy texture but is still kind of light. The lovage adds a great green flavor. Lovage is a perennial herb that tastes like celery. The leaves add a nice element to this soup and pairs well with the peas. If you don’t have lovage, celery leaves could be used. I used fresh pea pods, but frozen would be OK, too.
Fresh Pea Soup with Lovage
2 T. butter or oil
1 medium onion, chopped
2 c. fresh English peas, pea pods (sliced), or sugar snaps (sliced)
¼ –½ c. fresh lovage leaves, chopped fine
3 c. chicken stock or veggie stock
salt and pepper to taste
1 c. sour cream
Heat butter or oil in medium saucepan. Sauté onion until tender. Add peas, lovage, stock, and salt and pepper. Cook until peas are the desired tenderness, about 3 – 7 minutes. Puree soup in batches until smooth. Place sour cream in a small bowl. Ladle 1 cup of hot soup into the sour cream, and stir to smooth. Pour this mixture into the soup and cook, barely simmering, until soup is heated through, about 2 minutes. To serve, ladle into bowls and garnish with lovage sprigs. Serves 3 – 4.
Note: You can also serve this soup cold.

Lovage
Basil Butter Cookies


Basil Butter Cookies
I love basil so much I once owned a cat named Basil. I make pesto and use basil in almost every tomato dish I make.
This time of year, I am also freezing and drying basil, so I will have it year round.
You don’t always have to use basil in savory dishes. Its flavor actually compliments sweet dishes, too.
I used dried basil in these butter cookies and the flavor is wonderful. You could use fresh basil, too. Just increase the amount to 3 tablespoons of fresh basil. Chop the fresh basil finely, just before adding it to the dough.
To add a little extra pop of flavor, I finished the cookies with a lemon glaze.
Here is the recipe. I hope you like it.
Basil Butter Cookies with Lemon Glaze
1 c. butter
1 c. sugar
1 egg
1 t. vanilla
2 ¼ c. flour
1 T. dried basil
1 t. baking powder
¼ t. salt
Glaze
2 c. powdered sugar
2-3 T. lemon juice- or enough to make a thin glaze.
Beat sugar and butter together until fluffy and then beat in egg and vanilla. Combine dry ingredients and stir into butter mixture. Chill dough at least a couple of hours. Roll dough into ¾-1 inch balls. Place 2 inches apart on ungreased baking sheet and bake in a preheated 375 –degree oven for 8-10 minutes. Cookies will flatten somewhat. Make glaze and dip the top of the cooled cookies in the glaze. Glaze will harden a little as the cookies set. Makes about 6 dozen cookies.
Dehydrating Vegetables


Dehydrated Vegetables
I have dehydrating on my mind this week. I was canning tomatoes a few days ago. I saved the tomato skins and dried them. This morning I ground them up into a powder in my spice mill. Now I have this wonderful ingredient to add to sauces, pasta, baked goods and more.
I preserve a lot of food by dehydrating it. Once you get over the initial investment in a dehydrator, the cost to dry food and to store dried food is pretty minimal. I just got a very nice dehydrator for $30. Not a big investment at all.
Dried fruits are probably the most common home dried foods. Apples, grapes, pineapple, strawberries and cherries are among my favorites. But the dried vegetables are so useful and versatile, I enjoy them as much as dried fruits. I think you will, too.
Drying Vegetables
Most vegetables should be dried at the lower range if you have an adjustable thermometer on your dehydrator-around 125-degrees. The big thing to know with vegetables is that some of them need to be blanched first. Blanching is just steaming the vegetables for a few minutes and draining, if needed, before drying. Blanching kills certain enzymes, prevents browning and assures a better end product.
Vegetables that need blanching include green beans, cabbage, carrots, potatoes, greens, winter squash, corn and beets; this is not a complete list, but a good start.
Vegetables that do not require blanching include onions, celery, mushrooms, peppers, tomatoes, spinach, zucchini, cucumbers and garlic and also herbs.
Broccoli and cauliflower do not dehydrate well.
Tomatoes are probably the best vegetable to dry for the home gardener and cook. They are so easy to make and so tasty. Just cut plum tomatoes in half and scoop out the seeds. Lightly spray the trays with non-stick spray and place the tomatoes cut side up for the first 12 hours. Turn them over after that until they are dried. I like them pretty crispy, but keep them in the freezer to keep their color and flavor longer. After a year they will turn black if stored at room temperature. Larger tomatoes can also be dried. Just cut them in slices and squeeze out the seeds. Cherry tomatoes are just cut in half and squeezed to get out the seeds. With small cherry tomatoes I just make a cut large enough to get out the seeds and leave them whole.
How do I use them?
Veggie chips-zucchini and cucumber slices can be used instead of chips in dip.
Powders- Tomatoes, celery, onion, pumpkin and garlic can all be powdered and used to flavor soups, stews sauces, cheeses, dips and more. I add powdered veggies to pasta dough. Mushroom powder is one of my favorite ingredients.
Reconstituted as fresh- potatoes in casseroles are wonderful.
Dips- Peppers, onion and celery all add great flavor.
To thicken sauces- Shredded zucchini, peppers, onions celery and tomatoes all work well this way.
Soups and Stews- most any dried vegetable is most often used this way. Easy to just let them simmer together until tender and all their flavors will enrich your stock
Chowders- Corn and potatoes are great in these dishes
Dried vegetables are best stored in a cool, dry place- I often freeze them for best shelf life.
Vegetables in photo: Starting left with bright green and going clockwise: Celery, potatoes, red peppers, mushrooms, carrots, cucumbers, onions and tomatoes. In the center- mixed sweet peppers.
Dilly Green Beans


Dilly Green Beans
In a pickle making class last night, we made dilly green beans. These are one of my favorite pickles. I like pretty much any type of pickle, and I love green beans, so no surprises there. They have a great, tart flavor.
If you have an abundance of green beans, you might consider making a batch of these to enjoy year round. Green beans are also at local farm markets now, and are at their peak.
These are great just eaten like other pickles, as a side. But they are also a fun addition to a Bloody Mary- or so I am told. I also like to serve them as an appetizer with cheeses, crackers and olives. Who am I kidding? I just eat them right out of the jar.
While the recipe calls for 1/4 teaspoon of red pepper flakes per jar- feel free to add more, for a spicier version.
Dilly Green Beans
4 lbs. table‑perfect whole green beans
1 3/4 t. crushed dried hot red pepper
3 1/2 t. dried dill seed or seven fresh dill heads
7 cloves of fresh garlic, peeled
5 c. vinegar
5 c. water
1/2 c. less 1 T. pickling salt
Wash beans thoroughly. Remove stems and tips, and cut them as much as possible in uniform lengths to allow them to stand upright in canning jar, coming to the shoulder of the jar. have jars clean and very hot, and lids and sealers ready in scalding water. In each jar place one dill head or 1/2 t. dill seed, add one garlic clove, and 1/4 t. crushed hot red pepper. Pack beans upright in jars, leaving 1 inch of head room. Heat together the water, vinegar and salt. When the mixture boils, pour it over the beans, filling each jar to 1/2 inch from the top. Run a plastic knife down and around to remove trapped air. Adjust lids, and process in a boiling water bath for 10 minutes, start timing after the water in the canner returns to a boil. Remove jars. …Wait at least 2 weeks for these beans to develop their flavor. Yield: 7 pints
Source: Putting Food By
Warm Pasta and Tomato Salad

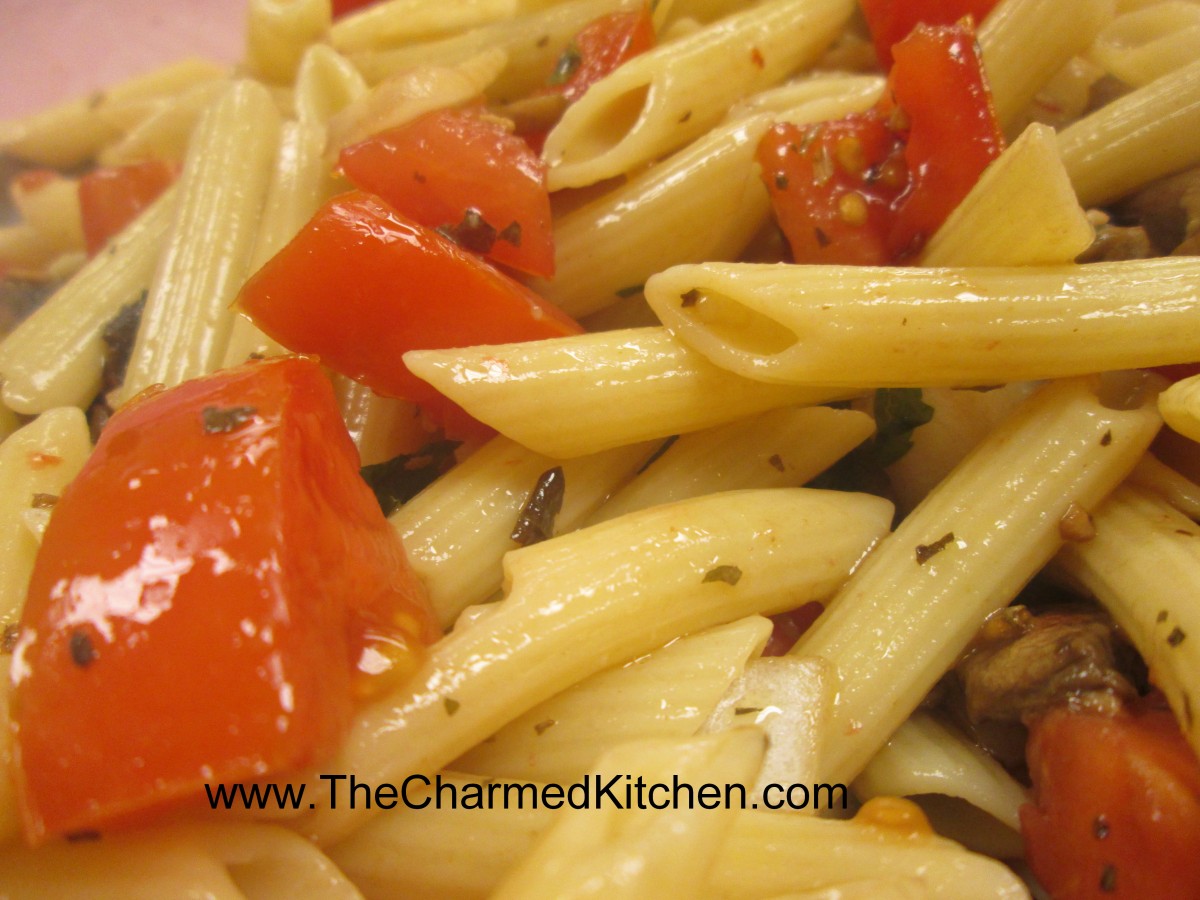
Warm Pasta and Tomato Salad
This salad has been a favorite of mine for a long time. I make it when fresh tomatoes are in season. You can serve it on its own, or as a side to grilled meats. It’s not like most salads, in that it is served warm.
The start of the salad is a mix of fresh tomatoes, mushrooms, oil, seasonings, vinegar. A lot of the typical ingredients you might find in a salad. These ingredients are mixed together and chilled, allowing enough time for the flavors to blend.
When you are ready to serve the salad, you toss the tomato mixture with fresh cooked, hot pasta. The result is a warm salad. Of course, you can serve leftovers cold, if you like.
Sometimes I top the salad with Parmesan cheese, too.
So here is the recipe. If you have some fresh tomatoes, you might want to try this salad. It really is tasty.
Warm Pasta and Tomato Salad
1 lb. Plum tomatoes, chopped
1 medium sweet onion, chopped
4 oz. Fresh mushrooms, sliced
2 cloves garlic, minced
¼ c. fresh parsley, chopped
1 T. dried basil or 1/4 c. chopped fresh basil
1 T. capers, optional
1 t. dried oregano
½ c. olive oil
¼ c. red wine vinegar
3 T. balsamic vinegar
Dash of hot red pepper flakes
Salt to taste
1 lb. Uncooked pasta
Combine all ingredients, except pasta, and chill overnight. Cook pasta, drain and toss with tomato mixture. Mixture should be served right away. Serves 6.
Homemade Peach Ice Cream


Homemade Peach Ice Cream
Peaches are one of those fruits that make me think summer. They are in the local farm markets right now, all juicy and ripe.
We had a couple of peach trees in the backyard when I was growing up. I remember one year, my dad had to prop up the branches so they wouldn’t break under the weight of all those peaches.
Homemade ice cream is all about summer, too. Fruit-studded ice cream seems like the perfect dessert for a warm summer day.
I had some perfectly ripe peaches and decided to use a few of them to make ice cream.
When using peaches in ice cream, you don’t want to just cut up the fruit and drop it in. If you do that, the peaches will form ice crystals and become quite hard. sort of like peachy ice cubes. Nobody want that in their ice cream. Better to cook the peaches first, like I did for the peaches in this recipe.That way, when you put them in the ice cream, they get frozen, but in a softer way.
Homemade Peach Ice Cream
3-4 ripe peaches
2 c. half and half
1 c. sugar, or to taste
1 T. vanilla
1 T. orange zest
Peel and dice peaches. Cook in a small amount of water and a little sugar until tender. If you don’t precook the peaches they will be icy and hard in the ice cream. Cool and drain. In bowl combine half and half and sugar and stir until sugar is dissolved. Add remaining ingredients and stir well. Place in ice cream machine and process according to manufacturer’s directions. If you don’t have an ice cream maker place mixture in a shallow pan and freeze solid. Remove from freezer and allow to soften a little at room temperature then break up into chunks and place in a mixing bowl. Beat with a mixer until smooth and return to freezer. Makes 1 quart.


